
Icinga Web is developed as a separate subproject under the Icinga project umbrella. It is not included in the default Icinga package, hence it needs to be separately installed.
Icinga Web requires a RDBMS backend such as MySQL, PostgreSQL, and Oracle. We will restrict ourselves to MySQL. You can refer to official installation guide for instructions for the other backends. Make sure you have a working MySQL server installation ready for use.
Install the following dependencies required for Icinga Web:
- Debian/Ubuntu:
sudo apt-get install php5 php5-cli php-pear php5-xmlrpc php5-xsl php5-pdo php5-soap php5-gd php5-ldap php5-mysql - RedHat/CentOS:
sudo yum install php php-cli php-pear php-xmlrpc php-xsl php-pdo php-soap php-gd php-ldap php-mysql
Now we need to install the icinga-idoutils-libdbi-mysql and icinga-web packages. There are three ways to install them, follow the one you used for original Icinga installation:
- Upstream: We need to install the
icinga-idoutils-libdbi-mysqlandicinga-webpackages. They should be available in your distribution packages. Similar to theicingapackage, Debian (Squeeze/Wheezy), and Ubuntu have the upstream packages available on LaunchPad. RedHat/CentOS have it available in RepoForge YUM repository (http://repoforge.org/). Install these packages from the relevant source and skip to the Configuration section. - Build the RPM packages: If you built the
icingapackage yourself (for example, for RedHat/CentOS), theicinga-idoutils-libdbi-mysqlpackage is built along with it. Simply install it and continue with building theicinga-webRPM package by following these steps:- Download the source. The source tarball can be downloaded from Icinga's official website from its Downloads section (https://www.icinga.org/download/packages/). The source includes a SPEC file for building RPMs.
- Build the RPM using the following command:
$ rpmdev-setuptree
$ cp icinga-web.spec ~/rpmbuild/SPECS
$ cp icinga-web-*.tar.gz ~/rpmbuild/SOURCES
$ cd ~/rpmbuild && rpmbuild –bb SPECS/icinga-web.spec
This will create an
icinga-webRPM in the~/rpmbuild/RPMS/noarchdirectory. Install it with therpm –ivhcommand. Now continue with the Configuration section for configuration.
- Compiling from the source: If you installed Icinga from the source, you should already have
icinga-idoutils-libdbi-mysqlinstalled. Compile icinga-web using the following commands:$ tar zxvf icinga-web-1.9.1.tar.gz $ cd icinga-web-1.9.1 $ ./configure $ sudo make install install-apache-config
Tip
Refer to the official documentation in case of any problems (http://docs.icinga.org/latest/en/icinga-web-scratch.html#install).
In this section, we will see how to configure the Icinga Web. Start MySQL Server using the following command:
$ sudo service mysqld start
Icinga needs access to MySQL database server, and for that we need to initialize a new database with a schema provided by Icinga. If you're using a different database server than localhost, edit the following script to properly set the database host in the DBHOST variable, and run it on the command line:
$ sudo /usr/share/doc/icinga-idoutils-libdbi-mysql-1.9.1/db/scripts/create_mysqldb.sh
Also, update the database configuration in /etc/icinga/ido2db.cfg in case the database is not on localhost. The path may vary depending on the distribution and version of the package installed. This script will initialize the database with the required schema. Now start the ido2db service:
$ sudo service ido2db start
Icinga Web uses a separate database than to IDOUtils, hence we need to set up a separate MySQL user and database by following these steps:
- Create a user by using the following commands:
$ mysql -u root -p
 mysql> GRANT USAGE ON *.* TO 'icinga_web'@'localhost' IDENTIFIED BY 'icinga_web';
  GRANT SELECT, INSERT, UPDATE, DELETE, CREATE, DROP, ALTER, INDEX ON icinga_web.* TO 'icinga_web'@'localhost';
  quit
- Create a database using the following command:
$ mysql -u root -p
 mysql> CREATE DATABASE icinga_web;
   GRANT USAGE ON *.* TO 'icinga_web'@'localhost' IDENTIFIED BY 'icinga_web' WITH MAX_QUERIES_PER_HOUR 0 MAX_CONNECTIONS_PER_HOUR 0 MAX_UPDATES_PER_HOUR 0;
   GRANT SELECT, INSERT, UPDATE, DELETE, CREATE, DROP, ALTER, INDEX ON icinga_web.* TO 'icinga_web'@'localhost';
   FLUSH PRIVILEGES;
   quit
- Initialize the database with the required schema as follows:
$ mysql -u root -p icinga_web < /usr/share/doc/icinga-web-1.9.1/schema/mysql.sql - Replace
localhostin the preceding commands with the hostname of the database server if it is different from the Icinga server. The default configuration of Icinga Web connects to MySQL atlocalhost, if this is not the case for your setup, update relevant entries in/usr/share/icinga-web/app/config/databases.xml. - Restart the web server and Icinga:
$ sudo service httpd restart
$ sudo service icinga restart
You can now access the Icinga Web at http://localhost/icinga-web/ with username root and password password.
Icinga Web is more or less the same as the Icinga Classic interface in terms of the feature set. Let us have a quick look at some of the views, the screenshots have been taken from the official Icinga website.
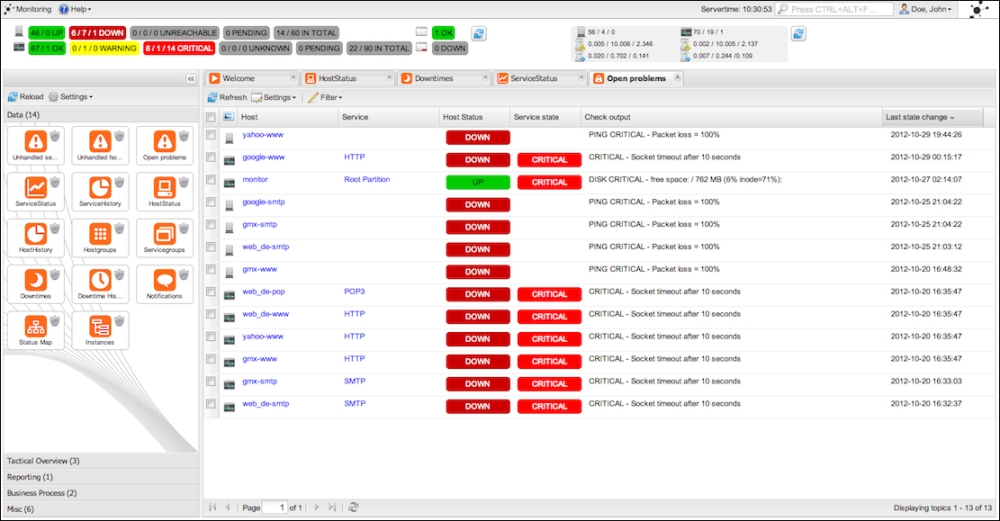
Status view of hosts and services
The top part of the interface is similar to the classic web interface. It shows all the host and service statistics by their states. The center view is a little advanced; it has tabs for the user to be able to open multiple views as tabs. The list of available views is on the center left, represented as icons and categorized into several types. Look at the bars at the bottom, each bar represents a category of views.
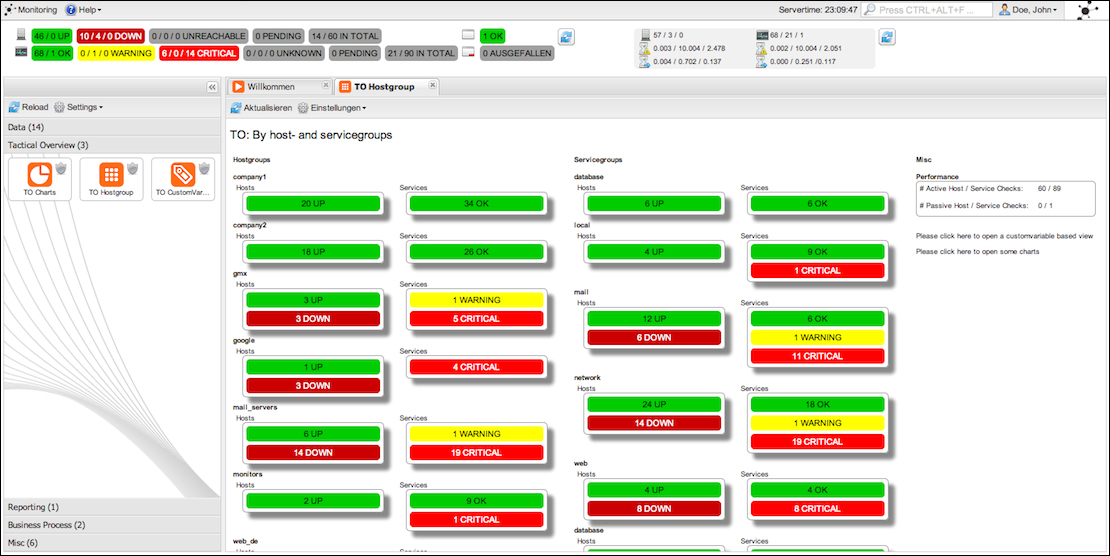
A tactical overview by hostgroup and servicegroup
This is similar to the tactical overview view of the classic web interface. It shows the number of hosts and services in different states grouped by hostgroups and servicegroups.
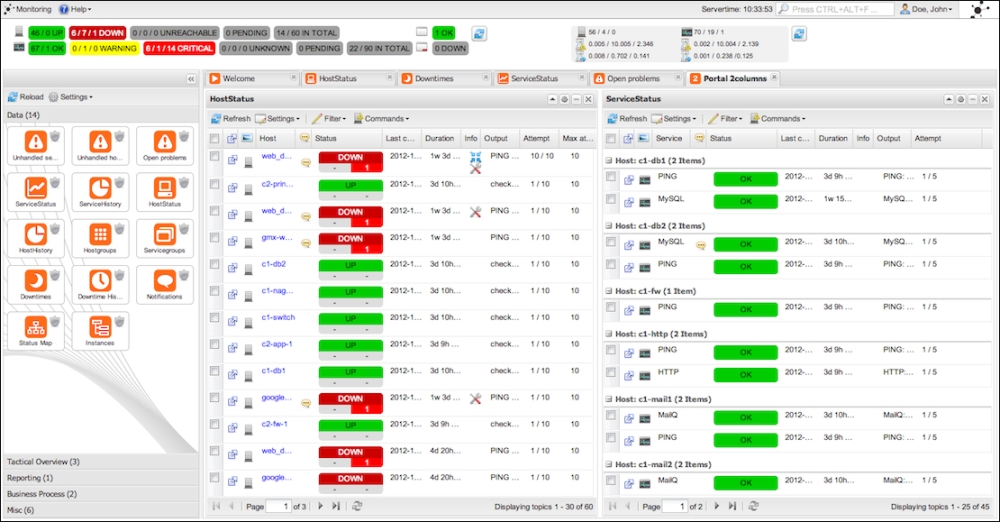
Host and service statuses in a vertically split tab
This is a very convenient view that is split vertically, with host statuses on left and service statuses on right.
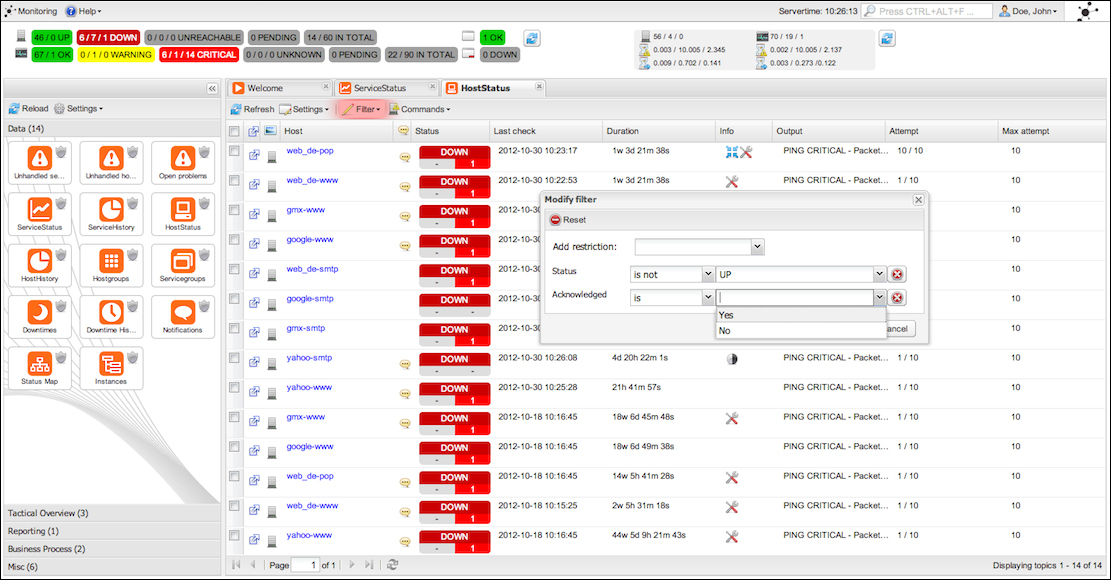
Filter entries by various parameters
The status view also has the ability to filter the entries being shown by certain parameters in order to be able to see the most relevant data.

External commands can be executed for multiple services
External command actions are available at the main page itself, which can be run for multiple service checks at once, without having to open up separate page for each service check.
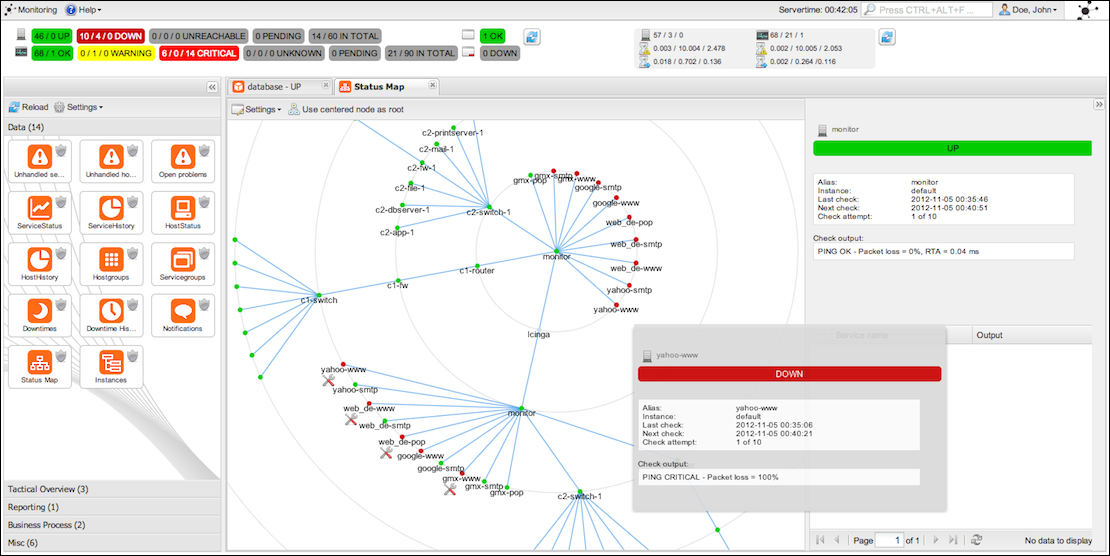
Status map of the network being monitored
This is similar to the status map in the classic web interface. This shows much the same information and some additional statistics on side.
As one can see, all these views can be kept on the interface as tabs, and you can navigate around them without having to go away from the page itself. This greatly improves the usability.