Menus, Menus, Art and Function
If Timelines are the highways on a DVD, then Menus are the gateways to those roads. DVD menus offer perhaps the greatest advantages over VHS. With menus, a DVD’s features may be seen and accessed instantly. Menu creation has become an art form of its own right with the use of spectacular backgrounds, motion transitions, video backgrounds and motion thumbnails.
Encore is supplied with professionally designed templates that can be put to use in minutes. This speeds the production process and allows a beginning author to quickly create professionally designed menus and buttons.
It is recommended that everyone, not just beginning authors, explore the templates included with Encore. The concepts learned from the templates will pay off dividends when creating menus from scratch.
Open an Existing Template
The first step in using templates is to open one of the menu templates. They are stored in the Library palette.
To open a template:
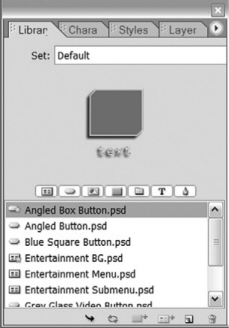
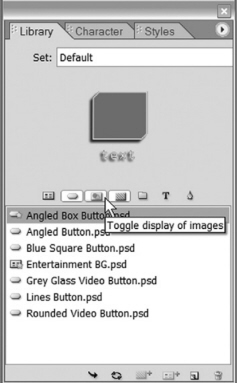
Open the Library palette.
The Library palette contains three kinds of Photoshop files: graphics, buttons, and menus. The menus in the Library palette contain backgrounds, buttons, text, and graphics. The menu templates all contain the word “menu” in their names. Submenus are generally used for chapter selection menus.
You can preview the look of a menu by selecting from the list. A thumbnail view of the menu or graphic appears.
Select the desired menu from the list.
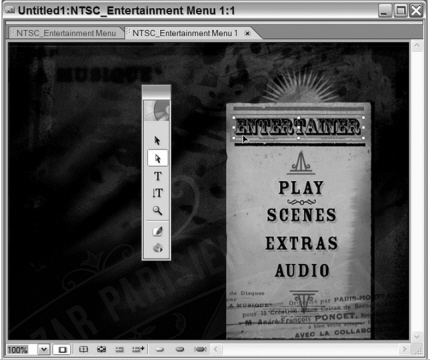
Right-click on the selected menu and select Create New Menu.
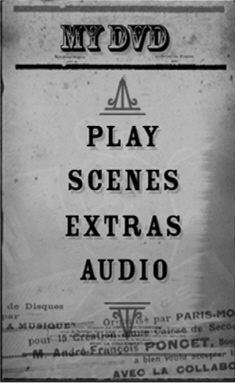
This loads the template into the Menu Editor window. For this example, the Entertainment menu is used.
At this time it’s a good idea to reorganize the workspace. Minimize the Project window, Monitor window, or Timeline window. The Menu Editor, palettes, and Toolbar should be easily accessible. Drag the Properties palette out of the Palette window.


Understanding Basic Layers and Layer Prefixes
Encore inherits one of the best innovations of its sister program Adobe Photoshop—Layers. All Encore menus, buttons, and graphics exist on layers separated with sensible naming conventions.
Encore uses layers and layer sets to organize various aspects of a menu. A layer can be a specific graphical aspect of a file. For example, there is a specific layer for text, a specific layer for a graphic and a specific layer for the background. These layers are organized into layer sets. For example, a button of a DVD is a group of layers organized into a layer set.
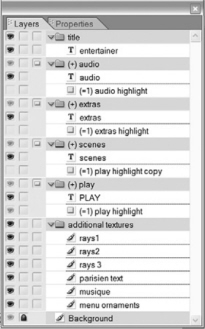
A button is a functional aspect of DVD. The viewer can press it to perform an action. Encore must make a distinction between an ordinary graphic and a button. Encore does this by assigning a (+) prefix to a button’s layer set.
Another important aspect of a DVD menu is the Subpicture Highlight. This is an interactive graphic generated by the DVD player. It aids navigation by highlighting the buttons, and confirming selection. In many ways, the subpicture is really the menu itself. You can create a menu using just the subpicture. But because the subpicture is a crude two-bit image that can use a maximum of three colors at once, it is best used as a highlight for a more elaborate background menu.
The subpicture highlight layers are identified by the (=1),(=2), and (=3) prefixes. The subpicture highlights just one layer inside a button’s layer set.
Modify the Text in an Existing Template
You can change a template to suit individual needs with the Menu Editor. You can add or delete text and buttons. Making changes to a template does not affect the original template. See “Saving a Modified Template” in this chapter.
Don’t let the text of a menu limit your perception of what it should or can possibly do. You may set buttons in a menu to link anywhere, and you may modify the text to indicate the changed link.
To change the title text of a menu:
Select the Direct Select tool (the white arrow) from the Toolbar.
In the Menu Editor, double-click on the title text.
While you can use the Text tools to perform this function, it is best to use the Direct Select tool to modify existing text. This prevents the accidental creation of blank text layers.
When the Insert Text cursor appears, delete the existing text
Type in the new title.
The title text has now been changed.
The font and font size can also be changed for the text using the Character palette and Direct Select tool.
To change the font or size of text in a menu:
Use the Direct Select tool and single-click on the text .
A blue bounding box will appear around the text. At this time you can move the text or resize it using the corners of the box. But for consistency, use the Character palette.
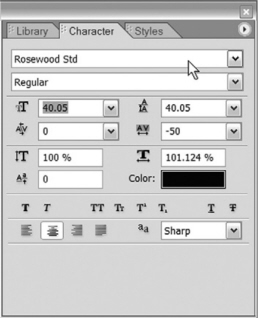
Open the Character palette.
Select the font and/or font size for the text.
Although you can adjust the color in the Character palette, the existing colors match the scheme of the menu and have a very professional look.
To modify the text of a button:
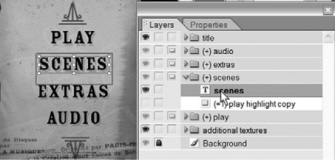
Open the Layers palette.

Click on the arrow to twirl down the button’s layer set and reveal its individual layers.
Select the Text layer of the button (the layer with the T).
A blue bounding box now appears around the text. There is a second bounding box around a larger area; this represents the entire area of the button.
You may now modify the text in the same way as the title text.
Deactivate or Remove Extra Buttons from a Template
Most of the templates have four buttons for the usual options in a DVD’s main menu. If you need fewer buttons, then you can the delete or deactivate the buttons. Simply deleting the text does not remove a button. The best way to hide a button is to deactivate it in the Layers palette.
To deactivate a button:
Open the layer’s palette.
Select the layer set of the button.
Click on the Button icon in the Button/Object column.
Notice when clicking on the Button/Object column (the third column from the left side of the palette) that the (+) prefix in the layer set is removed. Encore no longer treats this as a button and considers it an object. The next step is to hide the object.
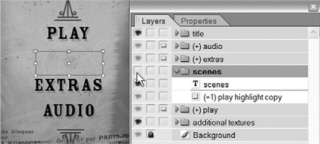
Click on the Eyeball icon in the first column’s box to deselect it.
Now that the Eyeball icon is deselected, the object and its text no longer appear in the Menu Editor.

Of course, you can delete the entire button from the menu.
To delete a button from a template:
In the layer’s palette, select the button’s layer set.
Press the Delete key.
The button and text have now been completely removed from the menu.
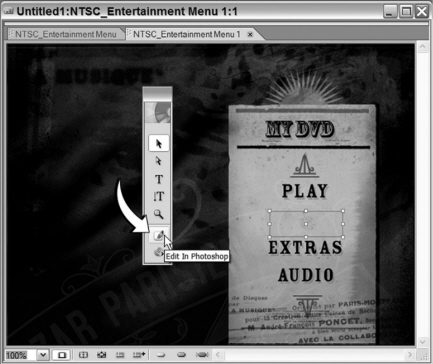
Edit in Photoshop Feature
Experienced Photoshop users will appreciate the ability to use Photoshop to edit their DVD menus. Photoshop offers several options for creating graphics and editing colors.
To edit in Photoshop:
With the Menu Editor open on the menu, go to Menu>Edit in Photoshop.
This opens Photoshop (if installed) and imports the current menu.
After you’ve made all the adjustments to the menu in Photoshop, go to File>Save in Photoshop.

The menu in Encore has now been updated with the changes to the file.

Save a Modified Template
When a template is used, a copy of that template is created. This way the original template is not changed by the user and safeguards against accidentally corrupting a useable menu. While this is a nice feature, it can be frustrating if one template is changed the same way every time it is used.
To save a modified template:
With the desired final template in the Menu Editor, go to Menu>Edit in Photoshop.
This opens and loads the template into Photoshop. Notice that the file name of the menu in Photoshop is completely different than the original name of the template.

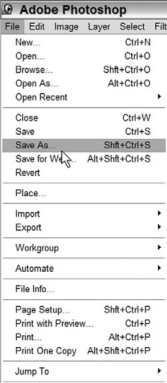
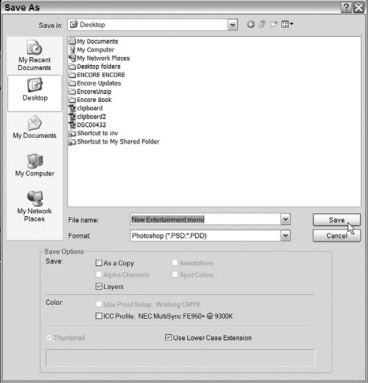
In Photoshop, go to File>Save As.
In the Save As dialog, give the template a new file name that is different from the original template name.
Choose the desktop as the saved file destination.
Click Save.
Now you need to import the menu into Encore’s Library palette.
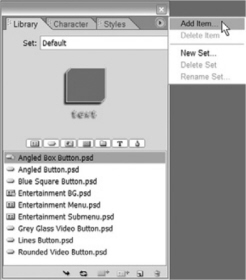
In Encore, open the Library palette.
Right-click inside the library, and select Add Item.
This opens the New Library Item dialog.
Locate and select the new template from the desktop.
Click Open.
The new template has been added to the Library palette.

Use the Library Palette toOrganize Graphics, Menus, and Buttons
You can set Encore’s Library palette to view only certain types of PSD files. This is rather helpful if you have multiple files in the Library palette. By default, all the file types are shown.
To hide a file type in the Library palette:
At the bottom of the window there are three icons.
Click on the icon of the file type you wish to hide.
To show just one type of file, click on the other file types to hide them.
Encore 1.5 allows even greater organization. You can create library sets to file the different items away under categories you define.
To create a new library set:
From the Library palette flyout menu, select New Library Set.
Enter a name for your library set and click OK.

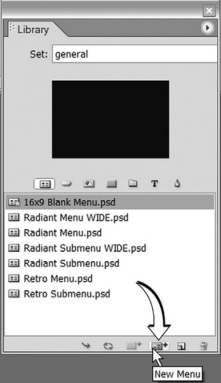
To add items to a library set:
In the Library palette, display the library set to which you want to add items by selecting it from the set drop-down box.
Click the Add Item button or select Add Item from the Library palette flyout menu.
In the file browser, locate the item you want to add and then click OK.

Library Palette Maintenance
After several projects have been created, the Library palette might appear cluttered and disorganized. It’s a good practice to perform a little spring cleaning from time to time to keep the file list short. Encore will not allow the builtin templates, buttons, and graphics to be deleted.
To delete an item from the Library palette:
Select the item to be deleted.
In the lower-right corner of the palette, click the Trash icon.
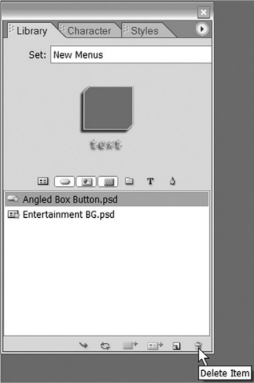
Encore will warn that this deletion cannot be undone.
Confirm the deletion by clicking OK.
Another recommendation is to prioritize your menus and buttons according to use. By default, Encore uses the blank menu as the default menu, but you may set any menu as the default menu. The same is true for a button. The default menu and button have asterisks next to their names.
To set the default menu/button:
Select the desired menu/button and right-click.

Select Set as Default Menu or Default button.
Each time a new menu is created from the Menu pulldown dialog, this will become the new default menu.
Using Photoshop to Create a Menu
Not only can you modify Encore’s menus in Photoshop, but you can create them within Photoshop without ever using Encore’s Menu Editor. Because Photoshop and Encore share the same layer conventions, importing a Photoshop menu is a breeze.

Keep in mind that Encore’s menus are Photoshop (PSD) files. There are several ways to import a PSD file as a menu. However, a PSD file should never be imported as an asset. When a PSD file is imported as an asset, it flattens the layers, making the menu unusable for anything other than a background.
To import a PSD file to use in only one project:
In the Project tab, right-click in a blank area of the pane.
Select Import as Menu.
In the Import as Menu dialog, locate and select the desired psd menu(s).
Click Open.
Of course, if a PSD file is slated for multiple use, the best way to import the menu is through the Library palette.
To import a menu for future use in projects:
Go to the Library palette, right-click in the list.

Select Add Item.
In the Add Item dialog, locate and select the menu(s).
Click Open.
Now the menu is a part of the Library palette and is available for use in any project. Keep in mind that a menu uses multiple layer sets. If the PSD file has just one layer set and a background, Encore will treat the PSD file as a button. Also, the layer sets must have the appropriate prefixes. See the sidebar “Understanding Basic Layers and Layer Prefixes Using the Library Palette” earlier in this chapter.

Create a New Menu Inside Encore
Creating a menu from scratch inside Encore is easy, but requires a greater understanding of the menu architecture. While Encore can certainly be used to create menus, it’s safe to say that Adobe intended Encore to be used in cooperation with Photoshop.
Open a Blank Menu
All menus start with a background. Encore’s default menu is a blank background. Buttons, text, and other graphics are added later.
To create a blank menu:
Open the Library palette, and choose the blank menu.
Note: Encore offers a 4x3 and a 16x9 blank menu.
Right-click on the menu, and select Create New Menu.
The Menu Editor opens and displays the blank menu background.

Use Non-Photoshop Files as Menus
Photoshop has been used by DVD authors for a very long time, and it is the graphics editor of choice. However, if the graphics/photo editor you use is not Photoshop, yet does support Photoshop layer conventions and prefixes, it is still possible to create and import a menu to Encore. To accomplish this task, you must first convert the file to PSD format before importing the file.
If your graphics editor doesn’t support PSD layers or cannot export to the PSD format, the recommended workflow is to use the non-Photoshop application to create the various components of a menu separately. Save them in a bitmap (BMP), JPG, or GIF format, and then import them into Encore as individual files.

Any supported graphic may be imported into the Library palette; Encore will treat them as flat graphics. Import the background and buttons individually into the Library palette, and then use Encore’s Menu Editor to apply the attributes to the buttons. (See “Convert a Graphic to a Button” in Chapter 5.)
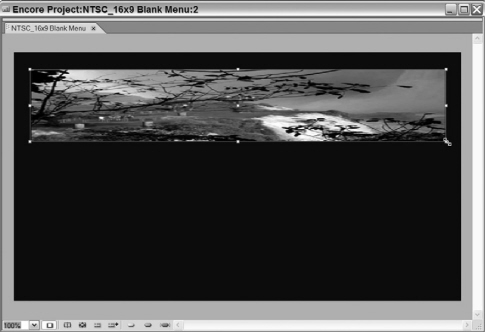
Gimme Some Background
A graphic that is imported from the Project tab into Encore’s Library palette can be used as a background for a menu. If the image is not the correct size for the project, it will be rescaled to fit within the dimensions of the normal blank background.
To import a graphic as a menu background:
Open the Library palette and the Project tab.
Select the graphic file in the Project tab.

Click and hold on the file, and then drag it into the Library palette.
Notice that the file becomes a PSD file after it is imported into the Library palette.
Click the Place icon in the Library palette.
When the Menu Editor is opened, the graphic is displayed as a part of the background. However, it is not locked to the background yet. This is especially apparent if the image was rescaled in any way.
Click on the graphic in the Menu Editor to display the blue bounding box.
Resize the image with the corner bounding boxes or click and hold on the image to reposition.
When the image is the desired size and is in the right position, it is best to lock the image to the background layer. This way it cannot be accidentally repositioned or resized.
Go to the Layers palette.
Click on the box in the second column of the layer.
The Lock icon will appear in the box. This indicates that the layer cannot be adjusted, unless it is unlocked. Now the background graphic will stay in place. If desired the black background layer can be deleted, but it is not necessary.
Encore 1.5 users will enjoy the more intuitive approach to adding a background to a menu.
To set a background in Encore 1.5:
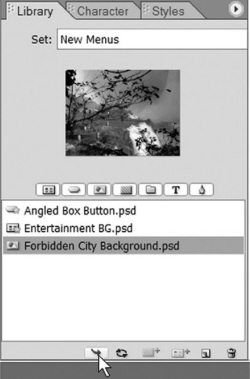
With the Menu Editor open, go to the Library palette and select the desired background.
Click the Set as Background icon.

What’s My Name?
It’s best to properly label your menus as soon as you create them to minimize confusion. You can rename menus in the Menu tab, the Project tab, or the Properties palette. Renaming in the Menu or Project tab is accomplished by right-clicking on the file name and choosing Rename. But it is better to get into the habit of using the Properties palette instead.
To rename a menu:
Click on the background of a menu in the Menu Editor, or have the menu selected in the Menu tab or Project tab.
Go to the Properties palette.
In the Name field, change the name of the menu.


What Do I Say?
When text is added to a menu, a text layer is created in the Layers palette. Exercise care when using the Text tools, because clicking multiple times on the menu with the Text tools could inadvertently create blank text layers.
You can add text horizontally or vertically.
To add horizontal text to a menu:
With the Menu Editor open, select the Horizontal Text tool.
Click the tool on the menu to set the inserted text position.
A blinking vertical line will appear; text will be entered from left to right.
Type in the text and hit return to add a line break.
Vertical Text places letters from top to bottom in a column.
To Insert Vertical Text:
Select the Vertical Text tool.
Click on the menu where you want the top most (first) letter to go.

Type in the text, and press Return to put in a column break.
The Character palette offers a wide array of fonts and tools to adjust the look of the text.
To change the font or attributes of text:
Open the Character palette.
Adjust the Font, Font Size, Letter Spacing, Text Style, or Color.
After you’ve made the adjustments, begin typing in the menu using the Text tools.
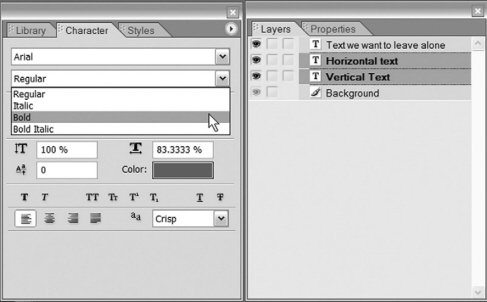
Changing the look of existing text is fairly simple and there are a few ways to do it, but the best way is to use the Layers palette and Character palette together.
To change the Font/Attributes of Existing Text:
In the Layer’s palette select the text layer or hold Ctrl while clicking to select multiple layers.


Go to the Character palette and make the desired adjustments.
Now the all the text in the layers will be adjusted simultaneously.
How Does it Look?
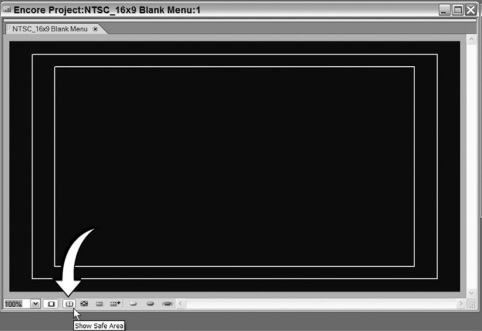
Text should be placed in an area that can be readily seen on all televisions and monitors. If text is placed too close to the edges, some televisions might cut off that text. Encore’s Menu Editor includes guides known as the Action and Title Safe areas.
To turn on the Action and Title Safe Areas:
In the Menu Editor, click on the Action/Title Safe icon.
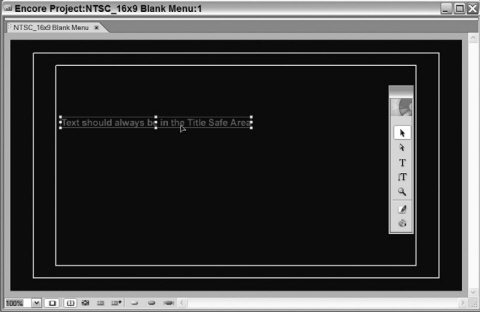
This will display two white boxes on the menu. Always place text within the inner box. Text is not locked in place until the project is built, and it should be adjusted to respect these Safe Areas if you want to assure that text will not be clippedby various television bezels.
To reposition text:
Using the Direct Select tool, click and hold on the center of the text in the Menu Editor.
Drag the text to the proper position within the Title Safe Area.
Release the left mouse button when done.
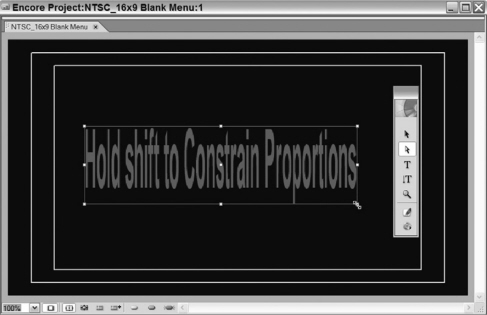
While the blue bounding box is in view, you can resize the text using the corners or sides of the box. It is always better to use the Character palette to adjust text. Avoid distortion of the text by holding the Shift key while resizing the text. The Shift key constrains the proportions, making the height and the width scale together.
To resize the text:
Using the Direct Select tool, click on the text.
Hold down the Shift key.
Click and hold on the corner of the blue bounding box with the mouse.
Drag the corner of the box to resize the text.
When the text is the desired size, release the mouse button.
Only the Shadow Knows…
A three-dimensional look can be given to text by adding a drop shadow. A drop shadow is an illusion that gives the appearance of light shining down on the text and casting a shadow on the background, as though the text were elevated.
To add a drop shadow to text:
Select the text layer(s).
Go to Object>Drop Shadow.
This opens up the Drop Shadow dialog, which offers several options for the shadow’s appearance.
Color: Black is the Default, but any color can be selected. It is best to use shades of grey. On a dark background, use a lighter shade, on a bright background go darker.
Opacity: Determines the transparency of the shadow. At 100 percent, the underlying background is blocked out, while 0 percent won’t appear at all. It is best to find a medium between the extremes, because a shadow doesn’t always block out what it is cast upon.

Angle: Sets the angle of the imaginary light source. Can be between 0 and 360 degrees.
Distance: Sets the length of the text from the background. A higher number increases the perceived distance between the text and the background.
Size: Determines the size of the shadow. The default size is best. But the size should increase with the distance from the light source.
Spread: Set to Zero. This determines the diffusion or spread of the shadow.
Make all desired changes to the settings.
Click OK.
Now the text appears to hover over the background.


Encore 1.5 Authoring with Style!
Another significant improvement in the 1.5 release is the ability to use preset styles. Styles let you quickly change the appearance of an element in a menu. Styles are Photoshop layer effects, such as shadows, glows, bevels, overlays, and strokes. When you move or edit the element, the effects are modified correspondingly.
Styles are located in the Styles palette. Styles come in three categories: text, shape, and image. You may sort styles by category by clicking on the Style Types icon. Styles behave differently, depending on whether they are applied to an individual layer or to a layer set, such as a button. You can apply text, shape, or image style to any individual layer. A text style could be applied to a shape, for example.
To apply a style to an individual layer or layer set:
Select the layer in the Layers palette, or click on the element in the Menu Editor.
Go to the Styles palette and double-click on the style you wish to apply—

Or simply click and drag the style from the palette and drop it onto that element in the Menu Editor.
You can undo styles by applying the Plain Shape, Plain Text, No Image Edge Effects, and No Image Fill Effects styles, just as you did in the previous examples. This function removes any styles applied to the element.
