
16. Saving with SQLite
There are many different ways for storing your Android applications’ data. As you learned in Chapter 14, “Using Android Preferences,” and in Chapter 15, “Accessing Files and Directories,” there is definitely more than one way for accessing and storing your data. But what if you need to store structured data for your application, such as data more suited for storing in a database? That’s where SQLite comes in. In this chapter, we are going to be modifying the SampleMaterial application found in Chapter 12, “Embracing Material Design,” so that Card data is stored persistently in a SQLite database on the device and will survive various lifecycle events. By the end of this chapter, you will be confident in adding a SQLite database for your application.
SampleMaterial Upgraded with SQLite
The SampleMaterial application found in Chapter 12, “Embracing Material Design,” shows you how to work with data in the application but fails when it comes to storing the data permanently so that it survives Android lifecycle events. When adding, updating, and deleting cards from the SampleMaterial application, and then clearing the SampleMaterial application from the Recent apps, the application is not able to remember what cards were added, updated, and deleted. So we updated the application to store the information in a SQLite database to keep track of the data permanently. Figure 16.1 shows the SampleSQLite application, which looks the same as the SampleMaterial application, but is backed by a SQLite database.
Working with Databases
The first thing that must be done is to define the database table that should be created for storing the cards in the database. Luckily, Android provides a helper class for defining a SQLite database table through Java code. That class is called SQLiteOpenHelper. You need to create a Java class that extends from the SQLiteOpenHelper, and this is where you can define a database name and version, and where you define the tables and columns. This is also where you create and upgrade your database. For the SampleSQLite application, we created a CardsDBHelper class that extends from SQLiteOpenHelper, and here’s the implementation that can be found in the CardsDBHelper.java file:
public class CardsDBHelper extends SQLiteOpenHelper {
private static final String DB_NAME = "cards.db";
private static final int DB_VERSION = 1;
public static final String TABLE_CARDS = "CARDS";
public static final String COLUMN_ID = "_ID";
public static final String COLUMN_NAME = "NAME";
public static final String COLUMN_COLOR_RESOURCE = "COLOR_RESOURCE";
private static final String TABLE_CREATE =
"CREATE TABLE " + TABLE_CARDS + " (" +
COLUMN_ID + " INTEGER PRIMARY KEY AUTOINCREMENT, " +
COLUMN_NAME + " TEXT, " +
COLUMN_COLOR_RESOURCE + " INTEGER" +
")";
public CardsDBHelper(Context context) {
super(context, DB_NAME, null, DB_VERSION);
}
@Override
public void onCreate(SQLiteDatabase db) {
db.execSQL(TABLE_CREATE); }
@Override
public void onUpgrade(SQLiteDatabase db, int oldVersion, int newVersion) {
db.execSQL("DROP TABLE IF EXISTS " + TABLE_CARDS);
onCreate(db);
}
}

This class starts off by defining a few static final variables for providing a name and version number, and an appropriate table name with table column names. Further, the TABLE_CREATE variable provides the SQL statement for creating the table in the database. The CardsDBHelper constructor accepts a context and this is where the database name and version are set. The onCreate() and onUpgrade() methods either create the new table or delete an existing table, and then create a new table.
You should also notice that the table provides one column for the _ID as an INTEGER, one column for the NAME as TEXT, and one column for the COLOR_RESOURCE as an INTEGER.
![]() Note
Note
The SQLiteOpenHelper class assumes version numbers will be increasing for an upgrade. That means if you are at version 1, and want to update your database, set the version number to 2 and increase the version number incrementally for additional versions.
Providing Data Access
Now that you are able to create a database, you need a way to access the database. To do so, you will create a class that provides access to the database from the SQLiteDatabase class using the SQLiteOpenHelper class. This class is where we will be defining the methods for adding, updating, deleting, and querying the database. The class for doing this is provided in the CardsData.java file and a partial implementation can be found here:
public class CardsData {
public static final String DEBUG_TAG = "CardsData";
private SQLiteDatabase db;
private SQLiteOpenHelper cardDbHelper;
private static final String[] ALL_COLUMNS = {
CardsDBHelper.COLUMN_ID,
CardsDBHelper.COLUMN_NAME,
CardsDBHelper.COLUMN_COLOR_RESOURCE
};
public CardsData(Context context) {
this.cardDbHelper = new CardsDBHelper(context);
}
public void open() {
db = cardDbHelper.getWritableDatabase(); }
public void close() {
if (cardDbHelper != null) {
cardDbHelper.close(); }
}
}
Notice the CardsData() constructor. This creates a new CardsDBHelper() object that will allow us to access the database. The open() method is where the database is created with the getWritableDatabase() method. The close() method is for closing the database. It is important to close the database to release any resources obtained by the object so that unexpected errors do not occur in your application during use. You also want to open and close the database during your application’s particular lifecycle events so that you are only executing database operations at the times when you have the appropriate access.
Updating the SampleMaterialActivity Class
The onCreate() method of the SampleMaterialActivity now creates a new data access object and opens the database. Here is the updated onCreate() method:
public CardsData cardsData = new CardsData(this);
@Override
protected void onCreate(Bundle savedInstanceState) {
super.onCreate(savedInstanceState);
setContentView(R.layout.activity_sample_material);
names = getResources().getStringArray(R.array.names_array);
colors = getResources().getIntArray(R.array.initial_colors);
recyclerView = (RecyclerView) findViewById(R.id.recycler_view);
recyclerView.setLayoutManager(new LinearLayoutManager(this));
new GetOrCreateCardsListTask().execute();
FloatingActionButton fab = (FloatingActionButton) findViewById(R.id.fab);
fab.setOnClickListener(new View.OnClickListener() {
@Override
public void onClick(View v) {
Pair<View, String> pair = Pair.create(v.findViewById(R.id.fab),
TRANSITION_FAB);
ActivityOptionsCompat options;
Activity act = SampleMaterialActivity.this;
options = ActivityOptionsCompat.makeSceneTransitionAnimation(act, pair);
Intent transitionIntent = new Intent(act, TransitionAddActivity.class);
act.startActivityForResult(transitionIntent, adapter.getItemCount(),
options.toBundle());
}
});
}
Notice the new GetOrCreateCardsListTask().execute() method call. We cover this implementation later in this chapter. This method queries the database for all cards or fills the database with cards if it is empty.
Updating the SampleMaterialAdapter Constructor
An update in the SampleMaterialAdapter class is also needed, and the constructor is shown below:
public CardsData cardsData;
public SampleMaterialAdapter(Context context, ArrayList<Card> cardsList,
CardsData cardsData) {
this.context = context;
this.cardsList = cardsList;
this.cardsData = cardsData;
}
Notice a CardsData object is passed into the constructor to ensure the database is available to the SampleMaterialAdapter object once it is created.
![]() Warning
Warning
Because database operations block the UI thread of your Android application, you should always run database operations in a background thread.
Database Operations Off the Main UI Thread
To make sure that the main UI thread of your Android application does not block during a potentially long-running database operation, you should run your database operations in a background thread. Here, we have implemented an AsyncTask for creating new cards in the database, and will subsequently update the UI only after the database operation is complete. Here is the GetOrCreateCardsListTask class that extends the AsyncTask class, which either retrieves all the cards from the database or creates them:
public class GetOrCreateCardsListTask extends AsyncTask<Void, Void,
ArrayList<Card>> {
@Override
protected ArrayList<Card> doInBackground(Void... params) {
cardsData.open();
cardsList = cardsData.getAll();
if (cardsList.size() == 0) {
for (int i = 0; i < 50; i++) {
Card card = new Card();
card.setName(names[i]);
card.setColorResource(colors[i]);
cardsList.add(card);
cardsData.create(card);
Log.d(DEBUG_TAG, "Card created with id " + card.getId() + ",
name " + card.getName() + ", color " + card.getColorResource());
}
}
return cardsList;
}
@Override
protected void onPostExecute(ArrayList<Card> cards) {
super.onPostExecute(cards);
adapter = new SampleMaterialAdapter(SampleMaterialActivity.this,
cardsList, cardsData);
recyclerView.setAdapter(adapter);
}
}
When this class is created and executed in the onCreate() method of the Activity, it overrides the doInBackground() method and creates a background task for retrieving all the cards from the database with the call to getAll(). If no items are returned, that means the database is empty and needs to be populated with entries. The for loop creates 50 Cards and each Card is added to the cardsList, and then created in the database with the call to create(). Once the background operation is complete, the onPostExecute() method, which was also overridden from the AsyncTask class, receives the cardsList result from the doInBackground() operation. It then uses the cardsList and cardsData to create a new SampleMaterialAdapter, and then adds that adapter to the recyclerView to update the UI once the entire background operation has completed.
Notice the AsyncTask class has three types defined; the first is of type Void, the second is also Void, and the third is ArrayList<Card>. These map to the Params, Progress, and Result generic types of an AsyncTask. The first Params is used as the parameter of the doInBackground() method, which are Void, and the third Result generic is used as the parameter of the onPostExecute() method. In this case, the second Void generic was not used, but would be used as the parameter for the onProgressUpdate() method of an AsyncTask.
Note that you are not able to call UI operations on the doInBackground() method of an AsyncTask. Those operations need to be performed before or after the doInBackground() method, but if you need the UI to update only after the background operation has completed, you must perform those operations in the onPostExecute() method so the UI is updated appropriately.
Creating a Card in the Database
The magic happens in the call to cardsData.create(). This is where the Card is inserted into the database. Here is the create() method definition found in the CardsData class:
public Card create(Card card) {
ContentValues values = new ContentValues();
values.put(CardsDBHelper.COLUMN_NAME, card.getName());
values.put(CardsDBHelper.COLUMN_COLOR_RESOURCE, card.getColorResource());
long id = db.insert(CardsDBHelper.TABLE_CARDS, null, values);
card.setId(id);
Log.d(DEBUG_TAG, "Insert id is " + String.valueOf(card.getId()));
return card;
}
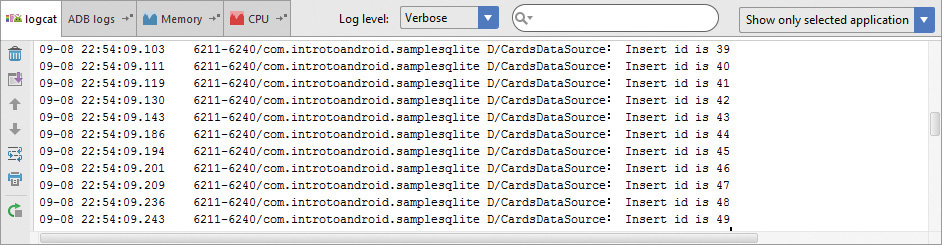
The create() method accepts a Card data object. A ContentValues object is created to temporarily store the data that will be inserted into the database in a structured format. There are two value.put() calls that map the database column to a Card attribute. The insert() method is then called on the cards table and the temporary values are passed in for insertion. An id is returned from the call to insert() and that value is then set as the id for the Card, and finally a Card object is returned. Figure 16.2 shows the logcat output of cards being inserted into the database.
Getting All Cards
Earlier, we mentioned the getAll() method that queries the database for all the cards in the cards table. Here is the implementation of the getAll() method:
public ArrayList<Card> getAll() {
ArrayList<Card> cards = new ArrayList<>();
Cursor cursor = null;
try {
cursor = db.query(CardsDBHelper.TABLE_CARDS,
COLUMNS, null, null, null, null, null);
if (cursor.getCount() > 0) {
while (cursor.moveToNext()) {
Card card = new Card();
card.setId(cursor.getLong(cursor
.getColumnIndex(CardsDBHelper.COLUMN_ID)));
card.setName(cursor.getString(cursor
.getColumnIndex(CardsDBHelper.COLUMN_NAME)));
card.setColorResource(cursor
.getInt(cursor.getColumnIndex(CardsDBHelper
.COLUMN_COLOR_RESOURCE)));
cards.add(card);
}
}
} catch (Exception e){
Log.d(DEBUG_TAG, "Exception raised with a value of " + e);
} finally{
if (cursor != null) {
cursor.close();
}
}
return cards;
}
A query is performed on the cards table inside a try statement with a call to query() that returns all columns for the query as a Cursor object. A Cursor allows you to access the results of the database query. First, we ensure that the Cursor count is greater than zero, otherwise no results will be returned from the query. Next, we iterate through all the cursor objects by calling the moveToNext() method on the cursor, and for each database item, we create a Card data object from the data in the Cursor and set the Cursor data to Card data. We also handle any exceptions that we may have encountered, and finally the Cursor object is closed and all cards are returned.
Adding a New Card
You already know how to insert cards into the database because we did that to initialize the database. So adding a new Card is very similar to how we initialized the database. The addCard() method of the SampleMaterialAdapter class needs a slight modification. This method executes AsyncTask to add a new card in the background. Here is the updated implementation of the addCard() method creating a CreateCardTask and executing the task:
public void addCard(String name, int color) {
Card card = new Card();
card.setName(name);
card.setColorResource(color);
new CreateCardTask().execute(card);
}
private class CreateCardTask extends AsyncTask<Card, Void, Card> {
@Override
protected Card doInBackground(Card... cards) {
cardsData.create(cards[0]);
cardsList.add(cards[0]);
return cards[0];
}
@Override
protected void onPostExecute(Card card) {
super.onPostExecute(card);
((SampleMaterialActivity) context).doSmoothScroll(getItemCount() - 1);
notifyItemInserted(getItemCount());
Log.d(DEBUG_TAG, "Card created with id " + card.getId() + ", name " +
card.getName() + ", color " + card.getColorResource());
}
}
The doInBackground() method makes a call to the create() method of the cardsData object, and in the onPostExecute() method, a call to the doSmoothScroll() method of the calling Activity is made, then the adapter is notified that a new Card has been inserted.
Updating a Card
To update a Card, we first need a way to keep track of the position of a Card within the list. This is not the same as the database id because the id of the item in the database is not the same as the position of the item in the list. The database increments the id of a Card, so each new Card has an id one higher than the previous Card. The RecyclerView list, on the other hand, shifts positions as items are added and removed from the list.
First, let’s update the Card data object found in the Card.java file and add a new listPosition attribute with the appropriate getter and setter methods as shown here:
private int listPosition = 0;
public int getListPosition() {
return listPosition;
}
public void setListPosition(int listPosition) {
this.listPosition = listPosition;
}
Next, update the updateCard() method of the SampleMaterialAdapter class and implement an UpdateCardTask class that extends AsyncTask as follows:
public void updateCard(String name, int list_position) {
Card card = new Card();
card.setName(name);
card.setId(getItemId(list_position));
card.setListPosition(list_position);
new UpdateCardTask().execute(card);
}
private class UpdateCardTask extends AsyncTask<Card, Void, Card> {
@Override
protected Card doInBackground(Card... cards) {
cardsData.update(cards[0].getId(), cards[0].getName());
cardsList.get(cards[0].getListPosition()).setName(cards[0].getName());
return cards[0];
}
@Override
protected void onPostExecute(Card card) {
super.onPostExecute(card);
Log.d(DEBUG_TAG, "list_position is " + card.getListPosition());
notifyItemChanged(card.getListPosition());
}
}
The UpdateCardTask calls the update() method of the cardsData object in the doInBackground() method and then updates the name of the corresponding Card in the cardsList object and returns the Card. The onPostExecute() method then notifies the adapter that the item has changed with the notifyItemChanged() method call.
Finally, the CardsData class needs to implement the update() method to update the particular Card in the database. Here is the update() method:
public void update(long id, String name) {
String whereClause = CardsDBHelper.COLUMN_ID + "=" + id;
Log.d(DEBUG_TAG, "Update id is " + String.valueOf(id));
ContentValues values = new ContentValues();
values.put(CardsDBHelper.COLUMN_NAME, name);
db.update(CardsDBHelper.TABLE_CARDS, values, whereClause, null);
}
The update() method accepts id and name parameters. A whereClause is then constructed for matching the id of the Card with the appropriate id column in the database, and a new ContentValues object is created for adding the updated name for the particular Card to the appropriate name column. Finally, the update() method is executed on the database.
Deleting a Card
Now let’s take a look at how to modify the deletion of cards. Remember the animateCircularDelete() method—this is where a Card was animated off the screen and deleted from the cardsList object. In the onAnimationEnd() method, construct a Card data object and pass that to the execute method of a DeleteCardTask object, which is an AsyncTask. Here are those implementations:
public void animateCircularDelete(final View view, final int list_position) {
int centerX = view.getWidth();
int centerY = view.getHeight();
int startRadius = view.getWidth();
int endRadius = 0;
Animator animation = ViewAnimationUtils.createCircularReveal(view,
centerX, centerY, startRadius, endRadius);
animation.addListener(new AnimatorListenerAdapter() {
@Override
public void onAnimationEnd(Animator animation) {
super.onAnimationEnd(animation);
view.setVisibility(View.INVISIBLE);
Card card = new Card();
card.setId(getItemId(list_position));
card.setListPosition(list_position);
new DeleteCardTask().execute(card);
}
});
animation.start();
}
private class DeleteCardTask extends AsyncTask<Card, Void, Card> {
@Override
protected Card doInBackground(Card... cards) {
cardsData.delete(cards[0].getId());
cardsList.remove(cards[0].getListPosition());
return cards[0];
}
@Override
protected void onPostExecute(Card card) {
super.onPostExecute(card);
notifyItemRemoved(card.getListPosition());
}
}
The doInBackground() method of the DeleteCardTask calls the delete() method of the cardsData object and passes in the id of Card. Then the Card is removed from the cardsList object, and in the onPostExecute() method, the adapter is notified that an item has been removed by calling the notifyItemRemoved() method and passing in the list position of the Card that has been removed.
There is one last method to implement—the delete() method of the CardsData class. Here is that method:
public void delete(long cardId) {
String whereClause = CardsDBHelper.COLUMN_ID + "=" + cardId;
Log.d(DEBUG_TAG, "Delete position is " + String.valueOf(cardId));
db.delete(CardsDBHelper.TABLE_CARDS, whereClause, null);
}
The delete() method of the CardsData class accepts an id of a Card, constructs a whereClause using that id, and then calls the delete() method on the cards table of the database, passing in the appropriate whereClause with the id of the Card to delete.
Summary
You now have a full implementation of a database that provides permanent storage for your application. In this chapter, you learned how to create a database. You also learned how to access the database for querying, inserting, updating, and deleting items from it. In addition, you also learned how to update the SampleMaterial application so that Card data is stored in a database. Finally, you learned how to perform your database operations off of the main UI thread by performing the operations in the background with an AsyncTask so as not to block the UI when running these blocking operations. You should now be ready to implement simple SQLite databases in your own applications.
Quiz Questions
1. What is the SQLiteDatabase method for creating a table?
2. What method provides access for reading and writing a database?
3. True or false: The async() method of an AsyncTask allows you to execute long-running operations off the main UI thread in the background.
4. True or false: The onAfterAsync() method of an AsyncTask allows you to execute UI methods after an AsyncTask completes.
Exercises
1. Read through the “Saving Data in SQL Databases” training in the Android documentation found here: http://d.android.com/training/basics/data-storage/databases.html.
2. Read through the “SQLiteDatabase” SDK reference to learn more about how to utilize a SQLite database here: http://d.android.com/reference/android/database/sqlite/SQLiteDatabase.html.
3. Modify the SampleSQLite application to support the deletion of all items from the database with a single database operation.
References and More Information
Android Tools: “sqlite3”:
http://d.android.com/tools/help/sqlite3.html
SQLite:
Command Line Shell For SQLite:
http://www.sqlite.org/cli.html
Android API Guides: “Content Providers”:
http://d.android.com/guide/topics/providers/content-providers.html
Android SDK Reference regarding the application android.database.sqlite package:
http://d.android.com/reference/android/database/sqlite/package-summary.html
Android SDK Reference regarding the application AsyncTask class:
http://d.android.com/reference/android/os/AsyncTask.html
Android SDK Reference regarding the application ContentValues class:
http://d.android.com/reference/android/content/ContentValues.html
Android SDK Reference regarding the application SQLiteDatabase class:
http://d.android.com/reference/android/database/sqlite/SQLiteDatabase.html
Android SDK Reference regarding the application SQLiteOpenHelper class:
http://d.android.com/reference/android/database/sqlite/SQLiteOpenHelper.html
Android SDK Reference regarding the application Cursor class: