In the previous chapter, we learned about web development with Python. We took a brief look into HTML, CSS, and JavaScript, and we created your first program with Flask. In this chapter, let’s create some more mini projects with the Python concepts you’ve learned in this book.
Project 23-1: Calculator with Tkinter

- 1.
Let’s import Tkinter first and create our window. I’m going to set the resizable option to 0 and 0, so the window can’t be resized. I’m also going to set the title as ‘Calculator’.
- 2.
Now, I’m going to create a string variable (Tkinter variable) that will hold our expression (that needs to be calculated). I’m also creating an empty string that’ll initially hold the expression. We’ll later set the Tkinter variable with the value in the “string”. Now, we’re making this a string and not an integer or float because we can use the eval() method in Python to evaluate mathematical expressions, and the expressions can be in the form of a string.
- 3.
Now, let’s create our buttons.
- 4.
Next, let’s create a frame, “buttons”, that’ll hold all of our buttons. Let’s pack that as well.
- 5.
Now, let’s start creating all of our buttons. They’re going to be of width 13 and height 2, and we’re going to call the clear_entry() method for the clear button, get_answer() method when the “answer” or equal to button is clicked, or the button_click() method that’ll add either a number or an operator to our expression.
- 6.Now that we’ve created our buttons, we should have something like Figure 23-1.
 Figure 23-1
Calculator app – the layout
- 7.
Now, let’s create our buttons above the function calls (widgets). First, the button_click method. Let’s load our global “calc” variable and just concatenate the number or operator clicked (we sent them in the form of a string, remember) with the current value of “calc”. That’s it!
- 8.
Finally, set the Tkinter variable with the current value of calc. This’ll make the expression appear on the entry box of your app.
- 9.
Next, for the clear_entry method, we’re just going to make “calc” an empty string again and set “e” to that string.
- 10.
For the get_answer method, let’s import “calc”, create a variable “ans” that’ll use the eval() method to calculate the expression inside “calc”, and set that answer to “e”, so the expression is replaced with the answer.
- 11.
Finally, let’s convert “ans” to a string (it’ll be an integer or floating-point value after evaluation) and replace the expression in “calc” with the answer so we can continue calculating.

Final calculator app
That’s it! A very simple calculator. You can actually do a lot to make this better. Maybe add some colors, iron out a couple of kinks, or add more features. For example, as of now, you can click two operators, one after the other, and that’ll get you an error. Why don’t you create an “if” condition that prevents that from happening?
Have fun! ![]()
Project 23-2: Random story generator
- 1.
Let’s import our random module first.
- 2.Then, I’m going to create my options.when_ch = ['Once upon a time,','A long time ago,','Thousands of years ago,','Long long ago,']character_ch = ['dragon','unicorn','fairy','elf']pronouns_ch = ['he','she','it']attributes_ch = ['brave','courageous','strong','smart','intelligent']enemy_ch = ['witches','warlocks','dark elves']saved_ch = ['the world', 'the Kingdom', 'everyone', 'the village']
- 3.Finally, let’s define a generate_story() function that loads all of our options in. Then, let’s use the choice() method in the random module to choose our option for that particular story.def generate_story():global when_ch,character_ch,pronouns_ch,attributes_ch,enem_chy,saved_chwhen = random.choice(when_ch)character = random.choice(character_ch)pronouns = random.choice(pronouns_ch)attributes = random.choice(attributes_ch)enemy = random.choice(enemy_ch)saved = random.choice(saved_ch)
- 4.Also, if our character is an elf, we need to address it with “an” and “a” for the rest of the characters.if character == 'elf':a = 'an'else:a = 'a'
- 5.Finally, let’s create our story with a multi-string.story = '''{} there lived {} {}. {} was very {}. {} fought against the {} and saved {}'. '''.format(when,a,character,pronouns.capitalize(),attributes,pronouns.capitalize(),enemy,saved)
- 6.
Now, let’s print it.
- 7.Now, for the function call, I’m going to create an infinite while loop that asks the user if they want to create a new story or not. If they typed ‘Y’ or ‘y’, then let’s call our generate_story function. Otherwise, let’s stop the program.while True:create = input('Shall we create a new story? Y or N: ')if create == 'Y' or create == 'y':generate_story()else:break
Nice! Very simple though. I’m sure you can add a lot more options and make these stories bigger or more random. Have fun! ![]()
Project 23-3: Rock Paper Scissors game
- 1.Let’s import the Tkinter and random packages first.#Rock, paper, scissorsfrom tkinter import *import random
- 2.Now, let’s create our window, configure its background color to white, and make it non-resizable.w = Tk()w.configure(bg='white')w.resizable(0,0)
- 3.To start with, we need a label that holds the title.title = Label(w,text='Rock Paper Scissors', fg="red", bg="white",font=('Arial',45,'bold'))title.pack()
- 4.
Let’s also create a u_option variable that’s empty right now, but will hold the user’s option later.
- 5.
Let’s also create a list with our three options.
- 6.Now, let’s create the rest of our widgets. We need another label that says ‘Choose one’.label = Label(w,text='Choose one', fg="green", bg="white",font=('Arial',25,'bold'))label.pack()
- 7.Below that, we need a canvas that’ll hold our rock, paper, and scissors. Let’s make it so that the cursor turns to a “hand” when the user hovers over the canvas.canvas = Canvas(w,width=500,height=150,background='white')canvas.pack()canvas.config(cursor='hand2')
- 8.
Next, let’s load our image using the PhotoImage method. You can use any image you want. I’ve used illustrations of a rock, paper, and scissors.
- 9.
Next, let’s draw our image into the canvas, in the X,Y coordinate position we want.
- 10.
Then, let’s create a tag_bind on that image. We need tag_bind, instead of bind, for canvas items. Ours is going to be a <Button-1> bind, for left mouse button click, and let’s call the chose() method with the argument being the item that was just clicked.
- 11.
That’s it! Let’s repeat the process for the next two images.
- 12.Now, let’s create labels that’ll initially be empty, but will later hold the messages we want, about the user’s choice, the computer’s choice, and the winner.you_chose = Label(w,text='', fg="blue", bg="white",font=('Arial',25,'bold'))you_chose.pack()c_chose = Label(w,text='', fg="blue" , bg="white",font=('Arial',25,'bold'))c_chose.pack()winner = Label(w,text='', fg="brown", bg="white",font=('Arial',45,'bold'))winner.pack()
- 13.Now, let’s create our chose() function above the widgets. Let’s import the u_option variable.def chose(option):global u_option
- 14.If u_option is empty, that means the user is selecting an option for the first time, and we’re ready to play. Let’s assign the option to u_option.if u_option == '':u_option = option
- 15.
Let’s also choose a random option for our computer and place that in c_option.
- 16.Now, let’s configure you_chose and c_chose with our choices.you_chose.config(text='You chose {}'.format(u_option))c_chose.config(text='Computer chose {}'.format(c_option))
- 17.Next, let’s check who won. If both u_option and c_option have the same value, it’s a draw. If u_option is rock, then the user wins if c_option is scissors and loses if c_option is paper. Similarly, let’s create our other conditions and also configure “winner” for every outcome.if u_option == c_option:winner.config(text='Draw!')elif u_option == 'rock':if c_option == 'paper':winner.config(text='You lose :(')elif c_option == 'scissors':winner.config(text='You win!')elif u_option == 'paper':if c_option == 'rock':winner.config(text='You win!')elif c_option == 'scissors':winner.config(text='You lose :(')elif u_option == 'scissors':if c_option == 'paper':winner.config(text='You win!')elif c_option == 'rock':winner.config(text='You lose :(')
- 18.Finally, let’s create our ‘New Game’ button.new = Button(w,text='New Game',font=('Arial',20,'bold'),command=new_game)new.pack()
- 19.Above the button, define the new_game() function. Let’s load u_option first. Now, let’s configure our labels so they become empty again, and let’s empty u_option so the user can play again.def new_game():global u_optionyou_chose.config(text='')c_chose.config(text='')winner.config(text='')u_option = ''
- 20.
That’s it! Let’s end the program with a main loop.
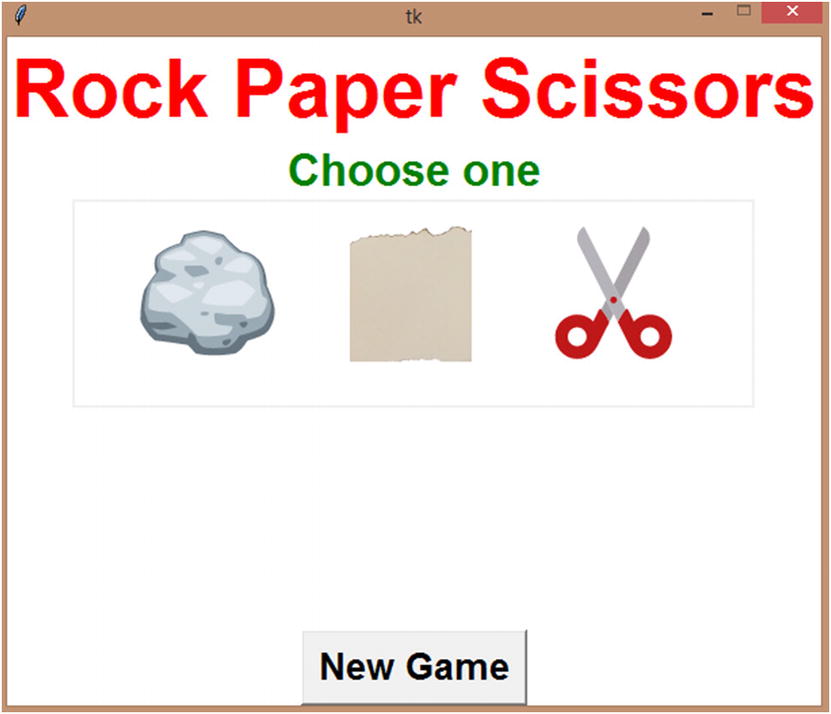
Rock Paper Scissors game
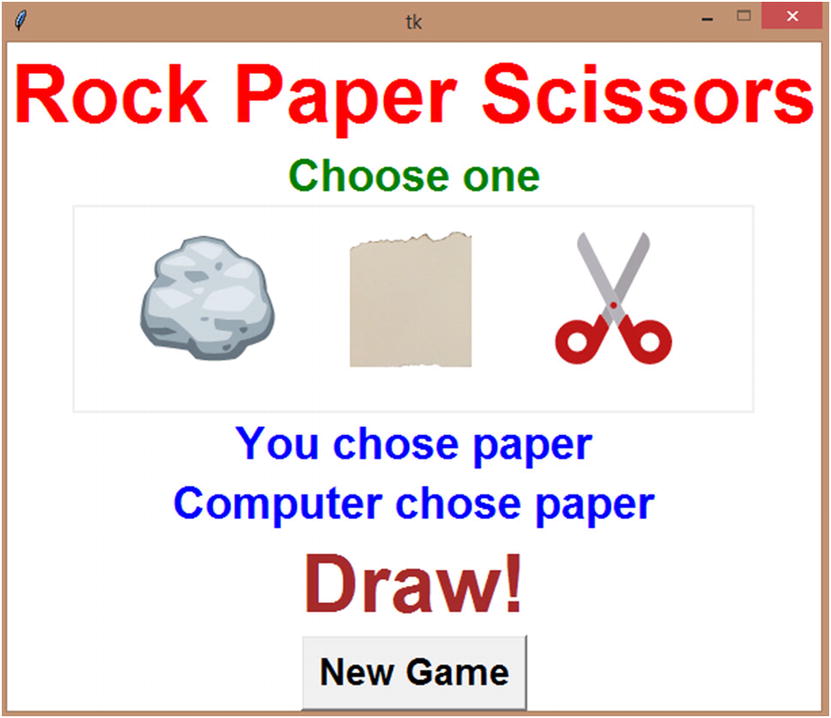
User chose an option
Works perfectly! ![]()
Project 23-4: Bouncing ball (off the four walls) with Pygame
- 1.Let’s import pygame, random and time to start with.import pygame import randomimport time
- 2.Then, let’s initialize pygame and create our screen. It’s going to be of width and height 500 each.pygame.init()screen = pygame.display.set_mode((500,500))
- 3.Now, let’s create a variable x and make it 250 and a variable y and make it 0 to start with. This is because we want to start the bounce from the point 250,0.x = 250y = 0
- 4.
We also need a “game” variable that’s currently True but will turn False when the user closes the screen.
- 5.Let’s also create x and y directional variables “xd” and “yd” that’ll be 1 by default. We’re going to increment the x or y value of the ball within the range (1 to 2) (to move upward) and (–1 to –2) (to move downward). This variable is going to change our ball’s direction.xd = 1yd = 1
- 6.
Now, let’s create our game loop.
- 7.To start with, let’s create the quit condition. If the event type is pygame.QUIT, make game false.for event in pygame.event.get():if event.type == pygame.QUIT:game = False
- 8.
Then, let’s fill our screen with white color.
- 9.Then, let’s use the draw.circle method to draw a red ball in the position 250,y (to start with, 250,0). Its radius is going to be 25 and is going to be a circle that’s entirely filled, so 0 for the last attribute.#draw a ball#circle draw function#where you want to draw it, color of the circle, position, widthpygame.draw.circle(screen,(0,0,255),(250,y),25,0)
- 10.Let’s use the display.update method to ensure that the screen gets updated every time the loop runs.pygame.display.update() #update the screen in the output window
- 11.
If we leave the game as it is, our ball would move too fast to be seen by the human eye. So, let’s slow the iterations of the loop down. There’ll be a delay of 0.005 seconds after every iteration.
- 12.Now, let’s set the wall collision conditions. When x is greater than or equal to 488 (since our ball has a diameter of 25, and we need the other half of the ball to be visible, we’re setting it at 488 and not 500), let’s reduce the value of x by a random value between 1 and 2, because we need the ball to move toward the left (back inside the screen). So, xd is going to be –1.if x >= 488:xd = -(random.randint(1,2))
- 13.If y is >= 488, similarly, reduce the value of yd.elif y >= 488:yd = -(random.randint(1,2))
- 14.If x is <= 12, increase xd, and increase yd if y is lesser than or equal to 12.elif x <= 12:xd = (random.randint(1,2))elif y <= 12:yd = (random.randint(1,2))
- 15.Finally, once we’re out of the if elif statement, let’s add “d” with the current value of “y”.x += xdy += ydpygame.quit()
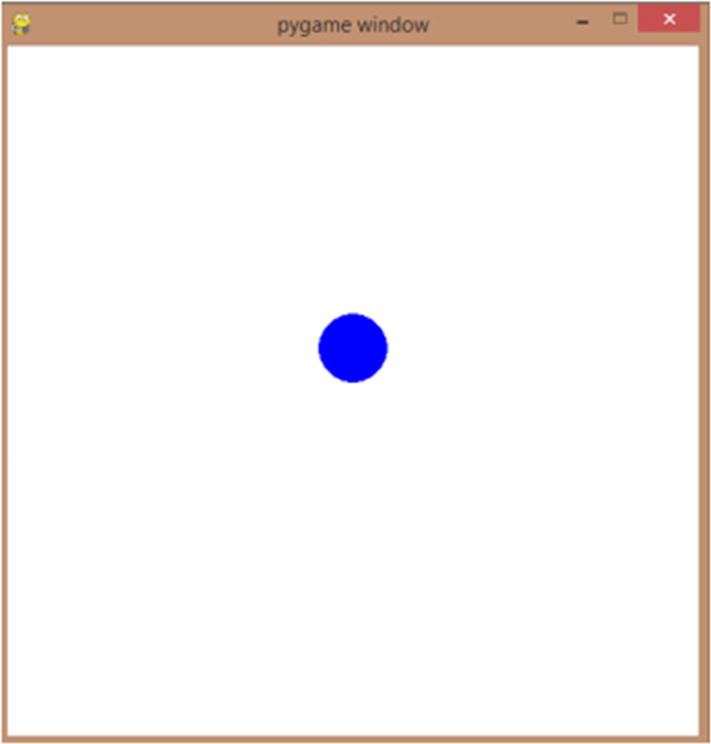
Bouncing ball (off the four walls)
Project 23-5: Temperature conversion app
- 1.Let’s import tkinter and set up our screen.from tkinter import *w = Tk()
- 2.Now, let’s design our app. It’s going to be a very simple design. We’re going to create two frames, one for each converter.frame1 = Frame(w)frame1.grid(row=0,column=0,padx=10,pady=10)
- 3.Let’s create a label, an entry box for the Celsius value, and a button that does the conversion on click and another entry box to get the result (Fahrenheit value).#Celsius to Fahrenheit conversionlabel1 = Label(frame1,text='Celsius to Fahrenheit conversion',font=('Arial',15,'bold'))label1.grid(row=0,column=0,columnspan=3)entry1 = Entry(frame1)entry1.grid(row=1,column=0)button1 = Button(frame1, text='Convert to Fahrenheit',command=find_fahrenheit)button1.grid(row=1,column=1)entry2 = Entry(frame1)entry2.grid(row=1,column=2)
- 4.Let’s repeat the same for the next converter.frame2 = Frame(w)frame2.grid(row=1,column=0,padx=10,pady=10)#Fahrenheit to Celsius conversionlabel2 = Label(frame2,text='Fahrenheit to Celsius conversion',font=('Arial',15,'bold'))label2.grid(row=0,column=0,columnspan=3)entry3 = Entry(frame2)entry3.grid(row=1,column=0)button2 = Button(frame2, text='Convert to Celsius',command=find_celsius)button2.grid(row=1,column=1)entry4 = Entry(frame2)entry4.grid(row=1,column=2)
- 5.Run the program, and you’ll get this (Figure 23-6).
 Figure 23-6
Temperature converter
- 6.
Now, let’s create our functions above the widgets. The find_fahrenheit() function to convert Celsius to Fahrenheit.
- 7.
There’s a formula to do the same, and that’s given as follows:
- 8.
Let’s delete the second entry box (the result box) in case the user already made a conversion and this is a new conversion.
- 9.Now, let’s get the first entry box’s value in “C” and convert that into an integer.C = entry1.get()C = int(C)
- 10.Now, let’s calculate “F” and insert that into the second entry box. That’s it!F = ((9/5)*C)+32entry2.insert(0,F)
- 11.Let’s repeat the same for our find_celsius function.def find_celsius():#Formula is C = (5/9)*(F-32)entry4.delete(0,END)F = entry3.get()F = int(F)C = (5/9)*(F-32)entry4.insert(0,C)

Conversion
It works! ![]()
Project 23-6: Introduce with files and Tkinter
This is going to be a simple project. We are going to create a text file called introduction.txt in a folder of your choice. We are going to write our introduction to that file via our Python code, and finally, we’re going to create a simple text application that accepts the file name (complete file path) and prints out the contents of that file in a text box.
- 1.Before we get started, let’s import Tkinter and create our screen.from tkinter import *w = Tk()
- 2.
I’m going to create my file in the following path: G:\Pythonintroduction.txt
- 3.
I can also use “x”, but I’m using ‘w’ so I wouldn’t have to open the file in write mode again.
- 4.4. Then, I’m going to write Susan’s introduction to it:f.write('''Hi, I'm Susan.I'm 9 years old.My puppy's name is Barky.He loves me very very much! :)''')
- 5.
Now, I’m going to create a global variable that’ll store the content of my file whenever I press Enter on my entry box. Let’s store an empty string in it for now.
- 6.Now, let’s create our widgets. I want a label that is on the left of my entry box. I’ve hence placed it in row 0 and column 0.label = Label(w,text='File name',font=('Arial',12,'bold'))label.grid(row=0,column=0,padx = 5, pady=5)
- 7.I’m going to place my entry box in row 0 and column 1, make it sticky in all four directions, and give everything padding. All the values I’ve chosen (width, padding, etc.) are arbitrary. You can test different values and choose the ones you like.entry = Entry(w,width=65)entry.grid(row=0,column=1,sticky='nsew', padx = 5, pady=5)
- 8.
Finally, let’s create a bind for my entry. Whenever I press the Enter button on my keyboard (command in Mac), I want to call my get_file function. You need to use the ‘<Return>’ condition to make that happen.
- 9.Finally, let’s create our text widget. I’m going to give my text some default stylings and place it in row 1, column 0 and make it span two columns (so it takes up the entire width of the first two widgets).text = Text(w,font=('Arial',14,'bold'))text.grid(row=1,column=0,columnspan=2)
- 10.
Alright, now that we’re done with the widgets, let’s define our get_file function. Define it above the calling function, okay?
- 11.To start with, get the file name from the entry box. Then, open that file in read mode, and store its contents in f_content (f.read()).file = entry.get()f = open(file,'r')f_content = f.read()
- 12.
Finally, insert whatever’s in f_content into the text box. We’re using ‘end’ so the entire content gets inserted.
That’s it!

Tkinter app layout
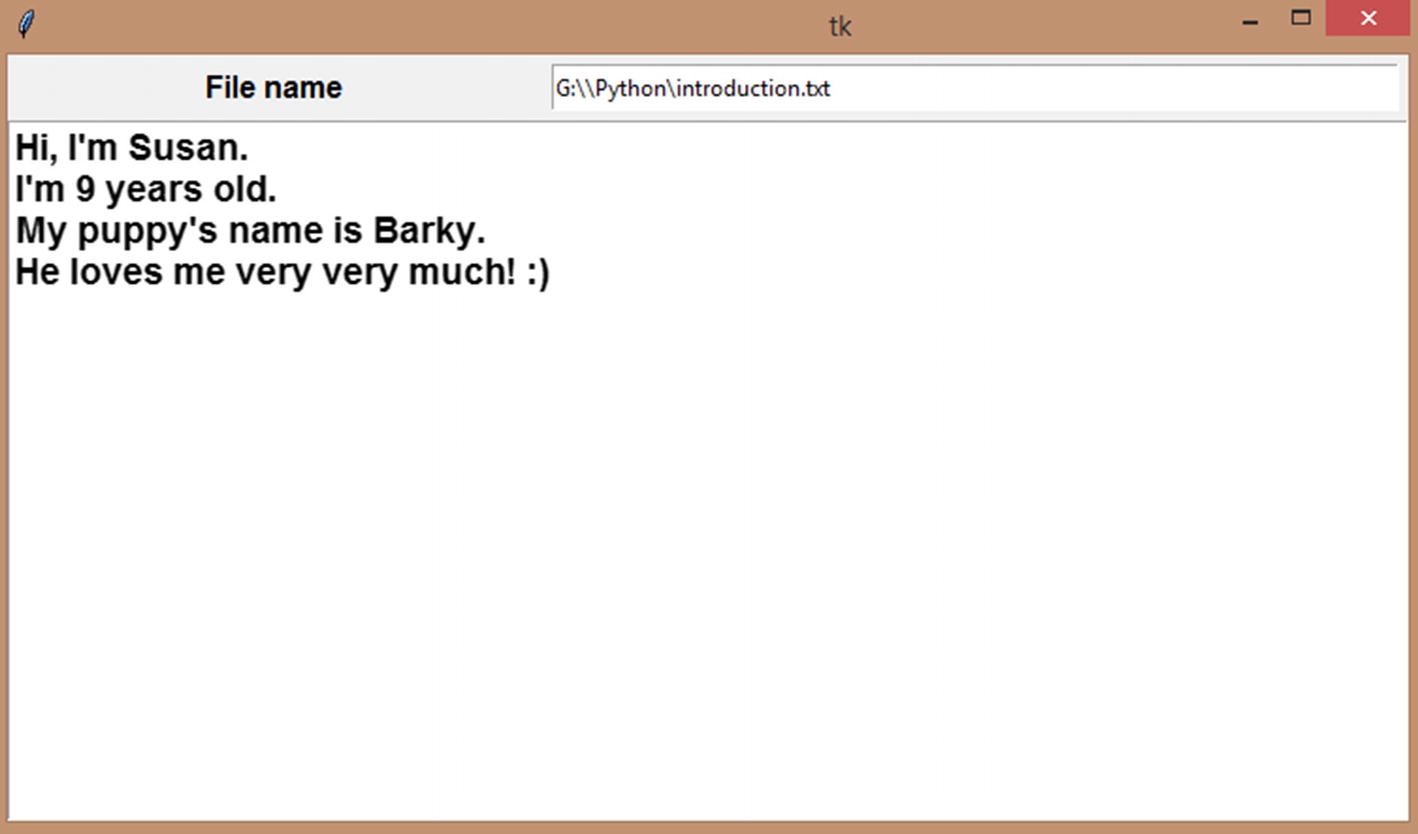
Import the file contents
Yes, it did. I entered my file path (the exact path) and pressed Enter, and my file’s content’s being displayed on my text box. Perfect! ![]()
Summary
In this chapter, we created six apps using either Tkinter or Pygame. We created a calculator, a random story generator, a Rock Paper Scissors game, a file uploader app, a temperature conversion app, and a bouncing ball.
In the next chapter, let’s talk about what’s next in your Python journey. I’ll give you some ideas on what you need to learn about next, and I’ll also give you some ideas on more mini and capstone projects you can work on your own.