Testing may not be your favorite task as a programmer; it probably rates just above documentation. Yet here is a tool that has made testing more bearable and more productive for many Java developers—and not just because it has pretty colors and flashing lights.
What JUnit is and why it’s getting so much attention.
How some people test before they start coding.
How to install and invoke JUnit.
The major JUnit concepts that you need to understand.
What assertions are available in JUnit.
JUnit is a framework for unit tests. It consists of a handful of classes which you can use to build bunches of test cases for testing your application. JUnit also comes with three test “runners” for running your tests and reporting the test results. So why all the fuss? Why has JUnit been so much in the technical forefront the last year or two?
Start with a straightforward idea, well executed, that can help almost any programmer working on any application. Make it something that can be integrated incrementally into existing projects. Make it robust enough to be used for projects starting “from scratch.” Give it a simple but pleasing GUI, and put it to work on a few high-profile projects. Give it some good press coverage. And you’ve got a winner: You’ve got JUnit. Besides, it really does help you get useful work done; it makes writing tests a little less work and a little more enjoyable. And working with well-tested code is its own reward—a satisfying experience.
This is the slogan of the test-oriented crowd, and if it sounds a bit impossible, it is. It’s hype—it got your attention, and there is a bit of truth to it, but don’t take it too literally.
The approach espoused by the “Testing First” crowd is to start, like all good software development efforts, with design. But once you have pieces designed, move directly into testing. Now you don’t have any code that can be tested yet, but you can start writing your tests. Then—although the tests will fail, as there is no code to run yet—you can begin keeping score on your progress by running these tests as code gets implemented.
Note
Some people like to tout the use of JUnit as an automated tool to track progress, but that’s a little hard to do when you can’t compile your tests because the classes they need don’t yet exist. However, if you document your design of a class by (among other things) creating an empty version of the source, with Javadoc comments for the class and whatever methods you have come up with so far, well, then you’ve got something that will compile, and thus can be used for tracking progress. It also makes great, tangible documentation. Our point here, though, is that you are doing some coding before you begin testing. It’s really more of a back-and-forth between coding and testing.
Let’s apply that approach to our previous design discussion. We’ve described an Account class in our design discussion. It needs a name, an owner, and an amount of money when created. It should have a method to create subaccounts, ones that are connected to this account and get allocated some or all of the main account’s money.
Example 13.1 is the basic structure of our Account class.
That’s enough to begin writing a test. We have described the constructor, with the three parameters that it will need. We’ve also described a method on the Account object, one that will create subaccounts. That gives us enough information to write a test that will create an account and then create subaccounts of that account. We can test to see if the accounts are created properly (i.e., are not null) and if the subaccounts use up all the money of the parent account.
When you “test then code,” you begin to use the objects that you have designed without getting bogged down in their implementation. You are, in effect, describing their external interfaces without implementing them. You are also beginning to use the classes as a user might, though a tester’s use is a bit different than the way an application might use them. However, as a user of these classes you are beginning to test the design, by testing the results of the use cases—are these classes really usable?
You may discover that you need some additional functionality. In our example, we can see from the description of our test that we will need a getter method on the account to return the amount of money that remains unallocated to subaccounts. Then we can test to see if it gets used up properly.
There are many more test cases that we could develop for the Account class, but let’s use just these for now, so that the size of our test case is manageable.
Our next step is to get JUnit installed before we get too deep into developing our test cases. That will give us something to run these tests.
It’s rather simple to install a standalone version of JUnit. We download a ZIP file from the JUnit Web site, then unzip it into a directory. Adding the JUnit JAR file to your CLASSPATH is all that’s needed to make JUnit available for you to run it.
Example 13.1. The bare bones of our Account class
package net.multitool.core;

import net.multitool.util.*;
import java.util.*;

/**
 * The basic Account class for our budgeting example; this is the
 * first-cut "implementation" where we have just transferred our
 * design into Java code. We can use this much to generate Javadocs
 * and also to begin our JUnit testing (design, test, code).
 */

public class
Account
{
   private String name;       // a name to identify this account
   private User owner;        // the user assigned to this account
   private SAMoney total;     // total amt allocated to this account
   private HashMap children;  // the collection of subaccounts,
                              //   by name
   private Account parent;    // it has this account as a child

   /**
    * Create an account, with a pool of dollars to budget.
    * Use this constructor to create the master account.
    * Use "createSub" to create children of this account.
    */
   public
   Account(String name, User owner, String total)
   {
   }

   /**
    * Create a new subaccount (i.e., child), given a name
    * and an amount. The child is connected to the parent.
    */
   public Account
   createSub(String name, String amt)
   {
      return null;        // so it compiles

   } // createChild

} // class Account
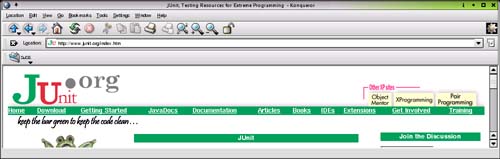
Point your browser at the site http://www.junit.org/ (Figure 13.1). From the main page, choose the Download heading.
That takes you to a SourceForge site (Figure 13.2); click on one of the sites near you, though any will do. The download is only a few hundred kilobytes, so it shouldn’t take long.
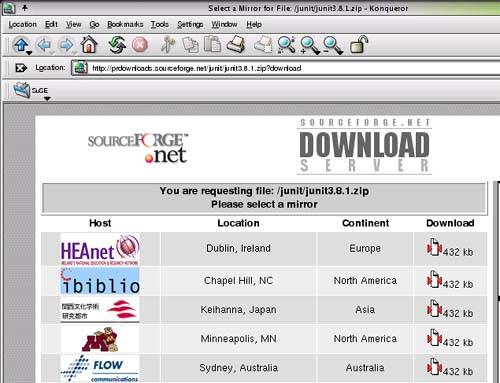
You’ll be left with a file named junitX.Y.Z. zip, where the X, Y, Z characters are the digits that tell you what release of JUnit this is. Our examples show the 3.8.1 release.
Note
It’s a good idea to inspect the ZIP files that you download before you actually unzip them. We like to know what files and especially what directories are going to get modified or cluttered up by the unzipping. Some ZIP files come with all their files inside of a single folder. Those are fine to unzip in place. Other ZIP files have been built from lots of pieces and unzipping them can make a mess of your current directory, or worse, of other directories that you may not even know about. Instead, play it safe and look before you leap. You can see the list of all the files in the JUnit ZIP file by typing this command:
$ unzip -l junit3.8.1.zip
The -l option will produce a listing of the contents of the ZIP file. That way you can see what subdirectories it will create, that is, if it is going to unpack into a single directory or make a mess. The JUnit ZIP file is very well behaved in this respect.
Create a directory and unpack the JUnit ZIP file in there:
$ mkdir ~/junit
$ mv junit3.8.1.zip !$
$ cd !$
$ unzip junit3.8.1.zip
This warning from the installation instructions is worth noting:
Important
Don’t install the junit.jar into the extention directory of your JDK installation. If you do so the test class on the filesystem will not be found.
The JDK installation directory has a subdirectory named jre/lib/ext. Don’t put the JUnit JAR file in there. If you have followed our instructions, you’re OK, since we had you create a new directory.
To use JUnit, the junit.jar file needs to be in your classpath. For example:
$ export CLASSPATH="${CLASSPATH}:${HOME}/junit/junit3.8.1/junit.jar"
That’s all the installing there is. It doesn’t feel like much, because you haven’t done much. All it provides is a JAR file that you will use when you want to run tests. That’s where it gets interesting.
To test out your installation, cd to the directory where you unpacked JUnit. If it isn’t already part of it, add the current directory (".") to your CLASSPATH:
$ export CLASSPATH="${CLASSPATH}:."
Then try:
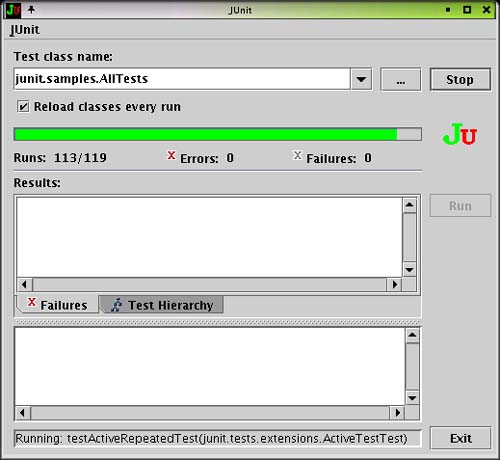
$ java junit.swingui.TestRunner junit.samples.AllTests
You should see a Java Swing GUI appear, with a green bar showing the progress of the testing (Figure 13.3).
Note
You may see an error message like this in your terminal window:
(data/time) java.util.prefs.FileSystemPreferences checkLock...
WARNING: Could not lock System prefs.Unix error code 136742412
(data/time) java.util.prefs.FileSystemPreferences syncWorld
WARNING: Couldn't flush system prefs: java.util.prefs.Backi...
It will keep repeating as long as JUnit’s GUI is running. The easiest fix is to make the jre directory world-writable while you run the GUI the first time. It will create the files it needs (in a directory, .systemPrefs), and thereafter stop pestering you. Remember to change permissions on the directory back to their original value.
This is the GUI part of JUnit, part of what has made it so popular. By writing JUnit tests, you get to use their GUI. If you were to develop your own testing mechanism, you would also have to (re)invent a GUI.
There is an AWT GUI for the Swing-averse, but it is less featured. There is also a plain command-line test case runner:
$ java junit.textui.TestRunner junit.samples.AllTests
.........................................
.........................................
.....................................
Time: 3.834

OK (119 tests)
$
It prints a period for each test that it runs. (Yes, there are 119 periods there. Go ahead; count them if you must.) The command-line version is useful for incorporating JUnit tests into shell scripts (e.g., for testing nightly builds, e-mailing the results) and is used by ant when it invokes JUnit.
Writing a test case for your own Java code consists, at its simplest, of writing a new class for each class that you want to test. But this class that you create is built in a special way so that the test harness of JUnit can execute it. That is, the test case class that you create should meet certain naming conventions, so that the JUnit test runners can find what they need in order to run your tests.
More specifically, your test cases will extend the JUnit class TestCase. Now, TestCase is an abstract class, meaning there are parts that you have to fill in (i.e., methods that you must write) to make it a working class. Moreover, TestCase implements (in the Java sense of the word) the Test interface. Can you begin to see how the TestCase class is a framework? It defines the rough outline of how the test cases will look so that a common test runner can run any test case, no matter who wrote it.
Let’s look at a simple example, to see what such a test case looks like. Example 13.2 shows one for testing our Account class.
Example 13.2. Simple test case
package net.multitool.core;

import java.util.*;            // needed by our class
import net.multitool.util.*;   // needed by our class

import junit.framework.*;      // needed by JUnit

/**
 * for JUnit testing of Account.java
 */
public class
AccountTest
  extends TestCase
{
  // our test instrumentation:
  Account base;
// run before each test case:
protected void
setUp()
{
  base = new Account("Base", new User("testuser"), "150");
}

// our one test case
public void
testCreateSub()
{
  // Create a subaccount, assigning $50 of our pool of $150.
  Account sub1 = base.createSub("sub1", "50");
  // Make sure that it created something.
  assertNotNull("Couldn't create sub1", sub1);

  // Now a 2nd subaccount.
  Account sub2 = base.createSub("sub2", "75");
  assertNotNull("Couldn't create sub2", sub2);

  // Now a 3rd subaccount, to use up all the $.
  Account sub3 = base.createSub("sub3", "25");
  assertNotNull("Couldn't create sub3", sub3);

  // We should have the same total that we started with.
  assertEquals(150, base.getTotal().getDollars());

  // We should have used up all our $.
  assertEquals(0, base.getBalance().getDollars());

  // Be sure the (sub)account lookup works:
  Account ex2 = base.getSub("sub2");
  assertNotNull("Couldn't find sub2", ex2);
  assertSame(sub2, ex2);

 } // testCreateSub

} // class AccountTest
Notice how we’ve named our test case class. We take the name of the class and append Test to the end. This is convenient for us—we can easily see which classes have test cases; but more importantly, JUnit can use this and other naming conventions to derive the test case names (more on that later). Notice also that the method in the Account class that we want to test, called createSub(), gets exercised by a method named testCreateSub()—we prepend the word “test” to the method name, and capitalize the now-no-longer-first letter. Again, JUnit will use this naming convention, along with introspection, to automatically derive the test names from the actual method names (more on that later, too). The naming conventions we’ve seen so far are summarized in Table 13.1.
Table 13.1. JUnit Naming
In your original code | In your test case | |
|---|---|---|
Class |
|
|
Method |
|
|
Let’s take a quick look at the code. We import the framework for JUnit test cases, so that the compiler can resolve the names that deal with JUnit stuff. The TestCase class that we extend is part of that JUnit stuff. It’s an abstract class that defines much of what we use for testing. We just fill in what we need.
The TestCase class defines a method called setUp(). The setUp() method is called not just once, but before every test method is called. That way you can initialize variables and get into a known state before each test. Since it’s already defined in the TestCase class, we can override it (as in our example) to do what we want, or we can not include it in our class and get the default behavior from TestCase (which is to do nothing).
There is also a method named tearDown() which you can override if you need to close things up at the end of a test case (e.g., close a database connection). As with setUp(), its default behavior, as defined in TestCase, is to do nothing.
The test case itself—the method where we will exercise our class—is called testCreateSub (since we want to test our createSub() method). Inside such a method (and we could have more than one) we write code which uses the objects in our application. Then at various junctures in the code we make assertions about the state of things—for example, this variable should be non-null, or this expression should have this particular value.
Those assertions are, to our way of thinking, the tests. We’re testing to see if the subaccount was created, or if the main account did, indeed, use up all of its dollars in allocation to the subaccounts. But they are not what is called tests by JUnit. Rather, each individual method in a test class is considered a single test. Such test methods are, typically, a collection of assertions surrounding the use of a single (application) method. So in our example, the method testCreateSub() is a single JUnit test which asserts various conditions about various invocations of the createSub() method. Note that all of the assertions encountered in the execution of the test class must pass for the test to pass.
So what happens if an assertion fails? The assert method will throw an exception, reporting the failure. In JUnit terminology, a failure is a test that didn’t pass, whereas an error is a problem with the running of the test. A missing class or a null pointer exception are errors, whereas an assertNotNull() call failing is considered a test failure.
The handy thing about the exceptions that the assert methods throw is that they are, technically speaking, not java.lang.Exception throwables but rather belong to the java.lang.Error type of throwable. (Don’t confuse this technical Java use of the word “error” with our more informal use in the previous discussion of failure versus error.) To quote from the Javadoc page for java.lang.Error:
A method is not required to declare in its
throwsclause any subclasses ofErrorthat might be thrown during the execution of the method but not caught, since these errors are abnormal conditions that should never occur.
So the use of Error by JUnit’s various assert methods is done simply as a convenience for us test developers, so that we don’t have to put throws ... clauses on all of our method declarations.
These are the various test assertions available with JUnit:
booleanwithbooleancharwithcharshortwithshortintwithintlongwithlongfloatwithfloatdoublewithdoubleObjectwithObjectStringwithString
Each of the assert methods comes in two “flavors,” one with a message String and one without. For example, there is a method assertTrue() which takes a boolean as its parameter; typically it would be used with an expression, for example:[1]
assertTrue( (sample actual) );
If the condition is not true, an AssertionFailedError is thrown. That means, among other things, that if/when your test fails, it will stop executing at that point. The tearDown() method, though, will still be executed before proceeding to the next test.
There is also a method of the same name, assertTrue(), but with a slightly different signature—it adds a String as its first parameter. The string is the message to be included in the error report. Using this variation on assertTrue(), our example would become:
assertTrue("Sample too small", (sample actual));
In the same way, assertFalse() has two versions—assertFalse(boolean) and assertFalse(String, boolean)—and so on for all other assert methods.
The String message is very helpful when you get large numbers of comparisons and assertions inside your test cases. It can help you identify which assert in which test failed.
Tip
When writing your assertions, keep in mind the difference between assertEquals() and assertSame(). The latter will test if the two arguments refer to the very same instance of an object, whereas the former only checks to see that their values are equal. So any two references to objects that are the same will also be equal, but not vice versa. For example:
String sample = "value";
String others = "more value".substring(5);
assertEquals(sample, others); // will pass
assertSame(sample, others); // will fail
Digging a little deeper into how all this works, it might be worth pointing out that the JUnit TestCase class, while an abstract class itself, is also an extension of another class, the Assert class. The Assert class is the class that defines all these public static methods for asserting the various conditions (see the list above). That is why you don’t need any qualifiers on the various assert calls. They are all part of your test case by virtue of it extending TestCase. It also means that you could override any of them to get special behavior. This might be useful for assertEquals(Object, Object), to allow you to compare objects of your own kinds, but we don’t recommend this. You are better off overriding the equals() method of your own object than messing with the JUnit methods. And remember that if you override those behaviors, your tests will only be as good as your implementation of the assert mechanisms.
Recall how we ran the JUnit self-tests after installation. We can now use a similar command to execute our own test case. With the CLASSPATH still set as above, try compiling and running the test case:
$ javac net/multitool/core/AccountTest.java
$ java junit.textui.TestRunner net.multitool.core.AccountTest
The TestRunner will use introspection and reflection to dig information out of the AccountTest class. It will find all the public methods that begin with test and have no parameters. It will execute setUp(), then one of the test methods, then tearDown(); then setUp(), then another test method, then tearDown(), and so on. Our example has only one test method, testCreateSub(), so that will be the one test method it runs.
The result of running the test should look like this:
$ java junit.textui.TestRunner net.multitool.core.AccountTest
.
Time: 0.071

OK (1 test)

$
Quite likely, you’ll want to run several tests, exercising the various classes that make up your application. Let’s see an example of how to build such a suite of tests (Example 13.3).
While not defined as an interface, the convention is used by JUnit TestRunner classes that they will look for a public static method called suite() in any class that you ask a TestRunner to run. Your class, the one that will define the suite of tests, should return something that implements the Test interface. A TestSuite object is one such object, and we can fill it with tests gleaned automatically by JUnit from the class names that we supply.
We’ve also added a main() that invokes the text-based user interface for running these tests. That way you can invoke the tests from the command line if you like.
Here are the two commands to compile and execute the CoreTest suite, using the Swing GUI:
$ javac test/net/multitool/core/CoreTest.java
$ java junit.swingui.TestRunner net.multitool.core.CoreTest
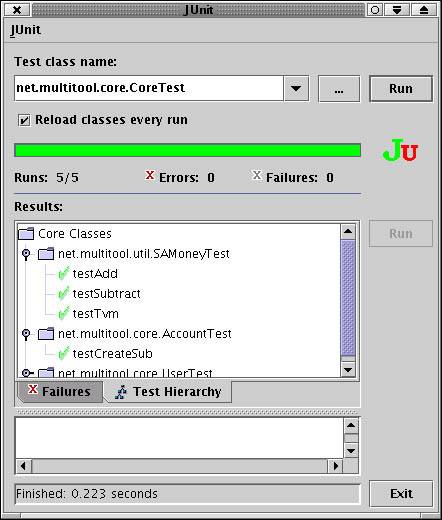
When the GUI runs, click on the Hierarchy tab and you can see the various tests that make up the suite. Opening the folders will show the tests inside of suites (Figure 13.4).
Example 13.3. A suite of test cases
package net.multitool.core;

import junit.framework.*;

public class
CoreTest
extends TestCase
{
  public
  CoreTest(String str)
  {
    super(str);
  } // constructor CoreTest

  /**
   * Constructs a collection of tests to be run by the TestRunner.
   */
  public static Test
  suite()
  {
    /*
     * Add the results of each separate Test into a big Suite.
     */
    TestSuite suite = new TestSuite("Core Classes");
    suite.addTestSuite(net.multitool.util.SAMoneyTest.class);
    suite.addTestSuite(AccountTest.class);
    suite.addTestSuite(UserTest.class);

    return suite;

  } // suite

  public static void
  main(String [] args)
  {
    junit.textui.TestRunner.run(suite());
  } // main

} // class CoreTest
One last example is the SAMoneyTest.java file that was used in the CoreTest example (Figure 13.4). Did you notice the names displayed in the test hierarchy? They don’t match the method names used to run the tests in SAMoneyTest.java because we constructed the suite “by hand” instead of letting the JUnit introspection and reflection find the methods dynamically.
Such manual approach has some advantages. You can restrict the current set of tests being executed to a subset of the entire set of tests. You can also, as this example shows, give other names to the tests. The biggest drawback, though, is the maintenance cost of having to add the test by hand to the suite() method whenever you add another test method.
We have shown you how to download JUnit and get it running. We have discussed creating a test case and creating a suite of tests. We’ve looked at the Swing GUI for JUnit but also at the command-line interface. We have shown how our design translates to a minimal code implementation from which we can begin testing. We’ve discussed the “design, test, then code” approach, and how you can use it to track the progress of your implementation.
JUnit can be invoked from ant. It is an optional task (not part of the standard ant release), but easy to install and get running. Both the junit.jar and ant’s optional tasks JAR file need to be in your classpath. That’s all it takes. See http://ant.apache.org/manual/OptionalTasks/junit.html for more details.
JUnit integrates well with Eclipse and other IDEs. It is easy to install and very easy to use when it’s part of your IDE. For whichever IDE you choose, get the JUnit plug-in for it and use it.
One area we haven’t yet discussed is how to do unit testing for the GUI portion of your application. The basic idea is the same. In order to manipulate your GUI from the test, you may want to investigate the java.awt.Robot class. It can be used to generate system input events such as mouse and keyboard actions.
In fact, we’ve only begun to describe the various ways that JUnit can be used for all kinds of testing. Our focus has been on unit tests during code development, but JUnit can also be applied to integration and release testing. With any large Java application, it is crucial to have a good set of regression tests that can be rerun after features or fixes are added, or after classes have been refactored. JUnit has proven to be very valuable in these situations.
Finally, remember that JUnit is only a tool. The GIGO law[2] tells us not to expect great tests just because we know how to run a tool. Test design, like any good design skill, is art as well as science. Learning the art of testing will pay dividends in better code built faster.
Visit http://www.junit.org/ for all things JUnit-y, including some documentation (though it’s not the greatest) and scores of articles which provide tons of useful information.
A very good article on JUnit appeared in the May/June 2003 issue of Oracle magazine (online at http://otn.oracle.com/oraclemagazine), titled ““A JUnit Step-by-Step”,” by Michel Casabianca.
For more about software testing in general, there is a classic (that is, from early days of computing) book on the subject: Glenford J. Myers, The Art of Software Testing, Wiley, New York, 1979.
You may also want to check out Just Enough Software Test Automation by Daniel J. Mosley and Bruce A. Posey (ISBN 0-13-008468-9, 2002). Their Web site[3] includes a bibliography of nearly hundred articles and books on client-server and other software testing topics.
[1] Yes, the extra parentheses are not needed; they just make the point that this is a boolean expression being passed as the argument to assertTrue(). We could also have written it as:
boolean result = (sample actual);
assertTrue(result);
Again, the extra parentheses are used just to make it clearer.
[2] Garbage In, Garbage Out.