10. Moving Documents from your iPad
If you’ve created a presentation on Keynote for iPad (or modified one you previously imported), you may want to bring it back to your computer so you can use it for other presentations. When you’re on the go, you can email the presentation to colleagues. You can also share it using the iWork.com online service.
Exporting Documents to Your Computer
Keynote presentations that you’ve created or modified on your iPad must be exported before you can see them in iTunes File Sharing. You can export the presentation in either Keynote format or as a PDF. Once you export the document, you can retrieve it from the iPad using iTunes.
To export presentations from Keynote:
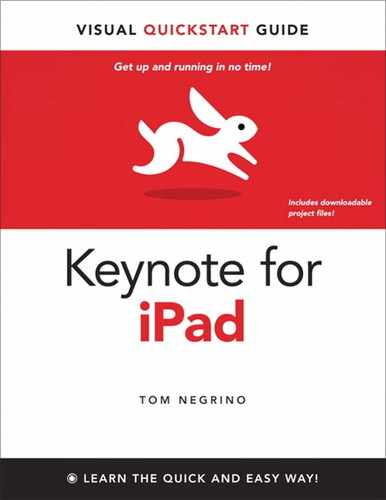
1. On your iPad, in Keynote’s My Presentations view, center the presentation you want to export ![]() .
.
![]() Make sure that the presentation you want to export is centered in the My Presentations view.
Make sure that the presentation you want to export is centered in the My Presentations view.
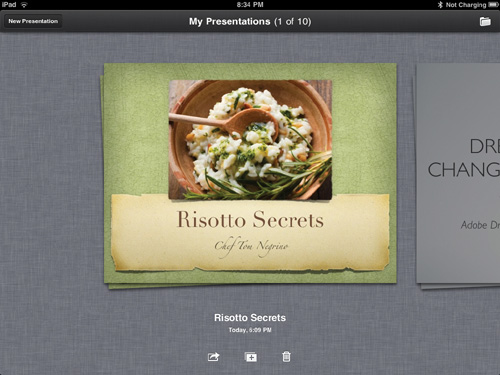
2. Underneath the presentation, tap the Send button ![]() .
.
![]() Tap the Send button to begin the export.
Tap the Send button to begin the export.
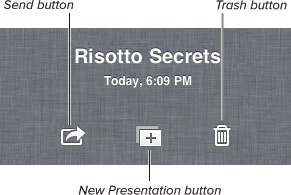
A popover appears with three choices ![]() .
.
![]() The Send button’s popover allows you to send the presentation file via email, via iWork.com, or export to iTunes.
The Send button’s popover allows you to send the presentation file via email, via iWork.com, or export to iTunes.
3. Tap Export.
The Export Presentation window appears ![]() . In this window, you have a choice of exporting your presentation document either in Keynote format or as a PDF, where each slide becomes a separate page in the PDF file.
. In this window, you have a choice of exporting your presentation document either in Keynote format or as a PDF, where each slide becomes a separate page in the PDF file.
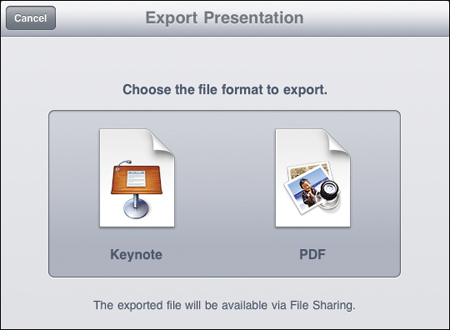
![]() Tap the button for the file format you want to export.
Tap the button for the file format you want to export.
4. Tap the button for the file format you want.
Keynote exports the document, making it available for File Sharing.
Tip
Remember that the documents you can see in Keynote’s My Presentations view and the Import Presentation popover are entirely separate. By exporting from Keynote, you’re making a copy of the document you see in My Presentations and putting the copy into the Import Presentation list. iTunes File Sharing sees only the files in the Import Presentation list.
Tip
You don’t have to be connected to your computer to export presentations. Because exporting merely makes a copy of the file for iTunes’s File Sharing, you can do the export whenever you want and then connect to your computer to do the actual file transfer later.
Tip
If you make any changes to your presentation after you export it but before you transfer it to your computer, you must export it again to make sure that the latest version of the presentation gets transferred.
To import a document to your computer:
1. On your computer, launch iTunes.
2. Connect your iPad to your computer with the Dock Connector to USB cable.
Your iPad appears in iTunes’s sidebar, under Devices ![]() .
.
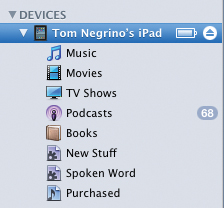
![]() Select your iPad in the Devices section of iTunes’s sidebar.
Select your iPad in the Devices section of iTunes’s sidebar.
3. Go to the Apps tab for your iPad. Scroll down to the File Sharing section at the bottom of the window.
4. In the left column of the File Sharing section, click Keynote ![]() .
.
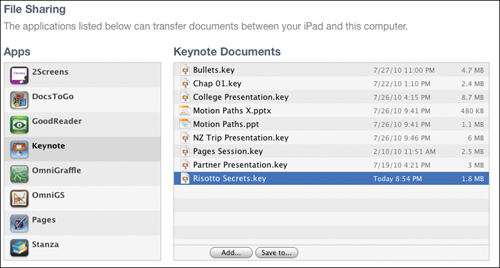
![]() The file you exported appears in the Keynote Documents list in iTunes’s File Sharing.
The file you exported appears in the Keynote Documents list in iTunes’s File Sharing.
The file or files that you exported from Keynote will appear in the list on the right.
5. Drag the file that you want to the Macintosh Finder or Windows Explorer from the Documents list.
or
At the bottom of the right column, click the Save to button. iTunes displays a Choose a Folder dialog. Navigate to the folder where you want to save the file and click the Choose button.
Tip
You can’t synchronize your iPad to iTunes wirelessly; you must use a USB cable.
Emailing Presentations
When you email a presentation, it becomes an attachment to the outgoing email. The recipient gets the email and can open the attached file like any other attachment.
1. In Keynote’s My Presentations view, center the presentation you want to email.
2. Underneath the presentation, tap the Send button.
A popover appears with three choices.
3. Tap Send via Mail.
The Send via Mail window appears ![]() . In this window, you have a choice of exporting your presentation document either in Keynote format or as a PDF, where each slide becomes a separate page in the PDF file.
. In this window, you have a choice of exporting your presentation document either in Keynote format or as a PDF, where each slide becomes a separate page in the PDF file.
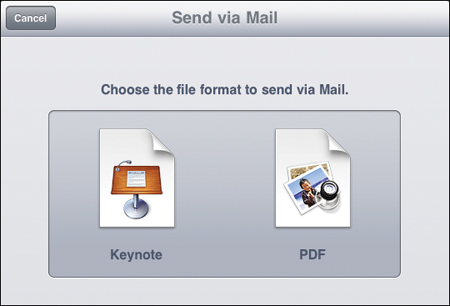
![]() Tap the button for the file format you want to email.
Tap the button for the file format you want to email.
4. Tap the button for the file format you want.
The iPad creates an outgoing message with a file attachment ![]() .
.
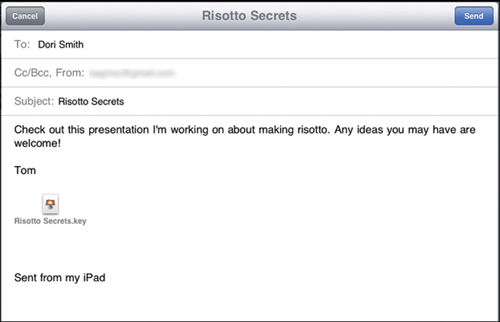
![]() Fill out the outgoing email form.
Fill out the outgoing email form.
The attachment appears at the bottom of the email’s message body. The email’s subject is automatically filled in with the name of the presentation file you are emailing.
5. Tap the To field and address the email in the usual fashion. Optionally, enter a message in the message body.
6. Tap the Send button.
Keynote sends the message and then you can continue working in the program.
Tip
Don’t forget that Keynote for iPad files run only on Keynote ’09 on the Mac. So if you know that any of your recipients don’t have iWork ’09 or later (they could be using Windows machines, or have older versions of iWork, or not have iWork at all) you should send separate e-mails to them using the PDF format.
Tip
Sending email is a system-wide service, so the outgoing email message gets created in Keynote, without needing to switch to the Mail app.
Tip
Unfortunately, while Keynote for iPad imports PowerPoint files, it does not export them.
Tip
Let’s say that you happen to be traveling with both your iPad and your Mac notebook, and your notebook does not contain your iTunes library. If you want to transfer Keynote files between your two devices, sending an email to yourself is the way to go. See Chapter 2 for more information on receiving Keynote documents on your iPad via email.
Sharing Documents with iWork.com
In early 2009, Apple launched iWork.com, an online service that helps you share your iWork documents with others. You can upload Keynote, Pages, and Numbers documents from within their respective applications. The service provides a Web interface for viewing and commenting on iWork documents.
Shared documents from iWork.com can be downloaded in three possible formats: their native format, the corresponding Microsoft Office format (PowerPoint, Word, and Excel), or as PDF files.
Keynote for iPad can upload presentation files to iWork.com. You must set up an account on iWork.com before you can work with it from your Mac or iPad. You can sign up for the service using a Web browser from any computer or from your iPad. You must sign into iWork.com using Safari on your iPad before you can share presentations to the service from the device ![]() .
.
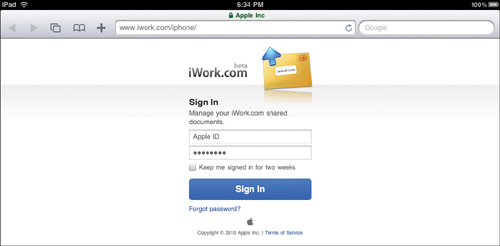
![]() You must sign into the iWork.com service from your iPad before you can share presentation files to it.
You must sign into the iWork.com service from your iPad before you can share presentation files to it.
To share presentations to iWork.com:
1. In Keynote’s My Presentations view, center the presentation you want to email.
2. Underneath the presentation, tap the Send button.
A popover appears with three choices.
3. Tap Share via iWork.com.
The Share via iWork.com window appears ![]() . It’s a specially-prepared email message. The email’s subject is automatically filled in, and a thumbnail of the presentation appears in the message body, with instructions and a View Document button.
. It’s a specially-prepared email message. The email’s subject is automatically filled in, and a thumbnail of the presentation appears in the message body, with instructions and a View Document button.
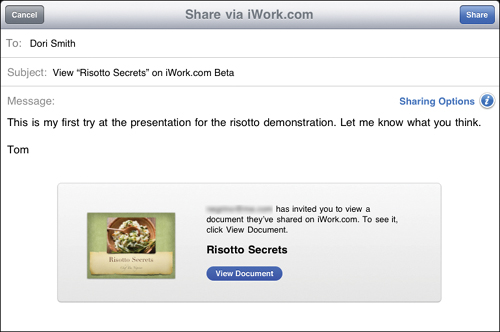
![]() Address the sharing e-mail, adding a message to it if you like.
Address the sharing e-mail, adding a message to it if you like.
4. Tap the To field and address the email. Optionally, enter a message in the message body.
5. (Optional) Tap the Sharing Options button.
A popover appears with the options ![]() . You can rename the presentation, password-protect it, and allow or deny viewer comments. You can also allow it to be downloaded as a Keynote file and/or PDF, or prevent downloading altogether (the file will only be viewable in the browser).
. You can rename the presentation, password-protect it, and allow or deny viewer comments. You can also allow it to be downloaded as a Keynote file and/or PDF, or prevent downloading altogether (the file will only be viewable in the browser).
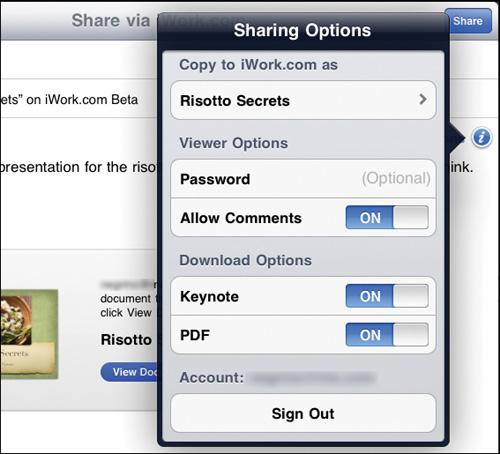
![]() You have a variety of sharing options that you can set for the file.
You have a variety of sharing options that you can set for the file.
6. Tap the Share button.
The iPad sends the email with the invitation and uploads the file to iWork.com. When the recipient gets the email, they can click the View Document button and open the presentation in a browser ![]() .
.
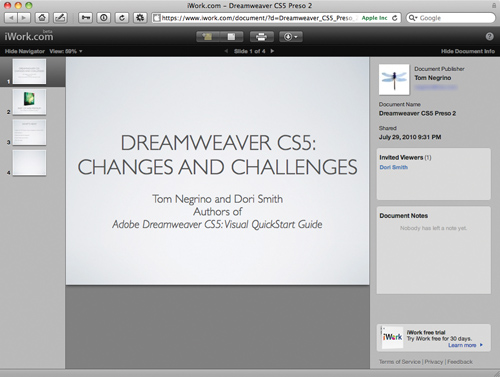
![]() Your recipient can view the document in a Web browser, and (if you allow them to) download the file.
Your recipient can view the document in a Web browser, and (if you allow them to) download the file.