
3. Creating a Presentation
A Keynote document includes all of the items that make up your presentation, including text, images, and dynamic media such as QuickTime movies. It also includes the set of slide layouts for the presentation. Slide layouts are templates for slides that you can use throughout your presentation. Slide layouts contain slide backgrounds and boxes for text and graphics that you’ll fill in with your show’s content. Slide layouts help your presentation look more polished and consistent. A group of slide layouts makes up a theme, the basic building block of a Keynote presentation.
In this chapter, you’ll learn how to choose a theme for your presentation; add and organize slides; and learn how to manage and preview your presentations.
Creating a New Presentation
When you start Keynote, the program, as with most iOS programs, assumes that you want to resume what you were doing when you last left the program. So, if you were editing a presentation, you’ll go back to the same slide within that presentation. If you were last in the My Presentations view, you will return there. In any event, you begin creating a presentation in My Presentations.
All Keynote presentations begin with a theme. A theme provides a set of slide layouts and a graphic look for a presentation. Think of a theme as a template from which you can build your presentation. When you first create a Keynote document, you must choose a theme.
1. Launch Keynote, and if you’re not already there, go to the My Presentations view by tapping the My Presentations button in the toolbar.
The My Presentations view appears ![]() .
.
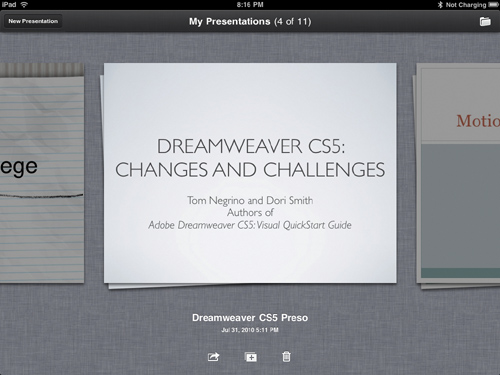
![]() You create new presentations in the My Presentations view.
You create new presentations in the My Presentations view.
2. Tap the New Presentation button at the left edge of the toolbar.
or
Tap the New Presentation button at the bottom of the screen (the button with the plus (+) icon).
The Choose a Theme view appears ![]() .
.
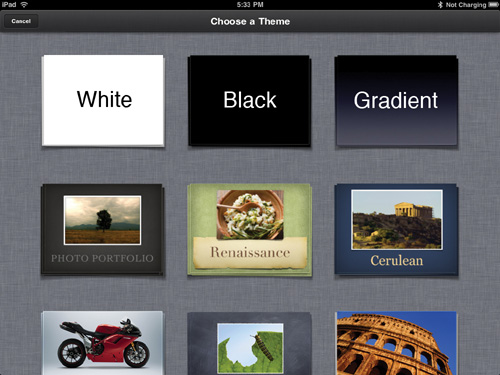
![]() Pick a theme that suits the style you want for your presentation.
Pick a theme that suits the style you want for your presentation.
3. Pick one of the available themes by tapping it.
Keynote creates the presentation and opens it in the editing view, displaying the first slide, using the Title, Subtitle & Photo slide layout ![]() . Some of the themes correspond to themes found in Keynote ’09, but others do not. See the “Themes Comparison” sidebar.
. Some of the themes correspond to themes found in Keynote ’09, but others do not. See the “Themes Comparison” sidebar.
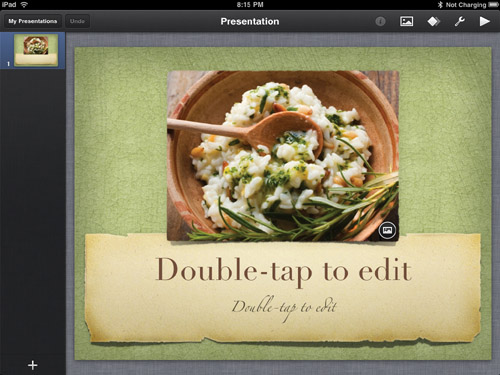
![]() After you’ve created a presentation, it appears in the editing view, with the first slide (which is always a Title, Subtitle, & Photo slide) ready for editing.
After you’ve created a presentation, it appears in the editing view, with the first slide (which is always a Title, Subtitle, & Photo slide) ready for editing.
Themes Comparison
Keynote for iPad (at least version 1.1, which is what I’m using for this book), comes with 12 presentation themes from which to choose. Some of these themes correspond almost exactly with themes built-in to Keynote ’09, though most differ in subtle ways, and a couple are completely different.
According to Apple’s support document, “Best practices for creating a presentation on a Mac for use on an iPad,” found at http://support.apple.com/kb/HT4114, it’s best to start on the Mac with one of the themes that correspond to a similar theme on the iPad, and also to set the slide size to 1024 × 768.

Adding Slides
Once you have created a presentation and applied a theme, you’ll want to add additional slides. You’ll use each different sort of slide layout for a particular purpose in your show. For example, the default slide layout type for the beginning of a presentation is Title, Subtitle, & Photo, which gives you a large line of type for the presentation’s title, centered horizontally on the slide. Underneath is a smaller line of type for a subtitle, if you want one. There is also a large photo placeholder to illustrate your presentation’s topic.
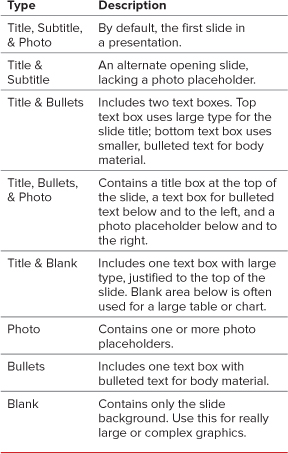
You should become familiar with the eight slide layout types, as described in Table 3.1 (on the next page). Keynote for iPad offers eight slide layouts for each theme ![]() .
.

![]() Keynote provides eight slide masters from which to choose.
Keynote provides eight slide masters from which to choose.
1. Tap the Add Slides button at the lower left corner of the editing area.
The Tap to add a slide popover appears ![]() .
.
2. Tap the slide layout you want.
Keynote adds the slide, and it appears in both the Slide Navigator and in the Slide Canvas.
See Chapter 4 for more about working with text on slides and Chapter 5 for details on working with graphics.
Deleting Slides
Deleting unwanted slides is easy; just select the slide and get rid of it.
To delete slides:
1. In the Slide Navigator, slow double-tap the slide you want to delete.
The Edit popover appears ![]() .
.
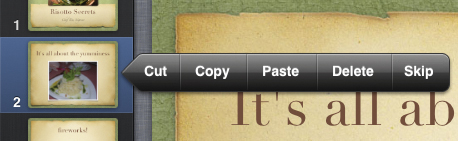
![]() Tap the Delete button to remove the selected slide from your presentation.
Tap the Delete button to remove the selected slide from your presentation.
2. Tap Delete.
The slide disappears.
Tip
If you accidentally delete a slide, immediately tap the Undo button in the toolbar.
Tip
If you delete the first slide in a group of slides (see “Grouping Slides” later in this chapter), all the slides indented below it will also be deleted. Be careful!
Grouping Slides
In the Slide Navigator, Keynote allows you to organize your presentation by indenting related slides. Indenting slides in this way doesn’t change the final presentation. It’s a tool that helps you organize large sets of slides.
Once you have grouped related slides together, you can show or hide groups to make it easier for you to work with and organize the presentation.
To group slides:
1. In the Slide Navigator, tap to select a slide you wish to indent.
2. Tap and drag the slide to the right.
The slide is indented, and a disclosure triangle appears next to the slide above the indented slide ![]() .
.
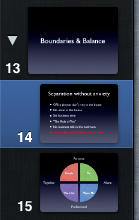
![]() Slides 14 and 15 are grouped under slide 13.
Slides 14 and 15 are grouped under slide 13.
3. Repeat as necessary until you have indented all the slides that you want.
To hide and show slide groups:
Tap the disclosure triangle next to the first slide in the group to hide a group of slides, as shown in ![]() . Tap the disclosure triangle again to show the slides in the group.
. Tap the disclosure triangle again to show the slides in the group.
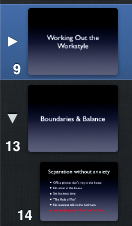
![]() With the group hidden, you can’t see slides 10 through 12 in the Slide Navigator.
With the group hidden, you can’t see slides 10 through 12 in the Slide Navigator.
Tip
You can select multiple slides in the Slide Navigator by tapping the first slide in the group to select it, and then holding one finger on that slide while tapping other slides with another finger.
Tip
If you have multiple slides selected, you can drag them all at once.
Tip
You can outdent slides (i.e., move slides that were previously indented to the left) by electing one or more slides in the Slide Navigator and dragging to the left.
Changing the Slide Order
The Slide Navigator also allows you to rearrange the slides in your presentation, by dragging the slide’s thumbnail up or down in the Slide Navigator.
There are times when you have your presentation ready to go, and you arrive at the venue and realize that you don’t want to show some of the slides in your presentation. Perhaps your company’s product line has changed, and you want to hide the slide that shows the fabulous Wonder Widget because it will soon be replaced by a new model (probably the Ultra Wonder Widget). Sometimes even news reports are a reason to remove slides from your presentation; for example, you probably wouldn’t have wanted to give a presentation with a picture of a sinking ship the day after the Titanic went down.
To rearrange slides:
1. Select the slide that you wish to move.
2. Drag it up or down in the Slide Navigator.
A gray line appears, indicating where the slide will go when you release the slide ![]() .
.
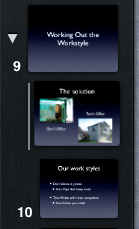
![]() A gray line shows where the slide will move when released.
A gray line shows where the slide will move when released.
To move slide groups:
Select the first slide in the group and drag the group up or down in the Slide Navigator. A gray line appears in the Slide Navigator to show where the slides will be placed.
1. In the Slide Navigator, slow double-tap the slide that you want to skip.
The Edit popover appears ![]() .
.

![]() The Edit popover appears, with the Skip option.
The Edit popover appears, with the Skip option.
2. Tap Skip.
Keynote collapses the thumbnail image of the slide in the Slide Navigator to a line ![]() .
.

![]() After selecting a slide in the Slide Navigator and setting it to be skipped, Keynote shows the slide as a line and renumbers subsequent slides.
After selecting a slide in the Slide Navigator and setting it to be skipped, Keynote shows the slide as a line and renumbers subsequent slides.
Tip
To restore a skipped slide in your presentation, slow double-tap the collapsed slide thumbnail in the Slide Navigator, and choose Don’t Skip from the resulting Edit popover.
Duplicating Slides
Why might you want to duplicate a slide? The most common reason is that you have added some custom elements to a slide—such as a graphic or a custom text box—that you want to appear on a few slides, and don’t want to have to recreate again and again.
To duplicate slides:
1. Slow double-tap on the slide you want to duplicate.
The Edit popover appears.
2. Tap Copy.
3. (Optional) Scroll the Slide Navigator to where you want the duplicated slide to appear.
4. Slow double-tap on a slide in the Slide Navigator.
5. Tap Paste.
The duplicated slide appears in the Slide Navigator.
Managing Presentations
Presentation management occurs in the My Presentations view. You can duplicate, rename, or delete any presentation in that view.
To duplicate an existing presentation:
1. In the My Presentations view, center the presentation you want to duplicate.
2. Below the centered presentation, tap the New Presentation button.
A popover appears ![]() .
.
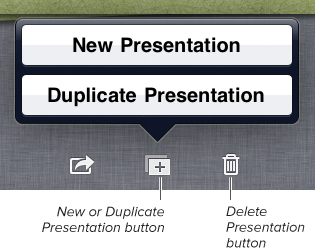
![]() Tap to duplicate the existing presentation.
Tap to duplicate the existing presentation.
3. Tap Duplicate Presentation.
Keynote creates a duplicate of the presentation, named “Presentation copy,” and centers the duplicate in the My Presentations view.
1. In the My Presentations view, center the presentation you want to rename.
2. Tap the name of the presentation.
Keynote makes the name editable ![]() .
.

![]() Enter the new name for the presentation.
Enter the new name for the presentation.
3. Type the new name for the presentation.
4. Tap the Done button in the toolbar, or tap anywhere other than on the presentation’s name.
Tip
If you have an external keyboard attached to your iPad, the on-screen keyboard will not appear.
To delete a presentation:
1. In the My Presentations view, center the presentation you want to delete.
2. Tap the Delete Presentation button.
A confirmation popover appears ![]() .
.
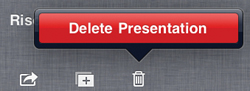
![]() Tap to confirm the presentation’s deletion.
Tap to confirm the presentation’s deletion.
3. Tap Delete Presentation.
Numbering Slides
If you prefer (most of the time, I do not, because I don’t think it adds to most presentations), you can have a number appear on each slide. Slide numbering in Keynote for iPad is an all-or-nothing proposition. Turning it on makes unobtrusive numbers appear on every slide (yes, including the first slide). These slide numbers are not editable in any way.
To number slides:
1. In the editing view, tap the Tools button in the toolbar ![]() .
.
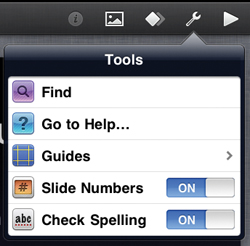
![]() Tap the Slide Numbers switch on.
Tap the Slide Numbers switch on.
2. In the resulting popover, tap the switch next to Slide Numbers so that it shows On.
Keynote adds the numbers to the slide ![]() . The exact position and appearance depends on the presentation’s theme.
. The exact position and appearance depends on the presentation’s theme.

![]() Slide numbers appear at the bottom of each slide.
Slide numbers appear at the bottom of each slide.
Previewing the Presentation
When you’re done creating your presentation, it’s often useful to run it through as a slideshow once or twice. This helps you get a feel for the flow of the presentation and almost always shows you places where the presentation could use tightening or better explanation.
After you run the slideshow, you can return to individual slides to tweak the text, or you can begin adding graphics, tables, and charts to your presentation.
To run your presentation:
1. In the Slide Navigator, tap the first slide in the presentation.
2. Tap the Play button in the toolbar ![]() .
.
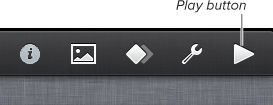
![]() Tap Play to begin your run-through.
Tap Play to begin your run-through.
The slideshow begins. Tap anywhere on the screen to advance through your slides.
3. To end the slideshow, double-tap anywhere on the screen, and Keynote will return to the editing view.