Chapter 9
Events and DOM Manipulation
In this chapter, we return to JavaScript’s native environment and put our newly created Node module to work in the browser. Specifically, we’ll be making a simple single-page JavaScript application that takes in a string from the user and indicates whether or not that string is a palindrome.
Our approach involves gradually increasing levels of sophistication, starting with a simple “hello, world”–style proof-of-concept (Section 9.1). We’ll then add a prompt/-alert design that will motivate the introduction of event listeners (Section 9.2). In Section 9.3, we’ll replace the alert with dynamic HTML inserted on the page itself—our first example of manipulating the Document Object Model tree. Finally, in Section 9.4 we’ll add an HTML form, which is a more convenient method for entering data than a JavaScript prompt.
9.1 A Working Palindrome Page
To get started with our palindrome detector, we’ll create both an HTML file and our site’s main JavaScript file, called palindrome.html and main.js, respectively:
$ cd ~/repos/js_tutorial
$ touch palindrome.html main.js
As in Chapter 1, we’ll make a minimal “hello, world” app just to prove that everything is basically working. To do this, we need to install the <username>-palindrome module created in Section 8.1:
$ npm install <username>-palindrome # Replace <username> with your username.
If for any reason you didn’t complete Section 8.1, you can use my version of the module, mhartl-palindrome.
To use the Phrase object exported by the module (Listing 8.2), all we need to do is edit main.js and use let to bind the name Phrase to the result of the require function, as shown in Listing 9.1.
Listing 9.1: Adding a proof-of-concept.main.js
let Phrase = require("<username>-palindrome");

alert(new Phrase("Madam, I'm Adam.").palindrome());
Listing 9.1 also includes an alert, which if it works will tell us that the require succeeded.
Recall from Section 5.2 that we can include external JavaScript files using the src attribute of the script tag (Listing 5.5):
<script src="filename.js"></script>
You might think that we could just include main.js directly, like this:
<script src="main.js"></script>
Unfortunately, because browsers don’t support require, this won’t work. Instead, we need to use an NPM module called browserify (Google “require node module into browser”):
$ npm install --global browserifyThe browserify utility takes our offline code and bundles it up in a way that browsers can understand, as shown in Listing 9.2.
Listing 9.2: Using browserify to prepare a JavaScript bundle for the browser.
$ browserify main.js -o bundle.jsUsing the -o (output file) flag, Listing 9.2 arranges to create a file called bundle.js that can be included in a browser.1 (How does browserify do this? I have no idea. Being able to use modules whose inner workings are mysterious is an important part of technical sophistication.)
1. The browserify program defaults to dumping the results to the screen (STDOUT), so redirecting (https://www.learnenough.com/command-line-tutorial/manipulating_files#sec-redirecting_and_appending) via browserify main.js > bundle.js works as well.
Note: Making changes in main.js but forgetting to rerun browserify is a common source of errors, so be sure to try rerunning Listing 9.2 if you ever find that your expected changes aren’t showing up on the page. I also suggest looking at the watchify (https://www.npmjs.com/package/watchify) package, which is designed to re-build the bundled version automatically.
At this point, our JavaScript is properly bundled for use on a web page, so we can include it using the src attribute as developed in Section 5.2. The resulting palindrome.html, which includes a minimal HTML skeleton as well, appears in Listing 9.3.
Listing 9.3: Creating the palindrome page, including the JavaScript source.palindrome.html
<!DOCTYPE html>
<html>
  <head>
    <title>Palindrome Tester</title>
    <meta charset="utf-8">
    <script src="bundle.js"></script>
  </head>
  <body>
    <h1>Palindrome Tester</h1>
  </body>
</html>
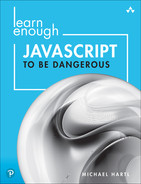
The result should be a working alert, as shown in Figure 9.1. If things don’t work on your system, follow the suggestions in Box 5.1 to resolve the discrepancy.
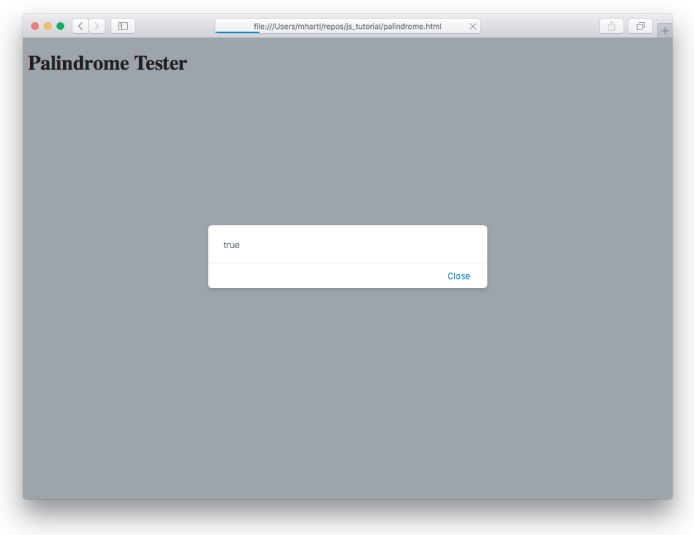
Figure 9.1: Confirming that the module has been loaded.
Amazingly, we can already get a working (if rudimentary) palindrome detector working. All we need to do is use the prompt function, which prompts the user for some input (and returns the result):
let Phrase = require("<username>-palindrome");
let string = prompt("Please enter a string for palindrome testing:");
The user’s input is automatically returned, allowing us to create a new Phrase instance and test whether it’s a palindrome or not:
let phrase = new Phrase(string);

if (phrase.palindrome()) {
  alert(`"${phrase.content}" is a palindrome!`);
} else {
  alert(`"${phrase.content}" is not a palindrome.`)
}
Putting everything together gives the result shown in Listing 9.4.
Listing 9.4: Our first working palindrome detector.main.js
let Phrase = require("<username>-palindrome");

let string = prompt("Please enter a string for palindrome testing:");
let phrase = new Phrase(string);

if (phrase.palindrome()) {
  alert(`"${phrase.content}" is a palindrome!`);
} else {
  alert(`"${phrase.content}" is not a palindrome.`)
}
All we need to do now is rerun browserify and reload the browser:
$ browserify main.js -o bundle.jsRefreshing palindrome.html now immediately prompts us for a string, as shown in Figure 9.2.

Figure 9.2: A string prompt.
The user experience may not be all that great, but, as seen in Figure 9.3, it actually works!
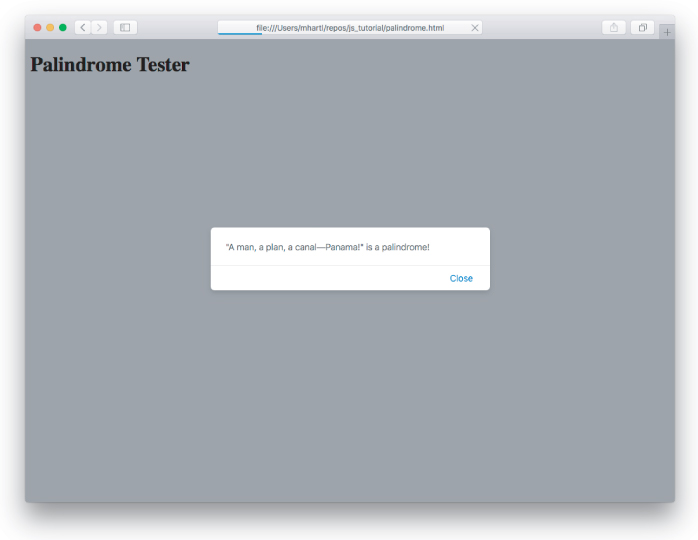
Figure 9.3: Alerted to a valid palindrome.
9.1.1 Exercise
By following the steps from Section 1.2.1, deploy the palindrome detector to production. It might be necessary to add a file to tell GitHub Pages to treat the site as ordinary HTML instead of using the Jekyll static site builder (which sometimes causes errors when processing Node modules), as shown in Listing 9.5. (Some readers have reported that it currently works without this step.) Does the code work on the live site?
Listing 9.5: Telling GitHub Pages not to use the Jekyll static site builder.
$ touch .nojekyll
$ git add -A
$ git commit -m "Prevent Jekyll build"
9.2 Event Listeners
In Section 9.1, we somewhat miraculously got a live palindrome detector working, but the user experience wasn’t all that great: Users visiting the page are immediately hit with a prompt, without even a chance to see what the page is about.
In this section, we’ll make the palindrome page a little friendlier by adding a button that gives the user the option to initiate the action. It’s also nicer for detecting palindromes more than once, since users will be able to click the button again rather than having to refresh the entire page.
Our first step is to add the button itself, as shown in Listing 9.6, which shows how to use the HTML button tag.
Listing 9.6: Adding a button.palindrome.html
<!DOCTYPE html>
<html>
  <head>
    <title>Palindrome Tester</title>
    <meta charset="utf-8">
    <script src="bundle.js"></script>
  </head>
  <body>
    <h1>Palindrome Tester</h1>
    <button id="palindromeTester">Is it a palindrome?</button>
  </body>
</html>
Note that the button in Listing 9.6 uses a CSS id. This is in line with the recommendations discussed (https://www.learnenough.com/css-and-layout-tutorial/style-of-style#sec-css_why) in Learn Enough CSS & Layout to Be Dangerous (https://www.learnenough.com/css-and-layout), which recommended not using ids for styling (preferring classes instead), and reserving them for use in things like JavaScript applications (a time that now has come!).
After refreshing the page, we see the button appear (Figure 9.4).
Figure 9.4: A wild button appears.
As you can confirm by clicking it, the button currently does nothing, but we can change that using a JavaScript event listener, which is a piece of code that waits for a particular event to happen and then responds appropriately. In this case, the response will be the palindrome test itself, so we’ll factor the corresponding code from Listing 9.4 into a separate function, as shown in Listing 9.7.
Listing 9.7: Factoring the palindrome tester into a function.main.js
function palindromeTester() {
  let string = prompt("Please enter a string for palindrome testing:");
  let phrase = new Phrase(string);

  if (phrase.palindrome()) {
    alert(`"${phrase.content}" is a palindrome!`);
  } else {
    alert(`"${phrase.content}" is not a palindrome.`)
  }
}
Next, we’ll create a special object that represents the button itself. The way to do this is to use the powerful querySelector function, which lets us find an element in the page’s DOM using its id:2
2. I originally intended to cover the popular jQuery library in this tutorial, but using it does introduce some overhead and a third-party dependency, so I was pleased to discover that querySelector and the closely related querySelectorAll (Section 11.2) have made vanilla JavaScript plenty powerful for our purposes.
let button = document.querySelector("#palindromeTester");
Note here that JavaScript knows to look for a CSS id (and not a CSS class) because #palindromeTester starts with a hash symbol #. Recall (https://www.learnenough.com/css-and-layout-tutorial/style-of-style#sec-naming_things) from Learn Enough CSS & Layout to Be Dangerous that is the same notation to select a CSS id in CSS itself.
(The querySelector method is a rare case where Googling can lead you astray; as of this writing, searching for javascript find element by id leads mainly to getElementById, which does in fact work, but which is not as powerful and flexible as the newer querySelector method.)
Having created an object to represent the button, we can now add the event listener and set it to listen for a “click” using addEventListener:
let button = document.querySelector("#palindromeTester");
button.addEventListener("click", function() {
  palindromeTester();
});
The first argument here is the kind of event, while the second is a function that will be executed when the click happens. (A function of this sort that executes when something else happens is called a callback.) In this case, we could actually have written
let button = document.querySelector("#palindromeTester");
button.addEventListener("click", palindromeTester);
but we’ve used an anonymous function instead to emphasize the general case where there might be more than one line.
Putting everything together, the resulting main.js appears as in Listing 9.8.
Listing 9.8: The initial event listener code.main.js
let Phrase = require("<username>-palindrome");

function palindromeTester() {
  let string = prompt("Please enter a string for palindrome testing:");
  let phrase = new Phrase(string);

  if (phrase.palindrome()) {
    alert(`"${phrase.content}" is a palindrome!`);
  } else {
    alert(`"${phrase.content}" is not a palindrome.`)
  }
}

let button = document.querySelector("#palindromeTester");
button.addEventListener("click", function() {
  palindromeTester();
});
Running Listing 9.2, refreshing the page, and clicking the button shows that… still nothing happens. Taking a look at the console gives us a hint why (Figure 9.5). Somehow, the button object isn’t being defined.
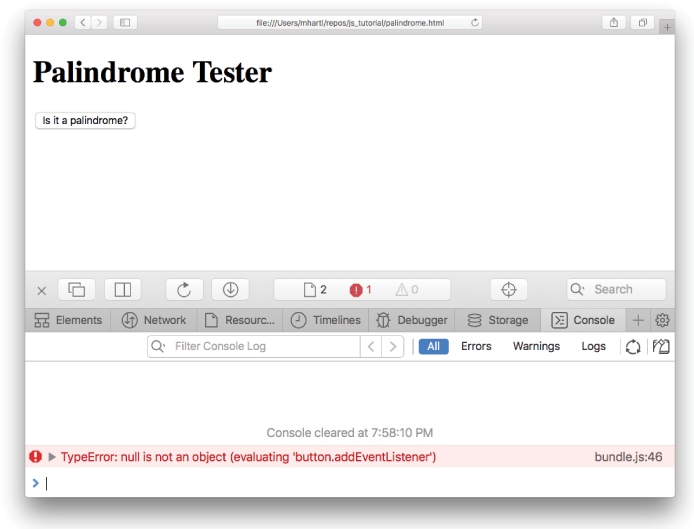
Figure 9.5: An unexpected null object.
The solution to this mystery also addresses something we glossed over when building up to Listing 9.8: Namely, what is document? The answer is that document (surprise!) represents the document itself. The problem we’re facing is that, at the time that main.js (via bundle.js) gets loaded, the document content hasn’t finished loading yet. As a result, while the document object exists, there is not yet an element with id palindromeTester, so the querySelector in Listing 9.8 turns up a big fat null. When we try calling addEventListener on this null, it raises the error shown in Figure 9.5.
This is a common issue when programming in JavaScript, and the solution is to use a second listener, one that waits for the Document Object Model content to be loaded.
As noted briefly in Chapter 1, the Document Object Model, or DOM, is the hierarchical model used to describe the contents of a web page (Figure 9.6). When rendering a page, the browser constructs the DOM using the content of the page, and fires off an event notification when the DOM content is loaded. For our button listener to work, this event—called, appropriately enough, "DOMContentLoaded"—needs a listener of its own:
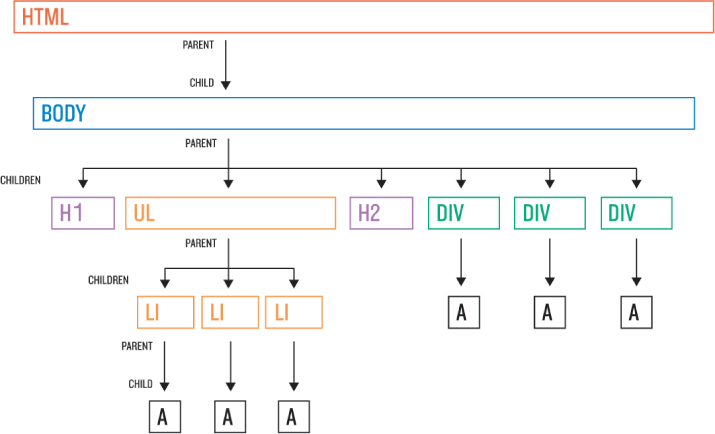
Figure 9.6: The DOM.
document.addEventListener("DOMContentLoaded", function() {
  let button = document.querySelector("#palindromeTester");
  button.addEventListener("click", function() {
    palindromeTester();

 });
});
Let’s put this expanded code into main.js (Listing 9.9) and see what happens.
Listing 9.9: An event listener for the loading of the DOM.main.js
let Phrase = require("<username>-palindrome");

function palindromeTester() {
  let string = prompt("Please enter a string for palindrome testing:");
  let phrase = new Phrase(string);

  if (phrase.palindrome()) {


    alert(`"${phrase.content}" is a palindrome!`);
  } else {
    alert(`"${phrase.content}" is not a palindrome.`)
  }
}
document.addEventListener("DOMContentLoaded", function() {
  let button = document.querySelector("#palindromeTester");
  button.addEventListener("click", function() {
    palindromeTester();
 });
});
Rerunning Listing 9.2, refreshing the browser, and clicking the button shows that it’s working! The result appears in Figure 9.7.

Figure 9.7: Clicking the button after waiting for the DOM to load.
As with the initial version in Section 9.1, the current page displays the results in an alert, as seen in Figure 9.8.
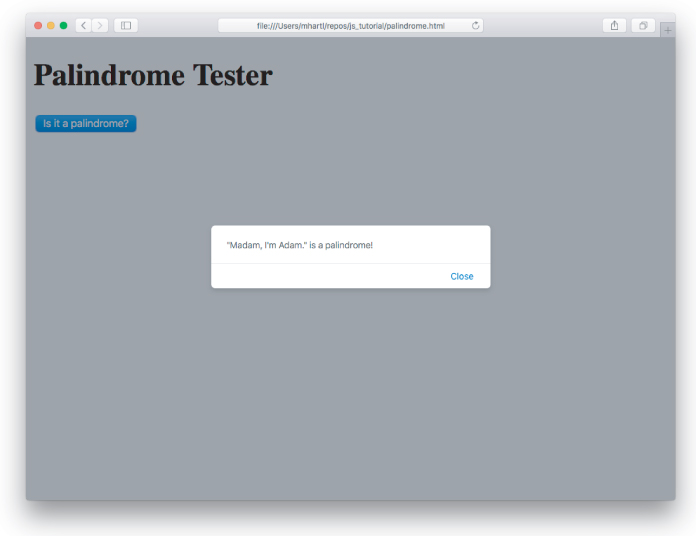
Figure 9.8: Still an alert.
This is an excellent start. In Section 9.3, we’ll learn how to display the result in the HTML itself.
9.2.1 Exercise
The most common way to handle a button is to put it in an HTML form (discussed further in Section 9.4). Confirm using the code in Listing 9.10 and Listing 9.11 that it’s possible to combine a form, a button, and a listener on the
submitevent to achieve the same behavior as a plain button. (Don’t forget to rerunbrowserifyto updatebundle.js.)
Listing 9.10: Adding a simple HTML form.palindrome.html
<!DOCTYPE html>
<html>
  <head>
    <title>Palindrome Tester</title>
    <meta charset="utf-8">
    <script src="bundle.js"></script>
  </head>
  <body>
    <h1>Palindrome Tester</h1>
    <form id="palindromeTester">
      <button type="submit">Is it a palindrome?</button>
    </form>
  </body>
</html>
Listing 9.11: Listening for the submit event.main.js
let Phrase = require("<username>-palindrome");

function palindromeTester() {
  let string = prompt("Please enter a string for palindrome testing:");
  let phrase = new Phrase(string);

  if (phrase.palindrome()) {
    alert(`"${phrase.content}" is a palindrome!`);
  } else {
    alert(`"${phrase.content}" is not a palindrome.`)
  }
}

document.addEventListener("DOMContentLoaded", function() {
  let form = document.querySelector("#palindromeTester");
  form.addEventListener("submit", function() {
    palindromeTester();
  });
});
9.3 Dynamic HTML
We left off in Section 9.2 with a working palindrome detector, but displaying the results in an alert is a little cumbersome. In this section, we’ll improve the design by updating the page HTML directly. (Accepting input via a prompt is also cumbersome; we’ll address that issue in Section 9.4.)
To prepare for this, let’s add another heading and a paragraph with a CSS id for the result (Listing 9.12).
Listing 9.12: Adding HTML for a palindrome result.palindrome.html
<!DOCTYPE html>
<html>
  <head>
    <title>Palindrome Tester</title>
    <meta charset="utf-8">
    <script src="bundle.js"></script>
  </head>
  <body>
    <h1>Palindrome Tester</h1>

    <button id="palindromeTester">Test palindrome</button>
    <h2>Result</h2>

    <p id="palindromeResult"></p>
  </body>
</html>
Note that the paragraph in Listing 9.12 is empty; this is because we’re going to fill its contents dynamically with JavaScript.
Amazingly, updating our code to use dynamic HTML instead of an alert requires adding only one line, while making minor edits to two others. We first need to use the same querySelector method from Listing 9.9 to grab the HTML element with the palindromeResult id:
function palindromeTester() {
  let string = prompt("Please enter a string for palindrome testing:");
  let phrase = new Phrase(string);

  let palindromeResult = document.querySelector("#palindromeResult");

  if (phrase.palindrome()) {
    alert(`"${phrase.content}" is a palindrome!`);
  } else {
    alert(`"${phrase.content}" is not a palindrome.`)
  }
}
Then, instead of using an alert, we can simply assign the notification strings to the innerHTML attribute of the palindromeResult object:
function palindromeTester() {
  let string = prompt("Please enter a string for palindrome testing:");
  let phrase = new Phrase(string);
  let palindromeResult = document.querySelector("#palindromeResult");

  if (phrase.palindrome()) {

    palindromeResult.innerHTML = `"${phrase.content}" is a palindrome!`;

  } else {

    palindromeResult.innerHTML = `"${phrase.content}" is not a palindrome.`;

  }
}
The full main.js now appears as in Listing 9.13.
Listing 9.13: Adding the notification to the result area.main.js
let Phrase = require("<username>-palindrome");

function palindromeTester() {
  let string = prompt("Please enter a string for palindrome testing:");
  let phrase = new Phrase(string);
  let palindromeResult = document.querySelector("#palindromeResult");

  if (phrase.palindrome()) {
    palindromeResult.innerHTML = `"${phrase.content}" is a palindrome!`;
  } else {
    palindromeResult.innerHTML = `"${phrase.content}" is not a palindrome.`;
  }
}

document.addEventListener("DOMContentLoaded", function() {
  let button = document.querySelector("#palindromeTester");

  button.addEventListener("click", function() {
    palindromeTester();
  });
});
Upon rerunning Listing 9.2 and refreshing the browser, the result area is now ready to display the notification previously seen in the alert (Figure 9.9).
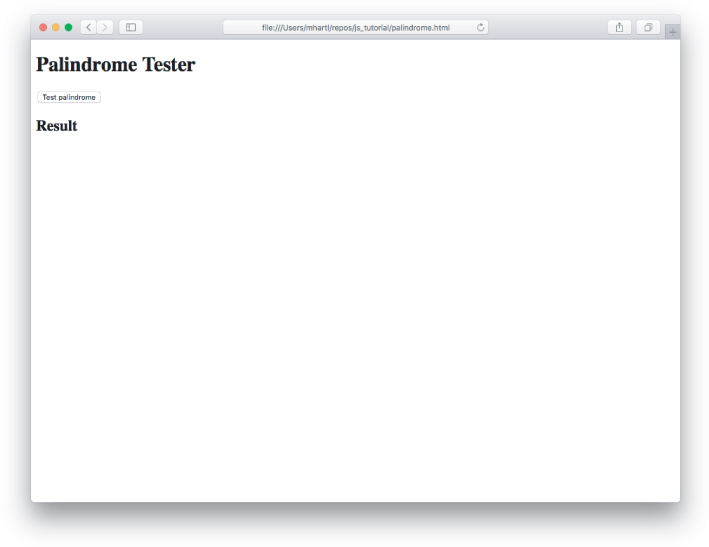
Figure 9.9: The result area.
Let’s see if our detector can correctly identify one of the most ancient palindromes, the so-called Sator Square first found in the ruins of Pompeii (Figure 9.10).3 (Authorities differ on the exact meaning of the Latin words in the square, but the likeliest translation is “The sower [farmer] Arepo holds the wheels with effort.”)
3. Image courtesy of CPA Media Pte Ltd/Alamy Stock Photo.

Figure 9.10: A Latin palindrome from the lost city of Pompeii.
Clicking the button and entering “SATOR AREPO TENET OPERA ROTAS” (Figure 9.11) leads to the results being displayed directly in the HTML, as seen in Figure 9.12.

Figure 9.11: A Latin palindrome.

Figure 9.12: HTML dynamicus.
9.3.1 Exercise
In order to make the result in Figure 9.12 easier to read, make the palindrome itself bold using the
strongtag, as in “ ‘SATOR AREPO TENET OPERA ROTAS’ is a palindrome!”
9.4 Form Handling
As a final touch, in this section we’ll replace the prompt used in previous sections with a more natural HTML form. Although form handling in general requires having a back-end web application on the server (such as that provided by Sinatra (https://www.learnenough.com/ruby) or Rails (https://www.railstutorial.org/)), we can fake it with JavaScript by adding an event listener to intercept the resulting "submit" event.
The first step is to wrap the button tag (Listing 9.12) in a form:
<form id="palindromeTester">
  <textarea name="phrase" rows="10" cols="30"></textarea>
  <br>
  <button type="submit">Is it a palindrome?</button>
</form>
Here we’ve transferred the CSS id to the form tag itself, and have introduced the HTML textarea tag (10 rows tall and 30 columns wide), while also identifying the button as being of type "submit". Note also that the textarea has a name attribute (with value "phrase"); this will become important in a moment.
Placing the form on our palindrome page leads to the code shown in Listing 9.14. The result appears in Figure 9.13.

Figure 9.13: Our palindrome page with a fancy new form.
Listing 9.14: Adding a form to the palindrome page.palindrome.html
<!DOCTYPE html>
<html>
  <head>
    <title>Palindrome Tester</title>
    <meta charset="utf-8">
    <script src="bundle.js"></script>
  </head>
  <body>
    <h1>Palindrome Tester</h1>
    <form id="palindromeTester">
      <textarea name="phrase" rows="10" cols="30"></textarea>
      <br>
      <button type="submit">Is it a palindrome?</button>
    </form>
    <h2>Result</h2>

    <p id="palindromeResult"></p>

  </body>
</html>
Since we’ve changed the event type, we need to update our listener, changing from "click"to "submit":
document.addEventListener("DOMContentLoaded", function() {

  let tester = document.querySelector("#palindromeTester");
  tester.addEventListener("submit", function(event) {
    palindromeTester(event);

  });
});
Note that we’ve also added the event parameter to the function argument and when calling palindromeTester; more on this in a moment.
Then, in the palindromeTester method, we have to make two minor changes. The first involves preventing the default behavior of the form, which is to submit information back to the server. Since our “server” is just a static web page, we can’t handle such a submission, so we need to prevent this default behavior as follows:
function palindromeTester(event) {
  event.preventDefault();
   .
   .
   .
}
Here event is a special object that JavaScript provides for just this sort of case.
The second change is that, instead of grabbing the phrase string from a prompt, we’ll get it directly from the form submission. This is where the name attribute from the textarea in Listing 9.14 comes in: We can access the phrase from the target of the event. In this case, the event target is just a form object, so event.target is the form itself. Moreover, because of the name="phrase" key–value pair in the textarea of the form, event.target has an attribute whose value is the submitted string. In other words, if we entered, say, the phrase “Madam, I’m Adam.”, we could extract the value as follows:
event.target.phrase.value // would be "Madam, I'm Adam."Applying this to the palindromeTester function and combining with the new listener gives the result shown in Listing 9.15. By the way, the inclusion of event in function(event) isn’t necessary on some systems, but should be included for maximum cross-browser compatibility.
Listing 9.15: Handling form submission in JavaScript.main.js
let Phrase = require("<username>-palindrome");
function palindromeTester(event) {
  event.preventDefault();

  let phrase = new Phrase(event.target.phrase.value);

  let palindromeResult = document.querySelector("#palindromeResult");

  if (phrase.palindrome()) {
    palindromeResult.innerHTML = `"${phrase.content}" is a palindrome!`;
  } else {
    palindromeResult.innerHTML = `"${phrase.content}" is not a palindrome.`;
  }
}

document.addEventListener("DOMContentLoaded", function() {
  let tester = document.querySelector("#palindromeTester");
  tester.addEventListener("submit", function(event) {
     palindromeTester(event);
  });
});
Rerunning Listing 9.2, refreshing, and filling the textarea with one of my favorite looooong palindromes (Figure 9.14) gives the result shown in Figure 9.15.4
4. The amazingly long palindrome in Figure 9.14 was created in 1983 by pioneering computer scientist Guy Steele with the aid of a custom program.
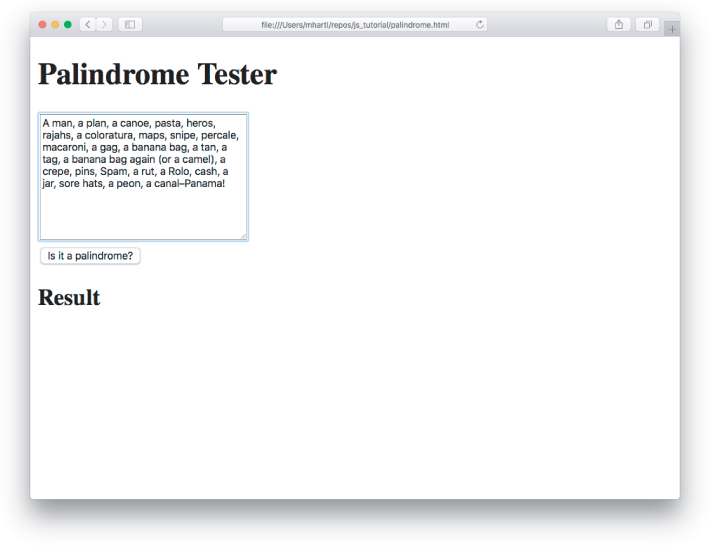
Figure 9.14: Entering a long string in the form’s textarea field.

Figure 9.15: That long string is a palindrome!
And with that—“A man, a plan, a canoe, pasta, heros, rajahs, a coloratura, maps, snipe, percale, macaroni, a gag, a banana bag, a tan, a tag, a banana bag again (or a camel), a crepe, pins, Spam, a rut, a Rolo, cash, a jar, sore hats, a peon, a canal—Panama!”—we’re done with the web version of our JavaScript palindrome detector. Whew!
9.4.1 Exercises
Confirm by submitting an empty form that an empty string is currently considered to be a palindrome (Figure 9.16). This is true in a vacuous sense, but it’s probably not the behavior we want.
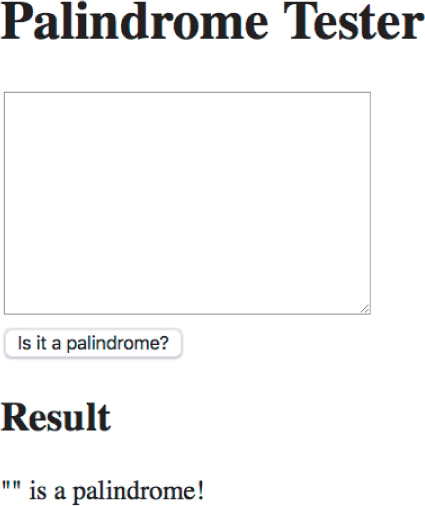
Figure 9.16: Oops—our application thinks the empty string is a palindrome!
To fix this issue, follow the procedure outlined in Box 8.2 and write a RED test asserting that the empty string is not a palindrome (Listing 9.16), then confirm that the application code in Listing 9.17 gets the test GREEN.
Bump the version number using the guidelines in Box 8.1, publish your new module as in Section 8.5.1, and then update it using the
npm updatecommand (Listing 9.18). Does your application now correctly identify""as not being a palindrome (Figure 9.17)? (Hint: Don’t forget to rerun Listing 9.2.)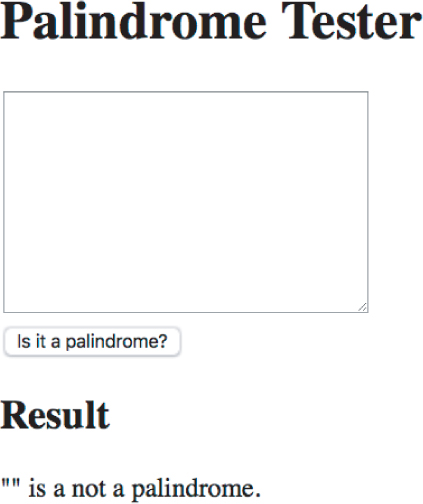
Figure 9.17: Confirming that the empty string is not a palindrome.
Listing 9.16: Template for asserting that the empty string isn’t a palindrome. RED~/repos/palindrome/test/test.js
let assert = require("assert");
let Phrase = require("../index.js");

describe("Phrase", function() {

  describe("#palindrome", function() {
    .
    .
    .
    it("should return false for an empty string", function() {
      let emptyPhrase = new Phrase("");
      assert(FILL_IN);
    });
  }
}
Listing 9.17: Application code for Listing 9.16. GREEN~/repos/palindrome/index.js
module.exports = Phrase;

// Adds `reverse` to all strings.
String.prototype.reverse = function() {
  return Array.from(this).reverse().join("");
}

function Phrase(content) {
  this.content = content;
  .
  .
  .
  // Returns true if the phrase is a palindrome, false otherwise.
  this.palindrome = function palindrome() {
    if (this.processedContent()) {
      return this.processedContent() === this.processedContent().reverse();

    } else {
      return false;
    }
  }
}
Listing 9.18: Updating an NPM module.
$ npm update <username>-palindrome