
Chapter 10
Shell Scripts with Node.js
In this chapter, we’ll return to the world of the command line and use Node.js to write three shell scripts of increasing sophistication. This use of JavaScript is currently less common than JavaScript in the browser, but it can be expected to grow as JavaScript (especially via Node and NPM) continues to expand past its original web-programming niche. These programs also serve as a useful foundation for similar programs written in languages more traditionally thought of as “scripting languages”, such as Perl, Python, and Ruby.
Perhaps surprisingly, we’ll discover en route that the DOM manipulation skills developed in Chapter 9 are still useful in shell scripts. Indeed, we’ll extend our capabilities significantly, in exactly the direction needed for the more advanced manipulations used in Chapter 11.
The first program (Section 10.1) shows how to use JavaScript to read and process the contents of a file from the filesystem. The program in Section 10.2 then shows how to accomplish the similar feat of reading the contents of a URL. (This has personal meaning to me, as I distinctly remember the first time I wrote an automated program to read and process text from the Web, which at the time seemed truly miraculous.) Finally, in Section 10.3, we’ll write a real-life utility program adapted from one I once wrote for myself; it includes an introduction (alluded to above) to DOM manipulation in a context outside of a web browser.
10.1 Reading from Files
Our first task is to read and process the contents of a file. The example is simple by design, but it demonstrates the necessary principles, and gives you the background needed to read more advanced documentation.
We’ll start by using curl to download a file of simple phrases (note that this should be in the js_tutorial directory we used prior to Chapter 8, not the palindrome package directory):
$ cd ~/repos/js_tutorial/
$ curl -OL https://cdn.learnenough.com/phrases.txt
As you can confirm by running less phrases.txt at the command line, this file contains a large number of phrases—some of which (surprise!) happen to be palindromes.
Our specific task is to write a palindrome detector that iterates through each line in this file and prints out any phrases that are palindromes (while ignoring others). To do this, we’ll need to open the file and read its contents.
When I started writing this tutorial, I didn’t know how to do this in JavaScript. But I applied my technical sophistication (Box 1.1) and dropped “node open file” into Google. (Why not “javascript open file”? That might have worked, but I suspected—correctly, as it turned out—that JavaScript’s browser-centric origins made “node” a more promising search term.) This search quickly turned up the File System module fs, which solves exactly the problem we have:
$ npm install --global fsThe documentation for File System can be a bit overwhelming, so I dug a little deeper and found the post “Reading a file with Node.js” (https://code-maven.com/reading-a-file-with-nodejs), which described the exact solution to our problem. Adapted to our current filename and programming conventions (e.g., let in place of var, double quotes), it looks like this in the REPL:
> let fs = require("fs");
> let text = fs.readFileSync("phrases.txt", "utf-8");
Here we’ve opted for the “Sync” (synchronous) version of the readFile function, mainly because we have no need to run more than one of these programs at a time (which is what “asynchronous” is for). We’ve also included (following the blog post) a second argument to indicate that the source is UTF-8, the Unicode character set discussed (https://www.learnenough.com/html-tutorial/html_intro#sec-an_html_skeleton) in Learn Enough HTML to Be Dangerous (https://www.learnenough.com/html).
The result of running this code is to load the full contents of the text file into the text variable:
> text.length;
1373
> text.split("
")[0];     // Split on newlines and extract the 1st phrase.
'A butt tuba'
The second command here splits the text on the newline character
and selects the zeroth element, revealing the enigmatic first line of the file, “A butt tuba”.
Let’s take the ideas from the REPL and put them in a script:
$ touch palindrome_file
$ chmod +x palindrome_file
The script itself is simple: We just open the file, split the contents on newlines, and iterate through the resulting array, printing any line that’s a palindrome. The result, which at this stage you should aspire to read fairly easily, appears in Listing 10.1. (In this and subsequent examples, make sure that your shebang line matches the result of which node on your system if it differs from mine.)
Listing 10.1: Reading and processing the contents of a file.palindrome_file
#!/usr/local/bin/node

let fs = require("fs");
let Phrase = require("<username>-palindrome");

let text = fs.readFileSync("phrases.txt", "utf-8");
text.split("
").forEach(function(line) {
  let phrase = new Phrase(line);
  if (phrase.palindrome()) {
    console.log("palindrome detected:", line);
  }
});
Note that the code in Listing 10.1 will work only if the palindrome module was installed correctly (Section 9.1).
Running the script at the command line confirms that there are quite a few palindromes in the file:
$ ./palindrome_file
.
.
.
palindrome detected: Dennis sinned.
palindrome detected: Dennis and Edna sinned.
palindrome detected: Dennis, Nell, Edna, Leon, Nedra, Anita, Rolf, Nora,
Alice, Carol, Leo, Jane, Reed, Dena, Dale, Basil, Rae, Penny, Lana, Dave,
Denny, Lena, Ida, Bernadette, Ben, Ray, Lila, Nina, Jo, Ira, Mara, Sara,
Mario, Jan, Ina, Lily, Arne, Bette, Dan, Reba, Diane, Lynn, Ed, Eva, Dana,
Lynne, Pearl, Isabel, Ada, Ned, Dee, Rena, Joel, Lora, Cecil, Aaron, Flora,
Tina, Arden, Noel, and Ellen sinned.
palindrome detected: Go hang a salami, I'm a lasagna hog.
palindrome detected: level
palindrome detected: Madam, I’m Adam.
palindrome detected: No "x" in "Nixon"
palindrome detected: No devil lived on
palindrome detected: Race fast, safe car
palindrome detected: racecar
palindrome detected: radar
palindrome detected: Was it a bar or a bat I saw?
palindrome detected: Was it a car or a cat I saw?
palindrome detected: Was it a cat I saw?
palindrome detected: Yo, banana boy!
Among others, we see a rather elaborate expansion on the simple palindrome “Dennis sinned” (Figure 10.1)!1
1. Image courtesy of Historical Images Archive/Alamy Stock Photo.
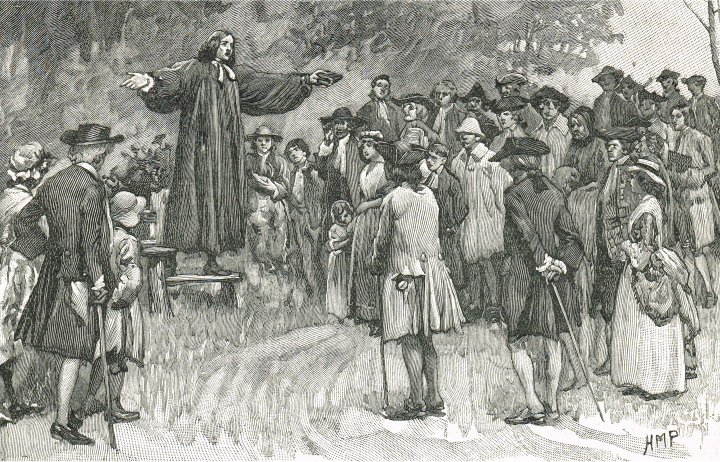
Figure 10.1: Dennis, Nell, Edna, Leon, Nedra, and many others sinned.
10.1.1 Exercise
Using whichever method you prefer (such as searching for node write file), add code to the script in Listing 10.1 to write all detected palindromes to a file called
palindromes.txt.
10.2 Reading from URLs
In this section, we’ll write a script whose effect is identical to the one in Section 10.1, except that it reads the phrases.txt file directly from its public URL. By itself, the program doesn’t do anything fancy, but realize what a miracle this is: The ideas aren’t specific to the URL we’re hitting, which means that after this section you’ll have the power to write programs to access and process practically any public site on the Web. (This practice, sometimes called “web scraping”, should be done with due consideration and caution.)
As in Section 10.1, installing an NPM module is a necessary prerequisite. As is often the case with NPM modules, there are multiple different ways to accomplish the same task. Based on the results of the web search node read web page url and a list of the alternatives to request,2 we’ll use the urllib module, which we can install as follows:3
2. The original version of this tutorial used request, but it has since been deprecated.
3. For reasons I don’t really understand, urllib module global installation doesn’t work, at least on my system, so here we install it locally.
$ npm install urllibThen we can create our script as in Section 10.1:
$ touch palindrome_url
$ chmod +x palindrome_url
Consulting the urllib documentation (https://www.npmjs.com/package/urllib), we find (as of this writing) the example code in Listing 10.2.
Listing 10.2: Example code for reading the contents of a URL.
var urllib = require('urllib');

urllib.request('http://cnodejs.org/', function (err, data, res) {
  if (err) {
    throw err; // you need to handle error
  }
  console.log(res.statusCode);
  console.log(res.headers);
  // data is Buffer instance
  console.log(data.toString());
});
Bootstrapping off of code examples like Listing 10.2 is an excellent practice. Indeed, it’s not a bad idea to actually execute the code at each stage, but for brevity I’ll omit the output until the script is done.
We can modify the default code for our purposes by updating the conventions (such as using let in place of var), using more descriptive names, and eliminating lines that we definitely don’t need:
let urllib = require("urllib");
urllib.request("http://www.cnodejs.org/", function(error, data, response) {
  console.log('body:', data.toString());
});
We begin to see the shape of a solution. The urllib module opens a web request for the given URL, and takes a function with three arguments: an error (if any), a data object containing the body of the page (which is the full page, not to be confused with the HTML body tag), and a response object.
It’s important to emphasize at this point that I don’t know exactly what these objects are, so you don’t have to either. What I do know—what I can reasonably infer from the example code in Listing 10.2—is that data.toString() is a string that can take the place of text in Listing 10.1. (Recall that we saw the toString() method applied to numbers in Section 4.1.2.) This is enough to solve our problem, because it means that we can replace the cnodejs.org URL in Listing 10.2 with the one for phrases.txt, and replace
console.log('body:', data.toString());with the palindrome-detecting logic from Listing 10.1.
There’s one final subtlety, which is that the URL for phrases.txt is actually a redirect: If you visit https://cdn.learnenough.com/phrases.txt, you’ll find that in fact it forwards (using a 301 redirect) to a page on Amazon’s Simple Storage Service (S3), as seen in Figure 10.2.
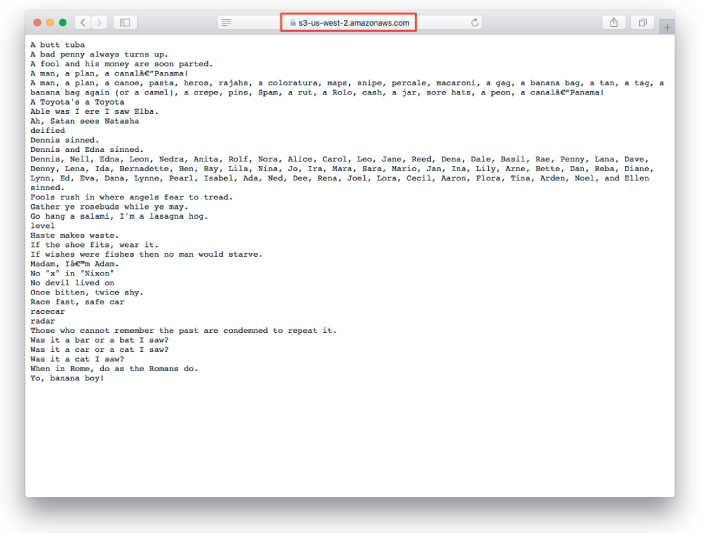
Figure 10.2: Visiting the phrase URL.
Some URL libraries follow redirects by default, but urllib does not, so we have to add an option (as described (https://www.npmjs.com/package/urllib#api-doc) in the urllib documentation):
urllib.request(url, { followRedirect: true }, function(error, data, response)With the followRedirect option set to true, urllib will follow the 301 redirect to S3, so the final code appears as in Listing 10.3.
Listing 10.3: A URL-reading script.palindrome_url
#!/usr/local/bin/node

let urllib = require("urllib");
let Phrase = require("mhartl-palindrome");
let url = 'https://cdn.learnenough.com/phrases.txt'

urllib.request(url, { followRedirect: true }, function(error, data, response) {
  let body = data.toString();
  body.split("
").forEach(function(line) {
    let phrase = new Phrase(line);
    if (phrase.palindrome()) {
      console.log("palindrome detected:", line);
    }
  });
});
At this point, we’re ready to try the script out at the command line:
$ ./palindrome_url
.
.
.
palindrome detected: Dennis sinned.
palindrome detected: Dennis and Edna sinned.
palindrome detected: Dennis, Nell, Edna, Leon, Nedra, Anita, Rolf, Nora,
Alice, Carol, Leo, Jane, Reed, Dena, Dale, Basil, Rae, Penny, Lana, Dave,
Denny, Lena, Ida, Bernadette, Ben, Ray, Lila, Nina, Jo, Ira, Mara, Sara,
Mario, Jan, Ina, Lily, Arne, Bette, Dan, Reba, Diane, Lynn, Ed, Eva, Dana,
Lynne, Pearl, Isabel, Ada, Ned, Dee, Rena, Joel, Lora, Cecil, Aaron, Flora,
Tina, Arden, Noel, and Ellen sinned.
palindrome detected: Go hang a salami, I'm a lasagna hog.
palindrome detected: level
palindrome detected: Madam, I’m Adam.
palindrome detected: No "x" in "Nixon"
palindrome detected: No devil lived on
palindrome detected: Race fast, safe car
palindrome detected: racecar
palindrome detected: radar
palindrome detected: Was it a bar or a bat I saw?
palindrome detected: Was it a car or a cat I saw?
palindrome detected: Was it a cat I saw?
palindrome detected: Yo, banana boy!
Amazing! The result is exactly as we saw in Section 10.1, but this time, we got the data right off the live Web.
10.2.1 Exercise
It’s often useful to have a separate variable with a list of the items you’re selecting for (in this case, palindromes). Using the
filtermethod discussed in Section 6.2, create apalindromesvariable with an array of palindromes, as shown in Listing 10.4. Is the output the same as the output of Listing 10.3?
Listing 10.4: Reading a URL the functional way.palindrome_url
#!/usr/local/bin/node

let urllib = require("urllib");
let Phrase = require("<username>-palindrome");
let url = 'https://cdn.learnenough.com/phrases.txt'

urllib.request(url, { followRedirect: true }, function(error, data, response) {
  let body = data.toString();
  let lines = body.split("
");
  let palindromes = lines.filter(line => /* FILL IN */);
  palindromes.forEach(function(palindrome) {
    console.log("palindrome detected:", palindrome);
  });
});
10.3 DOM Manipulation at the Command Line
In this final section, we’re going to put the URL-reading tricks we learned in Section 10.2 to good use by writing a version of an actual utility script I once wrote for myself. To begin, I’ll explain the context in which the script arose, and the problem it solves.
In recent years, there has been an explosion in the resources available for learning foreign languages, including things like Duolingo, Google Translate, and native OS support for multilingual text-to-speech (TTS). A few years ago, I decided to take advantage of this opportunity to brush up on my high-school/college Spanish.
One of the resources I found myself turning to was Wikipedia, with its huge number of articles in languages other than English. In particular, I discovered how useful it was to copy text from Spanish-language Wikipedia (Figure 10.3) and drop it into Google Translate (Figure 10.4). At that point, I could use the text-to-speech from either Google Translate (the red square in Figure 10.4) or macOS to hear the words spoken in Spanish, while following along with either the native language or the translation. Es muy útil.

Figure 10.3: Un artículo sobre JavaScript.

Figure 10.4: An article about JavaScript dropped into Google Translate.
After a while, I noticed two consistent sources of friction:
Copying a large number of paragraphs by hand was cumbersome.
Hand-copying text often selected things that I didn’t want, particularly reference numbers, which the TTS system duly pronounced, resulting in random numbers in the middle of sentences (e.g., “Se define como orientado a objetos, 3 [tres] basado en prototipos” = “It’s defined as object-oriented, 3 [three] based on prototypes.” ¿Qué pasó?).
Friction like this has inspired many a utility script, and thus was born wikp (“Wikipedia paragraphs”), a program to download a Wikipedia article’s HTML source, extract its paragraphs, and eliminate its reference numbers, dumping all the results to the screen.
The original wikp program was written in Ruby, but it’s just as easy (and arguably easier) in JavaScript. We already know from Listing 10.3 how to download the source. The remaining tasks are then to:
Take an arbitrary URL argument at the command line.
Manipulate the downloaded HTML as if it were a regular DOM (Section 9.3).
Remove the references.
Output the paragraphs.
I want to emphasize that, when I began writing this tutorial, I couldn’t do any of these things in JavaScript. So this section isn’t just about telling you how to do them; it’s about teaching you how to figure these sorts of things out on your own—in other words, classic technical sophistication.
Let’s get started by creating the initial script:
$ touch wikp
$ chmod +x wikp
Now we’re ready to get going on the main program. For each task above, I’ll include the kind of Google search you might use to figure out how to do it.
First, we’ll take in the URL as a command-line argument (javascript node command line arguments), as seen in Listing 10.5. Note that we’ve included a console.log line as a temporary way to track our progress.
Listing 10.5: Accept a command-line argument.wikp
#!/usr/local/bin/node

// Returns the paragraphs from a Wikipedia link, stripped of reference numbers.

let urllib = require("urllib");
let url = process.argv[2];

console.log(url);
We can confirm that Listing 10.5 works as advertised:
$ ./wikp https://es.wikipedia.org/wiki/JavaScript
https://es.wikipedia.org/wiki/JavaScript
Next, we need to learn how to parse HTML with Node (node parse html), for which there are several possibilities. The one that connects best with what we already know is JSDOM:
$ npm install jsdomAdding JSDOM to our script gives Listing 10.6.
Listing 10.6: Adding JSDOM.wikp
#!/usr/local/bin/node

// Returns the paragraphs from a Wikipedia link, stripped of reference numbers.

let urllib = require("urllib");
let url = process.argv[2];
const jsdom = require("jsdom");
const { JSDOM } = jsdom;
Why does Listing 10.5 have this weird-looking assignment?
const { JSDOM } = jsdom;
The answer is, I don’t know offhand; I copied-and-pasted the code directly from the JSDOM documentation (https://github.com/jsdom/jsdom#basic-usage). This is an essential skill for every developer (Figure 10.5).
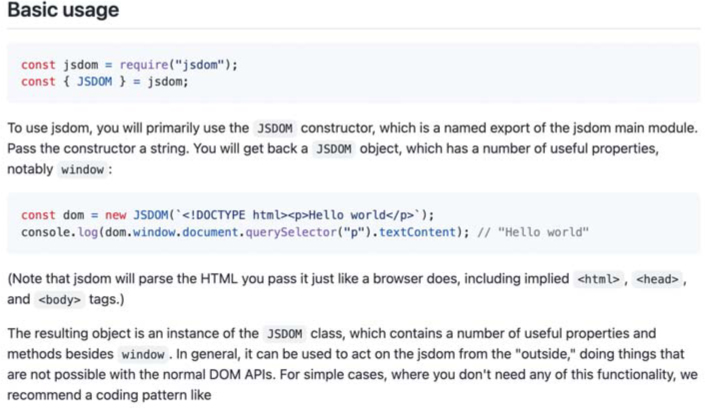
Figure 10.5: There’s nothing wrong with a little copy-and-paste.
We’ll have to do a little more work to see the effects of JSDOM. Following the documentation, we see that we can create a simulated document object—just like the one we saw in Listing 9.8—using this code:
let { document } = (new JSDOM(body)).window;
(The JSDOM documentation uses const, but we’ll use let as a signal that we might change the document, which indeed we will (by removing references).)
Combining this with the download code from Listing 10.3 gives Listing 10.7.
Listing 10.7: Adding a simulated DOM.wikp
#!/usr/local/bin/node

// Returns the paragraphs from a Wikipedia link, stripped of reference numbers.

let urllib = require("urllib");
let url = process.argv[2];

const jsdom = require("jsdom");
const { JSDOM } = jsdom;

urllib.request(url, { followRedirect: true }, function(error, data, response) {
  let body = data.toString();
  // Simulate a Document Object Model.
  let { document } = (new JSDOM(body)).window;
});
Our next task is to grab all the paragraphs and references. Since we have a simulated DOM, we can use something like the querySelector function we first saw in Section 9.2. That function returned only one DOM element, but we can guess how we might find them all (javascript queryselector return all elements). Indeed, as of this writing, the solution is the first example on the first Google hit:
let paragraphs = document.querySelectorAll("p");
(The only change I made was to modify var matches to read let paragraphs.)
Similar code applies to finding all the references, but here we need to know a little about Wikipedia’s source. We can use the web inspector (Section 1.3.1) to see that the references all have CSS class reference, as shown in Figure 10.6.
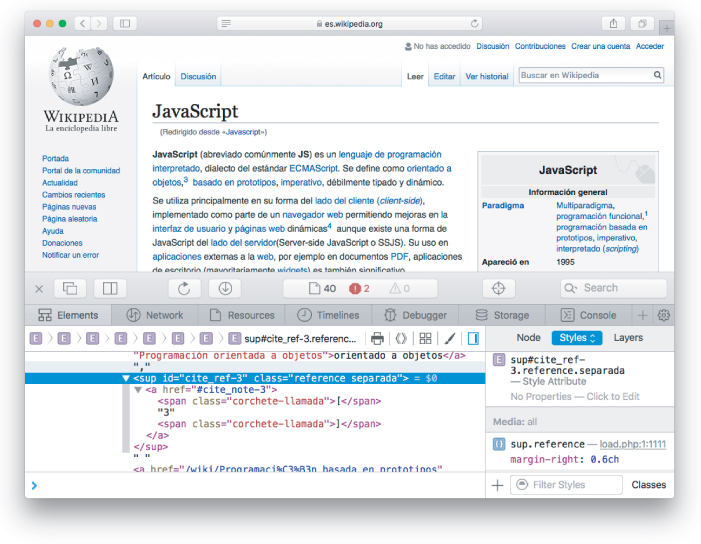
Figure 10.6: Viewing a reference in the web inspector.
Now, if I told you that the code
document.querySelector("#palindromeTester");
returned the element with CSS id palindromeTester (as in Listing 9.9), what would you guess is the code to find all the elements with CSS class equal to reference? The CSS notation for a class involves preceding it with a dot . instead of a #, and we just learned how to find them all using querySelectorAll, which means you can probably guess that it’s this:
let references = document.querySelectorAll(".reference");
Adding these assignments to the script yields Listing 10.8.
Listing 10.8: Pulling out the paragraphs and references.wikp
#!/usr/local/bin/node

// Returns the paragraphs from a Wikipedia link, stripped of reference numbers.

let urllib = require("urllib");
let url = process.argv[2];

const jsdom = require("jsdom");
const { JSDOM } = jsdom;

urllib.request(url, { followRedirect: true }, function(error, data, response) {
  let body = data.toString();
  // Simulate a Document Object Model.
  let { document } = (new JSDOM(body)).window;

  // Grab all the paragraphs and references.
  let paragraphs = document.querySelectorAll("p");
  let references = document.querySelectorAll(".reference");
});
At this point, we’re almost done. We just need to remove the references and then print out the contents of each paragraph. The first task is easy, as there’s a native remove method to remove an HTML “node” (an element in the Document Object Model tree; javascript dom remove element):
references.forEach(function(reference) {
  reference.remove();
});
Note that this involves guessing that references is a collection that can be iterated through using forEach, which at this point should be within your powers of technical sophistication. (Technically, querySelectorAll returns not an array, but rather a “NodeList”. Nevertheless, this object can be traversed using forEach just the same.)
The second task is also simple once we know that each element has a textCon-tent property (javascript dom element print content):
paragraphs.forEach(function(paragraph) {
  console.log(paragraph.textContent);
});
Putting everything together gives the wikp script shown in Listing 10.9.
Listing 10.9: The final Wikipedia paragraph script.wikp
#!/usr/local/bin/node

// Returns the paragraphs from a Wikipedia link, stripped of reference numbers.

let urllib = require("urllib");
let url = process.argv[2];

const jsdom = require("jsdom");
const { JSDOM } = jsdom;

urllib.request(url, { followRedirect: true }, function(error, data, response) {

  let body = data.toString();
  // Simulate a Document Object Model.
  let { document } = (new JSDOM(body)).window;

  // Grab all the paragraphs and references.
  let paragraphs = document.querySelectorAll("p");
  let references = document.querySelectorAll(".reference");

  // Remove any references.
  references.forEach(function(reference) {
    reference.remove();
  });
  // Print out all of the paragraphs.
  paragraphs.forEach(function(paragraph) {
    console.log(paragraph.textContent);
  });
});
Let’s see how things went:
$ ./wikp https://es.wikipedia.org/wiki/JavaScript
.
.
.
Existen algunas herramientas de ayuda a la depuración, también escritas en
JavaScript y construidas para ejecutarse en la Web. Un ejemplo es el programa
JSLint, desarrollado por Douglas Crockford, quien ha escrito extensamente
sobre el lenguaje. JSLint analiza el código JavaScript para que este quede
conforme con un conjunto de normas y directrices y que aseguran su correcto
funcionamiento y mantenibilidad.
Success! By scrolling up in our terminal, we can now select all the text and drop it into Google Translate or a text editor of our choice. On macOS, we can do even better by piping (https://www.learnenough.com/command-line-tutorial/inspecting_files#sec-wordcount_and_pipes) the results to pbcopy, which automatically copies the results to the macOS pasteboard (also called the “clipboard”):
$ ./wikp https://es.wikipedia.org/wiki/JavaScript | pbcopyAt this point, pasting into Google Translate (or anywhere else) will paste the full text.4
4. Google Translate has a limit for how much text it will translate at once, but for text-to-speech purposes you can always paste into a word processor and then use the operating system’s native TTS functionality.
Consider how remarkable this accomplishment is. The script in Listing 10.9 is a little tricky—and to get such a thing working completely on your own might involve more than a few console.log statements as you go along—but it’s not exactly rocket science. And yet, it’s genuinely useful, something that (if you’re active in foreign-language learning) you might well use all the time. Moreover, the basic skills involved—including not just the programming, but also the technical sophistication (<cough>Googling</cough>)—unlock a huge number of potential applications.
10.3.1 Exercises
By moving the file or changing your system’s configuration, add the
wikpscript to your environment’s PATH. (You may find the steps (https://www.learnenough.com/text-editor-tutorial/advanced_text_editing#sec-writing_an_executable_script) in Learn Enough Text Editor to Be Dangerous (https://www.learnenough.com/text-editor) helpful.) Confirm that you can runwikpwithout prepending./to the command name.What happens if you run
wikpwith no argument? Add code to your script to detect the absence of a command-line argument and output an appropriate usage statement. Hint: After printing out the usage statement, you will have to exit, which you can learn how to do with the search “node how to exit script”.The “pipe to
pbcopy” trick mentioned in the text works only on macOS, but any Unix-compatible system can redirect (https://www.learnenough.com/command-line-tutorial/manipulating_files#sec-redirecting_and_appending) the output to a file. What’s the command to redirect the output ofwikpto a file calledarticle.txt? (You could then open this file, select all, and copy the contents, which has the same basic result as piping topbcopy.)