In this chapter, you will learn to use Physics in animation creation. We will see that there are several animations that can be easily handled by Unity3D's Physics. During development, you will come to know that working with animations and Physics is easy in Unity3D. You will find the combination of Physics and animation very interesting.
We are going to cover the following topics:
- Interpolate and Extrapolate
- The Cloth component and its uses in animation
- ConstantForce
- AddForce
- AddTorque
- An example of creating a rope animation using different joints
As mentioned earlier, you will learn how to handle and create simple and complex animations using Physics, for example, creating a rope animation and hanging ball. Let's start with the Physics properties of a Rigidbody component, which help in syncing animation.
Unity3D offers a way that its Rigidbody component can help in the syncing of animation. Using the interpolation and extrapolation properties, we sync animations.
Let's see in detail how interpolation and extrapolation work:
- Create a new scene and save it.
- Create a Cube game object and apply Rigidbody on it.
- Look at the Inspector panel shown in the following screenshot. On clicking Interpolate, a drop-down list that contains three options will appear, which are None, Interpolate, and Extrapolate. For details, refer to the previous chapter. By selecting any one of them, we can apply the feature.
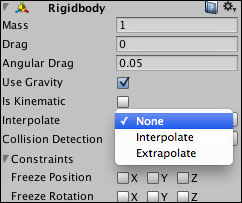
In interpolation, the position of an object is calculated by the current update time, moving it backwards one Physics update delta time.
Note
Delta time or delta timing is a concept used among programmers in relation to frame rate and time. For more details, check out http://docs.unity3d.com/ScriptReference/Time-deltaTime.html.
If you look closely, you will observe that there are at least two Physics updates, which are as follows:
- Ahead of the chosen time
- Behind the chosen time
Unity interpolates between these two updates to get a position for the update position. So, we can say that the interpolation is actually lagging behind one Physics update.
The second option is Extrapolate, which is to use for extrapolation. In this case, Unity predicts the future position for the object. Although this does not show any lag, incorrect prediction sometime causes a visual jitter.
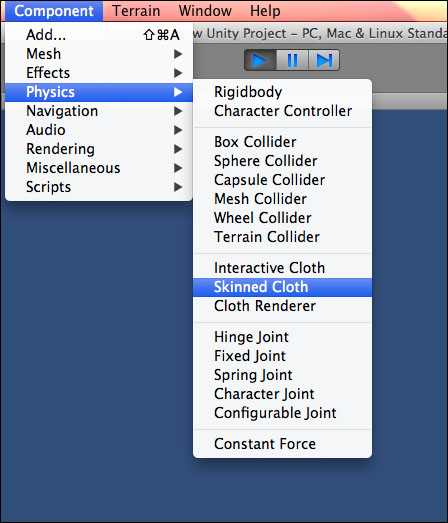
One more important component that is widely used to animate cloth is the Cloth component. Here, you will learn about its properties and how to use it.
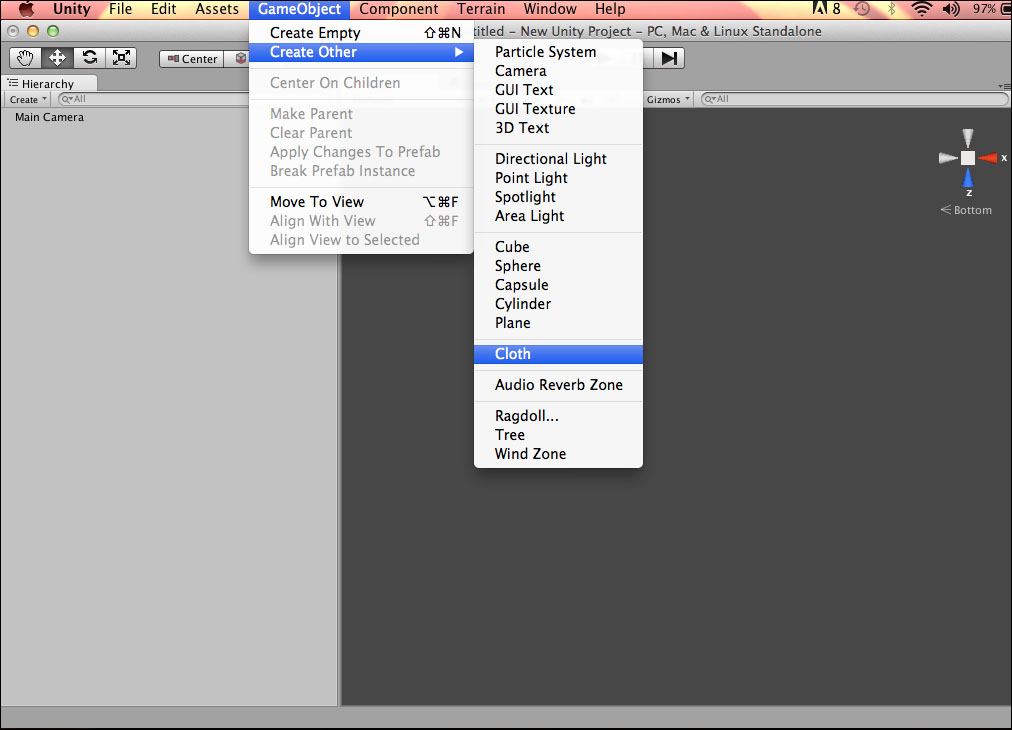
To make animation easy, Unity provides an interactive component called Cloth. In the GameObject menu, you can directly create the Cloth game object. Have a look at the following screenshot:
Unity also provides Cloth components in its Physics sections. To apply this, let's look at an example:
- Create a new scene and save it.
- Create a Plane game object. (We can also create a Cloth game object.)
- Navigate to Component | Physics and choose InteractiveCloth.
As shown in the following screenshot, you will see the following properties in the Inspector panel:
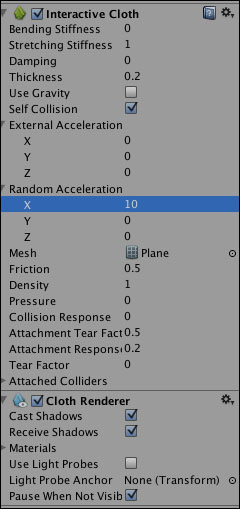
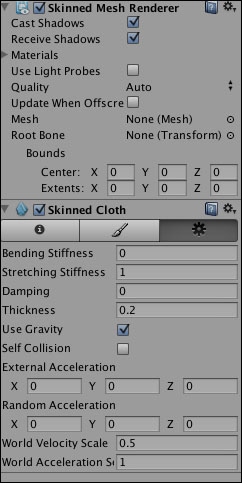
Let's have a look at the properties one by one. Blending Stiffness and Stretching Stiffness define the blending and stretching stiffness of the Cloth while Damping defines the damp motion of the Cloth. Using the Thickness property, we decide the thickness of the Cloth, which ranges from 0.001 to 10,000. If we enable the Use Gravity property, it will affect the Cloth simulation. Similarly, if we enable Self Collision, it allows the Cloth to collide with itself. For a constant or random acceleration, we apply the External Acceleration and Random Acceleration properties, respectively.
World Velocity Scale decides the movement of the character in the world, which will affect the Cloth vertices. The higher the value, the more movement of the character will affect. World Acceleration works similarly. The Interactive Cloth component depends on the Cloth Renderer components. Lots of Cloth components in a game reduces the performance of game. To simulate clothing in characters, we use the Skinned Cloth component.
The following are the important points to remember while using the Cloth component:
- Cloth simulation will not generate tangents. So, if you are using a tangent dependent shader, the lighting will look wrong for a Cloth component that has been moved from its initial position.
- We cannot directly change the transform of moving the Cloth game object. This is not supported.
- Disabling the Cloth before changing the transform is supported.
- The SkinnedCloth component works together with SkinnedMeshRenderer to simulate clothing on a character. As shown in the following screenshot, we can apply Skinned Cloth:
As you can see in the following screenshot, there are different properties that we can use to get the desired effect:
We can disable or enable the Skinned Cloth component at any time to turn it on or off.
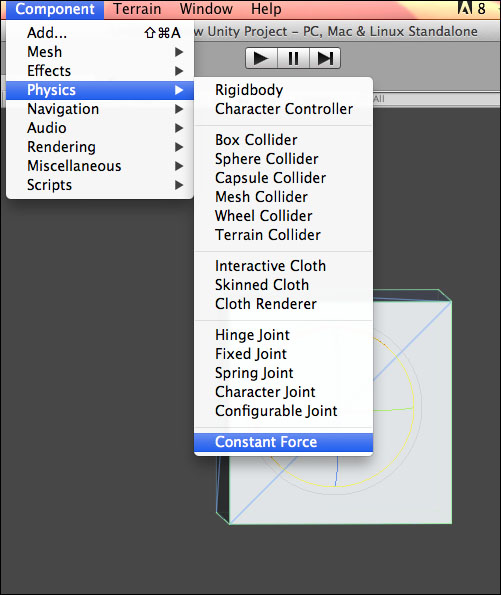
When a force is applied constantly on a game object, it is known as constant force. We use the ConstantForce Physics utility class to apply constant force on a game object. AddForce applies a force to the Rigidbody only for one frame whereas ConstantForce applies a force in every frame until we change the force or torque to a new value.
We use this for one-shot objects such as rockets.
We will look at the example of animation using ConstantForce with the help of the following steps:
- Create a new scene and save it as
Constant Force Example. - Create a Cube game object.
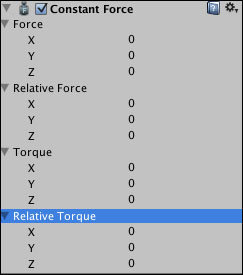
- As shown in the following screenshot, apply Constant Force on it:
- To make a cube that accelerates forward, we set Relative Force to be along the positive z axis.
- Then, use the Rigidbody's Drag property to set the maximum velocity and turn off gravity so that the game object will always stay on its path.
- Run the scene and you will see that the cube game object moves constantly.
Till now, you have learned different Physics components. Now, you'll learn how we can use Physics in scripting. In this chapter, we will learn AddForce and AddTorque. By applying AddForce on a Rigidbody, we make it move while AddTorque adds a torque to the Rigidbody to make it spin around the torque axis.
AddForce adds force to the Rigidbody.
Note
In Physics, a force is any interaction that tends to change the motion of an object. In other words, a force can cause an object with mass to change its velocity (which includes beginning moving from a state of rest), that is, to accelerate. Force can also be described by intuitive concepts such as a push or a pull.
In this example, we will create a projectile using AddForce Physics:
- Create a new scene and save it as
addForce example. - Use a Plane game object to create ground.
- Apply a green material on it.
- Create a Capsule object and apply Rigidbody on it as shown in the following screenshot. Now, name it
bullet.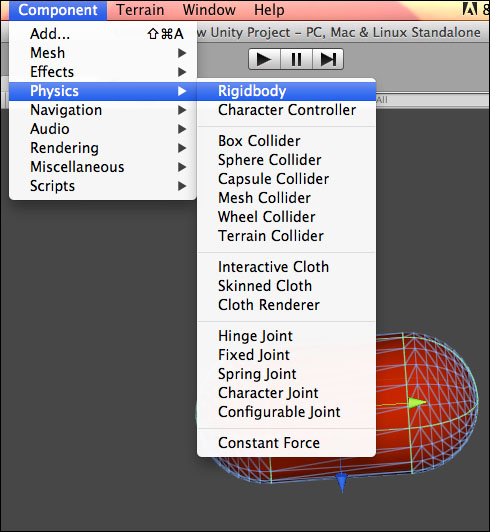
- Create a new JavaScript or UnityScript and name it
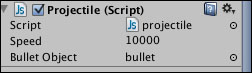
projectile. Write the following code inside it:var speed:int=10000; var bulletObject: GameObject; private var hitPoint:Vector3; private var hit : RaycastHit; function Update () { var ray = Camera.main.ScreenPointToRay (Input.mousePosition); if (Input.GetMouseButtonDown (0)) { if (Physics.Raycast (ray, hit, 300.0f)) { if (hit.collider.tag == "ground") { // Add "ground " tag to the plane game object. var bullet = Instantiate(bulletObject, Vector3(0,1.5,-12), transform.rotation); bullet.rigidbody.AddForce( Vector3(0,0.5,0.5) * speed); } } } } - As shown in the following screenshot, you will need to specify Bullet Object:
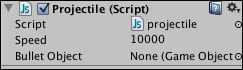
- Drag the bullet game object and put it on the Bullet Object section as shown in the following screenshot:
- Now, test the scene and you will see that on a click, the bullet is fired and it is moved in a projectile.
In this example, we saw how to use AddForce to create a projectile animation. Similarly, in the next example, we will see how to use AddTorque to create an animation.
AddTorque adds torque to the Rigidbody.
In this example, we will use AddTorque to create an animation:
- Create a new scene and save it as
AddTorque example. - Create a Cube game object and name it
box. - Add Rigidbody on a Box game object.
- Create a new JavaScript and use the following code:
// Spins the rigidbody around the global y-axis var box:GameObject; var speed:int=10; function FixedUpdate () { box.rigidbody.AddTorque (Vector3.up * speed); } - Add the script file to Main Camera and drag the game object box to the box variable.
- Run the scene and you will see the spin movement of the box.
In another example, we will create an animation using different joints. In the previous chapter, you learned different joints, including the character joint, which is used for a Ragdoll effect. Now, we will create a rope animation using Fixed Joint and Hinge Joint.
In the following example, we will create a rope using different joints. Joints help to create flexible animation, and this is why we are going to use joints for the rope animation.
- Create a new scene and save it as
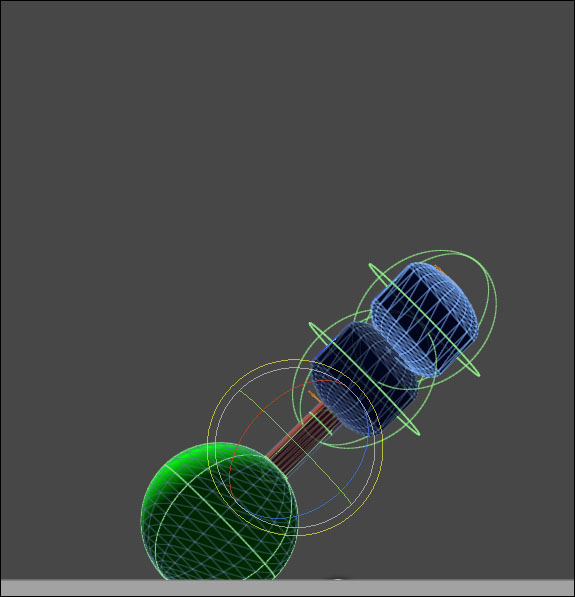
Rope Animation example. - Create a Sphere game object and apply a material to make it colorful.
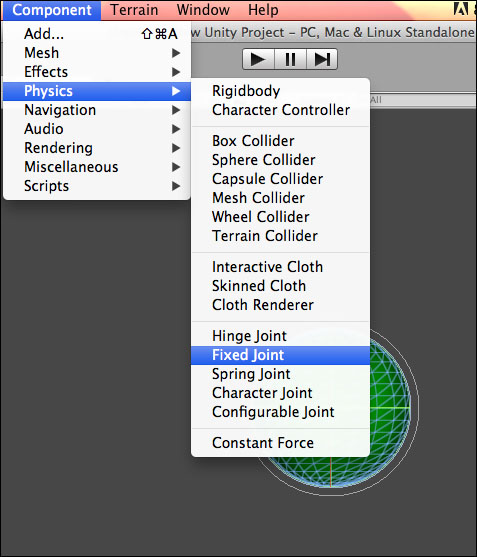
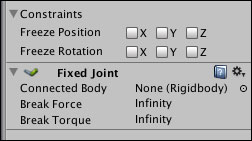
- Now, apply Rigidbody and Fixed Joint on it as shown in the following screenshot:
- Create a Cylinder game object and name it
Chain 1. - Now, apply Rigidbody and Hinge Joint on it. As shown in the following screenshot, you will see the Connected Body property:
- In the Connected Body property of the Sphere game object, drag the Chain 1 game object.
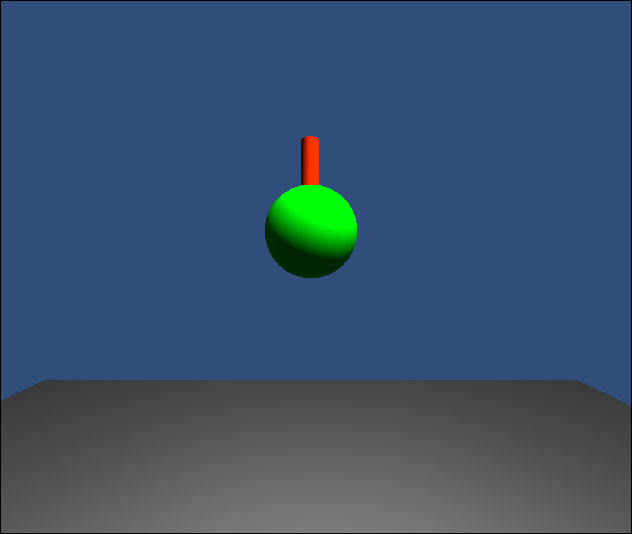
- Now, run the scene; you will see that the sphere falls along with the Cylinder game object as shown in the following screenshot:
- As shown in the following screenshot, now create the
Chain 2game object and apply Rigidbody and Hinge Joint. Specify its position above the Chain 1 and drag Chain 2 as connected body for Chain 1.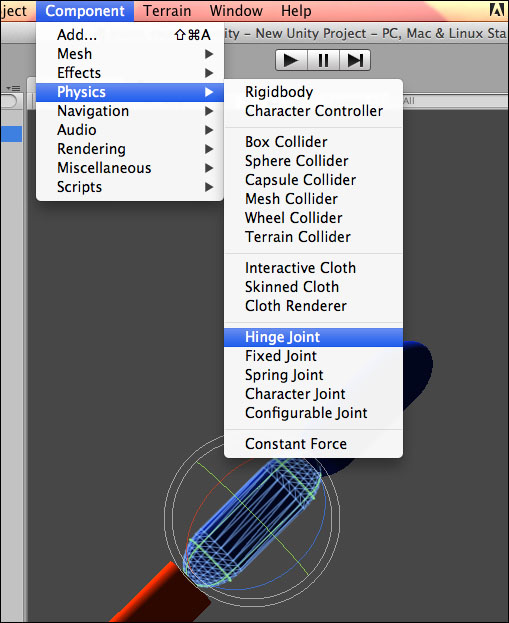
- Similarly, create Chain 3 and Chain 4. Now, rotate all the game objects as shown in the following screenshot:
- Test this application; you will see a sphere hanging from a rope:
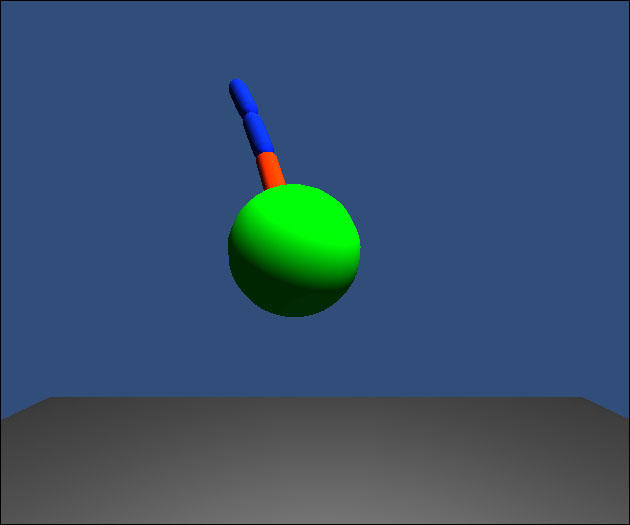
In the preceding steps, you learned how to create an animation using different joints.