Chapter 16
Getting Connected with Groups
IN THIS CHAPTER
![]() Getting to know LinkedIn groups
Getting to know LinkedIn groups
![]() Starting and participating in group discussions
Starting and participating in group discussions
![]() Searching a group’s membership list
Searching a group’s membership list
![]() Creating a group
Creating a group
![]() Managing a group
Managing a group
There’s more to a professional’s life than colleagues and classmates. People have always been drawn to groups based on common interests, backgrounds, or goals. This natural tendency to join can be seen in sports teams to Boy Scouts and Girl Scouts, social action organizations, and nonprofit charity groups. Naturally, LinkedIn also offers a way for people to connect with each other as a group — LinkedIn groups.
In this chapter, I discuss the value in LinkedIn groups, from gaining information and exposure to growing your network, and cover the overall idea and structure of groups and what you can expect to find. You then learn how to search for existing groups and how to join a group. Finally, you discover how to start your own group and invite others to join.
Reaping the Benefits of Groups
When people who are familiar with other social networking tools are first exposed to LinkedIn groups, they see some similarities. The group interactions in LinkedIn groups — discussion threads, job postings, and so on — feel like discussions or groups on most other social networking sites. And yet, being a member of a LinkedIn group has benefits that groups on other networking sites don’t have:
Connections: Group members share a special sort of connection. Although you don’t have access to their extended networks, you’re considered connected to them in that you can see their profile and send them a message through LinkedIn, and they can appear in your search results even if you aren’t within three degrees of everyone in the group. Your search results can include fellow group members as well as your first-degree connections and second-degree network members.
 LinkedIn imposes a monthly limit of 15 messages you can send to group members outside your network, so use this feature sparingly. Otherwise, your LinkedIn account may be suspended or cancelled.
- Visibility: By participating in groups — particularly large, open ones — and sharing your knowledge and expertise with people who are not yet in your network, you can increase your visibility in the LinkedIn network without adding thousands of contacts.
- Knowledge: LinkedIn groups share information and expertise among their members through the Discussions page of the group, which you can benefit from as a group member. Because there are thousands of groups for most industries and fields, LinkedIn groups can be a valuable source of knowledge.
- Recognition: Employers like to see that you’re connected with professional groups because it shows a desire to expand your knowledge base, stay current in your industry or field, and be open and eager to network with like-minded people.
- Group logos: The logos of the groups you’re in are available in your profile under Interests, and you can see all the group logos for a user when someone clicks See All under Interests, and then clicks the Groups tab from the Following window that opens. This visual branding reinforces your association with those groups. For example, Figure 16-1 shows the profile for a LinkedIn member who belongs to several groups.
Some LinkedIn groups are extensions of existing organizations, and others are created on LinkedIn by an individual or business as a way to identify and network with people who share a common interest. In either case, groups are useful tools for growing your network and leveraging your existing affiliations.
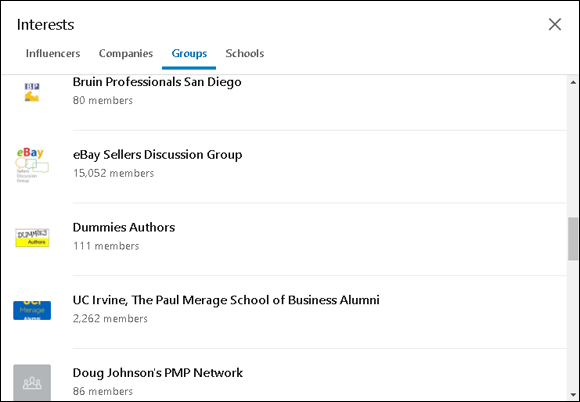
FIGURE 16-1: Group logos displayed in a profile.
Understanding the Two Types of Groups
Over the years, LinkedIn groups have evolved to provide a quality place for interactions and content while fighting attempts to flood groups with spam or promotional content. Therefore, LinkedIn groups are now private, members-only groups, which means that you can’t join a group without approval or an invitation, and the conversations in a group are not visible to the outside world (including search engines). In this way, only members of the group can see and contribute to conversations.
Following are the two types of LinkedIn groups:
- Listed: These groups are the most common form of LinkedIn groups, and they show up in search results. Membership in this group is displayed on each member’s profile page under the Interests header; and to see all of a person’s groups, you click See All below the Interests header. The group’s summary page appears in search engine results, but the conversations in the group do not.
- Unlisted: Because these groups are not discoverable by LinkedIn members by searching groups, they have become invitation-only groups; the only way you can join is to be invited by the group owner or manager. These groups do not appear in a LinkedIn search or any search engine, and non-group members can’t see the group logo in a member’s profile page. Examples of unlisted groups include employee-only groups for a company, customer-only groups to handle customer service or new product ideas, and focus groups to share and collaborate on new ideas or discuss potential upcoming products for a company.
Joining a Group
When you look at the LinkedIn groups available, one of the most important things to keep in mind is that you should join only those groups that are relevant. Although you might think it’s fun to join another alumni association group besides your alma mater, it won’t help you in the long run.
That said, if you’re self-employed or in sales, for example, you may consider joining groups that appeal to your customers or prospects, to gain a better perspective on what they need, or to share your expertise with a market that could appreciate and use the knowledge you’ve gained. On an individual level, though, groups are best for networking with colleagues or like-minded individuals to share knowledge and grow from each other’s experience.
Keep in mind that some professional groups have special requirements and you may not be eligible to join due to your particular educational or professional experience.
To seek out a group to join, follow these steps:
In the top navigation bar, click the Work icon and then click the Groups icon in the drop-down list that appears.
Your Groups page appears, as shown in Figure 16-2.

FIGURE 16-2: See the activity of your groups here.
Click the Search link at the bottom of the page to see potential groups you can join.
The search results page appears, as shown in Figure 16-3, filled with groups that may appeal to you.
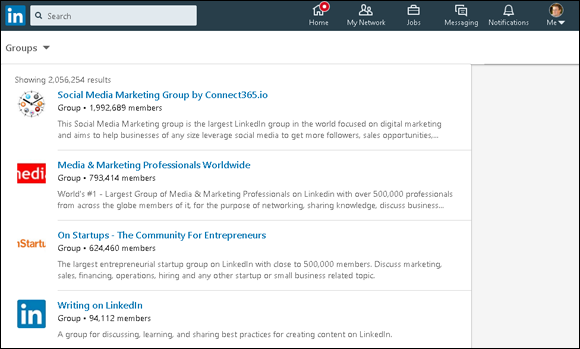
FIGURE 16-3: LinkedIn helps you discover groups to join.
- To find more specific groups to join, conduct a search:
- Enter keywords in the text box at the top of the page. Use keywords that describe the group that interests you. If you’re looking to join a group that deals with social media management, for example, type social media management in the text box.
- Press Enter. The search results list appears, with Groups already selected, as shown in Figure 16-4.
- Click a group in the list, and read the group’s description on the summary page that appears. You can also click the group administrator name to see that person's profile and send a message requesting a few details about the group.
- Click the Request to Join button to join the group. That’s it! Your request is sent to the group manager for approval. A Successfully Sent the Request message appears in the bottom-left corner of your screen, and the button changes to Withdraw Request, as shown in Figure 16-5. As mentioned, your request may not be approved depending on the criteria for that group.
 Another way to look for a new group to join is to click the Group logo in the profile of one of your first-degree connections. Then click the Request to Join button on the page that appears, and you’ve completed your part of the process.
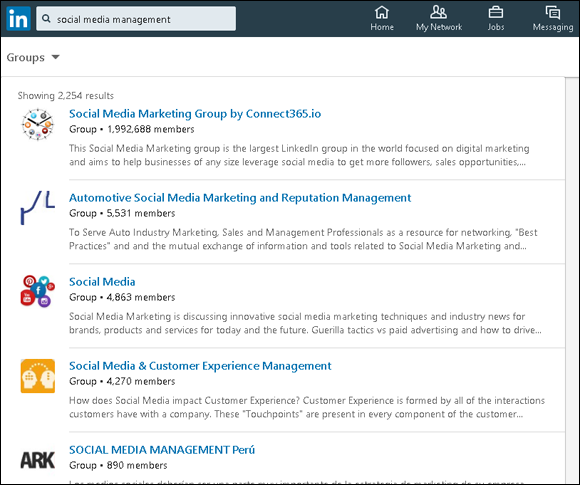
FIGURE 16-4: Review a list of potential groups to join.
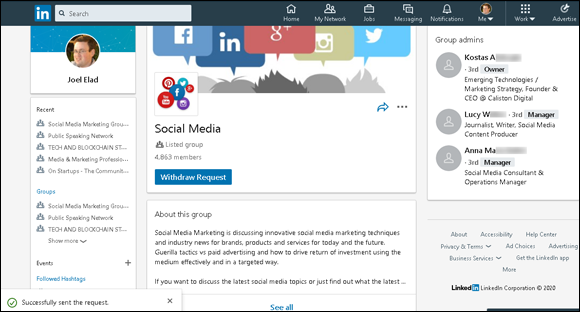
FIGURE 16-5: Your request to join this group is now pending.
Starting and participating in group discussions
The core of LinkedIn groups is to start and maintain conversations among group members that aid in sharing content and job postings, making business or professional connections, finding answers, and establishing industry experts.
As you look at a typical LinkedIn groups conversation, as shown in Figure 16-6, you can choose to interact with each entry in a way similar to what you can do on other social media sites:
- Like the conversation. By clicking the Like link, you signal that you found the post useful. Some group members may assess whether to participate in any given discussion based on the amount of likes that the discussion has received.

FIGURE 16-6: Interact by liking or commenting on the conversation.
- Comment on the conversation. By clicking the Comment link and adding a comment to the discussion thread, you unlock the true power of group conversations by adding your viewpoint, replying to the original point, or replying to another comment. To truly expand the conversation, you can also provide links to other articles or resources in your comment.
- Reply privately to the group member. When you read a conversation or another comment from a fellow group member, you can click the name of the author and send the person a message through LinkedIn. In this way, you can communicate with the group member directly, without the rest of the group viewing your communication. Perhaps you want to offer individualized help or generate a lead.
- Act on the conversation. Click the three dots at the top right of the conversation to display options for interacting with the conversation. Then click the Save link to save this conversation to review later when you’re on LinkedIn. You can also click Copy Link to Post, which copies the direct URL of the group conversation to your clipboard. This way, if you create a post or comment on some other conversation, you can paste the link to bring others into this conversation.
- Report a post or a comment. If you’re interested in keeping the group as spam-free as possible, you can click the three dots at the top of the conversation post or below any individual comment, and then click the Report link to report the post or comment as inappropriate. The group administrator will be notified and can review the item for further action.
After you join a group, start by participating in existing discussions and then decide how you can best contribute with your own posts.
When you are ready to start a conversation, follow these steps:
In the top navigation bar, click the Work icon and then click the Groups icon in the drop-down list that appears.
Your Groups page appears.
Click the name of the group to display that group’s page.
The main page of that group appears, as shown in Figure 16-7.
- Click the Start a Conversation in This Group prompt and begin writing your post in the window that opens, as shown in Figure 16-8.
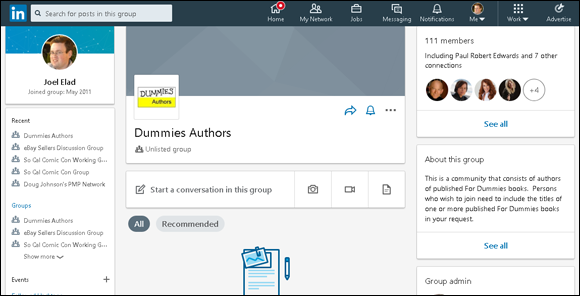
FIGURE 16-7: Start a conversation in your group.
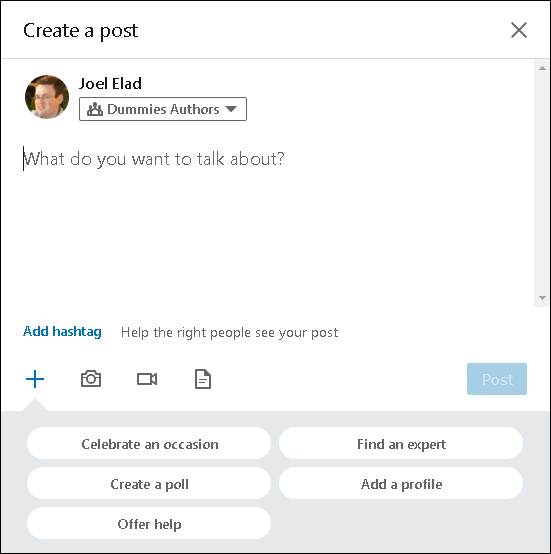
FIGURE 16-8: Create a conversation in your group.
Click “What Do You Want To Talk About?” and write the content of your post.
Start by asking an open-ended question to generate discussion, instead of something generic, such as Here’s a great article I discovered.- If you want to pull someone into the conversation:
- Type the @ symbol and begin typing the person’s name. A list of first-degree connections appears, as shown in Figure 16-9.
- Select the person’s name. He or she will be flagged, regardless of whether the person is already in the group, and will see this conversation and be able to contribute.
To link an article or post to your discussion, enter the URL for that item.
LinkedIn automatically formats the conversation so people will see a summary of that item in the conversation, and can click that summary to see the rest of the article or post.
To add one or more hashtags to your post, click the Add Hashtag link (below the main section of the window) and enter one or more relevant hashtags for your post.
By adding hashtags, you'll help people find your post based on their interest.
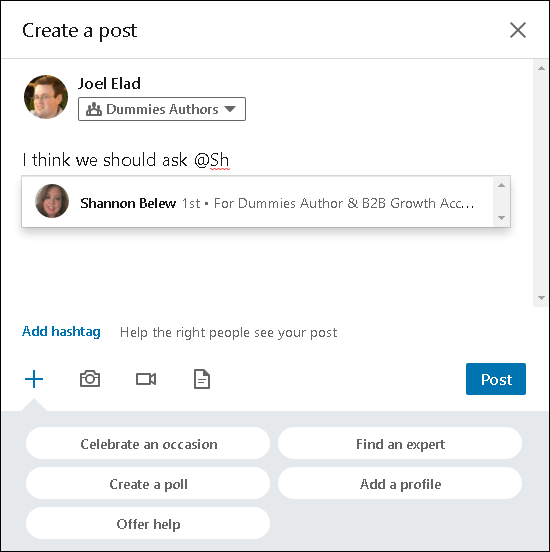
FIGURE 16-9: Tag people to include them in the discussion.
To insert a photo, video, or document, click the icon representing that graphic (in the middle of the window) and select the file from your computer.
 Upload graphics, videos, or documents only if they will add to the discussion or be useful visual content for the conversation.
Enhance your post.
Click one or more of the themed buttons to celebrate an occasion, create a poll, offer help, find an expert, or add a profile. Then follow the prompts. These options can be helpful for entrepreneurs who want to offer help by advertising their capabilities to a larger audience or people who want to gather opinions so they create a poll.
- Click the blue Post button to start the conversation in the group.
Your newly created post will appear at the top of the Conversations feed for the group. Other group members can then click the Like button below the conversation or click the Comment link and participate in the discussion, similar to other social media sites.
Although all conversations are automatically posted, group administrators retain the power to remove any post they consider spam, offensive, or counterproductive to the purpose of the group. Additionally, if a group member reports a post, it is temporarily hidden while the group administrator reviews the report to see whether that post should be removed.
Viewing a group’s membership list
After you join a group, you’ll probably want to see who’s in the group and find out whether or how the group members are connected to you. After all, the point of these groups is to stay in touch with like-minded individuals and perhaps invite them to become part of your network.
To view a group’s membership, go to the group’s home page and click the See All link below the count of the number of members in the group. (The link is on the top-right side of the screen.) The Members screen shown in Figure 16-10 appears. Then click an individual member’s name to go to his or her profile page and find out whether you share any connections.
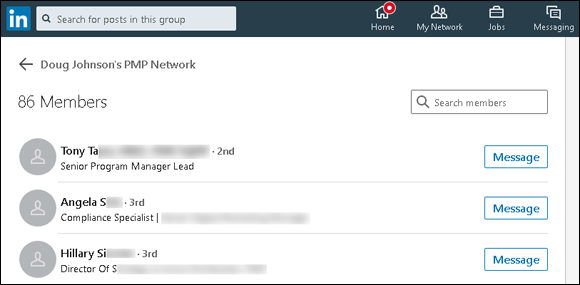
FIGURE 16-10: See your group membership list in one place.
Member aren't automatically sorted by last name or degrees of connection, so use the Search box to the right of the member count to find particular people in the list.
Click the Message button to the right of a member's name to send a LinkedIn message directly to that group member. As mentioned, LinkedIn doesn't want its members to abuse this feature, so you're limited to 15 of these messages per month for all the groups where you're either a member or an administrator.
Creating a Group
When you’re ready to create your own group, follow these steps:
In the top navigation bar, click the Work icon and then click the Groups icon in the drop-down list that appears.
Your Groups page appear.
On the right side, click the Create Group button.
The group creation window pops up, as shown in Figure 16-11. This is where you input the information about your newly requested group.

FIGURE 16-11: Enter your new group information here.
(Optional) Upload a cover photo for your group by clicking the Edit icon (pencil) in the top right of the window, locating the photo on your computer, and clicking Open.
Many social media sites encourage the use of a larger cover photo above the group logo.
Upload the logo for your group by clicking the Edit icon (pencil) next to the logo box, locating the file on your computer, and clicking Open.
LinkedIn requires a logo. The file format must be PNG, JPEG, or GIF, and the logo can't exceed 100K.
“But where do I get a logo?” you might ask. Well, you can design your own logo at sites such as www.logoworks.com. If a logo already exists, such as one for an alumni association, ask one of the administrators for a high-resolution copy of the logo, or save a copy of the logo from the group’s personal website — as long as you know you have the rights to use that image, of course. If you’re not sure whether you have the right to use the image, check with the group’s administrator.Provide your group information and settings.
The group name and description are required, so input those values in their respective text boxes. You have 100 characters for the group name and 2,000 characters for the group description, so choose your words wisely.
Scroll down the window and assign the visibility of the group to either Listed or Unlisted. You can also assign lots of other optional fields, such as Industry, Location, and group rules for members to follow, as shown in Figure 16-12 and described in the next section.
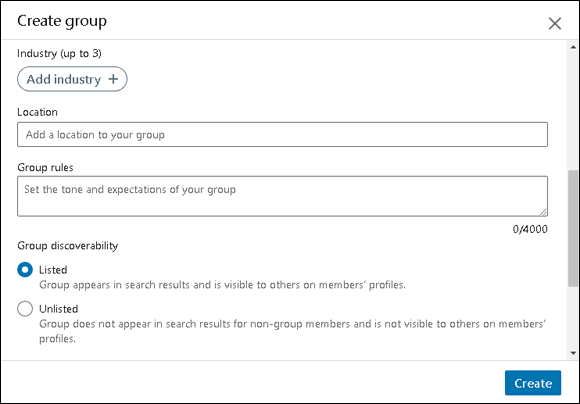
FIGURE 16-12: Your group request is ready to be submitted.
Click the Create button to create your group on LinkedIn.
The newly created home page for your group appears, as shown in Figure 16-13. Your new group is ready for members!

FIGURE 16-13: Your group has been created.
Setting Up the Group and Inviting Members
After you create your group, your next step is to set up the group properly and invite members to be a part of this group. In some cases, LinkedIn may prompt you to add people the moment you click the Create button, but you can take this step at any point after the group is created.
First, review the group details and consider defining rules and automated messages to help run your group more smoothly. You should do this before you send out any invitations or before members start using the group regularly basis. You can configure your group by going to the left menu on your Groups screen and clicking the Edit Group link below the Manage Group link:
- Group name, logo, and description: Update the group name, logo, and description, information you provided when you created your group.
- Group industry and location: Update the industry (or industries) best associated with your group, as well as the physical location of your group.
- Group rules: Every LinkedIn Group is allowed to write its own rules, which can be recommended rules for conduct, or any specific instructions or guidelines you want to offer your group members (what is acceptable and not acceptable in terms of content, how you will handle abuse or inappropriate comments, and so on).
- Group discoverability: Change your group from Listed (the group shows up in group searches) to Unlisted (the group is hidden from all public views) or vice versa.
- Group permissions: Decide whether members are allowed to invite their connections to the group (admins still retain the right to approve all requests to join the group) and whether new posts need to be reviewed by group admins before they can be displayed on the Group discussions page.
Building and managing your member list
When you’re ready to build your list of members, just follow these steps:
In the top navigation bar, click the Work icon and then click Groups in the drop-down list that appears.
A list of groups you belong to appears.
- When you see the name and logo of the group you’re maintaining, click that group name.
- To send automated invitations to your group:
- Click the Invite Connections button in the top-right corner.
- In the Invite Connections box, start typing the name of a first-degree connection.
- In the list that LinkedIn provides, click the check box next to a name to select it. You can select multiple names, as shown in Figure 16-14.
- Click the blue Invite x button at the bottom right of the window to complete this process.
To display your manage group page, click the Manage group link on the top left of the screen, under the Group owner photo and statistics.
A screen similar to the one in Figure 16-15 appears. The manage group page is your hub for group management duties.
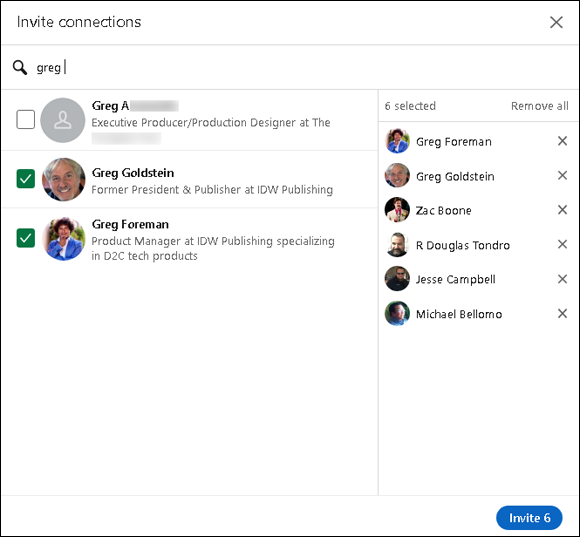
FIGURE 16-14: Invite new people to your LinkedIn group here.
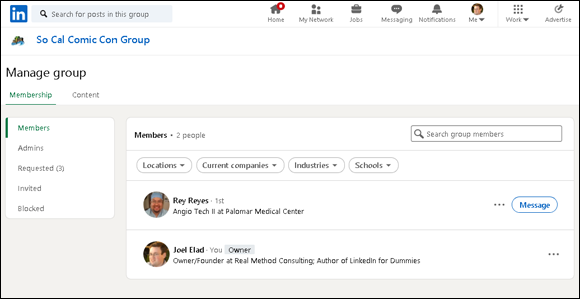
FIGURE 16-15: Manage your LinkedIn group from this page.
Crafting your invitation email
LinkedIn allows you to invite connections to your group. However, if you want your invitation to come with more information, you can send your own invitation from your own email program. Here are a few do’s and don’ts to keep in mind as you craft your invitation:
- Do relate the purpose and benefits of the group. People are busy and need to understand why they should join this group. Explain the benefits of being connected to other people, the ability for professional development or advancement, and what you hope to accomplish with this group. Remember, you’re sending this to LinkedIn members, so don’t worry about explaining LinkedIn; just explain your group.
- Don’t go on forever. Make your invitation no more than one or two paragraphs. Introduce yourself, introduce the group name, tell people the benefits of joining, encourage them to join, include the link to the group page, and then sign off. No one will read a long diatribe or laundry list of reasons to join. Use bullet points and short sentences whenever possible.
- Don’t put other offers in the email. Some people use the group invitation as an opportunity not only to encourage folks to join one group but also to push a second group invitation or highlight a link to the group’s non-LinkedIn website. The moment you start presenting multiple options for people, you lose their attention and they are less likely to sign up.
In your email, provide a direct link to your group home page. Simply bring up the page on your computer screen and then copy the URL from the location bar in your web browser. Typically, the URL will look like this: www.linkedin.com/groups/idnumber, where idnumber is the numerical ID for your group that LinkedIn created.
As members respond to your invitation, they’re moved from the Invited list to the current list of your group, and a small group logo appears in their profiles.
Approving members to your group
As more and more people find out about your new group and as members start joining, you may find that some of the people who have clicked the link to join aren’t on your Invited list. Perhaps you didn’t realize that they were on LinkedIn or maybe they clicked the wrong link and don’t belong in your group.
It can be helpful, from an administrative standpoint, to develop criteria or guidelines for people to join your group, so you can evaluate each request as it comes in. Consider talking to any governing members of your group (in case you are just the LinkedIn group administrator, but not the actual day-to-day person in charge of the organization) to develop criteria for joining the LinkedIn group in the early days of establishing it, so you don’t have to worry about this later on when things get busy.
Regardless, you need to either approve or reject people’s membership requests. Follow these steps:
From the top navigation bar, click the Work icon, and then click Groups in the drop-down list that appears.
The list of groups you belong to appears.
Scroll down (if necessary) until you see the name and logo of the group you’re maintaining, and click that group name.
The home page for your group appears.
- Click the Manage group link in the top-left corner to display your Manage page.
Click the Requested link below the Membership header.
A list of the people waiting to be approved for your group appears, as shown in Figure 16-16.

FIGURE 16-16: See who is waiting to be approved to your LinkedIn Group.
To find more information about a person before accepting or denying membership, click the person’s name to display his or her profile.
In addition to reading the profile, you can also send the person a message through the profile page.
To accept someone, deny someone, or send a message:
- To approve membership, click the Approve button.
- To refuse membership, click the Deny button.
- To permanently block someone from trying to join, click the 3 dots and then click the Block from Group link.
- To send someone a message, click the 3 dots next to the Deny button, and then click the Message link.
When you click Approve or Deny, the user’s name disappears from the page.
You can approve or deny more than one person at a time by simply selecting the check boxes next to their names first. To select everyone, click the Select X-Y check box at the top of the list.
You can remove someone from the group at any time after you initially approve that person, by going to the Members page and clicking the Remove link to the right of the person’s name in the Members list.
If you’re going to decline someone, you may want to send a Message first and let him know why you’re denying his request. After you deny that person, the only way you can send him a message is through the InMail system.