

4
Robot Heist: Creating Rules and Obstacles
In this chapter, you’ll build the Robot Heist game from the ground up. You’ll make two robot objects that the player will use to navigate each level. You’ll also create the backdrop and other objects, such as crates, guns, and panels. You’ll use PuzzleScript rules to make these objects interact with one another in interesting ways.
Recall from Chapter 2 that the RULES section in your code is where you write instructions to change one set of objects into another.
How Robot Heist Works
In Robot Heist, two robots work together to rob a Data Bank. Each robot has different capabilities, so the player needs to switch between them to solve puzzles. There are security robots and lasers to avoid, and a treasure to steal. You’ll find the game at http://tinyurl.com/robotheist/. This is what the game looks like.

Example level in Robot Heist
The game begins with only one robot named Vertibot because we want the player to learn the basics before introducing a second robot. Vertibot can push objects vertically (up and down). Later in the game, the player meets another robot named Horibot that can push objects horizontally (left and right). To take advantage of their different pushing capabilities, the player must make Vertibot and Horibot work together to solve the game’s puzzles.
Brainstorming Objects and Interactions
Before I started working on my Robot Heist game, I thought carefully about what objects I wanted in the game. I didn’t just want objects that were cool: I wanted objects that worked together in intriguing ways. Choosing your game’s objects is like casting a play, and a play in which none of the characters talk to each other would be very boring.
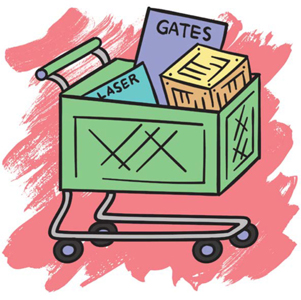
The objects I came up with were the robots (the player characters), crates to push, gates to open and close, security lasers, and patrolling guard robots. Each of these objects interacts with the others in the following ways:
Robots (the player) Robots can push crates and open gates. They need to avoid lasers and guards.
Crates Robots can push crates to block lasers or hold gates open. Crates can also block guards, so robots can put them in a guard’s path to confuse them.
Gates Robots and guards can open and close gates. Crates can be used to keep gates open. Gates block lasers when they’re closed but let lasers through when they’re open.
Lasers A laser will catch the robots if one of them tries to cross it, but robots can block a laser with a crate or a gate. Guards can block lasers as well, so the robots can sometimes sneak past while a guard is blocking the laser.
Guards Guards can open and close gates or block lasers. Guards can catch robots, so robots should avoid them. Robots can use crates to block the guards’ paths.
This is my cast of characters! Because I can make them all interact with each other, I should be able to make a lot of fun levels.
Getting Started
PuzzleScript remembers the last 20 versions you’ve saved, but it’ll forget any versions after that. You can click the Load menu at the top of the window to see your saved versions.
Before you start a new project, be sure to make a copy of the previous one! The easiest way to do this is to click Share as if you were sharing your game and keep a copy of the link. When you click the link, you should see the hack button that lets you access your game’s code again.
NOTE: You could also copy all the code and email it to yourself. Click the Export button to create an HTML copy of your game. To find the game code in your HTML file, open it using a plain text editor. The text between “sourceCode=” and “;compile” is your game code! Copy and paste the unformatted code into a free formatting tool like https://www.freeformatter.com/javascript-escape.html and then click UNESCAPE. You should now see the complete code of your game.
After you’ve backed up your old project, you can start the new one. Click Load Example▸Blank Project to start a new game from scratch.
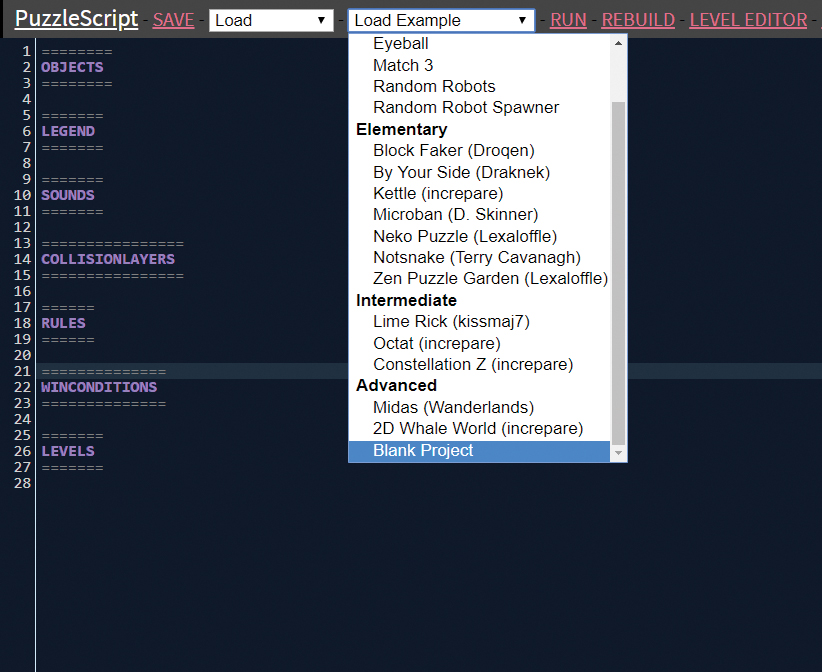
Creating a new project
Give your new game a title and an author. You can add these at the beginning of your code, like this:
title Robot Heist
author anna anthropy
Keep in mind that the title and author should go before your code’s OBJECTS section. Now that you’ve labeled your new game, you’re ready to start adding objects to the game.
Creating Objects
Objects are a very important part of your code because they outline all the items that make up your game. Whenever you add a new element to your game, you’ll follow these steps to create an object for it in your code’s OBJECTS section.
- Add an object to the OBJECTS section, giving it a name and appearance.
- Add the object to the LEGEND section so it appears in the level editor.
- Add the object to the COLLISIONLAYERS section. PuzzleScript won’t run if there are objects that don’t have a collision layer, because it won’t know what to do if they touch another object.
- Write the rules that tell PuzzleScript what the object should do.
To start, let’s add the most basic objects we need: a background and some sort of solid wall.
=======
OBJECTS
=======
Background
Green
Wall
LightGreen DarkGreen
00001
00001
00001
00001
11111
Your background and wall can look like these, or you can use your own colors. Keep in mind that if you give an object just a color but no numbered pixels, the object will just look like a solid square of that color. For example, in the example level shown at the beginning of this chapter, I made the background Green without including numbered pixels, which means it will be a solid green. But I list two colors for the wall: LightGreen and DarkGreen. Then I use a grid of numbers below that to specify that the outer pixels will be in dark green to make a border around the light green interior.
Before we can use these objects, we need to add them to the LEGEND section.
Creating the Legend
Adding an object to the legend makes it appear in the level editor so we can draw with it. Let’s add the background and wall to the LEGEND section and assign a symbol to each, as shown here:
=======
LEGEND
=======
. = Background
# = Wall
Not all objects need to be in the legend. For example, some objects never appear at the very start of a level, so we don’t need them in the level editor. We’ll make some objects like that soon.
Now add your new objects to the COLLISIONLAYERS section:
================
COLLISIONLAYERS
================
Background
Wall
Keep in mind that objects collide with each other only if they’re on the same collision layer. Because the background and wall objects are on different layers (each on its own line of code), they can share the same space without colliding. This allows the wall to sit on top of a background tile, which acts as the floor.
We don’t need to add any rules for these objects, because we don’t need them to do anything but display on the screen. Any other solid object we add from this point forward will need to be on the same collision layer as the wall because the walls should be able to block other objects from moving through them.
Now that we have our basic building blocks, we can run our game, right? Not so fast! PuzzleScript won’t let you run a game unless it has a player object. Let’s figure out how our two player robots are going to work!
Player Swapping
Think about what we need the player objects to do. We want two robots that are onscreen at the same time, but the player can control only one at a time. The player can switch between the two robots at any time.

One way to think about this scenario is that only one robot is awake at any given time while the other one is asleep. (Just like the cats in Herding Cats!) When the player presses the action key, the sleeping robot wakes up and the awake robot goes to sleep.
We can program the action key (either X or the spacebar) to do whatever we want, and the player can press it during the game. In our game, we’ll use the action key to allow the player to switch between robots. This means we need four objects in total to pull off this wacky scheme. Because we have two different robots, each needs two possible states: awake or asleep.
Our robots will also need something to push around, so let’s make a crate object while we’re creating the four robot objects. Add the four robot objects and the crate object to your game, using the following code.
Vertibot
blue pink
.000.
.101.
.000.
.111.
.000.

VertibotSleeping
blue gray
.000.
.101.
.000.
.111.
.000.

Horibot
orange blue
.....
01010
00000
01110
.....

HoribotSleeping
orange gray
.....
01010
00000
01110
.....

Crate
yellow brown
00000
01110
01110
01110
00000
As you can see, I drew the Vertibot to look tall and thin and the Horibot to look short and stout to make it easy to tell them apart. I made the sleeping version of each robot look different from the awake version by making the sleeping robots gray. The player should be able to tell just by looking at the colors which robot is awake and which is asleep. The crate is a square object that has a yellow border around its brown interior.
Updating the Legend
Now we need to put our new objects in the legend so we can use them in our levels. I picked the letter I for Vertibots because it’s tall and vertical and an H for Horibot. Let’s update the LEGEND section, as shown here:
=======
LEGEND
=======
. = Background
# = Wall
I = Vertibot
H = HoribotSleeping
* = Crate
Any objects we add to the legend should now appear in the level editor. You might notice that we only added two robot objects to the legend: the awake Vertibot and the asleep Horibot. The reason is that what we’re drawing in the level editor is the starting position for each level. In other words, we’re designing the way the level looks at the very beginning of play. Whenever a level begins, one robot should be awake and the other asleep. For consistency, I decided that at the start of each level, Vertibot will always be the robot that’s awake and Horibot will always be asleep.
PuzzleScript won’t let us run our game until we have a player object. Without it, PuzzleScript won’t know which of the two objects to move when the player presses the keys. Fortunately, the legend lets us define groups. You can use a group to contain multiple objects, which you can then refer to by the same name. For example, we can create a group called Player and add both robots to it by adding the following code to the LEGEND section:
Player = Vertibot or Horibot
By writing Vertibot or Horibot, we specify that only one of the awake versions of the robots counts as a player. Because VertibotSleeping and HoribotSleeping don’t count as players, they won’t move when the player runs the game.
PuzzleScript lets you have as many players onscreen as you like at the same time. But in our game, the two robots won’t ever be awake at the same time. Whichever one is awake will act as the player and move when the player presses the arrow keys.
Updating the Collision Layers
Because PuzzleScript won’t run if an object doesn’t have a collision layer, we need to put all our newly added objects into the COLLISIONLAYERS section. We want the robots to bump into walls and to be able to push crates around, so we should make sure the robots, crates, and walls are all on the same collision layer, as shown here:
================
COLLISIONLAYERS
================
Background
Wall, Vertibot, VertibotSleeping, Horibot, HoribotSleeping, Crate
Right now, the only object that should be on a separate collision layer is the background, which is on its own line of code. Save your game, and click Rebuild to make sure everything in your game works. If it does, a Successful Compilation message should appear under the game window.
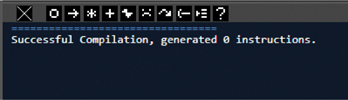
Successful Compilation message
If something is wrong with the code, such as if any of the objects are not in the COLLISIONLAYERS section or if you forgot to add a player to the LEGEND section, you might see a bright red error message pop up that looks like this.

Compilation Error message
We’re done updating the COLLISIONLAYERS section, so let’s create an action key that allows the player to switch between robots.
Writing Rules to Switch Characters
As mentioned earlier, we can program an action key to do whatever we want it to. Pressing either the X key or spacebar triggers action in PuzzleScript. The player can use whichever one they’re more comfortable with. While the player uses the arrow keys to move around, they can use the action key to jump, pull a switch, put on a hat, or do whatever the rules say happens when the player presses the action key.
In our game, the action key will switch between characters by waking up one robot and putting the other to sleep. Keep in mind that the action key won’t do anything until we write rules telling PuzzleScript what it should do. So let’s add the following rules in the RULES section:
======
RULES
======
(switching characters)
[action Horibot] [ VertibotSleeping ] -> [ HoribotSleeping ] [ Vertibot ]
[action Vertibot] [ HoribotSleeping ] -> [ VertibotSleeping ] [ Horibot ]
PuzzleScript ignores anything in parentheses, so (switching characters) is just a note to me to help me remember what this part of the code does when I look at it later.
The two lines of code below the note check to see when the player presses the action key and then switches each robot to its sleeping and awake state. In PuzzleScript, the action key is based on a condition, just like movement. For example, if > Horibot represents a moving Horibot, action Horibot represents a Horibot that’s doing the action.
If the awake Horibot has the action condition, it becomes HoribotSleeping, and VertibotSleeping becomes Vertibot, the awake version. And if Vertibot is the one doing the action, then it goes to sleep and the sleeping Horibot wakes up.
Note that because the characters are enclosed in separate square brackets, they don’t need to be next to each other for the switching rule to work. In PuzzleScript rules, we use sets of brackets to group objects together. A series of objects in the same set of brackets, divided by a vertical bar, indicates objects that are next to each other on the level’s grid (for example, [ Vertibot | HoribotSleeping ]). If we put the two objects together without the vertical bar, it means the two objects are sharing the same space (for example, [ Vertibot Background ]). We’ll talk more about this format shortly!
If we put one object in its own set of brackets and one in another set of brackets, that just means two objects are in two different grid spaces (for example, [ Vertibot ] [ HoribotSleeping ]). They could be next to each other, or they could be across the level from each other. All PuzzleScript checks for is that they’re on the same level at the same time.
But because both characters are listed in each rule, they both need to be in the same level for the switch to work. This automatically means that if only one character is in the level, the program will ignore these rules. That’s perfect if we want to design levels with only one of the characters, like we do in this case!
Note that even if the objects are in different places, there need to be as many objects on the left side of the rule as on the right side. If you entered [ Vertibot ] [ HoribotSleeping ] -> [ VertibotSleeping ], PuzzleScript would give you an error message. It wouldn’t know what to do with HoribotSleeping!
Let’s take a moment to make sure the rules we wrote are working.
Building a Test Level
To test our rules, we’ll create a quick test level to make sure everything in the game works so far. Enter this text in the LEVELS section:
======
LEVELS
======
#########
#.......#
#.I...H.#
#.......#
#...*...#
#.......#
#########
This level includes all the objects we’ve added so far. Recall from the legend that the I and H are the robots, the * is a crate, the # is the wall, and the . is the background. Click Save and then click Run. Now when you start the game, you should see something like this.

Test level
This level doesn’t look as pretty as it will in the finished game, but for now we just want to make sure the basics work. Try pressing the arrow keys to move the characters around and X or the spacebar to switch between them. Move one character around, switch to the other, move that character around, and then switch back. The robots shouldn’t be able to move through the walls or the crate because they’re on the same collision layer.
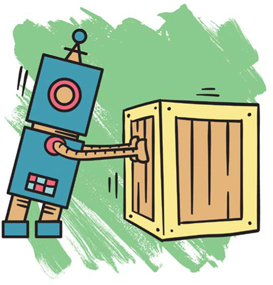
But we don’t want the crate to simply stop the robots. We want the robots to be able to push the crate around! Let’s add a few rules to make that happen.
Adding Pushing Rules
Here are some rules that let both robots push crates:
(pushing)
horizontal [ > Horibot | Crate ] -> [ > Horibot | > Crate ]
vertical [ > Vertibot | Crate ] -> [ > Vertibot | > Crate ]
This rule is similar to the one we saw in the demo game in Chapter 1 except this one includes horizontal and vertical. A PuzzleScript rule is applied in four different directions. We can specify which direction to apply a rule by giving PuzzleScript a specific direction, like left or right or down. In this case, horizontal means left and right, and vertical means up and down. This rule tells the program that a moving Horibot can only move a crate left and right, and a moving Vertibot can only move a crate up and down.
Click Save and then click Rebuild. Try pushing the crate around. Each robot should be able to push the crate in two directions: left and right horizontally or up and down vertically.
Making Groups of Pushable Objects
Now our robots can push crates, but what if the awake robot could push around the robot that’s asleep? This would create even more chances for teamwork and would cut down on traffic jams. For example, if the sleeping robot is in the way of the awake robot, instead of having to switch to the sleeping robot to move it, the player could just push it out of the way.
In the legend, we used a group to tell PuzzleScript that both Vertibot and Horibot count as players. Similarly, we can update the legend to say that crates and sleeping robots count as pushable objects. Note that the pushable group is a group we’re making up. The word “pushable” doesn’t mean anything to PuzzleScript until we tell it what it means. After we define a pushable group, we can write rules telling the robots to push pushables in general instead of just crates.
Add this line to the LEGEND section to tell PuzzleScript that crates and sleeping robots all count as pushables.
Pushable = Crate or VertibotSleeping or HoribotSleeping
Now when we write a rule using the word Pushable, we tell PuzzleScript to check for any of those three objects. Let’s go back and change the pushing rules we wrote earlier so they check for pushables instead of crates. Replace all instances of Crate with Pushable so the code looks like this:
(pushing)
horizontal [ > Horibot | Pushable ] -> [ > Horibot | > Pushable ]
vertical [ > Vertibot | Pushable ] -> [ > Vertibot | > Pushable ]
A robot that is moving toward an object can now push that object if it’s defined as Pushable, which includes crates and the robot’s sleeping partner. Click Rebuild and try it out. Of course, Horibot should only be able to push a sleeping Vertibot horizontally, and Vertibot should only be able to push a sleeping Horibot vertically.
Allowing Characters to Push Multiple Objects
What happens when you try pushing the crate into a sleeping robot or a sleeping robot into the crate? It stops, and you can’t push it any farther. As they are now, the rules only allow a character to push a single pushable at a time. But the ability to push in one direction or the other is each robot’s only superpower. So they should be able to push as many objects as they want, as long as it’s in the right direction.
To allow robots to push multiple objects at a time, add this line of code to the RULES section, under the pushing rules we already have:
(pushing)
horizontal [ > Horibot | Pushable ] -> [ > Horibot | > Pushable ]
vertical [ > Vertibot | Pushable ] -> [ > Vertibot | > Pushable ]
[ > Pushable | Pushable ] -> [ > Pushable | > Pushable ]
Note that this rule isn’t directional because Vertibot and Horibot already have rules telling them which directions they can push. Remember that PuzzleScript runs rules in order from top to bottom, and we want this new rule to happen after pushing starts. The rule checks whether one pushable is being pushed into another, and if it is, the rule tells the second pushable to move in the same direction. And because PuzzleScript can run each rule as many times as possible, if the second pushable is pushed into a third, that third one will also move in the same direction, and so on. Now our robots can push as many objects as they want, as long as there’s room.
Creating Win Conditions
How does the player win a Robot Heist level and go on to the next one? We can specify this by defining our win condition. In our game, a player satisfies the win condition, or completes a level, when both characters make it to the exit, which is a physical location in the level.
To add this condition to Robot Heist, we first need to make a new Exit object, as shown here.
Crate
yellow brown
00000
01110
01110
01110
00000
.....

Exit
white black
01010
10101
01010
10101
01010
When the robots are on the exit, the level is finished! I made my exit look like a black-and-white checkered flag.
Add the Exit object to your LEGEND section, like this:
=======
LEGEND
=======
. = Background
# = Wall
I = Vertibot
H = HoribotSleeping
* = Crate
X = Exit
Player = Vertibot or Horibot
Pushable = Crate or VertibotSleeping or HoribotSleeping
Of course, I used X for Exit.
Adding Exit to a Collision Layer
As with every object we add to a game, we need to assign Exit to a collision layer. But we’ll put it on a different collision layer than the robots because we want them to be able to stand on top of the exit. You can think of the exit as a checkered pattern painted on the ground at the end of a racetrack. Update the COLLISIONLAYERS section like this:
================
COLLISIONLAYERS
================
Background
Exit
Wall, Vertibot, VertibotSleeping, Horibot, HoribotSleeping, Crate
The placement of Exit gives it its own layer, which means the other objects won’t be able to collide with it. In fact, the higher up an object is in the COLLISIONLAYERS section’s list, the farther back it will be drawn in the game. For example, the background layer in the game is all the way in the back. The exit layer is in front of the background layer, and the solid objects (robots and crates) layer is in front of the exit layer.
Now we’re ready to write the win condition. It should state that both robots need to be on the Exit object to win the level. We could try something like this:
==============
WINCONDITIONS
==============
all Vertibot on Exit
all HoribotSleeping on Exit
But this condition will work only if Vertibot is awake and Horibot is asleep. What if the opposite is true? Or what if only one of the robots is in the level? We need code that’s a little more versatile.
Creating the Buddy Group for the Win Condition
Fortunately, we can use groups for the win condition too. Just like we made a pushable group to turn crates and sleeping robots into pushable objects, we can make a new group to make robots count as the same thing, whether they’re sleeping or awake. Let’s update the legend by adding the following line:
Player = Horibot or Vertibot
Pushable = Crate or HoribotSleeping or VertibotSleeping
Buddy = Player or HoribotSleeping or VertibotSleeping
Note that because Player already includes Horibot and Vertibot, we can just use Player to create a new group called Buddy that includes both robots. Now, whenever we refer to a Buddy, we’re referring to any robot in either state, asleep or awake.
Let’s update our WINCONDITIONS section using Buddy:
==============
WINCONDITIONS
==============
all Buddy on Exit
The code all Buddy refers to all Buddy objects currently in the level. If there’s only one robot in a level, all Buddy means just that one robot. If both robots are in the level, all Buddy means both of them. Because sleeping and awake robots count as Buddy objects, it doesn’t matter what state they’re in. As long as all the Buddy objects in the current level are on an Exit object, the win condition is satisfied.
One more thing! To make sure that both robots can fit on the exit, each level needs to have at least two Exit spaces. Add two Exit spaces to your level, as shown here:
======
LEVELS
======
#########
#.......#
#.I...H.#
#.......#
#...*...#
#X.....X#
#########
You can either add two Xs to your LEVELS section code, or you could add the Exit spaces using the level editor (see Chapter 3 to review how to do this). Here’s what the updated level should like:
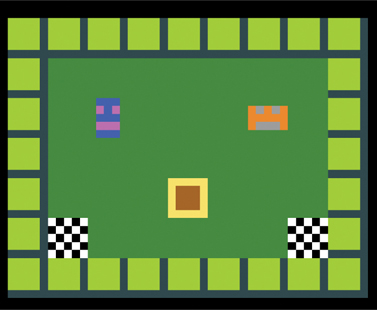
Creating exits for each robot
Now that we’ve created Exit objects and defined our win condition, let’s make our game even more fun to play by creating gates that open and close.
Making Gates That Open and Close
We decided that creating gates that open and close would help foster teamwork between the two robots. Because these gates can open only when a robot is holding them open, one robot must hold the gate open while the other goes through.
Gates are a great idea for our game, but how do they actually work? To keep the idea simple, you can think of a gate as a type of wall that can be turned on and off. When it’s on, it’s in the same collision layer as the robots and other solid objects, acting like a wall. But when it’s off, it’s on another collision layer, so the robots can walk over it. In its off state, the gate acts more like a floor.
We also need some sort of trigger, or switch, for the gate opening and closing. Have you ever seen a movie where someone steps on a hidden panel in the floor, and then a secret passage opens or a bunch of poison darts fly out of the wall? We’ll use this idea to make our trigger a switch panel that robots can step on to open gates. This is a good solution because it means that other solid objects, like crates and guards, can also activate these switches. When the game finds a solid object on top of a panel, the gates will be in floor mode. If there’s no object on a switch panel, the gates will be in wall mode.

Creating the Gate Objects
We’ve identified three different objects we need to make our gates work. Similar to how we have two versions of each robot (asleep and awake), we need two versions of our gate: open and closed. We’ll put the closed version on the same collision layer as the robots. The open version will be on a different collision layer. The third object we need is the trigger panel that opens the gates.
Let’s start by adding these objects to our game and describing what they look like.
GateClosed
blue darkblue
00001
00001
00001
00001
11111

GateOpen
darkblue black
00001
00001
00001
00001
11111

Panel
blue
00000
0...0
0...0
0...0
00000
Creating gates and panel objects
When objects work together in some way, like the panel and the gate, it’s a good idea to make them look similar. This helps the player make the connection between the two objects. Here, I made GateClosed and Panel in the same color so they match. I also made GateOpen blue but in a darker shade so it’s similar to the background. This will let the player know they can pass over it.
Adding the Gates to the Legend and the Collision Layers
Now we need to add these objects to the legend so we can use them in the level editor. I chose the letter T (T) for the gate because it looks kind of like a fence and a forward slash (/) for the panel because it looks like a lever you might pull.
T = GateClosed
/ = Panel
We don’t need a symbol for an open gate because the gates will start out closed, and we’re only defining the start of each level.
Finally, we need to add our new objects to the COLLISIONLAYERS section. Update the COLLISIONLAYERS section by adding the highlighted objects, like this:
Background
Exit, Panel, GateOpen
Wall, Vertibot, VertibotSleeping, Horibot, HoribotSleeping,
Crate, GateClosed
Because we want the robots to be able to step on or walk through the panel and any open gates, they’re in a different layer than the robots. But we want the robots to collide with closed gates, so GateClosed is in the same layer as the robots. Keep in mind that the closer a collision layer is to the top of the list, the farther back it is. This is why we need to make sure that the objects the robots can step on appear above the robots in code, not below.
Writing Rules for Gates
Now we can write the rules that tell our panels and gates what to do. So how do our gates work?
- Solid object on a panel means gates are open
- No solid object on any panels means gates are closed
Which solid objects can activate a panel? The robots, definitely, and crates, so robots can use them to keep gates open. It’d be fun to have guards operate panels, too. It sounds like we need a new group to contain all the objects that can activate a panel. Let’s define a new group called Depressor by adding the following to the legend (I’ve called the group “Depressor” because these objects can depress a panel in the floor, not because they’re depressing):
Depressor = Player or Pushable
Again, I use two groups I’ve already defined to name all the objects I want to include in the Depressor group. The first is Player, which includes the awake versions of both robots, and the second is Pushable, which includes the sleeping versions of both robots, plus crates. This is handy because if I ever introduce another pushable object, I only need to update the Pushable group. Because the Pushable group is in the Depressor group, it will get updated automatically!

Now let’s translate our ideas into rules PuzzleScript can understand by adding the following code:
(gates)
late [ Panel no Depressor ] [ GateOpen ] -> [ Panel no
Depressor ] [ GateClosed ]
late [ Panel Depressor ] [ GateClosed ] -> [ Panel Depressor ]
[ GateOpen ]
The first rule states that when there’s no depressor on a panel, open gates should change to closed gates. The second rule states that when there is a depressor on a panel, closed gates should change to opened gates.
Recall how we check for two objects next to each other. For example, in [ SleepingCat | WakerUpper ] the vertical bar indicates that the two objects are in two different spaces but right next to each other. So if we don’t use a line to separate two objects, that would mean that they’re in the same space. So [Panel Depressor] means that the space contains a panel and a depressor stepping on that panel. Similarly, [Panel no Depressor] means that there’s a panel in a space with no depressor on top of it. Naturally, two objects can share the same space only if they’re on different collision layers, which is why we put the panels and the depressors on different collision layers in the previous section.
When we put two separate, bracketed items next to each other, like [Panel Depressor] and [GateClosed], it means we’re looking for both states occurring at the same time anywhere in the level but not necessarily next to each other. So [Panel Depressor] [GateClosed] checks for instances where there’s a depressor on a panel anywhere and a closed gate anywhere. If that condition is met, we transform the closed gate into an open one.
The full rule is late [ Panel Depressor ] [ GateClosed ] -> [ Panel Depressor ] [ GateOpen ]. Notice that on the right side of the arrow, GateClosed has changed to GateOpen, but the panel and the depressor haven’t changed. We don’t want them to change, so to indicate that to PuzzleScript, we write them in the same way on both sides of the arrow.
Also, notice that both rules are late. You learned in Chapter 3 that late rules happen after movement, not before. Because we want gates to open after a robot has stepped onto a panel, we run this rule late.
Testing the Gates
Let’s build a new test level to make sure our gates and panels work the way we want. I drew a level with both robots, a long gate, a panel, and a crate for the robots to push onto the panel, as shown here:
###########
#.......T.#
#.i.....T.#
#.......T.#
#...*...T.#
#.......T.#
#.h.../.T.#
#.......T.#
###########
You can either type this in to the LEVELS section manually, or you can use the level editor. (Press E to switch into editing mode, and then click the S button in the corner to see a text version of your level.)
Now playtest your level. Playtesting is about trying as many features as possible in the game to make sure they work. Try to do as many actions as you can think of to see how the code handles different scenarios. Imagine you’re a detective, carefully trying to find the hidden bugs. There’s one in the game right now. Can you find it?
To find the bug, have one robot stand on the panel and hold the gate open. Next, move the other robot on top of an open gate.

Holding a gate open
Then have both robots stand right on top of the open gate. Finally, switch back to the first robot and have them step off the panel. What happens?
Boosh! The robot disappears forever because the closed gate object is on the same collision layer as the character object. Two objects on the same collision layer can’t share the same space, so when the open gate becomes a closed gate, the robot disappears.

Finding the bug
To fix this bug, we need to tell PuzzleScript to do something normally except in a specific case. In this case, we want the GateOpen to become a GateClosed except when there’s already a depressor on top of it. In other words, when a depressor is on top of an open gate, the gate should not close to prevent the depressor from disappearing.
Let’s update our rule with this exception by changing [ GateOpen ] to [ GateOpen no Depressor ], as shown here:
(gates)
late [ Panel no Depressor ] [ GateOpen no Depressor ] ->
 [ Panel no Depressor ]
 [ GateClosed ]
Updating the rule to [ GateOpen no Depressor ] tells PuzzleScript that if no depressor is on top of a panel, only the open gates without a depressor on them should close, except any that have depressors standing on them. Click Rebuild to rerun your game, and try to replicate the bug by trying to do the same action that caused the robot to disappear previously. Now when an object is on top of an open gate, for example, the gate won’t be able to close, even when another object is activating the switch. But when nothing is on top of the open gate, the gate should close.
Adding the Security Lasers
Now that we’ve created crates and gates, and written rules for how they interact, we’re ready to introduce security lasers, a threat that the robots can avoid using the gates and crates! To do this, we’ll make a laser gun that shoots out lasers at every turn. If a laser hits a robot, the player loses! But if the laser hits another solid object, like a crate or gate, it’ll stop there.
Creating the Laser Objects
Let’s start by drawing our objects. We’ll need three objects:
Gun
grey darkgray
..0..
.101.
00100
.101.
..0..

LaserVertical
red
..0..
..0..
..0..
..0..
..0..

LaserHorizontal
red
.....
.....
00000
.....
.....
The laser gun (Gun) is shaped like a cross, and the two lasers (LaserVertical and LaserHorizontal) are beams of red light. The vertical laser, as you can imagine, fires up and down, and the horizontal laser fires left and right.
Adding Lasers to the Legend
Because we only need to add objects to the legend that will be at the very beginning of the level, we only need to add the guns, which definitely will be at the start of the level. The lasers appear only when the guns fire them, so we don’t need to give them a symbol here. I used a plus sign (+) to represent the gun because it’s also plus-shaped.
+ = Gun
Can you think of any groups we should add to the legend before we start writing our rules? For example, it would be useful to create a group for objects that block the laser, like walls, closed gates, and crates. We’ll group these objects into a new group called Blocker, as shown here:
Blocker = Wall or GateClosed or Crate or Gun
This line tells PuzzleScript that the Wall, GateClosed, and Crate will all be able to block the lasers. We don’t use the Pushable group here because it includes Vertibot and Horibot in their sleeping forms, and we want them to trigger an alarm if a laser hits them. Note that we also want the Gun to be able to block lasers, because we want the lasers to shoot from our guns, not through them.
Because we have two different kinds of lasers, let’s add them to the group Laser to easily refer to both. This should make it easier to check whether something has been hit by a laser. Without this group, we’d have to do two separate checks, one for each kind of laser.
Laser = LaserVertical or LaserHorizontal
Adding Lasers to the Collision Layers
Now let’s add our new objects to the COLLISIONLAYERS section.
Background
Exit, Panel, GateOpen
LaserVertical
LaserHorizontal
Vertibot, VertibotSleeping, Horibot, HoribotSleeping, Crate,
Wall, GateClosed, Gun
We place the gun on the same layer as all the other solid objects that the robots can bump into. The different lasers are on different layers because we want the laser beams to be able to pass through the solid objects.
Notice that each laser is on its own collision layer. The reason is that if they were on the same layer, the vertical laser beam would be able to block the horizontal laser, and vice versa! In real life, lasers are just beams of light, and one laser can’t block another, or can it? If any scientists are reading this, please let me know!
Writing Laser Rules
The laser objects we made are just a single piece of a laser beam, which is big enough to fit only a single space in a given level. If we put a bunch of them in a row, we’ll have a much longer laser. We want the lasers to keep going until they hit a Blocker. The following rules make this happen:
(lasers)
horizontal [ Gun | no Blocker ] -> [ Gun | LaserHorizontal ]
vertical [ Gun | no Blocker ] -> [ Gun | LaserVertical ]
First, we need to make the laser guns fire. A gun fires laser beams in whatever directions aren’t blocked by a blocker. PuzzleScript checks a rule in all four directions (up, down, left, and right) unless you tell it to do otherwise. We don’t want the horizontal lasers to shoot up and down or the vertical lasers to shoot left and right. So we tell PuzzleScript that horizontal lasers fire horizontally and vertical lasers fire vertically using horizontal and vertical, respectively.
In this case, horizontal [ Gun | no Blocker ] -> [ Gun | LaserHorizontal ] checks that there’s no blocker next to a gun, and if this is true, the space next to the gun turns into a horizontal laser beam. We use the same idea for the vertical laser beam.
Testing the Lasers
Let’s return to our LEVELS section to test our laser rules. Add a laser to the test level by updating the code to look like this:
#############
#.......T...#
#.i.....T...#
#.......T.+.#
#...*...T...#
#.......T...#
#.h.../.T...#
#.......T...#
#############
I’ve put the laser behind the gate so I can test whether gates block lasers like they’re supposed to. Click Rebuild to run the game, and you should see something like this.
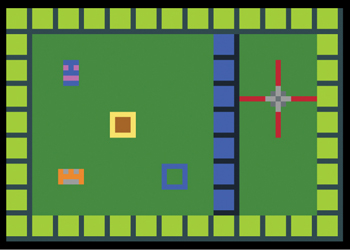
Test level with laser gun

As you can see, the lasers fire, but the beams extend only a single space in each direction. The laser beams are too short! We need to add a rule that makes the beams extend until they eventually hit a blocker. All the objects in PuzzleScript are the same size. To create a longer laser, we’ll put a bunch of laser objects in a line. We need to add a rule that does that.
Again, we’ll create separate rules for vertical and horizontal lasers. If every laser extended in every direction, it would be extremely dangerous, as you can imagine. Instead, we’ll extend horizontal lasers left and right and extend vertical lasers up and down. Add the following lines of code below your existing laser rules:
(lasers)
horizontal [ Gun | no blocker ] -> [ Gun | LaserHorizontal ]
vertical [ Gun | no blocker ] -> [ Gun | LaserVertical ]
vertical [ LaserVertical | no blocker ] -> [ LaserVertical |
LaserVertical ]
horizontal [ LaserHorizontal | no blocker ] ->
[LaserHorizontal | LaserHorizontal ]
These additional rules check for empty spaces next to the laser beams. As we did when we checked for a panel with no depressors on it using [ Panel no Depressor ], we use [ LaserVertical | no blocker ] to check for a laser with no blocker objects next to it. If there’s no blocker in the space next to the laser beam, we extend the laser into that space by changing no blocker to a LaserVertical or LaserHorizontal. But if there is a blocker in the space, the rule would stop there.
PuzzleScript runs a single rule over and over until it stops before moving on to the next rule. So this rule continues to run for all adjacent spaces in a laser’s path as long as there’s no blocker in those spaces. As a result of this rule, a continuous laser beam shoots out from the gun horizontally and vertically.
To test the updated laser rules, click Rebuild and check whether the laser beams extend to the wall. Also, try using the panel to open the gate. The laser should extend through the opened gate.
Fixing the Laser Bug
There’s still a problem with the lasers. If you step off the panel, the gate closes and blocks the laser, but the laser beam continues on the other side of the gate.
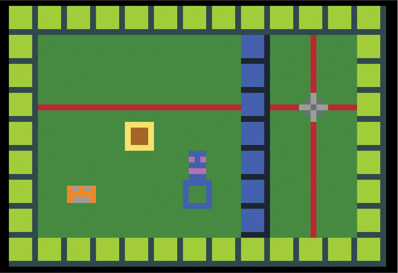
Test level showing a laser bug

The game design process often involves adding some code to your game, checking how it works, making little changes, and then checking it again. Every time we do this, we get a little closer to making our game exactly how we want it. In this case, we need to tweak our laser rules so a closed gate completely blocks a laser beam.
To do that, we need to remind ourselves what a single turn in a PuzzleScript game looks like. PuzzleScript runs a turn whenever the player presses a key (either the arrow keys or the action key). This is what happens in a turn:
- PuzzleScript marks any player objects that are trying to move (in the rules, this looks like > Vertibot instead of Vertibot).
- PuzzleScript runs every rule in order from top to bottom as many times as it can.
- Anything marked to move moves.
- PuzzleScript runs any late moves in order from top to bottom as many times as it can.
The problem with our current rules is that we never get rid of lasers after they’re cut off by a blocker object. Let’s add the following rule that does that:
(lasers)
[ laser ] -> [ ]
horizontal [ Gun | no blocker ] -> [ Gun | LaserHorizontal ]
vertical [ Gun | no blocker ] -> [ Gun | LaserVertical ]

vertical [ LaserVertical | no blocker ] -> [ LaserVertical |
LaserVertical ]
horizonta l [ LaserHorizontal | no blocker ] -> [
LaserHorizontal | LaserHorizontal ]
Here, we use the laser group we defined earlier. This simple addition tells PuzzleScript that any laser beams no longer attached to a gun should disappear. The rule also tells PuzzleScript to change the lasers into empty spaces to get rid of the laser beams after they’ve been blocked by a closed gate. Then PuzzleScript creates new lasers that extend out to erase all the lasers left over from the previous turn. The square brackets represent an empty space, so [ laser ] -> [ ] tells PuzzleScript to find all the laser objects and get rid of them. Then, we’ll redraw our lasers based on the current layout of the level.
Click Rebuild and run this test again! Try standing on and moving off the panel a few times. We’re a bit closer, but the program is still a little wonky. When the robot steps off the panel, the beams are cut off, but it doesn’t happen until the next turn!
Fortunately, there’s an easy solution to fixing this delay. On any given turn, PuzzleScript runs through each rule and then objects move according to the rules. Right now the rules governing our lasers are happening before the robots move on or off of the panel. Let’s make sure those rules happen after movement, which we can accomplish by simply making the laser rules happen late, as shown here:
(lasers)
[ laser ] -> [ ]
late horizontal [ Gun | no blocker ] -> [ Gun |
LaserHorizontal ]
late vertical [ Gun | no blocker ] -> [ Gun | LaserVertical ]

late vertical [ LaserVertical | no blocker ] -> [
LaserVertical | LaserVertical ]
late horizontal [ LaserHorizontal | no blocker ] -> [
LaserHorizontal | LaserHorizontal ]
Notice also that the lasers don’t fire immediately. They wait until after you’ve made a move and then fire. To have the lasers begin firing right away, just add run_rules_on_level_start to the very beginning of your PuzzleScript code, under the name of your game, as shown here:
title Robot Heist
author anna anthropy
run_rules_on_level_start
norepeat_action
You might have noticed when you hold down the action button to switch characters, the selection flickers back and forth quite quickly. The norepeat_action command makes sure the action button switches character only once, no matter how long you press it.
When you’re done, try the following challenges.
Bonus Challenges
Try making four different lasers, each of which shoots in only one direction: up, down, left, and right.
In the finished Robot Heist game, there are two kinds of gates and panels, pink and blue. There are also some gates that close instead of open when a Depressor steps on a panel. See if you can figure out how to do this in your own game!
If you need help, try clicking the hack link in Robot Heist (http://tinyurl.com/robotheist/) to see how this code works.
What You Learned
So far you successfully created the basic building blocks of the Robot Heist game, including the two robot objects the player will use to navigate the level, the background and wall that provide the backdrop, and other objects, such as crates, guns, and panels. You learned to write rules for each of these objects so they interact with one another in interesting ways. You also created obstacles, such as lasers, which some objects can block. But right now, our lasers aren’t a real threat because they don’t do anything.
In the next chapter, you’ll explore the concept of losing in game design and learn how to raise the stakes for the player. You’ll also explore PuzzleScript’s “realtime” mode by creating obstacles that move on their own. See you there!