
For the basis of demonstrating BlueStore, we will use ceph-volume to non-disruptively manually upgrade a live Ceph cluster's OSDs from filestore to BlueStore. If you wish to carry out this procedure for real, you could work through the Ansible section in Chapter 2, Deploying Ceph with Containers, to deploy a cluster with filestore OSDs and then go through the following instructions to upgrade them. The OSDs will be upgraded following the degraded method where OSDs are removed while still containing data.
Make sure that your Ceph cluster is in full health by checking with the ceph -s command, as shown in the following code. We'll be upgrading OSD by first removing it from the cluster and then letting Ceph recover the data onto the new BlueStore OSD, so we need to be sure that Ceph has enough valid copies of your data before we start. By taking advantage of the hot maintenance capability in Ceph, you can repeat this procedure across all of the OSDs in your cluster without downtime:

Now we need to stop all of the OSDs from running, unmount the disks, and then wipe them by going through the following steps:
- Use the following command to stop the OSD services:
sudo systemctl stop ceph-osd@*
The preceding command gives the following output:
![]()
We can confirm that the OSDs have been stopped and that Ceph is still functioning using the ceph -s command again, as shown in the following screenshot:

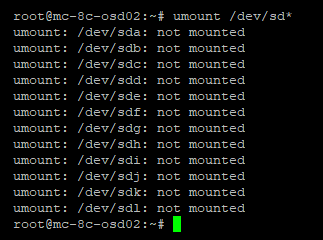
- Now, unmount the XFS partitions; the errors can be ignored:
sudo umount /dev/sd*
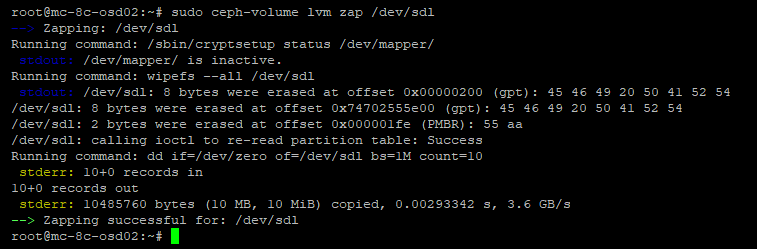
- Unmounting the filesystems will mean that the disks are no longer locked and we can wipe the disks using the following code:
sudo ceph-volume lvm zap /dev/sd<x>
- Now we can also edit the partition table on the flash device to remove the filestore journals and recreate them as a suitable size for BlueStore's RocksDB using the following code. In this example, the flash device is an NVMe:
sudo fdisk /dev/sd<x>

Delete each Ceph journal partition using the d command, as follows:

Now create all of the new partitions for BlueStore, as shown in the following screenshot:

Add one partition for each OSD you intend to create. When finished, your partition table should look something like the following:

Use the w command to write the new partition table to disk, as shown in the following screenshot. Upon doing so, you'll be informed that the new partition table is not currently in use, and so we need to run sudo partprobe to load the table into the kernel:

- Go back to one of your monitors. First, confirm the OSDs we are going to remove and remove the OSDs using the following purge commands:
sudo ceph osd tree
The preceding command gives the following output:

Now, remove the logical OSD entry from the Ceph cluster—in this example, OSD 36:
sudo ceph osd purge x --yes-i-really-mean-it

- Check the status of your Ceph cluster with the ceph -s command. You should now see that the OSD has been removed, as shown in the following screenshot:

Note that the number of OSDs has dropped, and that, because the OSDs have been removed from the CRUSH map, Ceph has now started to try and recover the missing data onto the remaining OSDs. It's probably a good idea not to leave Ceph in this state for too long to avoid unnecessary data movement.
- Now issue the ceph-volume command to create the bluestore OSD using the following code. In this example, we will be storing the DB on a separate flash device, so we need to specify that option. Also, as per this book's recommendation, the OSD will be encrypted:
sudo ceph-volume lvm create --bluestore --data /dev/sd<x> --block.db /dev/sda<ssd> --dmcrypt
The preceding command gives a lot of output, but if successful, we will end with the following:

- Check the status of ceph again with ceph-s to make sure that the new OSDs have been added and that Ceph is recovering the data onto them, as shown in the following screenshot:

Note that the number of misplaced objects is now almost zero because of the new OSDs that were placed in the same location in the CRUSH map before they were upgraded. Ceph now only needs to recover the data, not redistribute the data layout.
If further nodes need to be upgraded, wait for the back-filling process to complete and for the Ceph status to return to HEALTH_OK. Then the work can proceed on the next node.
As you can see, the overall procedure is very simple and is identical to the steps required to replace a failed disk.