Chapter 7: Customizing spaCy Models
In this chapter, you will learn how to train, store, and use custom statistical pipeline components. First, we will discuss when exactly we should perform custom model training. Then, you will learn a fundamental step of model training – how to collect and label your own data.
In this chapter, you will also learn how to make the best use of Prodigy, the annotation tool. Next, you will learn how to update an existing statistical pipeline component with your own data. We will update the spaCy pipeline's named entity recognizer (NER) component with our own labeled data.
Finally, you will learn how to create a statistical pipeline component from scratch with your own data and labels. For this purpose, we will again train an NER model. This chapter takes you through a complete machine learning practice, including collecting data, annotating data, and training a model for information extraction.
By the end of this chapter, you'll be ready to train spaCy models on your own data. You'll have the full skillset of collecting data, preprocessing data in to the format that spaCy can recognize, and finally, training spaCy models with this data. In this chapter, we're going to cover the following main topics:
- Getting started with data preparation
- Annotating and preparing data
- Updating an existing pipeline component
- Training a pipeline component from scratch
Technical requirements
The chapter code can be found at the book's GitHub repository: https://github.com/PacktPublishing/Mastering-spaCy/tree/main/Chapter07.
Getting started with data preparation
In the previous chapters, we saw how to make the best of spaCy's pre-trained statistical models (including the POS tagger, NER, and dependency parser) in our applications. In this chapter, we will see how to customize the statistical models for our custom domain and data.
spaCy models are very successful for general NLP purposes, such as understanding a sentence's syntax, splitting a paragraph into sentences, and extracting some entities. However, sometimes, we work on very specific domains that spaCy models didn't see during training.
For example, the Twitter text contains many non-regular words, such as hashtags, emoticons, and mentions. Also, Twitter sentences are usually just phrases, not full sentences. Here, it's entirely reasonable that spaCy's POS tagger performs in a substandard manner as the POS tagger is trained on full, grammatically correct English sentences.
Another example is the medical domain. The medical domain contains many entities, such as drug, disease, and chemical compound names. These entities are not expected to be recognized by spaCy's NER model because it has no disease or drug entity labels. NER does not know anything about the medical domain at all.
Training your custom models requires time and effort. Before even starting the training process, you should decide whether the training is really necessary. To determine whether you really need custom training, you will need to ask yourself the following questions:
- Do spaCy models perform well enough on your data?
- Does your domain include many labels that are absent in spaCy models?
- Is there a pre-trained model/application in GitHub or elsewhere already? (We wouldn't want to reinvent the wheel.)
Let's discuss these questions in detail in the following sections.
Do spaCy models perform well enough on your data?
If the model performs well enough (above 0.75 accuracy), then you can customize the model output by means of another spaCy component. For example, let's say we work on the navigation domain and we have utterances such as the following:
navigate to my home
navigate to Oxford Street
Let's see what entities spaCy's NER model outputs for these sentences:
import spacy
nlp = spacy.load("en_core_web_md")
doc1 = nlp("navigate to my home")
doc1.ents
()
doc2 = nlp("navigate to Oxford Street")
doc2.ents
(Oxford Street,)
doc2.ents[0].label_
'FAC'
spacy.explain("FAC")
'Buildings, airports, highways, bridges, etc.'
Here, home isn't recognized as an entity at all, but we want it to be recognized as a location entity. Also, spaCy's NER model labels Oxford Street as FAC, which means a building/highway/airport/bridge type entity, which is not what we want.
We want this entity to be recognized as GPE, a location. Here, we can train NER further to recognize street names as GPE, as well as also recognizing some location words, such as work, home, and my mama's house, as GPE.
Another example is the newspaper domain. In this domain, person, place, date, time, and organization entities are extracted, but you need one more entity type – vehicle (car, bus, airplane, and so on). Hence, instead of training from scratch, you can add a new entity type by using spaCy's EntityRuler (explained in Chapter 4, Rule-Based Matching). Always examine your data first and calculate the spaCy models' success rate. If the success rate is satisfying, then use other spaCy components to customize.
Does your domain include many labels that are absent in spaCy models?
For instance, in the preceding newspaper example, only one entity label, vehicle, is missing from the spaCy's NER model's labels. Other entity types are recognized. In this case, you don't need custom training.
Consider the medical domain again. The entities are diseases, symptoms, drugs, dosages, chemical compound names, and so on. This is a specialized and long list of entities. Obviously, for the medical domain, you require custom model training.
If we need custom model training, we usually follow these steps:
- Collect your data.
- Annotate your data.
- Decide to update an existing model or train a model from scratch.
In the data collection step, we decide how much data to collect: 1,000 sentences, 5,000 sentences, or more. The amount of data depends on the complexity of your task and domain. Usually, we start with an acceptable amount of data, make a first model training, and see how it performs; then we can add more data and retrain the model.
After collecting your dataset, you need to annotate your data in such a way that the spaCy training code recognizes it. In the next section, we will see the training data format and how to annotate data with spaCy's Prodigy tool.
The third point is to decide on training a blank model from scratch or make updates to an existing model. Here, the rule of thumb is as follows: if your entities/labels are present in the existing model but you don't see a very good performance, then update the model with your own data, such as in the preceding navigation example. If your entities are not present in the current spaCy model at all, then most probably you need custom training.
Tip
Don't rush into training your own models. First, examine if you really need to customize the models. Always keep in mind that training a model from scratch requires data preparation, training a model, and saving it, which means spending your time, money, and effort. Good engineering is about spending your resources wisely.
We'll start our journey of building a model with the first step: preparing our training data. Let's move on to the next section and see how to prepare and annotate our training data.
Annotating and preparing data
The first step of training a model is always preparing training data. You usually collect data from customer logs and then turn them into a dataset by dumping the data as a CSV file or a JSON file. spaCy model training code works with JSON files, so we will be working with JSON files in this chapter.
After collecting our data, we annotate our data. Annotation means labeling the intent, entities, POS tags, and so on.
This is an example of annotated data:
{
"sentence": "I visited JFK Airport."
"entities": {
"label": "LOC"
"value": "JFK Airport"
}
As you see, we point the statistical algorithm to what we want the model to learn. In this example, we want the model to learn about the entities, hence, we feed examples with entities annotated.
Writing down JSON files manually can be error-prone and time-consuming. Hence, in this section, we'll also see spaCy's annotation tool, Prodigy, along with an open source data annotation tool, Brat. Prodigy is not open source or free, but we will go over how it works to give you a better view of how annotation tools work in general. Brat is open source and immediately available for your use.
Annotating data with Prodigy
Prodigy is a modern tool for data annotation. We will be using the Prodigy web demo (https://prodi.gy/demo) to exhibit how an annotation tool works.
Let's get started:
- We navigate to the Prodigy web demo and view an example text by Prodigy, to be annotated as seen in the following screenshot:

Figure 7.1 – Prodigy interface; photo taken from their web demo page
The preceding screenshot shows an example text that we want to annotate. The buttons at the bottom of the screenshot showcase the means to accept this training example, to reject this example, or to ignore this example. If the example is irrelevant to our domain/task (but involved in the dataset somehow), we ignore this example. If the text is relevant and the annotation is good, then we accept this example, and it joins our dataset.
- Next, we'll label the entities. Labeling an entity is easy. First, we select an entity type from the upper bar (here, this corpus includes two types of entities, PERSON and ORG. Which entities you want to annotate depends on you; these are the labels you provide to the tool.) Then, we'll just select the words we want to label as an entity with the cursor, as seen in the following screenshot:
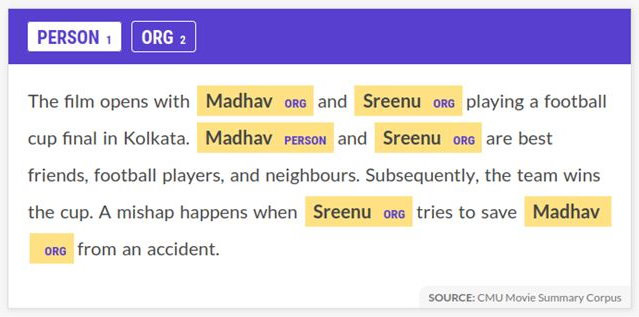
Figure 7.2 – Annotating PERSON entities on the web demo
After we're finished with annotating the text, we click the accept button. Once the session is finished, you can dump the annotated data as a JSON file. When you're finished with your annotation job, you can click the Save button to finish the session properly. Clicking Save will dump the annotated data as a JSON file automatically. That's it. Prodigy offers a really efficient way of annotating your data.
Annotating data with Brat
Another annotation tool is Brat, which is a free and web-based tool for text annotation (https://brat.nlplab.org/introduction.html). It's possible to annotate relations as well as entities in Brat. You can also download Brat onto your local machine and use it for annotation tasks. Basically, you upload your dataset to Brat and annotate the text on the interface. The following screenshot shows an annotated sentence from an example of a CoNLL dataset:

Figure 7.3 – An example annotated sentence
You can play with example datasets on the Brat demo website (https://brat.nlplab.org/examples.html) or get started by uploading a small subset of your own data. After the annotation session is finished, Brat dumps a JSON of annotated data as well.
spaCy training data format
As we remarked earlier, spaCy training code works with JSON file format. Let's see the details of training the data format.
For the NER, you need to provide a list of pairs of sentences and their annotations. Each annotation should include the entity type, the start position of the entity in terms of characters, and the end position of the entity in terms of characters. Let's see an example of a dataset:
training_data = [
("I will visit you in Munich.", {"entities": [(20, 26, "GPE")]}),
("I'm going to Victoria's house.", {
"entities": [
(13, 23, "PERSON"),
(24, 29, "GPE")
]})
("I go there.", {"entities": []})
]
This dataset consists of three example pairs. Each example pair includes a sentence as the first element. The second element of the pair is a list of annotated entities. In the first example sentence, there is only one entity, Munich. This entity's label is GPE and starts at the 20th character position in the sentence and ends at the 25th character. Similarly, the second sentence includes two entities; one is PERSON, Victoria's, and the second entity is GPE, house. The third sentence does not include any entities, hence the list is empty.
We cannot feed the raw text and annotations directly to spaCy. Instead, we need to create an Example object for each training example. Let's see the code:
import spacy
from spacy.training import Example
nlp = spacy.load("en_core_web_md")
doc = nlp("I will visit you in Munich.")
annotations = {"entities": [(20, 26, "GPE")]}
example_sent = Example.from_dict(doc, annotations)
In this code segment, first, we created a doc object from the example sentence. Then we fed the doc object and its annotations in a dictionary form to create an Example object. We'll use Example objects in the next section's training code.
Creating example sentences for training the dependency parser is a bit different, and we'll cover this in the Training a pipeline component from scratch section.
Now, we're ready to train our own spaCy models. We'll first see how to update an NLP pipeline statistical model. For this purpose, we'll train the NER component further with the help of our own examples.
Updating an existing pipeline component
In this section, we will train spaCy's NER component further with our own examples to recognize the navigation domain. We already saw some examples of navigation domain utterances and how spaCy's NER model labeled entities of some example utterances:
navigate/0 to/0 my/0 home/0
navigate/0 to/0 Oxford/FAC Street/FAC
Obviously, we want NER to perform better and recognize location entities, such as street names, district names, and other location names, such as home, work, and office. Now, we'll feed our examples to the NER component and will do more training. We will train NER in three steps:
- First, we'll disable all the other statistical pipeline components, including the POS tagger and the dependency parser.
- We'll feed our domain examples to the training procedure.
- We'll evaluate the new NER model.
Also, we will learn how to do the following:
- Save the updated NER model to disk.
- Read the updated NER model when we want to use it.
Let's get started and dive into training the NER model procedure. As we pointed out in the preceding list, we'll train the NER model in several steps. We'll start with the first step, disabling the other statistical models of the spaCy NLP pipeline.
Disabling the other statistical models
Before starting the training procedure, we disable the other pipeline components, hence we train only the intended component. The following code segment disables all the pipeline components except NER. We call this code block before starting the training procedure:
other_pipes = [pipe for pipe in nlp.pipe_names if pipe != 'ner']
nlp.disable_pipes(*other_pipes)
Another way of writing this code is as follows:
other_pipes = [pipe for pipe in nlp.pipe_names if pipe != 'ner']
with nlp.disable_pipes(*other_pipes):
# training code goes here
In the preceding code block, we made use of the fact that nlp.disable_pipes returns a context manager. Using a with statement makes sure that our code releases the allocated sources (such as file handlers, database locks, or multiple threads). If you're not familiar with statements, you can read more at this Python tutorial: https://book.pythontips.com/en/latest/context_managers.html.
We have completed the first step of the training code. Now, we are ready to make the model training procedure.
Model training procedure
As we mentioned in Chapter 3, Linguistic Features, in the Introducing named entity recognition section, spaCy's NER model is a neural network model. To train a neural network, we need to configure some parameters as well as provide training examples. Each prediction of the neural network is a sum of its weight values; hence, the training procedure adjusts the weights of the neural network with our examples. If you want to learn more about how neural networks function, you can read the excellent guide at http://neuralnetworksanddeeplearning.com/.
In the training procedure, we'll go over the training set several times and show each example several times (one iteration is called one epoch) because showing an example only once is not enough. At each iteration, we shuffle the training data so that the order of the training data does not matter. This shuffling of training data helps train the neural network thoroughly.
In each epoch, the training code updates the weights of the neural network with a small number. Optimizers are functions that update the neural network weights subject to a loss. At epoch, a loss value is calculated by comparing the actual label with the neural network's current output. Then, the optimizer function can update the neural network's weight with respect to this loss value.
In the following code, we used the stochastic gradient descent (SGD) algorithm as the optimizer. SGD itself is also an iterative algorithm. It aims to minimize a function (for neural networks, we want to minimize the loss function). SGD starts from a random point on the loss function and travels down its slope in steps until it reaches the lowest point of that function. If you want to learn more about SGD, you can visit Stanford's excellent neural network class at http://deeplearning.stanford.edu/tutorial/supervised/OptimizationStochasticGradientDescent/.
Putting it all altogether, here's the code to train spaCy's NER model for the navigation domain. Let's go step by step:
- In the first three lines, we make the necessary imports. random is a Python library that includes methods for pseudo-random generators for several distributions, including uniform, gamma, and beta distributions. In our code, we'll use random.shuffle to shuffle our dataset. shuffle shuffles sequences into place:
import random
import spacy
from spacy.training import Example
- Next, we will create a language pipeline object, nlp:
nlp = spacy.load("en_core_web_md")
- Then, we will define our navigation domain training set sentences. Each example contains a sentence and its annotation:
trainset = [
("navigate home", {"entities": [(9,13, "GPE")]}),
("navigate to office", {"entities": [(12,18, "GPE")]}),
("navigate", {"entities": []}),
("navigate to Oxford Street", {"entities": [(12, 25, "GPE")]})
]
- We want to iterate our data 20 times, hence the number of epochs is 20:
epochs = 20
- In the next 2 lines, we disable the other pipeline components and leave NER for training. We use with statement to invoke nlp.disable_pipe as a context manager:
other_pipes = [pipe for pipe in nlp.pipe_names if pipe != 'ner']
with nlp.disable_pipes(*other_pipes):
- We create an optimizer object, as we discussed previously. We'll feed this optimizer object to the training method as a parameter:
optimizer = nlp.create_optimizer()
- Then, for each epoch, we will shuffle our dataset by random.shuffle:
for i in range(epochs):
random.shuffle(trainset)
- For each example sentence in the dataset, we will create an Example object from the sentence and its annotation:
example = Example.from_dict(doc, annotation)
- We will feed the Example object and optimizer object to nlp.update. The actual training method is nlp.update. This is the place where the NER model gets trained:
nlp.update([example], sgd=optimizer)
- Once the epochs are complete, we save the newly trained NER component to disk under a directory called navi_ner:
ner = nlp.get_pipe("ner")
ner.to_disk("navi_ner")'
nlp.update outputs a loss value each time it is called. After invoking this code, you should see an output similar to the following screenshot (the loss values might be different):
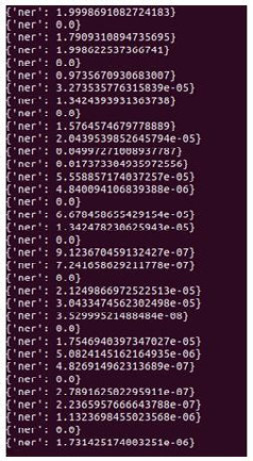
Figure 7.4 – NER training's output
That's it! We trained the NER component for the navigation domain! Let's try some example sentences and see whether it really worked.
Evaluating the updated NER
Now we can test our brand-new updated NER component. We can try some examples with synonyms and paraphrases to test whether the neural network really learned the navigation domain, instead of memorizing our examples. Let's see how it goes:
- These are the training sentences:
navigate home
navigate to office
navigate
navigate to Oxford Street
- Let's use the synonym house for home and also add two more words to to my:
doc= nlp("navigate to my house")
doc.ents
(house,)
doc.ents[0].label_
'GPE'
- It worked! House is recognized as a GPE type entity. How about we replace navigate with a similar verb, drive me, and create a paraphrase of the first example sentence:
doc= nlp("drive me to home")
doc.ents
(home,)
doc.ents[0].label_
'GPE'
- Now, we try a slightly different sentence. In the next sentence, we won't use a synonym or paraphrase. We'll replace Oxford Street with a district name, Soho. Let's see what happens this time:
doc= nlp("navigate to Soho")
doc.ents
(Soho,)
doc.ents[0].label_
'GPE'
- As we remarked before, we updated the statistical model, hence, the NER model didn't forget about the entities it already knew. Let's do a test with another entity type to see whether the NER model really didn't forget the other entity types:
doc = nlp("I watched a documentary about Lady Diana.")
doc.ents
(Lady Diana,)
doc.ents[0].label_
'PERSON'
Great! spaCy's neural networks can recognize not only synonyms but entities of the same type. This is one of the reasons why we use spaCy for NLP. Statistical models are incredibly powerful.
In the next section, we'll learn how to save the model we trained and load a model into our Python scripts.
Saving and loading custom models
In the preceding code segment, we already saw how to serialize the updated NER component as follows:
ner = nlp.get_pipe("ner")
ner.to_disk("navi_ner")
We serialize models so that we can upload them in other Python scripts whenever we want. When we want to upload a custom-made spaCy component, we perform the following steps:
import spacy
nlp = spacy.load('en', disable=['ner'])
ner = nlp.create_pipe("ner")
ner.from_disk("navi_ner")
nlp.add_pipe(ner, "navi_ner")
print(nlp.meta['pipeline'])
['tagger', 'parser', 'navi_ner']
Here are the steps that we follow:
- We first load the pipeline components without the NER, because we want to add our custom NER. This way, we make sure that the default NER doesn't override our custom NER component.
- Next, we create an NER pipeline component object. Then we load our custom NER component from the directory we serialized to this newly created component object.
- We then add our custom NER component to the pipeline.
- We print the metadata of the pipeline to make sure that loading our custom component worked.
Now, we also learned how to serialize and load custom components. Hence, we can move forward to a bigger mission: training a spaCy statistical model from scratch. We'll again train the NER component, but this time we'll start from scratch.
Training a pipeline component from scratch
In the previous section, we saw how to update the existing NER component according to our data. In this section, we will create a brand-new NER component for the medicine domain.
Let's start with a small dataset to understand the training procedure. Then we'll be experimenting with a real medical NLP dataset. The following sentences belong to the medicine domain and include medical entities such as drug and disease names:
Methylphenidate/DRUG is effectively used in treating children with epilepsy/DISEASE and ADHD/DISEASE.
Patients were followed up for 6 months.
Antichlamydial/DRUG antibiotics/DRUG may be useful for curing coronary-artery/DISEASE disease/DISEASE.
The following code block shows how to train an NER component from scratch. As we mentioned before, it's better to create our own NER rather than updating spaCy's default NER model as medical entities are not recognized by spaCy's NER component at all. Let's see the code and also compare it to the code from the previous section. We'll go step by step:
- In the first three lines, we made the necessary imports. We imported spacy and spacy.training.Example. We also imported random to shuffle our dataset:
import random
import spacy
from spacy.training import Example
- We defined our training set of three examples. For each example, we included a sentence and its annotated entities:
train_set = [
("Methylphenidate is effectively used in treating children with epilepsy and ADHD.", {"entities": [(0, 15, "DRUG"), (62, 70, "DISEASE"), (75, 79, "DISEASE")]}),
("Patients were followed up for 6 months.", {"entities": []}),
("Antichlamydial antibiotics may be useful for curing coronary-artery disease.", {"entities": [(0, 26, "DRUG"), (52, 75, "DIS")]})
]
- We also listed the set of entities we want to recognize – DIS for disease names, and DRUG for drug names:
entities = ["DIS", "DRUG"]
- We created a blank model. This is different from what we did in the previous section. In the previous section, we used spaCy's pre-trained English language pipeline:
nlp = spacy.blank("en")
- We also created a blank NER component. This is also different from the previous section's code. We used the pre-trained NER component in the previous section:
ner = nlp.add_pipe("ner")
ner
<spacy.pipeline.ner.EntityRecognizer object at 0x7f54b50044c0>
- Next, we add each medical label to the blank NER component by using ner.add_label:
for ent in entities:
ner.add_label(ent)
- We define the number of epochs as 25:
epochs = 25
- The next two lines disable the other components other than the NER:
other_pipes = [pipe for pipe in nlp.pipe_names if pipe != 'ner']
with nlp.disable_pipes(*other_pipes):
- We created an optimizer object by calling nlp.begin_training. This is different from the previous section. In the previous section, we created an optimizer object by calling nlp.create_optimizer, so that NER doesn't forget the labels it already knows. Here, nlp.begin_training initializes the NER model's weights with 0, hence, the NER model forgets everything it learned before. This is what we want; we want a blank NER model to train from scratch:
optimizer = nlp.begin_training()
- For each epoch, we shuffle our small training set and train the NER component with our examples:
for i in range(25):
random.shuffle(train_set)
for text, annotation in train_set:
doc = nlp.make_doc(text)
example = Example.from_dict(doc, annotation)
nlp.update([example], sgd=optimizer)
Here's what this code segment outputs (the loss values may be different):
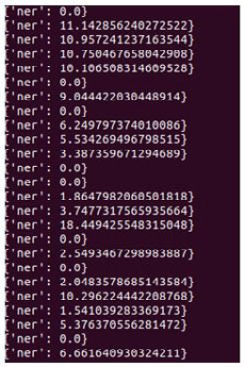
Figure 7.5 – Loss values during training
Did it really work? Let's test the newly trained NER component:
doc = nlp("I had a coronary disease.")
doc.ents
(coronary disease,)
doc.ents[0].label_
'DIS'
Great – it worked! Let's also test some negative examples, entities that are recognized by spaCy's pre-trained NER model but not ours:
doc = nlp("I met you at Trump Tower.")
doc.ents
()
doc = nlp("I meet you at SF.")
doc.ents
()
This looks good, too. Our brand new NER recognizes only medical entities. Let's visualize our first example sentence and see how displaCy exhibits new entities:
from spacy import displacy
doc = nlp("I had a coronary disease.")
displacy.serve(doc, style="ent")
This code block generates the following visualization:

Figure 7.6 – Visualization of the example sentence
We successfully trained the NER model on small datasets. Now it's time to work with a real-world dataset. In the next section, we'll dive into processing a very interesting dataset regarding a hot topic; mining Corona medical texts.
Working with a real-world dataset
In this section, we will train on a real-world corpus. We will train an NER model on the CORD-19 corpus provided by the Allen Institute for AI (https://allenai.org/). This is an open challenge for text miners to extract information from this dataset to help medical professionals around the world fight against Corona disease. CORD-19 is an open source dataset that is collected from over 500,000 scholarly articles about Corona disease. The training set consists of 20 annotated medical text samples:
- Let's get started by having a look at an example training text:
The antiviral drugs amantadine and rimantadine inhibit a viral ion channel (M2 protein), thus inhibiting replication of the influenza A virus.[86] These drugs are sometimes effective against influenza A if given early in the infection but are ineffective against influenza B viruses, which lack the M2 drug target.[160] Measured resistance to amantadine and rimantadine in American isolates of H3N2 has increased to 91% in 2005.[161] This high level of resistance may be due to the easy availability of amantadines as part of over-the-counter cold remedies in countries such as China and Russia,[162] and their use to prevent outbreaks of influenza in farmed poultry.[163][164] The CDC recommended against using M2 inhibitors during the 2005–06 influenza season due to high levels of drug resistance.[165]
As we see from this example, real-world medical text can be quite long, and it can include many medical terms and entities. Nouns, verbs, and entities are all related to the medicine domain. Entities can be numbers (91%), number and units (100 ng/ml, 25 microg/ml), number-letter combinations (H3N2), abbreviations (CDC), and also compound words (qRT-PCR, PE-labeled).
The medical entities come in several shapes (numbers, number and letter combinations, and compounds) as well as being very domain-specific. Hence, a medical text is very different from everyday spoken/written language and definitely needs custom training.
- Entity labels can be compound words as well. Here's the list of entity types that this corpus includes:
Pathogen
MedicalCondition
Medicine
We transformed the dataset so that it's ready to use with spaCy training. The dataset is available under the book's GitHub repository: https://github.com/PacktPublishing/Mastering-spaCy/tree/main/Chapter07/data.
- Let's go ahead and download the dataset. Type the following command into your terminal:
$wget
https://github.com/PacktPublishing/Mastering-spaCy/blob/main/Chapter07/data/corona.json
This will download the dataset into your machine. If you wish, you can manually download the dataset from GitHub, too.
- Now, we'll preprocess the dataset a bit to recover some format changes that happened while dumping the dataset as json:
import json
with open("data/corona.json") as f:
data = json.loads(f.read())
TRAIN_DATA = []
for (text, annotation) in data:
new_anno = []
for anno in annotation["entities"]:
st, end, label = anno
new_anno.append((st, end, label))
TRAIN_DATA.append((text, {"entities": new_anno}))
This code segment will read the dataset's JSON file and format it according to the spaCy training data conventions.
- Next, we'll do the statistical model training:
a) First, we'll do the related imports:
import random
import spacy
from spacy.training import Example
b) Secondly, we'll initialize a blank spaCy English model and add an NER component to this blank model:
nlp = spacy.blank("en")
ner = nlp.add_pipe("ner")
print(ner)
print(nlp.meta)
c) Next, we define the labels we'd like the NER component to recognize and introduce these labels to it:
labels = ['Pathogen', 'MedicalCondition', 'Medicine']
for ent in labels:
ner.add_label(ent)
print(ner.labels)
d) Finally, we're ready to define the training loop:
epochs = 100
other_pipes = [pipe for pipe in nlp.pipe_names if pipe != 'ner']
with nlp.disable_pipes(*other_pipes):
optimizer = nlp.begin_training()
for i in range(100):
random.shuffle(TRAIN_DATA)
for text, annotation in TRAIN_DATA:
doc = nlp.make_doc(text)
example = Example.from_dict(doc, annotation)
nlp.update([example], sgd=optimizer)
This code block is identical to the training code from the previous section, except for the value of the epochs variable. This time, we iterated for 100 epochs, because the entity types, entity values, and the training sample text are semantically more complicated. We recommend you do at least 500 iterations for this dataset if you have the time. 100 iterations over the data are sufficient to get good results, but 500 iterations will take the performance further.
- Let's visualize some sample texts to see how our newly trained medical NER model handled the medical entities. We'll visualize our medical entities with displaCy code:
from spacy import displacy
doc = nlp("One of the bacterial diseases with the highest disease burden is tuberculosis, caused by Mycobacterium tuberculosis bacteria, which kills about 2 million people a year.")
displacy.serve(doc, style="ent")
The following screenshot highlights two entities – tuberculosis and the name of the bacteria that causes it as the pathogen entity:

Figure 7.7 – Highlighted entities of the sample medical text
- This time, let's look at entities of a text concerning pathogenic bacteria. This sample text contains many entities, including several diseases and pathogen names. All the disease names, such as pneumonia, tetanus, and leprosy, are correctly extracted by our medical NER model. The following displaCy code highlights the entities:
doc2 = nlp("Pathogenic bacteria contribute to other globally important diseases, such as pneumonia, which can be caused by bacteria such as Streptococcus and Pseudomonas, and foodborne illnesses, which can be caused by bacteria such as Shigella, Campylobacter, and Salmonella. Pathogenic bacteria also cause infections such as tetanus, typhoid fever, diphtheria, syphilis, and leprosy. Pathogenic bacteria are also the cause of high infant mortality rates in developing countries.")
displacy.serve(doc2, style="ent")
Here is the visual generated by the preceding code block:

Figure 7.8 – Sample text with disease and pathogen entities highlighted
Looks good! We successfully trained spaCy's NER model for the medicine domain and now the NER can extract information from medical text. This concludes our section. We learned how to train a statistical pipeline component as well as prepare the training data and test the results. These are great steps in both mastering spaCy and machine learning algorithm design.
Summary
In this chapter, we explored how to customize spaCy statistical models according to our own domain and data. First, we learned the key points of deciding whether we really need custom model training. Then, we went through an essential part of statistical algorithm design – data collection, and labeling.
Here we also learned about two annotation tools – Prodigy and Brat. Next, we started model training by updating spaCy's NER component with our navigation domain data samples. We learned the necessary model training steps, including disabling the other pipeline components, creating example objects to hold our examples, and feeding our examples to the training code.
Finally, we learned how to train an NER model from scratch on a small toy dataset and on a real medical domain dataset.
With this chapter, we took a step into the statistical NLP playground. In the next chapter, we will take more steps in statistical modeling and learn about text classification with spaCy. Let's move forward and see what spaCy brings us!