
Outlook is part of the Microsoft Office suite of productivity programs. Microsoft has designed these programs to work with each other, sharing data to make your work easier. Outlook can also work with other non-Office applications. This chapter explores some of the ways you can integrate Outlook with your other programs.
Office users often need to send various documents via email, such as sending a Word document or an Excel workbook to a client or colleague for review. The usual procedure is as follows:
Create the document, for example a report written in Word.
Save it to disk.
Start Outlook if necessary, or switch to it.
Create a new email message.
Click the Attach File button in the message.
Locate and select the document.
Complete the message and send it.
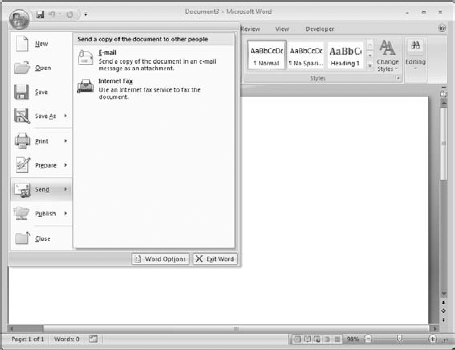
There's an easier way, however. On the Office menu in other Office applications (you open this menu by clicking the Office button at the top left of the application screen), you'll find a Send command, and on the next menu an E-mail command, as shown for Word in Figure 21.1. When you select this command, Office creates a new email message with the document attached. All you need to do is compose and address the message, and then send it.
An alternative to attaching Office documents to email messages is to include the document, or part of it, right in the body of the email message. There are a couple of reasons why you might want to do this:
You can easily send part of the document rather than the whole thing.
The content is immediately visible when the recipient opens the message—he does not have to open, or even have, the parent application to view it.
A potential disadvantage is that the recipient will not have a complete document that he can open and edit. Sometimes, however, that's just what you want: to let someone view and perhaps approve something without having access to an editable document.
Note
Please note that you cannot paste formatted content into plain text email messages, only HTML and RTF format messages.
The procedure is simple—simply select the content in the parent application and select the Copy command (or press Ctrl+C). Then switch to the email message you are composing, position the cursor at the desired location, and select Paste (or press Ctrl+V).
What can you paste into an email message? The possibilities are almost endless. You can paste formatted text from Word, and the fonts, colors, and other formatting details will all be retained. You can copy and paste a table created in Word, and your email message will have the same table. Charts created in Excel are another example of a data element you can paste into an email message.
Figures 21.2 and 21.3 show an example of a formatted Word document and the results when you paste the text into an email message. Figures 21.4 and 21.5 show an example using an Excel chart.
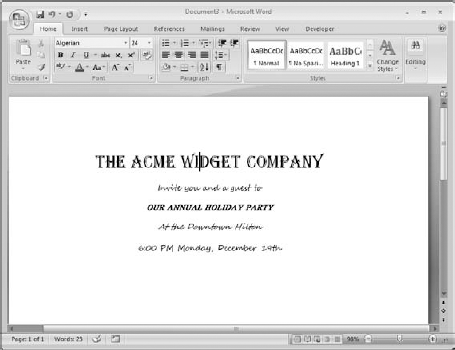
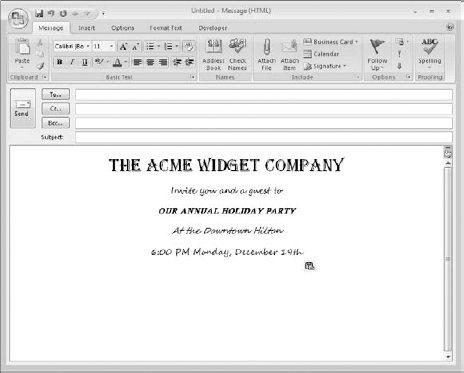
Figure 21.3. An email message after pasting the formatted text from the Word document in Figure 21.2 into it.

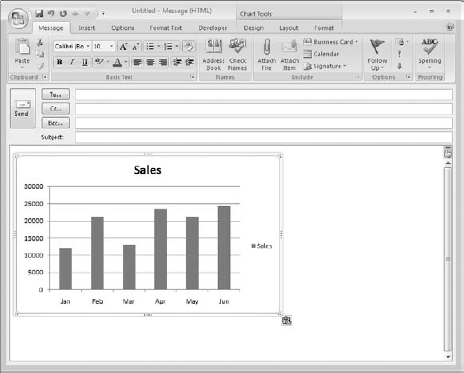
Figure 21.5. A chart pasted from Excel into an email message looks exactly the same as the original.
Can you edit text or other data after pasting it into a message? Generally speaking, yes. Pasted text and tables can be edited just as if you had typed them directly into the message. Other pasted items, such as charts, will be more or less editable depending on the program they came from. Right-click such a pasted object to view a context menu that will contain any available editing commands. However, it is almost always preferable to perform necessary editing in the parent application before copying to the message.
Note that copy and paste is a two-way street—you can copy data from Outlook and paste it into other programs as well.
Outlook Contacts is a great place to keep all the information about your friends, family, and business associates, including their postal addresses. You can use this information to create a mail merge using Microsoft Word. In a mail merge, you create a form letter and then Word creates one copy of the letter, along with an envelope or mailing label, for each name and address in a list. Outlook Contacts is one possible source for this list. Of course, this will work only for those contacts whose postal address is included in their Contacts entry.
This is not a book about Word, so I will not go into the complete details of performing a mail merge using Outlook Contacts, just the basics.
A mail merge document is created using two kinds of elements. One element is normal text that you type in as usual. Sometimes this is called boilerplate text because it will be the same in every document or message. The other element is fields that specify where in the document information from the recipient list is to be placed. For example, suppose you want to start each letter with "Dear" followed by the recipient's first name. You would type "Dear" (note the space!) and then insert the first name field; it will look like this in your document:
Dear <<first>>,
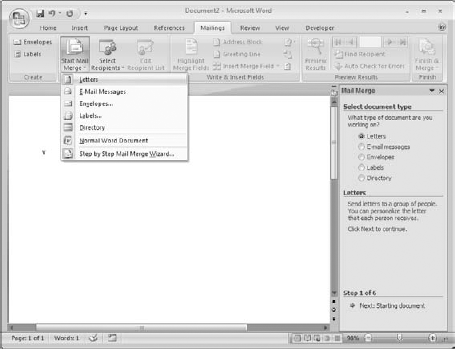
To perform a merge in Word using Outlook Contacts:
Start a new document in Word.
Click the Mailings tab to display the Mailings ribbon.
In the Start Mail Merge section, click Start Mail Merge.
Select the type of document you want to create from the menu (see Figure 21.6).
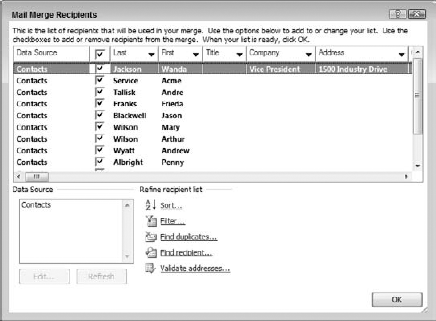
Click the Select Recipients button on the ribbon.
Choose Select from Outlook Contacts from the menu. If you have more than one Contacts folder, you will be prompted to select the folder to use.
Word displays a list of all contacts in the selected folder, as shown in Figure 21.7. Actions that you can take here include:
Remove the checkmark from any recipients that you do not want included in the merge.
Click the Sort link to specify the order of the merge (for example, ZIP code order, last name order, and so on).
Click the Filter link to filter the recipient list (for example, only recipients in California).
Click the Find Duplicates link to scan the recipient list for possible duplicates.
Click OK.
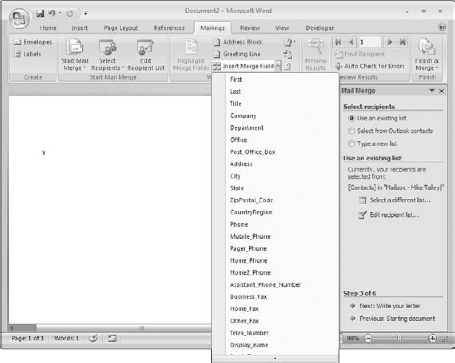
At this point, you are ready to start composing your document. Enter and format text as usual. When you come to a place where you want the document personalized with information from the recipient's list, click Insert Merge Field on the ribbon. Word displays a list of all the available fields, as shown in Figure 21.8.
As you work on the document, you can preview what the end result will look like by clicking the Preview Results button. All merge fields in the document are replaced with data from the first contact in the recipient list. Click the button again to return to the display of merge fields.
When the document is complete, click the Finish & Merge button. The options available on this menu depend on the type of merge you are performing. For example, if you are creating an email merge, you can select Send Emails to generate and send the merged email messages.