
In this chapter you will learn how to: |
|
A database that contains the day-to-day records of an active company is useful only if it can be kept up to date and if particular items of information can be found quickly. Although Microsoft Office Access 2003 is fairly easy to use, entering, editing, and retrieving information in Datasheet view is not a task you would want to assign to someone who’s not familiar with Access. Not only would these tasks be tedious and inefficient, but working in Datasheet view leaves far too much room for error, especially if details of complex transactions have to be entered into several related tables. The solution to this problem, and the first step in the conversion of this database to a database application, is to create and use forms.
A form is an organized and formatted view of some or all of the fields from one or more tables or queries. Forms work interactively with the tables in a database. You use controls in the form to enter new information, to edit or remove existing information, or to locate information. Like printed forms, Access forms can include label controls that tell users what type of information they are expected to enter, as well as text box controls in which they can enter the information. Unlike printed forms, Access forms can also include a variety of other controls, such as option buttons and command buttons that transform Access forms into something very much like a Microsoft Windows dialog box or one page of a wizard.
Tip
Some forms are used to navigate among the features and functions of a database application and have little or no connection with its actual data. A switchboard is an example of this type of form.
As with other Access objects, you can create forms by hand or with the help of a wizard. Navigational and housekeeping forms, such as switchboards, are best created by hand in Design view. Forms that are based on tables, on the other hand, should always be created with a wizard and then refined by hand—not because it is difficult to drag the necessary text box controls onto a form, but because there is simply no point in doing it by hand.
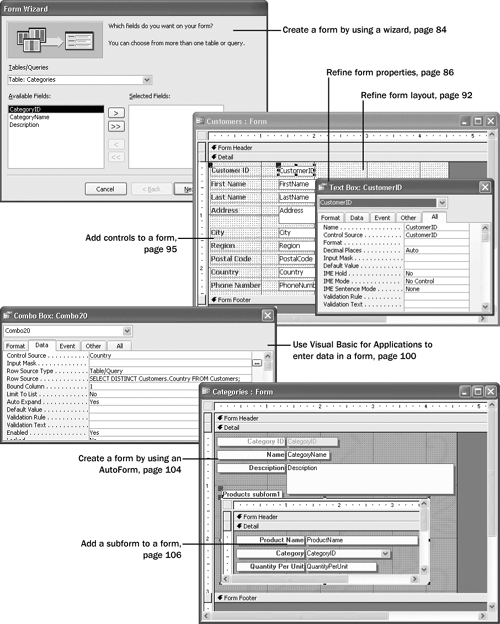
In this chapter, you will create some forms to hide the complexity of the GardenCo database from the people who will be entering and working with its information. First you will discover how easy it is to let the Form Wizard create forms that you can then modify to suit your needs. You’ll learn about the controls you can place in a form, and the properties that control its function and appearance. After you have created a form containing controls, you will learn how to tell Access what to do when a user performs some action in a control, such as clicking or entering text. You will also take a quick look at subforms (forms within a form).
See Also
Do you need only a quick refresher on the topics in this chapter? See the Quick Reference entries in Chapter 4 Simplifying Data Entry with Forms.
Important

Before you can use the practice files in this chapter, you need to install them from the book’s companion CD to their default location. See "Using the Book’s CD-ROM" for more information.

Before you begin creating a form, you need to know what table it will be based on and have an idea of how the form will be used. Having made these decisions, you can use the Form Wizard to help create the basic form. Remember though, that like almost any other object in Access, after the form is created you can always go into Design view to customize the form if it does not quite meet your needs.
In this exercise, you’ll create a form that will be used to add new customer records to the Customers table of The Garden Company’s database.
BE SURE TO start Access before beginning this exercise.
USE the GardenCo database in the practice file folder for this topic. This practice file is located in the My DocumentsMicrosoft PressAccess 2003 SBSFormsFormByWiz folder and can also be accessed by clicking Start/All Programs/Microsoft Press/Access 2003 Step by Step.
OPEN the GardenCo database and acknowledge the safety warning, if necessary.
On the Objects bar, click Forms.
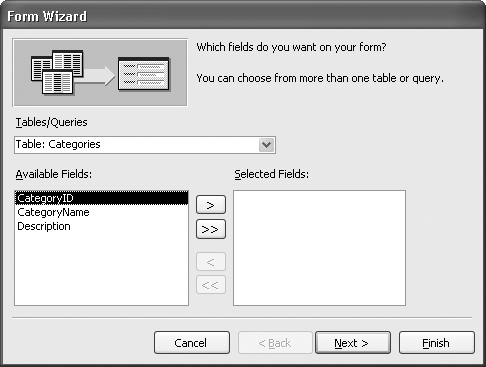
Double-click Create form by using wizard to display the first page of the Form Wizard.
Click the down arrow to the right of the Tables/Queries box and click Table: Customers to display the fields from that table in the Available Fields list.
Click the ≫ button to move all the fields from the Available Fields list to the Selected Fields list, and then click Next.
The second page of the Form Wizard appears, in which you choose the layout of the fields in the new form. When you select an option on the right side of the page, the preview area on the left side shows what the form layout will look like with that option applied.
If it is not already selected, select Columnar, and then click Next.
The third page of the wizard appears, in which you can select a style option to see how the style will look when applied to the form.
Click the Sumi Painting style in the list, and click Next.
Because this form is based on the Customers table, Access suggests Customers as the form’s title. Accept this suggestion, leave the Open the form to view or enter information option selected, and click Finish.
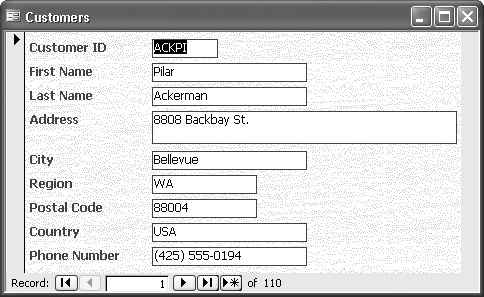
The new Customers form opens, displaying the first customer record in the Customers table.
Use the navigation controls at the bottom of the form to scroll through a few of the records.
Close the form.
CLOSE the GardenCo database.