
People discuss computers in terms of hardware and software. As you probably know, physical items such as computers and monitors are hardware, and all the programs that you use to do things with that hardware are collectively known as software.
Software and hardware are terms that have been around for a while, but middleware is a relatively new term that is slowly becoming known to computer users. Middleware is software that connects two or more otherwise separate applications, which could be software programs or system applications. Middleware programs are freestanding programs and therefore differentiated from importing or exporting functions within applications. Common types of middleware include transaction processing monitors and terminal emulation, messaging, and database access programs. Many middleware applications are Web-based.
In the context of Microsoft Office, middleware refers to the software programs that provide standard features such as Internet browsing, e-mail, instant messaging, video display, and audio playback. The standard Office middleware applications are Microsoft Internet Explorer, Microsoft Outlook Express, Microsoft Windows Media Player, and Microsoft Windows Messenger.
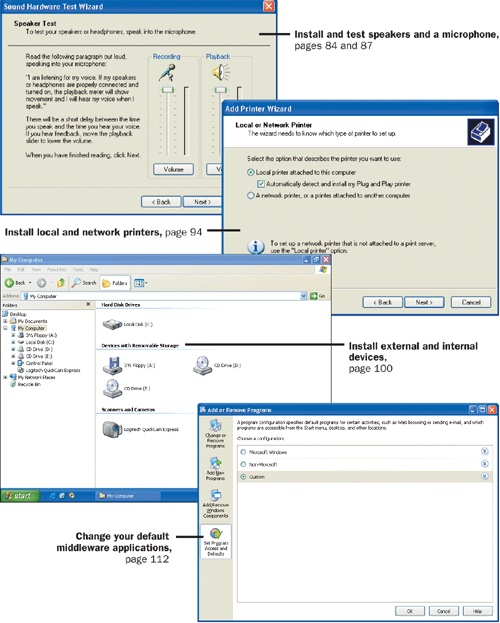
Whether you’re working in an office or at home, you will eventually want to install one or more bits of extra hardware, called peripheral devices, on your computer. Some devices, such as the keyboard, monitor, and mouse, usually come with the computer, but you will purchase others separately. The most common devices are speakers and a printer. Other popular devices include scanners, storage devices such as Zip drives, and fax machines. These devices are all external–meaning that you can install them without having to open up your computer–but others, such as a CD-ROM burner or a tape backup drive, might be internal–meaning that they have to be installed inside your computer’s case.
Many peripheral devices fall into a category called Plug and Play, which quite literally means that you can plug them in and use them–no setup is required. Others might require that you supply some kind of information, usually through a wizard, or they might require a specific device driver in order to work properly. Device drivers enable peripheral devices to "talk" to your computer, but they are unfortunately not universal. To hook up a printer, for example, you might need a driver that is not only specific to the printer but also specific to Microsoft Windows XP.
Nowadays you can pretty much walk into a computer store, purchase a computer, plug it in, and start working without installing any additional software. New name-brand computers usually come with the operating system (in this case, Windows XP) already installed. They might also include software programs that you’ll use to carry out specific tasks, such as word processing. Sooner or later, however, you will want to install additional programs, either from a floppy disk, a CD-ROM, a network server, or the Internet. You might also need to install some of the optional components of Windows XP that did not get set up during the operating system’s installation.
In this chapter, you will learn how to install hardware and software on your Windows XP computer, and how to specify your preferred middleware options.
See Also
Do you need only a quick refresher on the topics in this chapter? See the Quick Reference entries in Chapter 4 Working with Hardware, Software, and Middleware.
Important
Before you can use the practice files in this chapter, you need to install them form the book’s companion CD to their default location. See "Using the Book’s CD-ROM" in Display for more information.
A basic computer system consists of a computer, monitor, keyboard, and mouse. Computer systems that are equipped with sound cards usually come with a set of external speakers so that you can listen to music and other audio files. If you’re a real enthusiast, you might want to purchase fancy surround-sound speakers for your computer. Or if you want to listen to audio output privately, you might want to use speakers that have headphone jacks.
Most standard speaker systems consist of two speakers with one cord that connects them to each other, another that connects them to the computer, and a power cord that connects them to the power source. One speaker might have a volume control (independent of the computer-controlled volume control) and a headset jack.
With the rapid evolution of Internet-based communications, digital video, and speech-to-text technologies, microphones are being used more commonly with business and home computer systems. Microphones come in a variety of options: freestanding microphones, microphones that attach to your computer, headset microphones with built-in headphones that allow more private communication and consistent recording quality, boom microphones with a single headset speaker, and many others.
If you will be recording a lot of speech, it is worthwhile to invest in a good-quality microphone. Anything less and you are likely to find yourself making a return trip to the store. To get the best quality, it is also critical that you choose the type of microphone that best fits your needs. Headset and boom microphones maintain a constant distance between the microphone and your mouth, which helps to maintain a more consistent sound level than a stationary microphone. The headphones built into headset and boom microphones provide the same privacy of conversation as a telephone, because the audio output is heard only by the wearer.
In this exercise, you will connect a stereo speaker system and a microphone to your Windows XP computer. You will then test the connection and adjust the audio input and output levels appropriately.
BE SURE TO log on to Windows and obtain a set of computer speakers and a microphone before beginning this exercise.
Follow these steps:
Remove the audio devices from their packaging, if you have not already done so.
Link the two speakers using the connector cable.
Position the speakers to the left and right of your monitor to provide stereo sound quality.
Plug the speakers into a nearby power outlet using the AC adapter cord.
Plug the speakers into the speaker jack on the sound card at the back of the computer using the connector cable.
Plug the microphone connector cable into the audio input jack on the sound card on the back of your computer.
Click the Start button, and then on the Start menu, click Control Panel.
The Control Panel window appears.
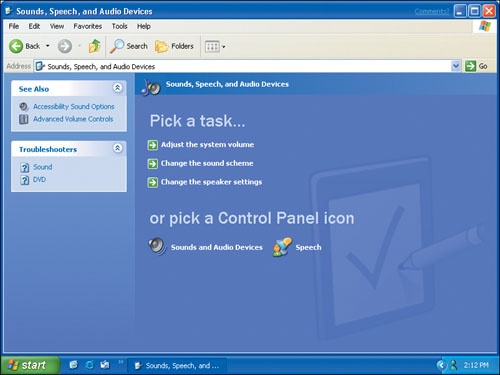
Click Sounds, Speech, and Audio Devices to open this window:
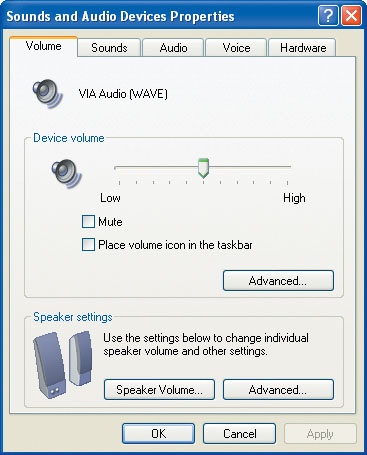
Click the Sounds and Audio Devices icon.
Click each of the tabs, and explore the options available.
On the Voice tab, click Test hardware.
The Sound Hardware Test Wizard appears:
Make sure no programs are open, and then click Next.
The wizard runs an automated test of your sound hardware. You will not hear any sounds during this process.
After completing the automated test, the wizard prompts you to test the microphone:
Read the microphone test paragraph aloud in your normal speaking voice. Just for fun, you might try singing a couple of lines from your favorite song!
You will not hear any sound from the speakers during the microphone test.
As you speak (or sing), the Recording indicator moves in response to your voice. When your voice volume is in an acceptable recording range, the meter is green. If your voice is too loud for the current Recording setting, the indicator enters a yellow or red zone, and the Recording setting adjusts to a lower level. If your voice is too quiet, the setting adjusts to a higher level to pick up your voice at the most appropriate level for recording.
Troubleshooting
If the Recording indicator does not move, your microphone might be incorrectly connected, or it might not be compatible with your computer. If this happens, hold the microphone close to your mouth and scream loudly–if the recording meter moves slightly, the connection is good, and the problem is between your microphone and your computer. You might be able to solve this problem by downloading new device drivers from the microphone manufacturer’s Web site, or it might be simpler to replace the microphone.
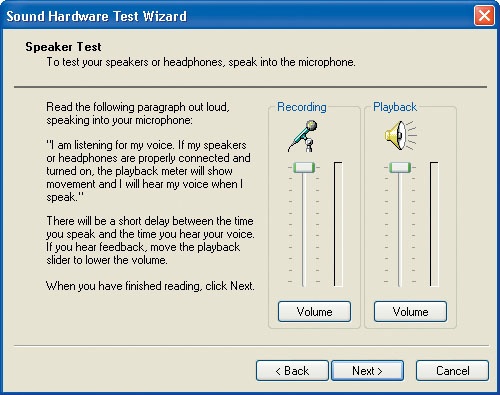
When you have finished reading the paragraph, click Next to begin the speaker test:
Read the speaker test paragraph aloud in your normal speaking voice.
As you speak, the Recording and Playback indicators will move in response to your voice, and you will hear yourself speaking, with a short delay between your words and the sound. (This can be somewhat distracting.) As with the microphone test, the Recording level adjusts to the volume of your voice.
Adjust the Playback slider control to a comfortable listening level.
When you have finished making adjustments, click Next, and then click Finish to close the Sound Hardware Test Wizard.
Click OK to close the Sounds and Audio Devices Properties dialog box, and then click the Close button to close the Sounds, Speech, and Audio Devices window.


A local printer is a printer that is connected directly to your computer. The software to run the printer is installed on and run from your computer. When you connect a printer to your Windows XP computer, Windows XP often recognizes that a printer has been connected. It then searches through its database of drivers to locate the appropriate software to run the printer. If Windows XP doesn’t have the current driver for your particular printer, it asks you to provide the driver.
Troubleshooting
Many printers come with a CD-ROM or floppy disk containing installation files and drivers that were current at the time the printer was manufactured. If you don’t have the current printer drivers, you can usually locate them on the printer manufacturer’s Web site.
In this exercise, you will install a local printer and then test the installation by printing a test page.
BE SURE TO log on to Windows and obtain a printer and any necessary printer drivers before beginning this exercise.
Follow these steps:
Connect the printer to the appropriate plug, or port, on the back of your computer. Then turn on the printer.
At this point, three things might happen:
Windows XP might detect the printer and display a Found New Hardware alert in the notification area at the right end of the taskbar. In this case, Windows knows what printer drivers to install, so wait while Windows finishes the installation process, and skip the rest of the steps.
Windows XP might detect the printer but not have all the information it needs to install it, in which case it displays the Found New Hardware Wizard. Skip to step 10 to complete the instructions.
Windows XP might not detect the printer, in which case it does nothing. Go to step 2.
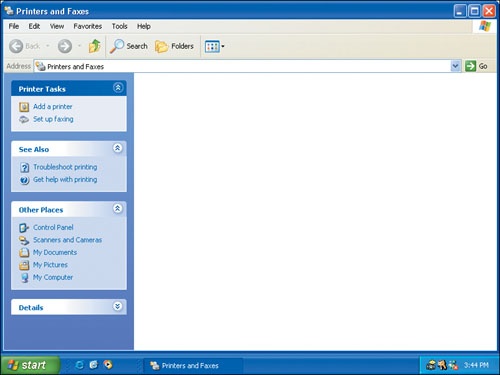
If the Found New Hardware Wizard does not appear, click Start, and then click Printers and Faxes.
On the Printer Tasks menu, click Add a printer.
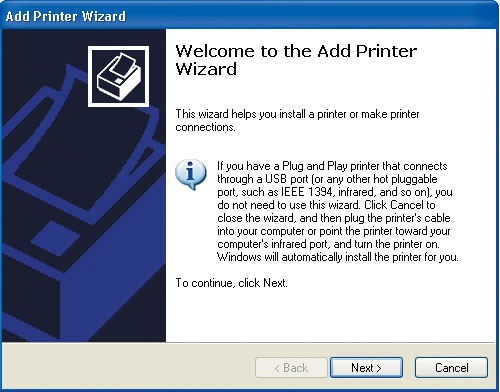
The Add Printer Wizard starts:
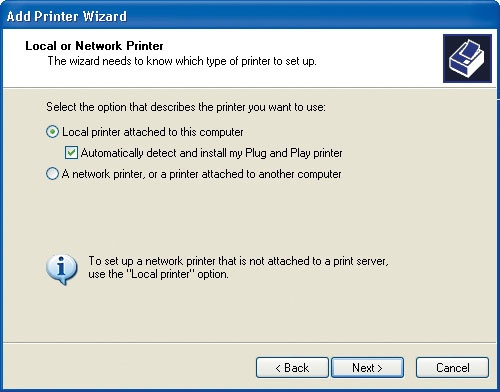
Click Next to move to the wizard’s Local or Network Printer page:
Select the Local printer attached to this computer option.
Clear the Automatically detect and install my Plug and Play printer check box.
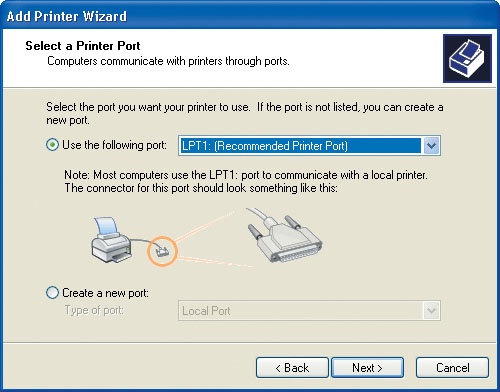
Click Next to move to the wizard’s Select a Printer Port page:
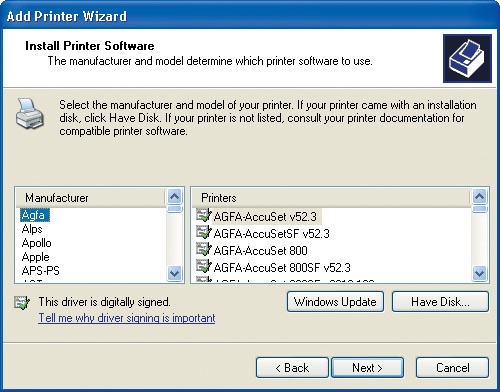
Confirm that your printer is connected to the recommended printer port, or select the correct port from the drop-down list, and click Next to move to the wizard’s Install Printer Software page:
If you have an installation CD-ROM or floppy disk, insert it, click Have Disk, and follow the instructions on the screen to install your printer.
In the Manufacturer list, click the name of the manufacturer of your printer.
The Printers list changes to reflect a list of the printer drivers that Windows XP has stored for that manufacturer.
In the Printers list, select the model of your printer.
Click Next to move to the wizard’s Name Your Printer page.
Type a name for your printer in the Printer name box, or accept the default name, and click Next.
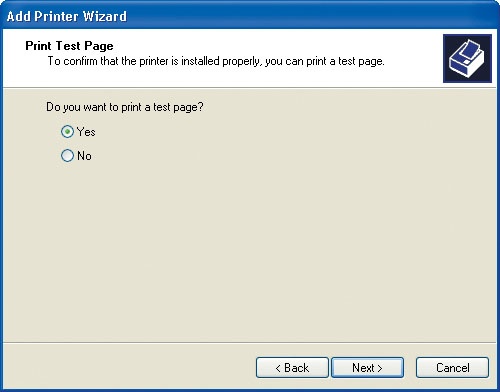
If you are connected to a network and are asked if you want to share the printer, make sure the Do not share this printer option is selected, and click Next to open the wizard’s Print Test Page page:
Select the Yes option, and then click Next.
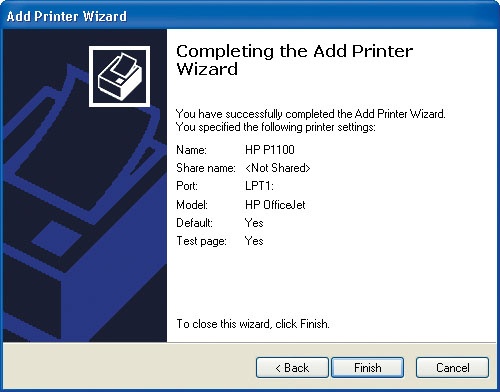
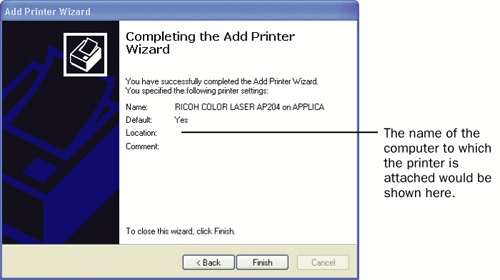
A completion page something like this one appears:
Click Finish to print the test page.
After the test page has printed, a confirmation dialog box appears.
Click OK to close the dialog box and the Add Printer Wizard.
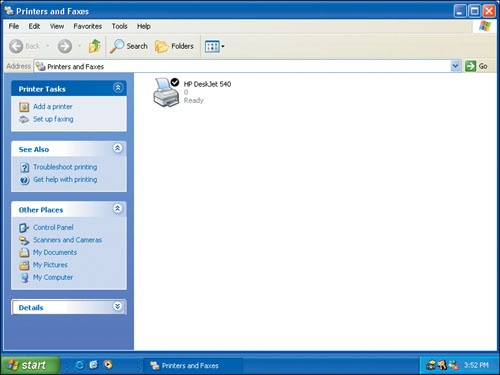
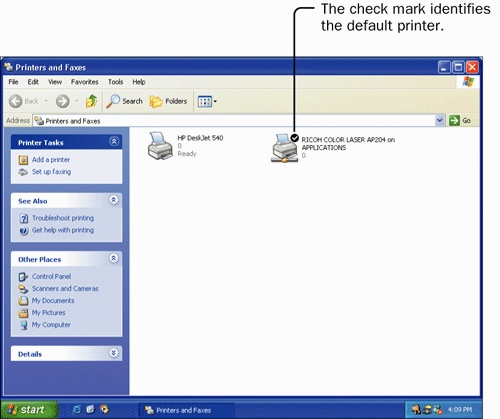
Your printer connection is displayed in the Printers and Faxes window:
Click the Close button to close the Printers and Faxes window.
A network printer is a printer that is not connected directly to your computer. Instead, you access the printer over the network as a free-standing networked printer, through someone else’s computer, through a print server, or through a printer hub.
If the printer you are connecting to is available to everyone on the network, you will not need specific permission to connect to it. If the printer has been made available only to specific people or groups, you will have to ask the printer’s "owner" or your network administrator to make the printer available to you.
In this exercise, you will connect to a network printer.
BE SURE TO log on to Windows and know the name of an available printer on your network before beginning this exercise.
Follow these steps:
On the Start menu, click Printers and Faxes.
The Printers and Faxes window appears with your currently installed printers shown in the right pane.
On the Printer Tasks menu, click Add a printer to open the Add Printer Wizard.
Click Next to move to the wizard’s Local or Network Printer page.
Select A network printer, or a printer attached to another computer, and then click Next.
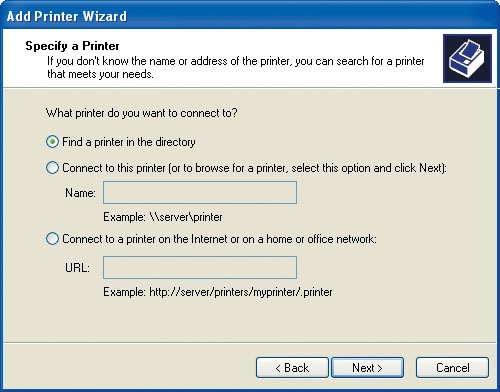
You move to the wizard’s Specify a Printer page:
Select Connect to this printer, and click Next.
On the Browse for Printer page, select the printer you want to use, and click Next.
If not everyone on your network is allowed to use this printer, at this point you might be asked for your user account name and password. Enter them, and click OK. If you are allowed to use the printer, you then see the wizard’s next page. If you are not, you will have to specify a different printer.
If necessary, enter your user account name and password, and then click OK to close the dialog box and make the connection.
If you have more than one printer installed, you are prompted to specify whether you would like this one to be the printer Windows XP uses unless you specify differently:
If this page appears, make your selection, and then click Next.
A completion page appears:
Click Finish to close the wizard.
Your new printer connection is now displayed in the Printers and Faxes window:
Click the Close button to close the Printers and Faxes window.
When you print anything from one of your applications, your computer will use the default printer unless you specifically select a different printer.

Configuring the Fax Service
Good news: You no longer need to spend money on a free-standing fax machine to send and receive faxes! You can now use the Microsoft Fax service to send and receive faxes using a fax modem or a fax board installed in your computer, or via your corporate LAN. You can fax a document from any application, send a cover fax page, and track and monitor your fax activity. New wizards make configuring and sending faxes simple. To configure the Fax service:
On the Start menu, click Control Panel, and then click Printers and Other Hardware.
In the Printers and Other Hardware window, click the Printers and Faxes icon.
On the Printer Tasks menu, click Set up faxing.
When prompted to do so, insert the Windows XP installation CD into the CD-ROM drive, and click OK.
When the configuration process is complete, click the Close button to close the Printers and Faxes window.
Remove the Windows XP installation CD from the CD-ROM drive and return it to its protective sleeve or jewel case.
Scanners are devices you use to convert printed information–words, drawings, photographs, and so on–into digital data that can be processed by your computer. If you have an optical character recognition (OCR) program, scanned documents can often be converted to word processor or spreadsheet files. Scanned photos, drawings, and graphics can be saved as graphic files for use on a Web site or in other documents. The digital image can be opened and enhanced in a graphic-processing program.
Computer-compatible cameras come in various shapes and sizes, including handheld digital cameras and digital video cameras (such as "eyeball" cameras).
Most modern scanners and digital video cameras are Plug and Play peripheral devices. To install a scanner or camera, you can simply plug it into the appropriate port on your computer. Windows XP recognizes the device and installs it on your computer. However, some peripheral devices come with special software that enables the features of the hardware, and some manufacturers recommend that you install the software before connecting the hardware to your computer; this is one case where it’s a good idea to read the manual first!
After the scanner or camera is installed, you can use the Scanner and Camera Wizard in Windows XP to easily create, download, and process images from a scanner, digital camera, or video camera.
In this exercise, you will install and access a Plug and Play scanner or camera.
BE SURE TO log on to Windows and obtain a scanner or camera before beginning this exercise.
Follow these steps:
Plug your scanner or camera into the appropriate port on your computer.
Windows XP detects the device and displays a Found New Hardware message in the notification area of the taskbar while it installs the hardware.
In the Control Panel window, click the Printers and Other Hardware icon.
In the Printers and Other Hardware window, click the Scanners and Cameras icon.
Your installed scanners and cameras are displayed in the right pane of the Scanners and Cameras window.
Double-click the icon for your scanner or camera to open the Scanner and Camera Wizard.
You can now start working with your installed device.
A variety of data storage devices are available; the most common are hard disk drives and floppy disk drives. Every computer has at least one hard disk drive, and almost all computers come with a floppy disk drive installed. However, when you need extra storage space, you don’t have to buy a new computer or even upgrade your hard disk. It is quite simple to install an internal or external storage device on your Windows XP computer, and there are plenty of options to choose from, such as Zip disk drives, Jaz disk drives, and tape drives. For portable data storage, new USB flash drives as small as a finger plug directly into your USB port. You can use these drives to easily transport up to 2 GB of data in your pocket.
To install an external Plug and Play storage device, plug the storage device into the appropriate port and, if necessary, into a power source. Windows XP detects the device and displays a Found New Hardware message in the notification area of the taskbar while it installs the hardware.
Installed storage devices are listed as available storage locations when you open, save, or look for a file on your computer in Windows Explorer.
Although many hardware components can be added to your system through the somewhat simple use of ports and cables, other devices require that components be installed inside the computer’s case. The internal component might be in the form of a card that provides a new connection at the back of the computer, or it might be a new hard disk drive, floppy disk drive, CD-ROM drive, or tape backup drive that is accessed from the front of the computer.
To install an internal device, you need to remove the cover from your computer and delve into its innards. This is not a book on hardware configuration, but we do want to demonstrate the manner in which Windows XP assimilates new hardware as it is added to your system.
In this exercise, you will install an internal CD-RW drive.
BE SURE TO log off of Windows, shut down and turn off your computer, and obtain an internal CD-RW drive and an appropriate screwdriver before beginning this exercise.
Follow these steps:
Disconnect the power cord from your computer.
Remove the computer’s cover, and install the internal device according to the manufacturer’s instructions.
Replace the cover, and reconnect the power cord.
Turn on the computer and log on to Windows XP.
Windows detects and installs the internal device.
Right-click the Start button, and then click Explore on the shortcut menu.
In the left pane, click My Computer.
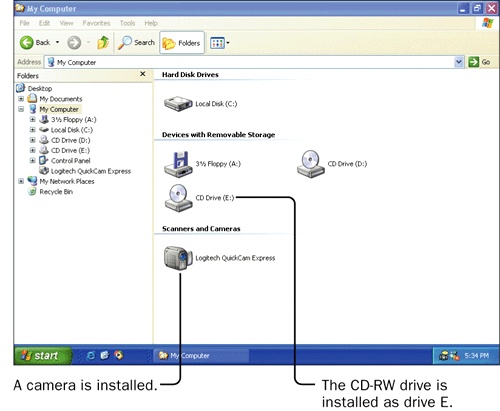
Windows displays a list of the internal and external storage devices installed on your computer, something like this:
Burning Your Own CDs
With CD-Recordable (CD-R) burners and CD-ReWritable (CD-RW) drives now becoming more budget-friendly options, Windows XP includes easy CD burning feature with which you can copy (or burn) your files, photos, music, and software to a compact disc (CD) without the need for third-party software. Most CDs have a data capacity of approximately 650 MB.
To burn data to your installed CD-RW drive:
Insert a blank CD in the CD-RW drive.
Browse to the folder containing the files you want to copy to CD, and click the Copy this folder task.
In the Copy Items dialog box, click the CD drive, and then click Copy.
Click the balloon note that tells you files are waiting to be copied.
On the CD Writing Tasks menu, click Write these files to CD.
Follow the CD Writing Wizard’s instructions to complete the process.
Software programs can be installed from a variety of sources: a CD-ROM, a floppy disk, a file on your computer, over a network, or over the Internet.
Regardless of the source of the installation files, almost all software programs are installed by running an executable file, which is often named Setup.exe. Many software manufacturers use files called autorun files, which are located in the root directory of the place from which the program is being installed–usually a CD-ROM. When you insert the CD-ROM into its drive, your computer checks the drive, and if it finds an autorun file, it starts it. The autorun file in turn starts an executable file that either leads you through the setup process or simply starts the program contained on the CD-ROM. Autorun files take the guesswork out of the setup process, because they don’t require you to browse to a specific location, find a specific file, run a specific program, or make any sort of decision about which installation action to take.
Troubleshooting
With Windows XP, only a user with administrative privileges can install certain programs on your computer. If you do not have administrative privileges for the computer on which you want to install new software, you might find that the installation procedure simply fails. The software setup program might just appear to crash, and you might not suspect that the wrong privileges are the culprit until your third unsuccessful attempt! Check with your network administrator or the person who created your user account if you can’t install a program.
Many companies supply free software or software upgrades that can be downloaded or installed from the Web. To install a program from the Internet, click the link that is provided. Depending on the type of installation file, you might be offered two options–to run the installation file from its current location on the Internet or to download the installation file to your own computer and run it locally. If you have a high-speed Internet connection through a DSL modem or a cable modem, it is simplest to run the installation file from the Internet. If your connection is not very fast or is unreliable, it is usually easier to download the file and run it locally.
Depending on the location from which you are installing the program, you might have to enter a unique registration code, called a product key or CD key, during the setup process:
If you are installing the program from a CD-ROM, the product key is usually located on a sticker on the back of the CD-ROM jewel case.
If you work for a company that keeps the most current versions of its licensed software on one or more servers rather than distributing it on CD-ROM to its employees, your network administrator will be able to supply the product key.
If you are installing the program from the Internet, you might not need a product key, but the software supplier might request or require you to register with the company before installing the software. The main purpose of this requirement is to add you to software manufacturers’ mailing lists so that they can follow up with marketing materials and other information. In the United States, the E-mail User Protection Act (HR 1910) requires that companies provide you with a means to remove yourself from mailing lists, and you can generally find a removal link or instructions at the bottom of the e-mail messages you receive from the company if you would prefer not to receive further messages.
Product keys are one of the methods software manufacturers use to try to prevent software piracy. A program that requires a product key for installation can’t be installed without it. If you lose your product key, you won’t be able to install the program in the future, unless you have registered your copy of the software and can successfully appeal to the software manufacturer for a replacement product key.
Many programs offer multiple installation options, such as default, complete, or custom. Some programs that are installed from a CD-ROM offer the option of copying large files to your computer or accessing them from the CD-ROM when needed. You might have the option of waiting to install rarely used program features the first time you need them to save space on your hard disk for the features that you do need. When choosing your installation type, consider the way in which you will use the application, the amount of space required by the application, and how much space is available on your hard disk. Also think about whether the installation source will be available to you later, in case you need to access files that aren’t installed to your computer or want to reinstall the application. In most cases, the default installation fits the needs of the average user and is the best choice.
When you start the installation process, most programs offer you the opportunity to accept or change the installation location, which by default is usually a product-specific subfolder within the Program Files folder on your drive C. The program might display a progress bar to keep you informed about what is going on during the installation process, and depending on the program, you might be informed of specific actions and file installations as they occur. When the installation is complete, you might be required to restart your computer; in fact, some large program installations require multiple restarts. Restarting the computer allows the installation program to replace older versions of files that are in use and to clean up after itself.
Tip
You can change a program’s settings or remove the program altogether through the Add or Remove Programs dialog box, which is available from Control Panel.
In this exercise, you will install and optionally uninstall the Plus! Photo Story 2 Limited Edition program from a folder on your hard disk drive.
Tip
Photo Story is a program that you can use to create cool slideshows of photographs. You can add movement (such as zooming and panning), music, and narration to make a movie-like presentation that you can share on your computer or Pocket PC, through e-mail, or on a Web site.
See Also
For more information about Plus! Photo Story 2, visit the Web site at www.microsoft.com/windows/plus/dme/Photo.asp.
USE the PS2LE executable file in the practice file folder for this topic. This practice file is located in the My DocumentsMicrosoft PressMicrosoft Windows XP SBSSoftwarePrograms folder.
BE SURE TO log on to Windows before beginning this exercise.
OPEN the My Documents folder, and then browse to the practice file folder.
Follow these steps:
Double-click PS2LE.
The installation program starts and walks you through the process of installing Plus! Photo Story 2 Limited Edition on your computer.
On the wizard’s first page, click Next.
On the wizard’s second page, read the license agreement, select the I accept the terms in the license agreement option, and then click Next.
On the wizard’s third page, click the Install button.
When the wizard finishes installing the program on your computer, clear the Start Plus! Photo Story 2 LE now check box, and then click the Finish button.
The Photo Story installation program does not install a desktop shortcut.
If you are prompted to restart your computer, save and close any open programs, click Yes, and then log on to your computer after it restarts.
Troubleshooting
Many computer programs require that you restart your computer when you install or uninstall the program. This allows the temporary files created during the setup or removal process to be cleared from your system. If you would prefer not to restart your computer when prompted, you can close the dialog box and the setup or removal tasks will be completed the next time you start or restart the computer.
If you are not prompted to restart your computer, click the Close button to close the Software window.
On the Start menu, point to All Programs, and then click Microsoft Plus! Photo Story 2 LE.
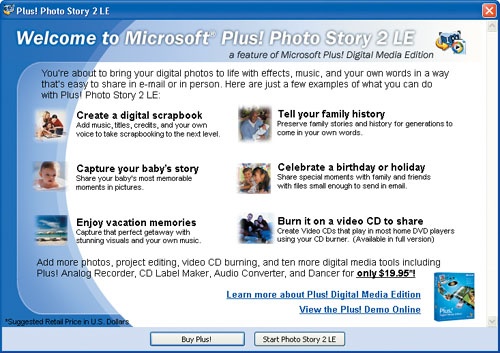
The program displays this welcome screen:
Clicking either of the links in the lower-right corner opens your default Internet browser and connects you to Web pages giving further information about the Microsoft Plus! Digital Media Edition program, of which Photo Story is a part.
Click the Start Photo Story 2 LE button.
Experiment with the program as you like. When you have finished exploring the program, click the Close button to close the program’s window, and again to close the thank you screen.
If you would like to remove the program, on the Start menu, click Control Panel.
In the Control Panel window, click Add or Remove Programs.
The Add or Remove Programs window appears, displaying a list of your currently installed programs.
Scroll down if necessary, and click Microsoft Plus! Photo Story 2 LE.
The Photo Story program listing expands.
Click the Remove button.
When you are prompted to confirm that you want to remove the program, click the Yes button.
The Photo Story uninstall program starts. When it finishes, Photo Story is no longer listed in the Add or Remove Programs window.
Click the Close button to close the Add or Remove Programs window, and again to close Control Panel.
Windows XP comes with a variety of components that are installed automatically during a typical installation. Others are available but are not installed unless you specifically add them to your system.
The Windows Components Wizard walks you through the process of installing, configuring, and removing Windows XP components, which include:
Accessories, utilities, and games
Function-specific programs including Fax Services, Indexing Service, Internet Information Services (IIS), Message Queuing, Networking Services, and other network file and print services
Internet Explorer and MSN Explorer
Management and monitoring tools
Automatic updating of root certificates
In this exercise, you will use the Windows Components Wizard to install and configure the Microsoft Fax Console, an application that is not part of the default Windows XP installation.
BE SURE TO log on to Windows and obtain your Windows XP installation CD-ROM before beginning this exercise.
OPEN Control Panel.
Follow these steps:
In Control Panel, click the Add or Remove Programs option.
In the Add or Remove Programs window, click the Add/Remove Windows Components button to start the Windows Components Wizard.
In the Windows Components Wizard, select the Fax Services check box, and then click Next.
If prompted to do so, insert the Windows XP installation CD into the CD-ROM drive, and then click OK.
In the Windows Components Wizard, click Finish.
Click the Close button to close the Add or Remove Program window, and then again to close Control Panel.
Remove the Windows XP installation CD from the CD-ROM drive and return it to its protective sleeve or jewel case.

If you use certain programs every day, you can easily have Windows start them for you whenever you log on to Windows. For example, some people start their e-mail program first thing in the morning and don’t quit it until just before they go home. Other people might work all day in a particular accounting program. You might want to open your company’s intranet site each morning to look for updates, or you might want to open your favorite Web site to check your horoscope. Whatever the reason, you shouldn’t have to go through a repetitive sequence each day when Windows can do it for you.
Tip
If the program you’re starting requires a user account name and password, you will be prompted to enter that information when Windows starts.
To specify that a particular program should start automatically, you place a shortcut to the program in the Startup folder. Each user has his or her own Startup folder, and there is also a Startup folder that applies to all users, so you can choose to make a program start automatically for everyone, or just for you.
You can access the Startup folders through the Start menu or through Windows Explorer. You cannot access another user’s individual Startup folder, but you can access the folder that pertains to all the people who use your computer.
In this exercise, you will specify that a program be started automatically when anyone logs on to your computer. This example uses Microsoft Paint, but you can substitute any other program.
BE SURE TO log on to Windows before beginning this exercise.
Follow these steps:
On the Start menu, point to All Programs, right-click Startup, and then click Explore All Users on the shortcut menu.
Tip
You can click Explore to open your own Startup folder, or click Open to open the Startup folder with the Folders list closed.
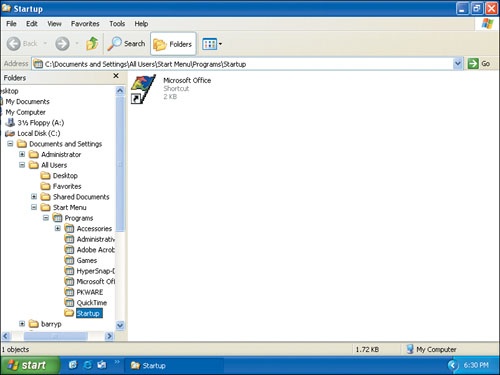
Windows Explorer opens to the C:Documents and SettingsAll UsersStart MenuProgramsStartup folder, with the Folders list open:
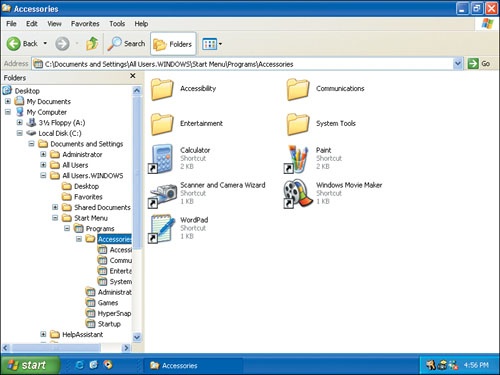
In the Folders list, click Accessories to expand the Accessories folder:
If necessary, move the left pane’s vertical scroll bar until the Startup folder is visible.
In the right pane, point to the shortcut to the Paint program, hold down the right mouse button, and drag the program to the Startup folder in the left pane.
When you release the mouse button, a shortcut menu appears.
On the shortcut menu, click Copy Here.
A copy of the shortcut is created in the Startup folder for all users of your computer to access.
In the Folders list, click the Startup folder to display your new shortcut.
Click the Close button to close the Startup window.
On the Start menu, click Log Off, and then click Log Off in the Log Off Windows dialog box. Then log back on again.
After Windows starts, a new Paint window appears.
Click the Close button to close Paint.
BE SURE TO delete the Paint shortcut from the Startup folder if you don’t want Paint to start every time you open Windows.
If you often work with multiple open windows or large-format files, such as spreadsheets, that are difficult to see on your monitor because of their width, you might want to consider adding one or more monitors. Windows XP makes it easy to configure up to 10 monitors attached to your computer (which is probably overkill, but certainly enough to handle a pretty tough workload).
In this exercise, you will configure your computer to display your Windows desktop on two monitors.
Troubleshooting
If you are uncomfortable disassembling your hardware, ask a professional for assistance.
BE SURE TO log off of Windows, shut down and turn off your computer, and obtain a monitor, video card, and an appropriate screwdriver before beginning this exercise.
Follow these steps:
Remove the cover from your computer.
Insert the second video card into an available slot that matches the size of your video card, and then replace the cover.
Secure the video card and the cover with screws.
Plug the additional monitor into the second video out port.
Turn on your computer.
Windows XP detects the second video card and installs the appropriate device drivers.
On the Start menu, click Control Panel.
The Control Panel window appears.
In Control Panel, click the Appearance and Themes category.
In the Appearance and Themes window, click the Display icon.
The Display Properties dialog box appears.
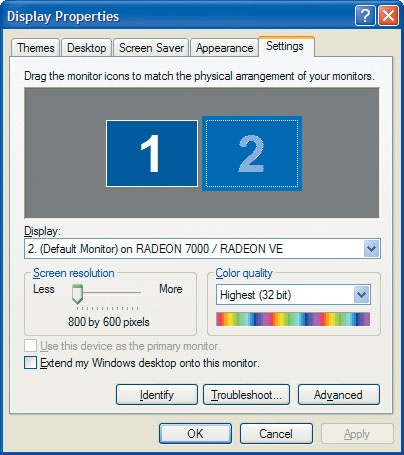
Click the Settings tab, which looks like this:
Select the Extend my Windows desktop onto this monitor check box, and then click OK.
Your display expands to the secondary monitor. The Windows logon screen will always be shown on the primary monitor, as will most application windows when they first open; you can then drag selected windows to the secondary screen.
Because middleware applications are merely connectors and not part of the applications they are connecting, different middleware applications are interchangeable. For instance, you might choose to use Internet Explorer or Netscape Navigator to browse the Internet. You might prefer to read your e-mail using Eudora rather than Outlook Express; or you might have a favorite media player that you would like to use by default.
Although you’ve always been able to install and run your preferred middleware applications on the Windows platform, Windows XP Service Pack 1 (SP1) and Windows XP Service Park 2 (SP2) have made it even simpler to specify your favorite middleware applications as defaults.
If you purchased your computer with the original Windows XP operating system installed or installed the original version yourself, it came with the standard Microsoft middleware applications (Internet Explorer, Outlook Express, Windows Media Player, and Windows Messenger) installed and selected as the default applications. If your computer came pre-installed with Windows XP SP1 or Windows XP SP2, the original equipment manufacturer (OEM) might have stipulated the standard Microsoft middleware applications, or the OEM might have installed other applications and selected them as the default applications for your computer. Regardless of which applications the OEM originally installed and selected as defaults on your computer, the Microsoft middleware applications are available as part of the Windows XP installation, and you can select one or more of them as the default at any time, or use them without selecting them as the default.
After installing SP1 or SP2, you can choose to retain or change the default settings at any time. You have either three or four options when setting your middleware defaults:
Computer manufacturer. Specifies the original defaults set by the OEM. This option is available only if you purchased your Windows XP computer with SP1 pre-installed by the OEM.
Microsoft Windows. Specifies all the standard Microsoft middleware applications.
Non-Microsoft. Specifies the current Web browser, e-mail program, media player, and instant messaging program.
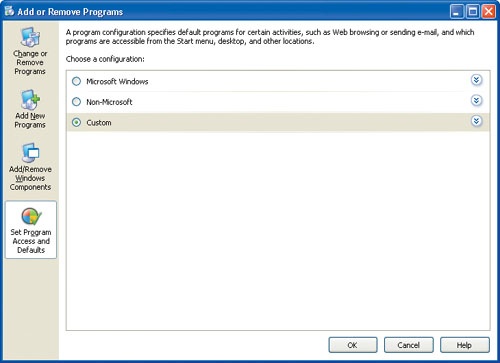
Custom. Specifies that you will customize your selections to either the Microsoft program or the current program for each of the five middleware options.
See Also
For information about Windows XP service packs, refer to "What’s New in Microsoft Windows XP" at the beginning of this book. To find out how to check your operating system version and how to install the most recent service pack, refer to "Updating and Safeguarding Your Computer System" in Chapter 1.
In this exercise, you will check your current default middleware applications and change the default applications if desired.
BE SURE TO log on to Windows and install Service Pack 1 or Service Pack 2 before beginning this exercise. If you want to stipulate a non-Microsoft middleware application as a default application, install it on your computer.
Follow these steps:
On the Start menu, click Set Program Access and Defaults. If the Set Program Access and Defaults command does not appear in the frequently used programs area of your Start menu, click Control Panel on the Start menu, click Add or Remove Programs, and then click Set Program Access and Defaults.
The Add or Remove Programs window appears to the Set Program Access and Defaults page, shown here:
Click the double chevrons to the right of the Microsoft Windows and Non-Microsoft options and review the expanded description. When you’re done, click the double chevrons again to contract the description.
Click the double chevrons to the right of the Custom option and review the choices. If you have alternate, non-Microsoft middleware applications installed, they will be visible here if their manufacturers have incorporated a special piece of code. If your alternate middleware application isn’t shown here, you can still choose it by selecting the Use my current... option.
If you’d like to make a change to your default middleware applications, make your selection here and then click OK. If you don’t want to make any changes at this time, click Cancel.
Windows XP automatically configures connections to a variety of hardware devices using Plug and Play technology.
You can instruct Windows XP to automatically start any software program when you start or log on to your computer.
Windows XP supports multiple-monitor displays, so you can spread your open applications across two screens.
You can choose the applications that your computer uses when accessing the Internet, watching or listening to media, and communicating by e-mail and instant messaging.