Chapter 5. List and library essentials
Organizations rely on accessing pertinent information so they can respond quickly to business needs. Microsoft SharePoint 2013 offers true document-management capabilities and is all about sharing information through apps called lists or libraries.
A list is a collection of like items, such as contact information, calendar events, or inventory items. Similar to a database table, each list contains data that you enter yourself or import from another source. You control how the information is displayed and who has access to either view or manipulate that data. SharePoint provides a central location for team members to access current, accurate, and relevant data.
You can create a custom list that describes the information that you want to capture, or use standard templates that come out of the box. SharePoint 2013 comes with several lists for collecting different kinds of information, such as tasks, announcements, contacts, and links, just to name a few.
Using your apps
Microsoft has included a new application development model in SharePoint 2013 called the SharePoint app. Certainly, we’ve all become familiar with the phrase, “There’s an app for that.” Well, now SharePoint can say the same. These self-contained web applications can come out of the box or be downloaded from Microsoft’s SharePoint Store. Apps provide users with a way to access existing applications that others have already built rather than building them from scratch. Lists and libraries are apps as well as being other useful mini programs.
Perhaps you want to highlight a “Tip of the Day” section on your SharePoint site or implement a Timesheet in which employees can enter their project hours. You can download these apps from the SharePoint Store for free instead of hiring a developer to design and implement it!
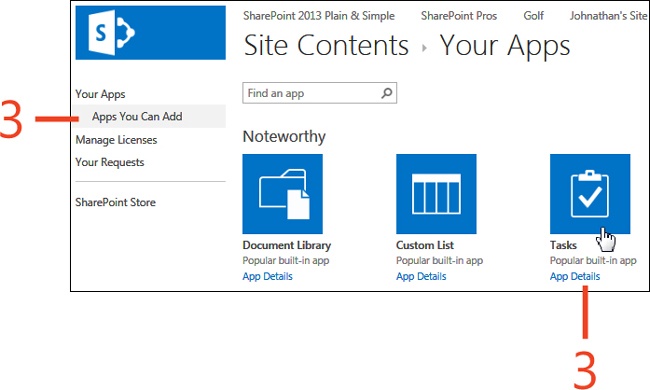
Add an app on SharePoint
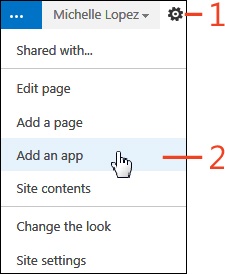
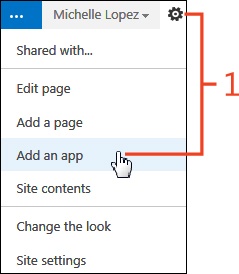
In the upper-right corner of the window, click the Settings icon (the small gear graphic).
On the menu that appears, click Add An App.
Click the app that you want to add to your site.
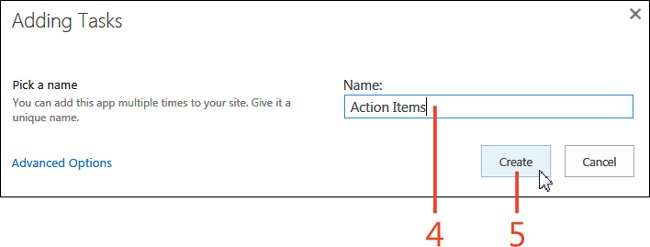
Enter a name for the new app.
Click Create.
Add an app from the SharePoint Store
In the upper-right corner of the window, click the Settings icon.
On the menu that appears, click Add An App.
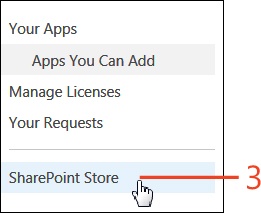
On the Your Apps page, on the Quick Launch bar, click SharePoint Store.
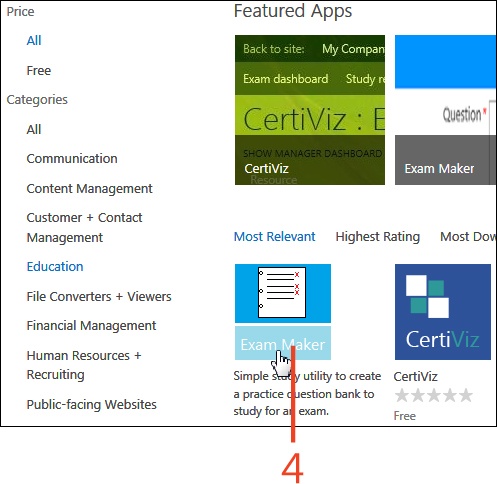
Click the app that you want to add to your site.
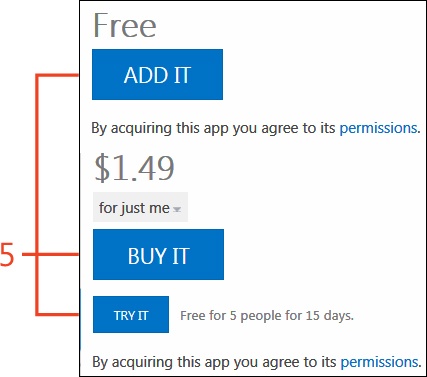
Click Add It, Buy It, or Try It.
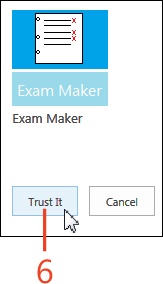
If the app requests trust confirmation, follow any instructions that are presented and then click either Trust It or Cancel.

Creating and deleting lists
Although SharePoint 2013 provides you with several lists and libraries based on commonly used templates, you’ll likely need to customize your list to suit your needs. Perhaps you need a way to display employee vacations or track open issues—SharePoint makes this possible with just a few clicks. To keep your site clean, you’ll want to get rid of unused or obsolete lists, as well.
Create a list or library
In the upper-right corner of the window, click the Settings icon, and then, on the menu that appears, click Add An App.
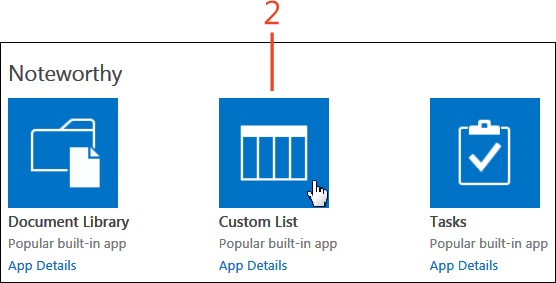
On the Your Apps page, under the Noteworthy section, select either Document Library or Custom List. For this example, the Custom List app is used.
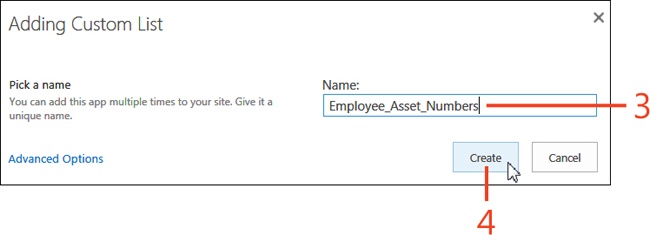
In the Adding Custom List dialog box, enter a name for your list (or library).
Click Create.
Tip
When naming your list, use underscores (_) in place of spaces between words or omit spaces between words altogether. This helps to keep the assigned URL clean. If you want to rename your list after you create it, go to the List Settings and then, in the General Settings section, click List Name, Description And Navigation. There, you can edit the name of your list to include spaces.
Delete a list or library
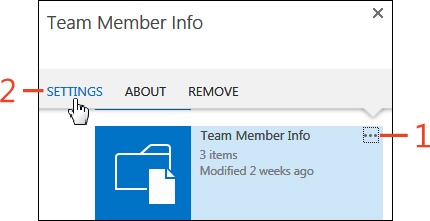
Hover over the list or library that you want to delete and then click the drop-down menu icon (...).
On the menu that appears, click the Settings link.
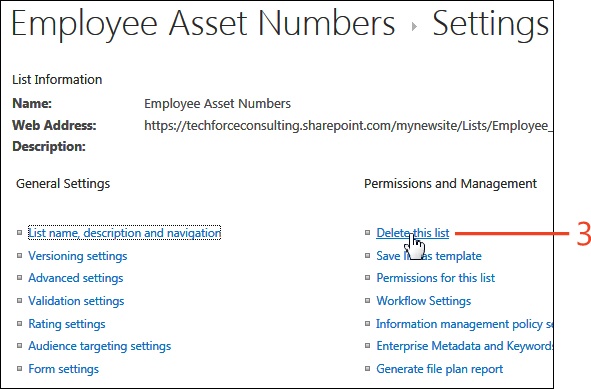
On the Settings page, under the Permissions And Management section, click Delete This List (or Delete This Library).
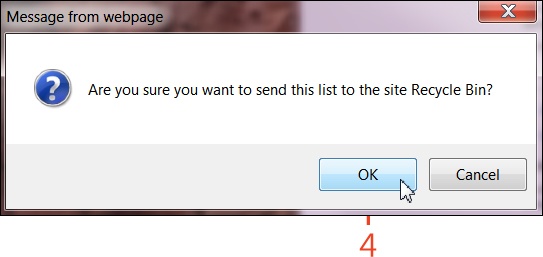
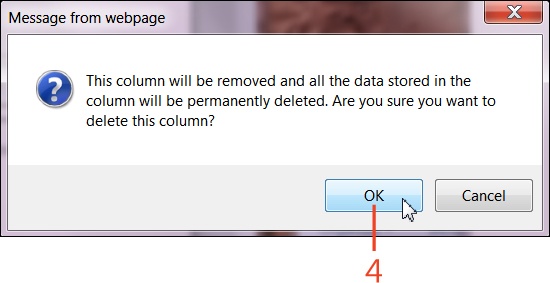
In the pop-up message box, click OK to confirm that you want to send the list to the Recycle Bin.
Adding and editing list items
After creating a list, you’ll want to populate that list with the information for which it was designed. Each row in your SharePoint 2013 list is called a list item. SharePoint can support up to 30 million items in one SharePoint list! Depending on your permission level, you can create, edit, and delete items.
You can also attach documents or items to a list item. For instance, it would be practical to attach a menu to a restaurant list or an agenda to a calendar item. By default, SharePoint supports including attachments to list items; however, you can turn off this feature on the Settings page for the list, if you’d like.
Add a list item
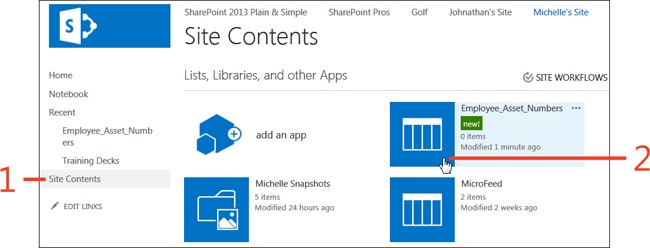
On the Quick Launch bar, click Site Contents.
On the Site Contents page, click the list to which you want to add items.
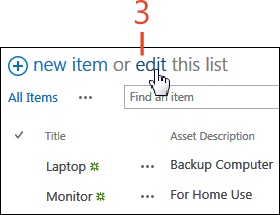
In the list, click New Item.
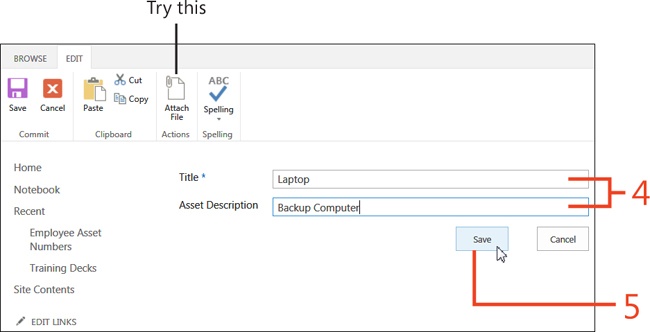
On the list’s Edit page, click with the mouse or use the Tab key to move through the item fields, entering data as required or as you see fit.
Click Save.

Edit a list item
Click the list in which you want to edit items.
Click Edit above the list items.
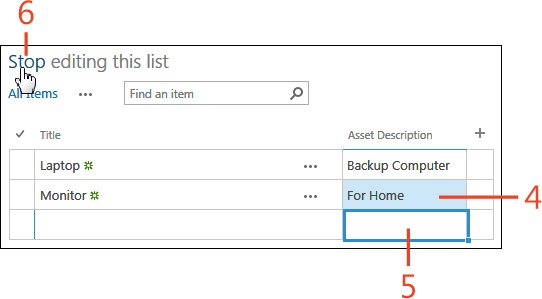
Click the mouse or use the Tab key to navigate between and edit the item fields.
Click the mouse or use the Tab key to select a different field; the changes are automatically saved.
When you’re done making changes, click Stop above the list items.

Deleting and restoring list items
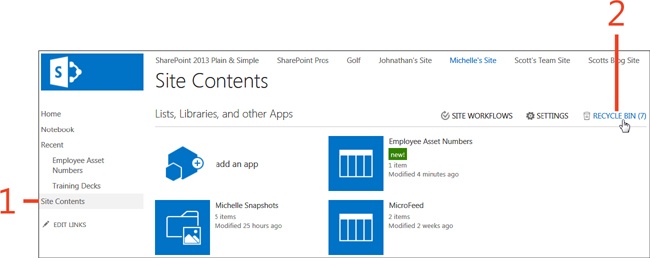
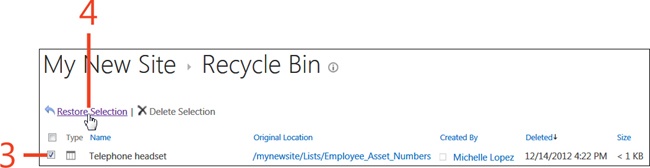
It’s possible that a user will want to retrieve a deleted item. SharePoint 2013 provides an easy way to restore that deleted item back to its original location.
Deleted items will remain in the site collection’s Recycle Bin for 30 days. If you delete an item from your Recycle Bin, you can request that your Site Collection Administrator restore the item back to its original location for you, as long as the item hasn’t exceeded 30 days from the original deletion date.
Delete a list item
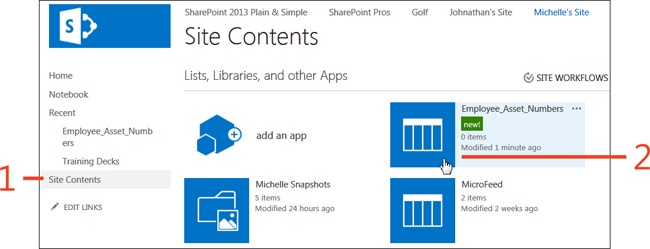
On the Quick Launch bar, click Site Contents.
Click the list from which you want to delete items.
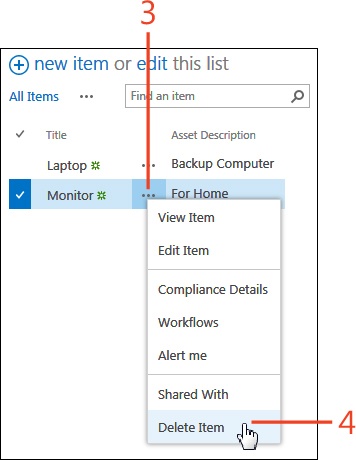
Hover over the item that you want to delete and then click the menu drop-down icon (...).
On the menu that appears, click Delete Item.
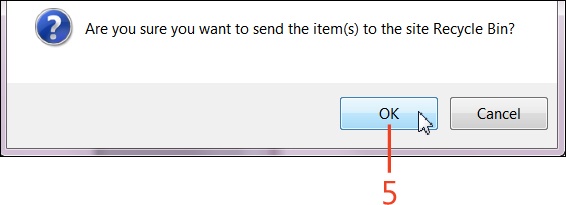
In the pop-up message box, click OK to confirm that you want to send the item to the Recycle Bin.
Restore a deleted item
Creating list columns
SharePoint 2013 provides several templates for common list types, such as Announcements, Calendar, Contacts, and Tasks. These templates can be used and then customized so that you don’t have to create a new list from scratch. Create additional columns to suit your list or library’s purpose.
Create a column
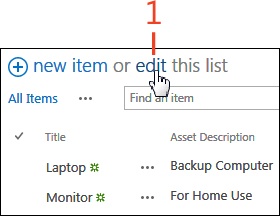
In a list, above the list items, click Edit.
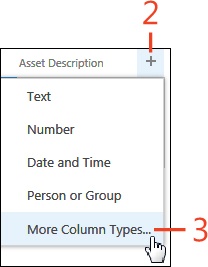
To the right of the column headings, click the Add button (the “+” sign).
On the menu that appears, click More Column Types.
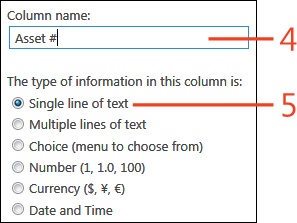
In the Column Name text box, enter a name for the column.
Choose the type of information that the new column will store.
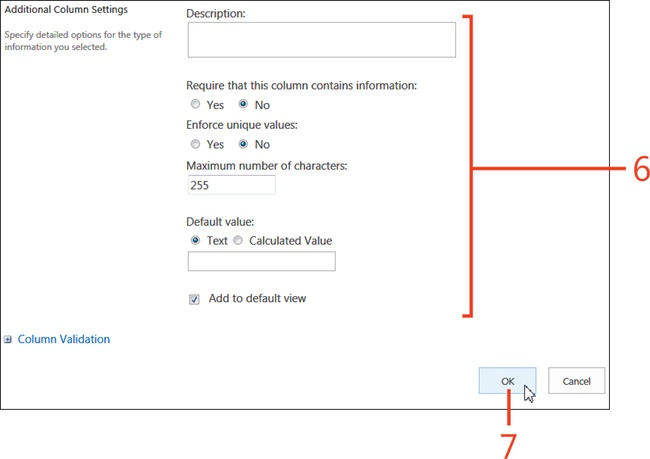
In the Additional Column Settings dialog box, you can also optionally edit the following column settings:
Description. What you enter here displays under the field when the user is editing the form.
Require That This Column Contains Information. Select Yes to require data to be entered in this field.
Enforce Unique Values. Select Yes to require that each value in this column be unique in this list.
Maximum Number Of Characters. This determines the maximum number of characters that can be entered in this field.
Default Value. Any text entered here will be the default column entry when a new item is created.
Add To Default View. Select this check box to add this column to the default view of this list.
Column Validation. Use rules to accept or reject information entered in this column based on defined criteria.
Click OK.
Editing and deleting list columns
After you’ve created new columns for your list or library in SharePoint 2013, you might change your mind about the column name or data type. You might want to require that information is entered in a field or include a different default value. You can also delete columns that are no longer necessary.
Edit column settings
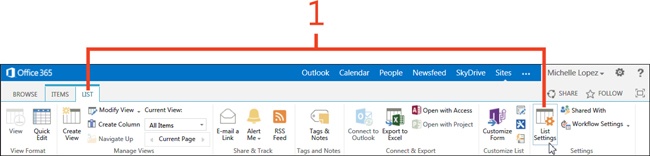
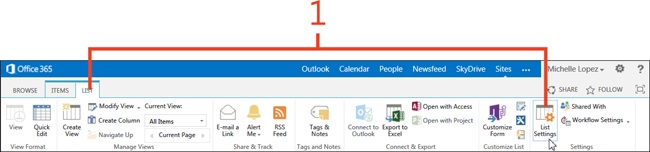
On the List tab, in the Settings group, click List Settings.
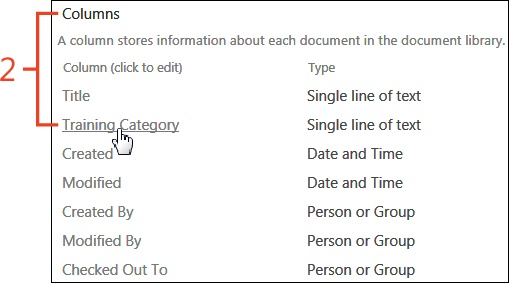
On the List Settings page, in the Columns section, click a column title.
Make the desired Column changes and click OK.


Using list and column validation rules
Being that we’re human, entries are bound to contain formatting errors. A SharePoint 2013 feature uses validation rules to accept or reject the entered information based on defined criteria. Rejected information needs to be corrected by the user before the item can be saved in the list. Validation rules exist on individual columns as well as the list level. SharePoint evaluates column rules before evaluating list level rules.
Validation rules are only available on the following column types: Single Line Of Text, Choice, Number, Currency, and Date/Time.
Add a validation rule to a column
On the Library tab, in the Settings group, click Library Settings (or List Settings on the List tab).
On the Library Settings page, in the Columns section, click a column title.
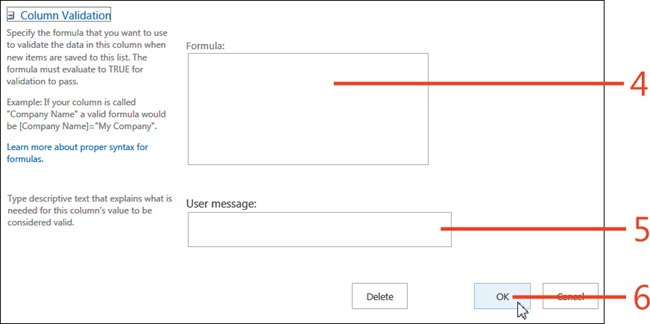
Scroll down to Column Validation and click the plus sign (+) icon next to Column Validation to expand the section.
In the User Message text box, enter a message to display if the information entered in the field is not valid.
Click OK.

Add a validation rule to a list
On the List tab, in the Settings group, click List Settings.
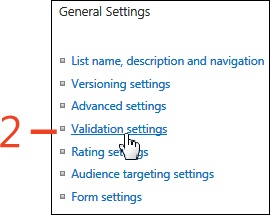
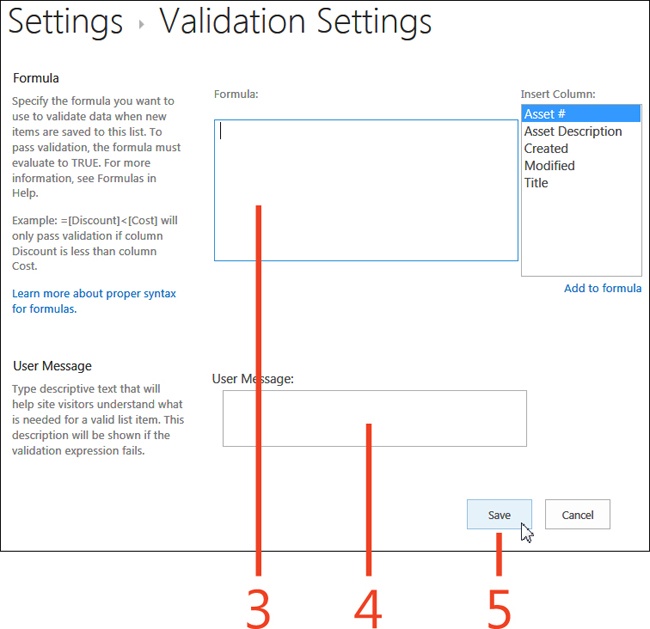
On the List Settings page, in the General Settings section, click Validation Settings.
In the Formula text box, enter a validation formula.
In the User Message text box, enter a message to display if the information entered in the field is not valid.
Click Save.

Sorting and filtering lists
Information in lists can be organized and displayed by using views. Views can be created and modified to specify which fields are displayed, the column order, how they are sorted, and whether the information is filtered and/or grouped. SharePoint 2013 provides several formats for displaying views, as well, such as Standard and Datasheet views. Standard views support dynamic sorting and filtering directly in the column headers, whereas Datasheet views give users the option to enter data as a batch instead of entering one list item at a time. Here, you’ll learn how to manually sort or filter a Standard view.
Sort a list
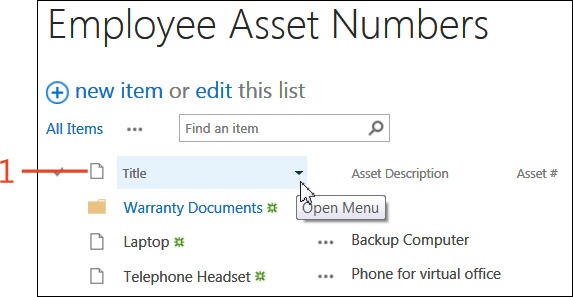
Hover your mouse pointer over the title of the column by which you want to sort.
Click the drop-down arrow to the right of the column title.
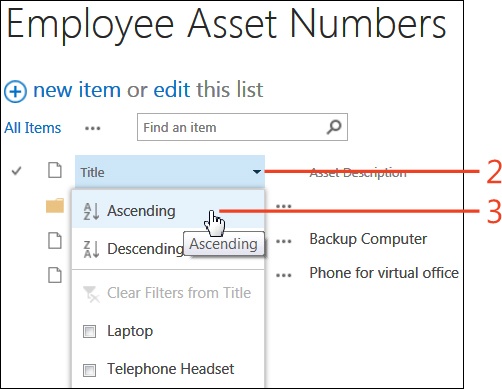
On the menu that appears, click either Ascending (A on Top) or Descending (Z on Top).
See Also
To sort on more than one column, you need to configure a list view. See Create a list view.
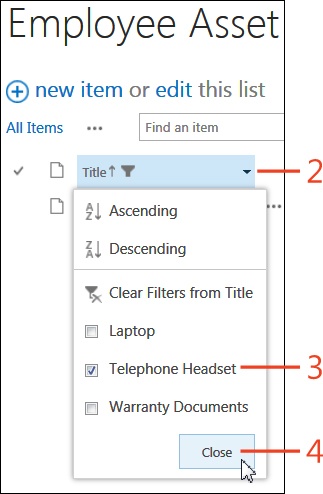
Filter a list
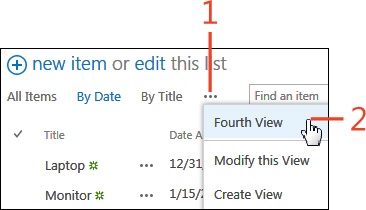
Creating and selecting a list view
SharePoint 2013 provides users with flexible ways to display their list information by using views. You control which fields appear in each list, the field order, as well as filtering or sorting on multiple columns. Additionally, information can be grouped to collapse or expand for a treelike view. Users can determine whether their configured views are available to all users or just themselves, and can be defined for mobile devices. If a preferred view of the list data already exists but is not the default view, SharePoint 2013 makes it easy to switch to that view.
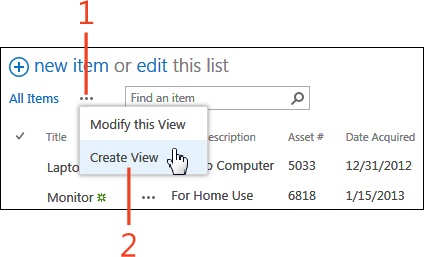
Create a list view
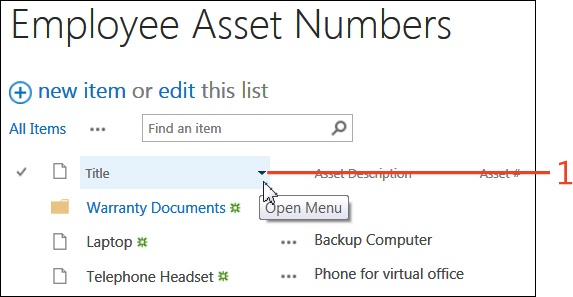
Click the drop-down menu icon (...) above the list headings.
On the menu that appears, click Create View.
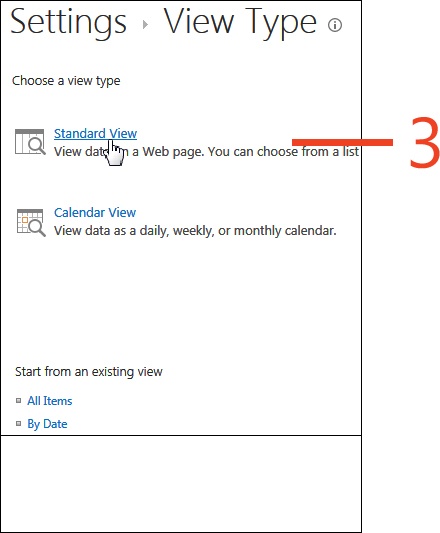
On the View Type page, click Standard View.
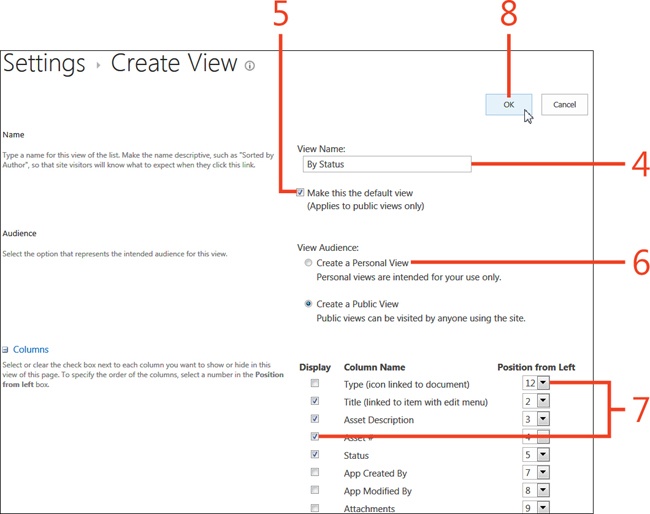
On the Create View page, in the View Name text box, enter a unique name for the view.
Select the Make This The Default View check box to make this new view the default view.
In the View Audience section, choose to make the view Personal (for your use only) or Public (available to all site users).
In the Columns section, you can perform two activities:
Select the check box adjacent to the columns that you want to display in the view; clear the check boxes adjacent to the columns that you want to hide.
Order the columns sequentially from left to right by selecting numbers in the Position From Left column.
At the top or bottom of the page, click OK.
Sorting or filtering a list view
If you find yourself continuously filtering the default view to meet your needs, why not eliminate that time by creating alternate views that you’ll access often? Here, you’ll learn how to modify views by using the sort and filter features.
Sort a list view
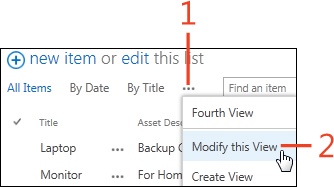
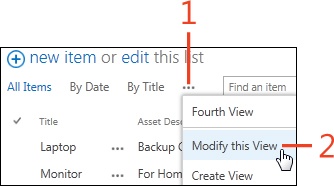
Click the drop-down menu icon (...) above the list headings.
On the menu that appears, click Modify This View.
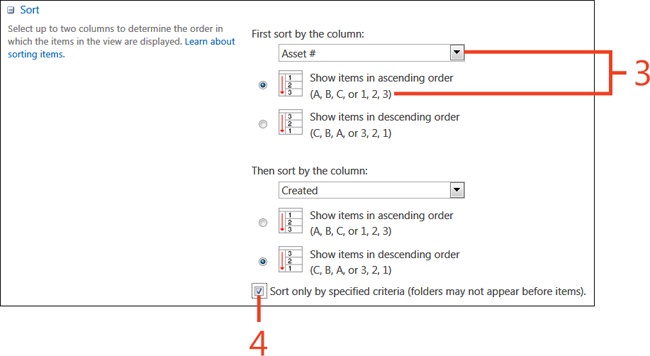
In the Sort section, you can perform two activities:
Click the drop-down list and select the First Sort By The Column.
Select whether you want that sorted column in ascending or descending order.
If you don’t want folders to appear before items, select the Sort Only By Specified Criteria check box.
At the top or bottom of the page, click OK.
Filter a list view
Click the drop-down menu icon (...) above the list headings.
On the menu that appears, click Modify This View.
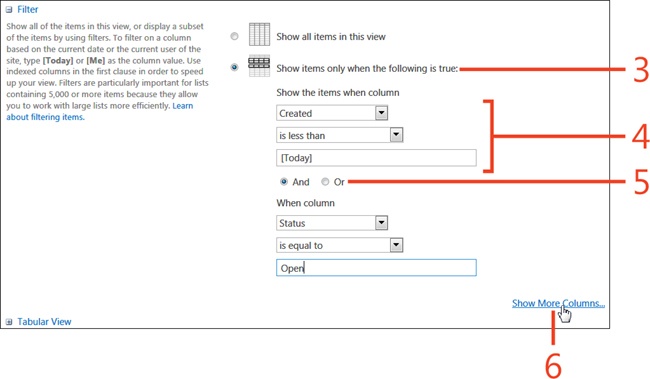
In the Filter section, click the Show Items Only When The Following Is True option.
To enter filter criteria, do the following:
Select a column on which to filter from the first drop-down menu.
Select a condition from the second drop-down menu.
Enter a value in the text box.
Select And or Or to enter additional filter criteria.
To filter on more than two criteria, click Show More Columns.
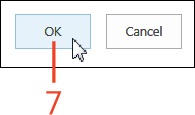
At the top or bottom of the page, click OK.
Organizing items by using folders
In SharePoint 2013, you can create folders to organize your lists, similar to creating folders on your computer. However, for the purposes of organizing information, adding a folder in a list can interrupt the display of the captured information.
You could use SharePoint to organize a Class Schedule listing different Classes, Class Times, and Costs to view at a glance. It would be helpful to have a folder for Class Descriptions for this scenario. Preparing an efficient organizational strategy ahead of time to locate, process, and manage your information is always a best practice.
Create a folder
On the Quick Launch bar, click Site Contents.
On the Site Contents page, locate the list or library in which you want to create a folder.
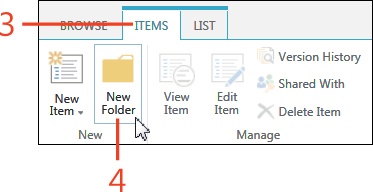
On the ribbon, click the Items tab of a list, or the Files tab of a library.
Click New Folder.
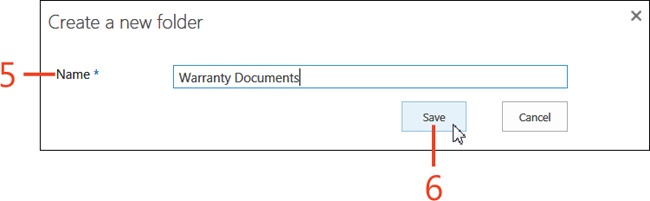
In the Create A New Folder dialog box, enter a folder name.
Click Save.