Chapter 14. Security within SharePoint 2013
Securing an organization’s information is crucial. Protecting organizational content is a key component to the success of that security.
Microsoft SharePoint 2013 provides proficient security tools to ensure that teams are completely confident that their content is available only to the users to whom they’ve granted access. Using the SharePoint security model, you can apply access privileges at an overall level such as the site collection, down to an individual level like a single document—not to mention all the levels in between (sites, pages, or lists and libraries).
Understanding SharePoint security
You can only access SharePoint 2013 if a SharePoint administrator or site owner grants you permission. You can grant permissions to groups of people or to individuals. SharePoint administrators can grant access to Active Directory groups, or Windows network groups, as well.
It is recommended to add individuals to SharePoint groups and then provide access to those groups, rather than directly to individuals. A SharePoint group is a collection of individuals (up to 5,000), and it is much more convenient to manage the applied security settings to a group than to manage individual users.
View site permissions
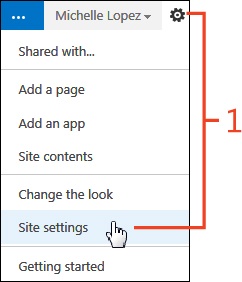
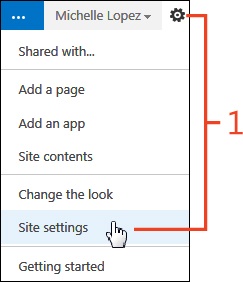
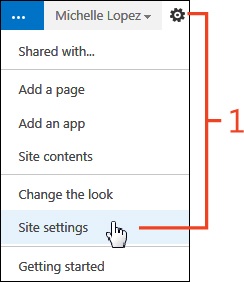
On the Home page, click the Settings button (the small gear icon next to the name of the logged-on user). On the menu that appears, click Site Settings.
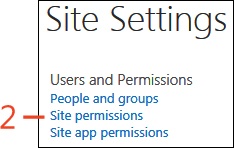
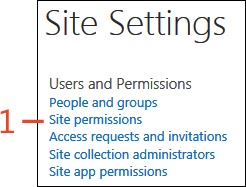
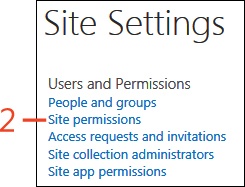
On the Site Settings page, in the Users And Permissions section, click Site Permissions.
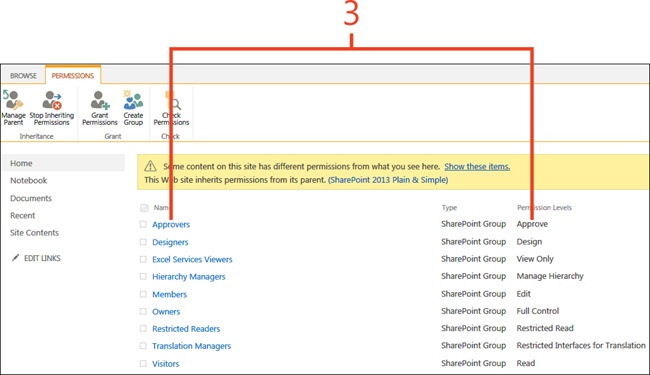
On the Permissions page, view the permission levels assigned to each group on the site.
Adding people to groups
A new site can be created to use the same permissions as the parent site or to use unique permissions. Upon creation of a new site with unique permissions, SharePoint 2013 automatically creates three groups: Visitor, Member, and Owner. New groups can be created, and unused groups can be deleted.
Permissions then need to be assigned to groups for them to actually be of use. SharePoint administrators can use permission levels to control what groups or individuals can do within SharePoint. Thirty-three selectable permissions can be mixed and matched in different combinations to define thousands of permission levels.
Permission levels determine what type of activities that group can perform on a site, page, list, library, item, or document. Upon creation of a new team site, SharePoint automatically creates seven permission levels:
Permission level | Definition |
Full Control | Users have full control of a site to add, delete, approve, move, and create new sites. |
Design | Users can view, add, delete, approve, and customize a SharePoint site. |
Edit | Users can add, edit, and delete lists. They can also view, add, update, and delete list items and documents. |
Contribute | Users can view, add, update, and delete list items and documents. |
Read | Users can view pages and list items. They can also can download document copies. |
Limited Access | User can view specific lists, document libraries, list items, folders, or documents when given permission. |
View Only | Similar to the Read permission level, but users cannot download items. |
Add people to existing groups
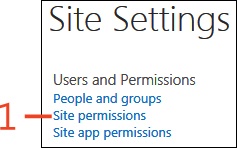
On the Site Settings page, in the Users And Permissions section, click Site Permissions.
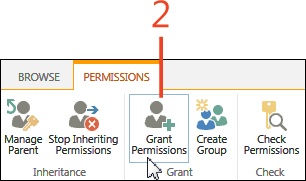
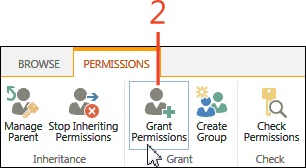
On the Permissions page, click the Permissions tab and then, in the Grant group, click Grant Permissions.
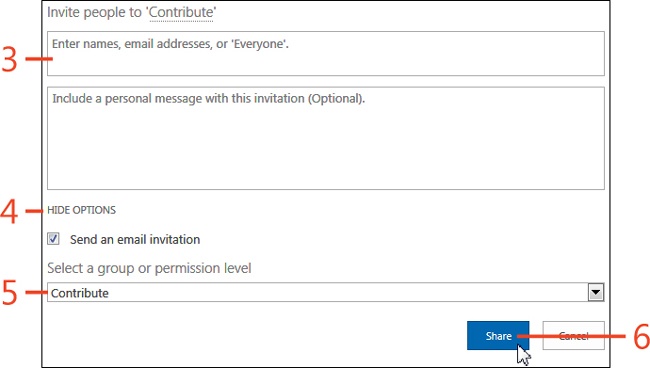
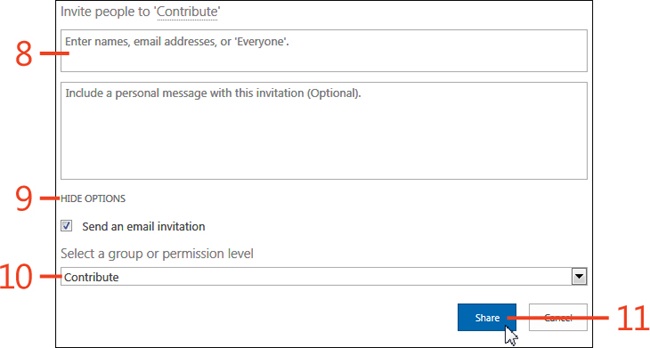
In the Share dialog box, in the designated text box, enter names, email addresses, or the word “Everyone”.
Click the Hide Options button.
In the Select A Group Or Permission Level list box, select a group name.
Click Share.

Creating groups
Customizing SharePoint groups makes it possible for your organization to effectively grant access to only the users it specifies. When you create a group, you can name it, assign it a permission level, and add people to it.
Create a group
On the Site Settings page, in the Users And Permissions section, click Site Permissions.
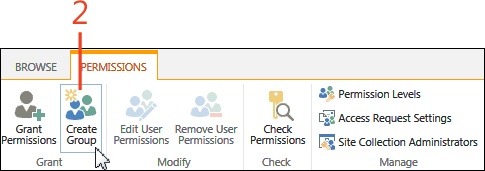
On the Permissions page, click the Permissions tab and then, in the Grant group, click Create Group.
On the Create Group page, in the Name text box, enter a name for the group.
In the About Me text box, enter a description.
Assign a group owner to the group.
In the Give Group Permission To This Site section, select a check box corresponding to the permission level that you want to assign to the group.
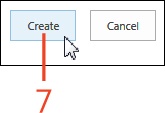
Click Create.


Granting permissions to an individual
By assigning people to SharePoint 2013 groups, you can see what permissions an individual has and assign those same permissions to someone else simply by adding that person to the same group. Occasionally, however, you might need to assign permissions directly to a user to grant access to a site or its individual items.
Grant permissions to an individual
On the Site Settings page, in the Users And Permissions section, click Site Permissions.
On the Permissions tab, in the Grant group, click Grant Permissions.
In the Share dialog box, in the designated text box, enter names, email addresses, or the word “Everyone”.
Click the Show Options button.
In the Select A Group Or Permission Level list box, select a permission level.
Click Share.
Breaking permission inheritance
By default, all children objects (sites, pages, lists, libraries) inherit their permissions from their parent site. Permissions for objects cascade from the parent to the child. For instance, a subsite inherits the permissions of its parent site. A library inherits the permissions of the site in which it is created, and a document inherits the permissions of the library to which it is uploaded. If you want to stop this inheritance and customize permissions, you’ll need to break inheritance.
Perhaps you have a site with team information for everyone on your team. By default, everyone who has access to a team library can see the documents in that library. Still, you might want to restrict the Performance Reviews folder to only allow managers to access it. In this case, you would break the inheritance from the parent library so that only the Managers group can see that particular folder.
Break inheritance
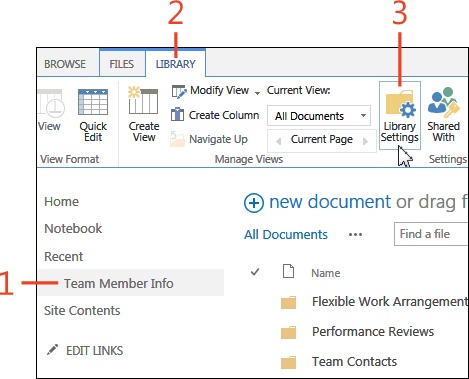
Select the list or library with which you want to work (for this example, we’ll work with a library).
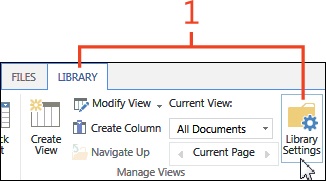
On the ribbon, click the Library tab.
In the Settings group, click Library Settings.
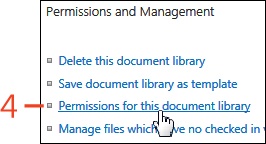
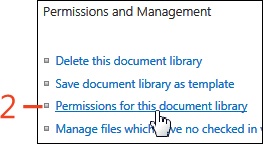
On the Library Settings page, in the Permissions And Management section, click Permissions For This Document Library.
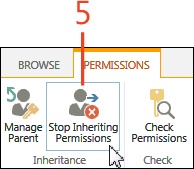
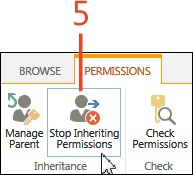
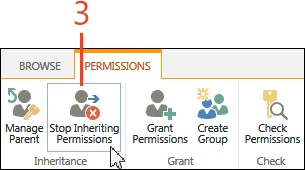
On the Permissions tab, in the Inheritance group, click Stop Inheriting Permissions.
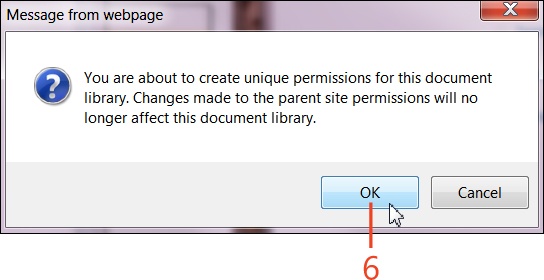
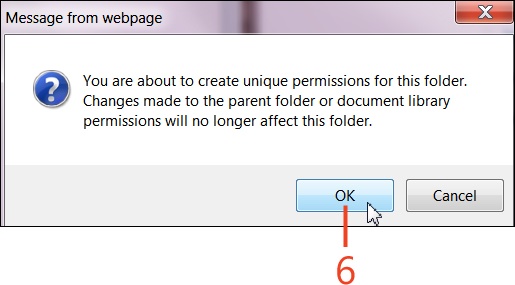
In the pop-up message box that asks you to confirm the change, click OK.
Inherit parent permissions
Select the list or library with which you want to work (for this example, we’ll work with a library). On the ribbon, click the Library tab and then, in the Settings group, click Library Settings.
On the Library Settings page, in the Permissions And Management group, click Permissions For This Document Library.
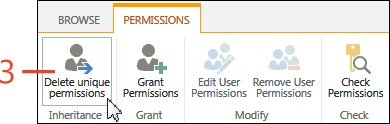
On the ribbon, click the Permissions tab and then, in the Inheritance group, click Delete Unique Permissions.
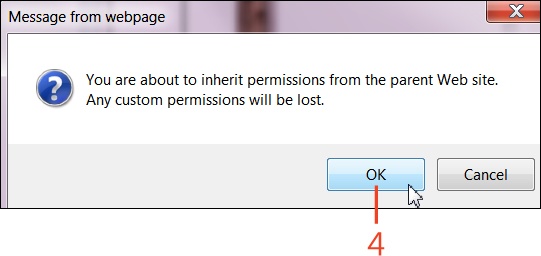
In the pop-up message box that asks you to confirm the change, click OK.
Granting access to lists, libraries, and individual items
When not inheriting permissions from its parent, SharePoint 2013 allows owners to apply unique security at the site collection level, the site level, the library or list level, and to items within a library or list. You might want to grant your department Read access to your site but only allow certain team members to edit documents within the site. SharePoint flexibly accommodates these needs.
Grant access to a list or library
Select the list or library with which you want to work (for this example, we’ll work with a library).
On the ribbon, click the Library tab.
In the Settings group, click Library Settings.
On the Library Settings page, in the Permissions And Management group, click Permissions For This Document Library.
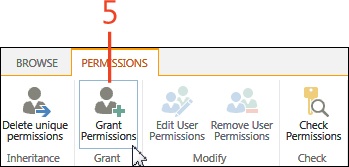
On the Permissions tab, in the Grant group, click Grant Permissions.
In the Share dialog box, in the designated text box, enter names, email addresses, or the word “Everyone”.
Click the Show Options button.
In the Select A Permission Level list box, select a permission level.
Click Share.


Grant access to individual items
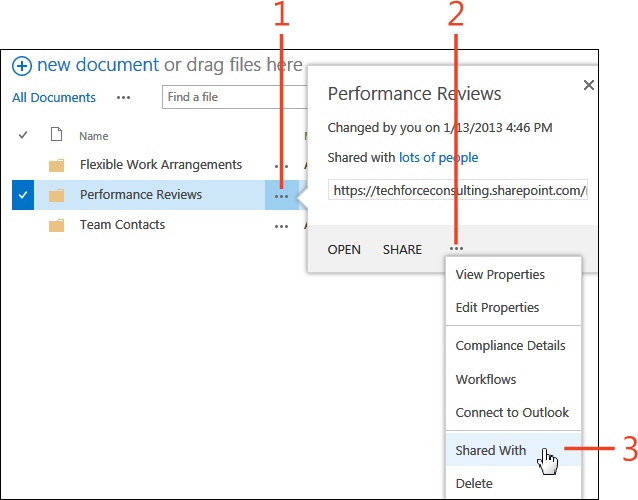
Click the drop-down ellipsis to the right of an item in a list or library. (Hover over the item to view the pointing hand.)
In the lower-right corner of the Properties box that opens, click the drop-down ellipsis. (Hover over the item to view the pointing hand).
On the menu that appears, click Shared With.
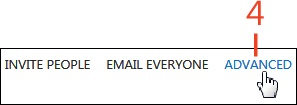
On the Shared With page, click Advanced.
On the Permissions tab, in the Inheritance group, click Stop Inheriting Permissions.
In the pop-up message box that asks you to confirm the change, click OK.
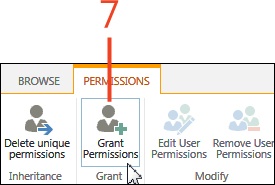
Back on the ribbon, click Grant Permissions.
In the Share dialog box, in the designated text box, enter names, email addresses, or the word “Everyone”.
Click the Show Options button.
In the Select A Permission Level list box, select a permission level.
Click Share.
Removing security
Logically, if you’ll be granting access to SharePoint 2013, you’ll be removing access, as well. Removing users from items or groups involves the same steps as adding users. You’ll begin to realize the convenience of managing users in groups as opposed to individually. Removing users from a group can be done in one location instead of each location where they’ve been added separately.
Remove a user from a group
On the Home page, click the Settings button (the small gear icon next to the name of the logged-on user). On the menu that appears, click Site Settings.
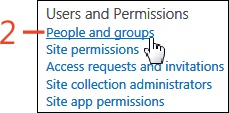
On the Site Settings page, in the Users And Permissions section, click People And Groups.
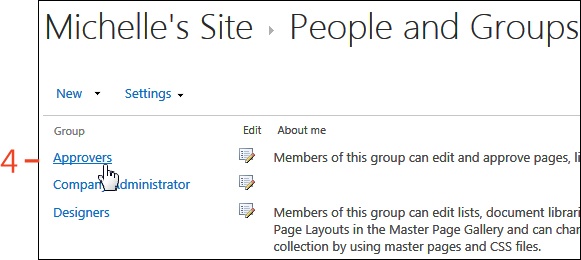
On the Quick Launch bar, click Groups.
Click the name of the group from which you want to remove the user.
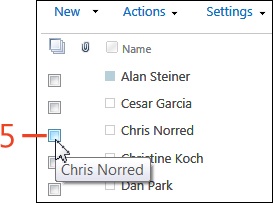
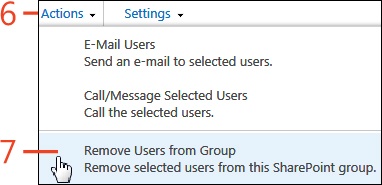
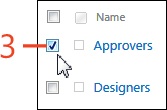
Select the check box next to the name of the user whom you want to remove.
Click the Actions drop-down arrow.
On the menu that appears, click Remove Users From Group.
In the pop-up message box that asks you to confirm the change, click OK.


Remove a group’s site permissions
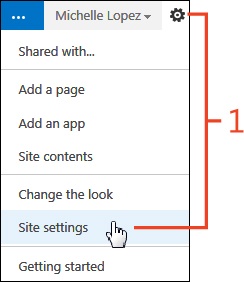
On the Home page, click the Settings button (the small gear icon next to the name of the logged-on user). On the menu that appears, click Site Settings.
On the Site Settings page, in the Users And Permissions section, click Site Permissions.
Select the check box next to the group from which you want to remove site permissions.
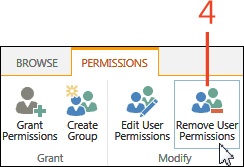
On the Permissions tab, in the Modify group, click Remove User Permissions.
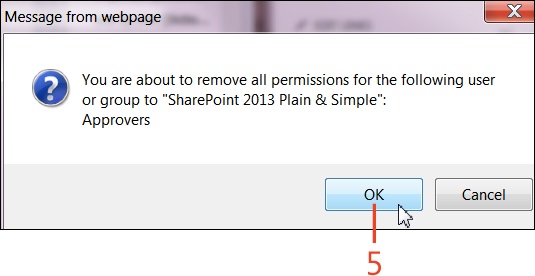
In the pop-up message box that asks you to confirm the change, click OK.
Editing permissions
Suppose that a project has completed and you no longer want the team to add or edit the project’s supporting documents. The flexibility of SharePoint 2103 gives you the ability to easily make changes to permission level of an individual or a group.
Edit site permissions for an individual or group
On the Home page, click the Settings button (the small gear icon next to the name of the logged-on user). On the menu that appears, click Site Settings.
On the Site Settings page, in the Users And Permissions section, click Site Permissions.
On the Permissions page, if the site is inheriting permissions, click Stop Inheriting Permissions, and then, in the pop-up message box that asks you to confirm the change, click OK.
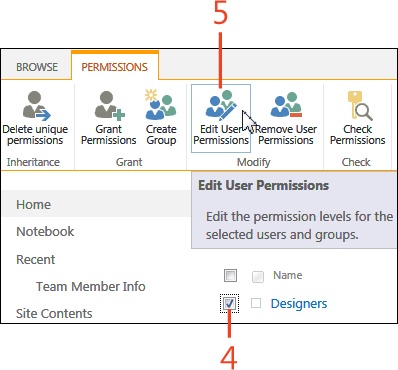
Select the check box next to the group or individual for which you want to edit permissions.
Click Edit User Permissions.
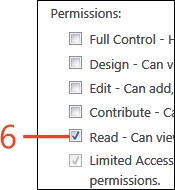
Clear the current permissions check box and select a different one.
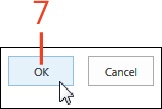
Click OK.

Checking permissions
It can be easy to lose track of who has access to your sites and libraries. You can use the tools on the SharePoint 2013 ribbon to check what permissions are on an entire site or to view a summary of the permissions assigned to a group or individual.
View permissions on a library or list
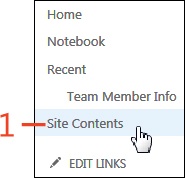
On the Quick Launch bar, click Site Contents.
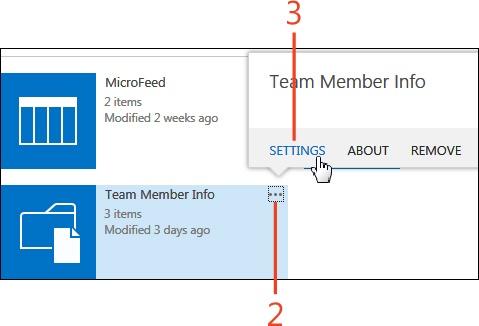
Click the drop-down ellipsis to the right of the library with which you want to work. (Hover over the library for the drop-down indicator to display).
On the menu that appears, click Settings.
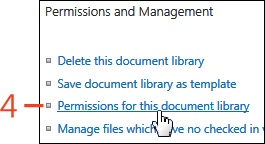
On the Library Settings page, in the Permissions And Management group, click Permissions For This Document Library.
On the Permissions tab, review each group name and permission level.

Check permissions for an individual or group
On the Home page, click the Settings button (the small gear icon next to the name of the logged-on user). On the menu that appears, click Site Settings.
On the Site Settings page, in the Users And Permissions section, click Site Permissions.
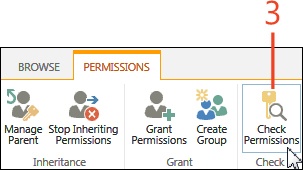
On the Permissions tab, in the Check group, click Check Permissions.
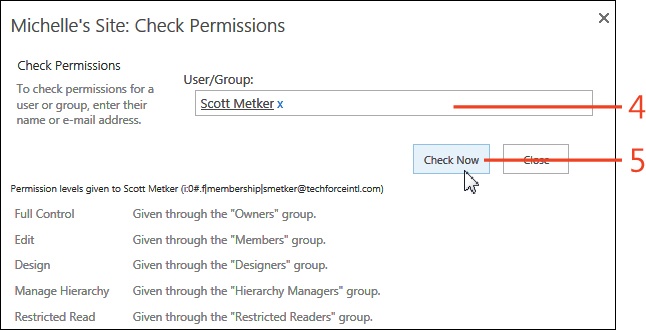
In the Check Permissions dialog box, in the User/Group text box, enter the name of the person or group.
Click Check Now.
In the Check Permissions dialog box, review the permission level summary.