
Chapter 27. Accessing a remote database from a Windows Store app
After completing the chapter, you will be able to:
Fetch data from a remote database by using a REST web service.
Inserting, updating, and deleting data through a REST web service
Chapter 26 shows how to implement the Model-View-ViewModel (MVVM) pattern. It also explains how to separate the business logic of an app from the user interface (UI) by using a ViewModel class that provides access to the data in the model and implements commands the UI can use to invoke the business logic of the app. Chapter 26 also illustrates how to use data binding to display the data presented by the ViewModel in the user interface and how the UI can update this data. This all results in a fully functional Windows Store app.
In this chapter, you will turn your attention to the model aspect of the MVVM pattern. In particular, you will see how to implement a model that a Microsoft Windows Store app can use to retrieve and update data in a remote database.
Retrieving data from a database
So far, the data you have been using has been confined to a simple collection embedded in the ViewModel of the app. In the real world, the data displayed and maintained by an app is more likely to be stored in a data source such as a relational database.
Windows Store apps cannot directly access a relational database by using technologies provided by Microsoft (although some third-party database vendors might implement their own solutions). This might sound like a severe restriction, but there are sensible reasons for this limitation. Primarily, it eliminates any dependencies that a Windows Store app might have on external resources, making it a stand-alone item that can be easily packaged and downloaded from the Windows Store without requiring users to install and configure a database management system on their computer. However, many business apps are still going to have a requirement for accessing a database. To address this scenario, you can use a web service.
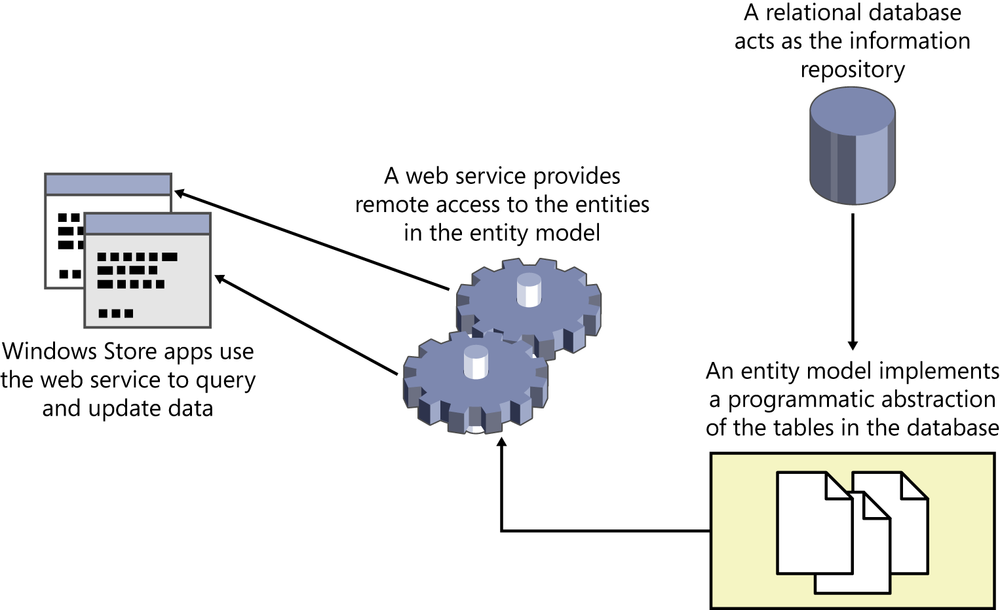
Web services can implement a variety of functions, but one common scenario is to provide an interface with which an app can connect to a remote data source to retrieve and update data. A web service can be located almost anywhere, from the same computer on which the app is running to a web server hosted on a computer on a different continent. As long as you can connect to it, you can use the web service to provide access to the repository for your information. Microsoft Visual Studio provides templates and tools with which you can build a web service very quickly and easily. The simplest strategy is to base the web service on an entity model generated by using the Entity Framework, as shown in the following diagram:
The Entity Framework is a powerful technology with which you can connect to a relational database. It can reduce the amount of code that most developers need to write to add data access capabilities to an app. This is where you will start, but first you need to set up the AdventureWorks database; this is the database that contains the details of Adventure Works customers.
Note
There is not sufficient space in this book to go into great detail on how to use the Entity Framework, and the exercises in this section walk you through only the most essential steps to get started. If you want more information, look at the “Entity Framework” page on the Microsoft website at http://msdn.microsoft.com/data/aa937723.
On the File menu, point to Open, and then click File.
In the Open File dialog box, browse to the folder Microsoft PressVisual CSharp Step By StepChapter 27AdventureWorks in your Documents folder, click AttachDatabase.sql, and then click Open.
In the Transact-SQL Editor window displaying the Create Database command, change the text <YourName> to your user name. This text occurs twice: once on the second line of the command and once on the third.
On the SQL menu, click Execute to run the command.
In the Connect To Server dialog box, in the Server box, type (localdb)v11.0, ensure that the Authentication box is set to Windows Authentication, and then click Connect. Verify that the command completes without errors.
Note
(localdb)V11.0 is the connection string that identifies the version of SQL Server that is installed with Visual Studio 2013. Sometimes this instance of SQL Server can take a few seconds to start up, and you might receive a timeout error after you click Connect. If this happens, run the command again and specify the same values in the Connect To Server dialog box; SQL Server should now be running and the command should be successful.
Close the AttachDatabase.sql window. In the message box that appears asking you whether to save the changes you made to the script, click No.
Creating an entity model
Now that you have installed the AdventureWorks database, you can use the Entity Framework to create an entity model that an app can use to query and update information in this database. If you have worked with databases in the past, you might be familiar with technologies such as ADO.NET, which provides a library of classes that you can use to connect to a database and run SQL commands. ADO.NET is useful, but it requires that you have a decent understanding of SQL, and if you are not careful, it can force you into structuring your code around the logic necessary to perform SQL commands rather than focusing on the business operations of your app. The Entity Framework provides a level of abstraction that reduces the dependencies that your apps have on SQL.
Essentially, the Entity Framework implements a mapping layer between a relational database and your app; it generates an entity model that consists of collections of objects that your app can use just like any other collection. A collection typically corresponds to a table in the database, and each row in a table corresponds to an item in the collection. You perform queries by iterating through the items in a collection, typically by using Language-Integrated Query (LINQ). Behind the scenes, the entity model converts your queries into SQL SELECT commands that fetch the data. You can modify the data in the collection, and then you can arrange for the entity model to generate and perform the appropriate SQL INSERT, UPDATE, and DELETE commands to perform the equivalent operations in the database. In short, the Entity Framework is an excellent vehicle for connecting to a database and retrieving and managing data without requiring that you embed SQL commands in your code.
In the following exercise, you will create a very simple entity model for the Customer table in the AdventureWorks database. You will follow what is known as the database-first approach to entity modeling. In this approach, the Entity Framework generates classes based on the definitions of tables in the database. The Entity Framework also makes it possible for you to employ a code-first approach; this strategy can generate a set of tables in a database based on classes that you have implemented in your app.
Note
If you want more information about the code-first approach to creating an entity model, consult the “Code First to an Existing Database” page on the Microsoft website at http://msdn.microsoft.com/data/jj200620.
In Visual Studio, open the Customers project, which is located in the Microsoft PressVisual CSharp Step By StepChapter 27Web Service folder in your Documents folder.
This project contains a modified version of the Customers app from the set of exercises in Chapter 26. The ViewModel implements additional commands to skip to the first and last customers in the customers collection, and the app bar contains First and Last buttons that invoke these commands.
Additionally, this version of the project does not implement the Search contract. The reason behind this omission is that by doing so you can concentrate on the core elements of this exercise without the files and other elements that make up the Search contract getting in the way.
In Solution Explorer, right-click the Customers solution (not the Customers project), point to Add, and then click New Project.
In the Add New Project dialog box, in the left pane, click the Web tab. In the middle pane, click the ASP.NET Web Application template. In the Name box, type AdventureWorksService, and then click OK.
In the New ASP.NET Project dialog box, click Web API, and then click OK.
As mentioned at the start of this section, you cannot access a relational database directly from a Windows Store app, and this includes using the Entity Framework. Instead, you have created a web app (this is not a Windows Store app), and you will host the entity model that you create in this app. The Web API template provides wizards and tools with which you can quickly implement a web service, which is what you will do in the next exercise. This web service will provide remote access to the entity model for the Customers Windows Store app.
In Solution Explorer, right-click the Customers solution again, and then click Set Startup Projects.
In the Solution ‘Customers’ Property Pages dialog box, click Multiple Startup Projects. Set the Action for the AdventureWorksService project to Start without debugging, set the Action for the Customers project to Start, and then click OK.
This configuration ensures that the AdventureWorksService web app runs whenever you start the project from the Debug menu.
Right-click the AdventureWorksService project, and then click Properties.
On the properties page, click the Web tab in the left column.
On the Web page, click “Don’t open a page. Wait for a request from an external application.”
Normally, when you run a web app from Visual Studio, the web browser (Internet Explorer) opens and attempts to display the home page for the app. The AdventureWorksService app does not have a home page; the purpose of this app is to host the web service to which client apps can connect and retrieve data from the AdventureWorks database.
In the Project Url box, change the address of the web app to http://localhost:50000/ and then click Create Virtual Directory. In the Microsoft Visual Studio message box that appears, verify that the virtual directory was created successfully, and then click OK.
By default, the ASP.NET project template creates a web app that is hosted by using IIS Express, and it selects a random port for the URL. This configuration sets the port to 50000 so that the subsequent steps in the exercises in this chapter can be described more easily.
On the File menu, click Save All, and then close the properties page. In Solution Explorer, right-click the AdventureWorksService project, point to Add, and then click New Item.
In the Add New Item – AdventureWorksService dialog box, in the left column, click the Data tab. In the middle pane, Click the ADO.NET Entity Data Model template. In the Name box type AdventureWorksModel.edmx, and then click Add.
The Entity Data Model Wizard starts. You can use this wizard to generate an entity model from an existing database.
On the Choose Model Contents page of the wizard, click Generate From Database, and then click Next.
On the Choose Your Data Connection page, click New Connection.
In the Connection Properties dialog box, in the Server Name box, type (localdb)v11.0. Verify that Use Windows Authentication is selected. In the Select Or Enter A Database Name box, type AdventureWorks, and then click OK.
This action creates a connection to the AdventureWorks database that you configured in the previous exercise.
On the Choose Your Data Connection page, verify that Save Entity Connection Settings In Web.Config As is selected, confirm that the name of the connection string is AdventureWorksEntities, and then click Next.
On the Choose Your Version page, accept the default version of the Entity Framework and then click Next.
Note
If you are using the Technical Preview edition of Visual Studio 2013, the default version of the Entity Framework referenced by the ASP.NET Web Application template is version 5.0. In the release version, it is expected that this will change to version 6.0. However, this app does not depend on any version 6.0 specific features, and you can build the app by using version 5.0.
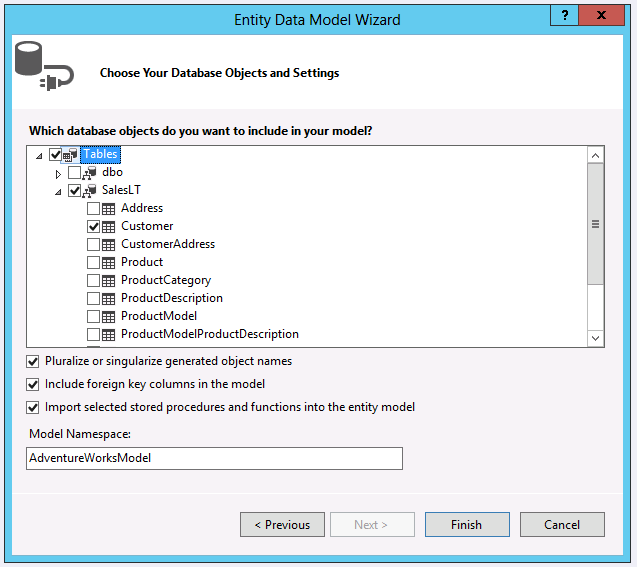
On the Choose Your Database Objects And Settings page, expand Tables, expand SalesLT, and then select Customer. Verify that the Pluralize Or Singularize Generated Object Names check box is selected (the other two options on this page will also be selected by default), observe that that Entity Framework generates the classes for the entity model in the AdventureWorksModel namespace, and then click Finish.
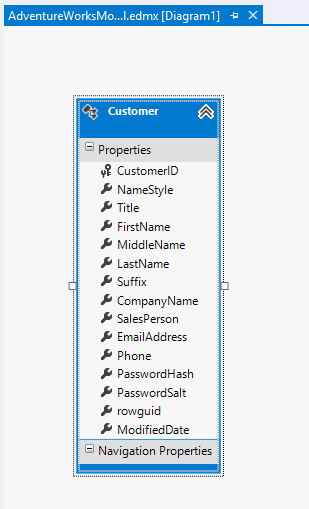
The Entity Data Model Wizard generates an entity model for the Customers table and displays a graphical representation in the Entity Model editor on the screen, like this:
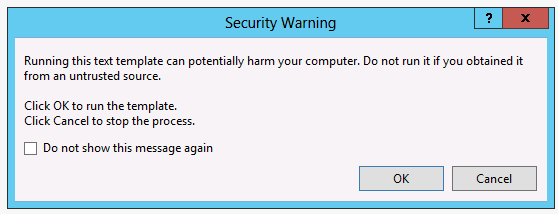
If the following Security Warning message box appears, select the Do Not Show This Message Again check box, and then click OK. This security warning appears because the Entity Framework uses a technology known as T4 templates to generate the code for your entity model, and it has downloaded these templates from the web by using NuGet. The Entity Framework templates have been verified by Microsoft and are safe to use.
In the Entity Model editor, right-click the NameStyle column and then click Delete From Model. Using the same technique, delete the MiddleName, Suffix, CompanyName, SalesPerson, PasswordHash, and PasswordSalt columns from the entity model.
The Customers app does not use these columns, and there is no need to retrieve them from the database. However, you should not remove the rowguid and ModifiedDate columns. These columns are used by the database to identify rows in the Customers table and track changes to these rows in a multiuser environment. If you remove these columns, you will not be able to save data back to the database correctly.
On the Build menu, click Build Solution.
In Solution Explorer, expand AdventureWorksModel.edmx, expand AdventureWorksModel.tt, and then double-click Customer.cs.
This file contains the class that the Entity Data Model Wizard generated to represent a customer. This class contains automatic properties for each of the columns in the Customer table that you have included in the entity model:
public partial class Customer
{
    public int CustomerID { get; set; }
    public string Title { get; set; }
    public string FirstName { get; set; }
    public string LastName { get; set; }
    public string EmailAddress { get; set; }
    public string Phone { get; set; }
    public System.Guid rowguid { get; set; }
    public System.DateTime ModifiedDate { get; set; }
}
In Solution Explorer, under AdventureWorksModel.edmx, expand AdventureWorksModel.Context.tt, and then double-click AdventureWorksModel.Context.cs.
This file contains the definition of a class called AdventureWorksEntities (it has the same name that you used when you generated the connection to the database in the Entity Data Model Wizard).
public partial class AdventureWorksEntities : DbContext
{
    public AdventureWorksEntities()
        : base("name=AdventureWorksEntities")
    {
    }
    protected override void OnModelCreating(DbModelBuilder modelBuilder)
    {
        throw new UnintentionalCodeFirstException();
    }
    public DbSet<Customer> Customers { get; set; }
}
The AdventureWorksEntities class is descended from the DbContext class, and this class provides the functionality that an app uses to connect to the database. The constructor passes a parameter to the base class constructor that specifies the name of a connection string to use to connect to the database. If you look in the Web.config file, you will find this string in the <ConnectionStrings> section. It contains the parameters (among other things) that you specified when you ran the Entity Data Model Wizard.
You can ignore the OnModelCreating method in the AdventureWorksEntities class. The only other item is the Customers collection. This collection has the type DbSet<Customer>. The DbSet generic type provides methods with which you can add, insert, delete, and query objects in a database; it works in conjunction with the DbContext class to generate the appropriate SQL SELECT commands necessary to fetch customer information from the database and populate the collection as well as create the SQL INSERT, UPDATE, and DELETE commands that run if Customer objects are added, modified, or removed from the collection. A DbSet collection is frequently referred to as an entity set.
Creating and using a REST web service
You have created an entity model that provides operations to retrieve and maintain customer information, and the next step is to implement a web service so that a Windows Store app can access the entity model.
With Visual Studio 2013, you can quickly create a web service in an ASP.NET web app based directly on an entity model generated by using the Entity Framework. The web service uses the entity model to retrieve data from a database and update the database. You can create a web service by using the Add Scaffold wizard. This wizard can generate a web service that implements the REST model. The REST model uses a navigational scheme to represent business objects and services over a network and the HTTP protocol to transmit requests to access these objects and services. A client app that accesses a resource submits a request in the form of a URL that the web service parses and processes. For example, Adventure Works might publish customer information, exposing the details of each customer as a single resource, by using a scheme similar to this:
http://Adventure-Works.com/DataService/Customers/1
Accessing this URL causes the web service to retrieve the data for customer 1. This data can be returned in a number of formats, but for portability the most common formats include XML and JavaScript Object Notation (JSON). A typical JSON response generated by a REST web service request issuing the previous query looks like this:
{
"CustomerID":1,
"Title":"Mr",
"FirstName":"Orlando",
"LastName":"Gee",
"EmailAddress":"[email protected]",
"Phone":"245-555-0173"
}
The REST model relies on the app that accesses the data sending the appropriate HTTP verb as part of the request used to access the data. For example, the simple request shown previously should send an HTTP GET request to the web service. HTTP supports other verbs, as well, such as POST, PUT, and DELETE, which you can use to create, modify, and remove resources, respectively. Writing the code to generate the appropriate HTTP requests and parsing the responses returned by a REST web service all sounds quite complicated. Fortunately, the Add Scaffold Wizard can generate most of this code for you, leaving you free to concentrate on the business logic of your app.
In the following exercise, you will create a simple REST web service for the AdventureWorks entity model. This web service will make it possible for a client app to query and maintain customer information.
In Visual Studio, in the AdventureWorksService project, right-click the Controllers folder, point to Add, and then click New Scaffold Item.
In the Add Scaffold Wizard, in the middle pane, scroll down and click the Web API 2 Controller with read/write actions, using Entity Framework template, and then click Add.
In the Add Controller dialog box, in the Controller Name box, type CustomersController. In the Model Class list, select Customer (AdventureWorksService), in the Data Context Class list, select AdventureWorksEntities (AdventureWorksService), and then click Add.
In a web service created by using the ASP.NET Web API template, all incoming web requests are handled by one or more controller classes, and each controller class exposes methods that map to each of the different types of REST requests for each of the resources that it exposes. For example, the CustomersController looks like this:
public class CustomersController : ApiController
{
    private AdventureWorksEntities db = new AdventureWorksEntities();
    // GET api/Customers
    public IEnumerable<Customer> GetCustomer()
    {
        return db.Customers.AsEnumerable();
    }
    // GET api/Customers/5
    public Customer GetCustomer(Int32 id)
    {
        Customer customer = db.Customers.Find(id);
        if (customer == null)
        {
            throw new HttpResponseException(
                Request.CreateResponse(HttpStatusCode.NotFound));
        }
        return customer;
    }
    // PUT api/Customers/5
    public HttpResponseMessage PutCustomer(Int32 id, Customer customer)
    {
        ...
    }
    // POST api/Customers
    public HttpResponseMessage PostCustomer(Customer customer)
    {
        ...
    }
    // DELETE api/Customers/5
    public HttpResponseMessage DeleteCustomer(Int32 id)
    {
        ...
    }
    ...
}
The first GetCustomer method handles requests to retrieve all customers, and it satisfies this request by simply returning the entire Customers collection from the Entity Framework data model that you created previously. Behind the scenes, the Entity Framework fetches all of the customers from the database and uses this information to populate the Customers collection. This method is invoked if an app sends an HTTP GET request to the api/Customers URL in this web service.
The GetCustomer method is overloaded, and the second version takes an integer parameter. This parameter specifies the CustomerID of a specific customer and this method uses the Entity Framework to find the details of this customer before returning it. This method runs when an app sends an HTTP GET request to the api/Customers/n URL, where n is the ID of the customer to retrieve.
The PutCustomer method runs when an app sends an HTTP PUT request to the web service. The request specifies a customer ID and the details of a customer, and the code in this method uses the Entity Framework to update the specified customer by using the detail information (the internal workings of this method are not shown in the preceding code sample).
The PostCustomer method responds to HTTP POST requests, and takes the details of a customer as its parameter. This method adds a new customer with these details to the database.
Finally, the DeleteCustomer method handles HTTP DELETE requests and removes the customer with the specified customer ID.
The ASP.NET Web API template automatically generates code that directs requests to the appropriate method in the controller classes, and you can add further controller classes if you need to manage other resources, such as Products or Orders.
Note
For detailed information on implementing REST web services by using the ASP.NET Web API template, visit the “Web API” page at http://www.asp.net/web-api.
You can also create controller classes manually by using the same pattern as that shown by the CustomersController class—you do not have to fetch and store data in a database by using the Entity Framework. The ASP.Net Web API template contains an example controller in the ValuesController.cs file that you can copy and augment with your own code.
In the Controllers folder, right-click the ValuesController.cs file, and then click Delete. In the Message box, click OK to confirm that you want to delete this file.
You will not be using the example ValuesController class in this exercise.
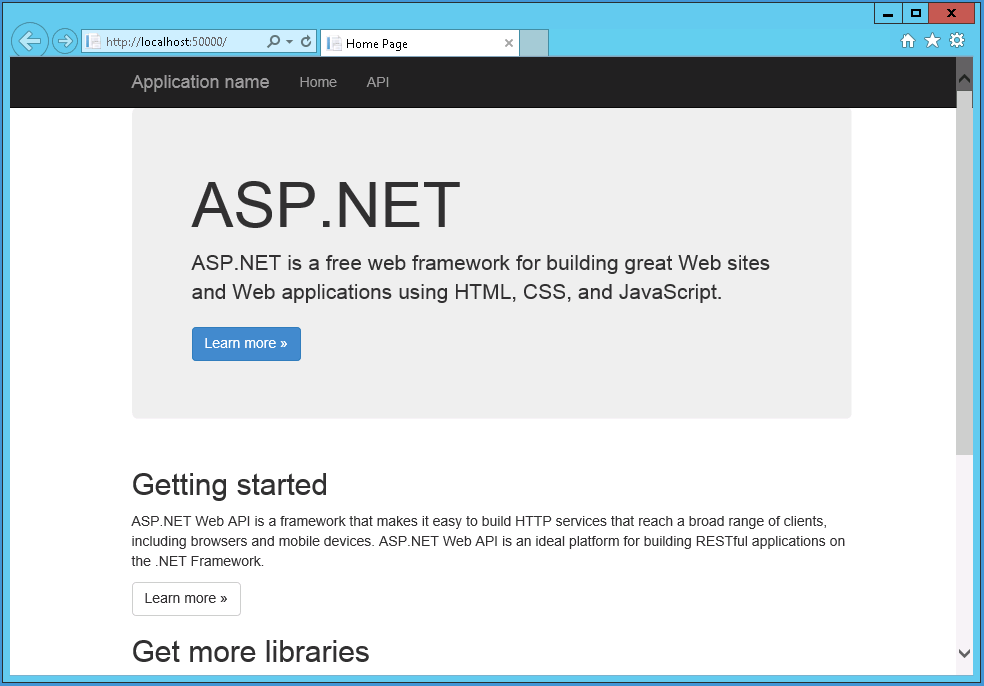
In Solution Explorer, check that you have correctly configured the web service. Right-click the AdventureWorksService project, and then, on the shortcut menu that appears, point to View, and then click View In Browser.
Your web browser will start, and it should display the following page:
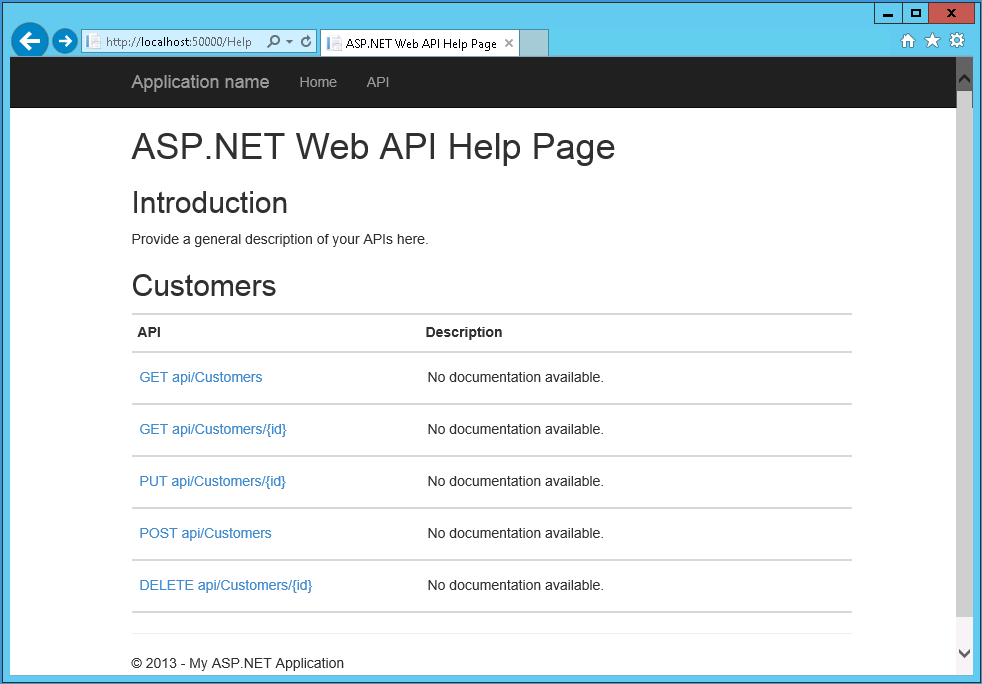
On the title bar, click API.
Another page appears, summarizing the REST requests that an app can send to the web service:
On the address bar, type http://localhost:50000/api/Customers/1, and then press Enter. When the message “Do you want to open or save 1.json (223 bytes) from localhost?” appears, click Open.
This request is directed to the overloaded GetCustomer method in the CustomersController class, and the value 1 is passed as the parameter to this method. Note that the Web API uses routes that start with the path “api” after the address of the server.
The GetCustomer method retrieves the details of customer 1 from the database and returns it as a JSON-formatted object. The file 1.json contains this data, which you can open by using Notepad. The data looks like this:
{"CustomerID":1,"Title":"Mr","FirstName":"Orlando","LastName":"Gee","EmailAddress":
"[email protected]","Phone":"245-555-0173","rowguid":
"3f5ae95e-b87d-4aed-95b4-c3797afcb74f","ModifiedDate":"2001-08-01T00:00:00"}
Close Notepad, close the web browser and return to Visual Studio.
The next phase of this journey is to connect to the web service from the Customers Windows Store app, and then use the web service to fetch some data.
The .NET Framework provides the HttpClient class that an app can use to formulate and send HTTP REST requests to a web service, and the HttpResponseMessage class that an app can use to process the result from the web service. These classes abstract the details of the HTTP protocol away from your app code. As such, you can focus on the business logic that displays and manipulates the objects published through the web service. You will use these classes in the following exercise.
In Solution Explorer, in the Customers project, right-click the DataSource.cs file and then, on the shortcut menu, click Delete. In the message box, click OK to confirm that you want to delete the file.
This file contained the sample data used by the Customers app. You are going to modify the ViewModel class to fetch this data from the web service, so this file is no longer required.
In Solution Explorer, double-click ViewModel.cs to display the file in the Code and Text Editor window.
Add the following using directives to the list at the top of the file:
using System.Net.Http;
using System.Net.Http.Headers;
In the ViewModel class, add the following variables shown in bold before the ViewModel constructor:
public class ViewModel : INotifyPropertyChanged
{
    ...
    private const string ServerUrl = "http://localhost:50000/";
    private HttpClient client = null;

    public ViewModel()
    {
        ...
    }
    ...
}
The ServerUrl variable contains the base address of the web service. You will use the client variable to connect to the web service.
In the ViewModel constructor, initialize the customers list to null and add the following statements that configure the client variable:
public ViewModel()
{
    ...
    this.customers = null;
    this.client = new HttpClient();
    this.client.BaseAddress = new Uri(ServerUrl);
    this.client.DefaultRequestHeaders.Accept.
        Add(new MediaTypeWithQualityHeaderValue("application/json"));
}
The customers list contains the customers displayed by the app; it was previously populated with the data in the DataSource.cs file that you have removed.
The client variable is initialized with the address of the web server to which it will send requests. A REST web service can receive requests and send responses in a variety of formats, but the Customers app will use JSON. The final statement in the preceding code configures the client variable to submit requests in this format.
In Solution Explorer, double-click the Customer.cs file in the root folder of the Customers project to display it in the Code and Text Editor window.
Immediately after the Phone property, add the public properties shown in bold in the following code to the Customer class:
public class Customer : INotifyPropertyChanged
{
    ...
    public string Phone
    {
        ...
    }
    public System.Guid rowguid { get; set; }
    public System.DateTime ModifiedDate { get; set; }

    ...
}
The web service retrieves these fields from the database, and the Customers app must be prepared to handle them; otherwise, they will be lost if the user decides to modify the details of a Customer (you will add this capability to the Customers app later in this chapter).
Return to the ViewModel class. After the constructor, add the public GetDataAsync method shown here:
public async Task GetDataAsync()
{
    try
    {
        var response = await this.client.GetAsync("api/customers");
        if (response.IsSuccessStatusCode)
        {
            var customerData =
                await response.Content.ReadAsAsync<IEnumerable<Customer>>();
            this.customers = customerData as List<Customer>;
            this.currentCustomer = 0;
            this.OnPropertyChanged("Current");
            this.IsAtStart = true;
            this.IsAtEnd = (this.customers.Count == 0);
        }
        else
        {
            // TODO: Handle GET failure
        }
    }
    catch (Exception e)
    {
        // TODO: Handle exceptions
    }
}
This method is asynchronous; it uses the GetAsync method of the HttpClient object to invoke the api/customers operation in the web service. This operation fetches the details of the customers from the AdventureWorks database. The GetAsync method is itself asynchronous, and returns an HttpResponseMessage object wrapped in a Task. The HttpResponseObject contains a status code that indicates whether the request was successful, and if it is, the app uses the ReadAsAsync method of the Content property of the HttpResponseMessage object to actually retrieve the data returned by the web service. This data is assigned to the customers collection, the currentCustomer property of the ViewModel is set to point to the first customer in this collection, and the IsAtStart and IsAtEnd properties are initialized to indicate the state of the ViewModel.
Note
The ASP.NET Web API Client Libraries assume that all web service requests can take an indeterminate length of time to run, and consequently, classes such as HttpClient and HttpResponseMessage are designed to support asynchronous operations to prevent an app from being blocked while waiting for a response. In fact, these classes only support asynchronous operations; there are no synchronous versions of GetAsync or ReadAsAsync.
Observe that currently the GetDataAsync method does not handle any exceptions or failures other than to consume them silently. You will see a technique for reporting exceptions in a Windows Store app later in this chapter.
Modify the get accessor for the Current property, as shown in the following:
public Customer Current
{
    get
    {
        if (this.customers != null)
        {
            return this.customers[currentCustomer];
        }
        else
        {
            return null;
        }
    }
}
The GetDataAsync method is asynchronous, so there is the possibility that the customers collection might not be populated when the controls on the MainPage form attempt to bind to a customer. In this situation, this modification prevents the data bindings from generating a null reference exception when they access the customers collection.
In the ViewModel constructor, update the conditions that make it possible for each of the commands to run as shown in bold in the following code:
public ViewModel()
{
    ...
    this.NextCustomer = new Command(this.Next,
        () => { return this.customers != null &&
                this.customers.Count > 0 && !this.IsAtEnd; });
    this.PreviousCustomer = new Command(this.Previous,
        () => { return this.customers != null &&
                this.customers.Count > 0 && !this.IsAtStart; });
    this.FirstCustomer = new Command(this.First,
        () => { return this.customers != null &&
                this.customers.Count > 0 && !this.IsAtStart; });
    this.LastCustomer = new Command(this.Last,
        () => { return this.customers != null &&
                this.customers.Count > 0 && !this.IsAtEnd; });
}
These changes ensure that the buttons on the app bar are not enabled until there is some data to display.
In Solution Explorer, expand MainPage.xaml and double-click MainPage.xaml.cs to open it in the Code and Text Editor window.
Add the following statement shown in bold to the MainPage constructor:
public MainPage()
{
    ...
    ViewModel viewModel = new ViewModel();
    viewModel.GetDataAsync();
    this.DataContext = viewModel;
}
This statement populates the ViewModel.
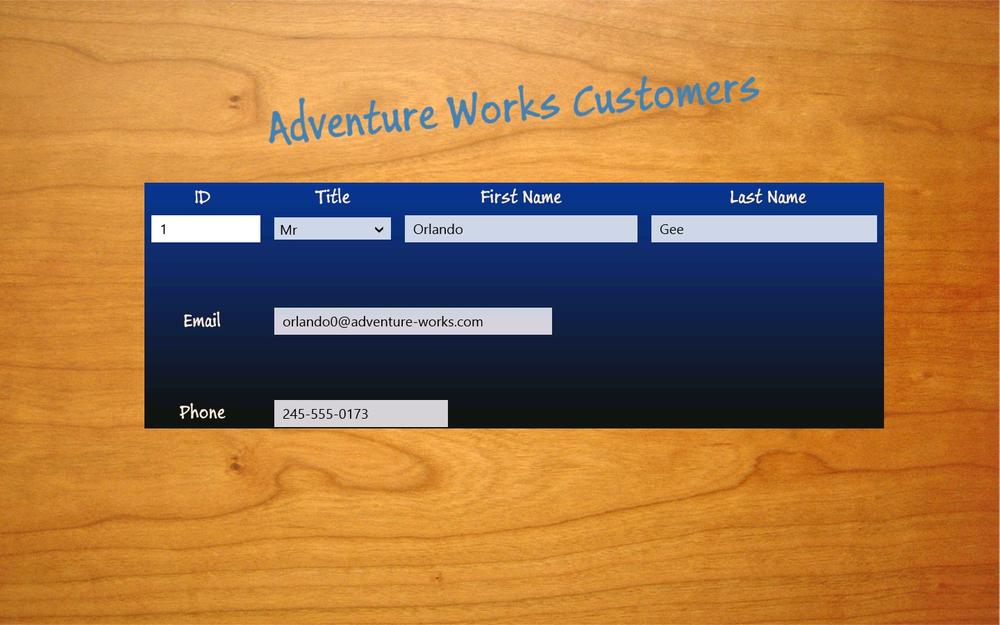
On the Debug menu, click Start Debugging to build and run the app.
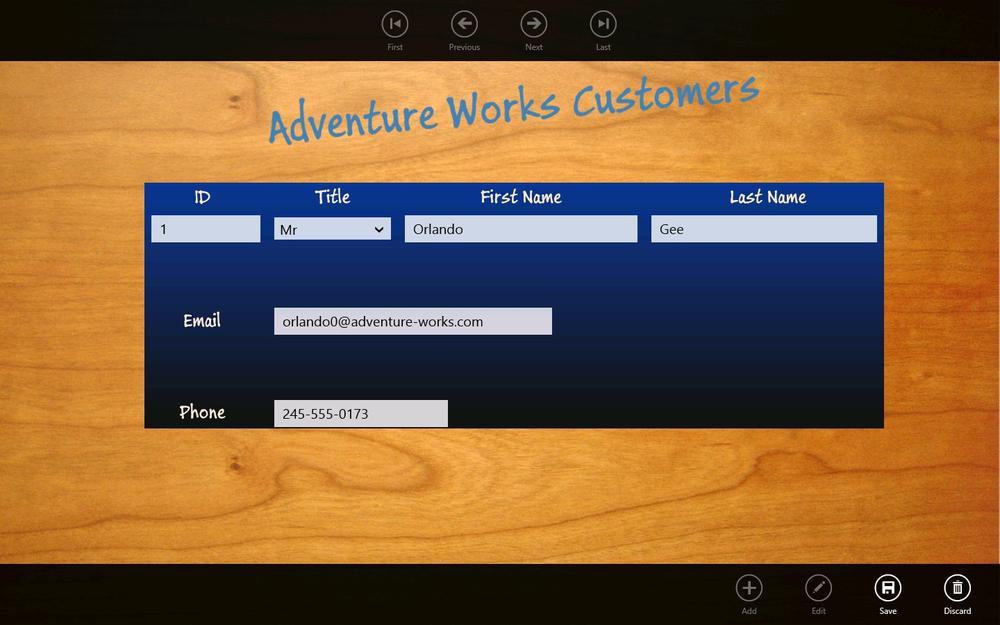
The form will appear empty initially while the GetDataAsync method runs, but after a few seconds the details of the first customer, Orlando Gee, should appear:
Right-click the form to display the app bar. Use the navigation buttons to move through the list of customers to verify that the form works as expected.
Return to Visual Studio and stop debugging.
As a final flourish to this section, when the form is initially displayed it would be helpful to let the user know that although the form appears to be empty, the app is actually in the process of fetching the data. In a Windows Store app, you can use a ProgressRing control to provide this feedback. This control should be displayed when the ViewModel is busy communicating with the web service, but inactive otherwise.
Display the VievModel.cs file in the Code and Text Editor window. After the GetDataAsync method, add the private _isBusy field and public IsBusy property to the ViewModel class, as illustrated here:
private bool _isBusy;
public bool IsBusy
{
    get { return this._isBusy; }
    set
    {
        this._isBusy = value;
        this.OnPropertyChanged("IsBusy");
    }
}
In the GetDatAsynca method, add the following statements shown in bold:
public async Task GetDataAsync()
{
    try
    {
        this.IsBusy = true;
        var response = await this.client.GetAsync("api/customers");
        ...
    }
    catch (Exception e)
    {
        // TODO: Handle exceptions
    }
    finally
    {
        this.IsBusy = false;
    }
}
The GetData method sets the IsBusy property to true prior to running the query to fetch the customer information. The finally block ensures that the IsBusy property is set back to false, even if an exception occurs.
Open the MainPage.xaml file in the Design View window.
In the XAML pane, add as the first item in the top-level Grid control the ProgressRing control shown in bold in the following code:
<Grid Style="{StaticResource GridStyle}">
    <ProgressRing HorizontalAlignment="Center"
VerticalAlignment="Center" Foreground="AntiqueWhite"
Height="100" Width="100" IsActive="{Binding IsBusy}"
Canvas.ZIndex="1"/>
    <Grid x:Name="customersTabularView" Margin="40,104,0,0" ...>
    ...
Setting the Canvas.ZIndex property to “1” ensures that the ProgressRing appears in front of the other controls displayed by the Grid control.
On the Debug menu, click Start Debugging to build and run the app.
Notice that when the app starts, the progress ring briefly appears before the first customer is displayed. If you find that the first customer appears too quickly, you can introduce a small delay into the GetData method just to satisfy yourself that the progress ring is working. Add the following statement which pauses the method for 5 seconds:
public async Task GetData()
{
    try
    {
        this.IsBusy = true;
        await Task.Delay(5000);
        this.connection = new AdventureWorksEntities(...);
        ...
    }
    ...
}
Be sure to remove this statement when you have finished testing the progress ring.
Return to Visual Studio and stop debugging.
Inserting, updating, and deleting data through a REST web service
Apart from giving users the ability to query and display data, many apps will have the requirement to also give them the ability to insert, update, and delete information. The ASP.NET Web API implements a model that supports these operations, through the use of HTTP PUT, POST, and DELETE requests. Conventionally, a PUT request modifies an existing resource in a web service and a POST request creates a new instance of a resource. A DELETE request removes a resource. The code generated by the Add Scaffold Wizard in the ASP.NET Web API template follows these conventions.
In the next exercise, you will extend the Customers app and add features with which users can add new customers and modify the details of existing customers by constructing the appropriate REST requests and sending them to the AdventureWorksService web service. You will not provide any functionality to delete customers. This restriction ensures that you have a record of all customers that have done business with the Adventure Works organization, which might be required for auditing purposes. Additionally, even if a customer has not been active for a long time, there is a chance that the customer might place an order at some point in the future.
In Visual Studio, open the Customers project, which is located in the Microsoft PressVisual CSharp Step By StepChapter 27Updatable ViewModel folder in your Documents folder.
The code in the ViewModel.cs file is getting rather lengthy, so it has been reorganized into regions to make it easier to manage. The ViewModel class has also been extended with the following Boolean properties that indicate the “mode” in which the ViewModel is operating: Browsing, Adding, or Editing. These properties are defined in the region named Properties For Managing The Edit Mode:
IsBrowsing. This property indicates whether the ViewModel is in Browsing mode. When the ViewModel is in Browsing mode, the FirstCustomer, LastCustomer, PreviousCustomer, and NextCustomer commands are enabled and a view can invoke these commands to browse data.
IsAdding. This property indicates whether the ViewModel is in Adding mode. In this mode, the FirstCustomer, LastCustomer, PreviousCustomer, and NextCustomer commands are disabled. You will define an AddCustomer command, a SaveChanges command, and a DiscardChanges command that will be enabled in this mode.
IsEditing. This property indicates whether the ViewModel is in Editing mode. Like Adding mode, in this mode, the FirstCustomer, LastCustomer, PreviousCustomer, and NextCustomer commands are disabled. You will define an EditCustomer command that will be enabled in this mode. The SaveChanges command and DiscardChanges command will also be enabled, but the AddCustomer command will be disabled. The EditCustomer command will be disabled in Adding mode.
IsAddingOrEditing. This property indicates whether the ViewModel is in Adding or Editing mode. You will use this property in the methods that you define in this exercise.
CanBrowse. This property returns true if the ViewModel is in Browsing mode and there is an open connection to the web service. The code in the constructor that creates the FirstCustomer, LastCustomer, PreviousCustomer, and NextCustomer commands has been updated to use this property to determine whether these commands should be enabled or disabled, as follows:
public ViewModel() { ... this.NextCustomer = new Command(this.Next, () => { return this.CanBrowse && this.customers.Count > 0 && !this.IsAtEnd; }); this.PreviousCustomer = new Command(this.Previous, () => { return this.CanBrowse && this.customers.Count > 0 && !this.IsAtStart; }); this.FirstCustomer = new Command(this.First, () => { return this.CanBrowse && this.customers.Count > 0 && !this.IsAtStart; }); this.LastCustomer = new Command(this.Last, () => { return this.CanBrowse && this.customers.Count > 0 && !this.IsAtEnd; }); }CanSaveOrDiscardChanges. This property returns true if the ViewModel is in Adding or Editing mode and it has an open connection to the web service.
The Methods For Fetching And Updating Data region contains the following methods:
GetData. This is the same method that you created earlier in this chapter. It connects to the web service and retrieves the details of every customer.
ValidateCustomer. This method takes a Customer object and examines the FirstName and LastName properties to ensure that they are not empty. It also inspects the EmailAddress and Phone properties to verify that they contain information that is in a valid format. The method returns true if the data is valid and false otherwise. You will use this method when you create the SaveChanges command later in this exercise.
Note
The code that validates the EmailAddress and Phone properties performs regular expression matching by using the Regex class defined in the System.Text.RegularExpressions namespace. To use this class, you define a regular expression in a Regex object that specifies the pattern that the data should match, and then you invoke the IsMatch method of the Regex object with the data that you need to validate. For more information about regular expressions and the Regex class, visit the “Regular Expression Object Model” page on the Microsoft website at http://msdn.microsoft.com/library/30wbz966.
CopyCustomer. The purpose of this method is to create a shallow copy of a Customer object. You will use it when you create the EditCustomer command, to make a copy of the original data of a customer before it is changed. If the user decides to discard the changes, those changes can simply be copied back from the copy made by this method.
In Solution Explorer, expand the Customers project and double-click the ViewModel.cs file to open it in the Code and Text Editor window.
In the ViewModel.cs file, expand the Methods For Fetching And Updating Data region. In this region, above the ValidateCustomer method, create the Add method shown here:
// Create a new (empty) customer
// and put the form into Adding mode
private void Add()
{
    Customer newCustomer = new Customer { CustomerID = 0 };
    this.customers.Insert(currentCustomer, newCustomer);
    this.IsAdding = true;
    this.OnPropertyChanged("Current");
}
This method creates a new Customer object. It is empty, apart from the CustomerID property, which is temporarily set to 0 for display purposes; the real value in this property is generated when the customer is saved to the database, as described earlier. The customer is added to the customers list (the view uses data-binding to display the data in this list), the ViewModel is placed in Adding mode, and the PropertyChanged event is raised to indicate that the Current customer has changed.
Add the following Command variable shown in bold to the list at the start of the ViewModel class:
public class ViewModel : INotifyPropertyChanged
{
    ...
    public Command LastCustomer { get; private set; }
    public Command AddCustomer { get; private set; }
    ...
}
In the ViewModel constructor, instantiate the AddCustomer command as shown here in bold:
public ViewModel()
{
    ...
    this.LastCustomer = new Command(this.Last, ...);
    this.AddCustomer = new Command(this.Add,
        () => { return this.CanBrowse; });
}
This code references the Add method that you just created. The command is enabled if the ViewModel is has a connection to the web service and it is in Browsing mode (the AddCustomer command will not be enabled if the ViewModel is already in Adding mode).
After the Add method in the Methods For Fetching And Updating Data region, create a private Customer variable called oldCustomer and define another method called Edit:
// Edit the current customer
// - save the existing details of the customer
//   and put the form into Editing mode
private Customer oldCustomer;
private void Edit ()
{
    this.oldCustomer = new Customer();
    this.CopyCustomer(this.Current, this.oldCustomer);
    this.IsEditing = true;
}
This method copies the details of the current customer to the oldCustomer variable and puts the ViewModel into Editing mode. In this mode, the user can change the details of the current customer. If the user subsequently decides to discard these changes, the original data can be copied back from the oldCustomer variable.
Add the following Command variable shown in bold to the list at the start of the ViewModel class:
public class ViewModel : INotifyPropertyChanged
{
    ...
    public Command AddCustomer { get; private set; }
    public Command EditCustomer { get; private set; }
    ...
}
In the ViewModel constructor, instantiate the EditCustomer command as shown in bold in the following code:
public ViewModel()
{
    ...
    this.AddCustomer = new Command(this.Add, ...);
    this.EditCustomer = new Command(this.Edit,
        () => { return this.CanBrowse; });
}
This code is similar to the statement for the AddCustomer command, except that it references the Edit method.
After the Edit method in the Methods For Fetching And Updating Data region, add the following method named Discard to the ViewModel class:
// Discard changes made while in Adding or Editing mode
// and return the form to Browsing mode
private void Discard ()
{
    // If the user was adding a new customer, then remove it
    if (this.IsAdding)
    {
        this.customers.Remove(this.Current);
        this.OnPropertyChanged("Current");
    }
    // If the user was editing an existing customer,
    // then restore the saved details
    if (this.IsEditing)
    {
        this.CopyCustomer(this.oldCustomer, this.Current);
    }
    this.IsBrowsing = true;
}
The purpose of this method is to make it possible for the user to discard any changes made when the ViewModel is in Adding or Editing mode. If the ViewModel is in Adding mode, the current customer is removed from the list (this is the new customer created by the Add method), and the PropertyChanged event is raised to indicate that the current customer in the customers list has changed. If the ViewModel is in Editing mode, the original details in the oldCustomer variable are copied back to the currently displayed customer. Finally, the ViewModel is returned to Browsing mode.
Add the DiscardChanges Command variable to the list at the start of the ViewModel class, and update the constructor to instantiate this command, as shown here in bold:
public class ViewModel : INotifyPropertyChanged
{
    ...
    public Command EditCustomer { get; private set; }
    public Command DiscardChanges { get; private set; }
    ...
    public ViewModel()
    {
        ...
        this.EditCustomer = new Command(this.Edit, ...);
        this.DiscardChanges = new Command(this.Discard,
            () => { return this.CanSaveOrDiscardChanges; });
    }
    ...
}
Notice that the DiscardChanges command is only enabled if the CanSaveOrDiscardChanges property is true; the ViewModel has a connection to the web service and the ViewModel is in Adding or Editing mode.
In the Methods For Fetching And Updating Data region, after the Discard method, add one more method, named SaveAsync, as shown in the code that follows. This method should be marked as async.
// Save the new or updated customer back to the web service
// and return the form to Browsing mode
private async void SaveAsync()
{
    // Validate the details of the Customer
    if (this.ValidateCustomer(this.Current))
    {
        // Only continue if the customer details are valid
        this.IsBusy = true;
        try
        {
            // If the user is adding a new customer,
            // send an HTTP POST request to the web service with the details
            if (this.IsAdding)
            {
                var response =
                    await client.PostAsJsonAsync("api/customers", this.Current);
                if (response.IsSuccessStatusCode)
                {
                    // TODO: Display the details of the new customer
                }
                // TODO: Handle POST failure
            }
            // The user must be editing an existing customer,
            // so send the details by using a PUT request
            else
            {
                string path = string.Format("api/customers/{0}",
                    this.Current.CustomerID);
                var response = await client.PutAsJsonAsync(path, this.Current);
                if (response.IsSuccessStatusCode)
                {
                    this.IsEditing = false;
                    this.IsBrowsing = true;
                }
                // TODO: Handle PUT failure
            }
        }
        catch (Exception e)
        {
            // TODO: Handle exceptions
        }
        finally
        {
            this.IsBusy = false;
        }
    }
}
This method is not yet complete. The initial code that you have just entered verifies that the customer details are valid. If they are, the details can be saved, and the IsBusy property of the ViewModel is set to true to indicate that this can take some time while the information is sent over the network to the web service (remember that the IsActive property of ProgressRing control on the Customers form is bound to this property, and the progress ring will display while the data is being saved).
The code in the try block determines whether the user is adding a new customer or editing the details of an existing customer. If the user is adding a new customer, the code uses the PostAsJsonAsync method of the HttpClient object to send a POST message to the web service. Remember that the POST request is sent to the PostCustomer method in the CustomersController class in the web service, and this method expects a Customer object as its parameter. The details are transmitted in JSON format.
If the user is editing an existing customer, the app calls the PutAsJsonAsync method of the HttpClient object. This method generates a PUT request which is passed to the PutCustomer method in the CustomersController class in the web service. The PutCustomer method updates the details of the customer in the database, and expects the customer ID and customer details as parameters. Again, this data is transmitted to the web service in JSON format.
When the data has been sent, the isBusy property is set to false, which causes the ProgressRing control to disappear from the display.
In the SaveAsync method, replace the comment // TODO: Display the details of the new customer with the following code shown in bold:
if (response.IsSuccessStatusCode)
{
    // Get the ID of the newly created customer and display it
    Uri customerUri = response.Headers.Location;
    var newCust = await this.client.GetAsync(customerUri);
    if (newCust.IsSuccessStatusCode)
    {
        var customerData = await newCust.Content.ReadAsAsync<Customer>();
        this.CopyCustomer(customerData, this.Current);
        this.OnPropertyChanged("Current");
        this.IsAdding = false;
        this.IsBrowsing = true;
    }
    else
    {
        // TODO: Handle GET failure
    }
}
The CustomerID column in the Customer table in the AdventureWorks database contains automatically generated values. The user does not provide a value for this data when creating a customer; rather the database generates the value itself when a customer is added to the database. In this way, the database can ensure that each customer has a unique customer ID. Therefore, after you have sent the POST request to the web service, you must send a GET request to obtain the customer ID. Fortunately, the HttpResponseMessage object passed back by the web service as the result of the POST request contains a URL that an app can use to query the new data. This URL is available in the Headers.Location property of the response, and it will have the form api/Customers/n where n is the ID of the customer. The code that you have just added sends a GET request to this URL by using the GetAsync method of the HttpClient object, and reads the data back for the new customer by using the ReadAsAsync method of the response. The code then updates the details of the customer held in the customers collection with this data.
Note
It might look like this code is performing an unnecessary round-trip to the web service to fetch the customer ID, which is available in the Headers.Location property of the response message from the POST request. However, this step verifies that the data has been saved correctly, and there might well be other fields which are transformed by the web service when the data is saved, so this process ensures that the app displays the data as it appears in the database.
In Solution Explorer, in the Controllers folder, open the CustomersController.cs file and display it in the Code and Text Editor window.
In the PostCustomer method, before the statements that save the new customer in the database, add the following code shown in bold.
// POST api/Customers
public HttpResponseMessage PostCustomer(Customer customer)
{
    if (ModelState.IsValid)
    {
        customer.ModifiedDate = DateTime.Now;
        customer.rowguid = Guid.NewGuid();
        db.Customers.Add(customer);
        db.SaveChanges();
        ...
    }
}
The Customer table in the AdventureWorks database has some additional requirements; specifically, if you are adding or editing a customer, you should set the ModifiedDate property of the customer to reflect the date on which the change was made. Additionally, if you are creating a new customer, you must populate the rowguid property of the Customer object with a new GUID before you can save it (this is a mandatory column in the Customer table; other apps inside the Adventure Works organization use this column to track information about customers).
Note
GUID stands for globally unique identifier. A GUID is a string, generated by Windows, that is almost guaranteed to be unique (there is a very small possibility that Windows might generate a nonunique GUID, but the possibility is so infinitesimally small that it can be discounted). GUIDs are frequently used by databases as key values used to identify individual rows, as in the case of the Customer table in the AdventureWorks database.
In the PutCustomer method, update the ModifiedDate property of the customer before the statement that indicates that the customer has been modified, as shown here in bold:
// PUT api/Customers/5
public HttpResponseMessage PutCustomer(Int32 id, Customer customer)
{
    ...
    customer.ModifiedDate = DateTime.Now;
    db.Entry(customer).State = EntityState.Modified;
    ...
}
Return to the ViewModel class in the Code and Text Editor window.
Add the SaveChanges Command variable to the list at the start of the ViewModel class, and update the constructor to instantiate this command, as shown in the following:
public class ViewModel : INotifyPropertyChanged
{
    ...
    public Command DiscardChanges { get; private set; }
    public Command SaveChanges { get; private set; }
    ...
    public ViewModel()
    {
        ...
        this.DiscardChanges = new Command(this.Discard, ...);
        this.SaveChanges = new Command(this.SaveAsync, () =>
            { return this.CanSaveOrDiscardChanges; });
    }
    ...
}
On the Build menu, click Build Solution and verify that your app compiles without any errors.
Reporting errors and updating the UI
You have added the commands by which a user can retrieve, add, edit, and save customer information. However, if something goes wrong and an error occurs, the user is not going to know what has happened. This is because the ViewModel class does not include any error reporting capabilities. One way to add such a feature is to capture the exception messages that occur and expose them as a property of the ViewModel class. A view can use data-binding to connect to this property and display the error messages.
In the ViewModel.cs file, expand the region named Properties For “Busy” And Error Message Handling.
After the IsBusy property, add the private _lastError string variable and public LastError string property shown here:
private string _lastError = null;
public string LastError
{
    get { return this._lastError; }
    private set
    {
        this._lastError = value;
        this.OnPropertyChanged("LastError");
    }
}
In the Methods For Fetching And Updating Data region, find the GetDataAsync method. This method contains the following exception handler:
catch (Exception e)
{
    // TODO: Handle exceptions
}
After the // TODO: Handle errors comment, add the following code shown in bold:
catch (Exception e)
{
    // TODO: Handle exceptions
    this.LastError = e.Message;
}
In the else block immediately preceding the exception handler, after the // TODO: Handle GET failure comment, add the following code shown in bold:
else
{
    // TODO: Handle GET failure
    this.LastError = response.ReasonPhrase;
}
The ReasonPhrase property of the HttpResponseMessage object contains a string indicating the reason for the failure reported by the web service.
At the end of the if block, immediately preceding the else block, add the following statement shown in bold:
if
{
    ...
    this.IsAtEnd = (this.customers.Count == 0);
    this.LastError = String.Empty;
}
else
{
    this.LastError = response.ReasonPhrase;
}
This statement removes any error messages from the LastError property.
Find the ValidateCustomer method, and add the following statement shown in bold immediately before the return statement:
private bool ValidateCustomer(Customer customer)
{
    ...
    this.LastError = validationErrors;
    return !hasErrors;
}
The ValidateCustomer method populates the validationErrors variable with information about any properties in the Customer object that contain invalid data. The statement that you have just added copies this information to the LastError property.
Find the SaveAsync method. In this method, add the following code shown in bold to catch any errors and HTTP web service failures:
private async void SaveAsync()
{
    // Validate the details of the Customer
    if (this.ValidateCustomer(this.Current))
    {
        ...
        try
        {
            // If the user is adding a new customer,
            // send an HTTP POST request to the web service with the details
            if (this.IsAdding)
            {
                ...
                if (response.IsSuccessStatusCode)
                {
                    ...
                    if (newCust.IsSuccessStatusCode)
                    {
                        ...
                        this.IsBrowsing = true;
                        this.LastError = String.Empty;
                    }
                    else
                    {
                        // TODO: Handle GET failure
                        this.LastError = response.ReasonPhrase;
                    }
                }
                // TODO: Handle POST failure
                else
                {
                    this.LastError = response.ReasonPhrase;
                }
            }
            // The user must be editing an existing customer,
            // so send the details by using a PUT request
            else
            {
                ...
                if (response.IsSuccessStatusCode)
                {
                    this.IsEditing = false;
                    this.IsBrowsing = true;
                    this.LastError = String.Empty;
                }
                // TODO: Handle PUT failure
                else
                {
                    this.LastError = response.ReasonPhrase;
                }
            }
        }
        catch (Exception e)
        {
            // TODO: Handle exceptions
            this.LastError = e.Message;
        }
        finally
        {
            this.IsBusy = false;
        }
    }
}
Find the Discard method, and add the statement shown here in bold to the end of this method:
private void Discard()
{
    ...
    this.LastError = String.Empty;
}
On the Build menu, click Build Solution and verify that the app builds without any errors.
The ViewModel is now complete. The final stage is to incorporate the new commands, state information, and error reporting features into the view provided by the Customers form.
Open the MainPage.xaml file in the Design View window.
The XAML markup for the MainPage form has already been modified, and the following TextBlock controls have been added to the Grid controls that display the data:
<Page
    x:Class="Customers.MainPage"
    ...>
    <Grid Style="{StaticResource GridStyle}">
        ...
        <Grid x:Name="customersTabularView" ...>
            ...
            <Grid Grid.Row="2">
                ...
                <TextBlock Grid.Row="3" Grid.RowSpan="4"
Grid.Column="7" Style="{StaticResource ErrorMessageStyle}"/>
            </Grid>
        </Grid>
        <Grid x:Name="customersColumnarView" Margin="20,10,20,110" ...>
            ...
            <Grid Grid.Row="1">
                ...
                <TextBlock Grid.Row="6" Grid.Column="0"
Grid.ColumnSpan="2" Style="{StaticResource ErrorMessageStyle}"/>
            </Grid>
        </Grid>
    ...
    </Grid>
    ...
</Page>
The ErrorMessageStyle referenced by these TextBlock controls is defined in the AppStyles.xaml file.
Set the Text property of both TextBlock controls to bind to the LastError property of the ViewModel, as shown here in bold:
...
<TextBlock Grid.Row="3" Grid.RowSpan="4" Grid.Column="7"
Style="{StaticResource ErrorMessageStyle}" Text="{Binding LastError}"/>
...
<TextBlock Grid.Row="6" Grid.Column="0" Grid.ColumnSpan="2"
Style="{StaticResource ErrorMessageStyle}" Text="{Binding LastError}"/>
The TextBox and ComboBox controls on the form that display customer data should only allow the user to modify this data if the ViewModel is in Adding or Editing mode; otherwise, they should be disabled. Add the IsEnabled property to each of these controls, and bind it to the IsAddingOrEditing property of the ViewModel as follows:
...
<TextBox Grid.Row="1" Grid.Column="1" x:Name="id"
IsEnabled="{Binding IsAddingOrEditing}" .../>
<ComboBox Grid.Row="1" Grid.Column="3" x:Name="title"
IsEnabled="{Binding IsAddingOrEditing}" ...>
</ComboBox>
<TextBox Grid.Row="1" Grid.Column="5" x:Name="firstName"
IsEnabled="{Binding IsAddingOrEditing}" .../>
<TextBox Grid.Row="1" Grid.Column="7" x:Name="lastName"
IsEnabled="{Binding IsAddingOrEditing}" .../>
...
<TextBox Grid.Row="3" Grid.Column="3" ... x:Name="email"
IsEnabled="{Binding IsAddingOrEditing}" .../>
...
<TextBox Grid.Row="5" Grid.Column="3" ... x:Name="phone"
IsEnabled="{Binding IsAddingOrEditing}" .../>
...
...
<TextBox Grid.Row="0" Grid.Column="1" x:Name="cId" />
IsEnabled="{Binding IsAddingOrEditing}" .../>
<ComboBox Grid.Row="1" Grid.Column="1" x:Name="cTitle"
IsEnabled="{Binding IsAddingOrEditing}" ...>
</ComboBox>
<TextBox Grid.Row="2" Grid.Column="1" x:Name="cFirstName"
IsEnabled="{Binding IsAddingOrEditing}" .../>
<TextBox Grid.Row="3" Grid.Column="1" x:Name="cLastName"
IsEnabled="{Binding IsAddingOrEditing}" .../>
...
<TextBox Grid.Row="4" Grid.Column="1" x:Name="cEmail"
IsEnabled="{Binding IsAddingOrEditing}" .../>
...
<TextBox Grid.Row="5" Grid.Column="1" x:Name="cPhone"
IsEnabled="{Binding IsAddingOrEditing}" .../>
Add an app bar to the bottom of the page, immediately after the top app bar, using the <Page.BottomAppBar> element. This app bar should contain buttons for the AddCustomer, EditCustomer, SaveChanges, and DiscardChanges commands, as follows:
<Page ...>
    ...
    <Page.TopAppBar >
        ...
    </Page.TopAppBar>
    <Page.BottomAppBar>
        <AppBar IsSticky="True">
            <Grid>
                <StackPanel Orientation="Horizontal"
HorizontalAlignment="Right">
                    <AppBarButton x:Name="addCustomer"
Icon="Add" Command="{Binding Path=AddCustomer}"/>
                    <AppBarButton x:Name="editCustomer"
Icon="Edit" Command="{Binding Path=EditCustomer}"/>
                    <AppBarButton x:Name="saveChanges"
Icon="Save" Command="{Binding Path=SaveChanges}"/>
                    <AppBarButton x:Name="discardChanges"
Icon="Undo" Command="{Binding Path=DiscardChanges}"/>
                </StackPanel>
            </Grid>
        </AppBar>
    </Page.BottomAppBar>
</Page>
Note that the convention for commands on the bottom app bar is to group them together, starting on the right side. The icons referenced by the buttons are the standard images provided with the Windows Store App template.
On the Debug menu, click Start Debugging to build and run the app.
When the Customers form appears, notice that the TextBox and ComboBox controls are disabled. This is because the view is in Browsing mode.
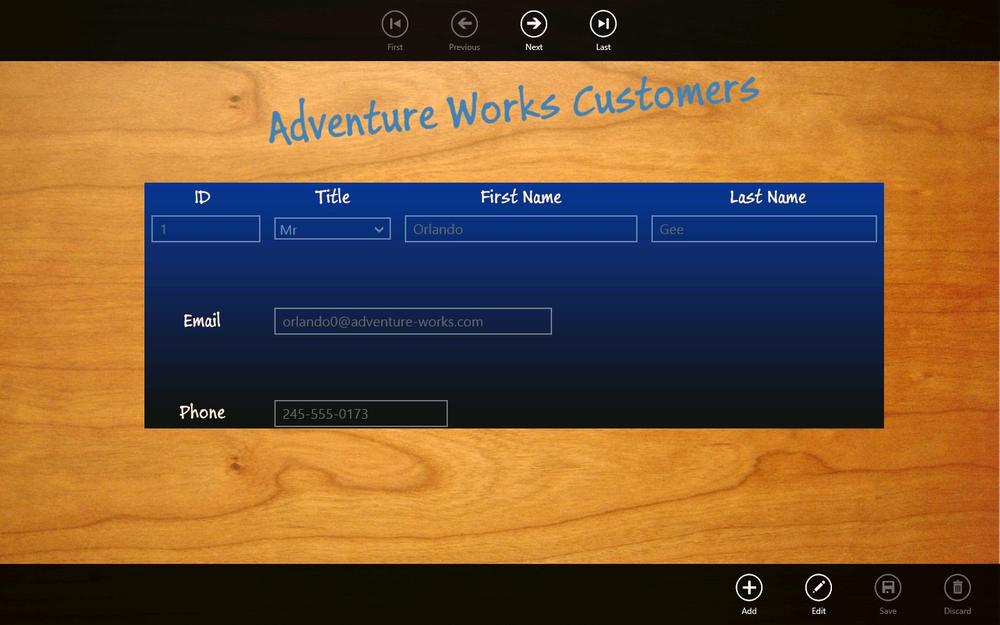
Right-click the form and verify that the upper and lower app bars both appear.
You can use the First, Next, Previous, and Last buttons in the upper app bar as before (remember that the First and Previous buttons will not be enabled until you move away from the first customer). In the lower app bar, the Add and Edit buttons should be enabled, but the Save and Discard buttons should be disabled. This is because the AddCustomer and EditCustomer commands are enabled when the ViewModel is in Browsing mode, and the SaveChanges and DiscardChanges commands are only enabled when the ViewModel is in Adding or Editing mode.
In the bottom app bar, click Edit.
The buttons in the top app bar become disabled because the ViewModel is now in Editing mode. Additionally, the Add and Edit buttons are also disabled, but the Save and Discard buttons should be enabled. Furthermore, the data entry fields on the form should now be enabled, and the user can modify the details of the customer.
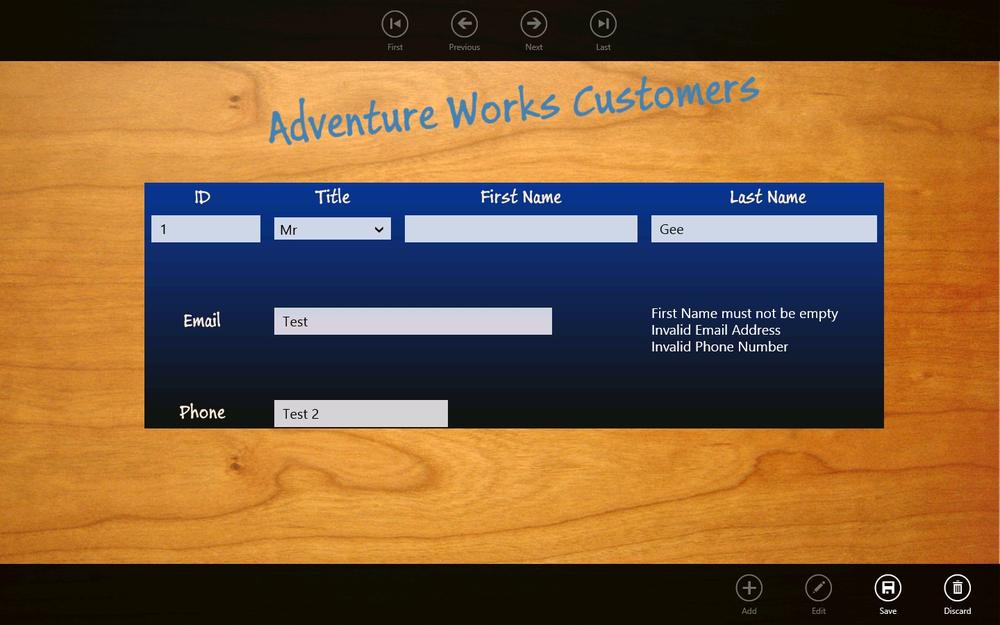
Modify the details of the customer: blank out the first name, type Test for the email address, type Test 2 for the phone number, and then click Save.
These changes violate the validation rules implemented by the ValidateCustomer method. The ValidateCustomer method populates the LastError property of the ViewModel with validation messages, and they are displayed on the form in the TextBlock that binds to the LastError property:
Click Discard, and verify that the original data is reinstated on the form, the validation messages disappear, and the ViewModel reverts to Browsing mode.
Click Add. The fields on the form should be emptied (apart from the ID field, which displays the value 0). Enter the details for a new customer. Be sure to provide a first name and last name, a valid email address of the form [email protected], and a numeric phone number (you can also include parentheses, hyphens, and spaces).
Click Save. If the data is valid (there are no validation errors), your data should be saved to the database. You should see the ID generated for the new customer in the ID field, and the ViewModel should switch back to Browsing mode.
Experiment with the app and try adding and editing more customers. Notice that you can resize the view to display the columnar layout and the form should still work.
When you have finished, return to Visual Studio and stop debugging.
Summary
In this chapter, you learned how to use the Entity Framework to create an entity model that you can use to connect to a SQL Server database. You also saw how to create a REST web service that a Windows Store app can use to query and update data in the database through the entity model, and you learned how to integrate code that calls the web service into a ViewModel.
You have now completed all the exercises in this book. Hopefully, you are thoroughly conversant with the C# language and understand how to use Visual Studio 2013 to build professional apps for Windows 7 and for Windows 8.1. However, this is not the end of the story. You have jumped the first hurdle, but the best C# programmers learn from continued experience, and you can gain this experience only by building C# apps. As you do so, you will discover new ways to use the C# language and the many features available in Visual Studio 2013 that I have not had space to cover in this book. Also, remember that C# is an evolving language. Back in 2001, when I wrote the first edition of this book, C# introduced the syntax and semantics necessary to build apps that made use of Microsoft .NET Framework 1.0. Some enhancements were added to Visual Studio and .NET Framework 1.1 in 2003, and then in 2005, C# 2.0 emerged with support for generics and .NET Framework 2.0. C# 3.0 added numerous features such as anonymous types, lambda expressions, and, most significantly, LINQ. C# 4.0 extended the language further with support for named arguments, optional parameters, contra and covariant interfaces, and integration with dynamic languages. C# 5.0 has added full support for asynchronous processing through the async keyword and the await operator.
In parallel with the evolution of the C# programming language, the Windows operating system has changed considerably since the first edition of this book. Arguably, the changes instigated by Windows 8 and augmented in Windows 8.1 have been the most radical in this period, and developers familiar with earlier editions of Windows now have exciting new challenges to build apps for the modern, touch-centric, mobile platform that Windows 8.1 provides. Visual Studio 2013 and C# will undoubtedly be instrumental in assisting you to address these challenges.
What will the next version of C# and Visual Studio bring? Watch this space!