16. Customizing the Office 2016 for Mac Applications

In this chapter, you learn about customizing the Office 2016 for Mac applications, including working with the application options and customizing the interface. Topics include the following:
![]() Accessing the Preferences dialog for the Office 2016 for Mac applications
Accessing the Preferences dialog for the Office 2016 for Mac applications
![]() Changing your Office 2016 for Mac user name and initials
Changing your Office 2016 for Mac user name and initials
![]() Collapsing, expanding, and customizing the Ribbon
Collapsing, expanding, and customizing the Ribbon
![]() Changing the theme for the Office 2016 for Mac applications
Changing the theme for the Office 2016 for Mac applications
This book is called My Office 2016 for Mac, so it’s time you learned how to put the “My” in Office 2016 for Mac. I speak, of course, about customizing the applications in some way. After all, the interface and settings that you see when you first use Office 2016 for Mac are the “factory defaults.” That is, how the program looks and how it works out of the box has been specified by Microsoft. However, this “official” version of the program is almost always designed with some mythical “average” user in mind. Nothing is wrong with this concept, but it almost certainly means that the program is not set up optimally for you. This chapter shows you how to get the most out of the main Office 2016 for Mac programs—Word, Excel, PowerPoint, Outlook, and OneNote—by performing a few customization chores to set up the program to suit the way you work.
Working with Application Preferences
Customizing Office 2016 for Mac most often means tweaking a setting or two in the Preferences dialog that comes with each program. Each program has a unique Preferences dialog configuration, so it’s beyond the scope of this book to discuss these dialogs in detail. Instead, I introduce them by showing you how to get them onscreen and by going through some useful settings.
Working with the Preferences Dialog
You often need to access the Preferences dialog for an Office 2016 for Mac application, so let’s begin by quickly reviewing the steps required to access and work with this dialog in your current Office 2016 for Mac program.
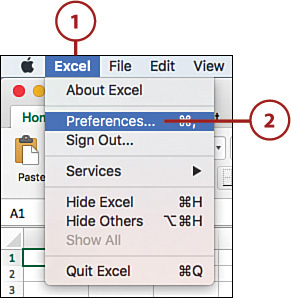
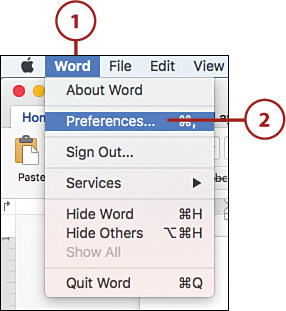
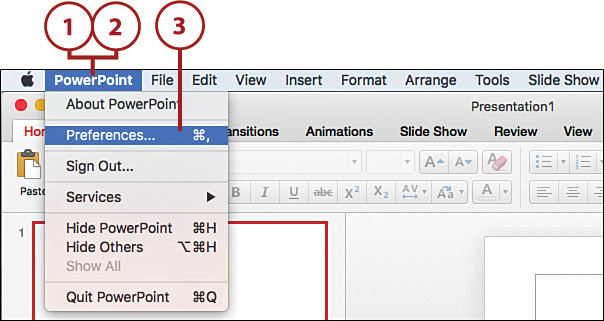
1. In the OS X menu bar, click the name of the Office 2016 for Mac application, such as Excel in this example.
2. Click Preferences. The Office 2016 for Mac application opens the Preferences dialog.
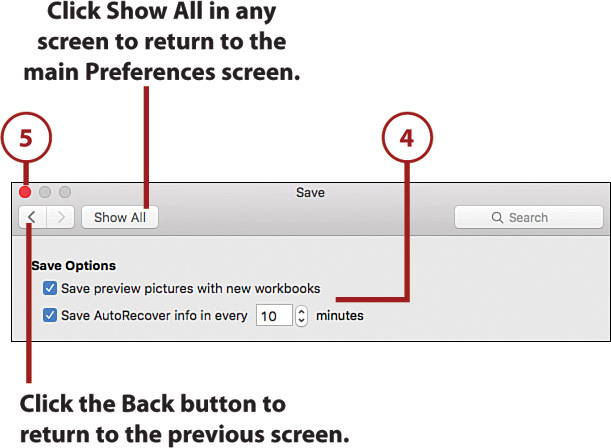
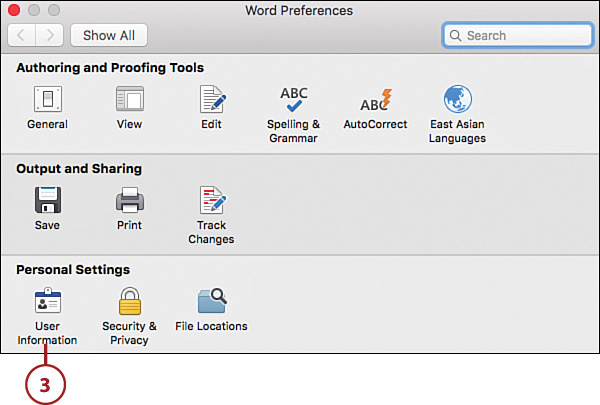
3. Click an icon. The Office 2016 for Mac application displays the options related to the clicked icon.

4. Use the controls to tweak the application’s settings.
5. Click Close. The Office 2016 for Mac application puts the changed options into effect.
Keyboard Shortcut
You can also open the Preferences dialog in any Office 2016 for Mac application by pressing Command+, (comma).
Changing Your User Name and Initials
In Chapter 17, “Collaborating with Others,” you learn how to insert comments into a document and track document changes. In both cases, the underlying program keeps a record of each “reviewer” who made changes to the document. For revisions in Word and PowerPoint and for all changes in Excel, the program identifies the reviewer by his or her Office 2016 for Mac user name; for comments, Word and PowerPoint identify the reviewer by his or her Office 2016 for Mac initials. The default user name is “Microsoft Office User” and the default initials are “MOU,” so you should change these to whatever you prefer.
1. In the OS X menu bar, click the name of the Office 2016 for Mac application.
2. Click Preferences to open the Preferences dialog.
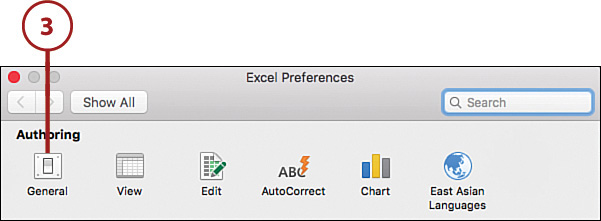
3. Click User Information. If you’re working in Excel, click General instead.
4. Use the Name text box to type your user name.
5. In Word and PowerPoint, use the Initials text box to type your initials.
6. Click Close. Office 2016 for Mac puts the new user name and initials into effect.

Universal User Name and Initials
Your user name and initials are universal in Office 2016 for Mac. That is, changing your user name or initials in one program automatically means the new user name or initials appear in the other Office 2016 for Mac programs.
Bypassing the Start Screen at Launch
By default, Word, Excel, and PowerPoint display the Start screen when you first launch the application, which lets you choose a template for a new file or select a recently used file. If you almost always opt to open a blank document, workbook, or presentation at startup, you can make this the default behavior.
1. Launch the Office 2016 for Mac application you want to customize.
2. In the OS X menu bar, click the name of the Office 2016 for Mac application.
3. Click Preferences to open the Preferences dialog.
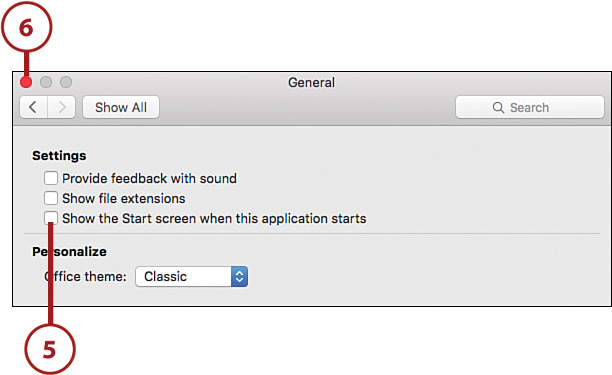
4. Click the General tab.
5. Deselect the Show the Start Screen When This Application Starts check box. In Word, deselect the Show Word Document Gallery When Opening Word check box; in Excel, deselect the Open Workbook Gallery When Opening Excel check box.
6. Click Close. The Office 2016 for Mac application puts the setting into effect.
Customizing the Interface
Besides the work area of any Office 2016 for Mac application window, the rest of the Office 2016 for Mac interface mostly consists of the Ribbon. This element (along with the menu bar) is the royal road to all things Office 2016 for Mac, so you’ll be less efficient and less productive if the Ribbon isn’t set up to suit the way you work.
Collapsing the Ribbon
By default, the Office 2016 for Mac applications show the Ribbon to give you easy access to its commands and features. However, the Ribbon does take up a great deal of room, so if you want maximum screen real estate for your documents, you can collapse the Ribbon to show just the tab names.
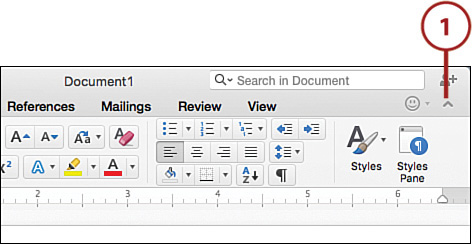
1. Click Collapse Ribbon. The Office 2016 for Mac application hides the Ribbon.
Shortcuts for Collapsing the Ribbon
The Office 2016 for Mac applications give you two shortcut methods for collapsing the Ribbon: Either click the current Ribbon tab (or double-click any other Ribbon tab) or press Option+Command+R.
Expanding the Ribbon
If you followed the steps in the previous section to collapse the Ribbon, you might later decide that the extra click required to access the Ribbon is a pain. You can avoid this by expanding the Ribbon so that it appears onscreen full-time.
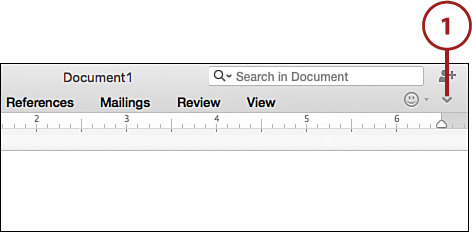
1. Click Expand Ribbon. The Ribbon appears onscreen full-time.
Shortcuts for Expanding the Ribbon
As with collapsing, Office 2016 for Mac gives you two shortcuts for expanding the Ribbon: Either click any Ribbon tab, or press Option+Command+R.
Adding Group Titles to the Ribbon
Each Ribbon tab organizes its command and features into groups. For example, PowerPoint’s Home tab has a group for all the Clipboard-related commands, one for all the slide-related commands, another for all the font-related commands, and so on. Although it uses up a bit more room, you can make the Ribbon a bit easier to navigate by showing the titles of each group.
1. Launch the Office 2016 for Mac application you want to customize.
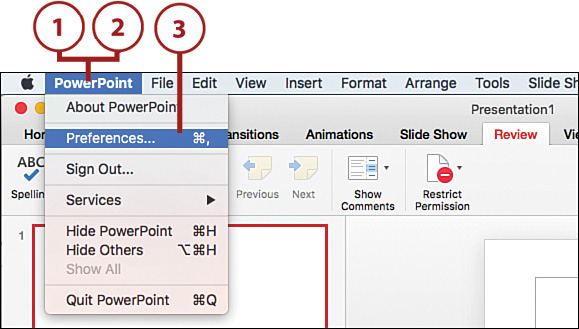
2. In the OS X menu bar, click the name of the Office 2016 for Mac application.
3. Click Preferences to open the Preferences dialog.
Applications That Support Group Titles
Note that group titles are available only in Word, Excel, and PowerPoint.
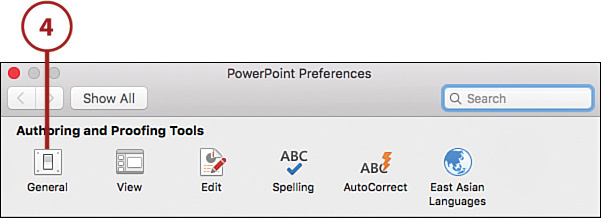
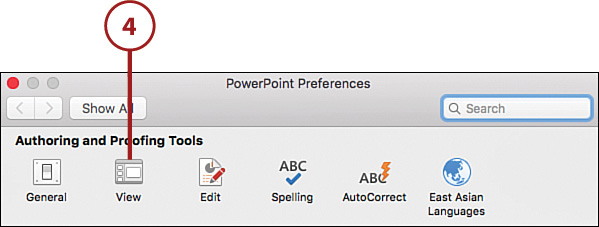
4. Click View.
5. Click to select the Show Group Titles check box.
6. Click Close. The Office 2016 for Mac application displays the group titles in the Ribbon.

Setting the Office Theme
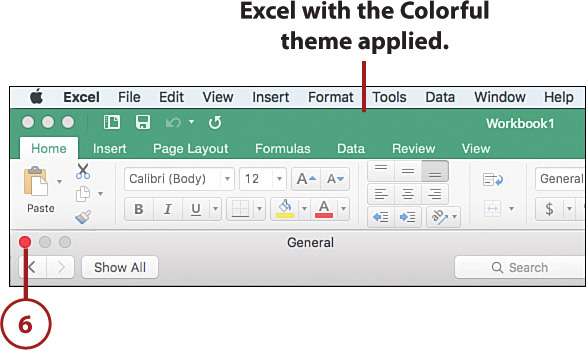
You can add a bit of visual interest to your Office 2016 for Mac applications by switching to the Colorful theme, which applies a color to the window title bar and tab background. If you prefer a simpler look, you can switch back to the default Classic theme.
1. In the OS X menu bar, click the name of the Office 2016 for Mac application you’re using.
2. Click Preferences to open the Preferences dialog.

3. Click General.
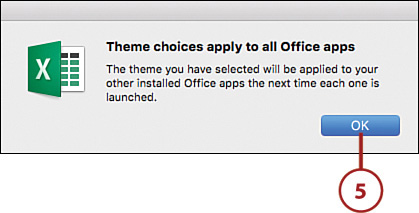
4. In the Office Theme pop-up menu, click the theme you want to use: Colorful or Classic. The application tells you that the theme applies to all the Office applications.

The Theme Is Universal
As the dialog says, the theme you choose is universal in Office 2016 for Mac. That is, switching to a particular theme in one application automatically means the new theme is applied to the other Office 2016 for Mac applications.
5. Click OK.
6. Click Close. The Office 2016 for Mac application applies to the theme you selected.
Adding the Developer Tab
Although they’re designed for advanced users and therefore are beyond the scope of this book, Visual Basic macros and custom forms are powerful tools. If you decide to learn how to use these tools, then you’ll need to display the Developer tab to get the most out of them.
1. Launch the Office 2016 for Mac application you want to customize.
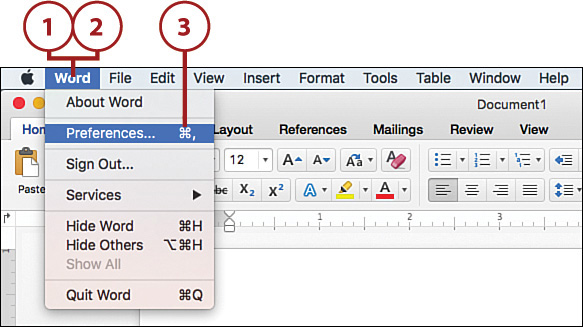
2. In the OS X menu bar, click the name of the Office 2016 for Mac application.
3. Click Preferences to open the Preferences dialog.
Applications That Support the Developer Tab
Note that the Developer tab is available only in Word and Excel.
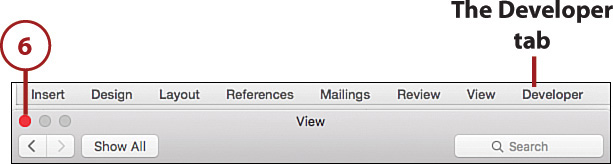
4. Click View.
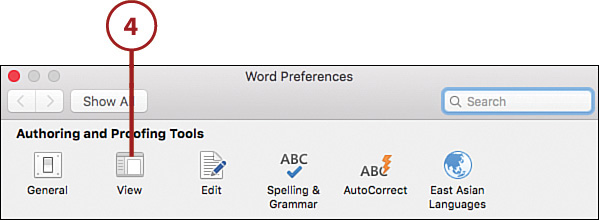
5. Click to select the Show Developer Tab check box.
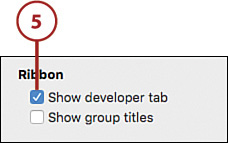
6. Click Close. The Office 2016 for Mac application adds the Developer tab to the Ribbon.