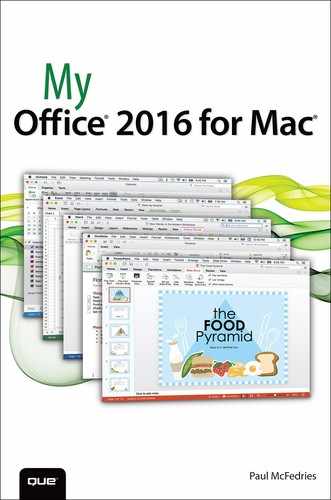
17. Collaborating with Others
In this chapter, you learn how to collaborate with other people, particularly on Word and Excel files. Topics include the following:
![]() Inserting and working with comments in Word
Inserting and working with comments in Word
![]() Tracking changes to Word documents
Tracking changes to Word documents
![]() Inserting and working with comments in Excel
Inserting and working with comments in Excel
![]() Tracking changes to Excel workbooks
Tracking changes to Excel workbooks
![]() Sharing an Excel workbook
Sharing an Excel workbook
![]() Sharing Office documents using your OneDrive
Sharing Office documents using your OneDrive
Whether you’re a company employee, a consultant, or a freelancer, you almost certainly work with other people in one capacity or another. Most of the time, our work with others is informal and consists of ideas exchanged during meetings, phone calls, or email messages. However, we’re often called upon to work with others more closely by collaborating with them on a document. This could involve commenting on another person’s work, editing someone else’s document, or dividing a project among multiple authors. For all these situations, Office 2016 for Mac offers a number of powerful collaborative tools. This chapter shows you how to use and get the most out of these tools.
Collaborating in Word with Comments and Changes
Microsoft Word is the collaboration champion in the Office suite because, more than any other Office program, Word boasts an impressive collection of tools that enable you to work with other people on a document. In the next few sections, you learn about the simplest and most common collaboration tools: comments and tracking changes.
Insert Comments in a Word Document
If someone asks for your feedback on a document, you could write that feedback in a separate document or in an email message. However, feedback is most useful when it appears in the proper context. That is, if you have a suggestion or critique of a particular word, sentence, or paragraph, the reader will understand that feedback more readily if it appears near the text in question. To do that in Word, you insert a comment, a separate section of text associated with some part of the original document.
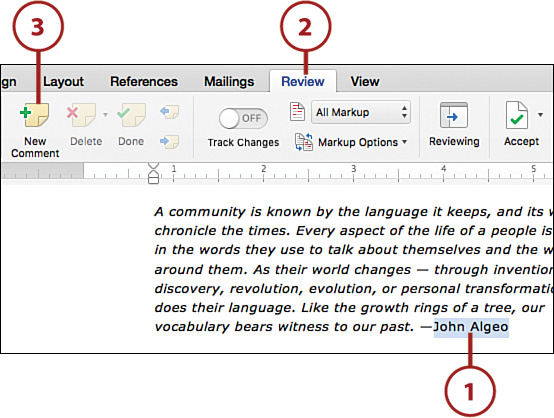
1. Select the text you want to comment on. If you want to comment on a particular word, you can position the cursor within or immediately to the left or right of the word.
2. Click the Review tab.
3. Click New Comment. Word highlights the selected text to indicate it has an associated comment.
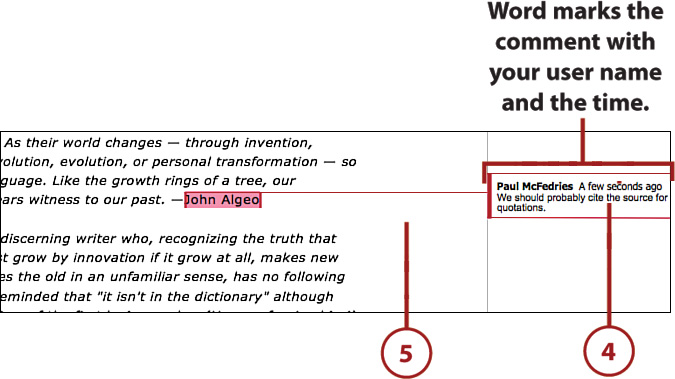
4. Type the comment.
5. Click outside the comment box to save it.
Edit a Comment
You can edit a comment either by adding to or changing the existing comment text, or by responding to a comment made by another person.
1. Click the text of the comment you want to edit. The Comments box appears.
2. Edit the comment text as needed.
3. If you want to respond to the comment, click this icon.

4. Type your response.
5. Click outside the comment box to save it.

Delete a Comment
When you no longer need a comment, you can delete it to reduce clutter in the Word document.
1. Click the comment you want to delete.
2. Click the Review tab.
3. Click Delete. Word deletes the comment.

Deleting All Comments
If you want a fresh start with a Word document, you can delete all the comments. To do this quickly, click the Review tab, drop down the Delete list, and then click Delete All Comments in Document.
Track Changes in a Word Document
A higher level of collaboration occurs when you ask another person to make changes to a document. That is, rather than suggesting changes by using comments, the other person performs the actual changes herself with Word keeping track of all the changes made to the document. This means that any time you or another person makes changes to the original text—including adding, editing, deleting, and formatting the text—Word keeps track of the changes and shows not only what changes were made, but who made them and when.
1. Click the Review tab.
2. Click the Track Changes switch to On. Word enables Track Changes.

Keyboard Shortcut
You can toggle Track Changes on and off quickly by pressing Shift+Command+E.
Control the Display of Comments and Changes
Depending on the document and the number of reviewers, comments and changes can make a document look messy. Fortunately, Word allows you to filter out particular types of changes and even changes made by particular reviewers.
These filters are part of Word’s Markup Options list, which contains the following six commands that toggle the respective markup on and off:
Markup refers to the icons, font changes, and balloons that indicate the comments and changes reviewers have made to a document.
• Comments—Toggles comments on and off.
• Insertions and Deletions—Toggles the display of text that has been added to or removed from the document.
• Formatting—Toggles the display of changes made to formatting such as fonts and paragraphs.
• Track Moves From/To—Toggles the display of changes where text as been moved to a new location or from its original location.
• Balloons—This command displays a list that enables you to click which revisions appear in balloons when the reviewing pane is activated. By default, Word only shows comments and formatting changes in balloons, but you can also choose to show all revisions in balloons or all revisions inline (that is, within the text itself).
• Reviewers—This command displays a list of reviewers so you can toggle the display of changes made by a particular reviewer.
Word also offers several options for controlling the entire markup in a document. The Display for Review list contains the following four commands:
• Simple Markup—This view shows the final version of the document (the version of the document if you accept all the current changes) with the markup only indicated with comment icons in the right margin and revision marks in the left margin.
• All Markup—This view shows the final version of the document (the version of the document if you accept all the current changes) with deletions marked as strikethrough, and comments, additions, and formatting changes shown in balloons.
• No Markup—This view shows the final version of the document with none of the markup showing (that is, how the document would look if all the changes had been accepted).
• Original—This is the original version of the document, before any changes were made (or, more precisely, either before Track Changes was turned on or since the last time all the changes were accepted).
Control the Markup Display
By default, Word shows all revisions from all reviewers using the Simple Markup display, but you can change these defaults to ones that you prefer.
1. Click the Review tab.
2. Click Markup Options.
3. Click which types of markup you want to view.
4. Click the Display for Review pop-up.

5. Click how you want Word to display the document’s markup.

Navigate Comments and Changes
To make sure that you review every comment or change in a document, or to accept or reject comments and changes individually (see the next section), you need to use Word’s reviewing navigation tools.
1. Click the Review tab.
2. Click Next Comment to view the next comment in the document.
3. Click Previous Comment to view the previous comment in the document.

4. Click Next to view the next revision in the document.
5. Click Previous to view the previous revision in the document.

Accept or Reject Comments and Changes
The point of marking up a document is to later review the changes and then either incorporate some or all of them into the final version or remove those that are not useful or suitable. Word gives you several tools to either accept markup (this action applies to changes only) or reject markup (this action applies to both comments and changes).
1. Click the Review tab.
2. Navigate to the comment or change you want to work with.
3. If you want to accept the change, click the Accept button.
4. If you want to reject the comment or change instead, click the Reject button.

5. Repeat steps 2 to 4 until you’ve gone through all the changes you want to review.
Collaborating in Excel with Comments and Changes
As with Word, Excel enables you to collaborate with other people by adding comments and tracking changes. Although these features are implemented slightly differently in Excel, the underlying concepts are basically the same, as you see in the next few sections. Later you see that Excel also enables you to collaborate by sharing a workbook among multiple users.
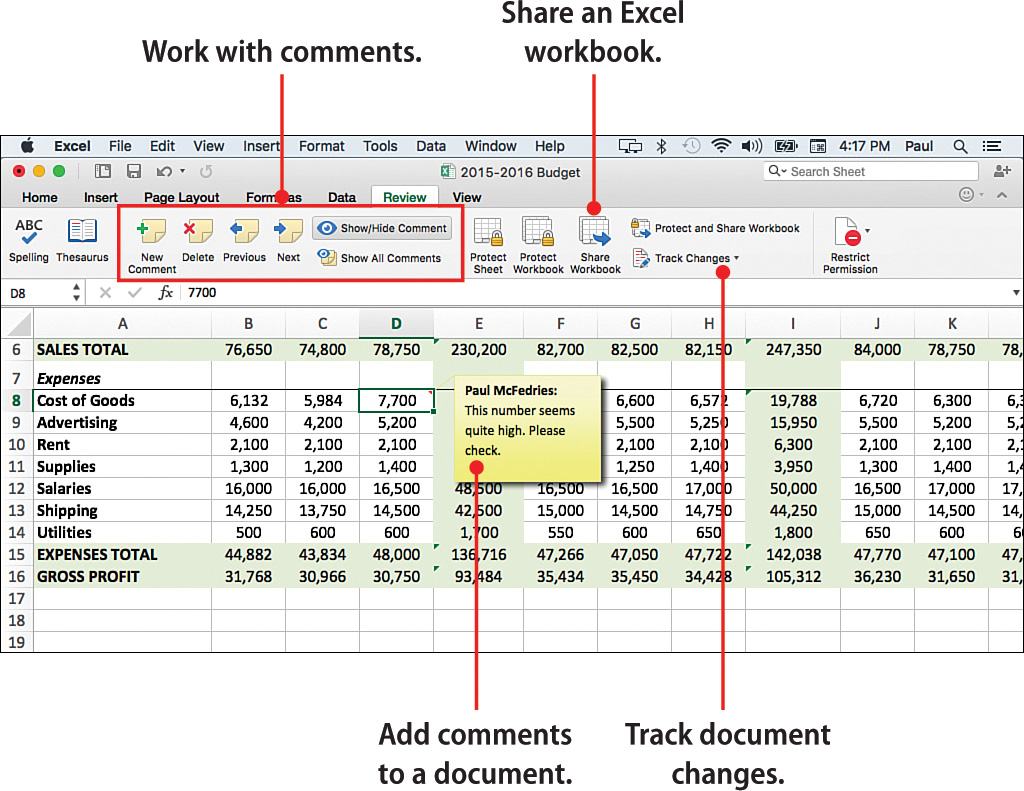
Insert Comments in Cells
The simplest level of collaboration with an Excel workbook is the comment that does not change any worksheet data but offers notes, suggestions, and critiques of the worksheet content. In Excel, you associate comments with individual cells, not with ranges.
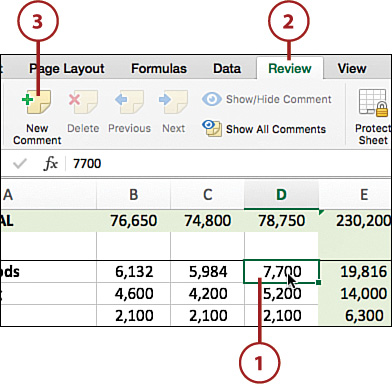
1. Click the cell in which you want to insert the comment.
2. Click the Review tab.
3. Click New Comment. Excel displays an empty comment balloon.
Turning Off the Comment Indicators
If you don’t want to see the comment indicators, you can turn them off by choosing Excel, Preferences to open the Excel Preferences dialog, and then clicking the View icon. Select the No Comments or Indicators option and then click Close.
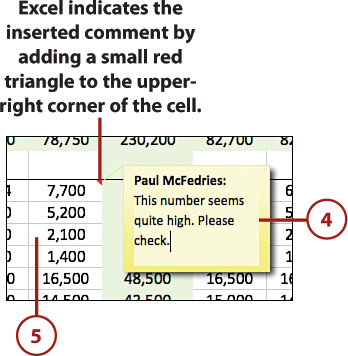
5. When you are done, click outside the comment balloon.
Editing a Comment
If you need to make changes to a comment, click the Review tab, and then click either Next or Previous until the comment is selected (see the next section for more on navigating comments). Click the comment to open it for editing. Make your changes and then click outside the comment box. If you need to delete a comment, click Review, click Next or Previous until the comment is selected, and then click Delete.
View Workbook Comments
By default, Excel indicates commented cells by placing a small, red triangle in the upper-right corner of the cell, but it doesn’t display the comment itself. So to read a cell’s comment, you must display it by hand.
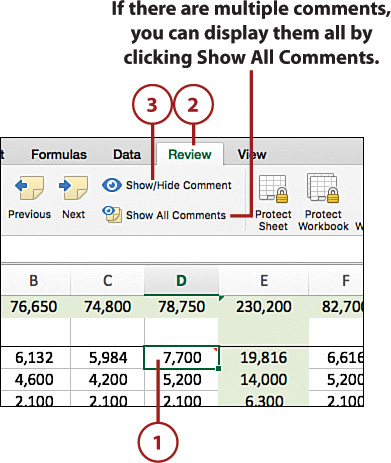
1. Click the cell that contains the comment you want to view.
2. Click the Review tab.
3. Click Show/Hide Comment. Excel displays the comment.
Viewing with a Mouse
You can also view the comment by hovering the mouse pointer over the cell.
4. To hide the comment, click Show/Hide Comment.
5. Click Next to view the next comment in the worksheet.
6. Click Previous to view the previous comment in the worksheet.

Track Worksheet Changes
If you want other people to make changes to a workbook, keeping track of those changes is a good idea so you can either accept or reject them. Like Word, Excel has a Track Changes feature that enables you to do this. When you turn on Track Changes, Excel monitors the activity of each reviewer and stores the reviewer’s cell edits, row and column additions and deletions, range moves, worksheet insertions, and worksheet renames. You can also filter the changes by date, reviewer, or worksheet location.
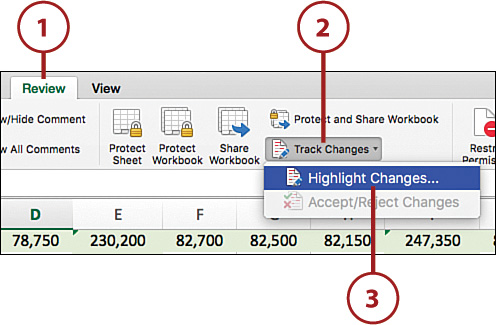
2. Click Track Changes.
3. Click Highlight Changes. Excel displays the Highlight Changes dialog.
4. Select the Track Changes While Editing check box. (The check box text mentions that “This also shares the workbook.” You find out more details on sharing an Excel workbook later in this chapter in the “Share an Excel Workbook with Other Users” section.)
5. To filter the displayed changes by time, click the When check box and then use the list to click a time frame.
Filtering Changes by Date
To show only the changes that have occurred since a specific date, drop down the When list, click the Since Date item, and then edit the date that Excel displays (the default is the current date).
6. To filter the displayed changes by reviewer, click the Who check box and then click a reviewer or group in the list. At first, this list contains Everyone and Everyone but Me. Later, when other users have made changes, the list includes the name of each reviewer.
7. To filter the displayed changes by range, click the Where check box and then click the range in which you want changes displayed.
8. Click OK. Excel displays a dialog letting you know that it will save your workbook.

Accept or Reject Workbook Changes
The idea behind tracking workbook changes is so that you can review the changes and then either incorporate some or all of them into the final version of the file or remove those that are not useful or suitable.
1. Click the Review tab.
2. Click Track Changes.
3. Click Accept/Reject Changes. If your workbook has unsaved changes, Excel tells you it will save the workbook.

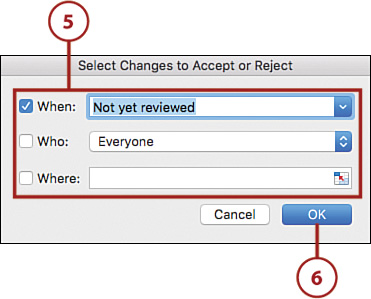
4. Click OK. Excel displays the Select Changes to Accept or Reject dialog.

5. Use the When, Who, and Where controls to filter the changes, as needed (see the previous section for the details).
6. Click OK. Excel displays the Accept or Reject Changes dialog and displays a change.
7. Click Accept or Reject. Excel moves to the next change. Repeat this step until you have reviewed all the changes.

Share an Excel Workbook with Other Users
Most Excel worksheet models are built to analyze data, but that analysis is only as good as the data is accurate. If you are building a model that brings in data from different departments or divisions, you can create a single workbook that you share with other users. This method enables those users to make changes to the workbook, and you can track those changes as described in the previous section. This is why Excel turns on workbook sharing automatically when you activate the Track Changes feature. Note, however, that the opposite is not the case. That is, you can share a workbook without also tracking changes.
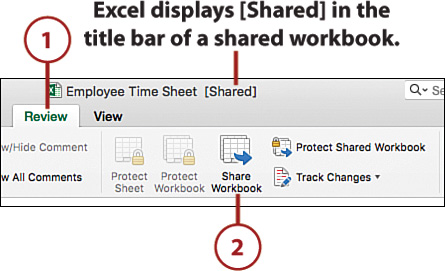
1. Click the Review tab.
2. Click Share Workbook. Excel displays the Share Workbook dialog.

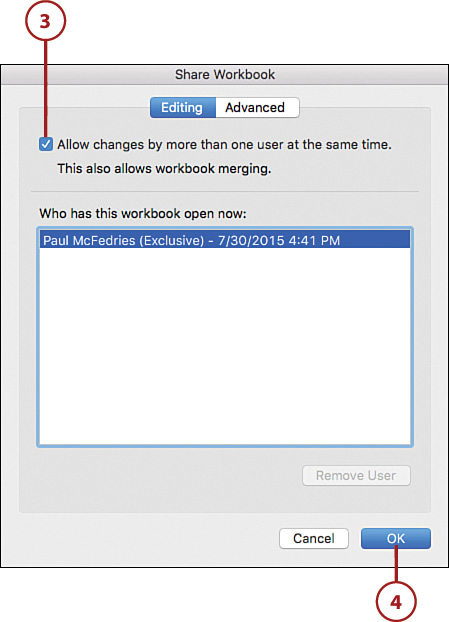
3. Click the Allow Changes by More Than One User at the Same Time check box.
4. Click OK. Excel tells you it will save the workbook.
5. Click OK. Excel shares the workbook and displays [Shared] in the title bar to remind you that the workbook is shared.
Display and Removing Reviewers
While your workbook is shared, you might also want to keep track of who is currently using it.
1. Click the Review tab.
2. Click Share Workbook. Excel displays the Share Workbook dialog.
3. Click the Editing tab. The Who Has This Workbook Open Now list displays the current reviewers.
4. If you want to remove a reviewer, click that person and then click Remove User.
5. Click OK.

Handle Sharing Conflicts
If a downside exists to sharing a workbook with other users, it’s that occasionally two people make changes to the same cell. For example, it could happen that another user changes a cell, saves his or her changes, and then you change the same cell before updating. This situation creates a conflict in the workbook versions that must be resolved.
1. Click Save. Before saving, Excel updates the workbook with the changes made by other users. If it detects a conflict, it displays the Resolve Conflicts dialog.
2. Click which change you want to accept. Excel displays the next conflict. Repeat this step until all the conflicts have been resolved.

3. If you accepted other users’ changes, click OK.

Sharing a Document Online
If you work with a document online via OneDrive, you can share that document with other people. Office 2016 for Mac gives you two ways to share a document:
• Using email—In this case you send an email invitation to one or more recipients, and that message contains a link to a OneDrive location of the document you’re sharing.
• Using a link—In this case you copy a OneDrive address (Office 2016 for Mac calls it a link) for the document you want to share. You can then distribute that address to the people you want to collaborate with (via email, text message, online post, or whatever).
In both cases, you can set up the shared document for viewing only, or to allow editing.
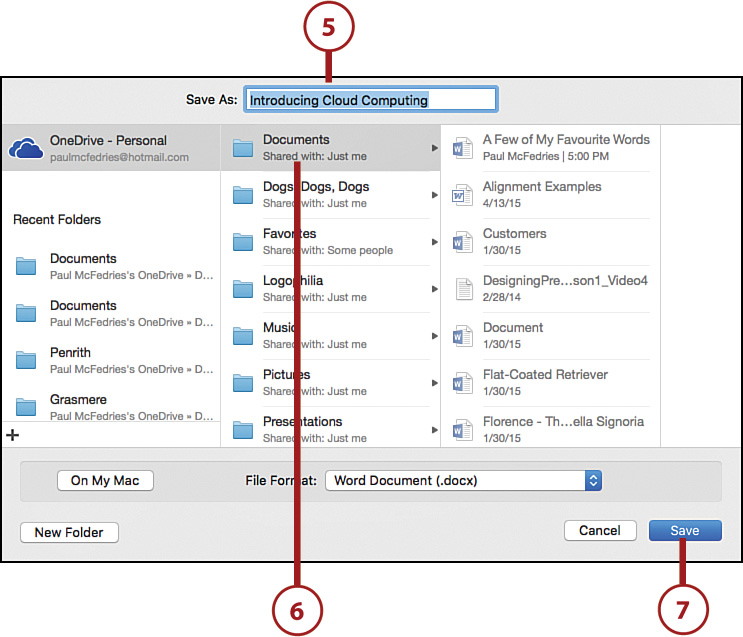
Save a Document to OneDrive
Before you can share a document online, you must save a copy of the document to your OneDrive.
1. Open the document you want to share.
2. Click File.
3. Click Save As.
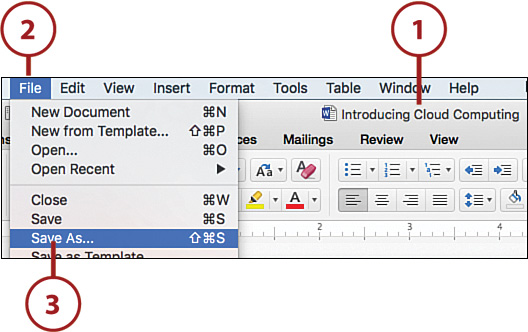
4. Click Online Locations.
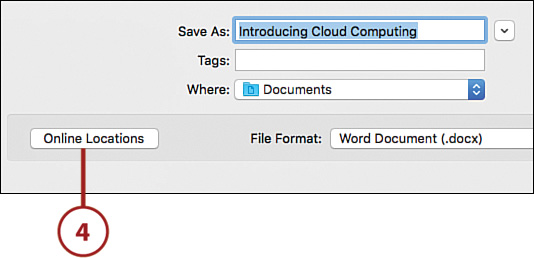
5. Edit the filename.
6. Select the folder you want to use.
7. Click Save.
Send an Invitation to Share a OneDrive Document
To allow other people to view, comment on, or even edit a document on your OneDrive, you can send an email invitation that contains a link to the document’s OneDrive location.

1. Open the OneDrive version of the document you want to share.
2. Click File.
3. Click Share.
4. Click Invite People.

5. Type the email address of each recipient, separating each with a semicolon.
6. Type a message to the invitees.
7. Deselect the Can Edit check box if you want to prevent the invitees from making changes to the document.
8. Click Share.
Copy a Link to Share a OneDrive Document
If you want more flexibility when it comes to sharing a document, you can copy a link to a OneDrive address for that document, which you can then distribute to your collaborators.
1. Open the OneDrive version of the document you want to share.
2. Click File.
3. Click Share.
4. If you want people to edit the document, click Copy View and Edit Link. Otherwise, if you want people to only view the document, click the Copy View-Only Link.

5. Paste the copied link into an email message, text message, website, or whatever medium you want to use to share the link.
