11. Using Calendar
The Calendar app makes it easy to keep up with what’s going on in your hectic life. You can connect the Calendar app to an Exchange or Office 365 calendar, a Microsoft account calendar, a Google calendar, an iCloud calendar, and more. In this chapter, you learn about
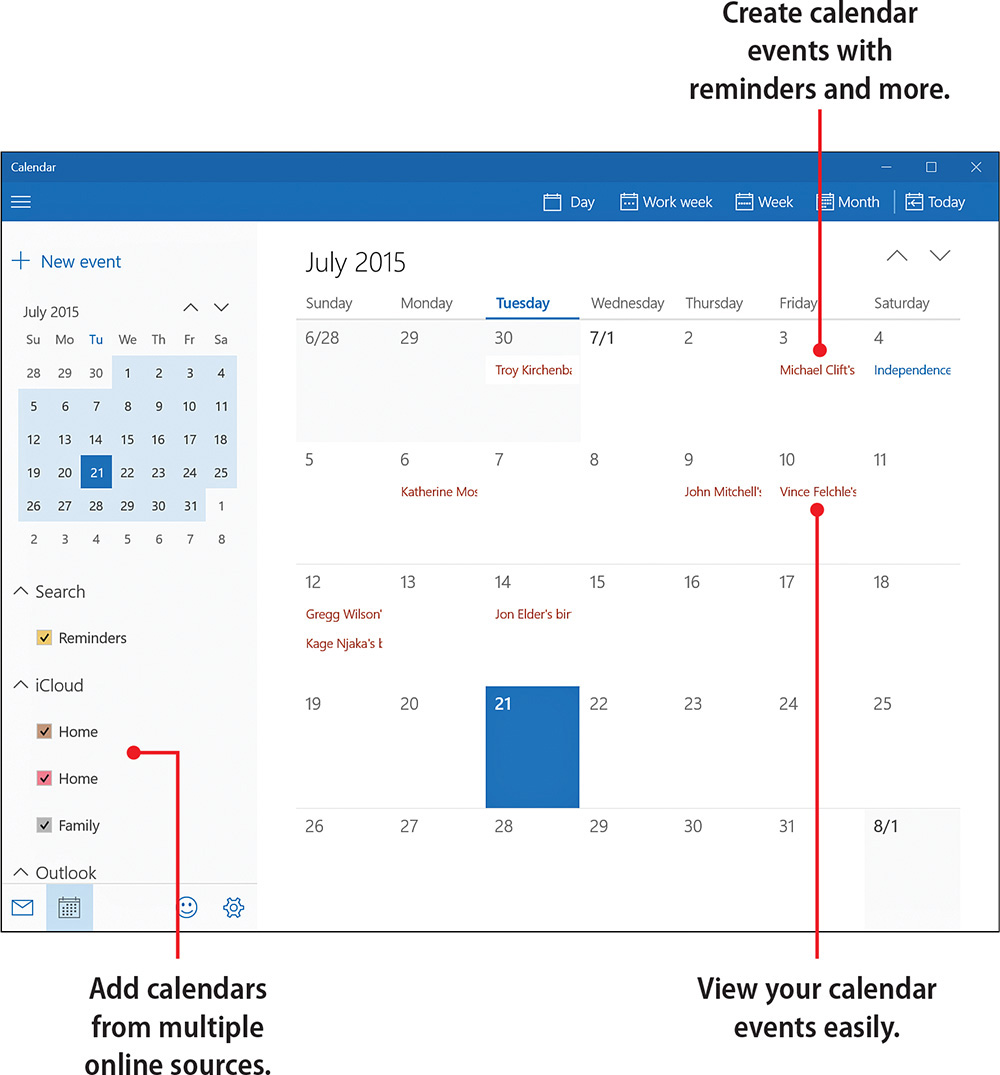
There’s nothing new about a calendar on your computer, but there is something new about Calendar in Windows 10. As with other apps in Windows 10, Calendar is a cloud-enabled app that makes it easy to keep track of multiple calendars in one place.
Connecting Calendars
I use a couple different calendars. I have a work calendar on my company’s Exchange server, and we keep a family calendar in Google. Fortunately, I don’t have to re-create all the appointments in these calendars on my tablet. Instead, I simply connect both of these calendars to the Calendar app, and all my appointments are immediately available to me.
You can add your Outlook.com calendar (which includes Outlook.com, Live.com, Hotmail and MSN calendars), Exchange and Office 365 calendars, a Google calendar (Gmail), and an iCloud calendar.
Adding an Outlook.com Calendar
You can add a calendar from your Outlook.com, Hotmail.com, or Live.com account.
1. From the Start menu, tap or click Calendar to launch the Calendar app.

2. Tap or click Settings.
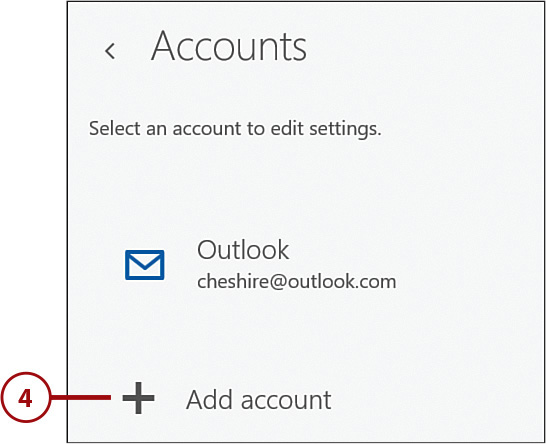
3. Tap or click Accounts.

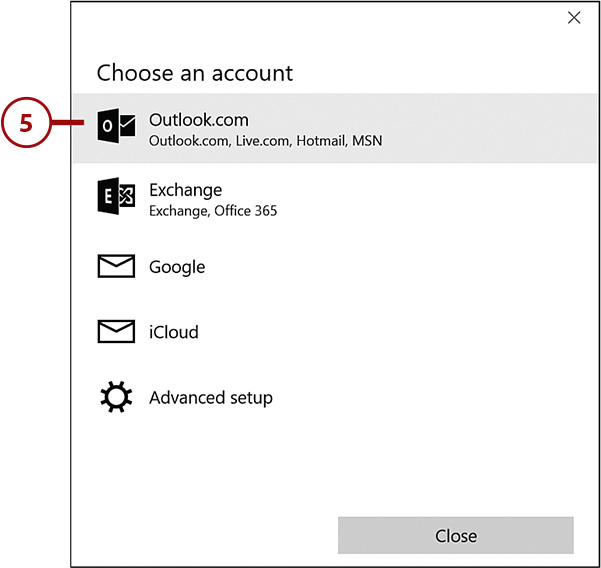
4. Tap or click Add Account.
5. Tap or click Outlook.com.
6. Enter the email address for your account.
7. Enter your password.
8. Tap or click Sign In.

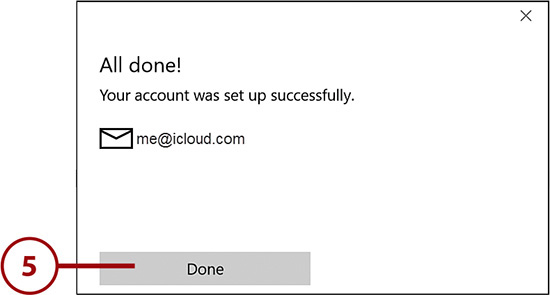
9. Tap or click Done.

Exchange and Office 365
You can also add an Exchange or Office 365 calendar. Simply tap or click Exchange in step 5 and enter the information for your Exchange server or Office 365 account.
Adding a Google (Gmail) Calendar
You can add your Google calendar so that you can see appointments and create new appointments on your Google calendar.
1. From the Choose an Account screen, tap or click Google.

2. Enter your Google username.
3. Tap or click Next.

4. Enter your Google password.
5. Tap or click Sign In.

6. Tap or click Accept.

7. Tap or click Done.

Adding an iCloud Calendar
You can add the calendar from your iCloud account so that you can use the Calendar app to manage your iCloud calendar.
1. From the Choose an Account screen, tap or click iCloud.

2. Enter your iCloud email address.
3. Enter your password.
4. Tap or click Sign In.

5. Tap or click Done.
Viewing Calendars
You can choose which calendars to display in Calendar, the color used for each calendar, and which view you would like to see for your events.
Hiding a Calendar
By default, after you connect a calendar to the Calendar app, events from that calendar are displayed. If you don’t want to see events from a particular calendar, you can hide it.
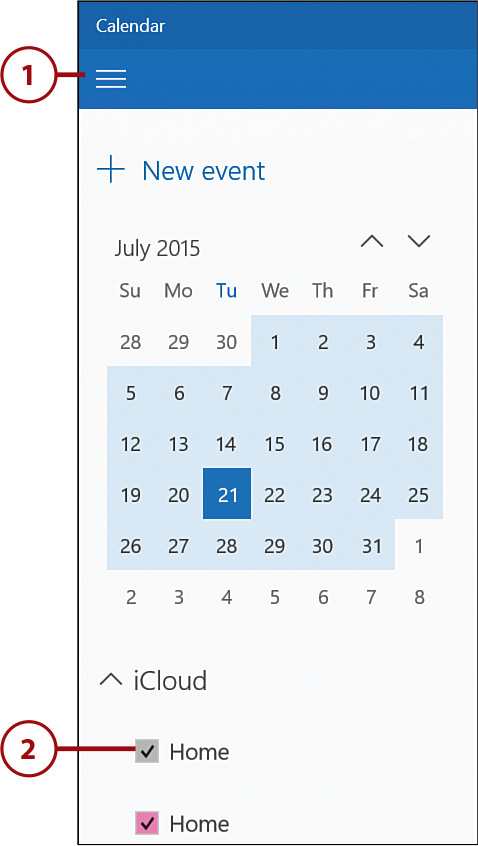
1. If the sidebar isn’t visible, tap or click the Expand button.
2. Tap or click a calendar to uncheck it and hide that calendar.
Birthday and Holiday Calendars
Note that the Calendar app automatically displays a birthday calendar and a holiday calendar. The birthday calendar displays an event when one of your contacts in the People app has a birthday.
Changing a Calendar’s Display Color
The Calendar app chooses a different color for each calendar you connect. This makes it easy to tell at a glance which calendar contains a specific event. You can customize the color used for each of your calendars.
1. Tap and hold or right-click the calendar whose color you want to change.
2. Tap or click the color you want to use for that calendar.

Viewing Events
You can choose between viewing your calendar events in Day view, Work Week view, Week view, or Month view.
1. Tap or click Day, and then tap the number of days to view events for multiple days.
2. Tap or click Work Week to view only days in your work week.
Work Week
You learn how you can configure the days in your work week later in this chapter.
3. Tap or click Week to view the entire week’s events.
4. Tap or click Month to view the entire month.
5. Tap or click Today to make today’s date visible.
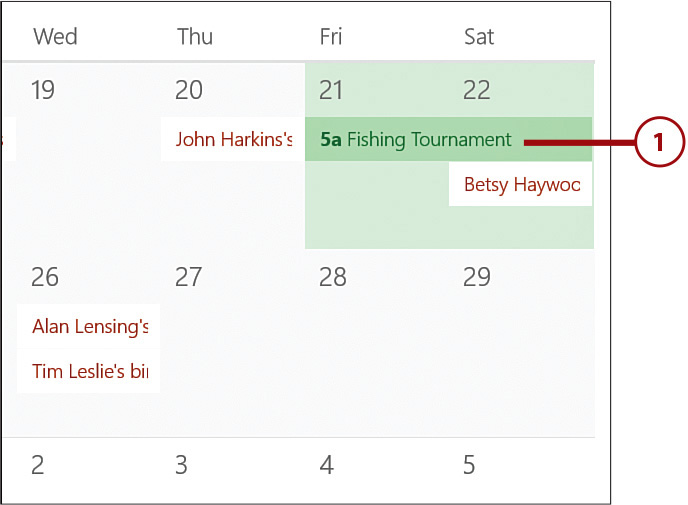
6. Tap or click an event to view details on that event.

Working with Events
Events in Calendar are automatically synchronized from your online calendars. If you add or modify an event on your smartphone or another computer, Calendar reflects that change automatically. Additionally, events you create or modify in Calendar synchronize with your other devices.
Adding a Basic Event
A basic event is one without any recurrences and that uses the default reminder time and other options.
1. In the Calendar app, tap or click New Event.

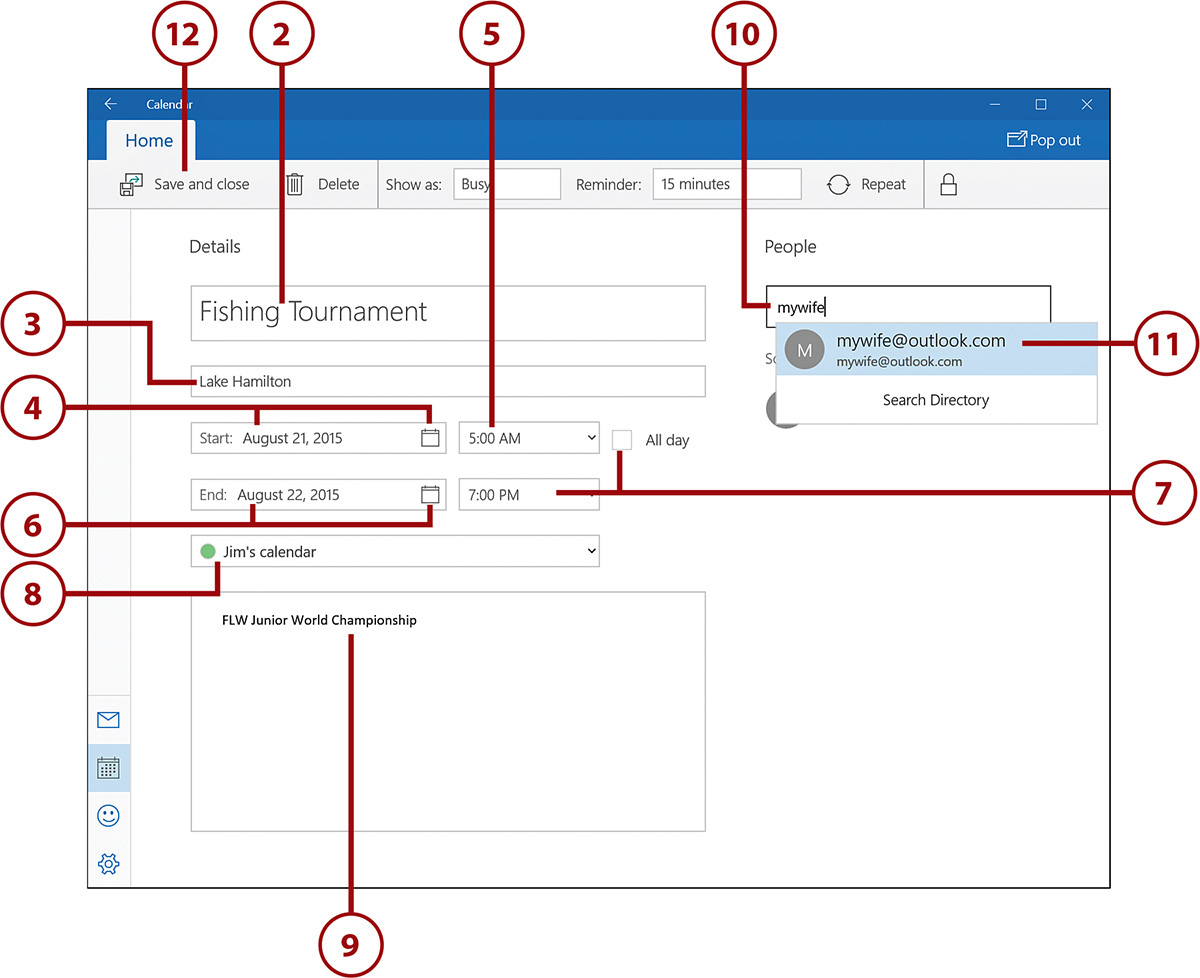
2. Enter a description for the event.
3. Enter a location.
4. Enter a start date, or tap or click the calendar icon and select a start date.
5. Select a start time.
6. Enter an end date, or tap or click the calendar icon and select an end date.
7. If the event is an all-day event, tap or click All Day to make the event an all-day event, or select an ending time.
8. Tap or click the calendar and select a different calendar if you want to.
9. Enter any additional information you want to add for the event.
10. To invite other people, enter a contact’s name in the People box.
11. Tap or click the contact’s name to add them to the event.
12. Tap or click Save and Close. (If you’ve invited others to the event, the Save and Close button changes to a Send button.)
Quickly Creating an Event
You can more quickly create an event by tapping the date or time for the event. (You won’t see times if you are in Month view.)
1. Tap a date or time for the event.
2. Enter a name for the event.
3. Enter a start time for the event.
4. Tap or click All Day to make the event an all-day event, or enter an end time for the event.
5. Enter a location.
6. Select a different calendar if you want to.
7. Tap or click More Details to access the full screen for adding a new event.
8. Tap or click Done.

Adding a Recurring Event
You can create an event that recurs at a regular interval.
1. While creating your event, tap or click Repeat.
2. Select a recurrence timeframe for the event.

3. If you want the recurring event to have an end date, enter it or tap or click the calendar icon and select the end date.

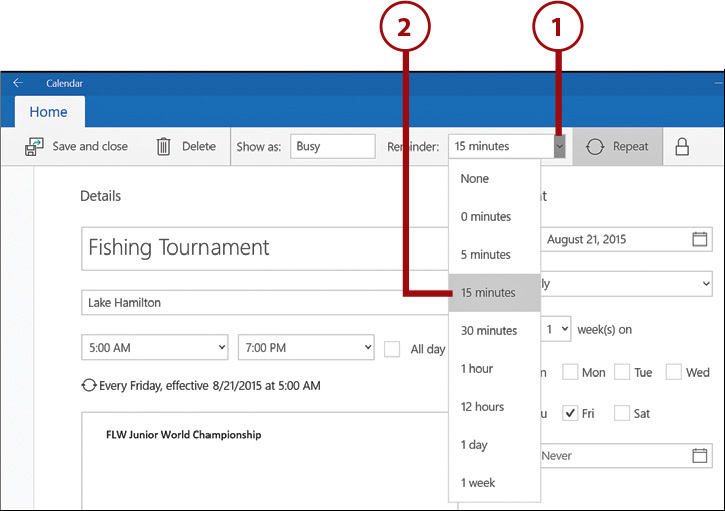
Setting Reminders
Windows 10 notifies you of events using the Notifications pane. By default, you will be reminded of events 15 minutes prior to the start time, but you can choose a different reminder time or choose not to be reminded.
1. While creating your event, tap or click Reminder.
2. Tap or click the desired timeframe prior to the event for your reminder or select None to turn off the reminder.
Specifying an Event Status
You can specify a status for your event of Free, Busy, Tentative, or Out of Office. Calendar displays a unique colored left edge for the event based on the status you select. Free displays a light-colored edge, Busy displays a light purple edge, Tentative displays a hashed edge of alternating colors, and Out of Office displays a dark purple edge.
1. While creating an event, tap or click Show As.
2. Tap or click the status for the event.

Creating a Private Event
You might want to create an event that only you can see. You can do that by marking an event as private. When you do, the event is actually created only as a local event on the device you are using. You (or others) will not be able to see the event on other devices that synchronize with your calendar.
1. While creating your event, tap or click Private to make the event private.
2. Tap or click Private again to make the event non-private.

Editing an Event
If you would like to make a change to an event, you can edit it and then resave it.
1. Tap or click the event you would like to edit.
2. Make any changes you want to the event. (If necessary, click More Details.)
3. Tap or click Save and Close to save the edited event.

Save or Send
If the event you are editing includes invites to others, you will tap Send to save the edited event and send it to those with whom you’ve shared the event.
Deleting an Event
If an event has been canceled, you can delete it from your calendar.
1. Tap or click the event you would like to delete.

Canceling Events with Attendees
If you have invited others to the event you are deleting, you will be asked to enter a cancellation message. The invited people will then receive a cancellation email from you.
2. Tap or click Delete to delete the event. (Click More Details, if necessary.)

Calendar Settings
You can configure the settings for the Calendar app so that your work week and work hours appear correctly and so that Calendar recognizes which day of the week starts your week.
Changing the First Day of the Week
By default, the Calendar app uses Sunday as the first day of the week. You can change the first day of the week if a different day marks your first day of the week.
1. Tap or click Settings.
2. Tap or click Calendar Settings.

3. Tap or click First Day of Week and select a new first day of the week.

Changing Days in Your Work Week
By default, Calendar uses Monday through Friday as the days in the work week. You can change the days in your work week if you work different days.
1. From the Settings screen, tap or click Calendar Settings.

2. Tap or click to check a day to add it to your work week.
3. Tap or click to uncheck a day to remove it from your work week.

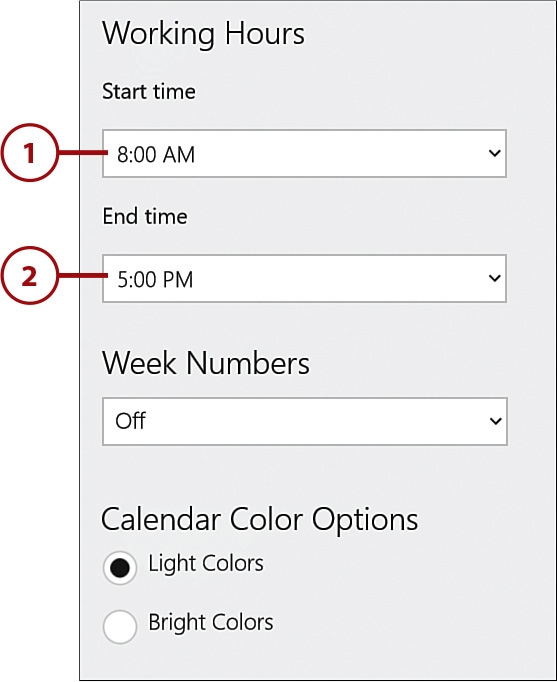
Changing Working Hours
Nonworking hours are shaded in the Calendar app so that you can quickly see the hours you work. You can change your working hours to accurately reflect when you are working.
1. From the Working Hours section in Calendar Settings, tap or click to select a start time for your working day.
2. Tap or click and select an end time for your working day.