20. Presenting with Microsoft PowerPoint Mobile

Presenting your ideas using PowerPoint can open up new possibilities for getting your point across. In this chapter, you learn about using PowerPoint Mobile. You learn about
→ Creating, Opening, and Saving Presentations
→ Presenting with PowerPoint Mobile
Microsoft PowerPoint Mobile makes it easy to create compelling presentations on any topic. By combining interesting content with attractive themes and transitions, you can keep your audience’s attention while getting your point across.
Office 365 Required
PowerPoint Mobile requires an Office 365 subscription. You can find out about purchasing an Office 365 subscription at http://products.office.com.
In this chapter, you learn how you can use PowerPoint Mobile to create a presentation and how you can use the unique capabilities of your tablet to present your presentation in a way that will impress your audience.
Creating, Opening, and Saving Presentations
PowerPoint files are called presentations. As you work on your presentation, PowerPoint Mobile automatically saves it to your OneDrive; however, you can save a copy somewhere else if you’d like to.
Creating a Presentation
When you create a presentation, you can choose between multiple templates that will apply graphics and colors to your presentation. You can also create a blank presentation and set the colors and add graphics yourself.
1. From the Start menu, tap or click PowerPoint Mobile to launch the app.

2. Tap or click In OneDrive - Personal to create your presentation somewhere other than on your OneDrive.
3. Swipe up or scroll down to see additional templates.
4. Tap or click a template that you like.

5. Tap or click the presentation name so that you can give it a unique name.

6. Enter a name for your presentation and press Enter.

OneDrive
It’s recommended that you create your new presentation in OneDrive so that you can access it easily from other PCs and so that you can easily share it with others if you need to.
Opening a Presentation
You might not finish working on your presentation in one session, and that’s okay. PowerPoint Mobile will save your presentation for you so that you won’t lose any of your work when you close it. When you open PowerPoint Mobile again, you can open the presentation you were working on earlier.
1. Launch PowerPoint Mobile from the Start menu.

2. If your presentation is in the Recent list, tap or click it to open it.
3. If your presentation is not in the Recent list, tap or click Browse.

4. Browse to the location of your presentation.
5. Tap or click your presentation.
6. Tap or click Open Presentation.

Saving a Presentation
PowerPoint Mobile automatically saves your presentation as you work on it, but there might be times when you want to save a copy manually. For example, if you want to change where PowerPoint Mobile saves your file when it performs an auto-save, you’ll need to manually save your presentation to the new location.
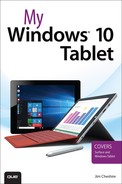
1. Tap or click File.

2. Tap or click Save.
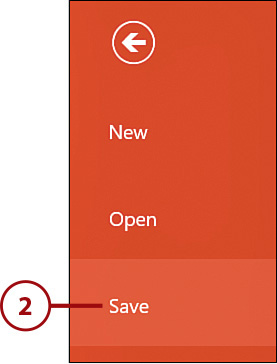
3. Tap or click Save a Copy of This File.
4. Browse to the location where you want to save the presentation.
5. Enter a new filename if you want to.
6. Tap or click Save a Copy.

Saving to a New Location
After you save your presentation to a new location, PowerPoint Mobile will begin auto-saving to the new location.
Sharing Presentations
After you save your presentation, you can easily share it with others using the sharing features built in to Office applications. For more information on how to do that, see “Sharing Documents” in Chapter 18, “Creating Documents with Microsoft Word Mobile.”
Creating Slides and Content
A PowerPoint presentation consists of one or more slides, and each slide can contain text, pictures, shapes, and so forth. PowerPoint Mobile offers predefined layouts for slides so that you can easily create content without having to build everything from scratch.
Adding a New Slide
A new slide can be easily added to your presentation. After you add a new slide, you can change its layout. I’ll show you how to do that in the next step-by-step.
1. Tap or click the slide after which you want to insert a new slide.
2. Tap or click Home.
3. Tap or click New Slide to insert a new slide.

Changing a Slide’s Layout
PowerPoint Mobile offers many predefined slide layouts so that you can quickly add new content without having to manually configure text areas and so forth. These predefined layouts also make it easy to maintain a consistent appearance in your presentation. You can easily change a slide’s layout after you add it to your presentation.
Default Layout
By default, any new slide you add to your presentation will use a layout that provides a place for a title and an area for text.
1. Tap or click the slide for which you’d like to change the layout.
2. Tap or click Layout.
3. Swipe up or scroll down to see additional layouts.
4. Tap or click the desired layout to apply it to your slide. Any existing content on the slide will be moved to fit into the new layout.

Trying a Layout
If you don’t know which layout you’d like to use, feel free to try out a few. The current layout for the slide will be highlighted when you tap or click Layout, so you can always return to the original layout easily.
You’re Not Locked In
You’re not locked in to the configuration of a particular layout. After you apply a layout, you can remove or resize elements, add new elements, and so forth. You’ll learn how to do that next.
Adding and Formatting Text
Even if you prefer a presentation that uses graphics and pictures, you’ll still want to add some text to make your point. PowerPoint Mobile has powerful text features that are similar to Word Mobile’s, so they should feel familiar to you.
You can add text to any slide using a Text Box. After you’ve added your text, you can configure that text to look just the way you want it to.
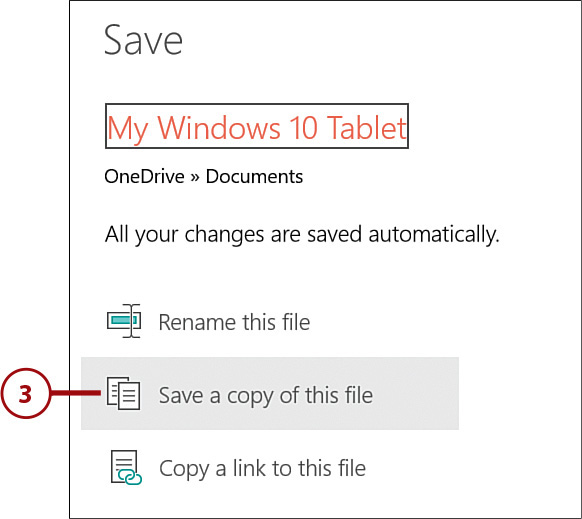
1. Tap or click the slide on which you would like to add text.
2. If the slide has a Text Box added automatically by the slide’s layout, double-tap inside the box to replace the layout’s text with your own text.
3. To add your own text, tap or click Insert.
4. Tap or click Text Box.

5. Tap and drag inside the Text Box to move it to a new position on the slide.
6. If you’re using a mouse, hover over a border of the Text Box until you see a four-way arrow, and click and hold while dragging the Text Box to a new location.
7. Tap or click inside a Text Box and enter some text.
8. Tap or click and drag a sizing handle to resize a Text Box.

9. Tap or click the Font drop-down to select a new font for selected text or new text.

10. Tap or click the Font Size drop-down to select a new font size for selected text or new text.
11. Tap or click Bold to make selected text or new text bold.
12. Tap or click Italic to make selected text or new text italic.
13. Tap or click Underline to make selected text or new text underlined.
14. Tap or click Strikethrough to make selected text or new text strikethrough text.

15. Tap or click the Font Color drop-down to select a new color for selected or new text.
16. Tap or click Clear All Formatting to clear any formatting you’ve applied to the selected text.

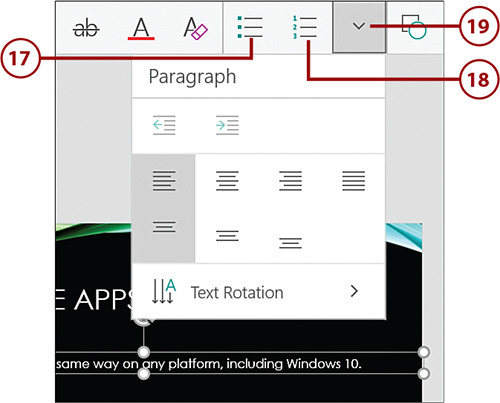
17. Tap or click Bullets to add a new bulleted list.
18. Tap or click Numbering to add a new numbered list.
19. Tap or click Paragraph Formatting to access additional formatting options for paragraphs.
Inserting and Formatting Pictures
Pictures are an important part of any presentation. Pictures can be added from your tablet or from OneDrive. After you add a picture to a slide, you can format the picture using the tools provided by PowerPoint Mobile.
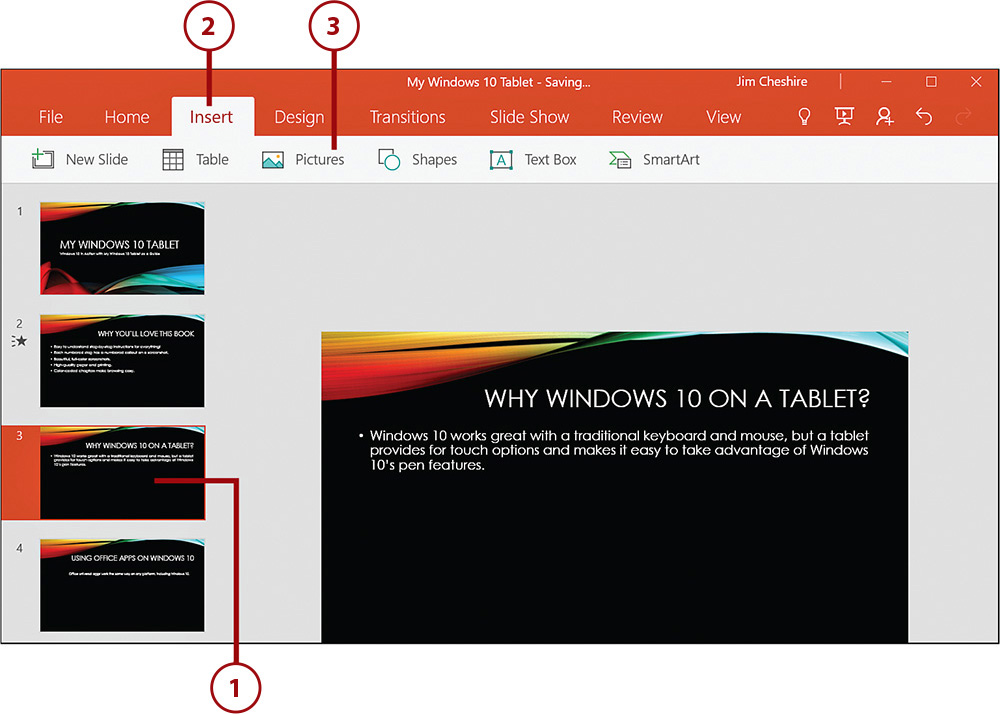
1. Tap or click the slide to which you want to add a picture.
2. Tap or click Insert.
3. Tap or click Pictures.
4. Browse to the picture you want to insert, and then tap or click it.
5. Tap or click Insert.

6. Tap or click and drag a sizing handle to resize the picture.
7. Tap or click and drag the picture to move it to a new location on the slide.

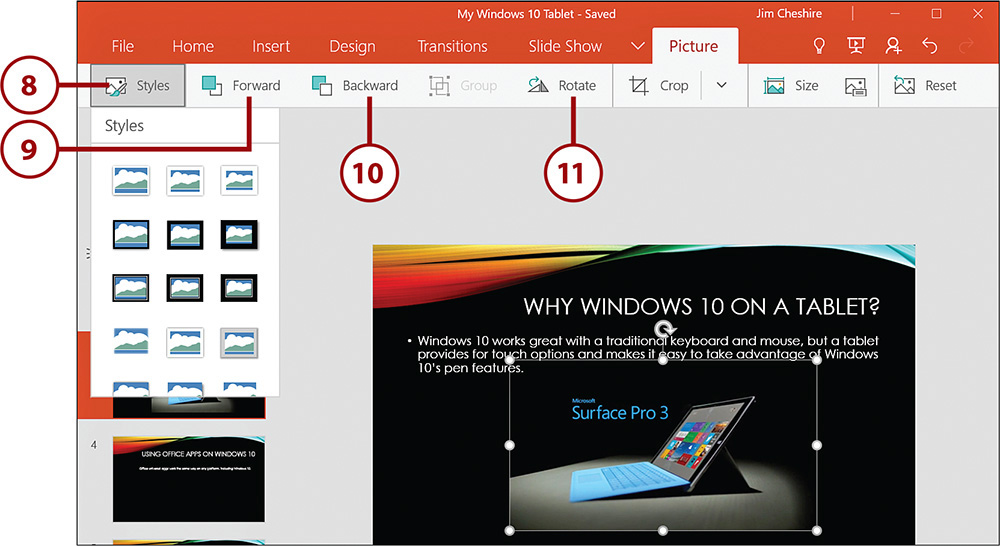
8. Tap or click Styles, and then tap or click a style to apply it to your picture.
9. Tap or click Forward to move the picture in front of other elements on the slide.
10. Tap or click Backward to move the picture behind other elements on the slide.
11. Tap or click Rotate to rotate the picture.
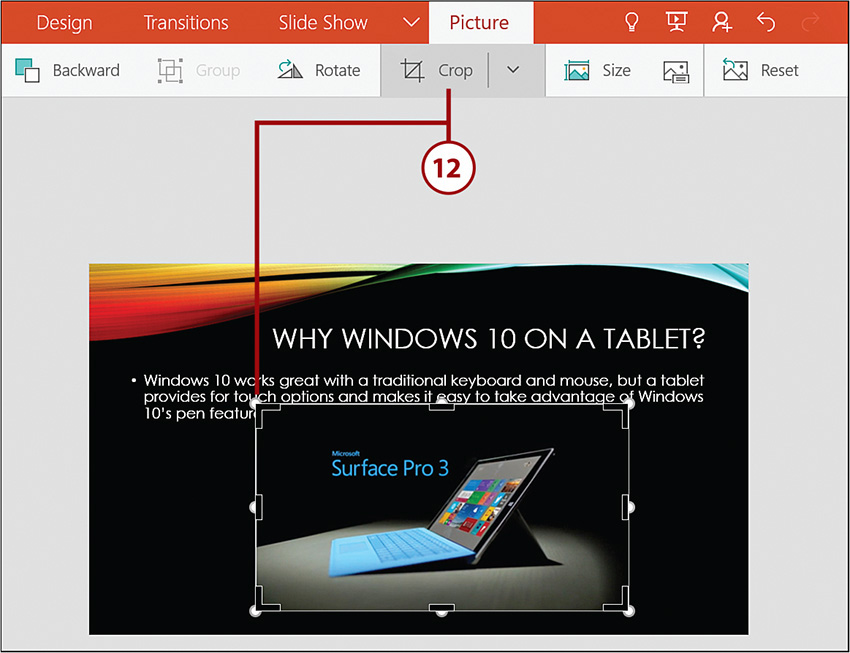
12. Tap or click Crop, and then drag the cropping handles to crop the picture.
Using SmartArt
SmartArt makes it easy for anyone to add professional-looking diagrams to a presentation. You can choose from a large assortment of SmartArt diagrams, all of which can be customized for your particular needs.
Inserting SmartArt
PowerPoint Mobile’s SmartArt assists in diagraming lists, processes, relationships, and more.
1. Tap or click the slide on which you want to insert SmartArt.
2. Tap or click Insert.
3. Tap or click SmartArt.
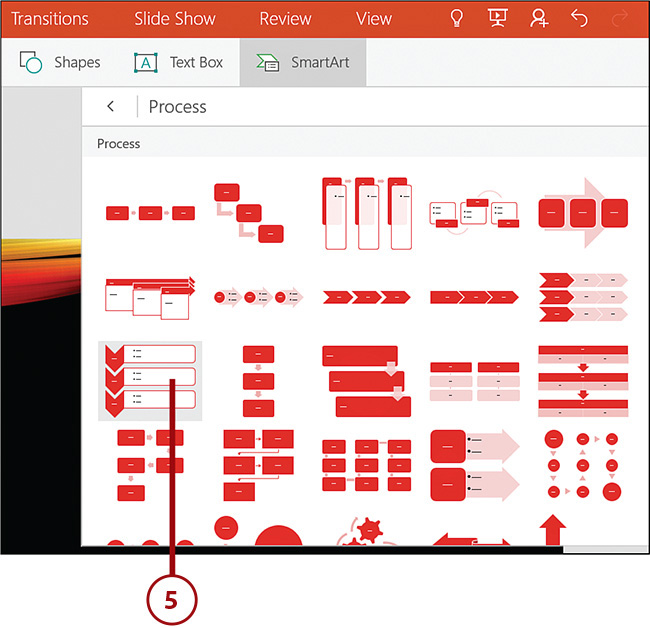
4. Tap or click a SmartArt category to see a list of diagrams you can add.

5. Tap or click a SmartArt diagram to insert it.
Editing SmartArt Text
SmartArt is made up of graphical and textual elements. You can edit SmartArt text directly on the SmartArt. You can also use the Text Pane to edit SmartArt text.
1. Tap or click the SmartArt whose text you want to edit.
2. Tap or click a text element and enter new text directly on the SmartArt.
3. To use the Text Pane, tap or click Show or Hide Text Pane.
4. Enter your text in the Text Pane.

Formatting SmartArt
You’re not stuck with the boring default look of your SmartArt. You can change the colors and the style to give your SmartArt an impressive look.
1. Tap or click the SmartArt you want to format.
2. Tap or click SmartArt (if it’s not already selected).

3. Tap or click Colors to apply a color scheme.
4. Swipe up or scroll down for additional color schemes.
5. Tap or click a color scheme to apply it.

6. Tap or click Styles.
7. Tap or click a style to apply it.

Presenting with PowerPoint Mobile
Once you’ve finished creating your presentation, you can present it in full-screen mode. You can also apply slide transitions to give your presentation a bit of flair.
Adding Transitions
Transitions are effects that happen when you move from slide to slide. Adding transitions can give your presentation a more polished look.
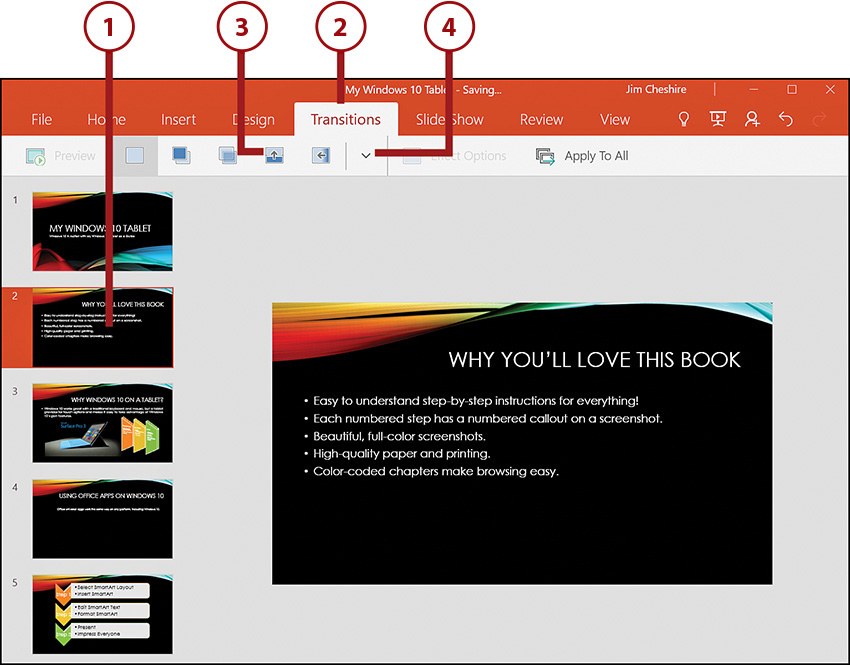
1. Tap or click the slide before which you want to add a transition.
2. Tap or click Transitions.
3. Tap or click a transition to apply it.
4. Tap or click the Transition drop-down to see more transitions that you can apply.
5. Swipe up or scroll down to see more transitions.
6. Tap or click a transition to apply it.

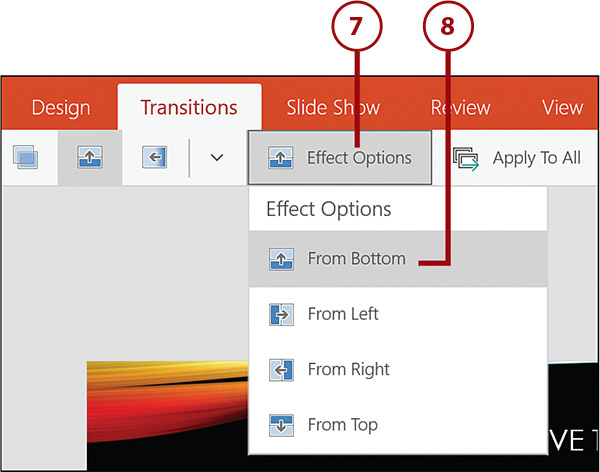
7. Tap or click Effect Options to see options for the selected transition.
8. Tap or click an effect to apply it.
Previewing Transitions
Transitions are visible only when you are presenting in Slide Show mode. However, you can preview a transition by tapping or clicking the Preview button on the Transition menu bar after inserting the transition.
Using Slide Show
Slide Show enables you to present your presentation so that your slides fill the entire screen. Any transitions you applied will also be visible in Slide Show mode.
1. Tap or click Slide Show.
2. Tap or click From Beginning to start a slide show from the first slide.
3. Tap or click From Current Slide to start the slide show from the currently selected slide.

4. Swipe left or click to move forward one slide.
5. Swipe right to move back one slide.
6. Tap or click and hold to activate a virtual laser pointer that you can use to highlight things of interest on a slide.

7. Right-click or tap above the current slide to display the inking controls.
8. Tap or click Ink Tools.
9. Tap or click a pen color to draw in that color on a slide.
10. Tap or click a highlighter color to highlight using that color on a slide.
11. Tap or click Eraser to erase previously added inking.
12. Tap or click Erase All to erase all previously added inking.
13. Tap or click End Show to end the slide show.
