
In this chapter, you’ll explore all the photo functionality that iPhone has to offer. Topics include the following:
![]() Moving photos from a computer onto iPhone
Moving photos from a computer onto iPhone
![]() Moving photos from email onto iPhone
Moving photos from email onto iPhone
![]() Viewing and working with photos on iPhone
Viewing and working with photos on iPhone
![]() Moving photos from iPhone to a computer
Moving photos from iPhone to a computer
9 Taking, Storing, and Viewing Photos
Although it isn’t likely to replace your primary digital camera, iPhone’s built-in camera takes reasonable photos, especially given how easy the camera function is to use and the fact that you’ll likely have iPhone with you at all times.
Whether you’ve taken them on iPhone or moved them from a computer onto iPhone, you can view your photos individually and as nice slideshows. If you decide some of the photos you’ve taken on iPhone are worthy of adding to your photo collection, you can move them from iPhone onto your computer.
You can also move photos you receive via email into the iPhone photo album for viewing or for transferring to your computer.
Taking Photos with iPhone
iPhone’s camera lens is located on the backside of iPhone in the upper-left corner. Using iPhone’s camera is just about as easy as it could be.
>>>step-by-step:
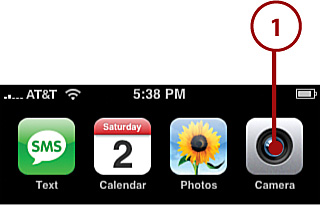
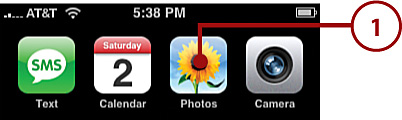
1. On the Home screen, press Camera. The Camera screen appears; initially it has a shutter, but after a few moments the window opens, and you start seeing through iPhone’s lens.
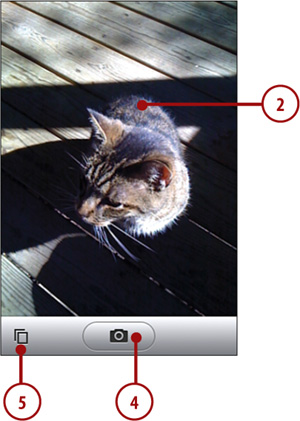
2. Point the camera at your subject; iPhone is truly point and shoot. (You can’t make any adjustments even if you want to.)
3. To capture a photo in landscape mode, rotate iPhone so that it’s horizontal.
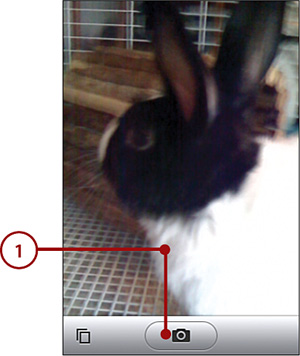
4. When the photo is properly framed, press the Camera button. iPhone snaps the photo, and the shutter closes while the photo is recorded in iPhone’s memory. When the shutter opens again, you’re ready to take the next photo.
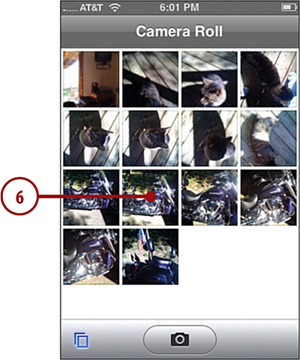
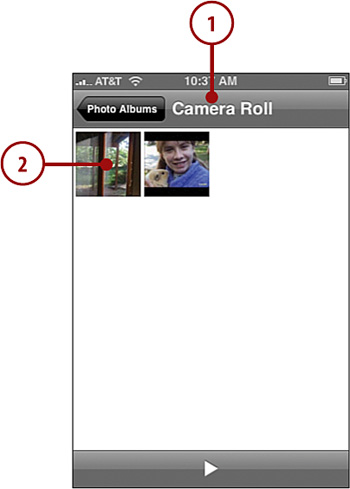
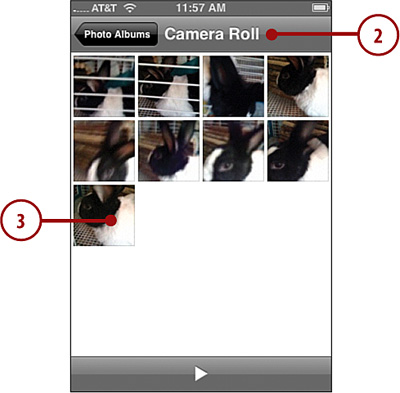
5. If you want to view the photos you’ve taken, press the Photos button. The Camera Roll screen appears.
Take More Photos
To move back into camera mode when you are viewing a photo, press the Camera button located in the right corner of the screen.
6. Press the photo you want to view. It appears on the screen with iPhone’s photo-viewing controls.
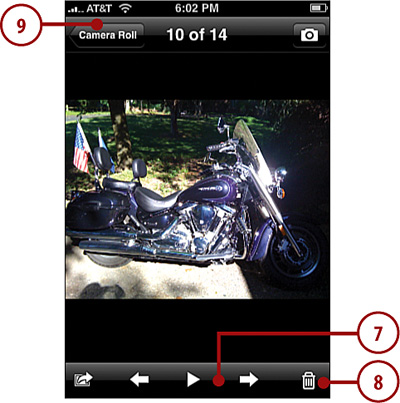
7. Use the photo-viewing tools to view the photo (see Viewing and Working with Photos on iPhone later in this chapter for the details).
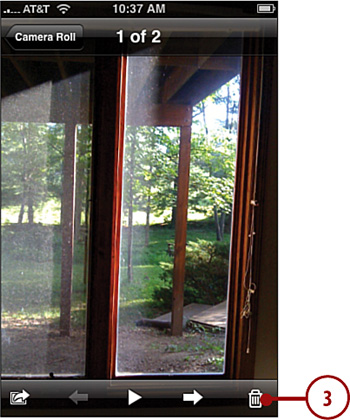
8. To delete a photo, press the Trash can and then press Delete Photo. iPhone deletes the photo, and you see the next photo in the album.
9. To move back to the photos in the roll, press Camera Roll. You return to the Camera Roll screen.
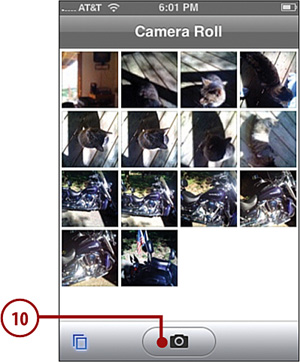
10. Press the Camera button. iPhone moves back into camera mode.
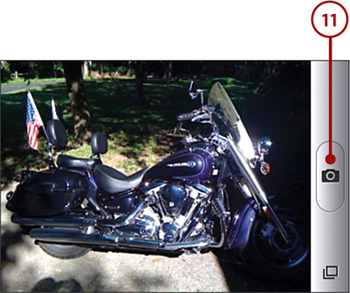
11. To take more photos, press the Camera button.
Sensitive, Isn’t It!
The iPhone’s camera is pretty sensitive to movement, so if your hand moves while you are taking a photo, it’s likely to be blurry. Sometimes, part of the image will be in focus while part of it isn’t, so be sure to check the view before you capture a photo. If you are getting blurry photos, the problem is probably your hand moving while you are taking them.
Moving Photos from a Computer onto iPhone
As you saw in the last section, iPhone is a great way to take and view your photos while you are on the go. In addition to taking photos to view them on iPhone, you can also move photos from a computer onto iPhone so that you can view them individually and as slideshows. As you might guess, the steps to move photos from a computer to iPhone are slightly different between Windows PCs and Macs. See the section that applies to your computer.
Syncing Photos
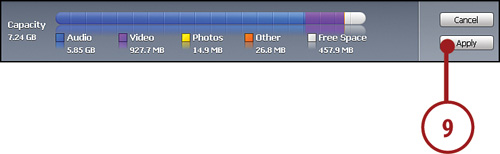
It’s a fact that iPhone’s memory is somewhat limited, especially if you have a lot of music and video on it. During the sync process, photos take a back seat to other kinds of content, meaning that if there isn’t room on iPhone for everything you’ve selected for a sync, photos are skipped first. It’s likely that you won’t have enough memory on iPhone for all of your photos. Consider creating specific photo albums for the photos you want on iPhone and then choose to sync only those photo albums. Use the memory gauge at the bottom of the iTunes window to get an idea of how much room iPhone has.
>>>step-by-step
Moving Photos from a Windows PC onto iPhone
You can use iTunes to move photos you’re storing on your PC using Adobe Photoshop Album 2.0 or later or Adobe Photoshop Elements 3.0 or later onto iPhone.
1. Connect iPhone to your computer and open iTunes.
2. Click the Photos tab.
3. Check the Sync photos from check box.
4. On the pop-up menu, choose the application containing the photos you want to move onto iPhone, such as Photoshop Elements.
5. If you want all the photos in the selected source to be moved onto iPhone, click the All photos and albums radio button and skip to step 9.
6. If you want only selected albums to be moved onto iPhone, click the Selected albums radio button.
7. Check the check box next to each photo album that you want to sync with iPhone.
8. Change the order in which albums appear by dragging them up and down the list. This changes the order in which they appear on iPhone.
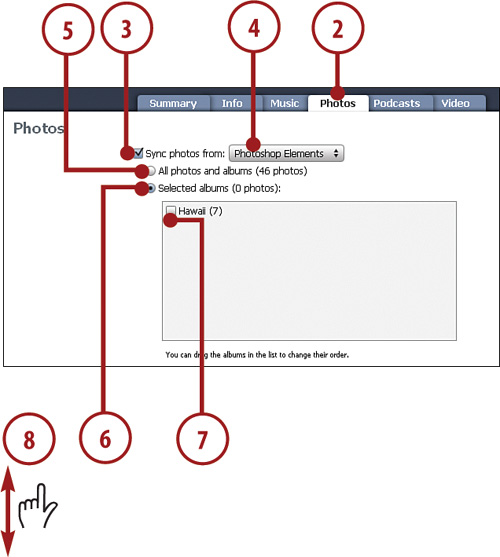
9. Click Apply. The photos you selected move onto iPhone. If you make changes to the photo albums or to the photos you selected, the updates move onto iPhone the next time you sync it.
See the section Viewing and Working with Photos on iPhone to learn how to view your photos on iPhone.
Other Sync Options
If you choose My Pictures on the Sync photos from pop-up menu, you can move photos stored in your My Pictures folder onto iPhone. If you select Choose Folder, you are prompted to select a folder of photos that you want to move onto iPhone. Depending on the option you choose, you might or might not be able to select specific photo albums to move onto iPhone.
Moving Photos from iPhoto to iPhone
iTunes is designed to work seamlessly with iPhoto. (If you don’t use iPhoto, you won’t be able to use iTunes to move photos onto iPhone. And if you don’t use iPhoto, why not?) You can move all your photos or selected photo albums from iPhoto to iPhone by using iTunes’ syncing. You can also move photos you’ve stored in a folder on your Mac almost as easily.
1. Connect iPhone to your computer and open iTunes.
2. Click the Photos tab.
3. Check the Sync photos from check box.
4. On the pop-up menu, choose iPhoto.
5. If you want all the photos in iPhoto to be moved onto iPhone, click the All photos and albums radio button and skip to step 10.
6. If you want to move specific events (which are collections of photos based on when those photos were taken), click the middle radio button and choose All on the pop-up menu to move all events onto iPhone or choose the number of recent events you want to move, such as 3 most recent to move the most recent three events onto iPhone; skip to step 10.
7. If you want only selected albums to move onto iPhone, click the Selected albums radio button.
8. Check the check box next to each photo album that you want to sync on iPhone.
9. Change the order in which albums appear by dragging them up and down the list.
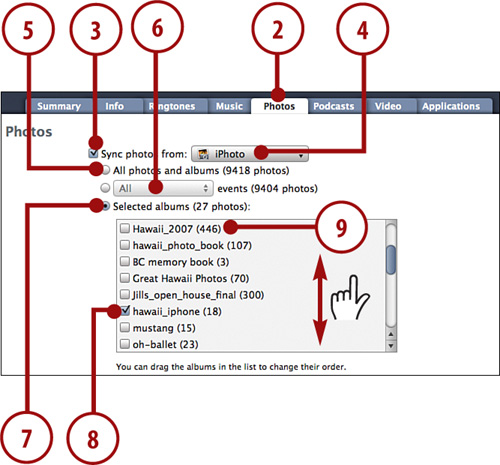
10. Click Apply. The photos you selected move onto iPhone. If you make changes to the photo albums or to the photos in your iPhoto Library (if you can store all of them on iPhone), the updates move onto iPhone the next time you sync it. If there’s not enough memory to store the photos you selected, you’re warned; you’ll need to remove some of the photos from the sync or remove other kinds of content to make more room.

Other Sync Options
If you choose Pictures on the Sync photos from pop-up menu, you can move photos stored in your Pictures folder onto iPhone. If you select Choose folder, you are prompted to select a folder of photos that you want to move onto iPhone. Depending on the option you choose, you might or might not be able to select specific collections of photos to move onto iPhone. For example, if you select a folder that contains other folders, you can select the contents of each folder individually (which is similar to selecting a specific photo album to sync).
Moving Photos from Email onto iPhone
In Chapter 5, “Emailing,” you learned all about the great email capabilities of iPhone. When you receive email that has photo attachments, you can view those photos using iPhone’s email application. You can also move those photos from the email into iPhone’s Photo tool at which point you can view them or move them onto a computer just like photos you’ve taken with iPhone’s camera.
>>>step-by-step
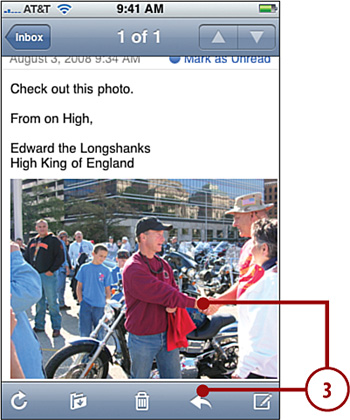
1. Open an email that has a photo as an attachment (see Chapter 5 for details).

2. Press the photo to download it to iPhone. The photo downloads and is displayed on iPhone’s screen.
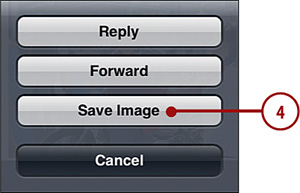
3. Press the Action button or press the photo itself.
Multiple Photos in an Email
If an email includes more than one photo, each image appears as an icon in the email. To add one of the attached photos to iPhone, download it and use the Save Image command. To save more than one photo, download each photo you want to save on iPhoto; when you press the Action button, the Save command will be Save X Images where X is the number of photos you’ve downloaded in the email. Once you’ve downloaded more than one image in the email, you can save all of them or none of them; you can’t pick and choose which you want to save. Of course, it’s easy to delete any photos you don’t want to keep as you’ll learn later in this chapter.
4. Press Save Image. The image is saved in the Camera Roll album within the Photo application, which is the same place photos you take with iPhone’s camera are stored, where you can view it. The next time you sync iPhone with a computer, the photo is moved onto the computer.
Viewing and Working with Photos on iPhone
After you’ve loaded iPhone with great (and maybe a few not-so-great) photos, you can use the Photos application to view them individually and as slideshows. You can also use the photos on iPhone for a number of tasks, such as setting iPhone’s wallpaper or emailing them.
>>>step-by-step
Viewing Photos Individually
Any photo on iPhone, whether you’ve taken it with iPhone’s camera or moved it onto iPhone via a sync, can be viewed at any time.
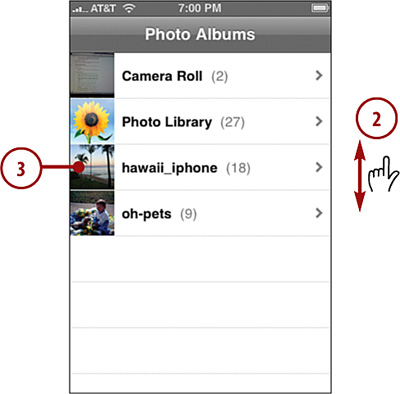
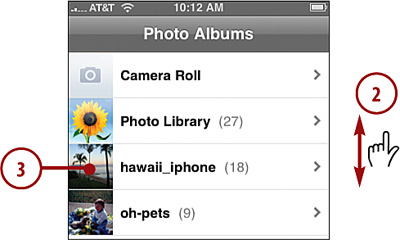
1. On the Home screen, press Photos. The Photo Albums screen appears. On this screen, you see various collections of photos. The Camera Roll contains all the photos you’ve taken on iPhone or only those you’ve taken since the last time you moved all its photos onto a computer and then deleted them from iPhone. The rest of the items are photo albums or other collections that you’ve moved from a computer onto iPhone.
2. Browse the screen until you see an album containing photos you want to view.
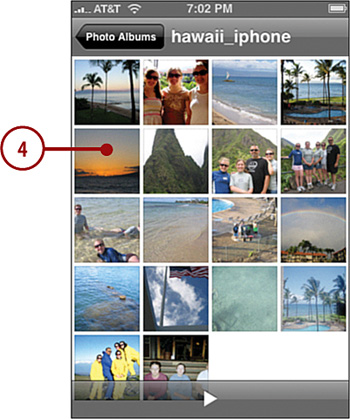
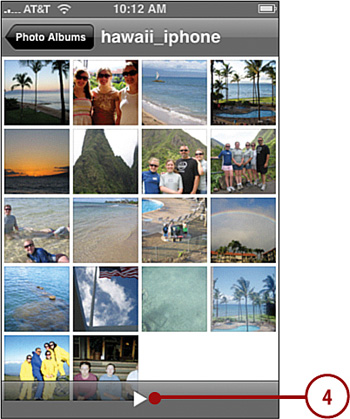
3. Press the album you want to view. You see the preview screen for that album with a thumbnail for each photo it contains.
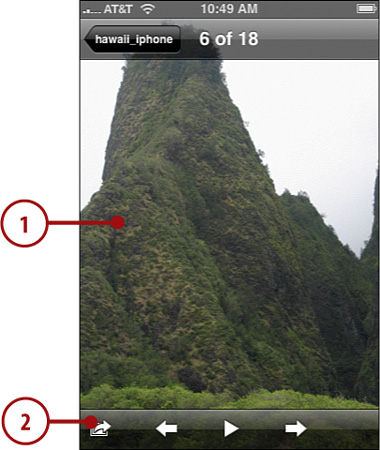
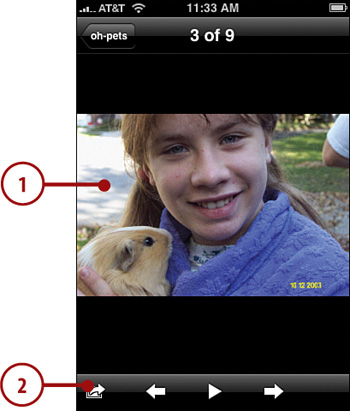
4. To view a photo, press it. The photo display screen appears. When the photo first appears, the photo viewing controls appear on the screen. After a moment, they disappear.
5. To view the photo in landscape orientation, rotate iPhone.
6. Unpinch or double-press on the photo to zoom in.
7. Pinch or double-press on the photo to zoom out if you are zoomed in.
8. Drag on the photo to scroll in it if you are zoomed in.

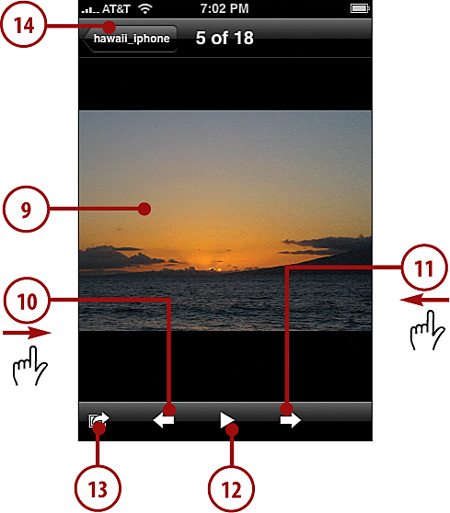
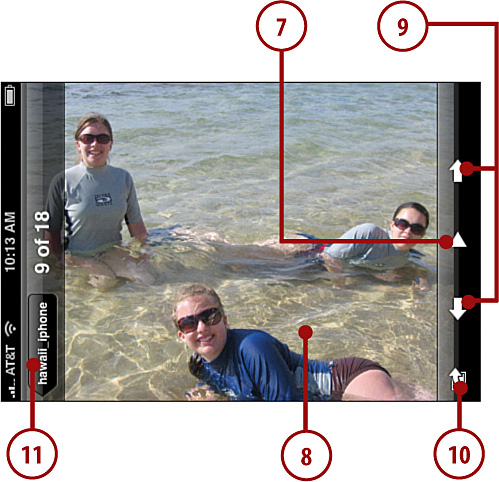
9. Press once to view the photo tools. The tool bars appear on the screen.
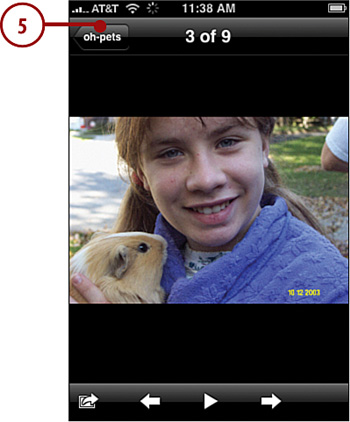
10. Press Back or drag quickly to the right to view the previous photo in the album.
11. Press Forward or drag quickly to the left to view the next photo in the album.
12. Press Play to start a slideshow (more on this in the next section).
13. Press the Action button. Choose the action you want to take; these are explained in the sections Using a Photo as Wallpaper, Emailing a Photo, Assigning a Photo to a Contact, and Sending a Photo to MobileMe later in this chapter.
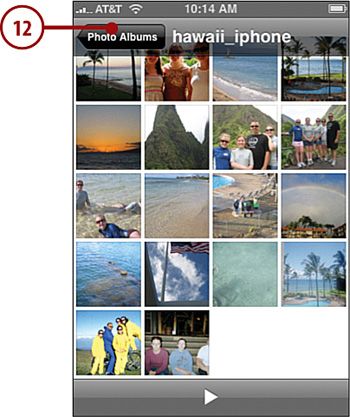
14. Press the Return button, which is labeled with the current photo album’s name. You move back to the photo album’s screen.
>>>step-by-step
Viewing Photos as a Slideshow
You can view photos in slideshows. Before you start watching your own slideshows, take a few moments to configure iPhone’s slideshow settings to set your slideshow preferences.
Configure Slideshow Settings
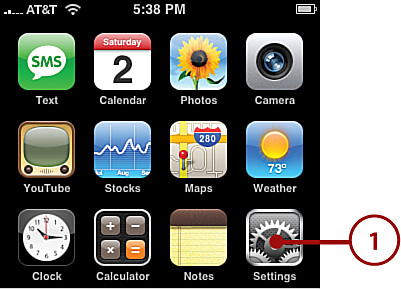
1. On the Home screen, press Settings. The Settings screen appears.
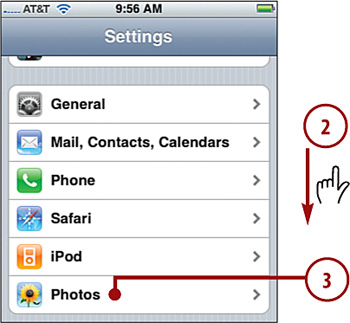
2. Scroll down until you see Photos.
3. Press Photos. The Photos setting screen appears.
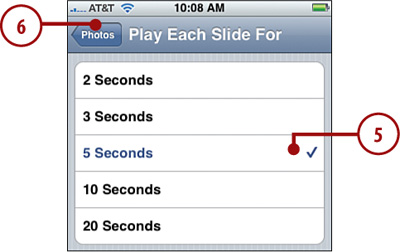
4. Press Play Each Slide For.
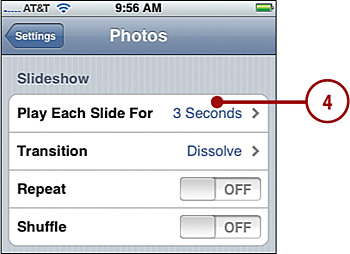
5. Press the amount of time you want each slide in a slideshow to appear on the screen.
6. Press Photos.
7. Press Transition.
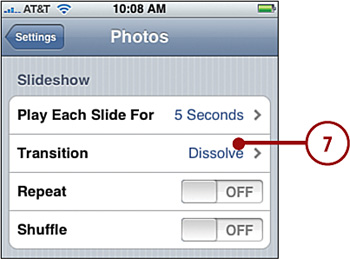
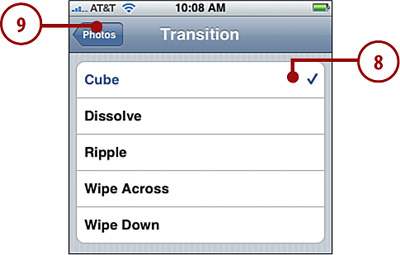
8. Press the transition you want to use when slides change.
9. Press Photos.
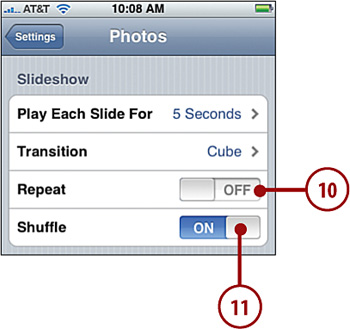
10. To make slideshows repeat until you stop them, press Repeat OFF. Its status becomes ON to indicate that you have to stop slideshows manually. When the status is OFF, slideshows play through once and then stop.
11. To view photos in a random order in a slideshow, press Shuffle OFF. Its status becomes ON so that you know photos will appear in random order during slideshows. To have photos appear in the order they are in the selected album, press ON so that the status becomes OFF.
Watching Slideshows
1. On the Home screen, press Photos. The Photo Albums screen appears.

2. Browse the screen until you see an album containing photos you want to view in a slideshow.
3. Press the album you want to view in a slideshow. The album’s preview screen appears.
4. Press Play. The slideshow begins to play.
5. To view the slideshow in landscape mode, rotate iPhone in the clockwise direction. The slideshow plays, each slide appearing on the screen for the length of time you set. The transition you selected is used to move between photos. If you set slideshows to repeat, the slideshow plays until you stop it; if not, it stops after each photo has been shown once.
6. To pause the slideshow, press the screen. The photo controls appear, and the slideshow pauses at the current photo.

7. Press Play to start the slideshow again. When the slideshow finishes, you return to the album’s preview screen.
8. To pause a slideshow again, press the screen. The controls appear.
9. To move ahead in the slideshow, press the Forward button; to move back, press the Back button.
10. To perform various actions on a photo, such as using it as wallpaper, press the Action button. These are covered in the next section.
11. When you’re done with the slideshow, press the return button, which is labeled with the album’s name. You move back to the album’s preview screen.
12. Press Photo Albums. You move back to the Photo Albums screen.
>>>step-by-step
Deleting Photos from iPhone
You can only delete photos in the Camera Roll album from iPhone. To remove photos that are loaded onto iPhone via syncing with a computer, you must change the sync settings so those photos are excluded and then resync. To delete a photo you’ve taken with iPhone’s camera, captured as a screenshot, or downloaded from email, take the following steps.
1. Move to the Photos application and open the Camera Roll source.
2. Press the photo you want to delete. It appears on the viewing screen.
3. Press the Trash icon.
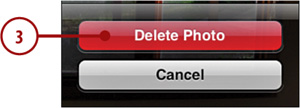
4. Press Delete Photo. The Trash icon opens and “swallows” the photo, at which point it is deleted. You see the next photo in the Camera Roll source.
Using a Photo as Wallpaper
iPhone’s wallpaper appears when you wake it up but before you unlock it. You can use any photo stored on iPhone to customize your wallpaper.
1. View the photo you want to use as wallpaper.
2. Press the Action button.
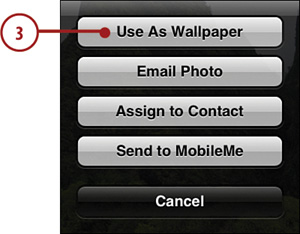
3. Press Use As Wallpaper. The Move and Scale screen appears.
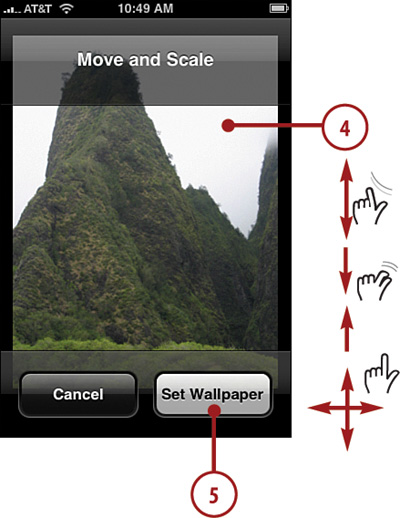
4. Drag and pinch or unpinch the image until the part you want to use as wallpaper shows on the screen the way you want to see it.
5. Press Set Wallpaper. The wallpaper is set, and you return to the photo.
6. Press the Sleep/Wake button to put iPhone to sleep and lock it.
7. Press the Sleep/Wake button again. You see your custom wallpaper.
Emailing a Photo
You can email photos via iPhone to others.
1. View the photo you want to send in an email.
2. Press the Action button.
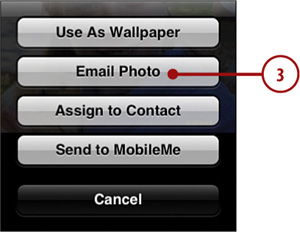
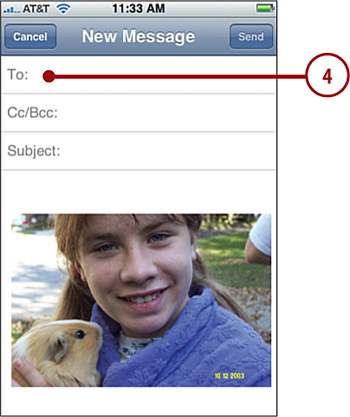
3. Press Email Photo. A new email message is created, and the photo is added as an attachment.
4. Use the email tools to address the email, add a subject, type the body, and send it. (See Chapter 5 for detailed information about using iPhone email.) After you send the email, you move back to the photo.
5. When you finish viewing the photo, press the return button, which is labeled with the name of the album. You move back to the album’s preview screen.
Assigning a Photo to a Contact
You can assign photos on iPhone to your contacts. When you assign a photo to a contact, you see that photo when the contact calls you, when you receive email from the contact, and so on. You can assign any photo to a contact, but you get the best results when you use a photo that you’ve taken with iPhone because it will scale to full screen when the person calls you; other kinds of photos appear as thumbnails instead.
1. Take the photo you want to assign to a contact. If the photo you want to use already exists on iPhone, skip this step.
2. Move to the source containing the photo you want to assign to a contact; if you’re using a photo you’ve taken, move to the Camera Roll.
3. Press the photo you want to associate with a contact. It appears on the viewing screen.
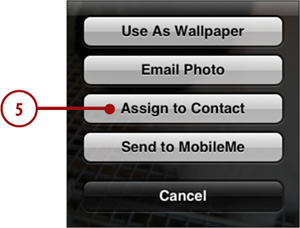
4. Press the Action button.

5. Press Assign To Contact. The All Contacts screen appears. (For more information on working with contacts, see Chapter 2, “Managing Contacts.”)
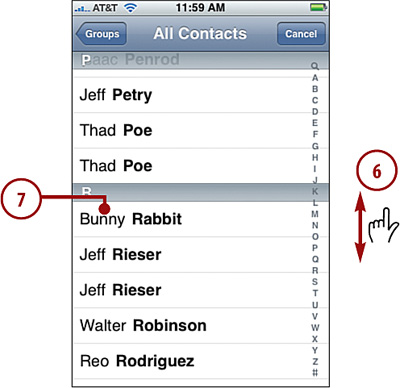
6. Browse or search for the contact to which you want to add the photo.
7. Press the contact with which you want to associate the photo. The Move and Scale screen appears.
8. Drag and pinch or unpinch the image until the part you want to add to the contact shows on the screen the way you want to see it.
9. Press Set Photo. The photo is saved to the contact; when iPhone interacts with that contact, such as when you receive a call, the photo is displayed on iPhone’s screen. You return to the photo.

Deleting Contact Photos
When a photo is associated with a contact, even if you delete the original photo taken with iPhone, the photo remains with the contact. (You can only delete photos taken with iPhone; photos that are transferred from a computer must be removed from the sync to be removed from iPhone.) Contact photos are quite small, so don’t worry about them using lots of iPhone’s memory.
Sending a Photo to MobileMe
If you have a MobileMe membership, you can post photos from the iPhone directly to your MobileMe galleries on the Web, where they can be viewed or downloaded.
1. View the photo you want to move to the Web.
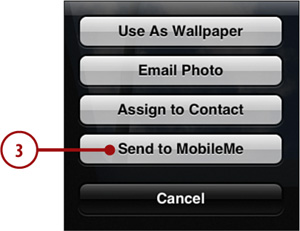
2. Press the Action button.
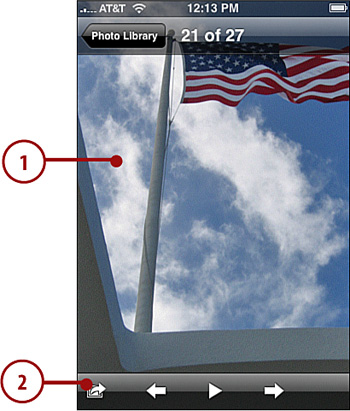
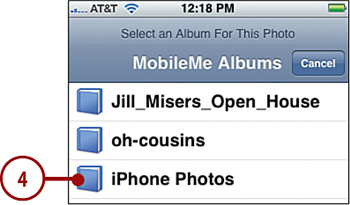
3. Press Send to MobileMe. The MobileMe Albums screen appears. Here, you see all the albums you have on your MobileMe Gallery website.
4. Press the album to which you want the photo posted. An email to your MobileMe site is created.
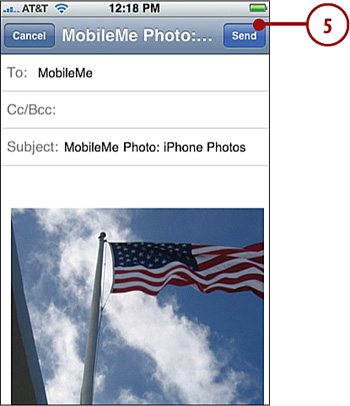
5. Press Send. The photo is sent to your website where it is posted in the album you selected.
Moving Photos from iPhone to a Computer
As you use iPhone for a camera or to take screenshots, you’re going to want to move some of the photos you capture to your computer. How you do this depends on the kind of computer and photo application you use.
>>>step-by-step
Moving Photos from iPhone to a Windows PC
How you move photos from iPhone to a Windows PC depends on the specific application you use to manage your digital photos. Most applications designed to import photos from a digital camera should also work with iPhone. One example is Adobe Photoshop Elements.
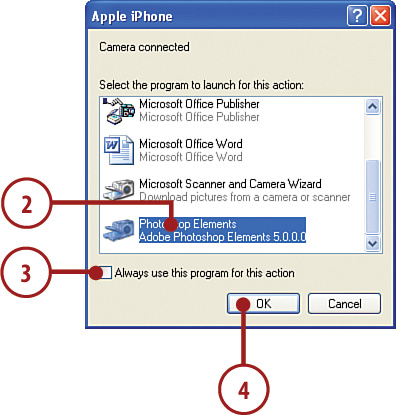
1. Connect iPhone to the computer. If new photos are detected, the Apple iPhone dialog appears.
3. Check the Always use this program for this action check box.
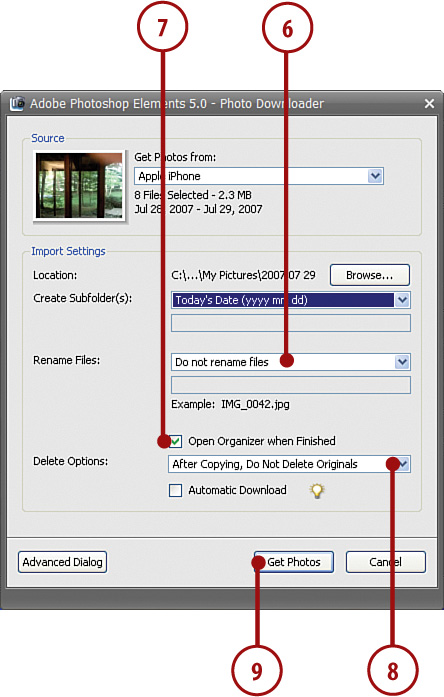
4. Click OK. The Photoshop Elements Photo Downloader appears.
5. To create subfolders for each photo session on iPhone, open the Create Subfolders menu and choose how you want to name the subfolders.
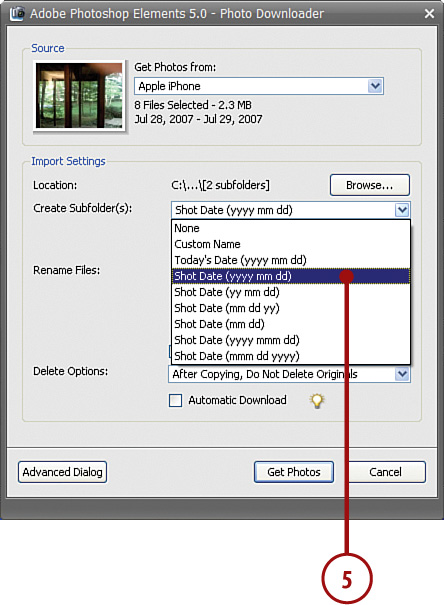
6. If you want to rename the files, use the Rename Files menu.
7. Check the Open Organizer when Finished check box.
8. Use the Delete Options menu to determine what happens to the photos on iPhone after they are imported. The best option is After Copying, Verify and Delete Originals because it frees up space on iPhone while ensuring the photos have been imported successfully.
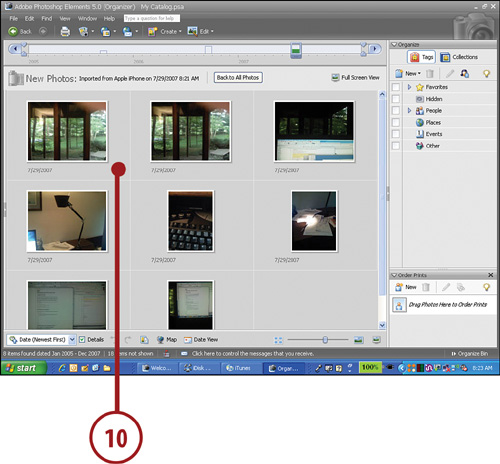
9. Click Get Photos. Photos move from iPhone into Photoshop Elements, and the application opens.
10. Use Photoshop Elements to work with the photos you imported.
Moving Photos from iPhone to a Mac
iPhone is designed to move its photos into your iPhoto Library easily.
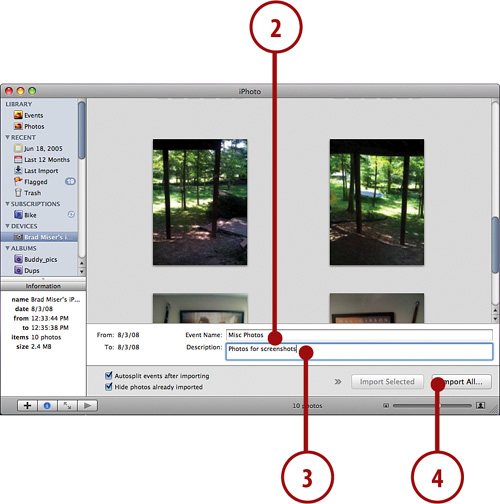
1. Connect iPhone to a Mac. iPhoto opens automatically and moves into Import mode. iPhone is selected as the import source. In the iPhoto window, you see thumbnails for images you’ve captured using iPhone’s camera (you only see empty boxes for screenshots), and at the bottom of the window, you see how many photos are available for import.
2. Enter an event name for the photos you want to import in the Event Name field.
3. Enter a description of the photos you want to import in the Description field.
4. Click Import All. The photos are copied from iPhone into iPhoto.
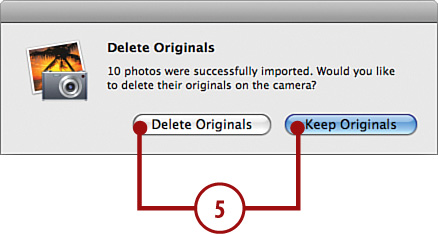
5. Click Delete Originals if you want to delete the photos from iPhone or Keep Originals if you want them to remain on iPhone.
6. Use iPhoto to work with the photos you imported from iPhone.