In this chapter, you’ll explore the settings not related to specific iPhone functionality. The topics include the following:
![]() Configuring general sound settings
Configuring general sound settings
11 Customizing iPhone
If you’ve read earlier chapters, such as the chapters on iPod or email functionality, you already have experienced customizing iPhone by using its Settings application. Many of those settings relate directly to functionality discussed in other chapters, which is why they are covered in the context of those topics. However, a number of iPhone settings are more general in nature, which is where this chapter comes into play.
One of most important things you can do to customize your iPhone is to configure the Home screen so it is most convenient for you (which doesn’t involve the Settings application, but this seemed the best place to talk about it).
Some examples of general settings you want to become familiar with include Airplane mode (sets iPhone in “silent running” so that you can use iPod and other functions while you fly); sound settings (controls the noises iPhone makes); screen brightness (controls the brightness of the screen); and so on. While you might not use these functions everyday, they come in handy from time to time.
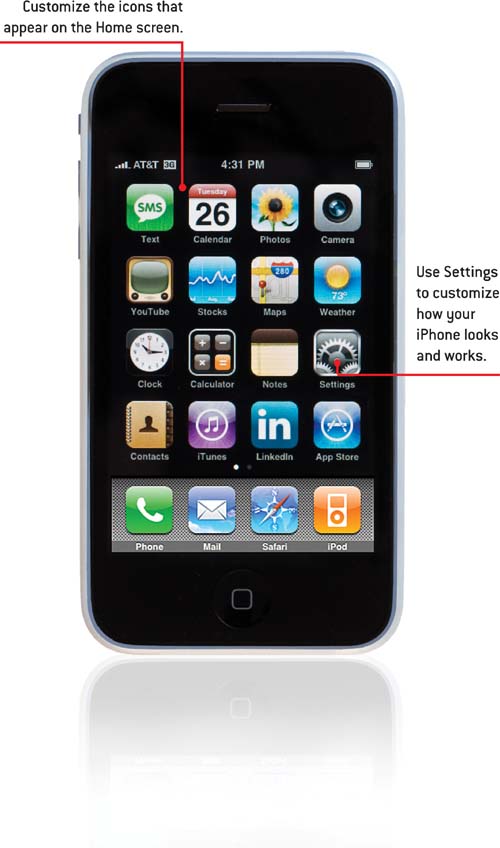
Customizing the Home Screen
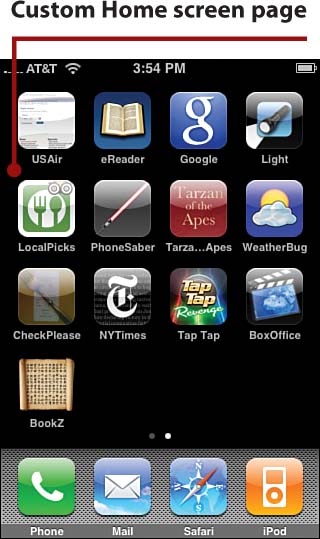
iPhone’s Home screen is the starting point for anything you do because this screen contains the icons that you use to access the various functions iPhone has to offer. The Home screen comes configured with icons in default locations. You can change the location of these icons to be more convenient for you; and as you add applications (see Chapter 10, “Working with iPhone Applications”) and create your own web page icons (see Chapter 6, “Surfing the Web”), it becomes even more important that you organize your Home screen so you can quickly get to the items you use most frequently. You can move icons within the same screen, and you can move icons between the pages of the Home screen.
>>>step-by-step
1. Move to the Home screen.
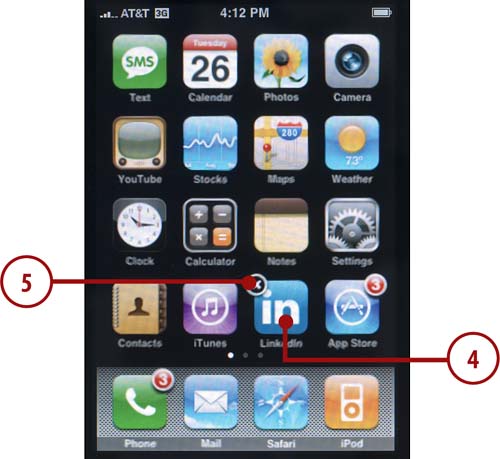
2. Press and hold any icon. After a moment, the icons begin jiggling, and you also see delete buttons next to certain icons. This indicates that you can move icons on the current Home screen and on other pages of the Home screen.

3. Press an icon you want to move and drag it to a new location; to move the icon onto a different page of the Home screen, drag it to the right or left side of the screen until the page changes.
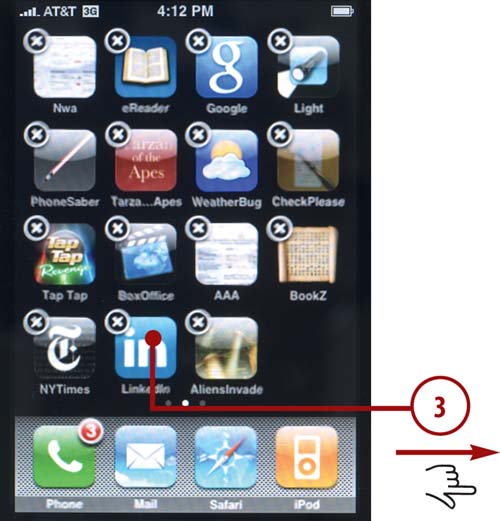
4. When the icon is in the position you want, lift your finger up. The icon is placed in that location.
5. To remove an icon, press the delete button, which is the x in the upper left corner of the icon. Note that if you remove an application’s icon, you also remove the application itself.
Icons You Can Delete and Those You Can’t
You can only delete icons you’ve added to iPhone, which are either applications you’ve installed or web pages you’ve added. When you remove an application’s icon, you also delete the application itself. You can’t delete any of the default applications. If you don’t use some of these, move them to later pages of the Home screen and replace them with icons you do use.
6. When you are happy with the Home screen layout, press the Home button. The icons are locked in their current positions and stop jiggling.
Changing Icons On the Main Toolbar
The icons on the main toolbar at the bottom of the screen are fair game for reorganization, too. You can move them around within the bar or you can drag them up onto the pages of the Home screen and replace them with icons from there. The only difference between the icons on the main toolbar and those on the pages of the Home screen is that the main toolbar is always visible when you are viewing the Home screen so you want to keep the four icons you use most often there.
Accessing iPhone Settings
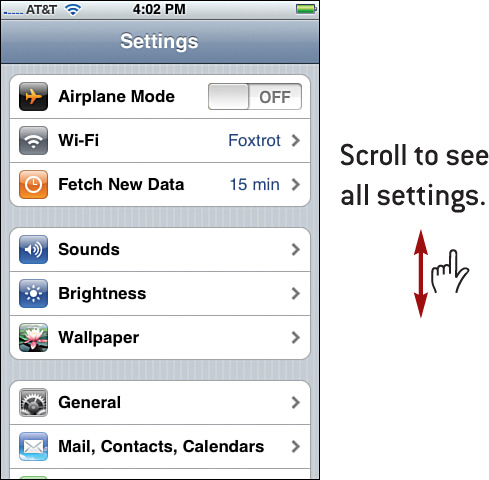
To get to iPhone’s settings, move to the Home screen and press the Settings button. The Settings screen appears; scroll to see and use all the settings available. The following sections describe various setting options and show you how to configure them. (Remember that most settings were explained in the context of where they take effect, such as the Mail settings, which were explained in Chapter 5, “Emailing.” If settings you are interested in aren’t covered here, see the chapter on the related topic.)
Using Airplane Mode
Although there’s a debate whether devices such as iPhone pose any real danger to the operation of aircraft, there’s no reason to run any risk by using iPhone while you are on an airplane. (Besides, not following crew instructions on airplanes can lead you to less-than-desirable situations.) When you place iPhone in Airplane mode, its transmitter and receivers are disabled so that it poses no threat to the operation of the aircraft. While it is in Airplane mode, you can’t use the phone, email, the Web, or any other functions that require communication between iPhone and other devices or networks. Of course, when you have permission to do so, you can use iPhone for iPod functions as well as all the other features that don’t require connections to networks.
To put iPhone in Airplane mode, move to the Settings screen and press the OFF button next to Airplane Mode. The OFF button becomes ON to show you that Airplane mode is enabled; all connections to network servers and the cell network stop, and iPhone goes into quiet mode in which it doesn’t broadcast or receive any signals.
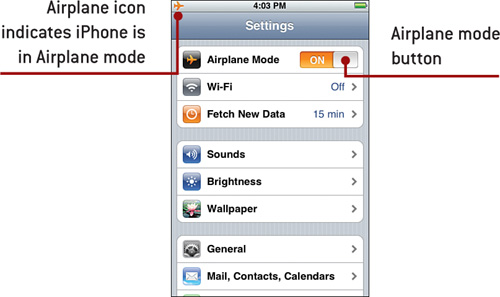
In Airplane mode, you can use iPhone for various functions, such as iPod, photos, games, and so on. To turn Airplane mode off, move to the Settings screen and press the Airplane Mode ON button, which then becomes the OFF button to show you Airplane mode is disabled. iPhone resumes transmitting and receiving signals.
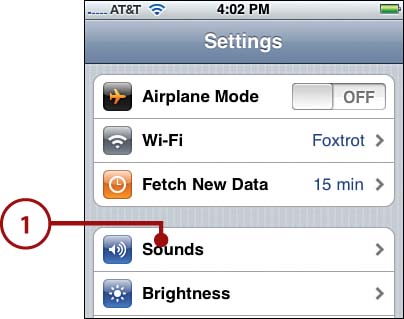
Configuring General Sound Settings
You learned about most of iPhone’s sound settings in Chapter 1, “Making, Receiving, and Managing Calls,” and Chapter 3, “Listening to Audio and Watching Video.” Two sound settings are more general to iPhone, and the following steps describe how to access and change them.
>>>step-by-step
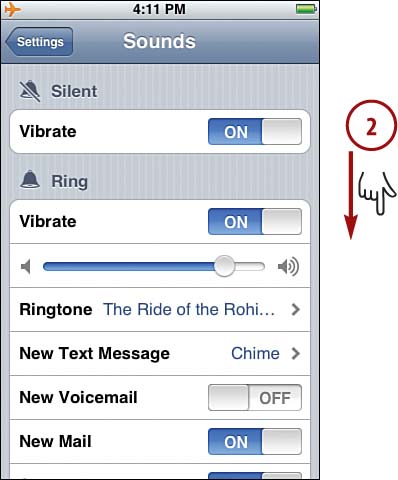
1. Move to the Settings screen and press Sounds. The Sounds screen appears.
2. Scroll down the screen until you see the Lock Sounds and Keyboard Clicks settings.
3. If you don’t want iPhone to make a sound when you lock it, press Lock Sounds ON. Its status becomes OFF. iPhone no longer makes this sound when you press the Wake/Sleep button to put it to sleep and lock it. Press OFF to re-enable this sound.
4. If you don’t like the audible feedback when you press keys on iPhone’s virtual keyboard, press Keyboard Clicks ON to disable that sound. Its status becomes OFF, and iPhone’s keyboard is silent as you type on it.
5. Press Settings. You move back to the Settings screen.

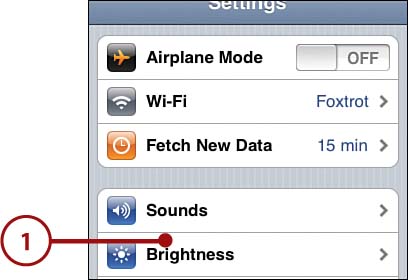
Setting Screen Brightness
Because you’re continually looking at iPhone’s screen, it should be the right brightness level for your eyes. However, the screen is also the largest single drain on battery power, so the less bright iPhone’s screen is, the longer its battery lasts. You have to find a good balance between viewing comfort and battery life. Fortunately, iPhone includes a brightness feature that adjusts for current lighting conditions automatically.
>>>step-by-step
1. Move to the Settings screen and press Brightness. The Brightness screen appears.
2. Press the ON button to disable the Auto-Brightness feature; its status becomes OFF. This keeps the screen brightness the same regardless of the lighting conditions in which you are using iPhone. Press OFF to enable this feature again; when enabled, iPhone’s screen dims when you are in low-level lighting conditions. You’ll get more battery life with Auto-Brightness on, but you might not be comfortable with the screen at a lower brightness.
3. Drag the slider to the right to raise the base brightness of the screen. This uses more power, but the screen is brighter.
4. Drag the slider to the left to lower the base brightness of the screen. This causes the screen to be dimmer but uses less power.
5. Press Settings. You move back to the Settings screen.

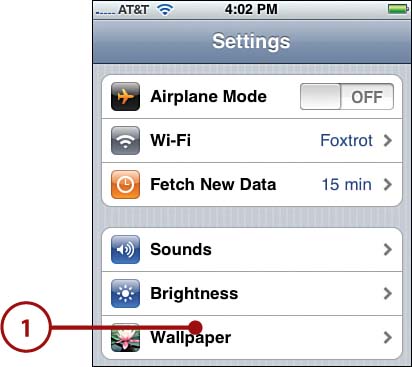
Setting Wallpaper
When iPhone is awake, but locked, you see its wallpaper. You can set the wallpaper for iPhone using either the default wallpaper collection or by choosing a photo you’ve moved onto iPhone. To use one of iPhone’s default images as your wallpaper, perform the following steps.
>>>step-by-step
1. Move to the Settings screen and press Wallpaper. The Wallpaper screen appears. You see the sources of wallpaper available to you.
2. Press Wallpaper. The default wallpaper images appear.
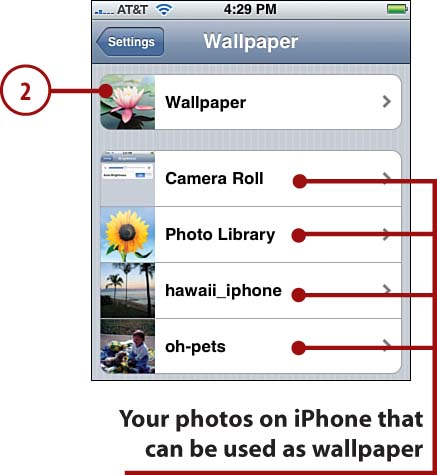
Using Your Photos as iPhone Wallpaper
To learn how to add photos to iPhone so that they are available as wallpaper, see Chapter 9, “Taking, Storing, and Viewing Photos.” You can select any of the sources of your photos on the Wallpaper screen to use any of the photos they contain as wallpaper by pressing the source you want to use instead of Wallpaper in step 2. You can also scale and move your own images to customize how they appear as wallpaper.
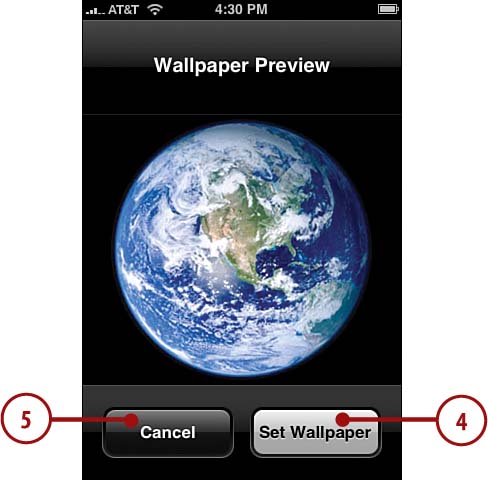
3. Press the image you want to use as wallpaper. You see a preview of the image you selected.

4. To set the wallpaper, press Set Wallpaper. You move back to the Settings screen. The next time iPhone is awake but locked, you see the wallpaper you selected.
5. To choose a different wallpaper, press Cancel instead. You move back to the available wallpaper in the selected source.
Repeat steps 2 through 4 until you are happy with the wallpaper you selected.
Configuring General Settings
iPhone has a large number of settings to control various behaviors including network access; security settings; and default preferences for the Home button, date and time, and other areas. You can also access information about iPhone, including statistics about your use and the kind of data stored there. These tools are all lumped under the imaginative name General settings.
To configure iPhone’s general settings, do the following.
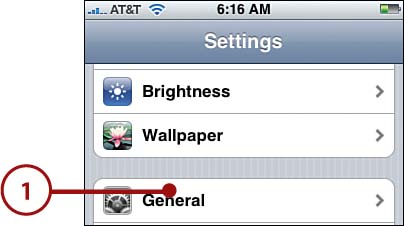
>>>step-by-step
1. Move to the Settings screen and press General. The General screen appears.
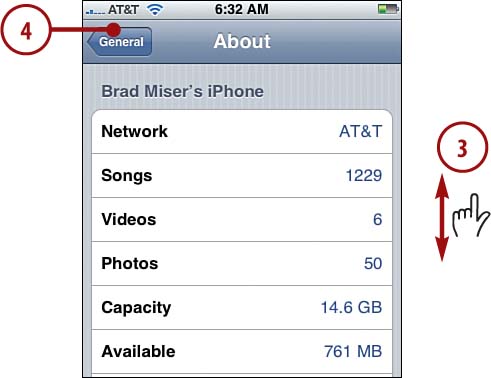
2. Press About. You see the About screen.
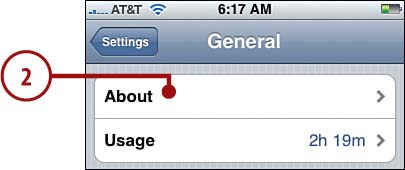
3. Scroll up and down the screen to view its information, such as the network, number of songs, videos, and photos, memory, software, serial number, and so on.
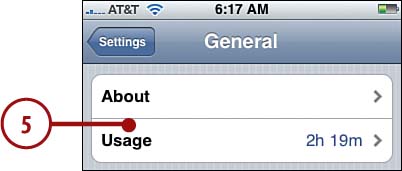
4. Press General to move back to the General screen.
5. Press Usage. The Usage screen appears.
What About Network and Bluetooth?
These settings are explained in Chapter 4 “Connecting to the Internet, Bluetooth Devices, and VPNs.”
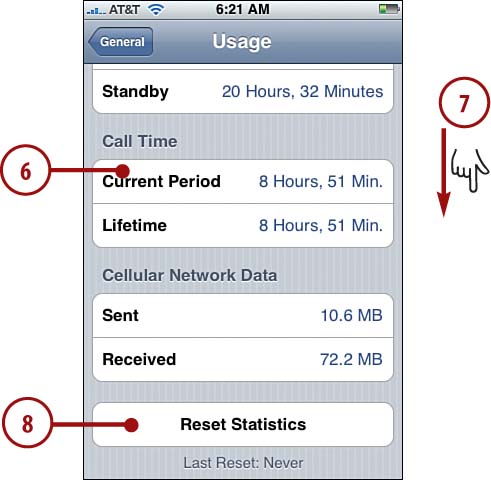
6. Review the information in which you are interested, such as current period call time, which you can use to monitor the minutes you’ve used under your calling plan. Note that the usage and standby information is from the time of your last full battery charge. The other values are from the last reset of the statistics you’ve done.
7. To reset usage monitoring, scroll down the screen.
8. Press Reset Statistics.
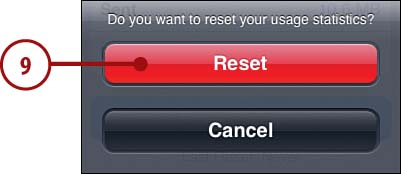
9. Press Reset. The current statistics are reset, and logging begins anew (Lifetime Call Time information is not reset).
10. Press General to move back to the General settings screen.
11. If you don’t want applications, such as the Maps, to be able to access iPhone’s current location, press the Location Services ON button. The status becomes OFF to indicate that iPhone won’t be able to access the services it uses to identify where it is. So things like the GPS function won’t work. To re-enable these services, press OFF so that the status becomes ON.
12. Press Auto-Lock. The Auto-Lock screen appears.
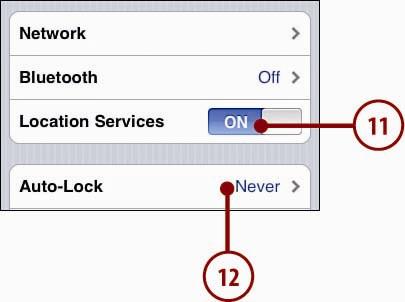
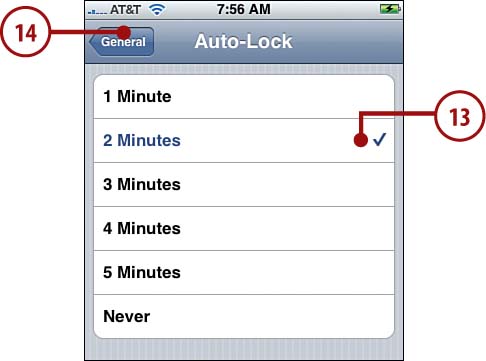
13. Press the amount of idle time you want to wait before iPhone automatically locks and goes to sleep. You can choose from 1 to 5 minutes; choose Never if you want to manually lock iPhone. I recommend that you keep Auto-Lock set to a relatively small value to conserve your iPhone’s battery.
14. Press General.
15. If you want a passcode to be required to unlock iPhone, press Passcode Lock. The Set Passcode screen appears.
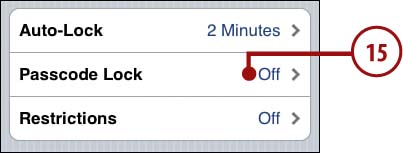
16. Enter a four-digit passcode.

Passcode Lock
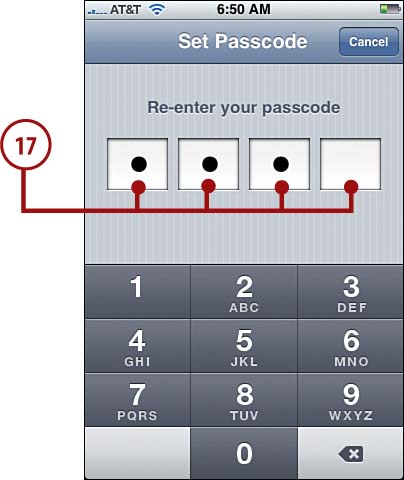
With passcode lock enabled, you must enter the passcode to be able to unlock iPhone, so make sure you don’t forget your passcode.
17. Re-enter the passcode. If the two passcodes match, you see the Passcode Lock screen.
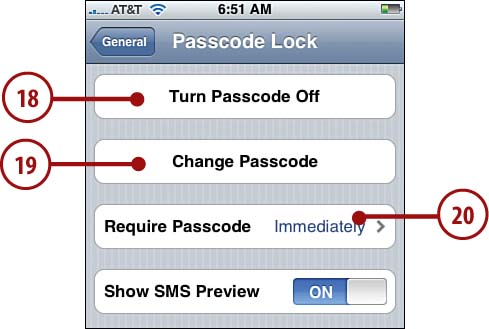
18. To disable the passcode, press Turn Passcode off and enter the passcode. You move back to the General screen, and the passcode is removed from iPhone; if you want to set it again, you need to repeat steps 15 through 17.
19. To change your passcode, press Change Passcode. You then enter your current passcode and enter your new passcode twice. You return to the Passcode Lock screen, and the new passcode takes effect.
20. To set the amount of time iPhone is locked before a passcode is required to unlock it, press Require Passcode. The Require Passcode screen appears.
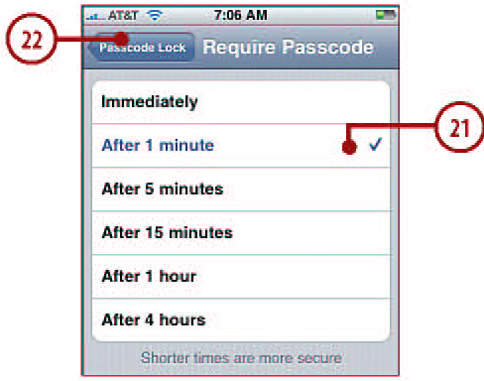
21. Press the amount of time iPhone is locked before the passcode takes effect. For example, to have the passcode take effect after iPhone has been locked for one minute, press After 1 minute. The shorter this time is, the more secure iPhone is, but also the more times you’ll have to enter the passcode if you lock and unlock iPhone frequently.
22. Press Passcode Lock.
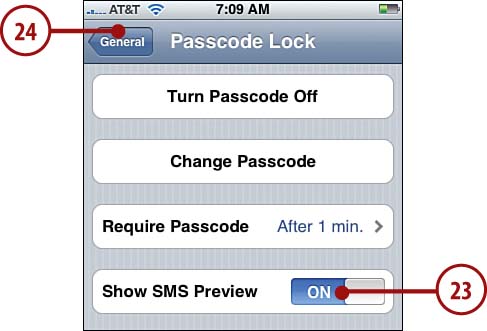
23. To hide previews of messages you receive while iPhone is locked, press Show SMS Preview ON. The setting becomes OFF, and iPhone no longer previews text messages for you when it is locked. Press OFF to restore the message previews.
24. Press General. The General screen appears.
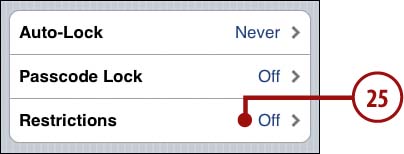
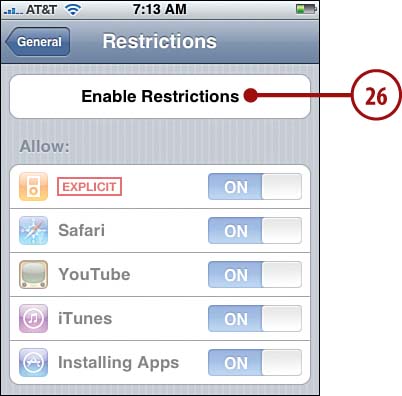
25. To limit the kind of content or functions that can be used on iPhone, press Restrictions. The Restrictions screen appears.
26. Press Enable Restrictions.
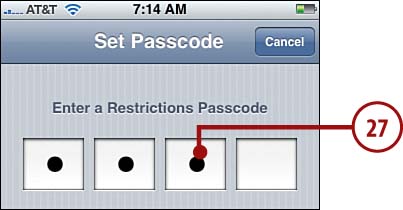
27. Create a restrictions passcode. You have to enter this passcode to change the content restrictions.
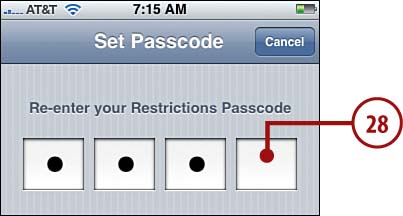
28. Re-enter your restrictions passcode. You return to the Restrictions screen, and the Allow buttons are enabled.
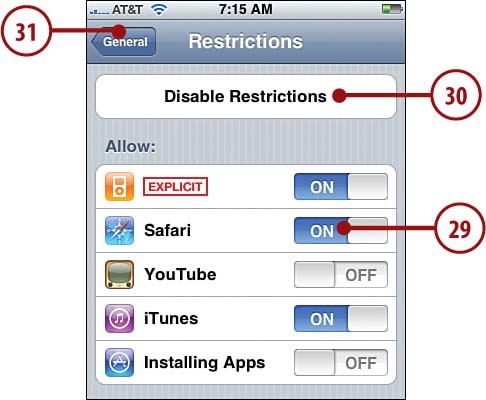
29. Press the ON button next to content you want to disable. Its status becomes OFF to show you that content or function can’t be accessed. For example, to prevent web browsing, press ON next to Safari; the status becomes OFF, and the Safari icon is removed from the Home screen and can’t be used. With the other controls, you can prevent access to iTunes content that is labeled as Explicit, YouTube videos, the iTunes Download application, and the Installing Apps function.
30. To turn off the restrictions, press Disable Restrictions and enter your restrictions passcode. Access to all content and functions is permitted again, and the Allow buttons are disabled.
31. Press General. You move back to the General screen.
32. To configure how the Home button works, press Home Button. The Home Button screen appears.
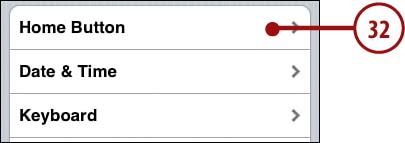
33. Press the action that you want to happen when you press the Home button twice: press Home to move to the Home screen (same as a single press), press Phone Favorites to move to the Favorites page in the Phone application, or iPod to show the iPod controls.
34. If you always want the iPod controls to appear when you press the Home button twice while music is playing, leave the iPod Controls setting to ON; if you always want the default action you set in step 33 to happen instead, press ON so it becomes OFF.
35. Press General.

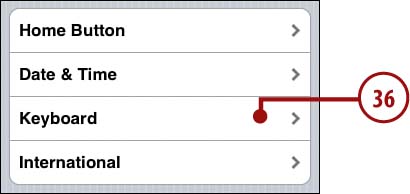
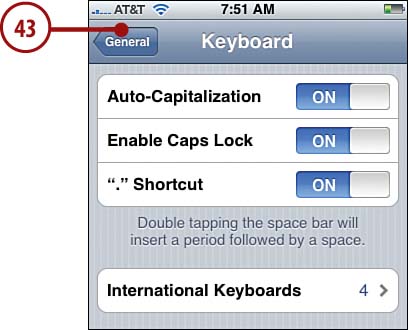
36. Press Keyboard. The Keyboard screen appears.
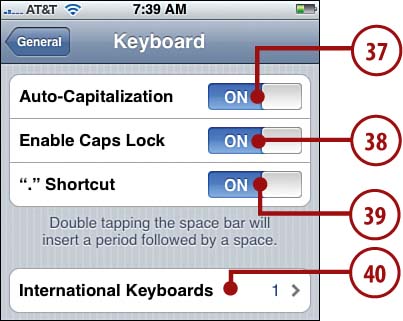
37. To prevent iPhone from automatically capitalizing as you type, press Auto-Capitalization ON. Its status becomes OFF, and iPhone no longer changes the case of letters as you type them.
38. To disable the Caps Lock key, press Enable Caps Lock ON. The status becomes OFF, and when the keyboard appears, you can’t use the Caps Lock key.
39. To disable the shortcut that types a period followed by a space when you press the space bar twice, press “.” Shortcut ON. Its status becomes OFF, and you must press a period and the space bar to type these characters.
40. To change the keyboard’s configuration, press International Keyboards. You move to the Keyboards screen.
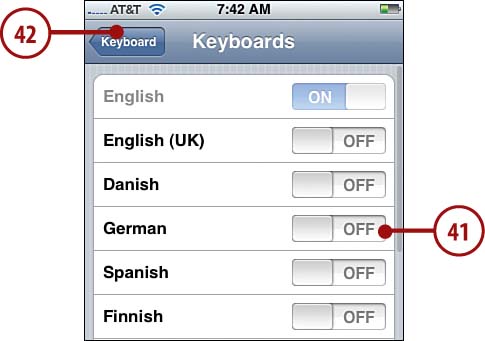
41. Press the OFF button next to the keyboard languages you want to enable so their status becomes ON. Turn off any keyboards that you want to disable by pressing their ON buttons so their status becomes OFF. You must have at least one keyboard style selected, but you can have multiple keyboards active at the same time. (Some languages have sub-menus you use to choose the keyboard layouts you want for that language.)
42. Press Keyboard. The number of keyboards you have enabled is shown in the International Keyboards menu.
43. Press General. You return to the General screen.
Who’s Got Time?
The Date & Time settings are covered in Chapter 8, “Working with Date & Time and the Calendar.”
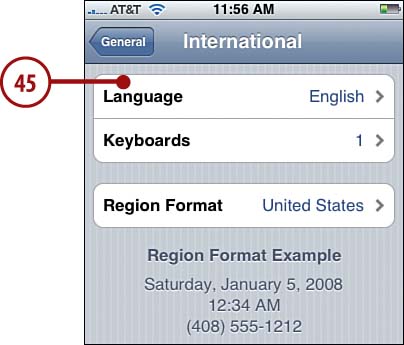
44. Press International. The International screen appears.

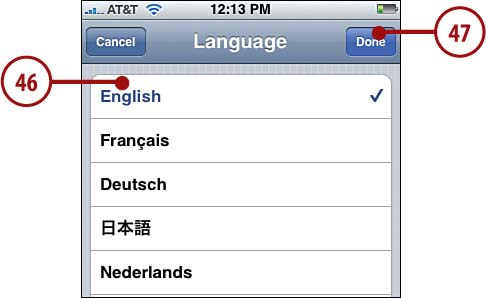
45. To change the language that iPhone uses, press Language. The Language screen appears.
Multiple Languages?
When you have more than one language enabled, a Globe button appears on iPhone’s keyboard to the left of the space bar. Pressing this button cycles through each of the enabled languages. When you reach the language you want to use, you can type using the characters for that language.
46. Press the language you want to use. The selected language is marked with a check mark.
47. Press Done. iPhone starts using the language you selected.
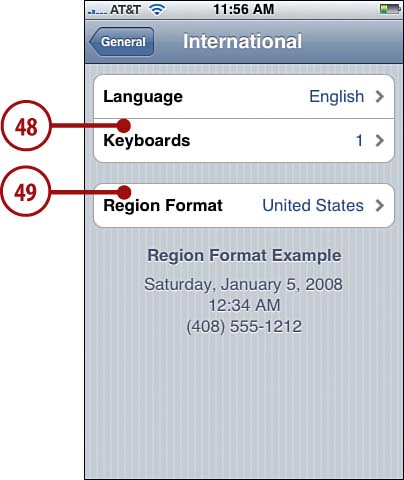
48. To configure the keyboards available on iPhone, press Keyboards and follow steps 41 and 42.
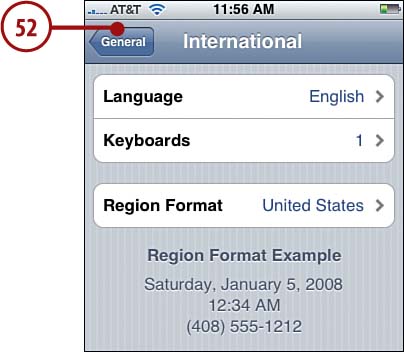
49. To change the formats used for dates, times, phone numbers, and so on, press Region Format. The Region Format screen appears.
50. Press the region whose formats you want to use. Some regions have alternate format choices; you can choose from among the format options that are used in those regions.
51. Press International. At the bottom of the International screen, you see examples of the format you selected.

52. Press General.
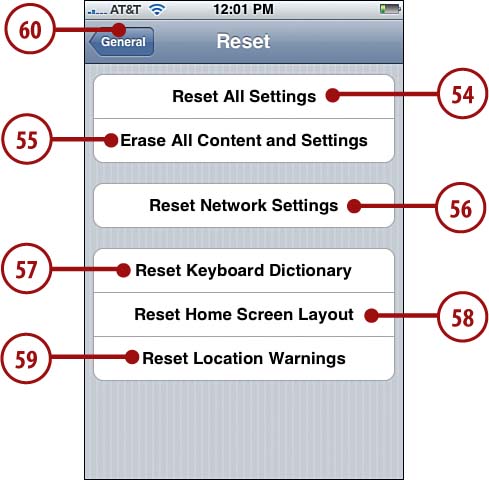
53. To reset iPhone’s settings, press Reset. The Reset screen appears.

54. To reset all settings to the defaults, press Reset All Settings and then press Reset All Settings again to confirm. All of iPhone’s settings are returned to the default states.
55. To reset all settings and delete all content (such as music), press Erase All Content and Settings; press Erase iPhone at the prompt. All of iPhone’s settings are returned to defaults, and all content you’ve added is erased.
56. To return only the network settings to defaults, press Reset Network Settings and then Reset Network Settings again at the prompt. You’ll need to reconfigure iPhone to connect to your networks (see Chapter 4).
57. To return iPhone to its default dictionary, press Reset Keyboard Dictionary followed by Reset Dictionary at the prompt. Any words you’ve added to iPhone’s dictionary are removed, and it returns to its default state.
58. To return the Home screen to the default layout, press Reset Home Screen Layout and Reset Home Layout again at the prompt. Icons on the Home screen are retuned to their default locations.
59. To reset the warnings iPhone has sent you when you use the location finder features, press Reset Location Warnings, and then Reset Location Warnings again at the prompt.
60. Press General. You return to the General screen.