Learning to use yet another source code editor was probably not high on your to-do list this year. However, the NetBeans syntax-coloring Source Editor, which is tightly integrated with the rest of the IDE, is easy to learn and is indispensible to your NetBeans development work flow.
The reason it is easy to learn the NetBeans Source Editor is that its behavior is unsurprising to anyone who has ever used a modern GUI text editor, especially one coded in Java. Try to guess what key sequences are required to copy, cut, and paste highlighted text? If you guessed Control-C, Control-X, and Control-V, respectively, you were right. Control-S saves your changes, if any exist. Shift-Right Arrow selects text to the right, Shift-Control-Right Arrow selects text to the right a word at a time. Et cetera...no surprises here.
The reason that the NetBeans Source Editor is indispensible to your NetBeans development work flow is the level of integration provided between objects in the NetBeans Explorer and Form Editor, code entities in your program, your actions within the editor, and the appearance of your code in the editor window.
There are two prinicipal ways to open a file in the NetBeans Source Editor:
From the NetBeans Main Window, pull down File → Open and use the file dialog to browse to the file you want to open.
From within the NetBeans Explorer, find the node representing your source, right-click on it, and choose Edit if that action is available or Open if there is no specific Edit action on the menu.
Note
Actually, with Java sources and many other NetBeans Explorer nodes, you can just double-click on the node to open it in the NetBeans Source Editor. So why the rigamarole about Open and Edit?
Recall from our discussion of the NetBeans Explorer that a double-click invokes the default action of an Explorer node. If you double-click on an Explorer node representing a Java class, the default action is to open its source in the Source Editor. However, if you double-click on an Ant build.xml file, the default action is to switch to the Running workspace and invoke Ant on the build file.
Very well ... now what about Open versus Edit? There are special editing modes for things like Java properties files. If you double-click on a .properties file in the NetBeans Explorer, the default action is Open, which brings up a special editor oriented toward the user filling in key-and-value pairs in string gadgets. If you instead choose Edit from the menu, you get the good ol’ NetBeans Source Editor open on the actual text of the .properties file.
All files opened in the Source Editor are opened in the same Source Editor frame. They are kept separate in tabbed notebook form. You flip between the files you have opened by clicking the tabs.
Whenever your code changes, an asterisk (*) appears by the filename when the file is being displayed in the Source Editor. Control-S then saves your changes. As a result of this save, your filenames will no longer have the asterisks (until the next change, of course).
When you right-click within the NetBeans Source Editor window, a contextual menu pops up. This menu has many of the selections that you would find when you right-click on the NetBeans Explorer node representation for the same entity. These selections include CVS, Compile, Build, and so on. Additionally, there are options on the menu relevant to the task of editing, such as Cut, Copy, and Paste.
When you click the close widget on the Source Editor window, the window closes, terminating all editing sessions. Alternatively, you may close an individual file by right-clicking on its editing window and choosing Close. In either case, if you have any unsaved changes, you will be offered the choice of saving the changes or abandoning the close operation. This choice is repeated for each unsaved, modified file until all files are closed.
Automated code completion is the NetBeans Source Editor’s ability to supply the name of a partially entered package, class, interface, method, or member without your having to finish typing in all the characters of the name. NetBeans Source Editor keeps a database of Java classes and members and can present you with a list of candidate completions from which you select the actual completion. This wonderful labor-saving feature of the NetBeans Source Editor is useful, but it can at times be annoying.
Automated code completion is useful when you are whizzing through classes and methods the NetBeans Source Editor’s database knows all about. Code completion saves typing when the editor knows what to expect.
Automated code completion is annoying when, after a predetermined timeout, the NetBeans Source Editor pops up the completion list window, obscuring your typing as you hesitate or as you try to enter something that NetBeans did not anticipate. But you can do something about that, as we’ll find out below.
It’s easy to turn NetBeans Source Editor code completion on and off according to your convenience.
To use NetBeans Source Editor code completion, just start typing a package, class, member, or method name. At some point during your typing, NetBeans should attempt to complete the component name. If NetBeans doesn’t automatically attempt to complete your code, type Control-Space. NetBeans Source Editor will then pop up the completion list window if it thinks it recognizes the incomplete syntax as the name of a class or member. (See Figure 3-1.)
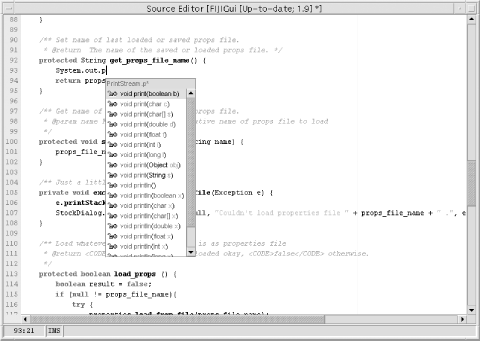
Either scroll down to the desired entry and press Enter or continue typing in further letters of the desired member or method.
There are three separate ways to avoid NetBeans Source Editor code completion:
One time: press
Escwhen the completion list window appears and it will go away.As the default: disable (or slow down) automatic popup of the completion list window. The settings for code completion in the NetBeans Source Editor can be changed on a file-type basis. Just pull down Tools → Options and make the desired changes.
Finish typing quickly. Source completion only pops up while the cursor is within a lexical element containing no spaces. If you are past the end of the method or member name, you’re in the clear as far as source completion is concerned.
As you can see in Figure 3-2, you can change the timeout before the code completion window pops up automatically, which is usually sufficient to diminish the resemblance of this useful NetBeans feature to a “talking paperclip.”
The parser database is the database that the NetBeans Source Editor references when performing code completion. If you attempt automatic code substitution where the correct substitution should be from your own classes but completion fails, it’s time to update the parser database. This can be done by selecting the top of your tree or a particular package and using the right mouse button to invoke the NetBeans Explorer context menu.
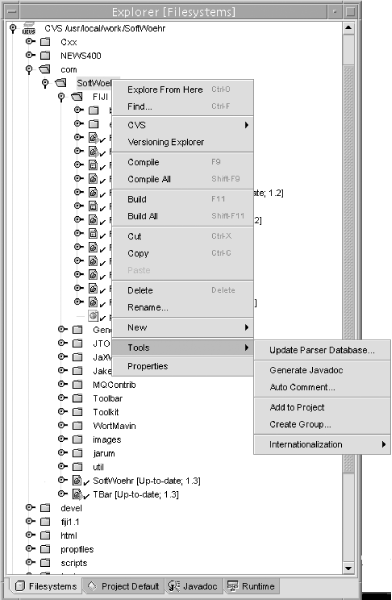
The update applies to the package you selected and all subpackages of the selected package. Ergo, you’ll usually do this at the top of your source tree. Be patient. On a large source tree this operation can take a while. A message box will keep you posted on the progress of the operation as the update executes.
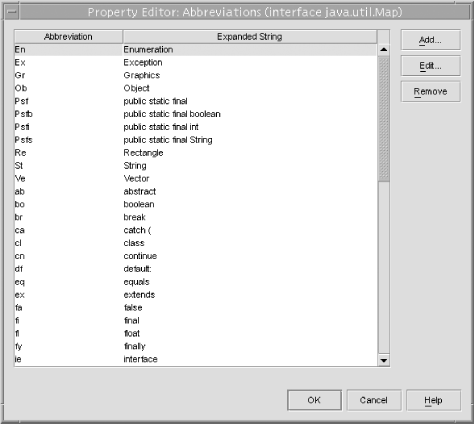
You can assign abbreviations that the Source Editor expands. Just type the first few letters of the abbreviation and hit the Spacebar, and the Source Editor will expand the abbreviation.
The Source Editor keeps separate sets of abbreviations for each type of file you will be editing. That is, when you are editing Java files, there is one set, another for JSPs, and another for XML, and so on. You type a sequence of characters matching an abbreviation and press the spacebar, and the abbreviation will expand. To add a space without the Source Editor checking for abbreviations, press Shift-Spacebar.
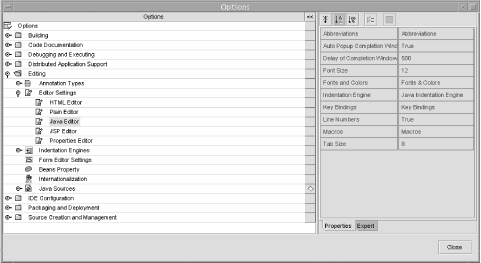
To view or alter Source Editor abbreviations (there is a rather large set already established by default), choose Tools → Options → Editing → Editor Settings → Java Editor and in the properties view to the right, choose Abbreviations, clicking on the ellipsis to bring up the property editor for Source Editor abbreviations. (See Figure 3-3 and Figure 3-4.)
Modules that support specific languages in NetBeans provide syntax highlighting support to the Source Editor. The colors used in the editor can be customized on a per-file-type basis. For example, to change the colors for Java source files, choose Tools → Options → Editing → Editor Settings → Java Editor → Fonts and Colors. There are additional color properties on the Expert tab of the Java Editor node to set things such as caret color and text-limit-line color.
Tip
One highly useful but often ignored feature of the editor is the ability to highlight the line the text caret is on. By setting the color for Highlight Insertion Point Row in the Fonts and Colors dialog to a color only marginally different than the background color, you get a convenient and quick visual reference to find the text caret in the editor.
Note that if you want to completely customize the colors you see in the Source Editor, you will also want to modify settings underneath the Annotation Types subnode of Editor Settings. An “annotation” in NetBeans parlance is the marking of a single line of source code in the Source Editor. An example is the red background of a line indicating a compiler error can be changed here.
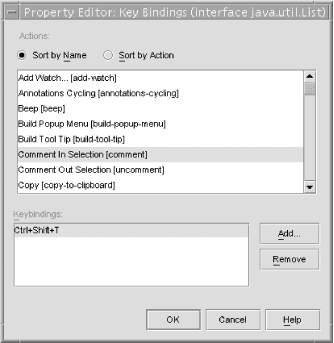
You can create your own key bindings as shortcuts to editing operations. Editor operations have names, and a dialog exists by which you can edit the already existing shortcuts to these operations or establish new ones. Choose Tools → Options → Editing → Editor Settings, and click in the associated properties window to edit the Key Bindings property. (See Figure 3-5.)
If you have already typed something once, why enter it again? Just enter the first few characters and type Control-L to search forward for text commencing with the same characters or Control-K to search similarly backward. If a match is found, a tentative completion will be inserted at the cursor point. If it’s not the completion you want, keep typing Control-L or Control-K until the string you meant to locate for the completion is encountered. This is only a good idea if you are near where you have typed the word you want to complete. Often paging through an entire document to avoid typing “internationalization” wastes more time than simply typing the entire word manually.
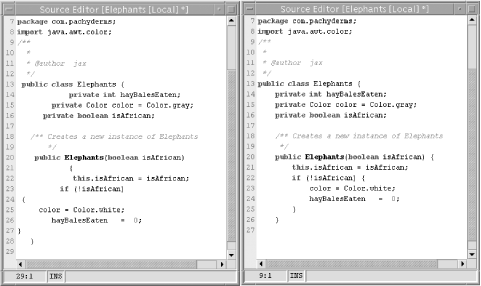
NetBeans Source Editor provides automatic code indentation by allowing modular indentation engines to associate themselves to object types. Invoke code indentation and reformatting by pressing Shift-Control-F. (See Figure 3-6.) After a while this key sequence becomes a NetBeans user’s reflex action.
Of course you’ve guessed that a feature such as automatic indentation, which has uncanny power to touch the programmer’s emotional hot buttons, will have settings you can modify. Select Tools → Options → Editing → Indentation Options and modify the appropriate properties.
Some features of NetBeans edit your source automatically and cause a “buffer changed” asterisk to appear in your source code’s tab. Among these actions that edit your source are:
Using the NetBeans Autocomment tool
Using the Form Editor or a Properties dialog to make changes to your class
Using wizard tools on your class
After such operations you must manually save your source via the context menu or File option for Save or via Control-S.
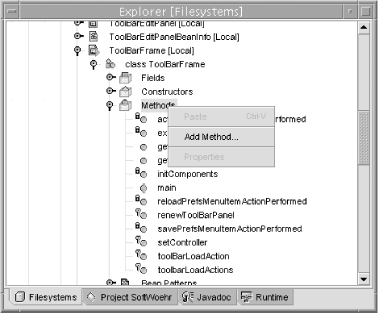
Regarding the latter, using wizard tools on your class, you can alter the signature of your class by right-clicking on the class in the NetBeans Explorer and choosing Customize or by expanding the view of the class in the Explorer, right-clicking on either Fields, Constructors, or Methods, and choosing New whichever. (See Figure 3-7.) You’ll be presented a wizard dialog to create the new field, method, or member variable.
We have focussed here on editing Java via the Source Editor. However, the NetBeans Source Editor also edits HTML, XML, Java Properties files, plain text, and other programming languages as NetBeans core developers and external open source contributors add modules to handle those languages. You can see the currently supported types by choosing Tools → Options → Editing → Editor Settings.
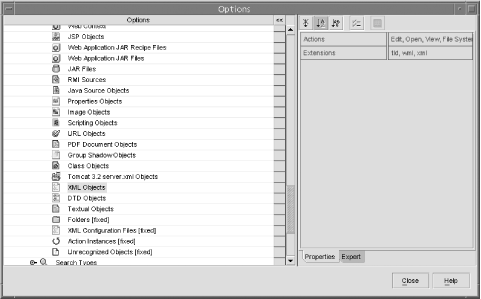
Sometimes the NetBeans Source Editor possesses an editing mode that works for a file type, but the Source Editor doesn’t know about the filename extension. You can let the Source Editor know that a filename extension should be handled by a particular editing mode. You can add, for instance, .wml files to the list of files handled as XML by the Source Editor. Just choose Tools → Options → IDE Configuration → System → ObjectTypes → XML and add wml to the Extensions list in the properties. (See Figure 3-8.)
Let’s leave the realm of theory and turn to practice. We’ll start from scratch now and use NetBeans and the Source Editor to build ourselves a little program and run it. Step-by-step instructions follow.
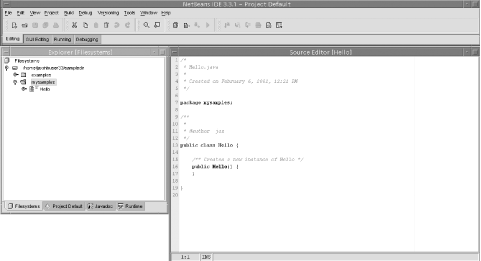
Choose a package. All NetBeans Java programming takes place in some package. Let’s use the sample directory created and mounted for us in the Default project by NetBeans the first time we run it. We’ll create a new package called mysamples in that sample directory. (If you have another project open and want to switch back to the Default project, use the Project Manager). Assuming that you currently have open the Default project, right-click on the topmost mounted directory (on my Unix system it’s /home/jax/nbuser33/sampledir) and choose New → Java Package and name the package mysamples.
Create the source file. Right-click on mysamples and choose New → Classes → Class, name the class Hello, and click Finish.
Edit the code. Here’s a reasonable first program that, when its
main( )is run, will either say “Hello, you!” to standard output or, if provided at invocation with an argument, will say “Hello” to whatever name is input as an argument. (See Figure 3-9.)/* * Hello.java * * Created on February 6, 2002, 12:21 PM */ package mysamples; /** * This class, unsurprisingly, says Hello to you. * * @author your_id */ public class Hello { private String toWhom; /** Creates a new instance of Hello */ public Hello( ) { this("you"); } public Hello(String name) { toWhom = name; } public void sayHello( ) { System.out.println("Hello, " + toWhom + "!"); } public static void main(String [ ] args) { Hello hello; if (args.length >0) { hello = new Hello(args[0]); } else { hello = new Hello( ); } hello.sayHello( ); } }Compile your code. Either press the F9 key or right-click in the Source Editor window and choose Compile to compile your code. If you committed any typographical errors that cause the compile to abort, click on the highlighted link in the compiler’s error output window to jump to the offending line in the source, correct the error, and recompile.
Run your code. Either press the F6 key or right-click in the Source Editor window and choose Execute to run your code. Output, both standard out and standard error (System.out and System.err in Java), goes to the NetBeans Output window.
The Output Window is tabbed. Note that the Output Window is a tabbed notebook, so if many distinct NetBeans tasks produce output, you can click on an appropriate tab to see other program’s output.
You changed workspaces. Note that you changed to the Running workspace when you executed your program. Choose the Editing tab of the NetBeans main window to get back to your work and continue our Source Editor exercise.
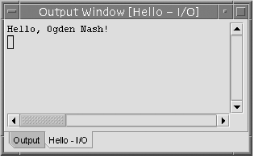
Run your code providing a command-line argument. Let’s say hello to Ogden Nash, the poet who wrote about the man who wasn’t there. In the NetBeans Explorer (not the Source Editor) right-click on the node representation of your Hello class and choose Properties, which brings up the NetBeans Properties Inspector on Hello. Click on the Execution tab and alter the Arguments property (by clicking to the right of the value and editing in the resulting window) to read “Ogden Nash” in quotes, just like that. (The quotes serve to make an argument of two words separated by a space be passed as one argument at runtime. If our
main( )function took two arguments, a first and a last name, we would leave out the quotes.)Now click back into the Source Editor window and run your application again. There’s no need to recompile; all that you changed were the arguments that will be passed to your class when NetBeans runs it on your behalf, and those are external to the class itself. (See Figure 3-10.)
More on Customizing the Source Editor. We have presented here a quick tour of the NetBeans Source Editor to give you enough to get started. There’s more detail about customizing the NetBeans Source Editor in Chapter 6.