


The Basics
The Exposure Triangle
The very fact that you have purchased this book means you plan to take your photography beyond the casual point and shoot stage. Although this book isn’t designed to be an introductory course in photography, it is necessary to understand some important basic concepts to fully take advantage of your Nikon Digital SLR camera. To fully understand and utilize the creative power of these incredible cameras, you need to understand the relationship of aperture, shutter speed, and ISO, or what we will call the ‘exposure triangle.’ The basic rule to remember is that all three factors control your exposure: change any one variable and one or both of the other two must be changed as well. Understanding this relationship will allow you to move beyond making technically correct photographs to capturing really great images.
Aperture
The aperture is an adjustable opening in the lens of a camera. Somewhat like the pupil of our eye, the aperture adjusts to allow more or less light to enter the lens and reach the sensor. The size of the aperture is controlled via an adjustable diaphragm that opens or closes to allow more or less light to enter. On a standard camera lens, we measure in units called‘stops.’ Each f/stop represents either double or half the amount of light, depending on whether the lens aperture is opened or closed. The inverse relationship between thef/stop number and the amount of light entering the lens is confusing to many novices. As the aperture is ‘stopped down,’ the numerical f/stop value increases and as the lens is ‘opened up,’ the numerical f/stop value decreases. We would classify a ‘fast’ lens as one with a maximum aperture (minimum f/stop number) of, say, f/1.4 or f/2.8 for example. Typically the same lens would have a minimum aperture (maximum f/stop value) of f/16 or f/22. Remember, as you open up the aperture by one stop you are allowing twice the amount of light to enter the lens, and as you close down one stop you are reducing by half the amount of light reaching the lens. You can see in the examples below the effects of one-stop difference either way.
Each of thef/stop settings below represents a one-stop difference in aperture. As the f/stop numerical value increases, the amount of light decreases. Depending on which way the aperture is adjusted, each f/stop setting either halves or doubles the amount of light entering the lens and reaching the sensor.
| f/1.4 | f/2.8 | f/4 | f/5.6 | f/8 | f/11 | f/16 | f/22 | f/32 |
Shutter Speed
Shutter speed refers to the amount of time the shutter remains open and allows light to enter and pass through the lens and strike the sensor. Shutter speed is measured in seconds and usually fractions of a second. You will often see 1/125 or 1/1000 as typically used shutter speeds for daylight photography, while 1/60 or even 1/30 is commonly used with flash or studio portrait photography. Many landscape photographers often employ shutter speeds involving several seconds.
As with the aperture, shutter speed is measured in units called ‘stops.’ Increasing the shutter speed by one stop decreases the amount of time light is allowed to strike the sensor by half. Conversely, decreasing the shutter speed by one stop allows twice as much time for the shutter to remain open allowing light to enter and strike the digital sensor. Obviously increasing or decreasing the shutter speed without making a corresponding adjustment to the shutter speed or ISO will result in an over-or underexposure of an image. (Figures 1.2, 1.3 and 1.4)


In the same way that different aperture settings affect the look and feel of a particular image, different shutter speeds can also produce various affects on the way a photograph is interpreted. A really fast shutter speed can literally ‘freeze’ action, such as a formula one car or even a bolt of lightning, while ‘dragging the shutter’ or intentionally shooting at a slower shutter speed can invoke a feeling of motion with the very same subjects. In this way aperture and shutter speed can be adjusted for a specific desired artistic affect.
Figures 1.5 and 1.6 are photographs of the very same subject; yet notice how different the images are due to the different shutter speeds.
Each of the values below represent a one-stop difference in shutter speed. As with aperture, depending on the direction we move, with each change in shutter speed we either halve or double the amount of light entering the lens and reaching the sensor.
| 1/15 | 1/30 | 1/60 | 1/125 | 1/250 | 1/500 | 1/1000 | 1/2000 | 1/40,000 |
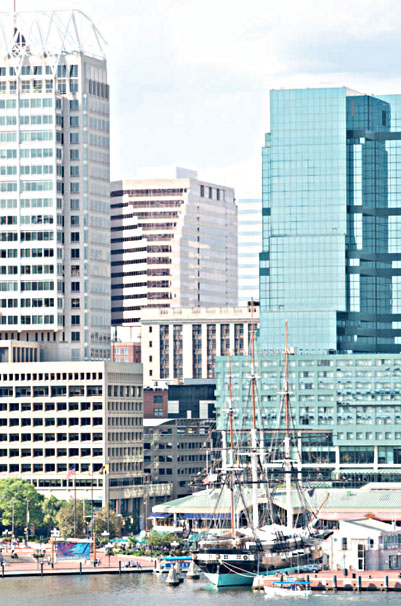
Aperture and Depth of Field
Learning to understand and use the relationship between aperture and depth of field is probably the single most important creative tool available to you as a photographer. Using the Program mode, or Full Auto mode, on your Nikon Digital SLR will almost always yield a technically correct photograph, but often the aperture chosen by the camera is counter-intuitive to the actual intent of you, the photographer, as an artist.
The two factors that determine depth of field are aperture and the focal length of the lens. As we stop down the lens aperture we increase the depth of field, and as the focal length of the lens increases, the depth of field becomes smaller. In other words, a 16 mm lens at f/22 has a larger depth of field than a 400 mm lens atf/22.
Notice in Figures 1.7, 1.8, 1.9 and 10 how the very same image can be captured, presented, and interpreted in four totally different ways.
In Figure 1.7, notice how the object in the foreground is obviously the main subject, as the rest of the image is totally
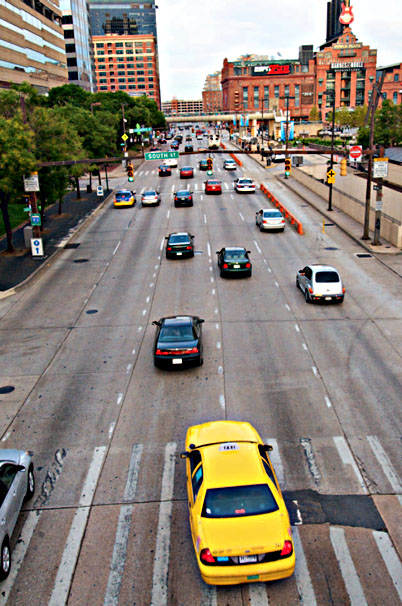
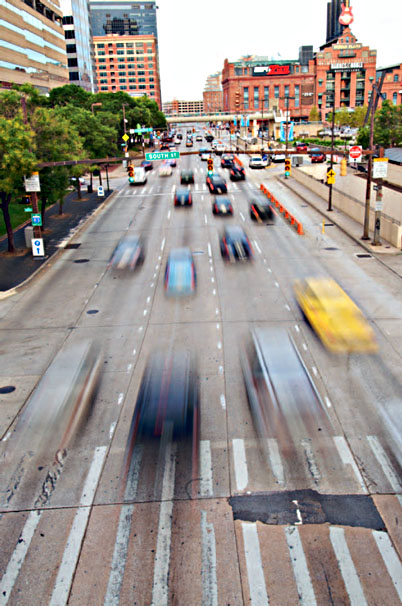


Figure 1.8
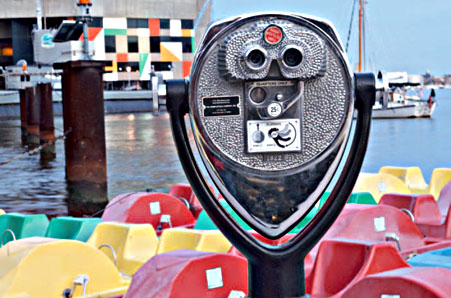
Figure 1.10
blurred and actually becomes a nice pleasing background. In Figures 1.9 and 1.10, as the background becomes more distinct, the object in the foreground becomes less of a subject, and more a part of the background.
The basic rule of thumb to remember is that as the aperture is stopped down (the f/stop numerical value increases), the depth of field increases. Conversely, as the aperture is increased (f/stop numerical value decreases), the depth of field becomes shallower. It is important to remember this inverse relationship between f/stop value and the amount of light the aperture allows through the lens.
The obvious implication for you as a photographer is that a wide-open aperture will place emphasis on the object or objects in focus, while rendering the out of focus areas of the image as part of the background. When the aperture is stopped down all the way, all or nearly all of the subject area of the image will be in focus. This means that the very same subject matter can be rendered in a totally different manner by merely adjusting the f/stop settings on our camera. Learning this relationship allows you to gain creative control of the imaging process.
Reciprocity
The rule of reciprocity means that for any shutter/aperture combination producing a correct exposure, we can adjust the shutter one or more stops, and the aperture correspondingly one or more stops, and arrive at a correct exposure. This means that as we increase or decrease the shutter speed, we need to increase or decrease the amount of light allowed through the lens and shutter to produce a correct exposure. In this equation it is assumed the ISO remains constant. In the chart below, assuming an aperture off/8 and a shutter speed of 1 /250 gives a proper exposure; any combination to the left or right off/8 will yield a correct exposure as well. This rule holds correct for situations where the light is constant, such as a daylight scene.
| f/32 | f/22 | f/16 | f/11 | f/8 | f/5.6 | f/4 | f/2.8 | f/1.4 |
| 1/15 | 1/30 | 1/60 | 1/125 | 1/250 | 1/500 | 1/1000 | 1/2000 | 1/40,000 |
Notice how each of the following images renders a correct exposure.

Figure 1.11 1/1250th second @ f/2.8

Figure 1.12 1/1000th second @ f/3.5
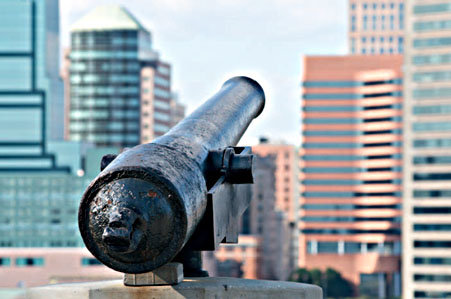
Figure 1.13 1/400th second @ f/5.6

Figure 1.14 1/250th second @ f/8

Figure 1.15 1 1/100th second @f/11

Figure 1.16 1 /60th second @f/16

Figure 1.17 1/25th second @ f/22
ISO
ISO (formerly ASA) is a numerical value representing the sensitivity of your digital sensor. ISO traditionally referred to the sensitivity of film, so often digital cameras tend to referto ISO equivalents. The higher the ISO setting the more light sensitive the sensor is, or less light is required to get a correct exposure. Knowing this would lead us to ask why we wouldn’t opt for the higher ISO settings so as to maximize shutter speed and sharpness. The hard fact is that it is a trade-off: the higher the ISO the more digital ‘noise’ produced and the longer it takes the camera to process the image and write it to the memory card. Just as increasing the ISO makes the digital sensor more sensitive to light, it also increases the sensitivity to digital noise. The newer generation of Nikon Digital SLR cameras have amazingly low noise, even at higher ISO settings, but images shot at ISO 100 are still noticeably cleaner, especially when you zoom in close and crop. Compare Figures 1.7 and 1.8. These are crops of the same image shot at ISO 100 and ISO 3200. Notice the difference in digital noise levels.
Some photographers use this effect for creative purposes, the same way that grain was employed during the heyday of film cameras, but most photographers will opt for lower ISO settings when given the option.
Each ISO value below represents a one-stop difference. With each increase or decrease in ISO value, we either double or halve the amount of light required to get a proper exposure.
| 50 | 100 | 200 | 400 | 800 | 1600 | 3200 |
Remember, as any one aspect of the exposure triangle is changed for a given situation, one or both of the other two must be adjusted to maintain a correct exposure value.
Resolution and Sensor Size
Resolution basically describes the ability of a particular capture device to ‘resolve’ information captured by the digital sensor. Popular thinking is that more pixels is ‘more better,’ but this is not necessarily the case. In actuality, the smaller the sensor size of a digital camera, the smaller the pixel size. Smaller pixels gather and resolve less light and produce more digital noise during processing. In addition, placing more pixels in a smaller area means the space between adjacent pixels is reduced, which produces even more digital noise. Consequently, a 10-megapixel point and shoot camera and a 10-megapixel digital SLR are far from equal in resolution. The digital SLR will always produce a smoother image with a better dynamic range than a point and shoot camera.
Notice the difference in Figures 1.18 and 1.19. These are details at 100% from the same image, the first one shot with an SLR and the second with a point and shoot camera, both 8 megapixel. Notice the difference in sharpness and resolution and how much more digital noise is produced by the smaller sensor.
One of the most controversial areas of digital photography revolves around sensor size, in particular with regards to full-frame sensors. The APS sized sensors, which are smaller than full-frame, produce what is termed a ‘crop factor,’ or a

Figure 1.19
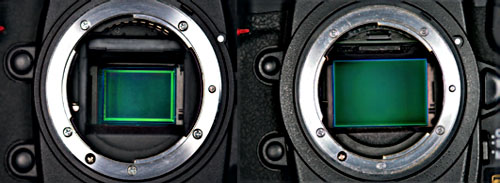
Figure 1.20
magnification factor of 1.5 ×. Because the sensor is less than full-frame, each lens produces a telephoto effect. In all Nikon Digital SLRs with the exception of the D3 and the D700, a 100mm lens has the focal length equivalent of a 150mm lens. Figure 1.20 shows the two sensor sizes used by Nikon Digital SLR cameras.
For most people, the lack of a full-frame sensor isn’t a problem. The viewfinder still reflects the capture area so for all practical purposes what you see is what you get. For professional photographers, in particular sports shooters, a high-resolution full-frame sensor with its wider capture area does provide some advantages, such as the ability to crop several usable images from one capture.
For most of us, the practical implication is that the effective focal length of our lenses is changed. Wide-angle lenses become less wide angle and standard to medium telephotos become even more telephoto. Obviously this can be an advantage or a problem, depending on what you are shooting and where you are standing. When all else fails just pick up your feet and move. Some photographers still say the best zoom is your own two feet!
Getting Started
So now you have your new camera and you are ready to get started. Hopefully you read at least some of the instructions that came with your camera but we will cover some basics to get you up and running for those who can’t wait.
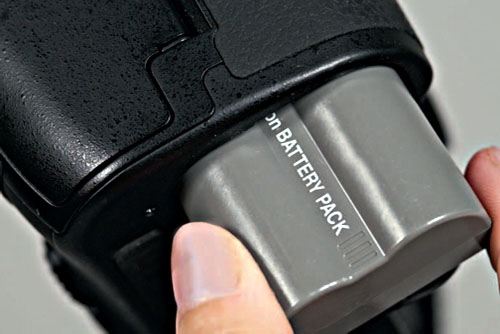
Figure 1.21


Figure 1.23
• Start with inserting the battery. Nikon cameras come from the factory with a partial charge but you should charge the battery fully in the charger provided prior to using the camera. Today’s batteries provide hours of continuous use but by the time you see a low battery symbol on the LCD it’s too late. This will usually happen at the worst possible time so it’s good to purchase at least one or more spare batteries to keep in your camera bag. Drop the battery into the battery compartment with the contacts down (it will only go in the right way fortunately) and close the compartment door.
• Attach the camera lens by aligning the white dots and rotating the lens counter-clockwise; you will lock it into place. Never force a lens onto a camera. It should always fit and turn smoothly.
• Set the focus switch on the lens to M/A for auto focus and manual focusing capability.
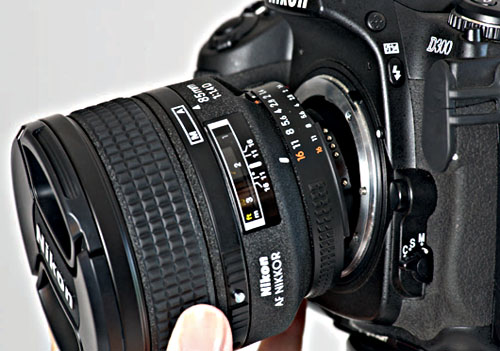
Figure 1.24
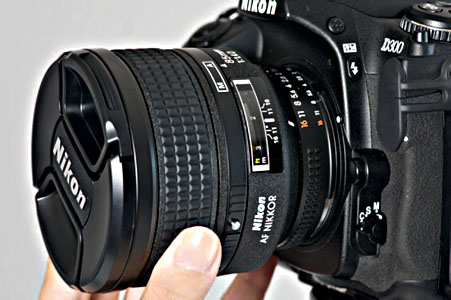

Figure 1.26
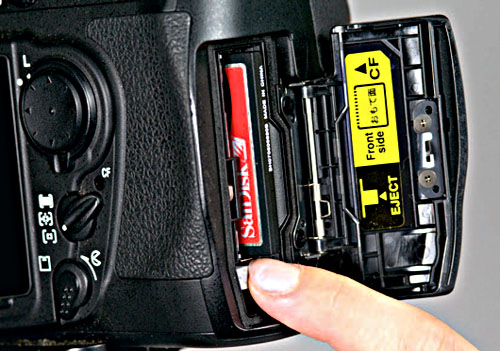
• On the D40, D40X, D60, and the D80, insert a Secure Digital (SD) card into the memory card slot. On the D300 and D3 insert a Compact Flash (CF) card.
• Turn the camera’s power switch to the ‘On’ position.
• In the camera’s menu, under the Setup Menu, choose the format memory card option and format the new card. You should always format a new memory card and use this option to prepare the card for use each time rather than just erase the images from the card via the camera or your computer. This will help prevent file corruption and subsequent loss of your precious images.
• To get started, set the camera mode to Full Auto (Green Camera) or the P mode. This way the camera will make sure you get a correct exposure by deciding the aperture, shutter speed, white balance, and ISO based on the existing light.

• Through the camera’s viewfinder, frame your shot by moving the camera, changing your position, or adjusting the zoom lens if you have one.
• Lightly press the shutter release to lock the exposure and focus, and then press it the rest of the way to complete the image capture.
• You can check the results in the LCD. Although this is not necessarily the most accurate way to assess the exposure, it will at least let you know if you are in the ballpark. At this point the image has been written to and saved on the memory card.