
In this example, we will use the Bookshelf Inventory Impl - Mock bundle from Chapter 5, The Book Inventory Bundle, showing the parts that are specific to Eclipse and the m2clipse plugin.
A lot of what you'll see here relating to Maven is exactly the same as what you've seen in Chapter 5. The only difference is that the project contents are edited in Eclipse. We will mainly focus on the specifics around the setup and operation in the Eclipse environment.
If you already have the project setup, as described in Chapter 5, to add it to Eclipse, follow the steps in the upcoming Importing a Maven project into Eclipse section.
At this point, Eclipse is open in Java perspective, with the m2clipse plugin installed and configured. We will now create a new Maven project in Eclipse. Let's quickly go through the project creation steps.
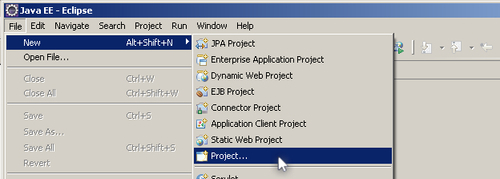
Go to the File menu and select New > Project...
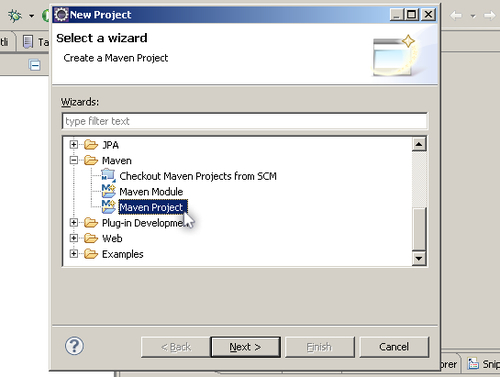
This will open the New Project dialog, which requests the selection of the type of project to be created. This shows the project templates provided by the installed plugins.
Pick Maven Project and continue to configure this project's details by clicking Next.
The New Maven Project wizard gathers the project information which it will use to set up the project structure and create its POM (Project Object Model).
In Maven, new projects can be created based on a template (or archetype). This is especially useful when a big part of the project's contents can be generated or when the directory structure is elaborated.
In our case, the projects are simple. Therefore, we will not use archetypes: tick the Create a simple project checkbox.
Eclipse project working sets allow further group projects in the workspace to reduce clutter when working in workspaces with a large number of projects. We will not use any working sets for this example.
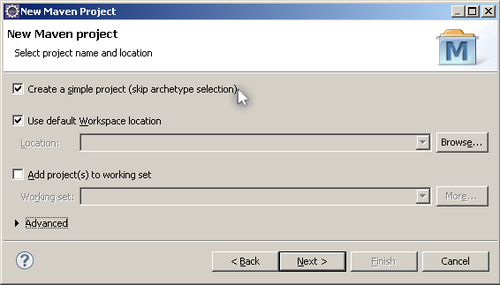
To continue with the project creation wizard, click Next. This gets us to the project identification.
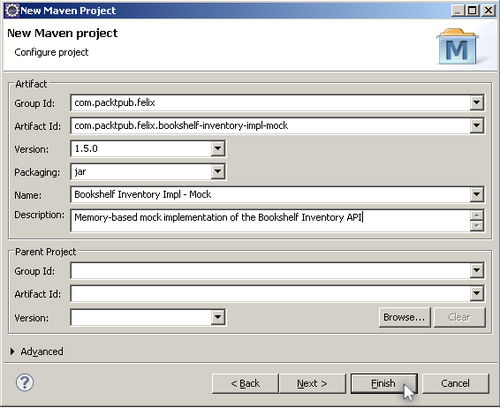
In this step, fill in the project information, as described in Chapter 5. Notice that we've left the packaging to its default value (jar). The bundle custom packaging is defined by the maven-bundle-plugin, which we have not declared yet in the project configuration. We'll edit it in the POM in the next step when adding dependencies and plugin declarations.
Maven allows us to optionally organize projects into structures, where child projects inherit common POM configuration from their parents. The Parent Project section of this form would be used to specify this project's parent. We will not set a parent for this project.
Click Finish to create the project.
This wizard has gathered the information necessary to construct a base Maven project for us. It contains the typical source structure and a POM that's based on the identification information we have provided.
This results in a project layout that looks like this:
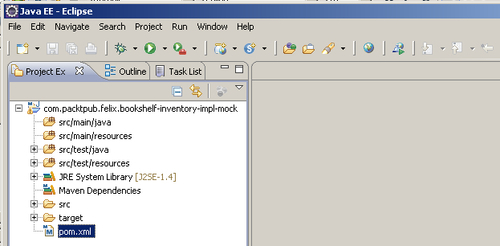
The m2clipse plugin keeps track of changes to the pom.xml file and updates the environment accordingly. For example, when we add our dependencies in the next step, they will be located by the Eclipse plugin and placed in the Maven Dependencies classpath container. Those are then made available to the environment when checking syntax, providing content assist, and so on. Also, when we set the maven-compiler-plugin constraints to the JVM version, the project assigned JRE System Library is updated.
The next step is to inspect the project POM and add the customizations for creating OSGi bundles.
As described in greater detail in Chapter 5, the Maven POM holds the project identification, as well as a wide range of description items. The POM that was generated by the m2clipse New Maven Project wizard is not yet complete from our project's point of view.
The m2clipse plugin provides a POM editor, which allows us to graphically edit the POM. When opened, by double-clicking on the pom.xml file, it displays a tabbed view showing the different parts of the POM, each part in a tab.
In our example, we'll just edit the POM in the XML format, in the last tab of the editor, and add the missing sections.