Chapter 31
Introducing Publisher
IN THIS CHAPTER
Learning how to get around in Publisher
Choosing and using a publication design
Typing text or inserting it from a file
Working with text AutoFlow and flowing text between frames
Formatting text
Inserting and formatting pictures
Drawing your own shapes and lines
Adding and editing a table
Desktop publishing made creating printed publications easier and faster, but for years it remained the bailiwick of graphic art and design superheroes. The software was expensive and difficult to master and provided little in the way of design help for mere mortals.
Microsoft Publisher was one of the first programs to make publication design affordable and doable for the average computer users. From its first version, Publisher offered an easy layout, simple tools, a variety of styles and graphics, and attractive templates for publication designs. This chapter shows you how to use Publisher 2013 to choose a publication template and add text and graphics to complete a publication.
The Publisher Workspace
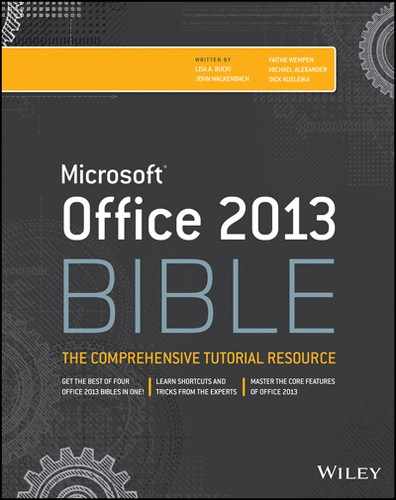
Each time you start Publisher, the program prompts you to create a new publication file by selecting a template from the New template gallery. You can either create a new publication as described in the next section, click one of the choices under Recent to open a recently used document, or click the Open Other Publications command to open a publication you created previously. In any case, Publisher displays a publication and the Ribbon in its workspace (Figure 31.1).
FIGURE 31.1 The Publisher workspace offers a variety of tools for creating publications.
You can design your publications by adding text, graphic objects, and other elements to the white page area. When the publication has multiple pages, you can move between pages by pressing Ctrl+Page Up and Ctrl+Page Down, or by clicking on the icon for a page in the Page Navigation pane, on the left side of the workspace. The gray area that appears around the page is called the scratch area. This area serves as a holding space for any objects you might want to pull off the page and reuse elsewhere. For example, you can drag a graphic off one page to the scratch area, display another page, and then drag the graphic onto that page.
The vertical and horizontal rulers enable you to align objects on a page with precision. As you drag an object, a moving marker appears on each ruler to indicate the mouse position, and the position measurements appear in the status bar. By default, when you drag an object and release the mouse, the object will snap into alignment with any green ruler guides that you have displayed or added. You can turn this snap feature on or off using the Guides check box in the Layout group of the Page Design tab. You can display built-in ruler guides for arranging objects by clicking the Guides button in the Layout group of the Page Design tab, and then clicking one of the thumbnails under Built-In Ruler Guides on the gallery that appears. You can also create custom ruler guides by dragging them from either ruler, as shown in the example in Figure 31.2. Then, drag objects to align with your guides.
FIGURE 31.2 Drag from either ruler to create a guide.

The Ribbon in Publisher offers a variety of buttons, galleries, and lists that you can use to add and work with publication content and publication files. Publisher displays these seven Ribbon tabs on-screen by default:
- File: As in the other Office 2013 applications, the File tab displays the Backstage view, with choices for creating, managing, sharing, and printing files.
- Home: This tab includes buttons for adding and formatting text, copying and pasting, working with object positioning, and finding and replacing.
- Insert: This tab enables you to insert pages, create tables, insert different types of illustrations such as online pictures, use building blocks to create content, add business information or insert text from another document, add hyperlinks, and work with headers and footers.
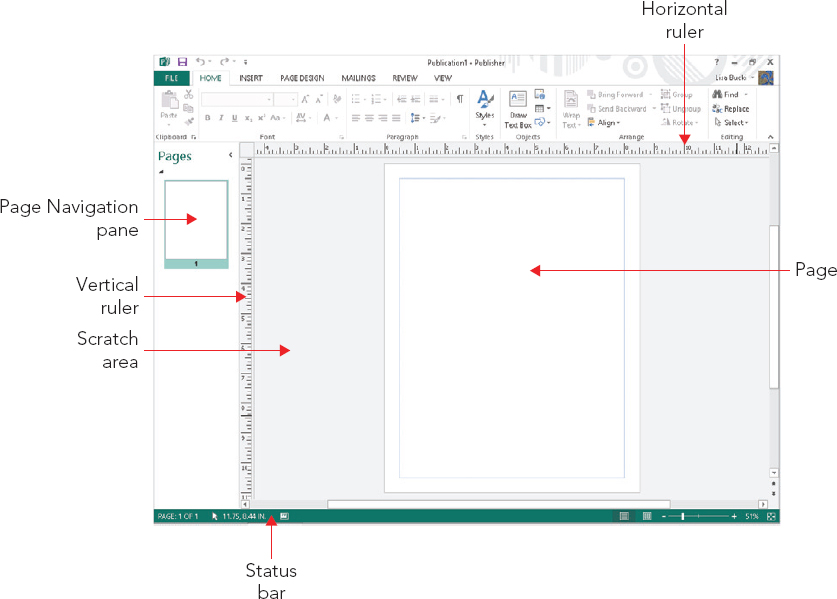
- Page Design: This tab enables you to change the page template, modify the margins, and set the color and font scheme. For example, Figure 31.3 shows a template applied to a previously blank document.
FIGURE 31.3 Use the Page Design tab to change templates and choose other page settings.
- Mailings: This tab enables you to merge data from a list to make custom copies of a document, as in Word 2013.
- Review: This tab offers choices for spell checking the document, performing content research, substituting words with the thesaurus, and changing language settings.
- View: This tab offers the options for changing how the document appears on-screen, including the settings for hiding and redisplaying specific screen elements such as guides and rulers.
As in other Office applications, with Publisher one or more contextual tabs may appear depending on what item you’ve selected in the document. For example, you might see the Drawing Tools ⇒ Format or Text Box Tools ⇒ Format tabs. You can use the choices on contextual tabs as needed to format and edit the selected object.
Using a Template to Create a Publication
Any time you start Publisher or select the File ⇒ New command (Ctrl+N), Publisher displays the New template gallery choices in the Backstage view so that you can navigate to and select a template to use to create a new publication file. When your system is connected to the Internet and you are signed in to Publisher, you can click Featured above the template thumbnails and scroll down to see the suggested templates available for download, as shown in Figure 31.4. Click a template thumbnail to view a window with a preview and description, and then click Create to download the template and create a new publication based on it.
FIGURE 31.4 Publisher enables you to select a template from various publication types.

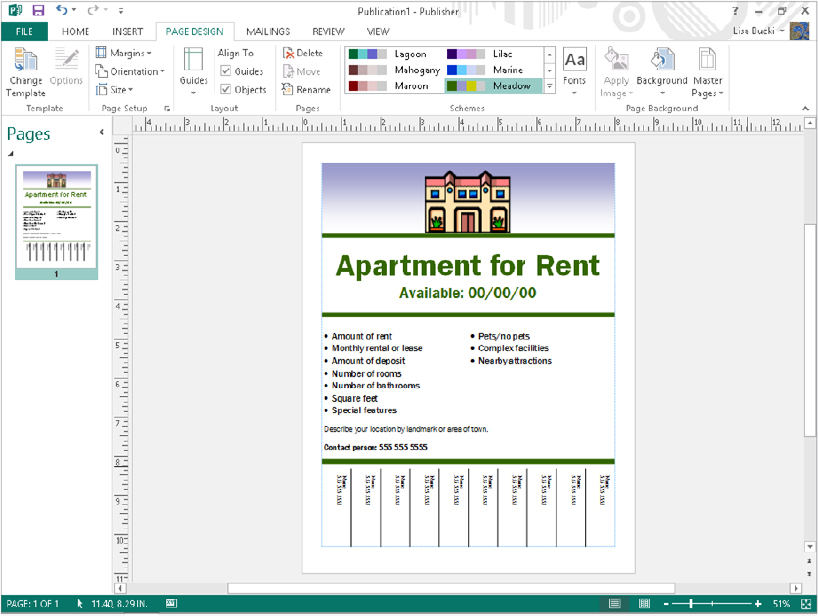
If you click Built-In above the template thumbnails, Publisher displays template categories including: Advertisements, Banners, Brochures, Business Forms, Flyers, and more. Scroll down, click a category thumbnail, and Publisher subcategories for that template type. You can click on the desired template to see a preview in the upper-right corner, as shown in Figure 31.5. Scroll down to see more subcategories, or click one of the folder icons at the far right of a subcategory to see even more templates for that subcategory. If you want to see more template subcategories, scroll down.
FIGURE 31.5 Browse, preview, and select a template.
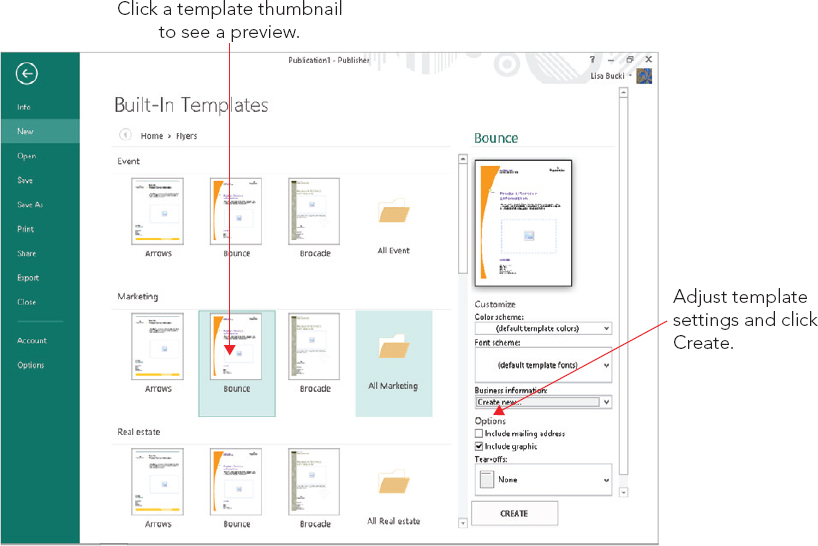
When you’ve clicked the thumbnail for the template you’d like to use, you can set up the template by making choices in the Customize and Options areas below the template preview. The template settings are only available for installed templates. The window that appears when you download an online template does not display any options. After you’ve made the desired choices, click the Create button. The new publication based on the template will appear in the workspace, as in the example shown in Figure 31.6, so that you can begin replacing placeholder information with the unique information for your publication.
FIGURE 31.6 The new publication based on the template appears.

Notice that the new publication file has a placeholder name; the example in Figure 31.6 is named Publication4. Remember to use the File ⇒ Save As command (Ctrl+S) or click the Save button on the Quick Access Toolbar to name the publication and specify a save location for it. Press Ctrl+S periodically to save changes as you make them in the file, and use the File ⇒ Open command (Ctrl+O) or click the Open button on the Standard toolbar to reopen any existing publication.
Working with Text
In Publisher, you add text into a text box. When you move the mouse over a text box, a dashed boundary displays to define where the text will appear. (Clicking in the text box changes to a solid boundary with selection handles.) If you create your publication from a template, the template design provides placeholder text boxes within the publication, as in the example shown in Figure 31.6. In that case, you can simply use an existing text box to add the text. You also can create your own text boxes as required for your publication design.
Typing text in a placeholder
Adding text into a placeholder text box requires that you select the placeholder and then type the text within the placeholder to replace the example text. Use these steps to add text into a placeholder text box in a file based on a template:
FIGURE 31.7 Click the text in a template text box to select both the text box and the example text.

Text boxes do not resize automatically in Publisher, so if the text you add is too long to fit within the text box, you need to resize the text, as described later in the section, “Resizing, autoflow, and linked text boxes.”
Many of the templates have automated placeholders that automatically insert business information stored in the business information set in Publisher. If you have not yet specified information for the business information set, choose File ⇒ Info ⇒ Edit Business Information. Enter the information in the Create New Business Information Set dialog box, click Save, and then click Update Publication. You can use the Business Information drop-down list in the Text group of the Insert tab to select a business information component and add that item to the publication at the insertion point. Business information items may have their own placeholders in publications. When you point to such an item, you can click on the option button that appears and then click on a choice in the shortcut menu to decide how to work with the information.
Creating a placeholder and adding text
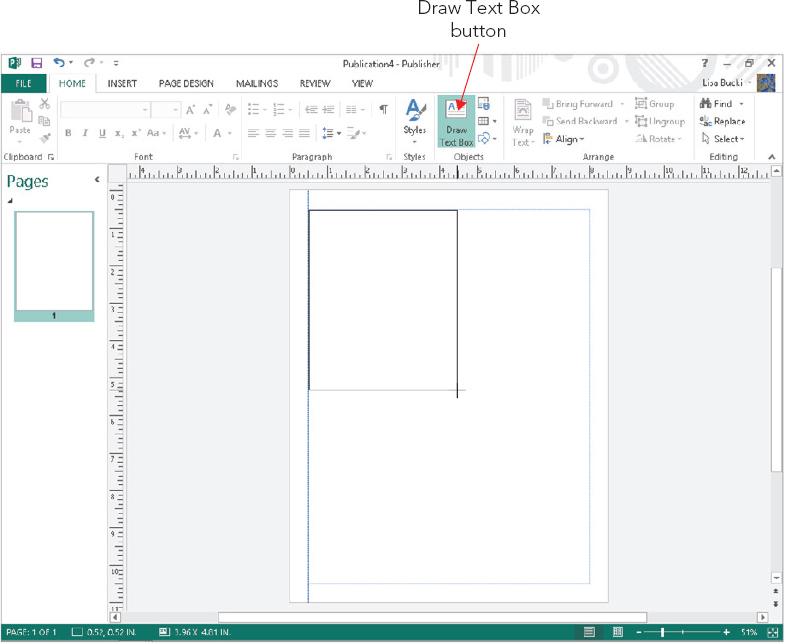
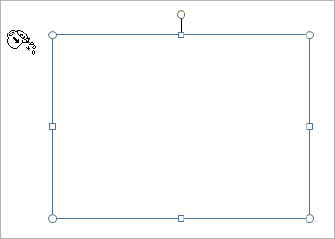
Whether you used a template as the basis for your publication or created the publication from scratch, you can add a new text box to place text in any location that you like in the publication. To add a text box, use the Draw Text Box tool, which is available on two of the Ribbon tabs.
FIGURE 31.8 Drag to define the size and shape for the text box.
Inserting a text file
Often, writing text and designing a publication are two separate activities assigned to two different people within an organization or group, especially for a publication that requires a lot of text, such as a newsletter or catalog. The person handling the writing assignment typically uses Word, WordPad, or another word processing program to write and edit the text, because a word processing program is the better tool for that purpose.
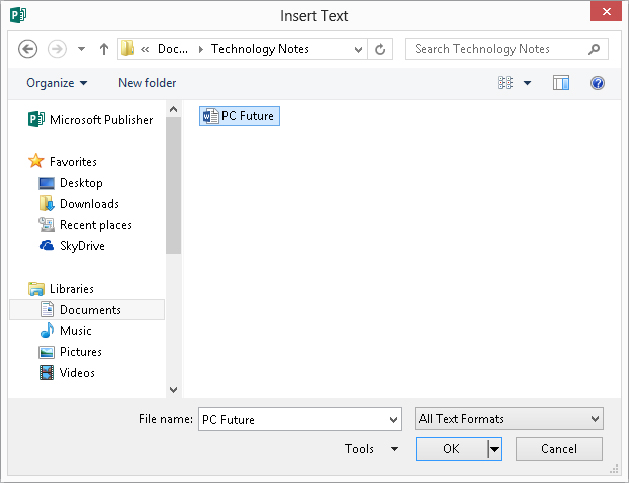
You need not worry about retyping text supplied by a colleague. Instead, you can insert word processing files [in popular formats including Word, WordPerfect, plain text (.txt), or Rich Text Format (.rtf)] directly into a text placeholder. The steps for doing so, which follow, combine the process for adding text into a text box and for opening a file:
FIGURE 31.9 Publisher selects the entire story in linked text boxes.
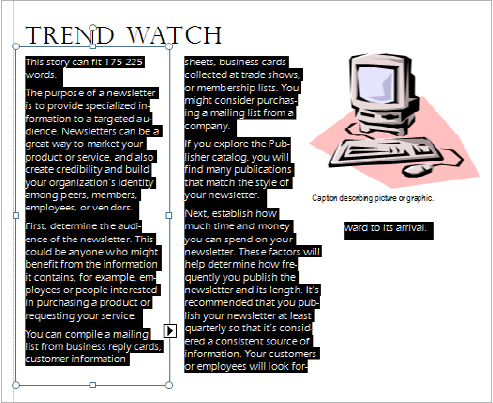
FIGURE 31.10 Insert a text file from a word processing program to avoid retyping the information.
Depending on the file format of the inserted file and whether any text and style formatting was applied in the original document, you may need to change the formatting of the text after inserting the file. The later section titled “Formatting Text” discusses some of the formatting methods you can use.
Resizing, autoflow, and linked text boxes
In some cases, such as for text boxes in many templates, Publisher does not resize a text box if the text you type or a file you insert is too lengthy. When the number of words you’ve typed or placed into a text box exceeds the number the box can hold and you haven’t allowed text to overflow into a linked text box, or there aren’t any subsequent linked text boxes, a Text in Overflow button shown near the lower-right corner of the text box in Figure 31.11 appears. When you see that button, you can drag one of the handles on the text box to enlarge the box to display the text in its entirety. You also can flow the text into another text box, as described later in this section.
FIGURE 31.11 The Text in Overflow button cues you that the text doesn’t fit in the text box.

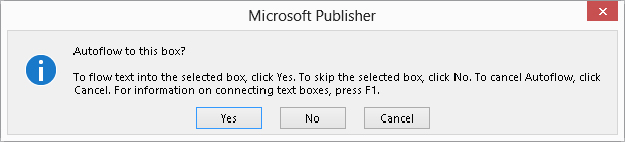
If you insert a file into a text box and the file’s contents are too large for the text box, Publisher displays a message box like the one shown in Figure 31.12. If you click Yes, Publisher automatically flows the extra text into subsequent frames in the publication until all the text has been placed, a feature called AutoFlow. If you click No, you can handle the extra text by resizing the text box manually. Alternatively, you can link the text box to another of your choice, thus choosing exactly which text box will receive the flowed text. Linking text boxes enables you to control how a story flows from one text box to another.
FIGURE 31.12 Publisher enables you to AutoFlow extra text from an inserted file into other text boxes in the publication.
To link two text boxes so that the overflow text flows from one to the other:
FIGURE 31.13 Linking text boxes flows text between them.
Other special buttons appear when you click on a linked text box. You may see the Go To Previous Text Box button above a linked text box. Clicking on that button selects the previous text box. When a Go To Next Text Box button appears below a linked text box, you can click on the button to select the next text box in sequence.
Formatting text
Some text formatting in Microsoft Publisher works similarly to Word and PowerPoint, and you can refer to earlier chapters about those programs to learn more about fonts, font sizes, alignments, and the type of text formats that you can apply. Click in the text box that has the text to format, drag over text within the text box to make a more specific selection to format or press Ctrl+A to select the entire story, and then use the choices in the Font and Paragraph groups of the Home tab to apply the desired changes. For example, you can click the Bold button to apply boldface or click the Bullets button to convert the text to a bulleted list.
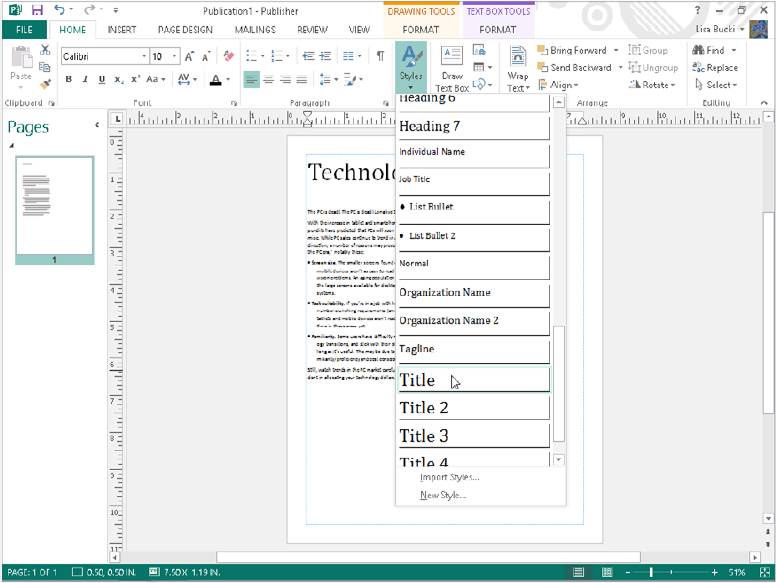
Often, text that you’ve imported from another file will have its own formatting applied rather than adhere to the formatting established by the publication template. In this case, you can work with the Styles gallery to apply template formatting to the text:
FIGURE 31.14 Applying a template style saves formatting legwork.
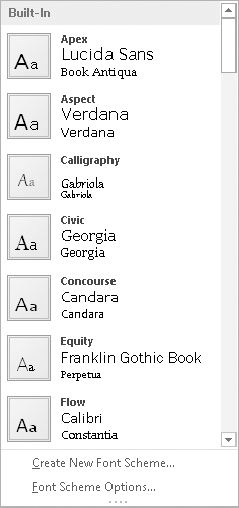
One feature that Publisher 2013 shares with some other Microsoft Office 2013 applications is the ability to apply a new font scheme to the publication. Changing the font scheme changes the entire set of styles in the publication to styles that use different fonts, sizes, and so on. By making one choice in a task pane, you can update the look of all the text in the entire publication. Here’s how to choose a new font scheme via the Format Publication task pane:
FIGURE 31.15 Applying a font scheme updates all the document styles to use new formatting.
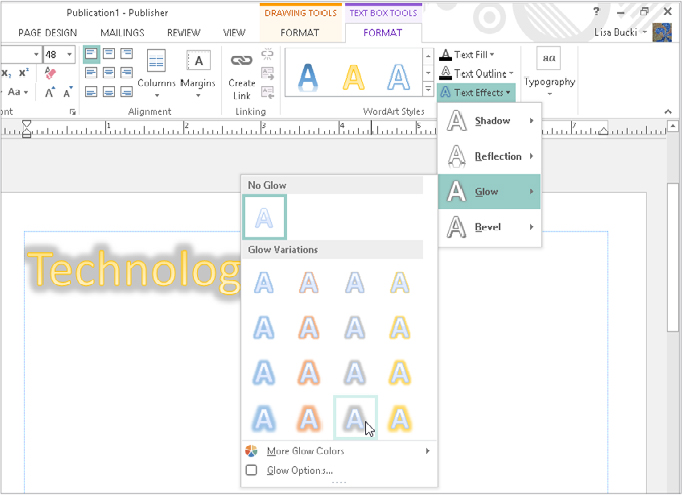
In addition to being able to apply template styles to selected text, you can apply WordArt styles using the gallery in the WordArt Styles group of the Text Box Tools ⇒ Format tab. New in Publisher 2013, you also can apply shadow, reflection, glow, and bevel effects using the Text Effects button in the same group. As shown in Figure 31.16, click the button, point to one of the effect types, and then move the mouse pointer over the gallery that appears to see a Live Preview of the effect on the selected text. When you see the effect you want to use, click it to apply it.
FIGURE 31.16 Publisher now enables you to apply four types of text effects.
The Measurement pane
One nice benefit of Publisher’s templates is that they have already been set up with great precision. All the text boxes, graphics, and other elements have been sized and aligned to exact dimensions. If you want to be as precise with your own publication – such as making sure that text boxes have the same width or sizing of certain types of graphics (for inserted objects or pictures, use the Format Object or Format Picture dialog box instead) to fit exactly within a column–you can use the Measurement pane (Figure 31.17).
FIGURE 31.17 View and change numerous dimensions for a selected object or text using the Measurement pane.
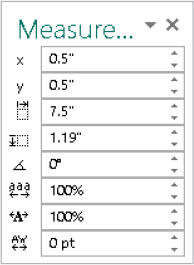
To display and hide the Measurement pane, select a graphic object or text box, click the Drawing Tools ⇒ Format tab, and then click Measurement in the Size group.
The Measurement pane displays the exact x (horizontal) and y (vertical) position of the upper-left corner of the selected text box or object. It also lists the object’s width, height, and rotation angle (if any). If you’ve selected text within a text box, the Measurement pane also displays text settings including Tracking, Text Scaling, and Kerning.
To change any of the settings for the selected object or text, you can enter a new value in the applicable text box on the Measurement pane and press Enter, or you can use the spinner arrow buttons to change the entry. In this way, if you want three different text boxes in a publication to be exactly 2.205 inches wide, you can use the Measurement pane to set that width dimension.
Working with Graphics
Graphics bring publication stories to life. If you’re a realtor creating a flyer to describe a terrific house that you have for sale, anyone who sees your flyer will really know how fabulous the house is if you include pictures of the granite countertops in the kitchen, the luxurious bathroom, and the gorgeous patio and landscaping in the backyard. Publisher makes it easy to add pictures and other graphic elements to punch up a story and really sell your message.
Inserting a picture file
Digital cameras and scanners are virtually as cheap as film cameras once were. Even the typical home or small business generally has a digital camera and users who take and transfer dozens of digital pictures to the computer’s hard disk. Microsoft Publisher enables you to place pictures in formats commonly captured by digital cameras, such as JPEG and TIFF, as well as numerous other graphics formats created with drawing and painting programs, directly into a publication.
This process does not require a picture placeholder, so when you’re ready to insert a digital picture file into a publication, follow this process:
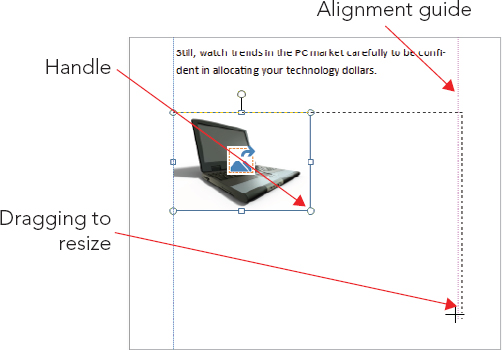
After you insert the picture, you can resize and position it as needed. You can drag the handles that appear on the corners and sides of the picture (Figure 31.18) to resize it, or move the mouse within the picture and drag to move it. You also can use the Measurement pane as described earlier to set the picture’s size and position. The Size group of the Picture Tools ⇒ Format tab also includes settings for sizing a picture precisely. As Figure 31.18 also illustrates, when you drag a picture to move it or drag a handle to resize it, alignment guides like those now also found in Word and PowerPoint appear to help you align the picture to the text dimensions or other objects with precision. When you finish sizing the picture, click outside it to deselect it.
FIGURE 31.18 Resize and move the inserted picture as needed.
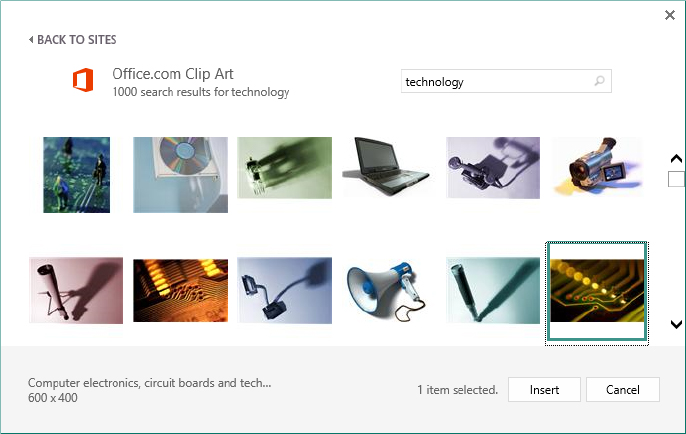
Inserting an online image
If you don’t have your own digital pictures but want to flesh out your publication with some images, you can take advantage of the royalty-free Clip Art available via Office.com. (You also can insert images from Bing Image Search or your SkyDrive; this process works just as it does in Word, so for more details, see “Adding an Online Picture” in Chapter 9.) You can search for the type of picture you want, such as a flower, boat, or person. Follow these steps when you want to insert an online picture into a publication:
FIGURE 31.19 Find and insert online pictures for your publication.
Inserting multiple pictures
Publisher 2013 also gives you the ability to insert multiple pictures into a publication at once. To do so, click the first picture in the Insert Picture dialog box or the online pictures search results, and then Ctrl+click additional pictures to select them before clicking Insert. Publisher places all the inserted pictures in the scratch area as shown in Figure 31.20. Drag a picture from the scratch area onto the desired page in your publication, and position and resize it from there as needed.
FIGURE 31.20 When you select multiple pictures before clicking Insert, Publisher places them on the scratch area so you can add them into the publication where needed.

Swapping pictures
If you place a picture on a page but decide you’d prefer to insert a different one in the same position, right-click the picture, point to Change Picture, and then click Change Picture.
Changing a placeholder picture or swapping pictures
Many publication templates include placeholder graphics that provide suggested sizes and locations where you can insert your own pictures or alternative clip art images. When you insert the replacement picture or clip art graphic, Publisher automatically resizes the replacement image to fit within the frame for the existing image. Similarly, you can replace a picture that you’ve inserted and positioned into a publication if you decide to go with another image.
To replace a placeholder image, right-click on it to display a shortcut menu. (If the picture frame is grouped with a text frame for a caption, right-click on the group first and click Ungroup. Then select the image itself and right-click on it.) Select Change Picture in the shortcut menu that appears, and then select Change Picture again in the submenu that appears. In the Insert Pictures window that appears, use the choices to insert a picture From a file (click the Browse link) or to choose Office.com Clip Art. From there, the steps work as previously described. The new picture takes on the styles and other formatting previously applied to the replaced placeholder image or picture.
If you have two pictures and want to swap their positions, for example placing picture A where picture B is and picture B where picture A is, you can now easily accomplish this. Click the first picture, and then Ctrl+click the second one. From there, you can either move the mouse pointer over the second picture and click the swap icon that appears or choose Picture Tools ⇒ Format Swap ⇒ Swap.
Formatting pictures
You can adjust numerous settings to fine-tune a picture and its placement, including settings such as an added fill color or outline, size and rotation, layout and text wrapping, and brightness and contrast. The available settings vary somewhat depending on whether the selected picture is a digital image file or clip art graphic, and whether the picture is inserted on its own or is within a frame that’s grouped with other objects.
The settings for formatting a picture appear in the Format Picture dialog box. To display the dialog box, right-click on the picture (right-click on the grouped object first and click Ungroup, if needed, and then select the picture alone), and then select Format Picture. Change settings on the tabs in the Format Picture dialog box (Figure 31.21) as needed, and then click OK to apply your choices to the picture.
FIGURE 31.21 The tabs in this dialog box offer numerous settings for fine-tuning the appearance of a picture.

Adding picture effects
The Picture Tools ⇒ Format tab includes a number of settings for jazzing up a picture in its Picture Styles group. You can not only apply an overall style that may include cropping, a frame, and a shadow or reflection from the Picture Styles gallery, but you also can use the choices that appear when you click the Picture Border or Picture Effects buttons in the Picture Styles group. Use the Caption button in Picture Styles to add a caption for a picture.
Drawing lines and shapes
You also can enhance a publication by drawing shapes using the Shapes choices in the Illustrations group of the Insert tab. For example, you might draw an arrow to point to an important piece of information or draw a banner AutoShape to layer behind headline text.
To draw the shape, click Insert, and then click the Shapes button in the Illustrations group. Click on the desired shape in the gallery that appears. If you click the AutoShapes button, a menu appears. Click on a shape category in the menu, and then click the specific AutoShape you want to draw in the submenu that appears, as shown in Figure 31.22.
FIGURE 31.22 You can select one of dozens of shapes to draw.

After you’ve selected the desired line or shape, drag on the publication page to draw the object. Keep these hints in mind when you draw and work with shapes:
- Drag in the desired direction to create a line or arrow. If you want to help the line snap to vertical, horizontal, or a 45-degree angle, press the Shift key when your line is close to the desired angle.
- Drag diagonally to draw an oval, rectangle, or other shape. Press and hold Shift as you drag to constrain the shape to proportional dimensions; doing so results in a perfect circle or square, or an AutoShape that fits within a perfect circle or square.
- Some shapes include a special yellow handle when selected. You can use this handle to reshape the object, such as dragging to increase the three-dimensional (3-D) angle of the shape.
- Right-click on a shape and then select Format AutoShape to display the Format AutoShape dialog box, where you can change shape settings, as for a picture. One cool thing you can do is insert a picture within a shape or AutoShape. To do so, click the Fill Effects in the Fill area of the Colors and Lines tab. Click the Picture tab in the Fill Effects dialog box that appears, and then use the Select Picture button to open the Select Picture dialog box. Navigate to and select the desired picture file, click Insert, and then click OK twice to fill the shape.
- Right-click on a shape, and click Add Text to insert text within it.
- To be able to reuse a shape that you’ve formatted, right-click on it and choose Save as Building Block. Specify the desired information in the Create New Building Block dialog box, and then click OK. You can then use the gallery you specified in the dialog box to insert the shape from the Building Blocks group of the Insert tab.
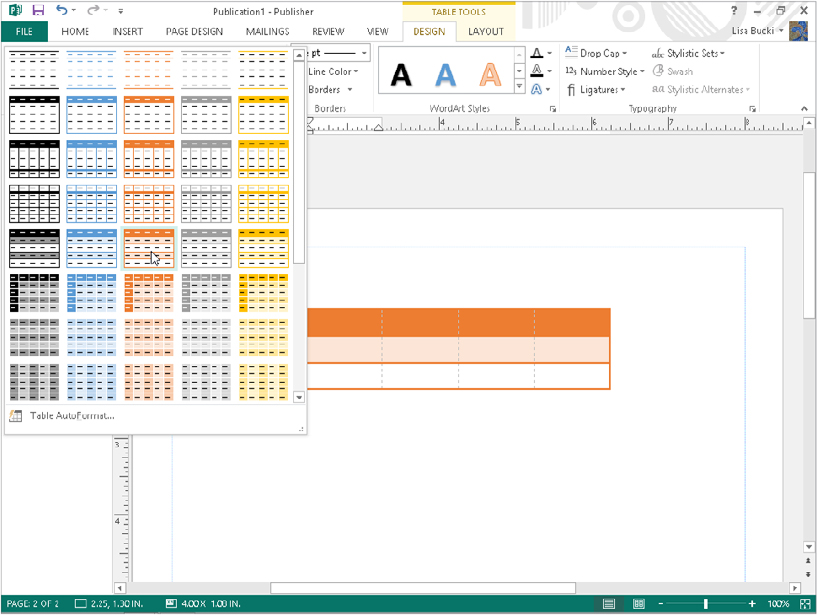
Working with Tables
When you need to organize information in a series of rows and columns, you don’t have to draw and arrange a text box for each bit of data. You can instead create a table, which has cells formed by the intersections of rows and columns. When you create a table using these steps, you specify the number of rows and columns and pick the initial table design:
FIGURE 31.23 Create a table by specifying rows, columns, and format.
Entering and editing table data
When the new table appears, the insertion point appears in the upper-left cell. Simply type the entry for each cell, and press Tab to move on to the next cell. If you type more text than the cell can initially handle, Publisher wraps the text to the next line and increases the row height as needed. You can press Shift+Tab to back up to a previous cell as needed.
To edit the entry in any particular table cell, click on the cell and then make the desired changes by selecting and replacing text or using editing keys such as Backspace. When you finish entering and editing table text, click outside the table to deselect it.
You can then click on a table at any time to reselect it.
Working with the table format
As with other objects you’ve seen in this chapter, you can right-click on a table and then click Format Table to open the Format Table dialog box. Note that the settings on the Colors and Lines tab apply only to the selected cell–the cell upon which you right-clicked to open the dialog box. If you want to work with colors and fills for more than one cell, you have to select those cells before right-clicking and selecting Format Table. To select cells, first click on the table. Then drag over the cells to select. You also can move the mouse pointer outside the table boundary above a column or to the left of a row that you want to select. When the mouse pointer changes to a black arrow pointing to the row or column, clicking the mouse selects the entire row or column. Also note that the Format Table dialog box includes a Cell Properties tab, on which you can change the vertical text alignment, margins, and text rotation for the selected cells.
One last table skill that’s handy to know is how to resize the width of a table column. To do so, point to the right border of the column until you see the resizing pointer, which appears in the Tuesday through Thursday row in Figure 31.24. Then drag left or right to fix the column width as desired.
FIGURE 31.24 Drag a divider to resize a table column.

Summary
Making it through this chapter provided you with the basic know-how for creating a publication in Microsoft Publisher. You learned to work with the features of the Publisher workspace, as well as how to:
- Create a blank file or a file based on a template supplied with Publisher or a featured template from Office.com.
- Add text into a text box supplied by a template or create a text box and type in text.
- Insert text from a word processing file.
- Format your text with formatting tools, styles, text effects, and a font scheme.
- Use the Measurement pane to format objects.
- Insert, create, and change graphics and tables to enhance the publication’s appearance and supplement the message delivered in the text.