
In Chapter 2, you saw how you can create business objects, either manually or by importing an Excel spreadsheet or CSV file, and in Chapter 4 you saw how to create a web application for the user to interact with data. In this chapter, we will discuss how developers and administrators can manage Visual Builder Cloud Service data.
Visual Builder Cloud Service stores all its data internally (in an Oracle database), but you cannot just connect to the VBCS database from a database development tool. Instead, you must use the built-in VBCS features to export and import data to and from comma-separated files and Excel spreadsheets.
VBCS also offers you the ability to edit individual rows and functionality to move data between the development, staging, and production environments. There is even an option to publish your business object data as REST services for other applications to use.
Creating Individual Records
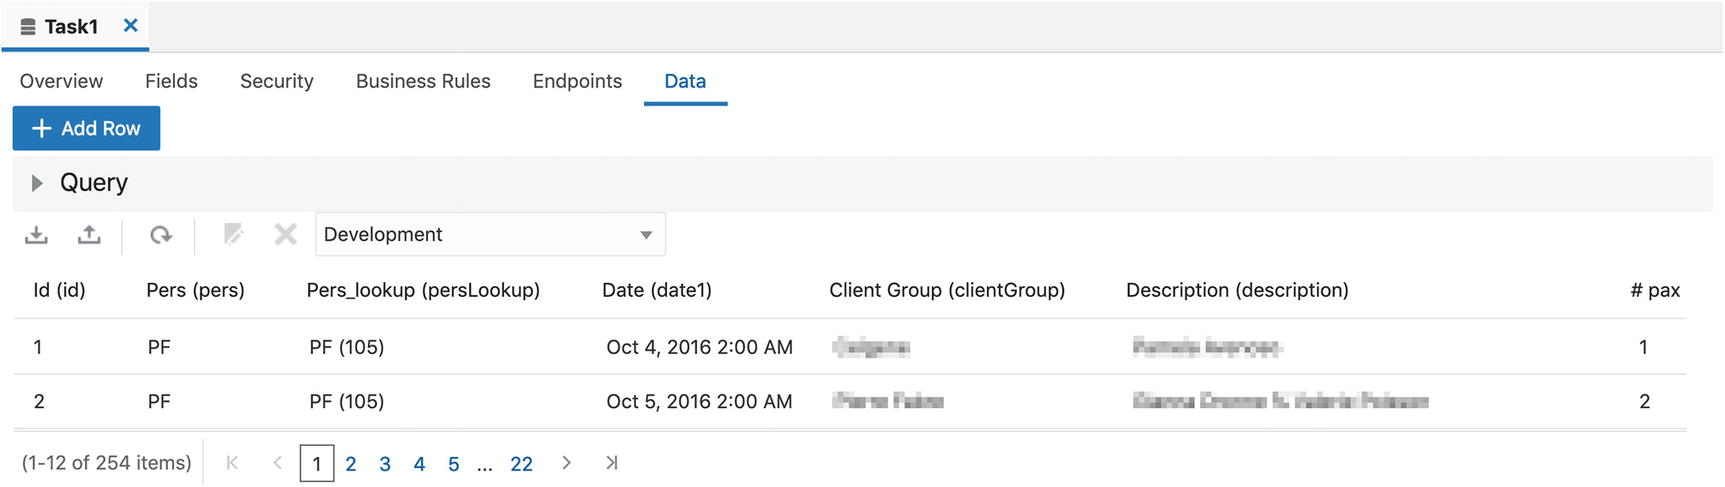
The Data tab for a business object
From here, you can create a new business object instance by clicking the Add Row button.
If you have a lot of data in your business object, you can click the little triangle next to Query to expand the query panel, where you can add query conditions. When a row is selected, you can also edit or delete it.
Note
The drop-down in the toolbar shows which environment you are working on. Initially, you only have the option Development, but as you stage and release your application, the options to work with data in the Staging and Live environments become active.
Exporting Data
To export the data from a single business object, you use the Export CSV icon on the Data tab of the object (the second from the left, with an up arrow). This downloads a CSV file with the same name as your business object, containing all the data in the business object. There are no decisions to make – you simply get all the values in the business object with one record per line and fields separated with commas. Any Date or DateTime fields are stored in YYYY-MM-DDTHH:MI:SS format (where the time part is 00:00:00 for date fields), and time fields are stored in THH:MI:SS format.
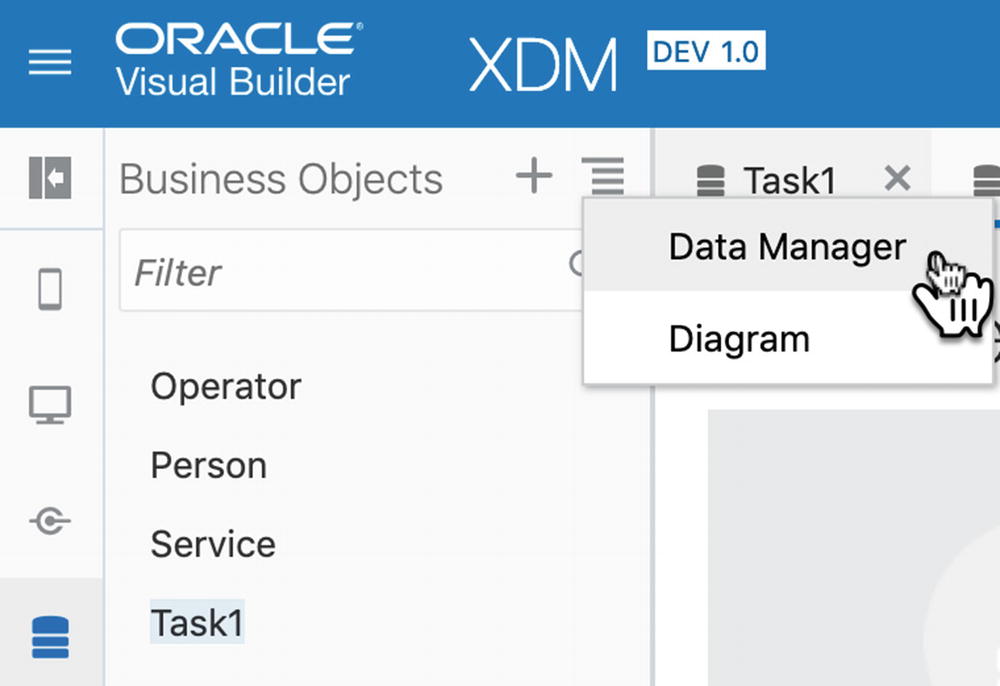
Accessing the Data Manager
Note
At the top right corner of the Data Manager window is a drop-down showing which environment you work on (Development, Staging, Live).
The Data Manager has an Export All Data option, which downloads a ZIP file containing CSV files for all business objects. The file name seems to be your application ID twice, followed by the version number (e.g., XDM-XDM-1.1).
Importing Data
To import data into a single business object, you can click the Import from File icon on the Data tab of the object (the leftmost icon, with a down arrow). The Confirm Import Data dialog appears, where you can upload a file. You can also choose whether you want to Append the records from the file to the data already in the business object, or if you want to Replace all existing data.
Tip
The file you import must match the business object exactly. If any column header is misspelled just slightly, that column will be ignored. If you want to import data from a file, it is easiest to start by creating an export file from an empty business object. In that way, you have a file with the right format and all column headings correct.
You can also import data into multiple business objects in one operation from the Data Manager. The Import from File option will replace all data in your current environment with the data in the file or files.
Caution
Check the value of the environment drop-down at the top right corner of the Data Manager window to make sure you won’t accidentally overwrite production data.
An individual CSV file.This replaces the data in the business object with the same name as the file.
An Excel spreadsheet.This replaces the data in all business objects that have the same names as sheets in the spreadsheet.
A ZIP file.VBCS will unzip it and then process any CSV and/or Excel files as described earlier.
Moving Data Between Environments
As you saw in Chapter 1, one instance of Visual Builder Cloud Service contains development, test, and production environments. Each of these environments has its own database, and VBCS makes it easy to move data between databases.
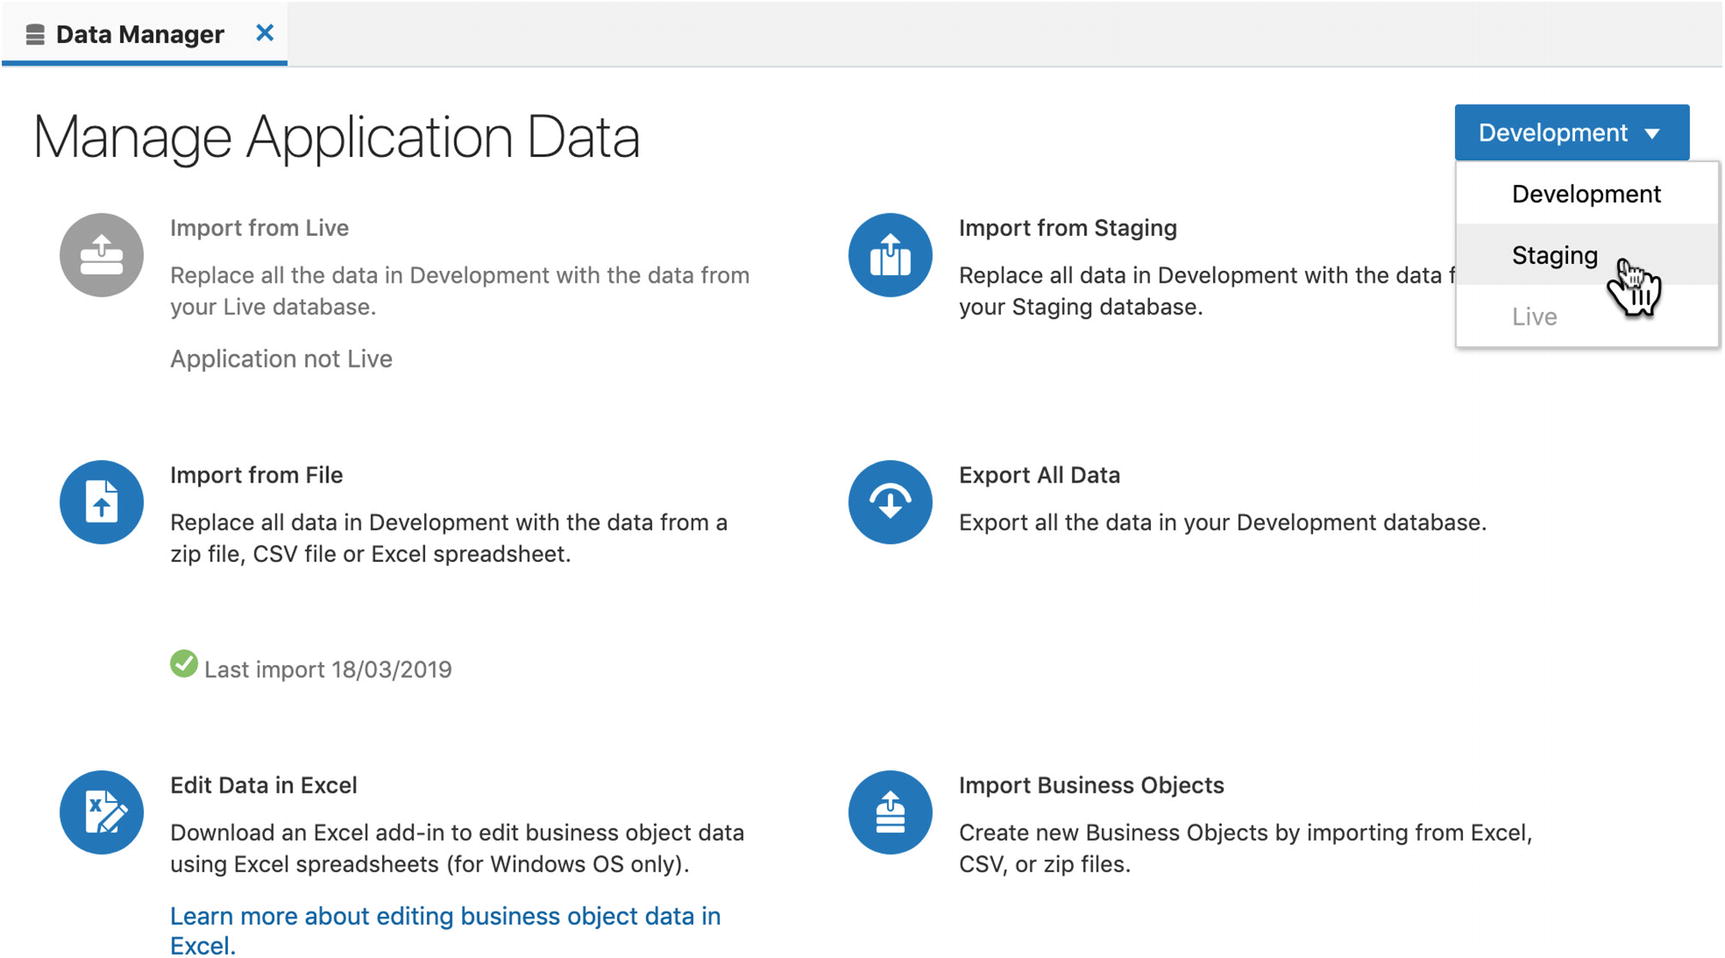
Moving data between environments
Depending on your selection and the life cycle of the application, VBCS will offer you the data movement options that make sense. In the example in this figure, I have selected the Development environment and get the options to Import from Live and Import from Staging. If you choose Staging, you can import from Live and Development, and if you choose to import to the Live environment, you get the options to import from Staging and Development. If the application is not staged or live, the corresponding option is, of course, grayed out.
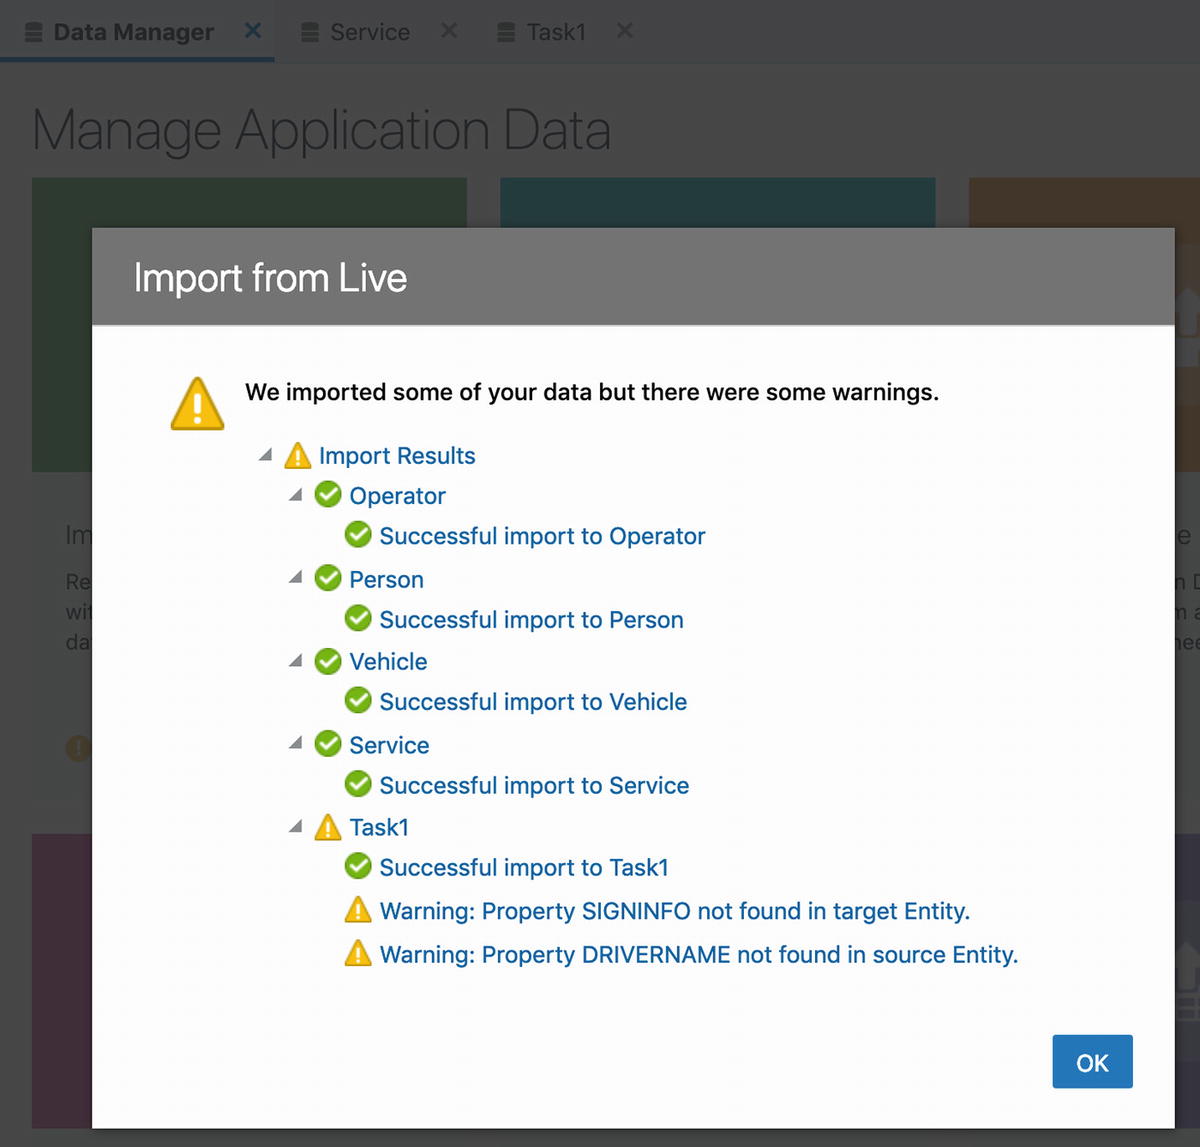
Warning dialog on import with changed data structure
If you have added or removed fields, you will get a warning, but the import still completes. You will need to decide whether you need to do anything about it. If you have made significant changes to your data structure, it is often easiest to use the Export All Data feature to get all your data out into text files, process these text files, change to your target environment, and use Import from File to put your data into the new format business objects.
Accessing Business Objects with REST
In addition to the data import and export features from the Data Manager, Visual Builder Cloud Service also allows you to access the REST interfaces it has built for use by VBCS web and mobile applications. This makes it possible for other VBCS applications and even applications outside VBCS to access data in VBCS business objects.
Before you can access the business objects in a VBCS application from outside, you need to change the Security settings for your application and enable role-based security for each business object you want to expose to external users. This is described in Chapter 10 on security.
Business Object Endpoints
When you use business objects on the web or mobile pages of a Visual Builder Cloud Service application, you are interacting with REST web services that VBCS has automatically created for you. VBCS normally shields you from having to know about these services in detail, but if you want to access your business objects from outside the VBCS application, you will need to know.
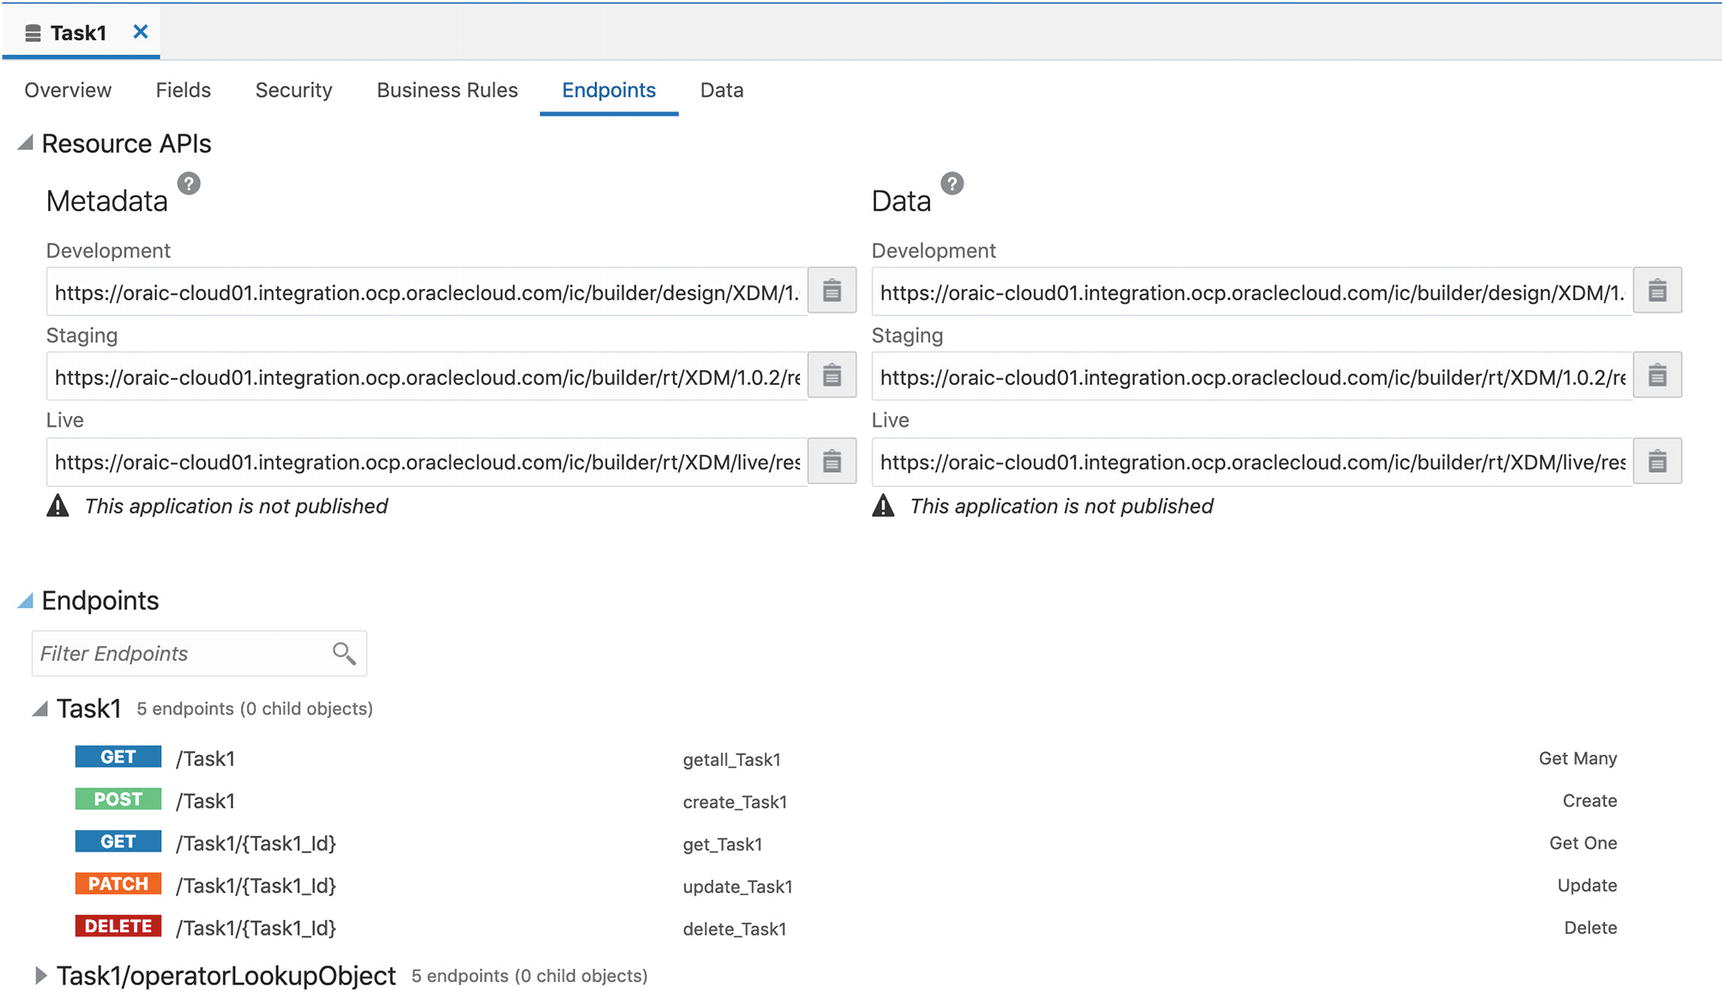
REST endpoints for business objects
Metadata Endpoints
Connecting to the metadata endpoints will give you a lot of metadata about your business object, including all the attributes and all the operations offered by the REST API. The result of calling the metadata endpoint is a very long JSON file that you would typically not have any use for.
Data Endpoints
The first part is the actual data, followed by some links that allow you to navigate to related items. At the end of all the data, you get some information about the request – in this case, that there were 25 records retrieved (count: 25) and there are more (hasMore: true).
There are different endpoints for the development, staging, and live environment. A warning will be displayed on the screen if the application has not been staged or made live yet.
Operation Endpoints
A GET endpoint for retrieving multiple business object instances
A GET endpoint for retrieving a single business object instance
A POST endpoint for creating a single business object instance
A PATCH endpoint for updating a single business object instance
A DELETE endpoint for deleting a single business object instance
The endpoints are listed in abbreviated form (e.g., /Task1 or /Task1/{Task1_id}). The full endpoint is the one listed as Data endpoint (e.g., https://oraic-cloud01.integration.ocp.oraclecloud.com/ic/builder/design/XDM/1.0.2/resources/data/Task1 ).
Note that the dialog box shows a warning for the staging and/or live URLs if you have not yet staged the application or released it to productions.
Example of Accessing a Business Object Externally
To test REST access to a business object, you can use a tool like Postman ( www.getpostman.com/ ).
To get data, you need to enable access in the application security settings, for instance, by obtaining an access token – a long string like you saw in Figure 5-6. Then you need to go to the business object you want to access and get the data endpoint for the business object you wish to access.
- 1.
Choose the method (GET, POST, PATCH, DELETE)
- 2.
Enter the data access URL
- 3.
On the Authorization tab, choose Bearer Token and paste in the token value
- 4.
Click Send
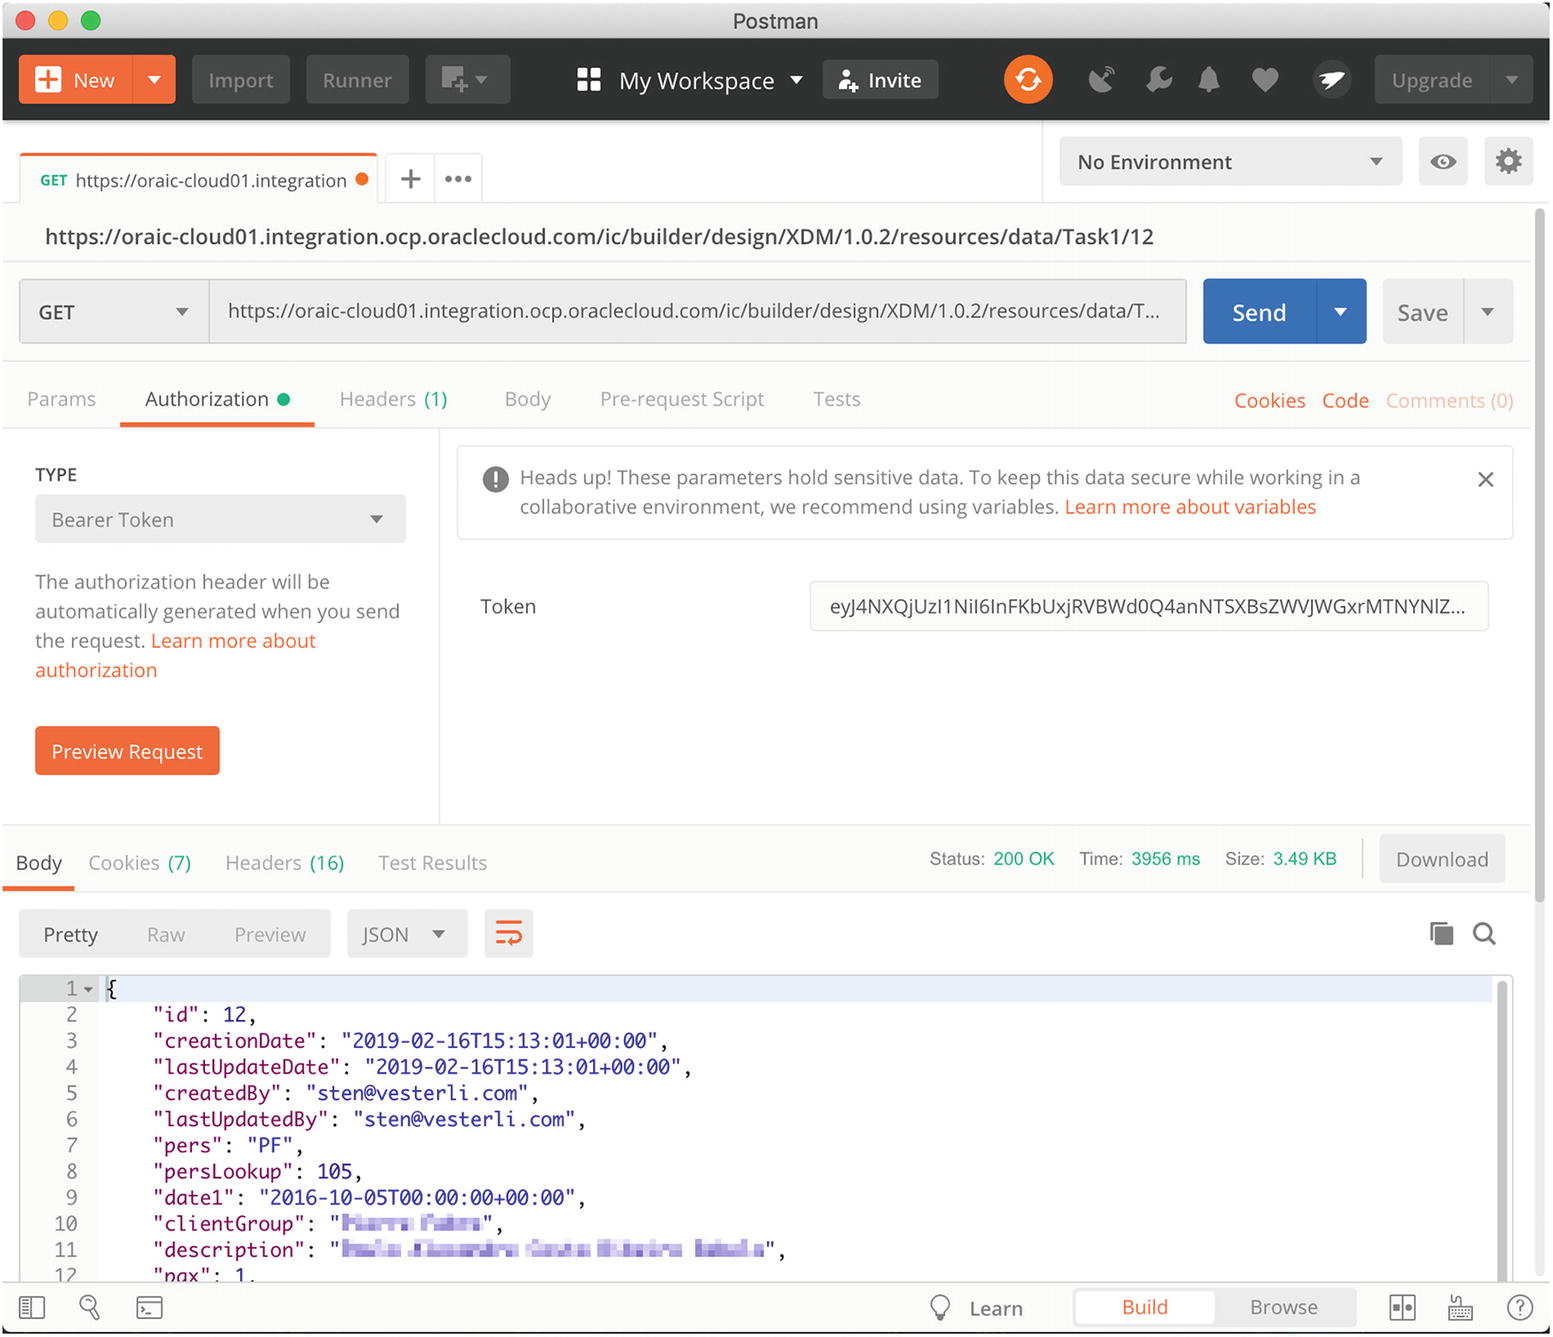
Getting an individual record using Postman
To update an item and create it if it doesn't already exist, you use an “upsert.” This is done by sending a POST request to the general business object URL. Do not include an ID in the URL. Use the normal Content-Type of application/vnd.oracle.adf.resourceitem+json, an additional HTTP Header Upsert-Mode: true, and a JSON payload including an Id value.
To delete an item, you send a DELETE request to the specific URL for the object you want to remove, that is, the URL should include the ID value.
For more information about how to access business objects through REST, refer to the manual “Oracle Cloud Accessing Business Objects Using REST APIs.” You find a link to this on the VBCS documentation page.
Conclusion
In this chapter, you have seen how to work with the data in business objects. You’ve seen how to create individual records and how to import and export multiple records from and to a business object. You have also seen how to move data between environments and how to access your VBCS data from outside the VBCS application.
In the next chapter, you will see how to add logic to your business objects.