
8 Managing Projects Effectively
In this chapter
![]() Learn how to develop a project plan
Learn how to develop a project plan
![]() Create your project plan
Create your project plan
![]() Discover ways to track project plans electronically
Discover ways to track project plans electronically
![]() Learn effective ways to implement projects through task management and monitoring, and organizing documentation
Learn effective ways to implement projects through task management and monitoring, and organizing documentation
In today’s business world, almost everyone has projects to manage. Whether you are an administrative assistant or a CEO, project management is part of your job. And, from the annual holiday party to a company relocation or the implementation of new strategic initiatives, each project needs management and planning. Our business culture is one of change and continuous improvement. Individuals who can effectively implement projects are becoming more and more in demand in the workplace. Even in the hit show The Apprentice, the participants are rated on their project management skills, including management, communication, delegation, and effective project planning.
The definition of a project is simply a “planned undertaking.” Projects can be large or small, but the key to any successful project is effective planning. The initial planning you do with all projects will save you time in the future. All projects have various components in which each aspect should be addressed and defined before taking action. This helps to ensure that your project stays on track and you plan for any challenges or obstacles that might come your way.
It is important with all projects to learn how to break down the project into manageable action steps and integrate it into your day or workweek. Doing this keeps the project moving forward and avoids procrastination. In this chapter, we take you through a step-by-step process of how to develop a project plan and break down any project into manageable steps.
You also learn about the many options for organizing projects, both on paper and electronically. You can use project management software such as Microsoft Project or even spreadsheet programs such as Excel to track and plan projects. You also can organize projects in your electronic or paper time-management tool or software. In this chapter, you learn various ways to track and organize projects of many types.
Projects usually entail teamwork and good communication. Regular project meetings are therefore necessary to anticipate problems and to provide updates. After action items have been assigned or delegated, the project manager needs to follow up with team members to track their progress and encourage accountability. In this chapter, you learn how to effectively delegate project responsibilities and follow up on their progress.
To do list

![]() Determine the objective and purpose of the project.
Determine the objective and purpose of the project.
![]() List all the action steps needed to complete the task.
List all the action steps needed to complete the task.
![]() Estimate the time and determine due dates with each task.
Estimate the time and determine due dates with each task.
![]() Develop a budget and estimate costs.
Develop a budget and estimate costs.
![]() Assign tasks to specific individuals.
Assign tasks to specific individuals.
Whether your project is large or small, it is important to define and consider all aspects of it before beginning. Understanding how you will approach the project helps you organize and implement the project more effectively. If you can master the project planning process, it doesn’t matter what type or size of project you have; the same methods will apply.
Projects take longer and are more time-consuming if you skip the project planning phase. Some project teams jump right into the implementation stage without planning beforehand. This inevitably makes the project take longer and causes more wasted time through lack of proper focus, guidelines, and structure. In this section, you learn how to structure and plan your project effectively, so you know exactly what must be done, when it must be done, what will be required to complete the project, and who will complete each step.
Things You’ll Need ![]()
![]() Computer software tools such as Microsoft Word, Excel, or Project
Computer software tools such as Microsoft Word, Excel, or Project
![]() Notebooks, file folders, hanging folders, magazine boxes, and labels
Notebooks, file folders, hanging folders, magazine boxes, and labels
![]() Project forms, spiral notebooks, or project planning day planner pages
Project forms, spiral notebooks, or project planning day planner pages
Before beginning any project, you and your project members need to determine the objective and purpose of it. This often is the most overlooked and disregarded aspect of project management. Knowing the purpose and goal helps you, and others, make appropriate decisions and choices during planning and implementation. Clarifying priorities and aligning team members help keep projects focused and on task. A lack of understanding of the ultimate purpose of the project can hinder and delay decision-making, and it can lead to failed projects. Take the time to think through the objective and purpose of each and every project. If you have done the project before, review the lessons you learned that you would want to incorporate into goals for the upcoming project. If management delegated this project to you, clarify their expectations and objectives of the project. Discuss or consider these questions to help determine the objective and purpose of your project:
• What is the ultimate goal of the project?
• Which objectives will be met if the project is successful?
• Of those objectives, which one is the most important? Why?
• What expectations does management have of this project?
• What lessons have been learned from similar prior projects?
When you’ve answered the questions, use your answers to develop a consolidated bulleted list of goals. To illustrate developing a project plan, let’s use an example of planning a company-wide annual meeting of 100 people that will be held in mid-December. Here are the goals for this sample project:
• To communicate to employees the strategic plan for the coming year (most important)
• To build colleague rapport and enforce the company’s mission and values
• To reach 90% of attendance with all staff members
• To have an enjoyable and fun event
After the objective is determined, create a separate task list detailing all the action steps required to accomplish the project. Projects don’t get done in one giant step but through multiple baby steps. Breaking down the tasks can be done formally or informally through a variety of methods, such as facilitated meetings, brainstorming sessions, mind-mapping, or freehand writing. Whichever method you choose, you should have a complete list of every action step needed to complete the project.
Techniques for Breaking Down Tasks

If you’re unfamiliar with the techniques recommended in this chapter for breaking down tasks into more manageable chunks, you might have a hard time choosing a method that works best for you. These short descriptions might help:
• Facilitated meetings—A facilitated meeting is a guided meeting lead by a neutral person (generally not a group participant or leader). The facilitator helps manage group processes and dynamics to ensure that a meeting is well-run, remains focused, and addresses essential issues and topics. Facilitated meetings work well for large projects.
• Brainstorming sessions—The act of brainstorming involves focusing on one particular topic or problem and thinking through all the possible ideas or solutions. Brainstorming is designed to determine the best approach, no matter how unconventional, radical, or improbable it seems. When brainstorming is in process, someone in the group should record all the ideas on a tablet or easel. At the end of the session, the group reviews and organizes the ideas into groups and a timeline. For more detailed information about how to do brainstorming, visit the Mind Tools website at www.mindtools.com/brainstm.html.
• Mind-Mapping—Mind-mapping is a technique used to unleash ideas from the brain. Mind-mapping starts with writing a topical word or phrase on a sheet of paper. From that word, you draw lines out and write additional words, pictures, or graphics that relate to subheadings or topics from that word. Then, from those words or graphics, you draw additional lines. For more information about mind-mapping, visit the websites of the originators of the technique—Tony Buzan (www.mind-map.com) and Peter Russell (www.peterussell.com).
• Freehand writing—Freehand writing is a conventional way in which to write down ideas on a piece of paper. You write down the topic at the top of the paper and list bulleted words or phrases that relate to that topic. Your mind might come up with ideas in a logical sequence or not. With project planning, write down all the action items in a list view. When you complete the freehand list, you can organize it into categories, a timeline, and a priority structure.
You will find in the initial breakdown process that large tasks are identified as major components of the project. After the major components are identified, break those down even further into smaller tasks. Depending on the size of the project, you might have to break down tasks into even smaller tasks. Ideally, you should have the project broken down so that each task takes less than 4 hours to complete (this is merely a guideline, of course).
You will edit, add to, and delete from the task list throughout the life of the project. However, it is important at this stage just to write all the foreseeable action steps you need to complete and break them down into manageable steps.

Don’t forget to consider the final action steps necessary to wrap up a project after the main tasks are completed. These final action items could include
• Writing the final report
• Sending thank-you notes
• Processing bills and invoices
• Developing the final financial report
• Providing training to staff or colleagues to maintain the project
• Evaluating or discussing the lessons learned
• Writing or discussing the project performance with team members
These action items are easy to overlook and leave out of the original plan, and project staff can find themselves scrambling to complete them at the last minute. Don’t forget to add these wrap-up tasks to your project plan so they are not forgotten.
Determining time and due dates for each action step establishes the sequence in which tasks should be completed. Begin by determining an exact (or optimal) due date for when the entire project should be completed. In the case of our example, the annual company meeting is to be held December 15. Then, estimate the approximate or optimal deadline date for each action item within the overall project timeframe. This backward planning approach allows you to know before you start the project how much time you will need to allocate each week or day to complete it.
Then, assign an approximate amount of time that each action item will take. For example, if you need to develop handouts for the meeting, how long should this take you or someone else in the project team? In our example, we have estimated approximately one 8-hour day to develop handouts. This is only an approximation and can, or will, change as we proceed in the project. If you find, as in our example in Figure 8.1, that some action items will take longer than 4 hours, consider breaking them down even further, if possible. Add up the time needed and figure a total time needed each week to get the project completed on time.

Determine the priority level of each action step if you have a medium to large project. Clarifying priorities helps you know which tasks to address first when you are under tight deadlines and have limited time in the week. When you realize that you have limited resources and money, you can then address those actions that are critical versus merely optional. You can prioritize using the A,B,C or 1,2,3 coding system. Tasks prioritized as A or 1, for example, might be essential to the project’s success, tasks labeled C or 3 might be relatively inconsequential, and the B or 2-level tasks might be helpful elements of the overall project that should be completed if possible.
caution
Build in “margin” time for each project. Every project involves certain unplanned-for tasks, such as documentation review, an approval process, revisions/corrections, or the inevitable crises that occur. So, remember to build in extra time for tasks that need review or approval. Also, use your experience from similar projects to build in time for dealing with contingencies and unpredictable scenarios that might crop up during the course of your project.
To determine the budget for your project, you need to assign expenses to each applicable task in your task-list breakdown. Be sure to add in a cushion for hidden or unknown costs, such as cost estimates you have not received, mistakes or errors in quantity or amount ordered, or additional resources needed but not known at the time. You can either increase each line item by a certain amount or percentage (10%–15% is usually adequate) or add one total contingency amount line at the bottom for unknown expenses. Although you want the budget to be as detailed as possible, remember that it is merely an estimate of expenses to help you plan. If you are working with a mandated budget, you need to work backward from the total budget amount to ensure your action items meet your budget requirements.

For smaller projects, I recommend that you integrate the budget into the project plan; for medium to large projects, I suggest creating a separate document for budgets. Most project software programs, such as MS Project, have financial functions to help you develop budgets. You can also download Excel budget templates; go to Microsoft Online at www.microsoft.com and then click Templates from the sidebar list.
Here are some categories of costs you’ll need to consider when developing your project’s budget:
• Labor—Approximate cost of each staff person working on the project. This can be estimated by the total hours needed to complete the project and an average hourly staff rate.
• Vendors—The cost of consultants, vendors, and suppliers needed. Most vendors supply an estimate of costs to include in your budget.
• Supplies and materials—The cost of equipment, supplies, and materials that will need to be purchased such as tools, technology, and other miscellaneous items.
• Marketing and promotion—All costs associated with marketing and promoting the project, including advertising, printing, graphic development, and mailing.
• Profit and gain—Some projects require a profit or financial gain to be successful. This is especially true with donations given at fundraisers or silent auctions where there is not a set price or fee determined. This is usually an income line item based on projected profit. For example, if you are planning a fundraising event and expect 200 people to attend and give an average donation of $20, you would add $4,000 into the profit and gain line item.
• Revenue—Some projects procure revenue, such as events, parties, and fundraisers based on a set fee or cost for the project or event. Estimate the amount of revenue income based on projected attendance multiplied by the fee or cost.
Within project teams, it is important that each task be assigned to specific team members. In addition to team members, external vendors and consultants can be responsible for completing individual tasks. However, usually within a project team there is a designated point of contact for each vendor or consultant to oversee that the designated task is monitored and completed by the vendor or consultant. Tracking the person(s) responsible and points of contact helps you monitor and follow up with individuals or vendors as necessary. Assigning a responsible team member helps create accountability for each task within the project and helps ensure that all tasks are completed as scheduled.
During the course of project planning, there will be notes—comments you will want to track with each action item to provide additional information, guidance, or suggestions. I suggest you create a column or text area in your project plan to track this type of information, as shown in Figure 8.1. These notes could include the following types of information:
• Internet sites to get additional information or find resources
• Individuals who are not members of the project team but who might be additional resources
• Guidelines and restrictions to decisions
• Other resources that might be helpful to complete a task, such as files, documents, software, and so on
Project Management Resources

The following are some project management websites that provide useful resources to plan and implement projects:
• Columbia University (http://www.columbia.edu/~jm2217/#RecReading)—Columbia University has an extensive list of project management resources that include sample project templates, samples, guidelines, and links to other project-related websites.
• PM Forum (www.pmforum.org)—This site provides international information on project management resources.
• Project Magazine (www.projectmagazine.com)—This online site has some good, short articles on managing projects.
• Project Management Institute (www.pmi.org)—The group that hosts this site is the association for project management professionals. They offer training, workshops, and certification for project management.
So far, this chapter has discussed the benefits of developing a project plan. Now that you know the components of that plan, it’s time to learn how to create the actual plan, in either electronic or hard-copy form.
Your project plan or map helps you and everyone on the project team stay on track. You will view the project plan weekly and integrate the upcoming action items into your calendar and task list. And, you can distribute the project plan to all team members and external parties who’ll be participating in project tasks, including vendors, other colleagues, and management. That way, everyone who is interested in or has a stake in the outcome can track the project’s progress. Remember to assign responsibility for updating the plan to someone on the project team. Updates could be the responsibility of one person or all team members, but the responsibility must be formally assigned to ensure that the project plan is updated regularly.
Things You’ll Need ![]()
![]() Project management software
Project management software
![]() Computer/handheld device
Computer/handheld device
![]() Paper planning tool, if appropriate
Paper planning tool, if appropriate
For larger projects, you might want to consider creating the project plan within formal project management software, such as Microsoft Project, as shown in Figure 8.2. Most project management programs provide standard fields for tracking all the necessary information and tasks within the project. They also provide excellent timelines, charts, and graphs to help you graphically illustrate the project’s plan and progress. If you make adjustments to due dates, the software usually adjusts future tasks accordingly. I recommend that you use project management software for projects that involve more than six people and that will take more than 4–5 months to complete.

You don’t have to use sophisticated project management software to plan projects. Some teams purchase project software and never use it because no one on the team has time to learn how to use the software. Don’t let this be a barrier to planning your project and creating an electronic project plan. You can use a simple Excel spreadsheet or Word table for creating your project plan. Both formats are easy to email as attachments and don’t require the installation of special software. You can use Microsoft standard project planning templates located online or create your own. If you create your own project table, create the following headings: Task, Due Date, Approximate Time, Budget, Person Assigned, Resources, and Notes/Comments, as shown previously in Figure 8.1.
tip
For Mac users, Entourage software has a project management tool that provides a separate task list and the capability to link key emails and documents into one view. This enables users to see all the information related to that project in a single view. The latest version of Lotus Notes also has a built-in project management tool called TeamRoom, which is an information sharing, tracking, and communication tool that is excellent for teams that are dispersed geographically and not in one location.
You can also use the contact management (CM) or personal information management (PIM) software, such as Outlook, Lotus Notes, or GroupWise, to create your project management plan. With networked CM and PIM tools, you can create public or shared electronic task lists in the CM or PIM that can be viewed by everyone internally in your company. Usually you need your IT consultant to set up the shared task list. This saves the hassle of sending an updated version of document files to project team members each time an update is made. It also alleviates the need to learn a new project software. The other advantage of using existing company CM or PIM software is that tasks can be copied into your personal electronic task list or calendar, eliminating the need to reenter data.

If you are the only one involved in your project and you prefer handwriting your project plan, purchase graph paper or spiral bound project planners (manufactured by Tops Docket and Mead) that can help you write the plan in spreadsheet format. Some day planners also have separate note or graph pages designed for project planning. Or print a project template available online and handwrite the information. You can download an array of project forms from Project Connections (www.projectconnections.com) after you subscribe to the service (the first 15 days are free). Microsoft also has Excel to-do lists for project templates available for download free from its website at www.microsoft.com.
caution
One of the challenges with tracking handwritten project plans is that project plan information is continually changing; therefore, changing and updating handwritten project plans is more difficult and time-consuming. If you decide to use a handwritten project plan, be diligent about updating it periodically; otherwise, it will become too outdated for you to use or plan from.
In addition, wall calendars and planners can be used as project planners. These are useful if you want to have a visual reminder of your project in a conference room, a hallway, or an office. At-A-Glance (www.ataglance.com) manufactures a variety of undated eraseable wall planners and calendars that could be used for project planning.
Project Management Software

The following are some project management software packages that can help you plan, manage, and track projects:
• FastTrack Schedule (www.aecsoft.com)—FastTrack Schedule works with both PC and Mac systems. It also has the capability to synchronize with Palm OS handheld systems. This is handy if you need to have your project plan with you outside the office. This is a good, easy-to-use software for medium to small projects.
• Microsoft Project (http://office.microsoft.com/en-us/FX010857951033.aspx)—Microsoft Project is a good project management tool for large, complex projects that have multiple people and resources involved. The newer version of the software is on the higher price end.
• Milestones (www.kidasa.com)—Milestones sets itself apart from the other project management applications by its use and design of graphics within each window view. It creates beautiful illustrations of the project plan, schedule, and resources in a clear visual manner for presentations.
• Project KickStart (www.projectkickstart.com)—Project KickStart is good project management tool for medium to small projects. The software links with Microsoft Word, Excel, PowerPoint, and Project for the easy importing of data. It also links with most major project software.
To do list
![]() Integrate your project tasks into your calendar and/or task list.
Integrate your project tasks into your calendar and/or task list.
![]() Schedule regular project meetings.
Schedule regular project meetings.
![]() Monitor the project by planning follow-up calls or emails to other colleagues and project team members.
Monitor the project by planning follow-up calls or emails to other colleagues and project team members.
![]() Delegate effectively by providing all the necessary information to complete the task.
Delegate effectively by providing all the necessary information to complete the task.
![]() Create a project file in your paper, electronic, and email file structures.
Create a project file in your paper, electronic, and email file structures.
![]() Determine the best method (file folder, notebook, day planner, or magazine box) for organizing your paper documentation.
Determine the best method (file folder, notebook, day planner, or magazine box) for organizing your paper documentation.
Review the project plan weekly and integrate your designated action items into your own calendar and/or task list. Remember to check daily for those tasks you must complete and to allow yourself adequate time. If the task takes considerable time, thought, and development, consider planning it in the morning. If a task takes longer than 2–4 hours to complete, consider breaking it down into smaller action items you can accomplish throughout the day. If the task can’t be broken down, block out adequate time in your calendar for completing it and treat that time commitment just as you would that for a very important meeting. Remember to mark the task as “done” when you finish.
When you begin major action items for the project, stay on task until your task is completed. This allows you to stay focused, so you can move quickly onto the next task. Consider clearing your desk before you begin, so other documents and action items don’t distract you. Don’t overwhelm yourself by worrying about all the tasks that need to get done. Remember to do one task at a time—each baby step leads you closer to the project’s completion.
![]() Your project plan
Your project plan
![]() Filing folders, binders, expandable files, file boxes, and other filing materials, as appropriate
Filing folders, binders, expandable files, file boxes, and other filing materials, as appropriate
![]() Task manager/calendar
Task manager/calendar
Communication is key to any successful team project. The project manager or coordinator should monitor the project plan and follow up with the person responsible for each action item either on or just after due dates. Performing regular task follow-up is key to maintaining accountability for all individuals involved with the project. Projects often fail or become delayed because of a lack of follow-up or monitoring.

The project manager or coordinator should schedule follow-up calls or emails in her task-tracking tool. By scheduling the follow-up in your calendar, you’re more likely to keep on top of the project. If you are using your electronic task tool, use the notes section to track the follow-up actions you have taken with others. Note the date and time of the follow-up, whether you called or emailed, the status of that task, and the project completion date. Tracking this data helps you in the future, in case you need to follow up with that task again. And recording this information lets you forget it and move on, so you can concentrate on other tasks.
Schedule regular project meetings either weekly or monthly. Regular project meetings help identify problems and provide necessary updates for others. During these meetings, you have an opportunity to uncover developing problems and determine the appropriate corrective actions. All members should come prepared to update the team on the status of their action items. The project plan itself should be updated to reflect any changes in deadline dates or additional action items. In Chapter 9, “Maximizing Meeting Time,” we discuss in more detail how to have effective meetings.
Some tasks involve delegating responsibilities to others who are not part of the project team, such as an administrative assistant, an intern, other department personnel, or temporary help. These individuals won’t have as much information and background on the project, so you will need to provide complete instructions, guidelines, and parameters for the roles you are delegating to them. Poor delegation leads to incomplete or failed tasks—problems which more often than not could have been avoided with proper communication. Here are some guidelines for effective delegation:
• Review the overall objective and purpose—This gives the delegatee essential data to help implement the task and avoid procrastination and indecision resulting from lack of data.
• Establish deadline dates—Be clear about when you need the action item completed. Negotiate due dates as needed.
• Provide clear and concise guidelines—If there is a certain method in which the task needs to be completed, describe the method clearly. If the delegatee can determine the best way for completing the task, make sure you’ve communicated any important parameters.
• Give additional resources—Let the delegatee know whether there are additional resources that might be helpful in completing the task or in finding answers to questions or issues that arise. These resources could be other colleagues, websites, or paper or electronic files.
• Determine follow-up and reporting—Agree on the communication method (email or phone) and time intervals (daily, weekly, monthly) to follow up or provide updates on the task. This encourages the delegatee to be proactive with the follow-up and increases accountability with the task.
caution
Don’t delegate something just because you want it off your list. Think about whether it is truly worth anyone’s time before you delegate any task. Then, make sure you are really giving it to the appropriate person who has the skills to complete it successfully. Poor delegation, done for the wrong reasons, can leave others feeling resentful and undervalued.
tip
Assume positive intent with your fellow project team members. In today’s busy world, action items or response to communications can be delayed. Refrain from getting angry and assuming the worst about your colleagues because of lack of follow-through. Assume initially that your team members have the intention to complete the task. Find out what obstacles they are facing and help them work through a plan of action to address those challenges. This ensures good communication and builds teamwork.
There will always be supplementary documentation, financials, correspondence, and meeting notes you need to track with all projects. It is important to create similar project files in your paper, electronic, and email file systems. Consider how you want to subcategorize your project. One way is to break it down either by topic or chronologically. Parallel all your information systems so you have similar subcategories developed in each area, as discussed in Chapter 3, “Joining the Electronic Age of Organizing.” Here are some suggested subtopics to consider creating for projects:
• Project Plan or Map—This subcategory would include all documentation about the initial development of the project, the master project plan, and any other development notes.
• Project Meeting Minutes and Notes—This subcategory would include the regular meeting agendas, minutes, and notes. Ideally it is best to keep this in chronological order for quick access.
• Budget and Financial Reports—This subcategory would include all the draft and final budgets, periodic financial reporting, and invoices or bills received for the project.
• Marketing and Promotion Information—This subcategory includes all marketing, advertising, press releases, flyers, announcements, and any graphic work documentation.
• Vendor or Consulting Firm Documentation—If you have hired any vendors or external consulting firms, you might want to create separate subcategories for each vendor. This file would include cost estimates, proposals, contracts, and all deliverable documentation that was received.
• Large Task Information—Depending on the project and your role, there might be large tasks that need their own subcategories to manage the incoming data and documentation. You might need only one section for a large task or multiple sections for other large tasks, depending on the project. In our company meeting project example, there might be a separate section just for the program that would include documentation about speakers, agenda, team-building games, and handouts.

The following are some suggestions for various methods of organizing paper documentation for projects. Whichever method you choose, be consistent. If you create multiple areas in which to store project documentation, finding the necessary information can become difficult and time-consuming:
• Create a hanging file—You can designate a separate file drawer for one project or have one file drawer for multiple projects. Determine space based on the scope and size of the project. For a large amount of documentation, purchase box-bottom file or hanging folders or expandable pocket file folders (which also come hanging). Consider using color hanging or tabbed files to color-code projects to make the folders easy to see and recognize.
• Use a three-ring binder notebook—Three-ring binder notebooks are great tools to use for organizing project documentation. You can use tabs to designate the subcategories. Binders are especially useful if you need to be mobile with all your information at meetings or offsite.
• Use your paper planner—If you use a paper planner, set up a separate tab for each project. You can include a paper copy of the project plan as well as track meeting notes in this section.
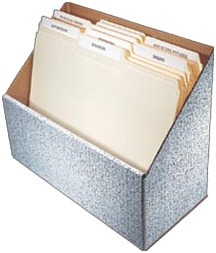
• Use desktop or file boxes—Desktop or file boxes that are made from cardboard or plastic can also be used to store project documentation. This is useful if you would like your project on your desk or bookcase for easy and immediate access. Wilson Jones makes an excellent product, Perma Easy Files, that are cardboard boxes designed to hold tabbed file folders, as shown in Figure 8.3. They can be purchased or ordered through your local supply store or online.
FIGURE 8.3 Shown here is the Wilson Jones Perma Easy File, which can be used to help organize project documentation and files. For more information about this product, visit www.wilsonjones.com.
Learning how to effectively plan and manage projects helps you complete projects on time and on budget. Whether you are planning small or large projects, implementing a standard approach to planning all your projects guides you toward becoming a successful project manager. All projects require teamwork, and it is important for the entire project team to be accountable and organized to help ensure project success. In this chapter, you learned these guidelines for successful project planning:
• Plan your project before beginning, and determine the goal and purpose.
• Create a project plan and refer to it weekly; integrate upcoming action items into your daily or weekly calendar.
• Be mindful to communicate all guidelines when delegating tasks to other colleagues.
• Be consistent when organizing project documentation in your paper, electronic, and email files.
In the next chapter, “Maximizing Meeting Time,” you learn how to have effective meetings. We will discuss the importance of agendas and taking meeting minutes and cover the necessary roles each of us has in meetings.