
Allowing File Uploads
You want a way for readers to communicate with you through your web site. This is commonly done through email, but sometimes the visitor may want to send something—a picture or a music file, perhaps. PHP allows you to upload a file through a form and send it to the web server. Let’s take a look at how to do this.
Remember that when using forms you can choose either GET or POST. PHP file uploading works best with POST.
HTML Program
I’ve created the form that allows for selecting a file. This one allows you to select a file from anywhere on your computer, and then it creates a submit button that lets the visitor send the file through the browser. Check out the code that makes this happen, then look at Figure 14.1.

<!DOCTYPE html PUBLIC "-//W3C//DTD XHTML 1.0 Strict//EN"
    "http://www.w3.org/TR/xhtml1/DTD/xhtml1-strict.dtd">

<html>
<head>
<title>Upload Form</title>
</head>

<body>
<form action="phpft14-01.php" method="POST" enctype="multipart/form-data">

   <input type="hidden" name="MAX_FILE_SIZE" value="30000" >
   Please select file to upload: <input name="filename" type="file" >

   <br><input type="submit">
</form>
</body>

</html>
enctype
Notice that the form has several familiar parts, such as method and action, but there is something special: enctype. What is this? enctype stands for encoding type, and it tells the PHP server that the form is going to send something other than regular text and field data. Instead, it sends a data file called form-data.
input
Another weird thing is the first input inside the form, with type being set to hidden. This input parameter defines the file’s maximum size. Right now, it is set to 30,000 bytes. You can adjust this to any value you like by altering the value parameter. Just make sure that the name of this input field is MAX_FILE_SIZE.
It is important you use MAX_FILE_SIZE. It prevents any uploaded file from being over the specified size. Someone can try to upload gigantic files that can use up your file space or server bandwidth. If someone has malicious intent, he can use file-uploading forms in what is called a denial-of-service (DoS) attack.
Browse
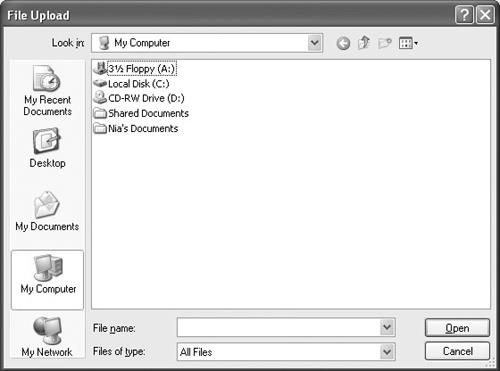
Lastly, because it is a file-upload form, the last field has a type of file, which creates a Browse button that lets the user select a file to upload. A box pops up like the one in Figure 14.2 when you press the Browse button.
Writing the HTML page that sends the file to the server is the easy part. Let’s make the PHP program to write it permanently to the server!
PHP Program
Take a look at the PHP you need to deal with file uploads.
Arrays
When submitting a file through a form, the server creates an array that holds the uploaded files. Remember when we used sessions and had the $_SESSION array?
It’s a lot like that. The $_FILES array stores five pieces of information about the uploaded data. These data are stored in multidimensional arrays:
The first dimension is the name of the input field from the form on the previous page. (In the preceding example the field name was filename.)
The second dimension is the name of the information field.
Table 14.1 lists the five options. You won’t use all of these, but keep in mind that you have the option to use any of them whenever necessary.
| Array | Description |
|---|---|
| $_FILES['.lename']['name'] | Stores the name of the original file from the sender’s computer. |
| $_FILES['.lename']['type'] | This is the MIME file type, defined by the browser. video/mpeg is an example. Figure 14.3 shows www.iana.org/assignments/media-types, where you can find out more. |
| $_FILES['.lename']['size'] | The uploaded file’s size in bytes. |
| $_FILES['.lename'] ['tmp_name'] | When uploaded, a file is given a name on the server. This field stores the name of the temporary file. The file is quickly moved and no longer temporary after the full action is complete. |
| $_FILES['.lename']['error'] | This is the error code, if any, associated with the uploaded file. |

move_uploaded_file()
When a file is uploaded to your server, it is placed in a temporary directory. This directory is a standard temporary directory, unless you change the upload_tmp_dir in the php.ini file. You generally don’t need to change the temporary directory. We need to move the file from the temporary directory to a directory of our choice. To do this, we can use a PHP function called move_uploaded_file(). The declaration for this function follows:
move_uploaded_file($filename, $destination)Both $filename and $destination are strings that hold the path and name of the file.
To use this function, we use the $FILES['filename']['tmp_name'] data in the array as the beginning $filename and the name of the original file as the final destination. Let’s make this happen. First of all, we need to define the folder on the server where the file will be located. We can then tag on the filename to get the file’s full $destination. Let’s look at how this might be done:
$destinationdirectory = 'C:PHPuploads'; //Can be any directory on the
  server
$destination = $updirectory . basename($_FILES['file']['name']);
This makes sense, right? We just created a string, $upfile, as the final $destination. You might have noticed this new function, $basename(). This function removes any directory structure from a filename and returns the actual filename. So, if you were to input basename("C:windowsdesktopindex.html"), the function would return index.html as a string.
Note
This program only works if you have your directory set to read/write by anyone. If you are using a UNIX server, you must chmod the final directory to 777. Otherwise, make sure anyone has read/write privileges on the directory.
Now that we have this string created, we can use the move_uploaded_file() function! Two cool things to note:
If you use this function and it returns an error (for whatever reason), the function returns a Boolean false; if it is successful, it returns true.
You’ll notice the new function print_r(), which prints out all the information about an array in one command.
Put it all together to make our final document:
<?

$updirectory = "c:phpuploads\"; //Can be any directory on the server
$upfile = $updirectory . basename($_FILES['file']['name']);
echo $upfile;

echo "<pre>";
if (move_uploaded_file($_FILES['file']['tmp_name'],$upfile))
{
   echo "Congrats! File was uploaded!";
}
else
{
   echo "File was not uploaded. There was an error.";
}

echo "Let's see some info about the file!";
print_r($_FILES);
echo "</pre>";

?>
Pretty cool huh? Figure 14.4 shows the results if you uploaded a file called test.txt.

Not too shabby. The program tries to move the file and then tells the user if the uploading was successful. Notice the code at the end of the document:
echo "Let's see some info about the file!";
print_r($_FILES);
echo "</pre>";
This function, print_r(), writes out the contents of an array in human readable terms. As you can see in Figure 14.4, this function prints the array as follows:
[file] => Array
   (
      [name] => test.txt
      [type] => text/plain
      [tmp_name] => C:PHPuploadtempphpC9.tmp
      [error] => 0
      [size] => 4
   )
This explains everything there is to know about the file. Notice the use of the <pre></pre> tag. This tag makes the new lines in the document’s HTML code appear as new lines on the web browser screen, rather than simply disappearing. Without it, the program would look like Figure 14.5. Looks a lot harder to read, huh?
