
Robin
Whether you make a realistic-looking bird or something more fanciful, a papier-mâché bird will look amazing perched in your home. These are quite addicting to make, so be warned: You may end up with an entire flock!
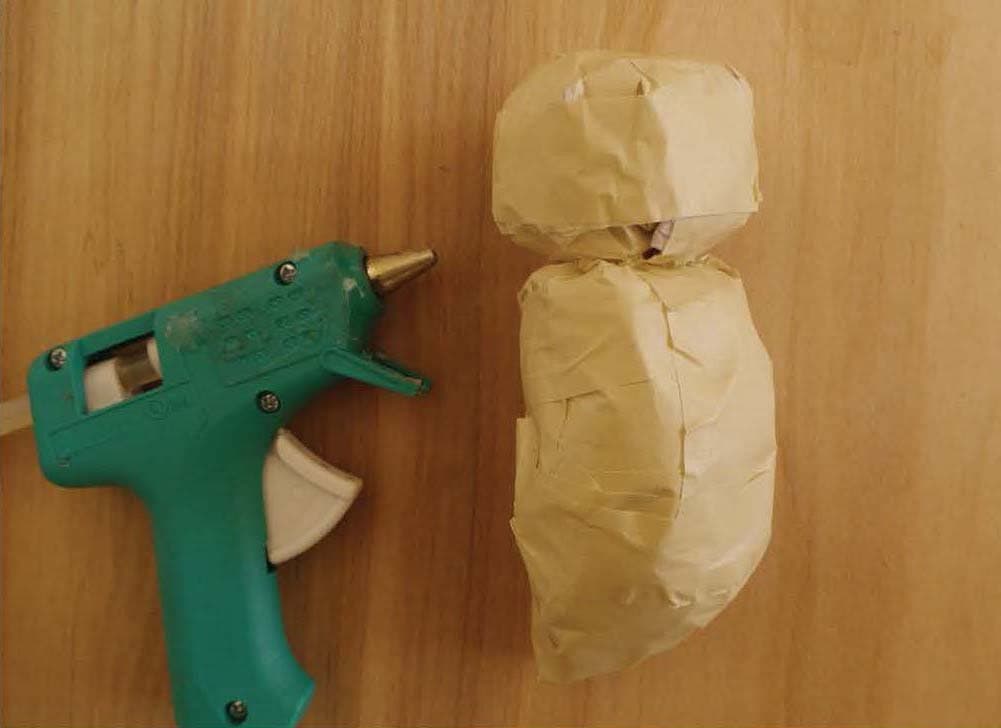
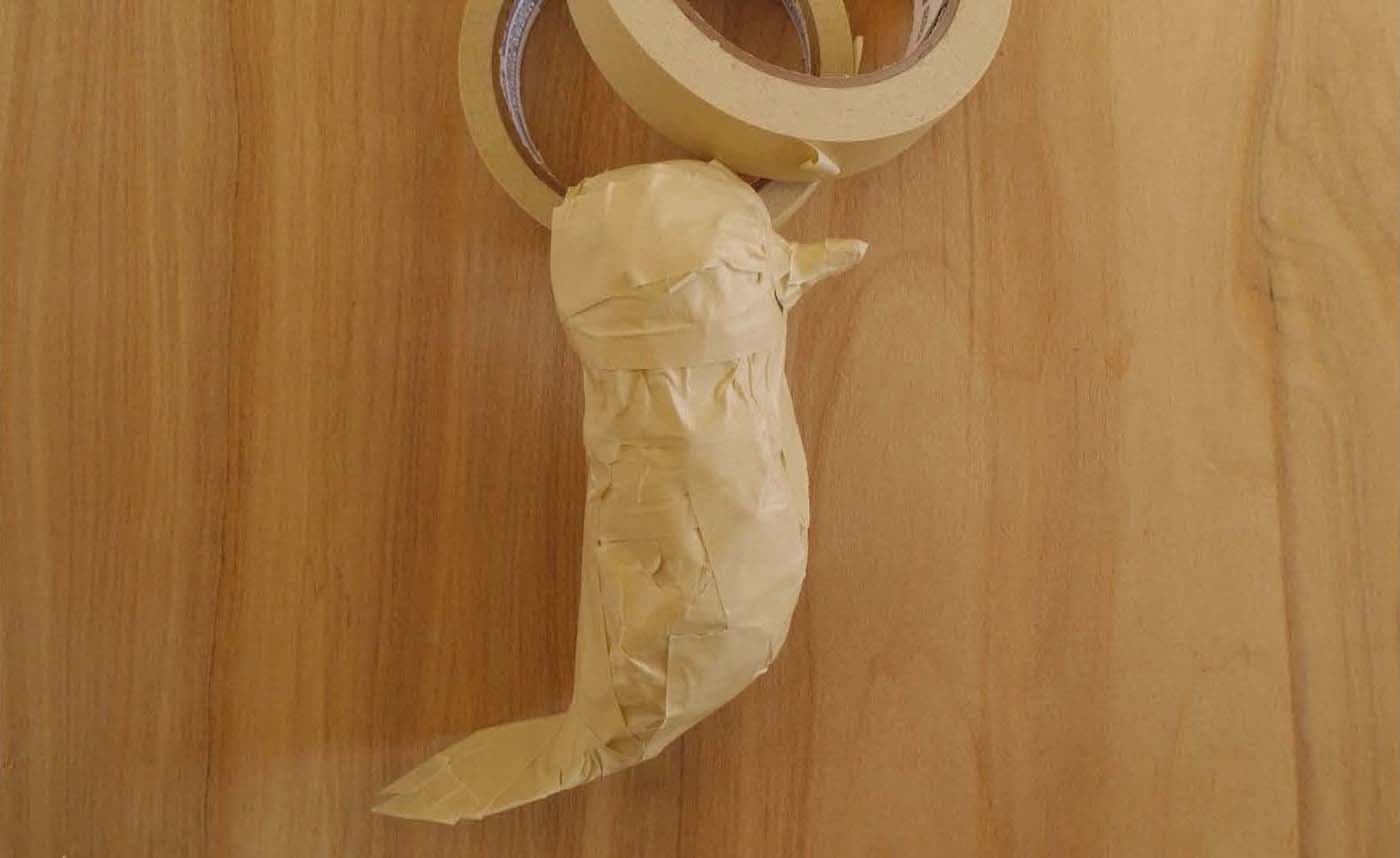
STEP 1
Pick a bird from nature or your imagination that you’d like to recreate. Then crumple up some paper to form the shape of the bird’s body. Cover the bird with masking tape, ensuring that it keeps its shape.

STEP 2
Use the same method to create the bird’s head. As you shape the head, use the bird’s body for reference and shape the head until it looks proportionate with the body. Then tape it securely.
Hot glue the bird’s head to the body to hold them in place.
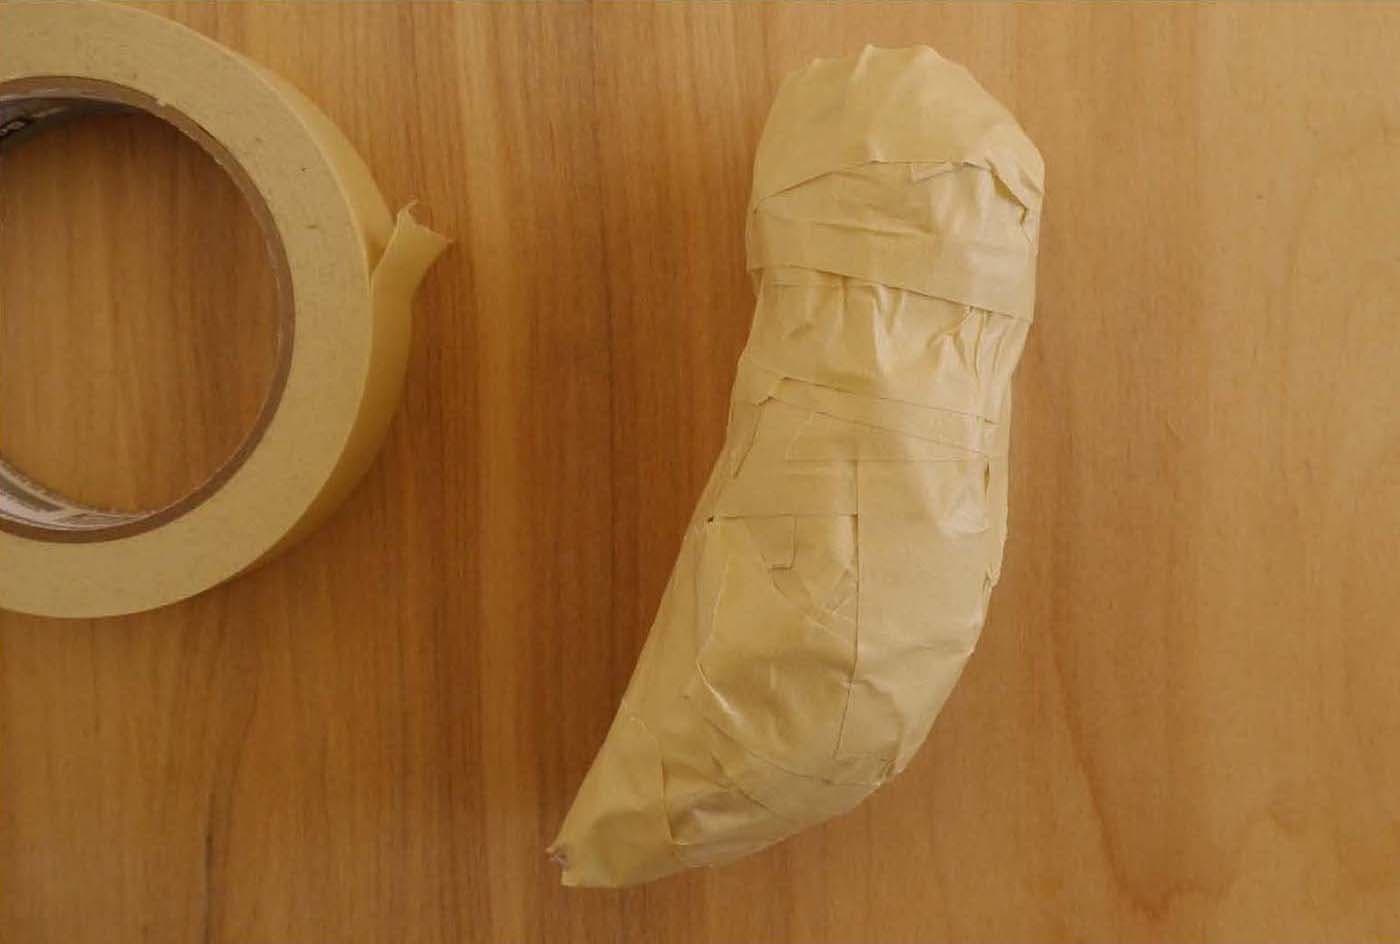
STEP 3
Use at least four vertical strips of tape to attach the bird’s head to the body. Then add tape around the neck to form a strong, smooth attachment.
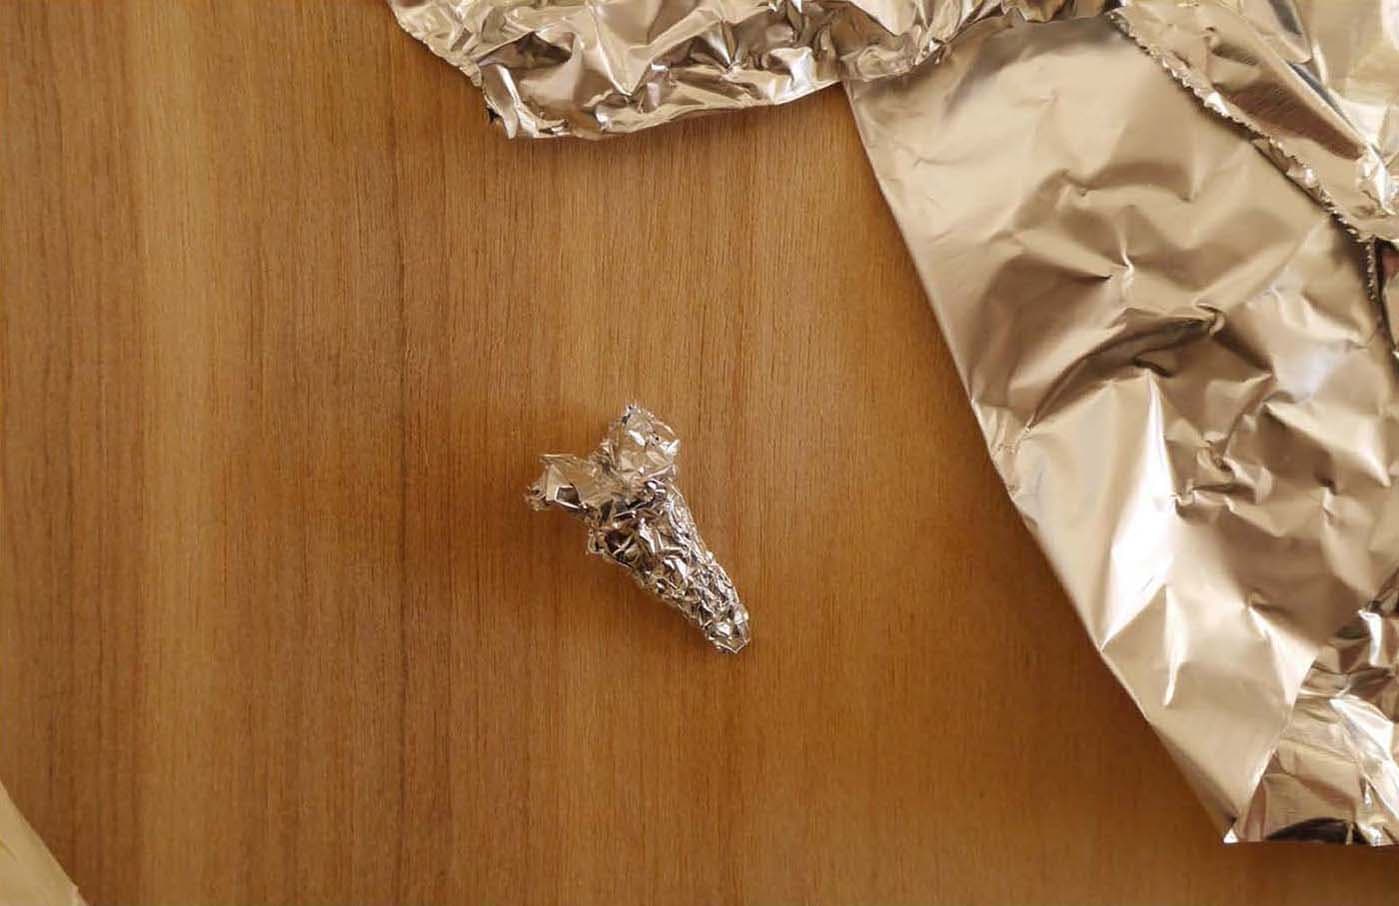
STEP 4
Pinch and squish a small piece of foil into a beak shape. If you make it too big at first, just uncrumple the foil and tear away some of it; then redo the beak until it is the right size.
STEP 5
On a hard surface, such as a table, rub the base of the beak to smooth and flatten. This creates a good surface for gluing the beak to the head in the next step.

STEP 6
Hot glue the beak to the bird’s head; then add tape over the beak.

STEP 7
Cut a tail feather from thin cardboard—any triangular shape works.

STEP 8
Hot glue the tail feather to the bird. Gluing it under the end of the body ensures that it flips upward in a sassy way!
Then tape the tail feather and the spot where it attaches to the body to smoothly join the two.
STEP 9
Draw a wing on thin cardboard and cut it out. Then trace that wing onto another piece of cardboard and cut it out so that the wings are identical.

STEP 10
Cover the wings with tape.

STEP 11
Apply hot glue to the top third of each wing and place both wings on the bird’s body, as shown. This lets the wings stand away from the body a little bit, which looks adorable!

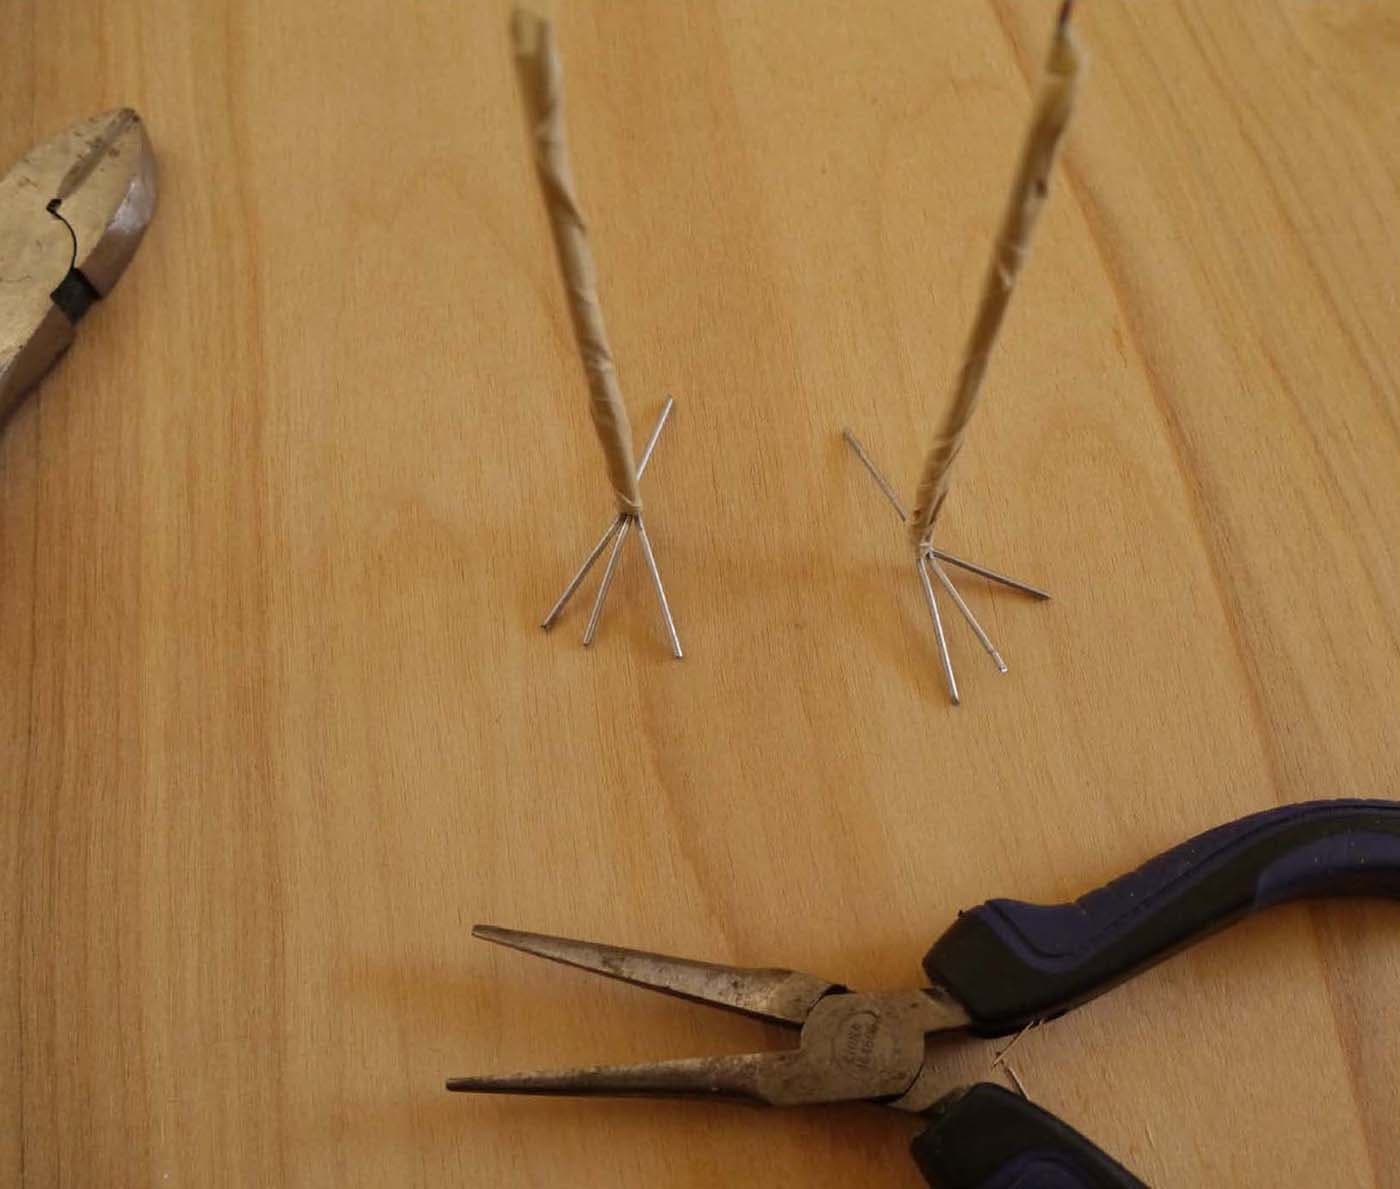
STEP 12
Each bird leg will consist of four pieces of wire. Tape the wires in a little bundle, leaving about ¾ inch free on one end for the toes. Make two legs. How long should they be? It’s your choice, but keep in mind that you’ll need ¾ inch for the bird toes at one end and 1 inch at the top to glue to the body.

STEP 13
Use pliers to bend the wire out for the toes—three in front and one in back.
Set the legs aside. You will papier-mâché the legs and body separately and attach the legs to the bird when everything is dry.
STEP 14
Make paste and tear up paper. Using a long strip of paper dipped in paste, wrap each bird leg starting just above the toes, all the way to the top of the leg. Then papier-mâché the beak and the unattached parts of the wings. Wrap the paper around the wing, all the way up to where it is glued down. It’s helpful to get these parts done first, as they are the most complex. Then papier-mâché the rest of the bird.

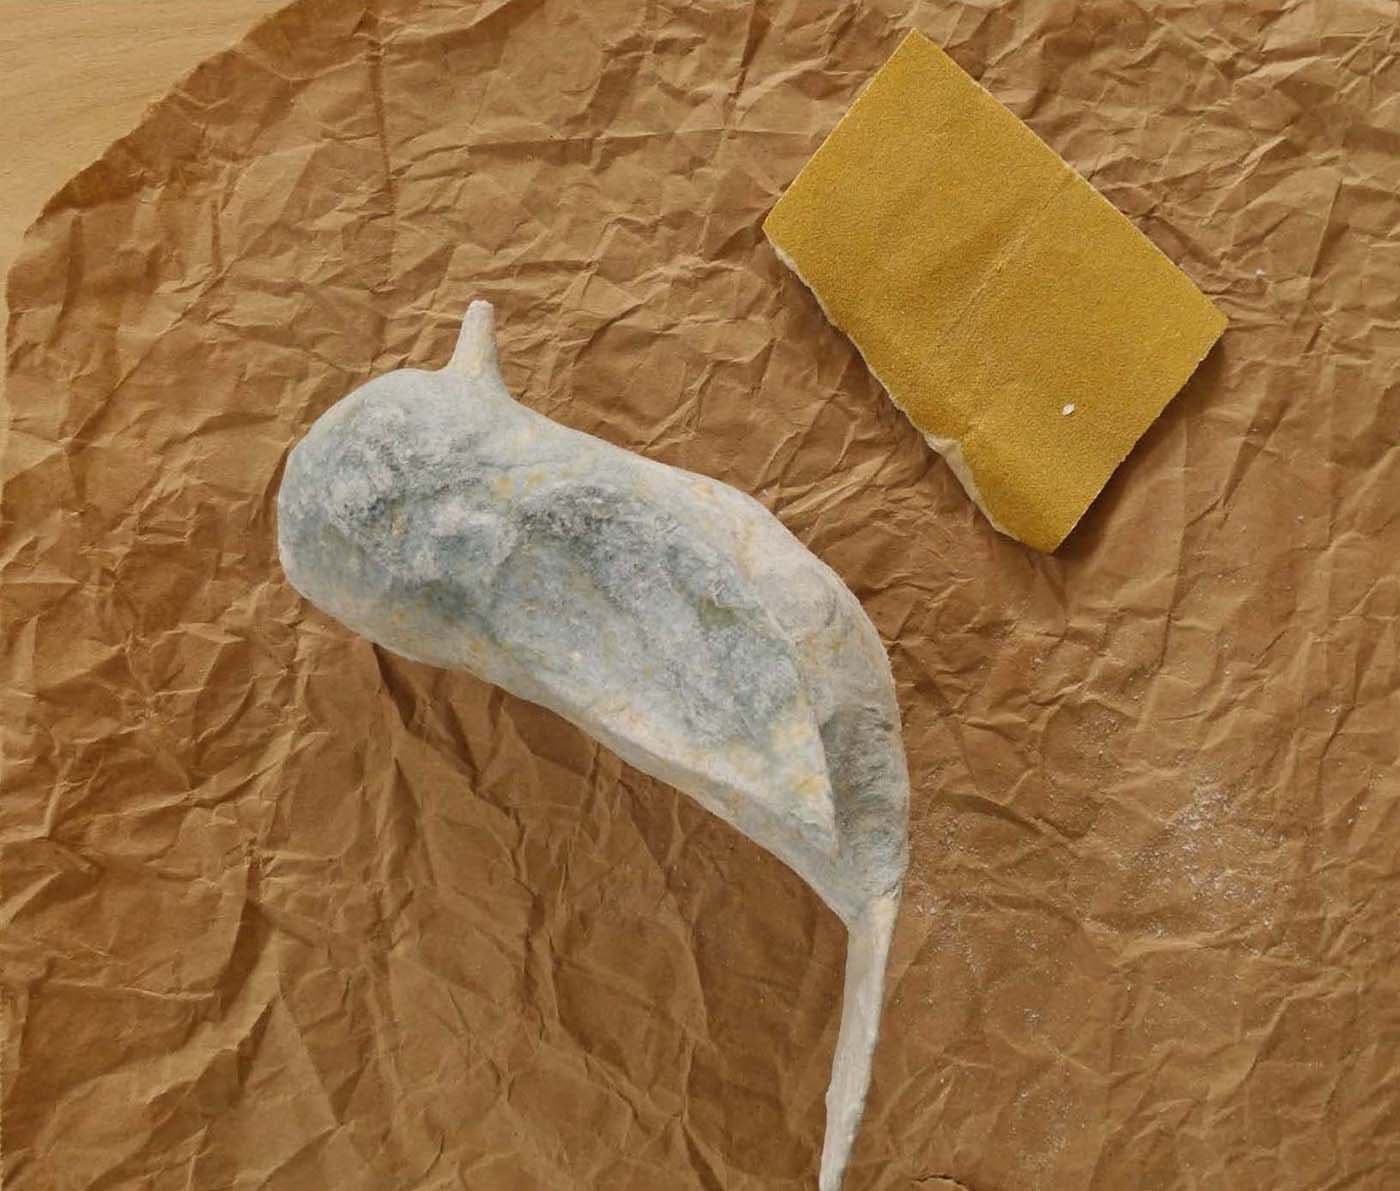
STEP 15
Let the papier-mâché dry; then sand the bird.
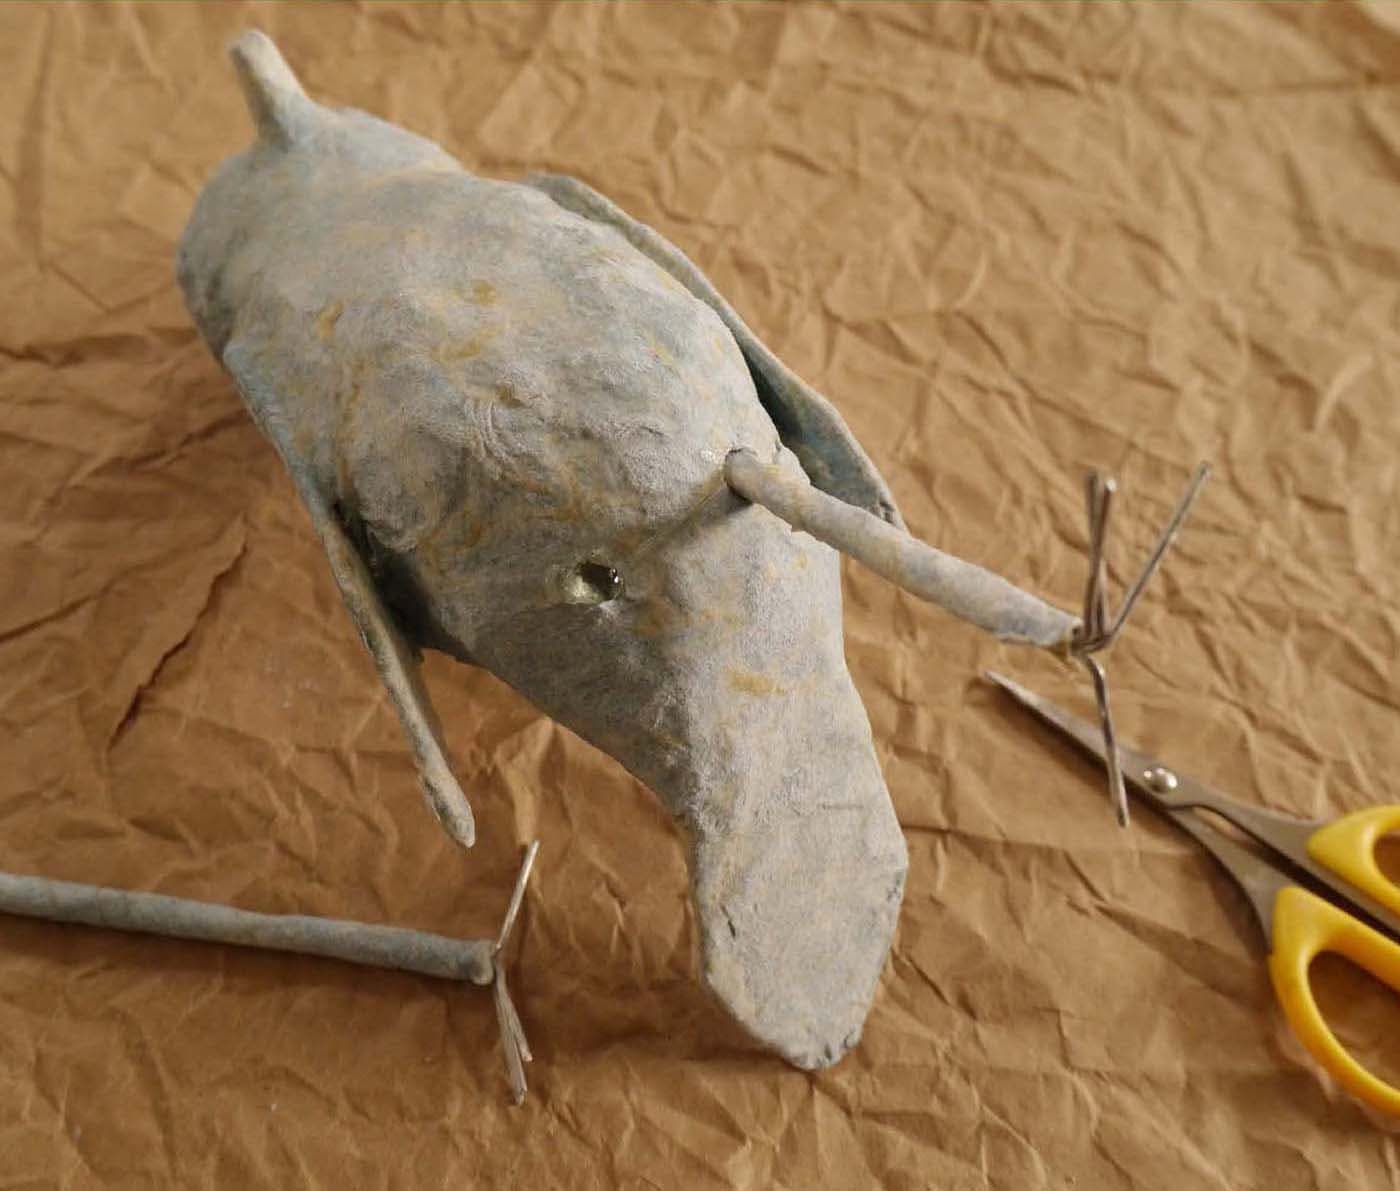
STEP 16
To attach the legs, use pointy scissors to make two holes in the underbelly of the bird. Don’t worry—he can’t feel it! Make the holes toward the middle back, leaving about 1 inch or so between them. Add a little hot glue in the holes and stick the legs in, feet forward!
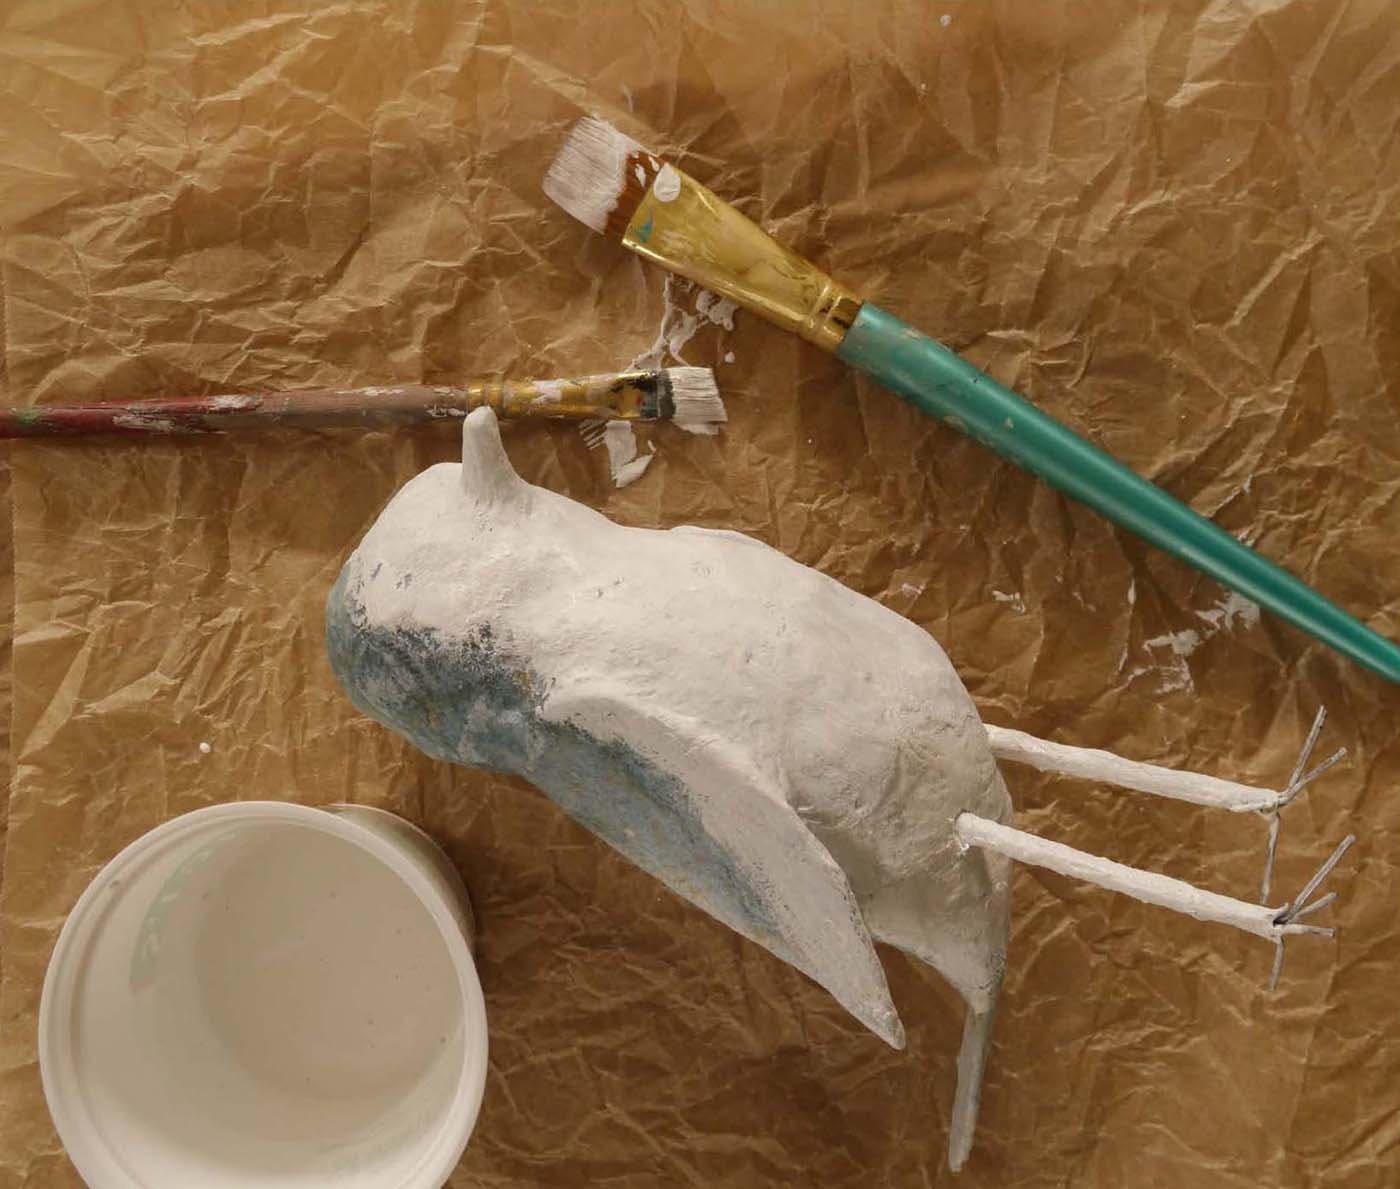
STEP 17
Gesso the whole bird. Make sure to get under the wings!
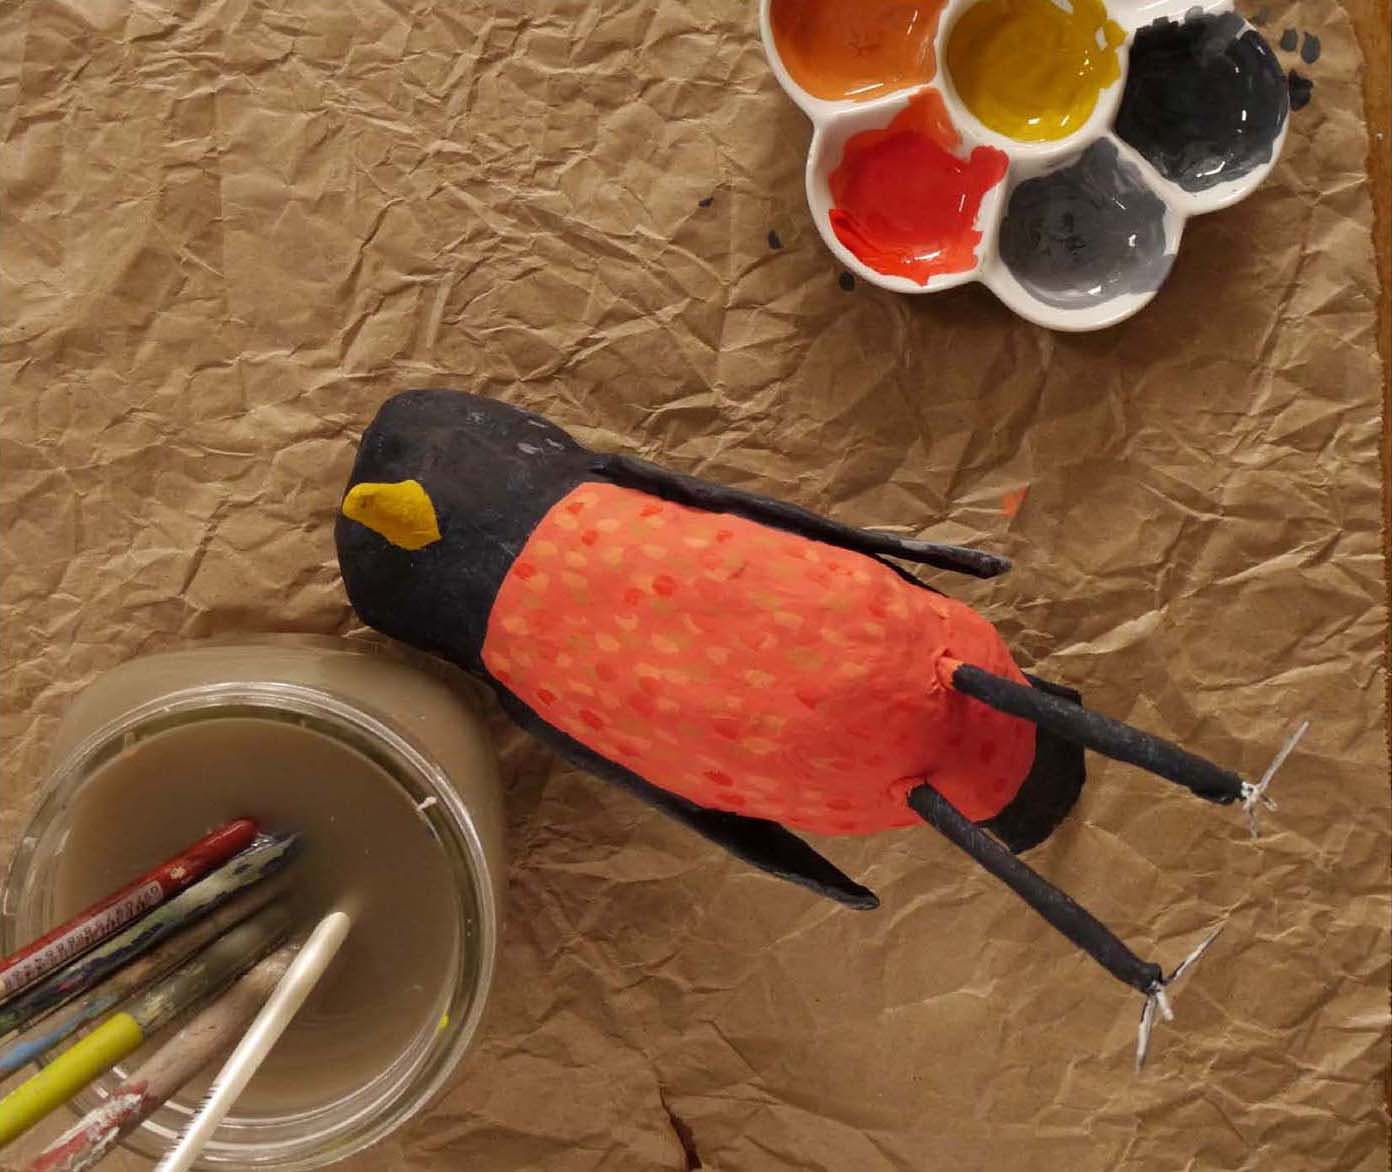
STEP 18
Painting birds is so much fun! The multiple steps and layers take a bit of time, but the results are worth it.
First, paint the base colors. Let them dry. Then paint the beak and add feathers. Light dabs and lines with a small brush make lovely feather textures. Layer until you’re happy.
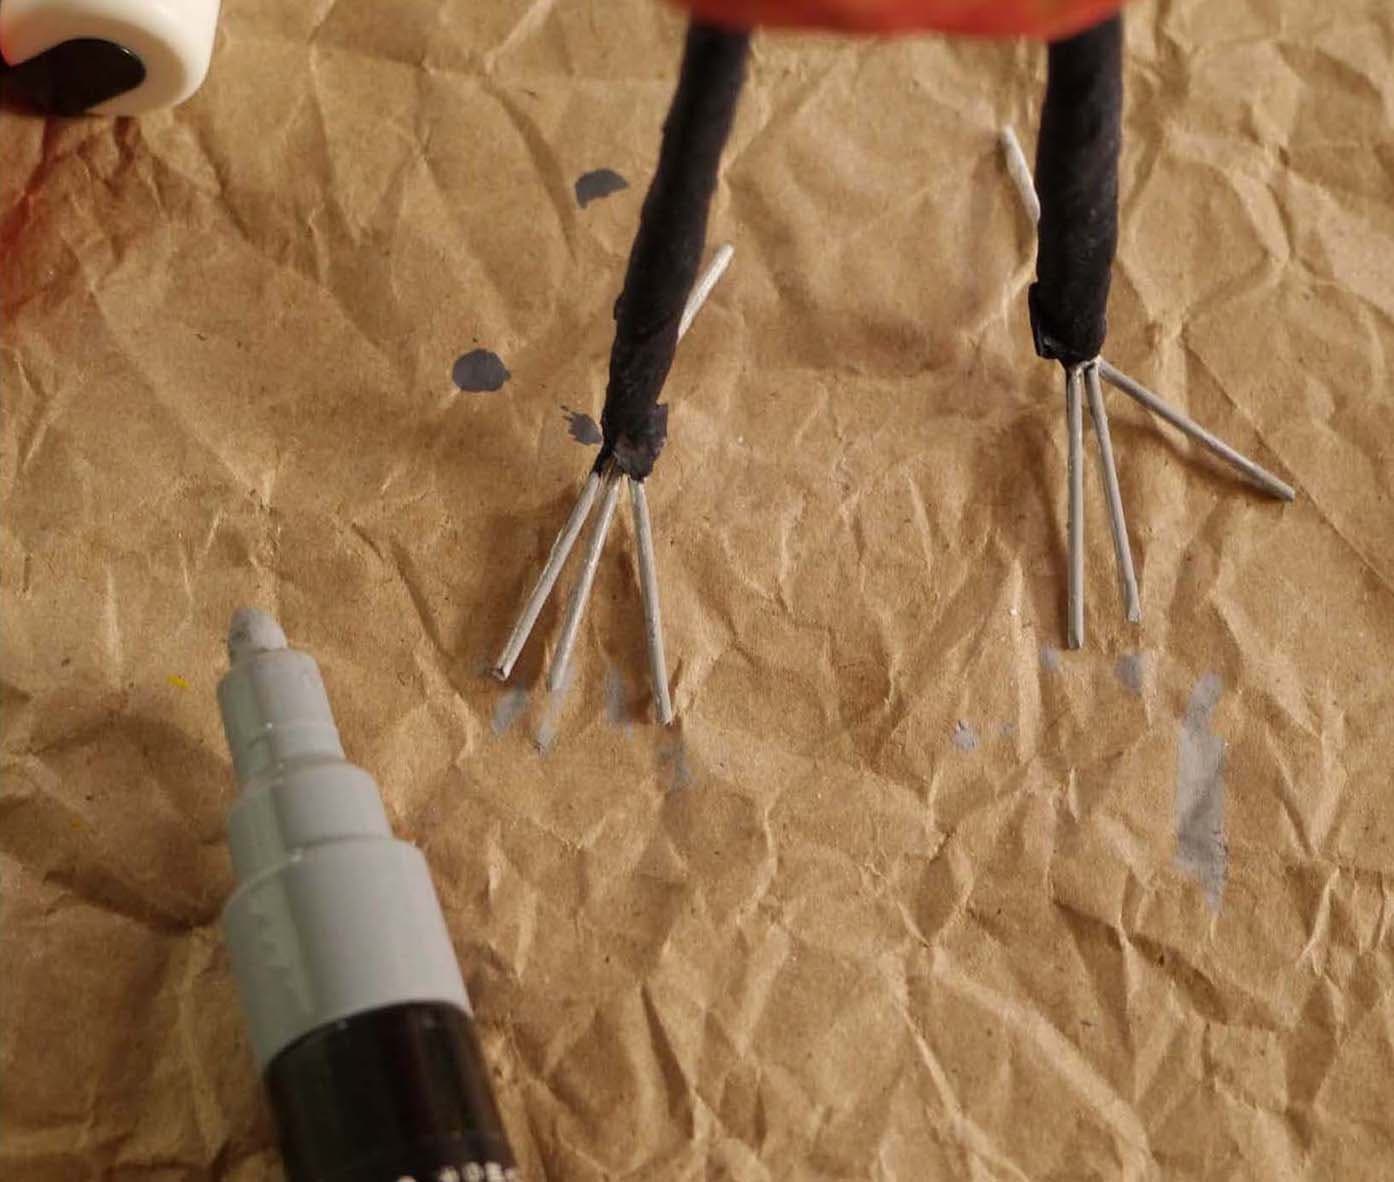
STEP 19
Check that your bird is balanced and has a solid stance. Adjust the toe wires if necessary.
STEP 20
Add the eyes using paint markers for better control. I also added red cheeks because I love the way they look. Let dry completely.

STEP 21
Seal and let dry.

STEP 22
Display your bird and never give it away because you love it too much.
