CHAPTER 5: THE LIGHT
Good lighting is key to the success of your pet photographs. While on location, I look for light that draws my attention, and while I’m always looking for the most pleasing location and lighting combination, I will often choose nice light over a perfect location.
While in many ways lighting techniques can be applied to all genres of photography, there are specific issues to consider when lighting for pet photography. Your lighting choices will not only directly impact the emotional and aesthetic quality of your images, but also the overall experience for you and the pets and people in front of your lens. There is a lot of value in becoming aware of the many options for lighting so that you can make conscious decisions for your individual pet portrait experiences.
In this chapter, I’ll address my favorite kinds of light and my insights on what works for me. I’ll share how I approach a variety of lighting solutions during my pet portrait sessions. Remember that this is one perspective, and I encourage you to explore what resonates for you, both on a technical and aesthetic level.
Light Quality
The quality of light in your pet portraits can affect your images on many levels. Light can create a sense of drama or mood in an image, accentuate details in an environment, or highlight a pet’s physical features. While working on location, you can incorporate studio strobes or small flash units, use available light, or choose to modify the available light. As you determine which light is best, you will need to take many factors into account, including your goals for the feeling of the image, the time available to you, the animal’s energy level, and how much you’re looking to accomplish during the shoot.
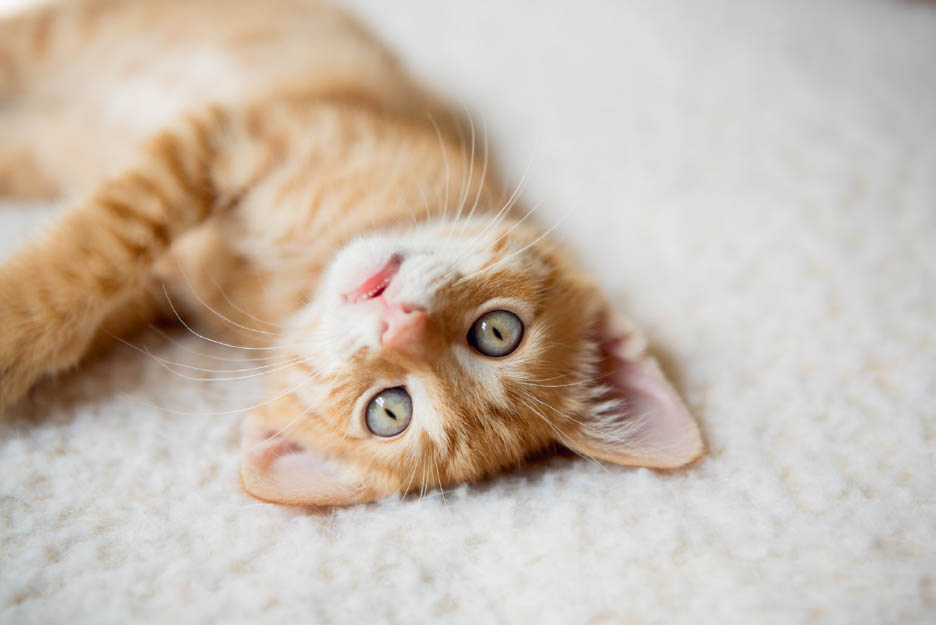
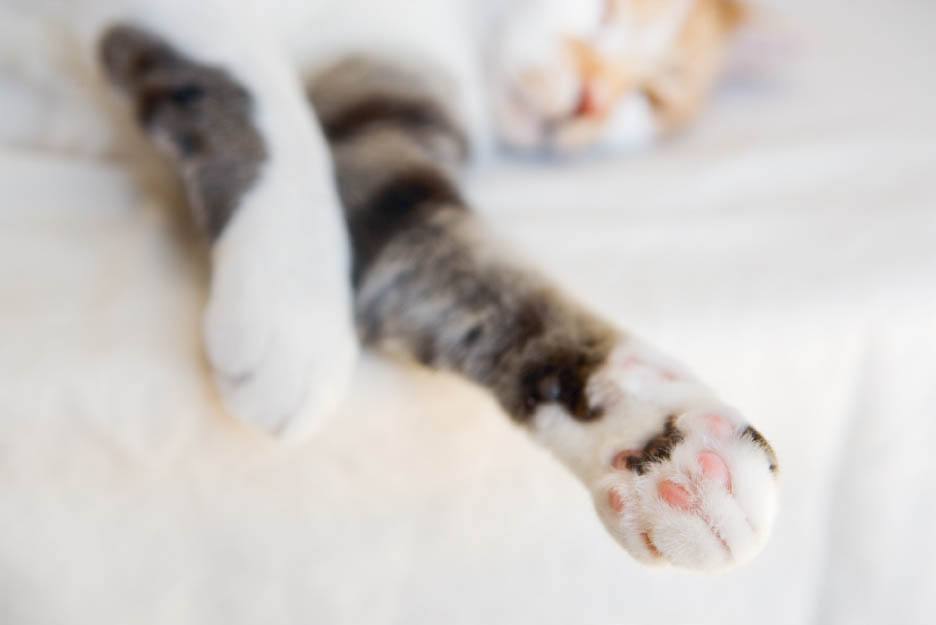
Diffused light softly wraps around Mr. Grizzle, the kitten, as he lies by a window.
DIFFUSED LIGHT
Diffused light, whether occurring naturally or created from studio or small strobes, can be a very effective and beautiful light for pet portraits.
MY FAVORITE QUALITY OF LIGHT
Diffused light is my favorite quality of light for pet portraits, and is the type of light I most often use. Diffused light occurs when light is passed through a translucent material of some kind or when the light is reflected off a surface and bounced onto the subject.
I am drawn to photographing with diffused light because of its softness. The shadows from diffused light are soft, and the light wraps around the subjects as I photograph them. This type of light is flattering to both people and animals and is appealing to the eye. Working with diffused light helps me develop the fresh, clean aesthetic I’m after.
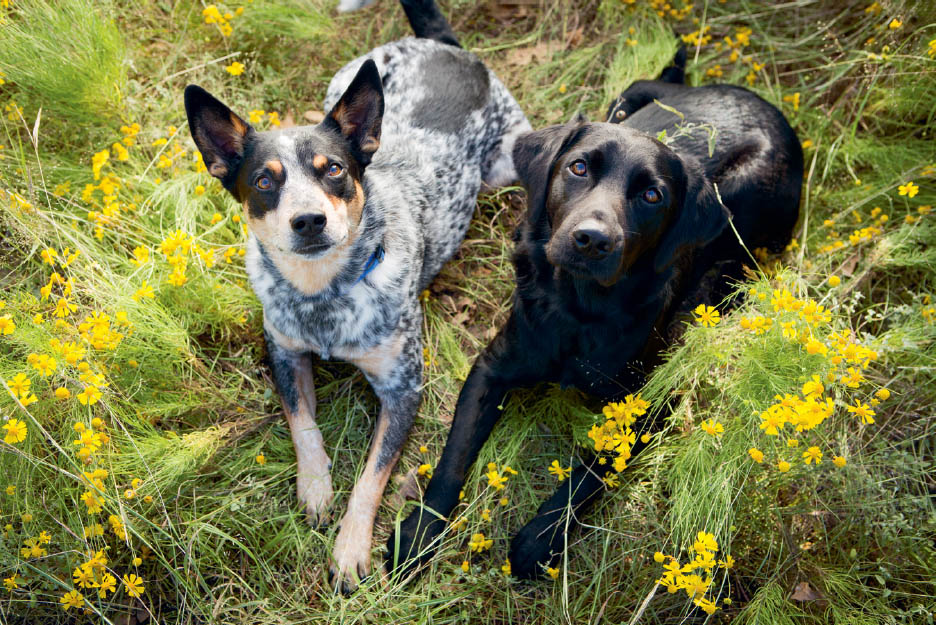
The light falling on these pups was initially very harsh and direct. I chose to create an area of soft, diffused light with a diffusion panel.
Photographing in a large area of diffused light is ideal for pet portraits. In this scenario, I have the freedom to allow the animals to move around without concern that they will step out of the light. This freedom allows me to work faster and, ultimately, photograph more. When the animals have a little “wiggle room,” I can focus on capturing sweet expressions and play with posing and composition. This flexibility makes a big difference in both my experience and the pet’s experience of the session, and allows both of us to maintain our energy during the shoot.
FINDING DIFFUSED LIGHT
There are plenty of places to find naturally occurring diffused light sources for your pet portraits. Keep in mind that even when light is diffused, there is still a main light source, and you’ll want to have your pets and people illuminated by this source for the best results.
OVERCAST DAYS when the sun is behind the clouds, yet still producing a small level of brightness, are a great source of naturally diffused light. Although darker, stormy days offer diffused light, they do not contain quite enough illumination to create my favorite kind of light quality. On an extremely overcast day, the lighting may feel flat and dimensionless.
I photographed sweet Lucy during an overcast day. You can see the soft shadow on her body and very subtle catchlights in her eyes from the sky.
Remember, on fairly bright overcast days, even if you can’t actually see the sun, you can still take advantage of the brightness of the sky. For example, you will likely want to have the pet facing this light source so you get light on their face, or maybe even a small catchlight in their eyes.
LIGHT BOUNCING OFF INTERIOR SURFACES, such as walls, doors, furniture, a tabletop, or even bedding, can be gorgeous. Light that enters through a window and bounces off the floor can softly illuminate a dog or cat and the surrounding space. This kind of diffused light quality can create an area large enough for you to photograph a pet with the freedom and flexibility I mentioned above. With the light being diffused in many places, you’ll be able to allow the pet to move around a little and still be in the main source of soft light.
The soft, diffused light is bouncing off an exterior patio and then bouncing around the room off the light-toned walls, ceiling, and floor.
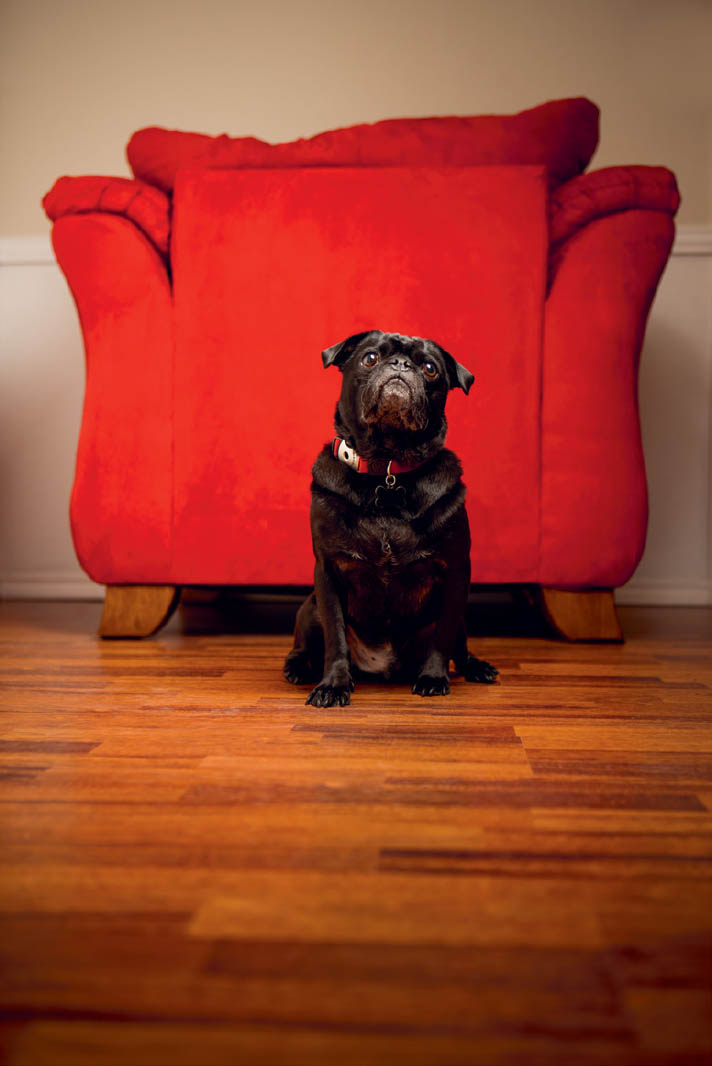
I love photographing my pets in the afternoon in the front of my home, because the light streams in through the window and bounces off the floor and walls and creates beautiful light in the entire room. The light wraps around my cats and dogs so nicely in that space. I wish I could have access to this type of light in every space, for every pet portrait session!
OPEN SHADE can be a wonderful way to take advantage of diffused light as it reflects off any brightly lit exterior area. As long as your pet subject is positioned right along the edge of the shaded area before they are directly hit by the sun’s light, you’ll see that they are beautifully illuminated by diffused light bouncing off the grass, adjacent buildings, patio, or pavement in front of them. The trick with this kind of light is that the pet has to be in the shade but facing the direction of the light source (not necessarily the sun).
HOW TO CREATE DIFFUSED LIGHT WITH NATURAL OR AMBIENT LIGHT
Sometimes there might be a small amount of diffused light in a space but not quite enough to keep my shutter speed where I want it or my ISO low enough for my preferences. In these cases, I’ll often use a large piece of white foam core or a 4x6-foot panel to reflect available light onto the subject to increase the intensity of the light.
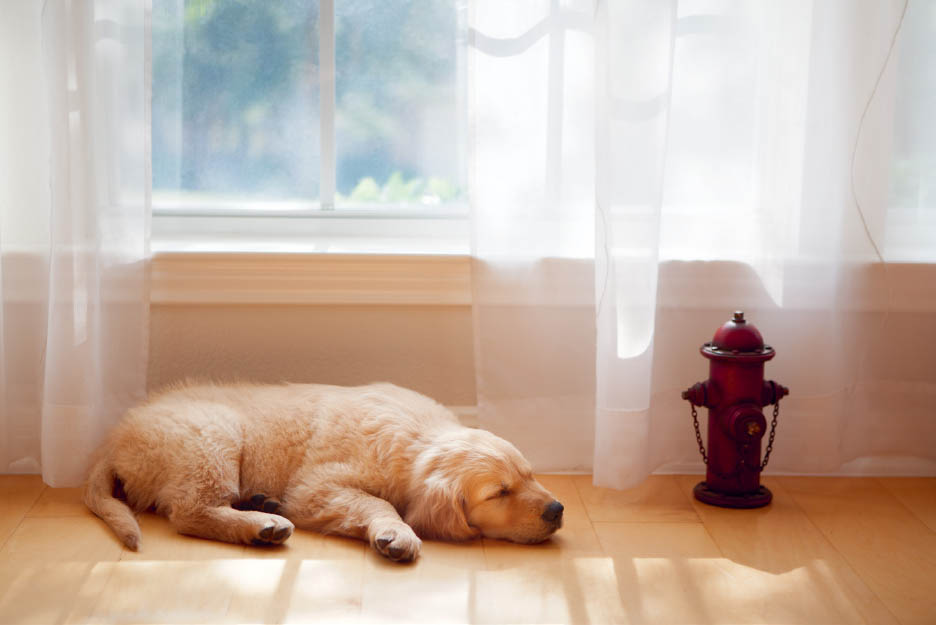
The sleeping pup in this image is being illuminated by the window light, and also from the light bouncing off the floor, walls, and a large piece of white foam core. This is a high-contrast scene, but the light on the puppy is still very soft and diffused.
Foam core is awesome, because it’s not very expensive and it’s pretty sturdy. I buy the biggest piece that will fit in my car and always pack it for each session in case I need it. The larger the piece of foam core I use, the more surface area will reflect light onto the animal and scene. Keep in mind that foam core is very light, and if you’re using it outdoors it can fly away and scare animals (and people, for that matter). You’ll either want to have an assistant hold onto the foam core, or secure it to a ladder or other support with some clamps or tape.
Multiuse panels are a great option for reflecting and creating diffused light, because I can bounce the light off the white side or use a panel with diffusion material to let the light pass through and soften before it falls onto the pet.
Sometimes windows have a lot of bright, direct sunlight streaming through them, and the light falling onto my subject will be harsher than I want. In such circumstances, I’ll either attach my 6’ × 6’ silk or my large piece of Ripstop nylon to the windowsill or door.
Diffusion material will always decrease the intensity of the light on some level, and this loss of light may become an issue for my shutter speed and ISO requirements. The amount of light I “lose” as a result of the diffusion material, whether the light is traveling through a Lastolite panel, a Ripstop nylon piece, or a Matthew’s silk, will vary based on the thickness of the material. If I feel that I am losing a lot of light, I may decide to bounce additional light back into the scene with a foam core or other reflector. I will also want to be sure my subject is as close to the light as possible, while keeping my background elements in mind.
Remember that all animals will respond differently to large pieces of material, foam core, diffusion panels, and reflectors, and you’ll want to remain mindful of their reaction to these items as you move forward with the shoot. Keep them secured as much as possible. You can create the most beautifully lit scene in the world, but it won’t do you a lot of good if the dog, cat, or horse is terrified.
CREATING DIFFUSED LIGHT WITH STUDIO AND SMALL STROBE LIGHTS
If I am lighting my pet portraits with a studio strobe, I almost always diffuse the light in some way. I soften the light quality by either bouncing the light off a neutral-colored surface (wall, door, floor, or ceiling) or passing it through a diffusion material just like I would with harsh window light. I typically use softboxes or silks when I am working with large strobes. I like to use large softboxes, because the larger size helps create an even softer, broader light source that can light the pet and sometimes the environment around them simultaneously.
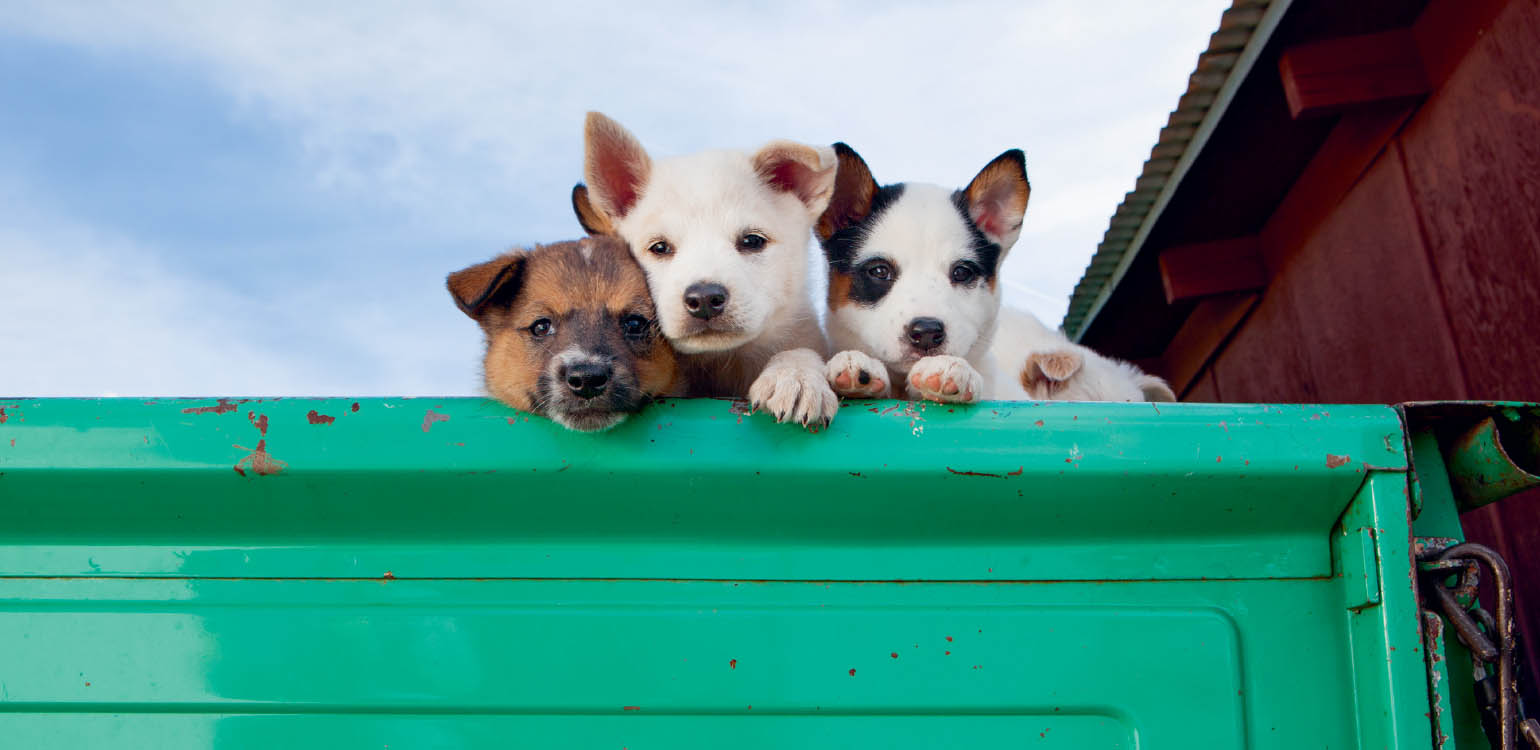
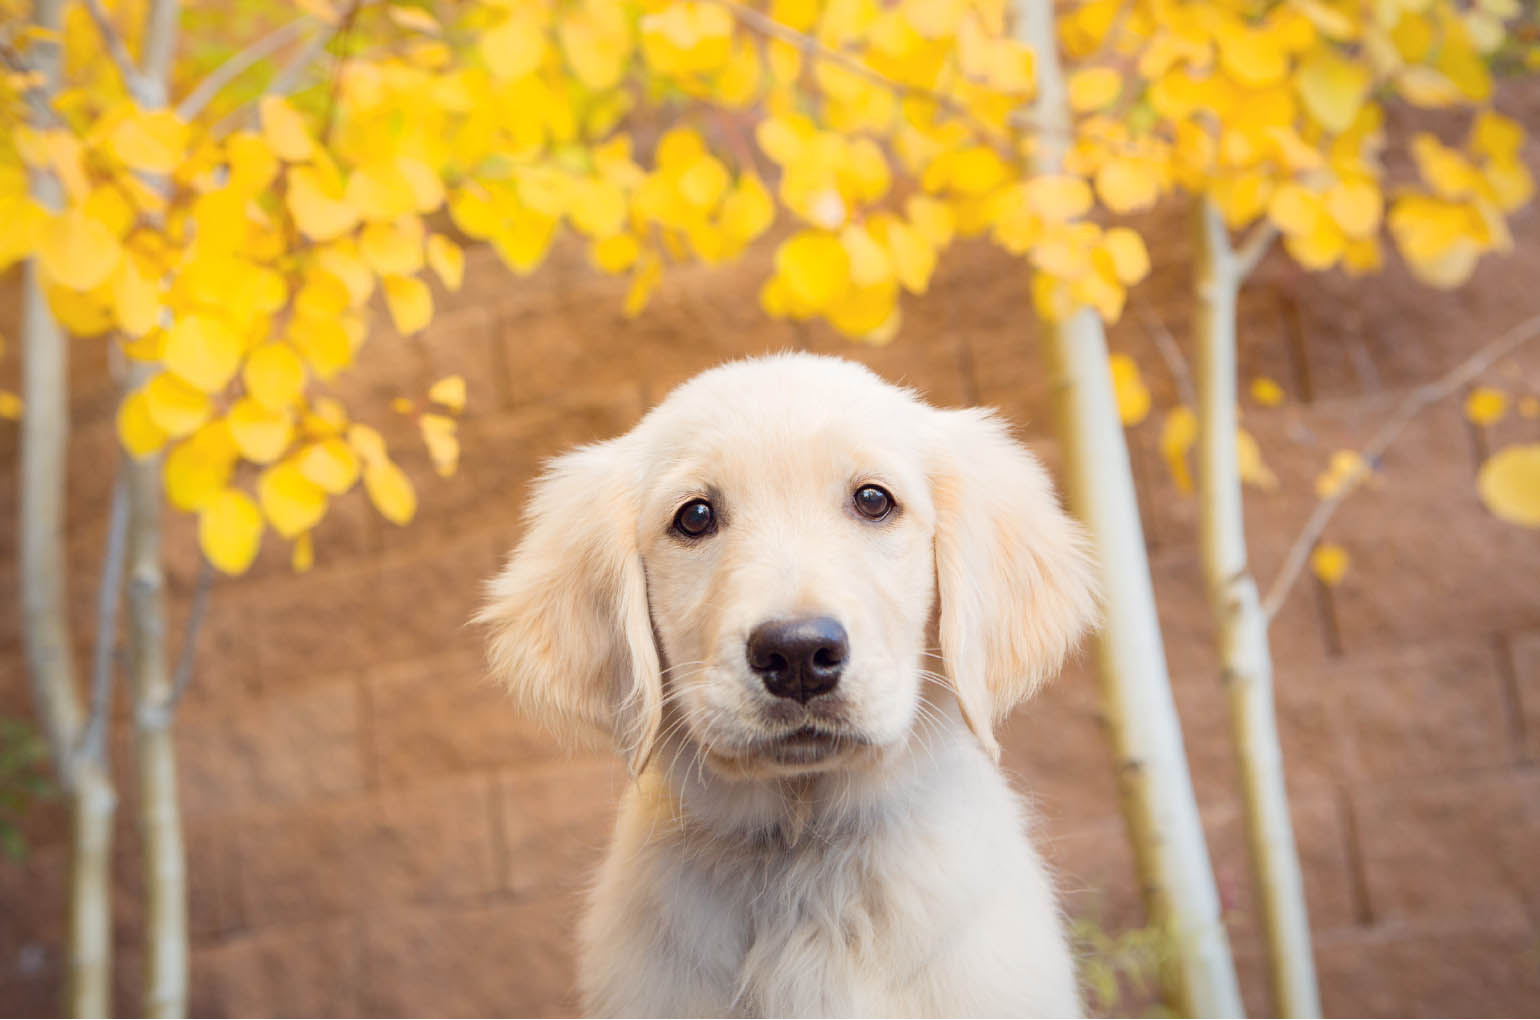
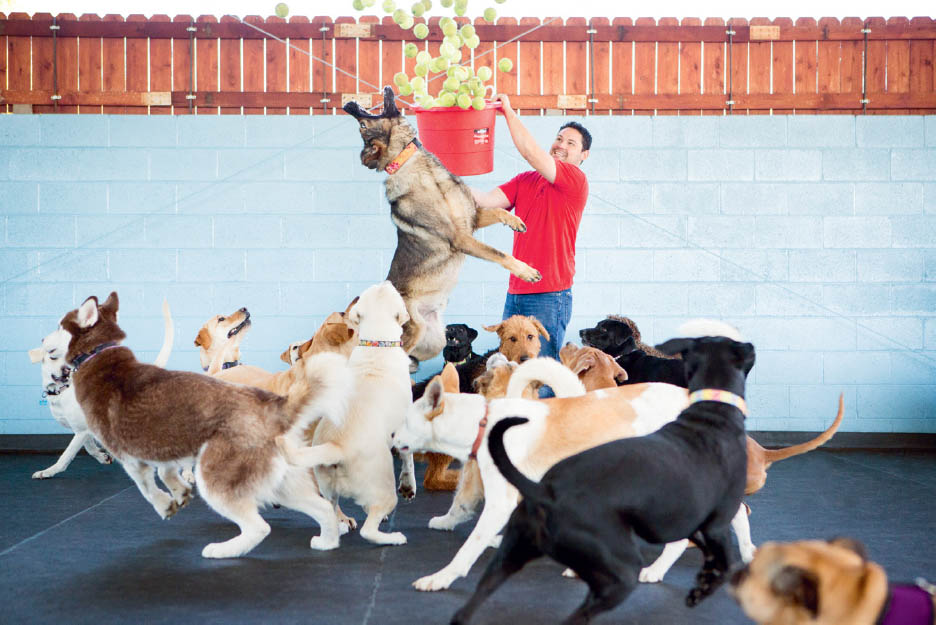
The light on these puppies was first diffused with a panel, and additional light was added with a small speedlite unit attached to a small softbox (Ezybox). Without this modification to the light, the puppies would have been lit by very direct, harsh light.
Bouncing small speedlites off ceilings and walls is a quick and easy way to diffuse light from this type of light source. This action spreads the light before it falls onto the pet and effectively turns a small light source into a larger one. Small softboxes that can attach to my speedlite also work really well to soften the light. In general, the softboxes used for a single speedlight are smaller, and the light produced is not quite as diffused as it is with large softboxes used on larger strobes. I love the Lastolite Joe McNally Ezybox setup for using softboxes on small speedlights.
Both small and large strobes effectively work the same way and will require some kind of light modification to diffuse the light, if that is your desire.
Diffused, soft light is not the only way to light pet portraits, but it is my preferred look. You get to decide which quality of light appeals to you and helps you communicate the feeling or message of your photographs.
FOCUSED OR DIRECTIONAL LIGHT
Directional, more concentrated light is very different from diffused, broad light. A directional “beam” of light streaking across a wall or a floor from the sun shining through a window, or a gridded strobe light creating a focused area of light in the center of a room, can be very dramatic and can create a different mood than soft, broad light.
When I notice this kind of light occurring naturally as I enter a home, or as I see the light shifting at any location during my session, I will absolutely make an attempt to position the subject so that the light beautifully falls onto them or frames them nicely. The high contrast between light and shadow can create a very dynamic effect or can generally support the mood of your pet portraits.
Working with a narrower, directional light for pet portraits can be logistically challenging and will require very specific placement of the pet within the light. As an example, if you place a dog’s face in a beam of light coming in through a window, you may be able to see bright catchlights in her eyes and really highlight her fur. If the beam of light is narrow and she takes a step to the side or moves even slightly in one direction or the other, she may be in the shadow and you’ve lost your photograph. These are the kinds of photos I tend to try to capture when I notice the opportunity, but because of the narrow “window,” I do not find value in spending a lot of time on them during my sessions.
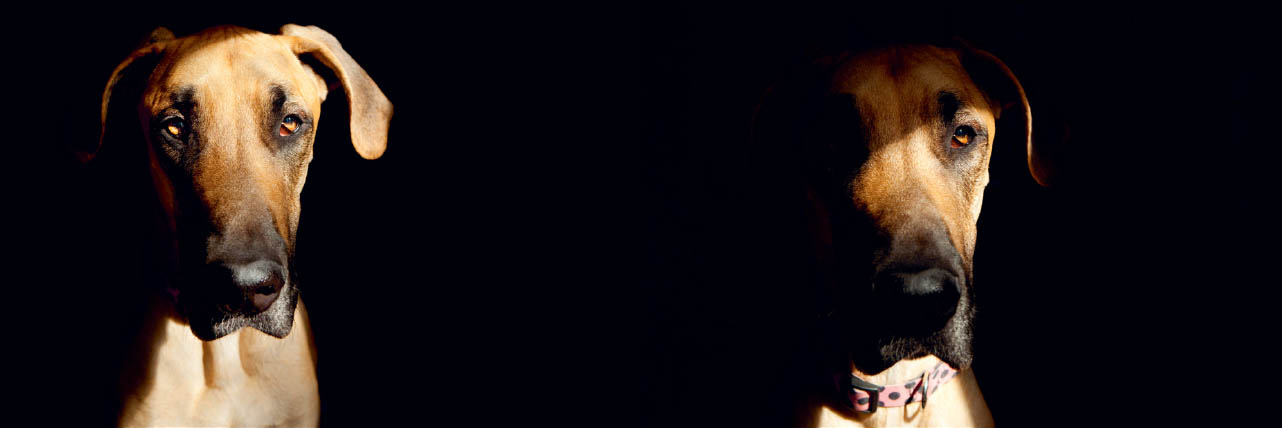
The directional light coming through the window beautifully lit Kiya’s face and brought a sparkle to both eyes in the image on the left. She moved slightly for the next frame and her face was out of the patch of light.
You can use your strobe lights, large or small, to create a more dramatic feel with focused or directional light. (Note that directional, focused light can either have a soft, diffused quality or appear more direct and harsh.) Setting up lights for this effect can work really well if you’ve got a very specific idea in mind for creating a more dramatically lit portrait. Be sure to give yourself extra time and patience for these kinds of images. You’re not photographing still life!
Extremely spot-focused light isn’t very conducive to action shots, because it can be very difficult to align the desired action with a small amount of light. Having said that, this approach isn’t impossible and has a lot of potential for a really amazing look. By all means, feel free to give this kind of special lighting look a try, and if you do so be aware of the inherent challenges that come with this scenario.
If I am setting up a directional or more focused light, I will be sure to take lots of test shots before the pet is in the scene to give myself the opportunity to tweak the light as much as I need to before asking the pet to cooperate.
For this image, I used a beauty dish covered with diffusion material. The light was positioned from above to create more of a spotlit, directional effect.
Directional light can really support your ability to tell a story and add dimension to your photographs. While there can be a lot to manage during the creation of pet portraits, it is integral to pay attention to what is happening with the light, either naturally occurring light or the light you create using strobes. If the light does have a naturally occurring direction (rather than being bounced around the room more evenly), I usually try to have the pet gaze in the direction of the main light source. This will help illuminate their eyes and visually makes sense to the viewer.
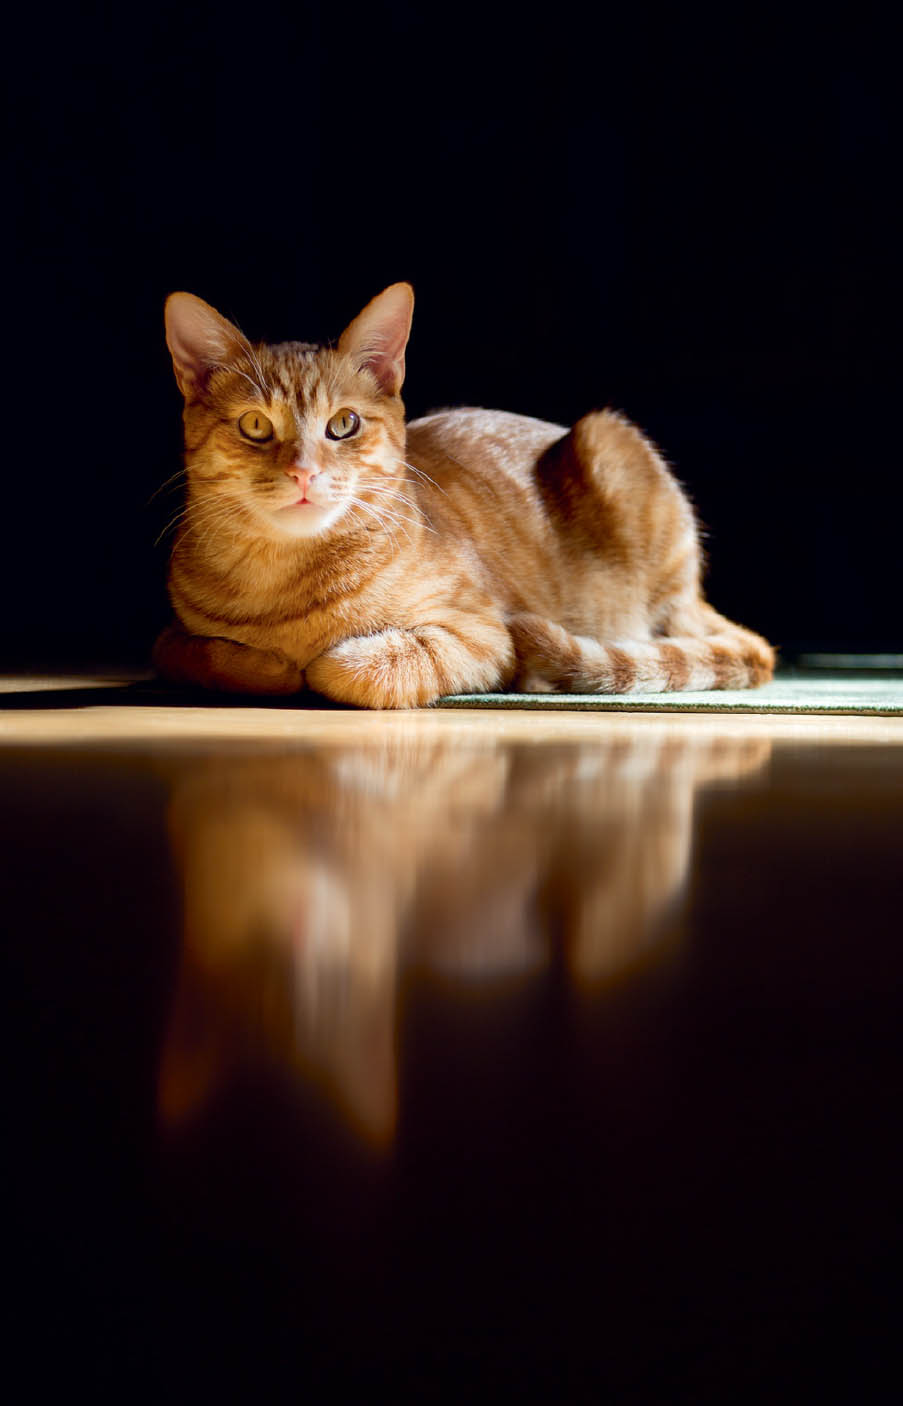
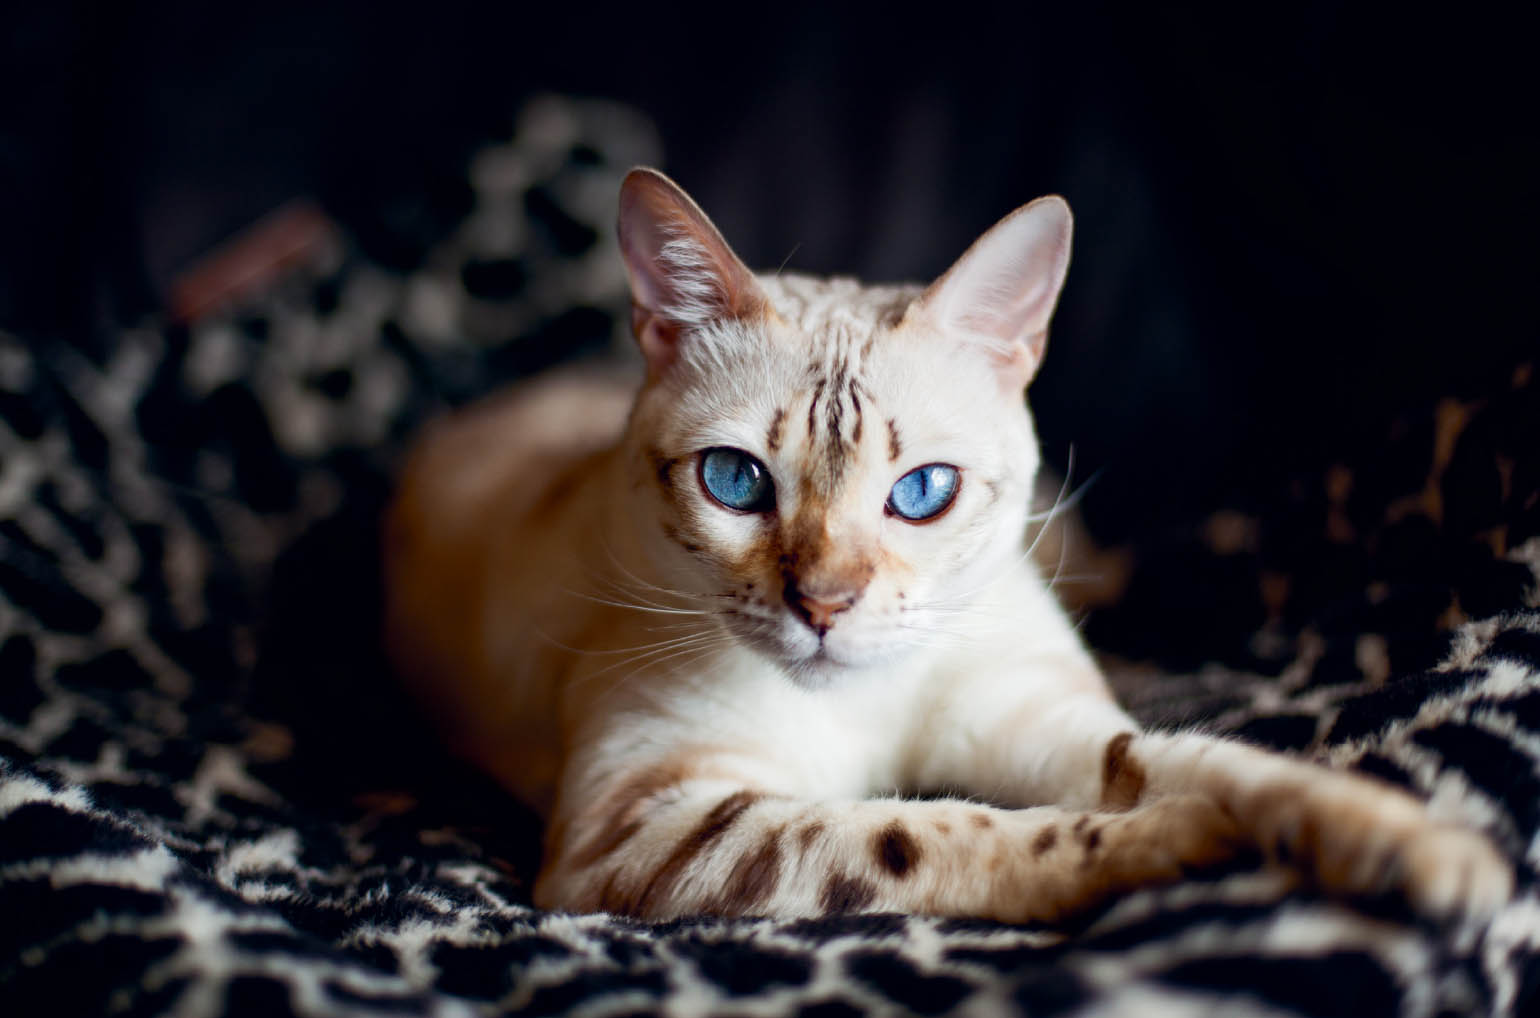
I noticed the kitten bathing in this pool of light and took advantage of the opportunity to capture a more dramatically lit image with some nice reflection. Creating this opportunity would have been a bit more difficult than responding to it.
As you look at my portfolio, you may notice that I do not tend to photograph many images with dramatic focused or directional light. It is not my “go-to,” for a couple reasons. One is that it’s just not what I’m aesthetically drawn to for pet portraits. The other is that I don’t usually want to take the time and energy away from the pet to set up a scenario with very focused light. It takes more energy from the pet to have them in a specific location, and while the results may be gorgeous, it can limit the variety for the overall shoot. If my goal were one or two final images, I may choose to commit to this approach.
I encourage you to find out if working in more dramatic and focused light speaks to you for your pet portraits. Experiment looking for naturally occurring dramatic lighting scenarios, both indoor and out. In addition, think about setting up some of your own lighting scenarios that include both a very directionally lit pet portrait and a portrait that incorporates a very focused, narrow light source.
DAPPLED LIGHTING
I often find myself in a dappled lighting situation when I am photographing pets. This type of lighting most often occurs outdoors but can appear indoors as well. For example, I might photograph a dog in a backyard and find that the light streaming through the trees and plants casts really bright spots of light on one part of the dog’s face and not on others. In another scenario, I might be photographing a horse in a grove of trees and find that the horse’s face is in full sun or open shade but that spots of light are falling on the horse’s body.
The highlights and shadows of dappled lighting can, in effect, create dramatic contrast, but because it’s usually happening in very small areas, it can be difficult to navigate both technically and aesthetically. You may find yourself photographing your cat indoors by the window in beautiful full sun that is traveling through the trees outside and causing spots to fall onto the floor and your cat’s face and body. This can be gorgeous light, but if you find yourself struggling, know that you’re not alone.
The light streaming through the trees onto Brie was dappled, but because the sun was in a fairly low position, I was able to have Brie lit from behind and not greatly affected by the spotty light.
The dance between the highlights and shadows caused by dappled lighting often creates a distraction. Exposing for dappled light can be tricky, because the contrast can be too high to capture both the highlights and the shadows properly. Even if you are able to expose accurately, the brightest areas demand the viewer’s attention.
So, what do you do about dappled light? I recommend avoiding it when possible, but this isn’t always the best option. Sometimes you can find the perfect spot to place a pet within dappled lighting, it works beautifully, and all you need is a slight modification in postproduction. Other times you’ll struggle to the point of missing the shot (and other opportunities). If trees are causing the dappled effect, the wind might blow, moving the trees around and causing the highlights and shadows to do the same. In this scenario, you may discover that you’re spending a lot of time chasing the light, using up valuable pet energy in the process.

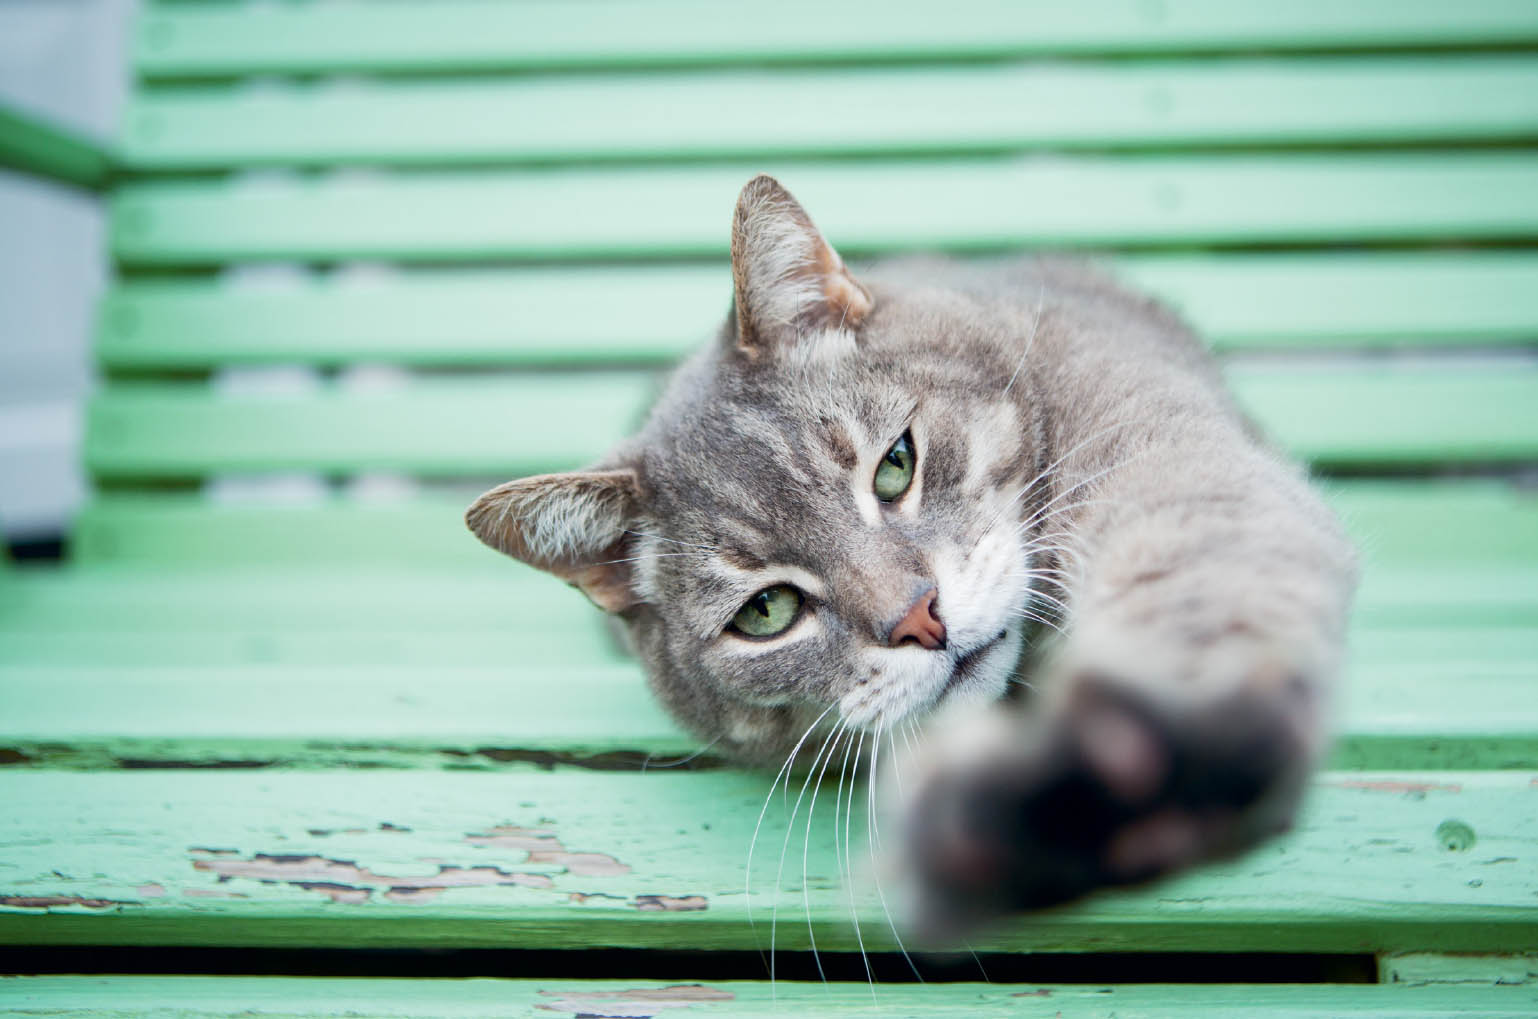
The trees outside the room were moving in the breeze, causing the dappled light to move position on the cat’s face. I had to be patient and wait for the trees to fall in the right position so that the cat’s full face was in the light—and simultaneously direct the cat’s attention toward this small area of light.
If the best location for your pet portraits happens to involve dappled lighting, try not to worry! See if there is an opportunity to diffuse the dappled light with a silk or other diffusion material to soften the highlights and decrease the contrast of the light. You also might be able to move or tie up a tree branch, plant, or whatever is causing the dappled lighting effect to fix or help alleviate the issue. Whenever I find myself in a dappled lighting situation, I see what I can move, diffuse the light if possible, and then if nothing works and I’m committed to capturing some images in that exact location, I prioritize the pet’s face. If I can get the pet’s face either consistently lit or have the highlights fall just on the eyes (for dramatic effect), I will do so.
BACKLIGHT
Light falling from behind the pet you’re photographing can create an exquisite and unique look. What is most beautiful about backlight is the rim of light that creates an outline around the animal. This kind of light can feel very warm to the senses and can work quite nicely for pet photography.
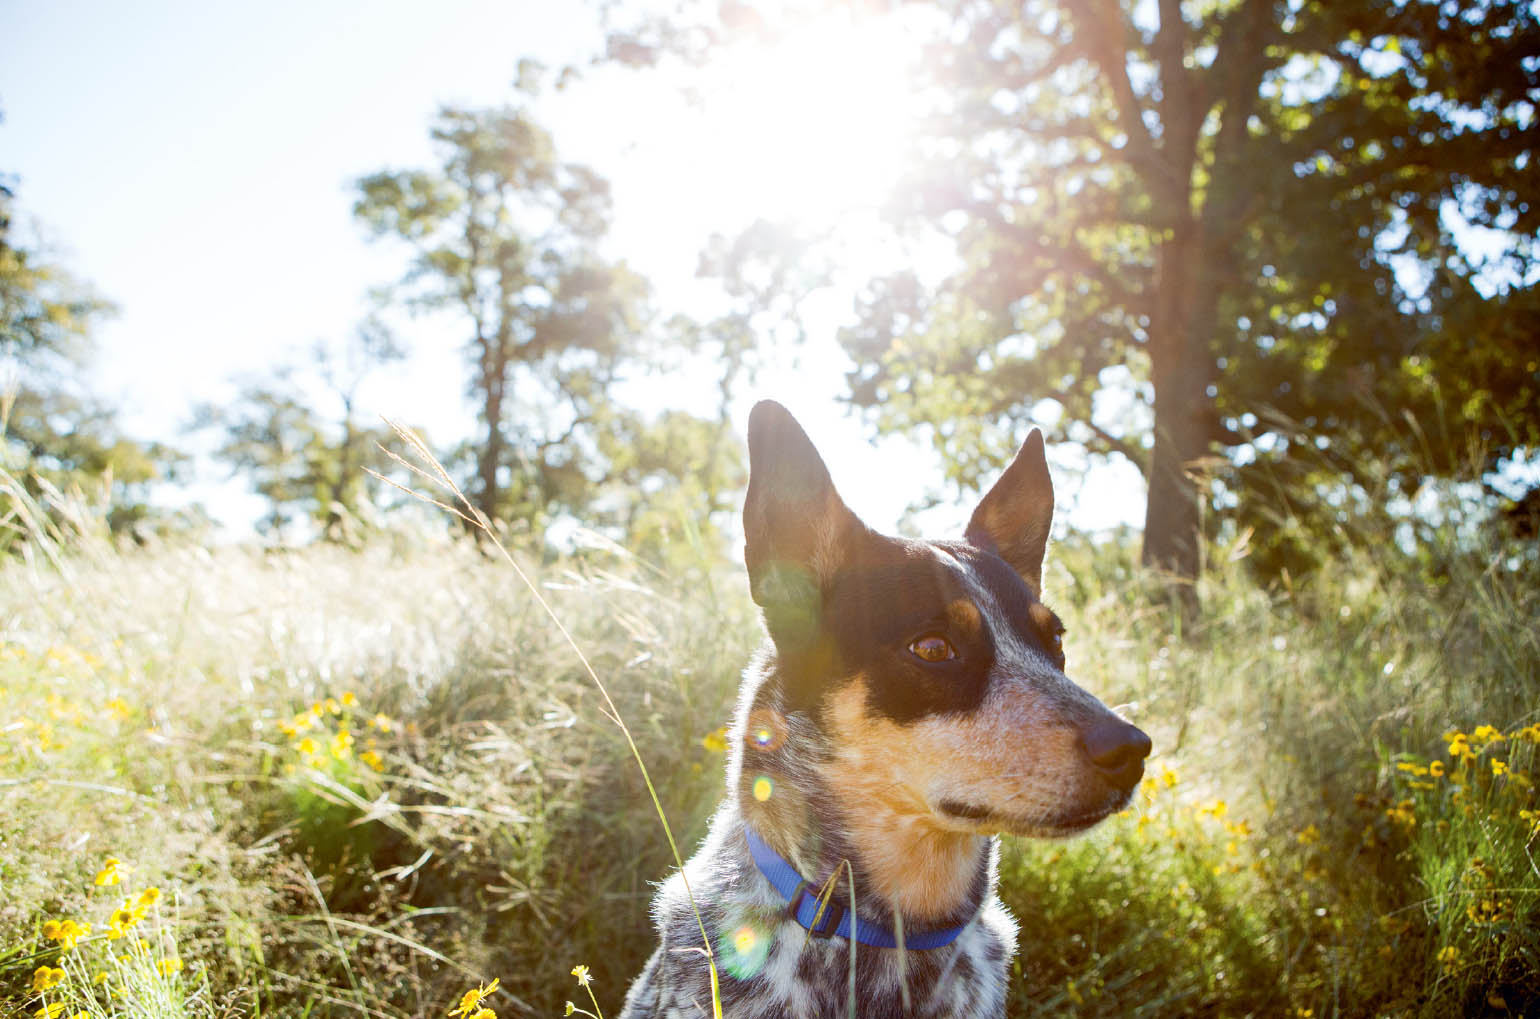
This image is being lit from the sunlight behind the dog, and the sun traveling directly into my lens caused some flare, which I really liked. I had to add contrast to this image in postproduction.
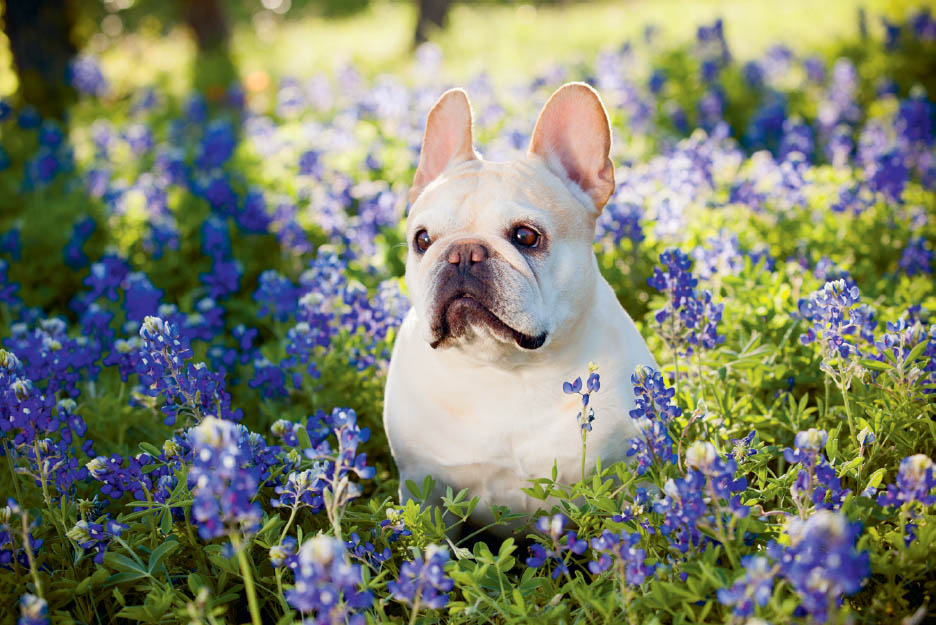
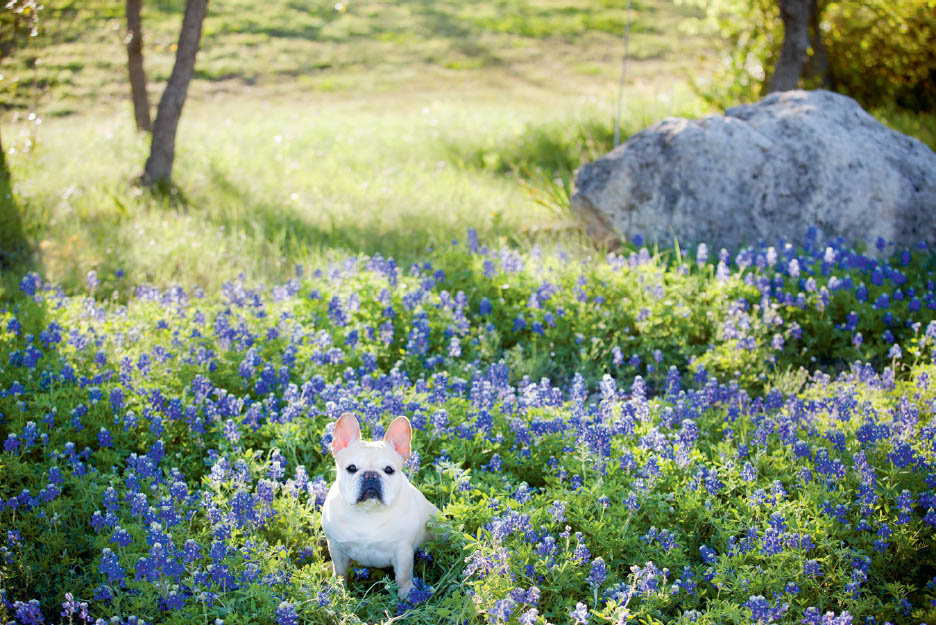
This image of Brie in the flowers was backlit, resulting in the nice rim light. I also added a pop of light to her with a reflector.
To capture backlit images with the sun outdoors, you’ll want to create images when the sun is low in the sky (either early in the morning or late in the day), as it will be easier to capture the sunlight falling directly behind your pet subject at these times, as opposed to when the sun is directly overhead. Because the sun will be coming directly toward the lens, the possibility of camera flare does increase. Lens flare isn’t necessary bad, as it can be really pretty and create variety for your pet images, but you may decide that you don’t care for it and choose to eliminate it by blocking the light that falls into the lens.
One of the challenges of photographing backlit pet portraits is that because the light is falling directly into the lens, the light on the pets can look “muddy” in terms of contrast and color. Adjusting the contrast levels in postproduction can help to resolve this issue. Often I’ll try to block the light that streams directly into my lens with a black card and add light back into the subject with a reflector, in effect decreasing the contrast of the scene and helping to create a more defined subject with the light I’m adding. If you’re working alone and want to play with backlight using fill light, place a reflector on the ground in front of you or lean it up against a stepstool or ladder to help get the proper angle.
You can also choose to include a fill flash to add a bit more light to your pet subject while the sun is doing the heavy lifting of the backlight. I find that if I can provide a small amount of fill light, I’m able to improve the muddiness in an image. If I use too much fill flash, it overpowers the effect of the backlight, and I miss out on the objective of including the backlighting altogether. Because backlit (at least naturally occurring) opportunities typically occur during the morning or late in the day, the light changes quickly. This light shift requires me to frequently adjust my position, global exposure, flash power, and the position of the pet so that they continue to be lit by the sun from behind and lit gently from the front.
Because backlight is a form of focused and directional light, photographing backlit stationary portraits of pets requires the pets to remain in a specific location, and this can take some extra patience and persistence. Therefore, backlighting is not necessarily my go-to choice for lighting. Having said that, if I find myself on location early in the morning or late in the day, I will absolutely take advantage of this kind of light.
Backlight can also work beautifully with studio lighting (small and large strobes) for pet portraits. The big advantage to working with studio strobes versus using the sun for backlight is that you can be consistent with the location of the light and not have to worry about that variable. You do still need to consider the pet’s physical location a bit more than with a broader light source.
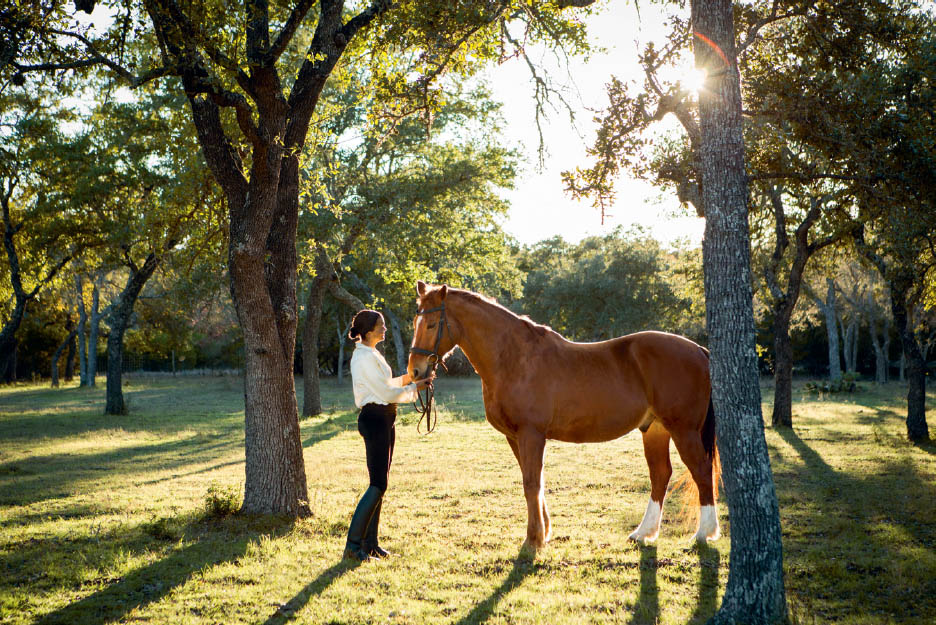
The light at the end of the day can help you make beautifully backlit portraits. The little bit of lens flare in this image helps create mood.
The process of lighting your pet photography can really be a game of compromise and constant assessment. Some of the questions I tend to ask myself include:
- What type of light currently exists naturally in the location?
- Do I like the quality of light?
- Is the quantity of light enough for the settings I want to use on my camera, such as depth of field and shutter speed?
- Do I want to change something about the natural light? Do I need to diffuse it, add to it, or modify it in some way to change the quality or quantity?
- Does my vision for the portraits include studio lighting and the effects I can achieve from setting up lights?
- Do I have the time and pet energy to set something up now? This might change depending on whether I’ve just started photographing or if I am nearing the end of the session.
- Is the animal comfortable with studio lighting?
- Is the light quality in the image supporting the feeling I’d like the viewer to experience, or do I need to prioritize something else based on my situation? (Maybe the dog is nervous, the horse is jumpy, the cat has settled in one particular spot on the couch, the sun is going down, and so on.)
- Am I in a situation where I need to make the best out of a tough lighting scenario?
Troubleshooting Low Light
Sometimes you may find that you like the quality of the natural light in your location, but there isn’t quite enough of it to keep your shutter speed where you want it or keep your ISO low enough to maintain the desired quality based on your camera’s capabilities. Let’s go over your options.
I always start with a reasonable ISO (as discussed in Chapter 3, “Exposure for Pets: Getting It Right In-camera”) and consider my priorities as I set up my camera for exposing. If I am determined to work with natural light for the portrait, I’ll try to see if I can bring more light into the scene before I increase my ISO to a really high number. This isn’t always possible, but sometimes if I slow down and really look around, there are elements I can change.
When I am working indoors and find the quantity of light lacking, I open all the doors, windows, curtains, and blinds in that space and see if I can increase the ambient, general light of the room. Sometimes this can gain me an entire stop or more of light. Once a window or door is open, I may notice a beam of light falling onto the floor or a nearby wall. I will then make efforts to take advantage of that light by placing a reflector on the floor or leaning it on the wall to bounce that additional light into my scene and onto the pet I am photographing.
If I’ve opened the windows and doors and raised the blinds, I’ll move anything in the room that is blocking the light from falling onto the animal. If I do all of this and my exposure still isn’t satisfactory, I will increase my ISO as needed. If I need to increase my ISO over 1600, I may decide either to light the scene with strobes (small or large) or move to a different location with more natural light. If the photographs have to be created in that space for any reason, I may bump my ISO to 3200 if I feel that I can get an accurate exposure.
If I am photographing an outdoor scene in natural light that is low, my options are a little more limited when it comes to increasing the light. I will pay the most attention to the direction of the light and make sure I have the pet positioned so that the most light is falling onto him or her. I will set my ISO high to begin with and make sure I am not sacrificing my shutter speed. I will sometimes use the silver side of the reflector, which has more contrast than the white side, to bounce light onto the pet. Silver reflectors in low light or overcast days can work surprisingly well to increase exposure and add a subtle pop of light.
I’ve learned to acknowledge the reality that there either is or isn’t enough light to work with, based on my needs. If there isn’t enough light, I’ll need to harness it, bringing light physically to the scene or adjusting my settings. Compromise is often necessary when photographing pets on location, and it’s important to be realistic and make a quick decision about how you’re going to proceed.
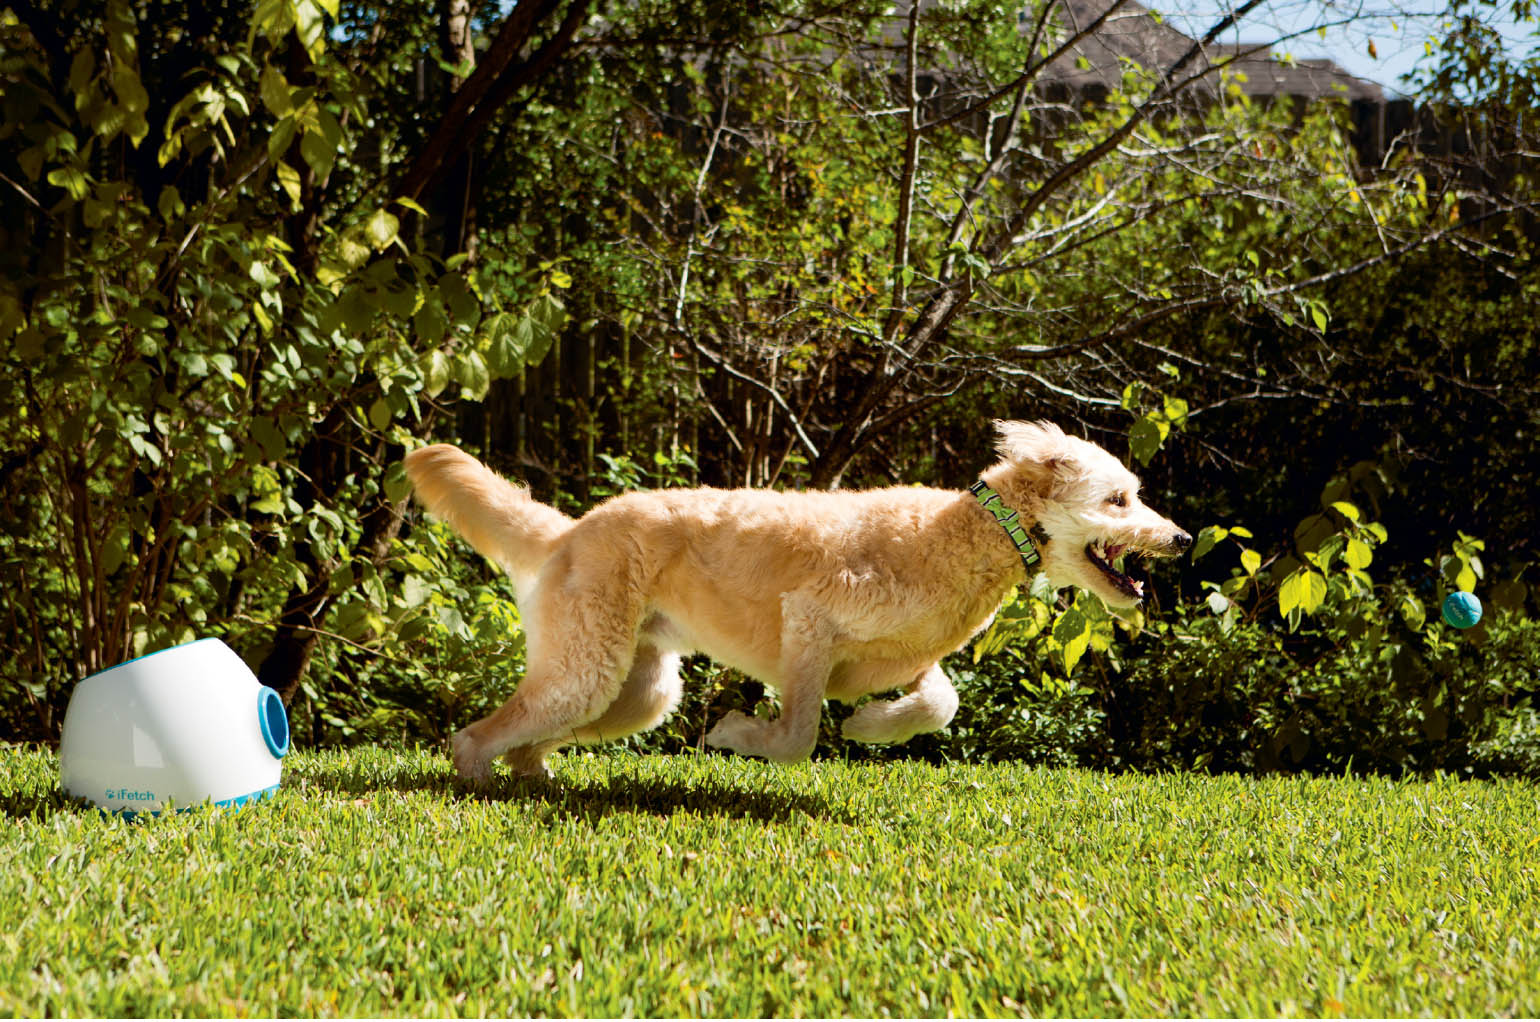
I wanted to stop the action in this image, and to do that I knew I needed a quick shutter speed. The ambient light was not quite bright enough for both a low ISO and a high shutter speed, so I needed to compromise and set my ISO to 2000. Settings: 1/1000 second, f/3.2, ISO 2000
Natural, Available Light Versus Studio Lighting
My pet portraits are created with both natural light and studio light. You don’t have to necessarily choose between the two for all of your portraits, and having a working knowledge of the pros and cons of both solutions will help you make decisions based on your specific situation.
NATURAL LIGHT PROS AND CONS
Photographing in natural light can allow me flexibility when I am photographing pets. What I mean by flexibility is that I can move around within a location with a pet more freely, thus experimenting with multiple backgrounds and scenes during a single shoot. While I am required to adjust my exposure frequently as I move about in multiple spaces filled with varying degrees of natural light, the amount of time required for these adjustments is less than with studio lighting. When working in naturally lit environments, I am not dealing with much equipment beyond my camera, my attention-getters, and perhaps some reflectors or diffusion materials.
Natural light has a quality that is very difficult to replicate with studio strobes and has a very specific feel to it. It can be exquisite. Many painters attempt to replicate the quality of natural light in their artwork, and we photographers are drawn to the same beautiful characteristics as we create our photographs.
One of the biggest challenges of working with natural light is that there often just isn’t enough of it when working indoors. While low light may not be a problem when photographing a person who can sit very still, for example, an animal tends to move a lot and thus demands specific camera settings. Photographing multiple animals in a naturally lit scene can require even more light, which can often become challenging. Another challenge of natural light pet portraits is that natural light is weather-dependent and can change often and quickly. You may have a portrait session scheduled, and it ends up being dark and rainy, dramatically impacting what you are able to accomplish. If you’re photographing outdoors on a partly cloudy day with wind, the sun will go in and out of cloud cover, which can add exposure challenges. You might love the light at the end of the day just before the sun sets, but that light doesn’t last very long.
In spite of these potential challenges, I love photographing in natural light and use it for my portraits whenever possible. I would definitely say that natural light is my first choice for pet portraits on location. And as mentioned before, photographing in natural light can be less disruptive for some pets than working with studio lighting.
STUDIO LIGHT PROS AND CONS
Studio light can be an excellent solution for times when there isn’t enough natural light for my needs or if I am aiming for a specific look and feel for my images. Sometimes I fall in love with a location, but there isn’t enough natural light, no matter how many windows and doors I open or reflectors I use to illuminate my subject. In these situations, I am really thankful to have the option of using studio lights.
Studio lighting is consistent, so once I have the lighting how I want it, I can photograph as much as I want without having to worry about the light changing. Studio lights can possess the power to illuminate dark spaces and expose tremendous detail, which may be something I want. Because of the consistency of studio light, a lot of creative control can be gained in terms of shaping and adjusting the quality of light to my needs. I can move the lights throughout a given location, thus opening up more options and, ultimately, allowing me to create more variety for my clients.
One way I love to light an interior space is to light from the outside inward. This setup will work if I am photographing indoors where there are large windows or sliding doors that allow me to flood light through them. I will set up a couple large studio strobes with umbrellas on stands outside of the window or door, diffuse the light through a silk or nylon material into the interior space, and then bounce that light off reflector cards inside. If the window has sheer curtains or blinds, I may directly diffuse the light through those instead of my material, simply because it’s a faster setup. Setting up the lighting in this way can create a very natural feel for the light and can help increase the general brightness of the room and allow me to photograph with smaller apertures than if I were solely relying on natural ambient light. This situation also gives me more space to move around indoors, because the lighting equipment isn’t in my way.
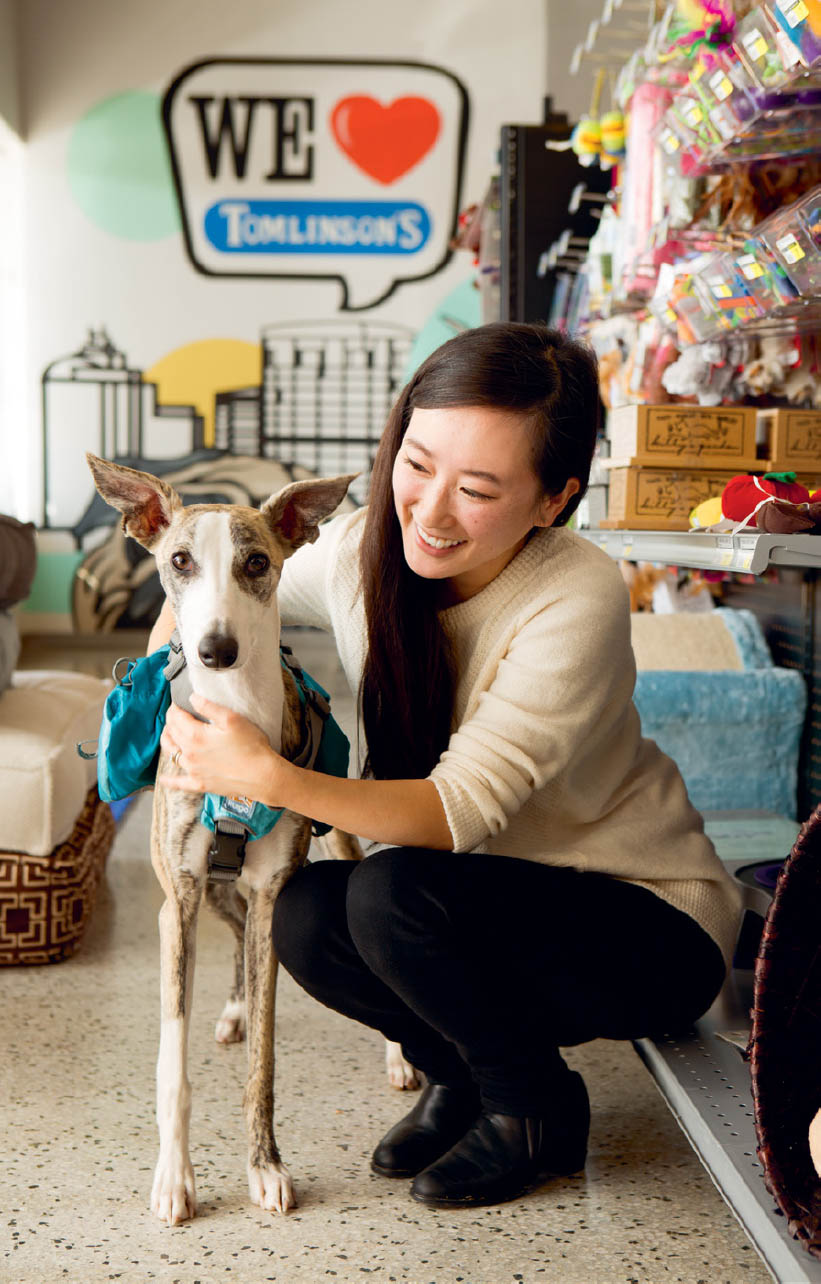
This light was created with large strobes placed outside the store window and through diffusion material, with reflectors filling some of the shadows.
Other times I might bounce light from a strobe light onto a wall or ceiling or simply feather it so that the softest edge of light falls onto my pet subject. There are so many options for working with strobe lights and an endless number of modifiers and ways to use them. Studio lighting can be really fun and creative.
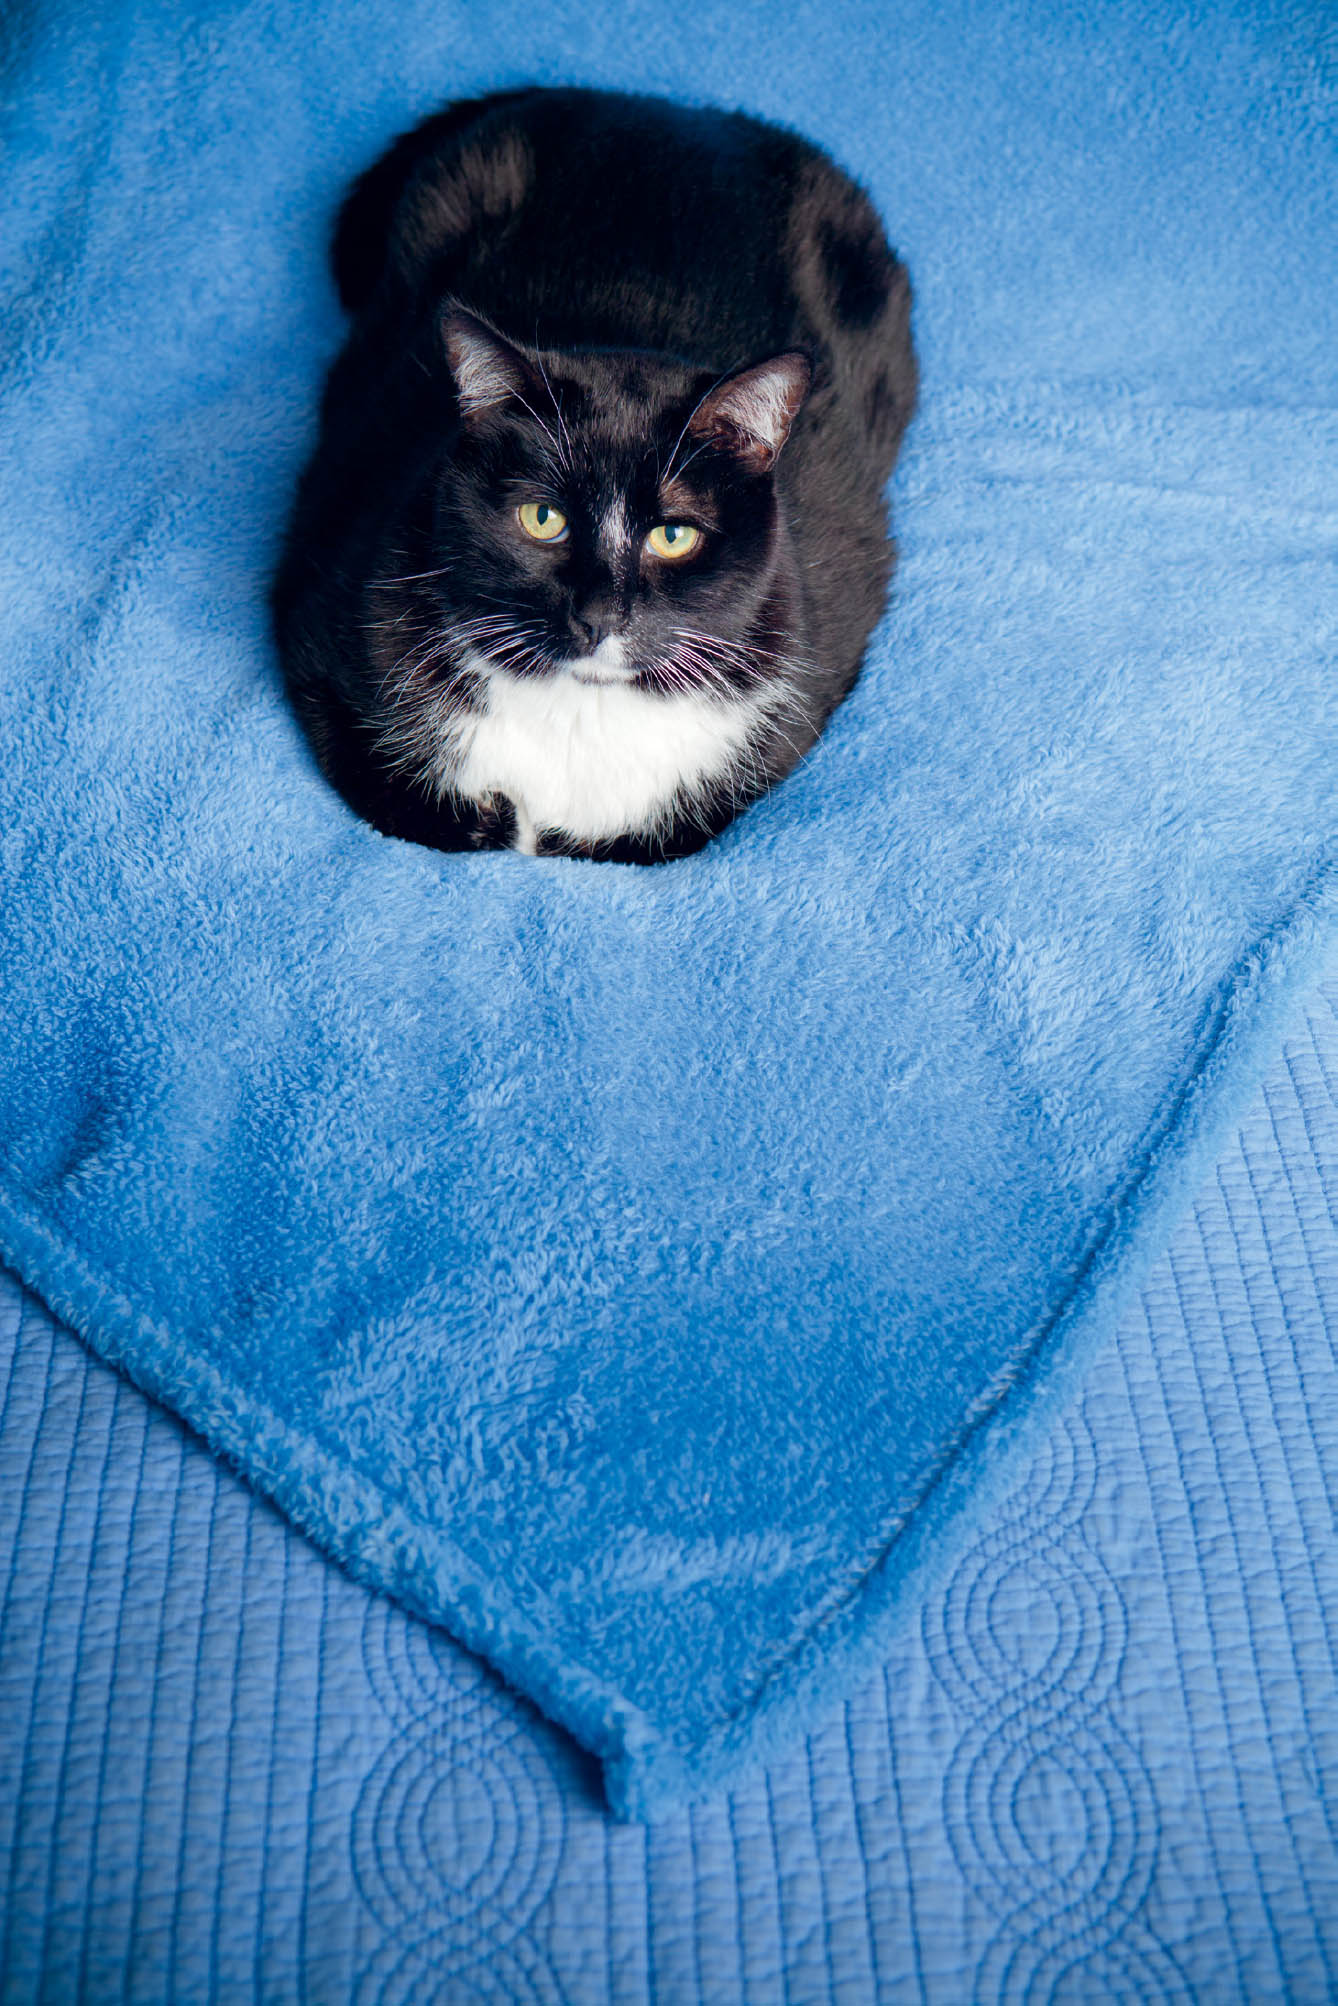
The soft quality of light in this image was created with a small flash unit bounced off a white ceiling. This was the quickest solution to the lack of light in the room.
I will emphasize, however, that photographing with strobes (either large or small) takes longer to set up and test, and as a result, makes me feel more locked into a specific area on location. I may find myself passing on an opportunity to set up strobes during a session, because I don’t feel the dog or cat (or pet parent) has enough energy left to wait for my setup time. If I know I am going to light something with studio strobes, I will usually prioritize that before the natural light images as a direct response to the pet’s energy conservation.
Having pointed out the challenges of studio lighting with regard to pet portraits, it’s important to share with you that I frequently use strobes, and they’ve allowed for some creativity that just isn’t possible with natural light. However, I do not believe that owning studio strobes is necessary for creating stunning pet portraits. There are pros and cons to using both types of light, and having a working knowledge of how to implement both in your pet photography can only serve as an asset.
I’d love to have all the time in the world to create and tweak elaborate lighting set ups while on location, and then position a pet in the exact spot necessary to create perfection. I would love to have this freedom but realize that situations are rarely ideal. I have learned over time that pet photography can involve a lot of juggling and on-the-spot decisions, and it’s my responsibility to keep as many balls in the air as possible. This has taken—and continues to take—a lot of practice.
I encourage you to remain open to the many possibilities for lighting your pet portraits and explore how light quality impacts not only your images, but also your experience of creating pet portraits.