
CHAPTER 2: BRINGING YOUR GEAR AND YOUR BAG OF TRICKS
I have slowly acquired a fair amount of equipment and tools over a several-year period. I have invested financially in my gear. I try to purchase equipment that I will use frequently and that is user-friendly, and this ability to invest in my equipment has supported my creative and learning process. I’ll be honest, though—I tend to get a bit frustrated by the feeling that I need to get more or new equipment so often it can feel like a distraction. Having said that, my equipment has helped bring to reality the images in my pet photography portfolio, and for that I am grateful.
If you’re anything like me, you can get overwhelmed with too many options. This can be challenging in any scenario, but in terms of photography, the digital revolution has also changed the gear game drastically. There is always something new and better coming out from the camera manufacturers, and this can result in “analysis paralysis” when it comes to purchasing. When I started in photography, digital was not ubiquitous, and if you got your hands on a high-quality film camera, it could take you far into your life as a photographer. Times have certainly changed, and with the ever-shifting technology to consider, it’s easier than ever to spend money.
But what do you really need? In this chapter, I invite you to learn to recognize the distinction between need and want with regard to photographic equipment.
Before you start to acquire a ton of gear, consider what you already have. Maybe it’s not the newest-latest-greatest equipment, but is it enough for you to start practicing with pet photography? Do you have a camera and a lens? If the answer is yes, you’re ready to practice. If not and you’re shopping for equipment, I’ll share with you my criteria for choosing these items and offer some ideas on what to consider in general with regard to pet photography equipment.
Every time I take a workshop or go to a photography conference or seminar, I walk away thinking I need more gear. Does this feel familiar? You may have participated in a workshop or class with someone who seems to have every piece of equipment imaginable. Do they really need all that gear? Are they really using all of those tools? Maybe, but maybe not. Granted, having certain kinds of equipment can be a huge help in achieving special creative and technical goals, but you don’t need it all to begin a practice in pet photography, and you can certainly learn how to create stunning imagery within a smaller budget.
Is the equipment required for pet photography different from what you might need for other types of photography? The answer is yes and no. There are definitely some specific issues to consider when approaching pet photography versus other types of portraiture. With regard to photographing animals, deciding how you want to approach your photo shoots will somewhat dictate the equipment that will be useful and convenient.
The “Best” Camera
I’ve been asked many times which camera is the “best.” Honestly, I often have to think hard about the exact model of my camera (it would be much easier for me to remember if it were named after an animal). All kidding aside, I currently use a Canon 5D Mark III, and although I like my camera (we are close friends), it is my intention to provide you with information that is applicable to you no matter what camera you’re using when you read this book.
You may have heard the phrase, “The best camera is the one that’s with you” (Chase Jarvis). It may sound cheesy, but it’s totally true. This statement refers to the value of simply having a camera with you, regardless of the brand or model. Besides, in this digital world it’s very hard to have the “best” for very long, anyway!
I regularly use my phone to create images, because I have it with me all the time and it’s lightweight. My phone is great for social media, small gifts, sharing, general documentation, and playing around with compositions. With the phone, I get to respond quickly to anything that catches my eye. This is like my daily workout for photography. I don’t spend a lot of time playing with apps and filters, but they’re fun, too.
I’ve also been experimenting and traveling with the Fuji X-E2, which is mirrorless, and thus, smaller and easier to carrier around than my “big girl” SLR. I purchased a wide-angle lens (the Zeiss Touit 12mm f/2.8) for this camera, because I don’t typically shoot with a super wide-angle lens and feel that it’s a good idea to try out new ideas and ways of shooting when I can.
For client and “serious” work, I currently and consistently use my digital SLR for its high quality, but ultimately, I’m able to see and capture images in a creative way with any camera in my hand. Each of these devices helps me create a variety of images, and each type of camera serves a unique purpose, depending on my goals for the final presentation.
If you don’t have the “latest and greatest” camera, don’t worry too much, because you can still practice all the techniques of composition, giving direction for portrait creation, working within a location, and utilizing light with any camera model or type.
As a professional, I have specific needs to address when I purchase digital cameras. In my research, I may get enticed by a new feature, but as a baseline, here are the criteria I consider.
QUICK SHUTTER RESPONSE
When I am photographing a pet, I need to make sure I don’t miss the shot because of a delay on the camera’s part (user error is a completely different element). When I press the shutter, I need the camera to respond immediately. Right now, most high-quality digital SLRs and mirrorless cameras have good reaction time. When I first started photographing with digital, I would press the shutter and the frame would be captured a second later. Let’s just say that I got a lot of photographs of tails, and it was more than frustrating.
ABILITY TO CAPTURE LARGE IMAGE FILES
I need the image files to be large enough to be able to maintain a high quality when printed as large wall portraits for my clients and to meet commercial and stock photography needs. While I tend to shoot very intentionally when it comes to my framing, I also appreciate having a large-enough file size that enables me to crop, if needed, without sacrificing quality.
ABILITY TO SHOOT IN RAW
Photographing in RAW gives me the ability to make adjustments and processing decisions rather than having the camera decide that for me. Most higher-quality cameras have this feature.
LOW-LIGHT SHOOTING
Because many of my pet portraits are created on location, I want my camera to have the ability to photograph in all kinds of lighting situations. I often photograph indoors, so it helps to use a camera that will maintain a good quality even in lower-light scenarios. This helps me shoot with ambient light and set a shutter speed high enough to stop unwanted blur. If the camera can hold its quality in low-light situations, a lot of creative doors open for me as a pet photographer.
CAMERA WEIGHT
Pet photography can be very physical. Ideally, my camera isn’t so heavy that it inhibits me or hurts my body. The first high-end digital camera I had was very heavy, and using it for long periods of time caused me to have physical issues in my forearm and back. Weight matters to me, and you may also want to consider this factor before making your investment.
SIMPLICITY AND USABILITY
When I get a new camera, I do not want to spend time relearning how to change the settings. I appreciate advanced features in camera systems, but my camera needs to be user-friendly and somewhat intuitive so I can work quickly. If this is not the case, it’s a deal breaker. If you are someone who loves diving into buttons and dials, you may feel differently.
BRAND LOYALTY
As I mentioned, I currently shoot with a Canon camera, and my mirrorless camera is a Fuji. I don’t feel exceptionally loyal to any company, except for the fact that I have basically invested myself into brand loyalty. I have spent plenty of money on Canon equipment—I have two camera bodies (one main body and one backup) and a few lenses. If I wanted to switch to another system, the cost would be significant. Trade-in values on used digital cameras aren’t great, and I would need to be prepared financially for that loss if I were to switch. This change could very well occur if I have enough incentive to do so, but overall I am not too concerned about who makes my camera—as long as it’s living up to my reasonable expectations. It’s important to have options when you purchase a camera, and the major manufacturers offer a range of cameras, lenses, and accessories and put a lot of money into research and development. This translates into their ability to improve on image quality and usability of their cameras.
LCD
While histograms provide the most useful information about exposure, having the ability to review my in-camera cropping or framing choices on the back of the camera is very important. I also like to double-check focus on my LCD, and that requires a high-quality screen. I need the screen to be large so I can see it easily and show it to my client, if desired.
DO YOUR RESEARCH
ABOVE ALL, IT’S IMPORTANT TO EDUCATE YOURSELF ON THE CURRENT SYSTEMS BEFORE YOU INVEST. THERE ARE MANY BLOGS AND REVIEWS ONLINE, AND NOTHING BEATS GOING INTO YOUR LOCAL CAMERA STORE TO SEE THE CAMERAS IN PERSON. THIS GIVES YOU THE OPPORTUNITY TO HOLD THE CAMERA AND ASK QUESTIONS OF PEOPLE WHO KNOW THESE SYSTEMS INSIDE AND OUT. BEFORE GOING INTO THE CAMERA-PURCHASING PROCESS, HOWEVER, THINK ABOUT WHAT YOU NEED THE CAMERA TO BE ABLE TO DO FOR YOU. FOR EXAMPLE, THERE MAY BE ONE KIND OF CAMERA THAT FUNCTIONS BETTER FOR PHOTOGRAPHING LOTS OF ACTION, AND ANOTHER MAY BE BETTER AT PHOTOGRAPHING IN LOW LIGHT. OF COURSE, YOU’LL WANT TO GET THE CAMERA THAT WILL FULFILL MOST, IF NOT ALL, OF YOUR NEEDS.
I’m not going to get super technical here, because there are many resources available to scratch our technical itches. Improvements to lenses are similar (but not quite as fast, it seems) to those in cameras. We tend to desire faster, sharper lenses, and camera manufacturers are constantly working to offer you something else to invest in. I feel similarly to lenses as I do with gear in general; they’re vital to the photographic process, but I don’t get overly fixated on them or feel the need to collect lenses for the sake of accruing quantity.
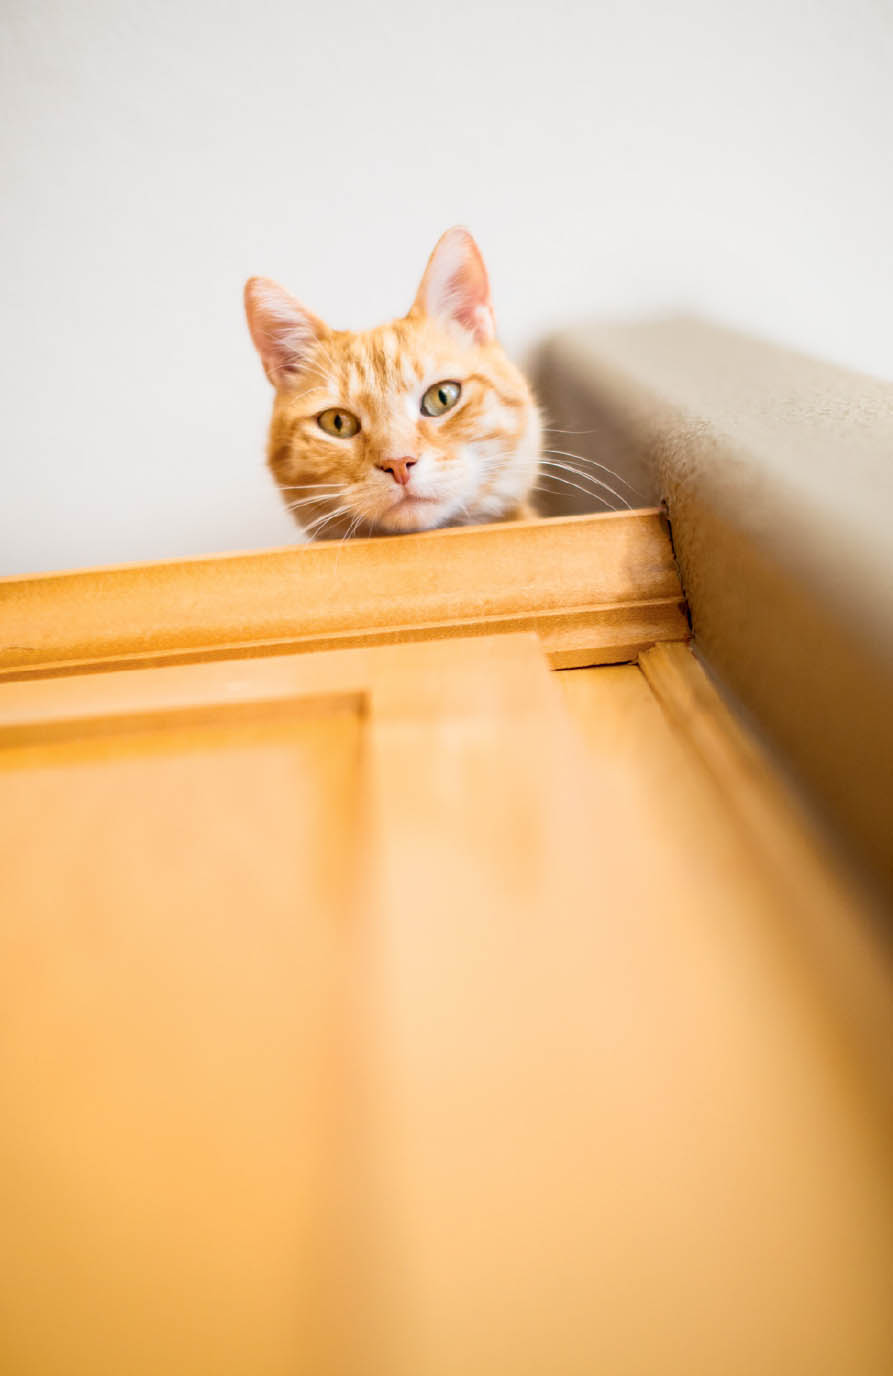
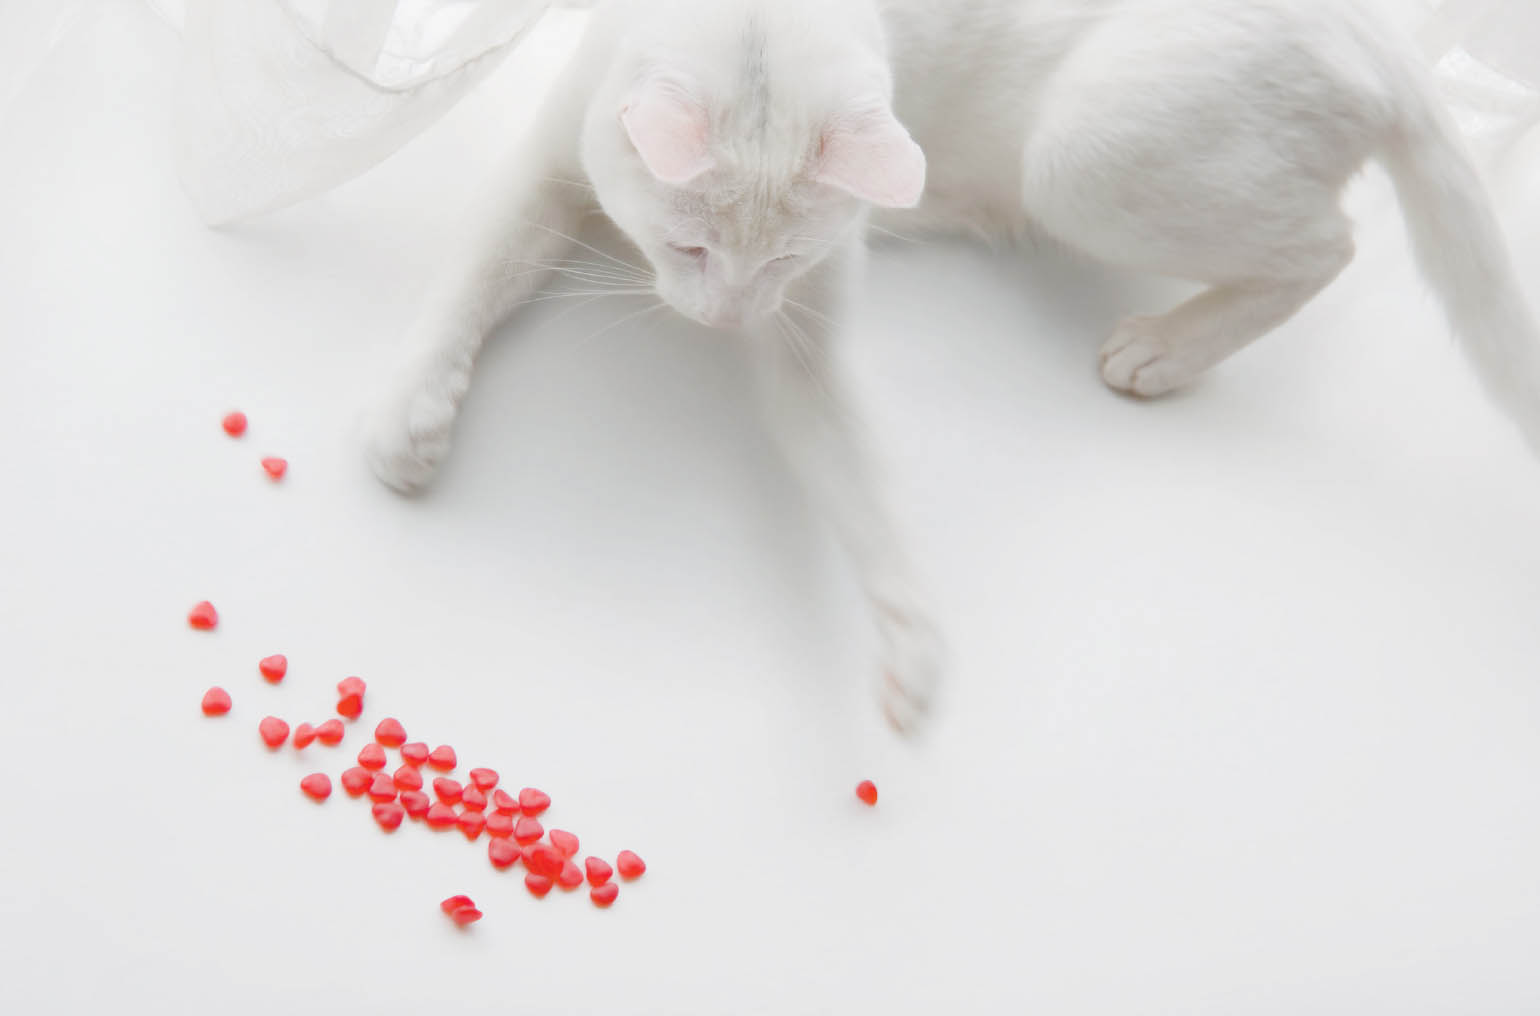
This image was created in a low-light situation with my 50mm lens at an aperture set to f/1.4, which created a soft environment around the cat and very limited depth of field.
The choices for lenses are vast, and I highly suggest that you consider how you like to physically operate before you make your investment. Think about the highest-quality lens you can afford that makes sense for pet portraiture and slowly building your toolbox over time based on your individual needs.
FIXED FOCAL LENGTH OR PRIME LENSES
Prime lenses are generally known for being sharper than zoom lenses. When I photographed with film, I had a couple fixed lenses, and the images created out of the camera and lens combination were very sharp. I had to physically move around a lot with prime lenses, I manually focused (using a Hasselblad), and in general moved more slowly than I do now. Keep in mind, I was also changing film then. There is something to be said for the shift in creativity that seems to occur when you are required to physically move around in order to change your composition and to photograph more slowly. I currently have one prime lens (a Sigma 50mm f/1.4) and enjoy the added challenge of the fixed focal lens, but I’ll be totally honest—it is not my “go-to” lens for pet photography. I like it for the wide aperture capabilities but find it difficult to shoot wide open with pets. Often I find myself lying on the floor or standing on a ladder, and when the animal moves out of the frame, I occasionally miss what I am aiming to capture when I use fixed lenses. Sometimes while using this lens, I notice an opportunity for creating a good photograph, but I am not able to get close enough, quickly enough, to capture the image.
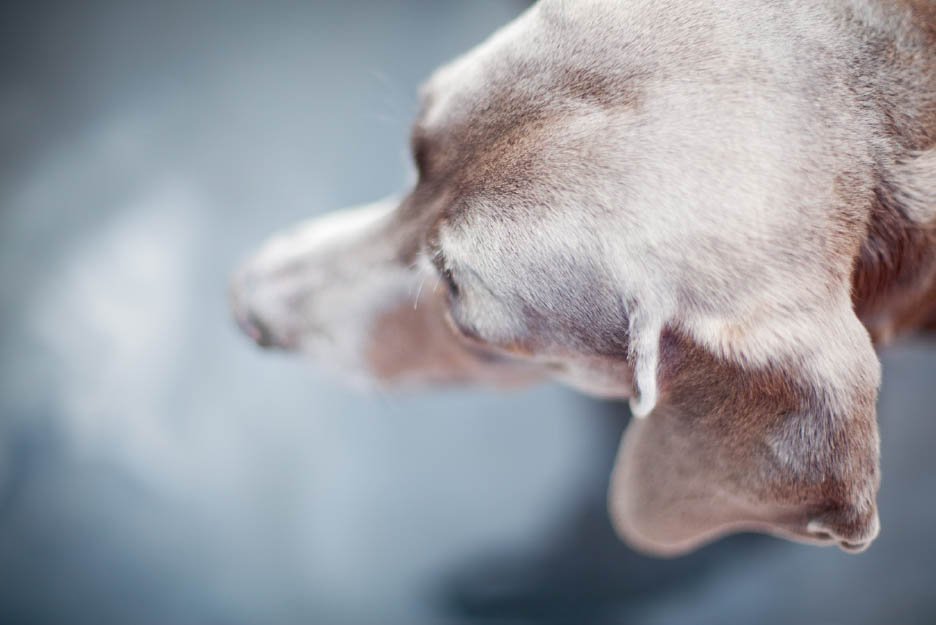
This image of Shadow was created with a 50mm fixed lens set to an f/1.4 aperture, which helped simplify the image and create a soft, abstract feel.
ZOOM LENSES
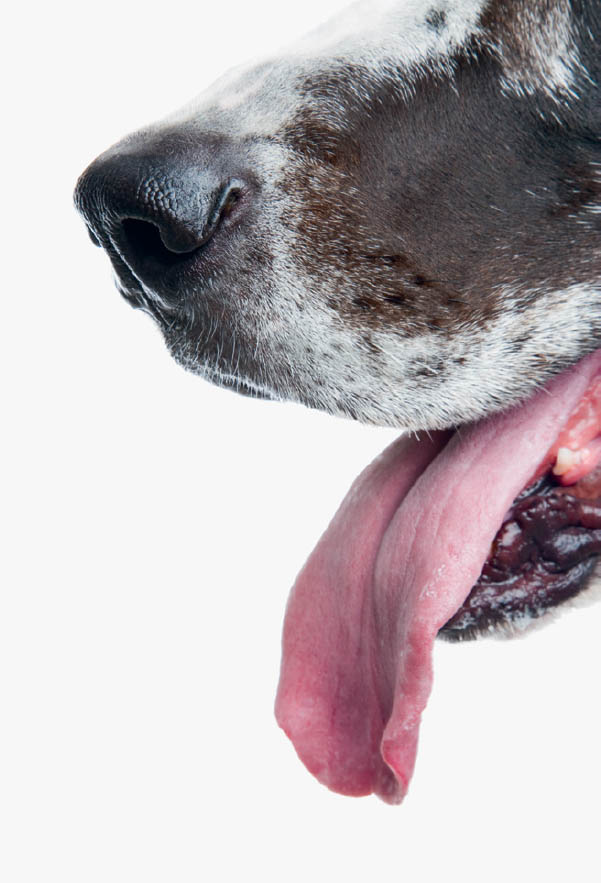
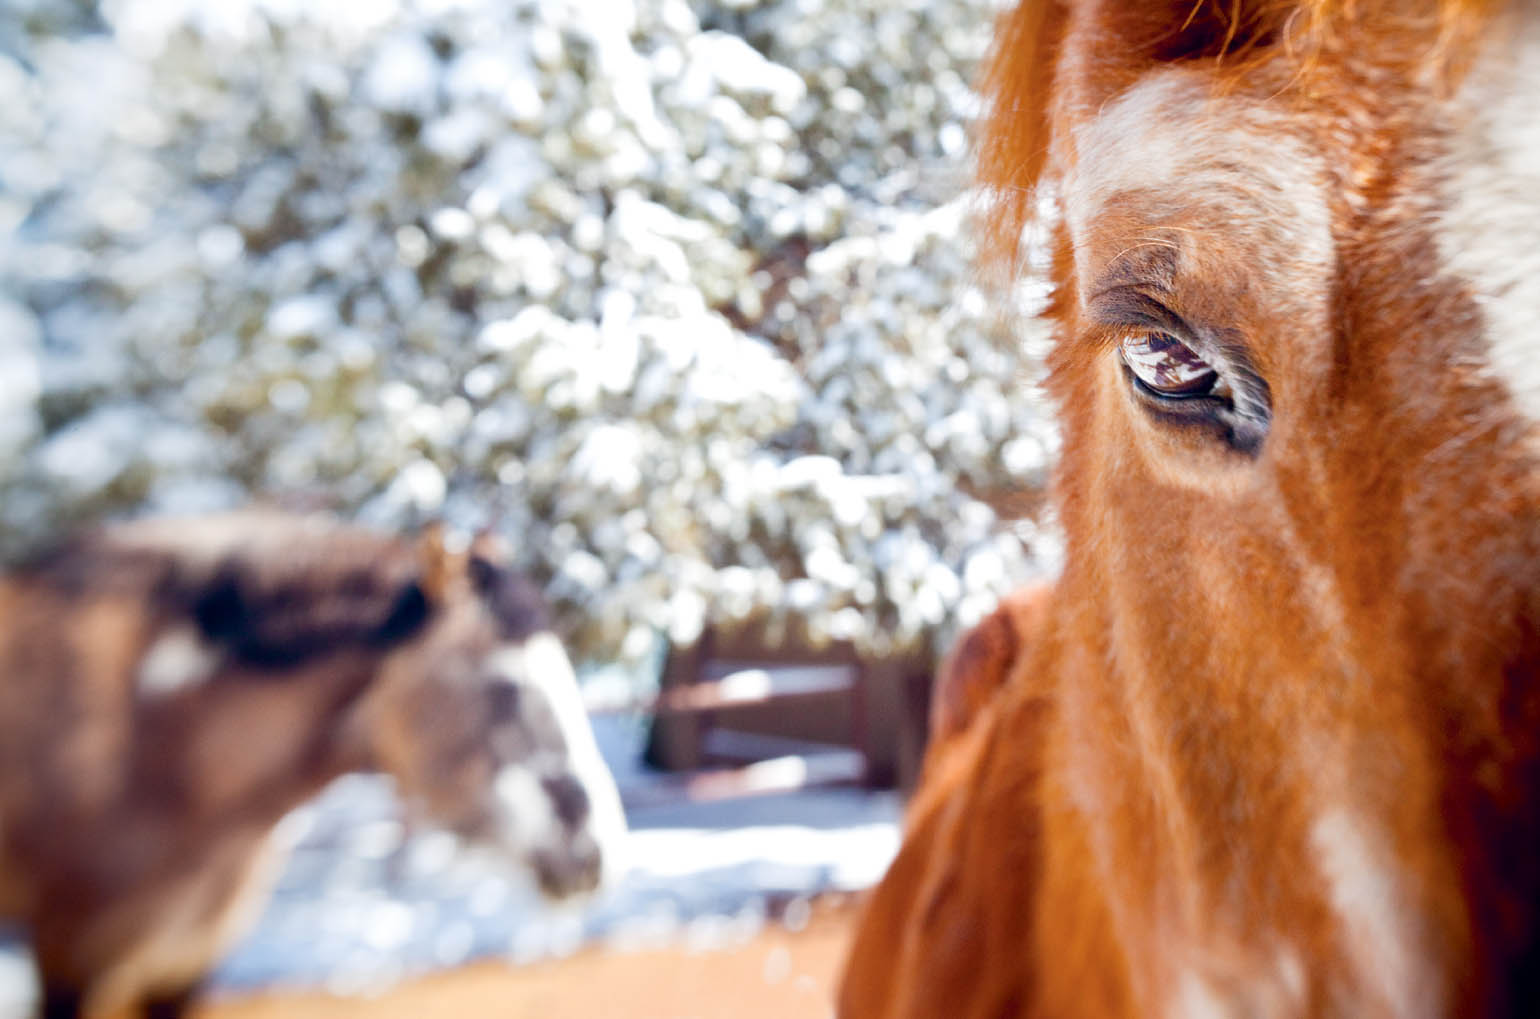
While maybe not quite as sharp overall, zoom lenses work wonderfully for me when photographing pets. As I started to seriously invest in my digital SLR equipment, I purchased a 24–70mm f/2.8 professional zoom lens. For a long time, this was my only lens and to this day it is my work horse. This lens allows me to shoot fairly wide angles in order to include a lot of environment, if desired. When I am lying on the floor or standing on a ladder and I want my frame to tighten on the dog or cat, for example, I can quickly zoom to 70mm and capture the image without having to physically move my body. Often this can really make the difference between getting the shot and missing it as a result of the animal moving positions, changing expressions, or leaving the space entirely. The other aspect of this lens that I love is that it can focus very closely on details due to its macro abilities. This is an excellent feature for photographing details like a dog’s muzzle, cat’s whisker, or horse’s eye.
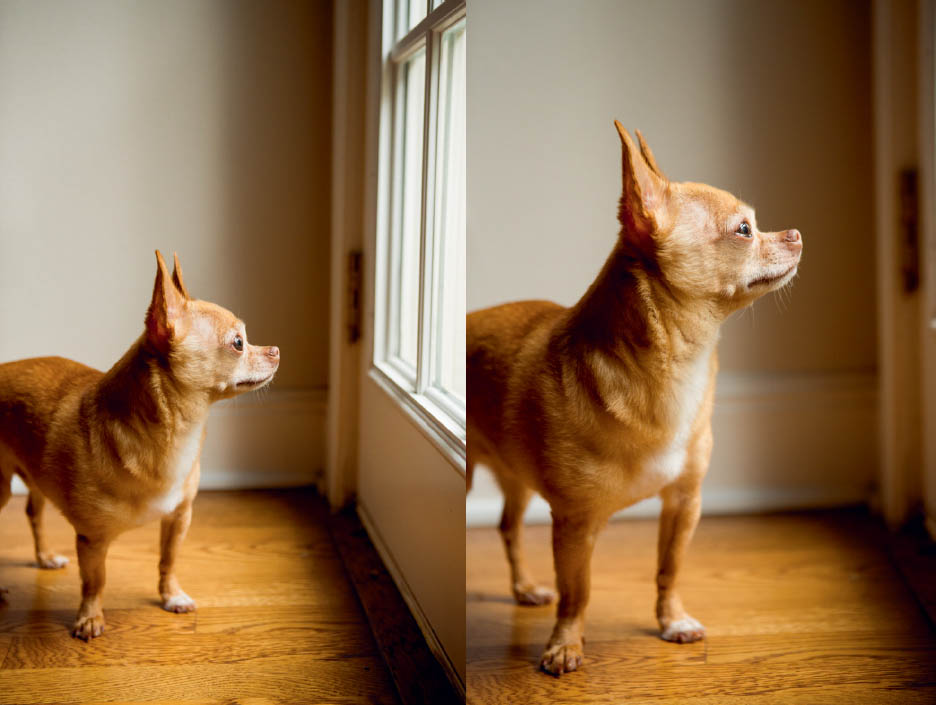
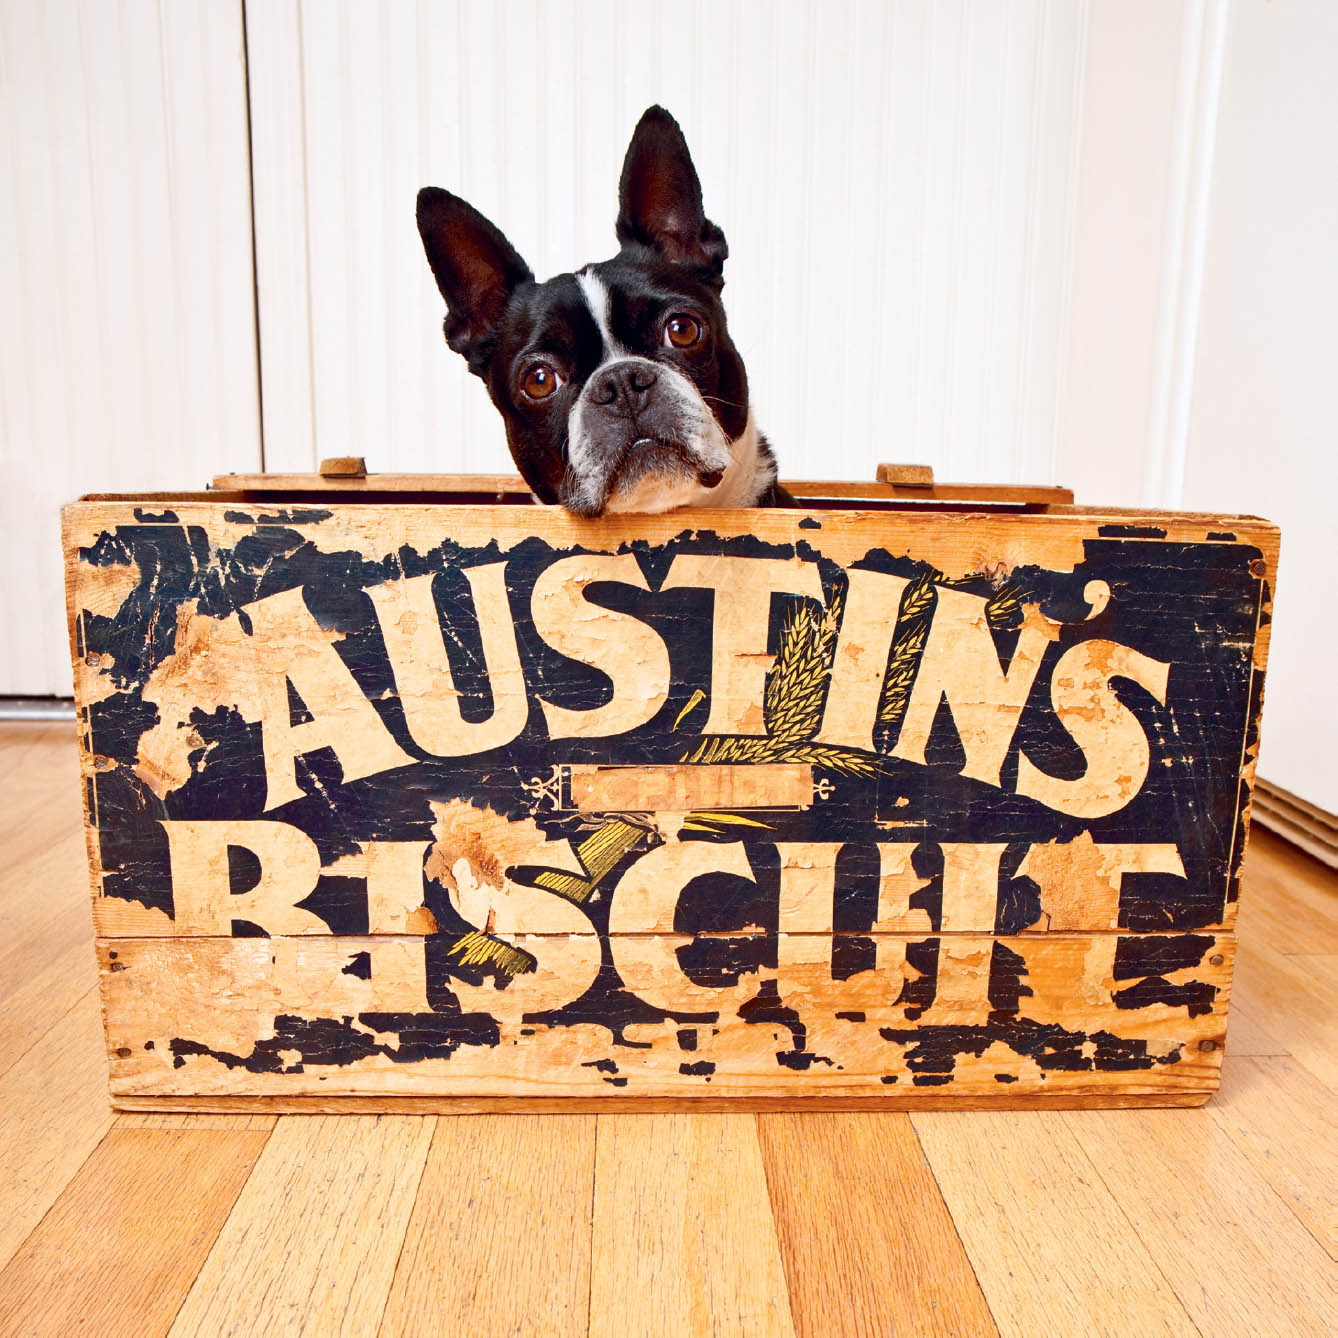
I loved the way Rocco was being lit by the light of the door in the image on the left and decided to keep the door in the frame for reference and environment. Rocco wasn’t interested in staying in that location for a long time, so I was glad to have a zoom lens (my 24–70mm) on my camera, which allowed me to capture a tighter frame of Rocco just before he stepped away from the door. I might have missed this shot if I had to move physically closer with a prime lens.
When photographing pets, saving time—and as a result, animal and human energy—is very helpful. Another reason I like zoom lenses is that if I were shooting with a 24mm prime lens and then a 50mm prime lens, I would have to spend time changing lenses as I felt inspired or motivated to use different focal lengths.
Physical proximity directly impacts the quality of my images, and using a shorter lens (versus a longer telephoto) helps me to connect with whomever I am photographing. If I am working alone and need to adjust a pet or person’s position, for example, I can more easily do this when I am physically closer than if I were using a long telephoto lens.
Zoom lenses are definitely the way to go if you have any physical limitations keeping you from moving quickly or comfortably. Something to keep in mind when purchasing zoom lenses is how fast they are; be aware of the widest aperture you can use while the camera is set to its longest zoom length. Some cameras are limited to f/4, which works if it’s what you can budget for, but this may become limiting in low-light situations or if you’re looking to really play with shallow depth of field. If you can afford it, think about investing in a fast lens.
One disadvantage of zoom lenses is that you can find yourself getting a bit lazy creatively, and because you don’t necessarily have to move around to capture another frame, you don’t. This can make for stagnant, repetitive images and missed opportunities for photographing from a different perspective or angle. Building an awareness of this can help fix this potential issue. Another disadvantage I’ve noticed is that with continued use of this lens and all of its moving parts, I have, on occasion, needed to have my camera recalibrated for focus. This may not be an issue across the board, but it’s something I have encountered.
LENS HOODS AND FILTERS
In addition to helping block unwanted lens flare, using a lens hood is a smart way to help keep your lens slobber-free from dog, horse, and cat noses getting too close for comfort. Lens hoods have also saved my lenses from damage on several occasions as my camera has knocked into things accidentally. (This is probably a good time to share that I am a bit clumsy.) Lens hoods are typically not very expensive, and it’s always a good idea to have them on your lenses.
I typically just use a good-quality UV filter on my lenses, primarily for protection. Occasionally, I use a polarizing filter to intensify a mediocre-looking sky.
TELEPHOTO LENSES
The next “go-to” lens in my bag is the 70–200mm f/2.8 zoom. I enjoy this lens for many reasons. It works well for photographing pets from a longer distance than the 24–70mm and, at wide apertures, can create beautifully soft backgrounds. Many portrait photographers love this lens because of the compression that can occur between subject and background. Images created with this lens have a distinctive feel, and I certainly appreciate the aesthetic.
The 70–200mm lens works well for photographing pets in action, because I am able to more easily anticipate activity from a distance and physically move my lens as needed to capture the action as it occurs. If I am too close, the action can easily take place outside the edges of the frame, and I may not have enough time to adjust physically and still focus.
The 70–200mm telephoto lens used in this image (set to 150mm at f/4.5) created a soft background.
Longer lenses are heavier than shorter ones. One of the challenging aspects of this lens is that when handheld, it requires a higher shutter speed for even stationary portraits than a smaller, lighter lens requires. These higher shutter speeds are necessary for hand-holding long telephoto lenses to prevent potential camera shake by the photographer. It can be challenging to work with higher shutter speeds if you are in a low-light situation, especially if you need a wide depth of field. As mentioned previously, pet photography can be a very physical activity, and longer lenses require more energy to carry and hold.
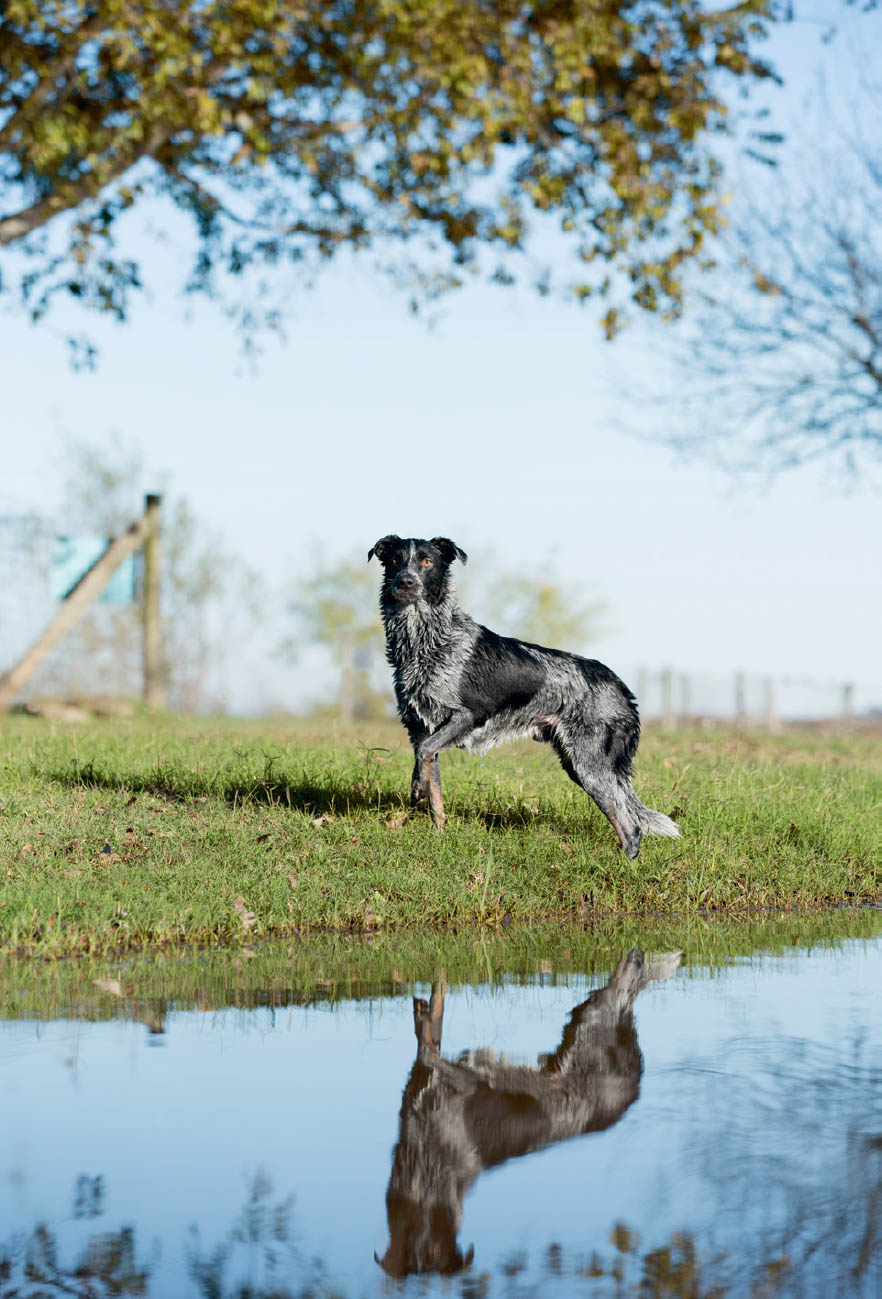
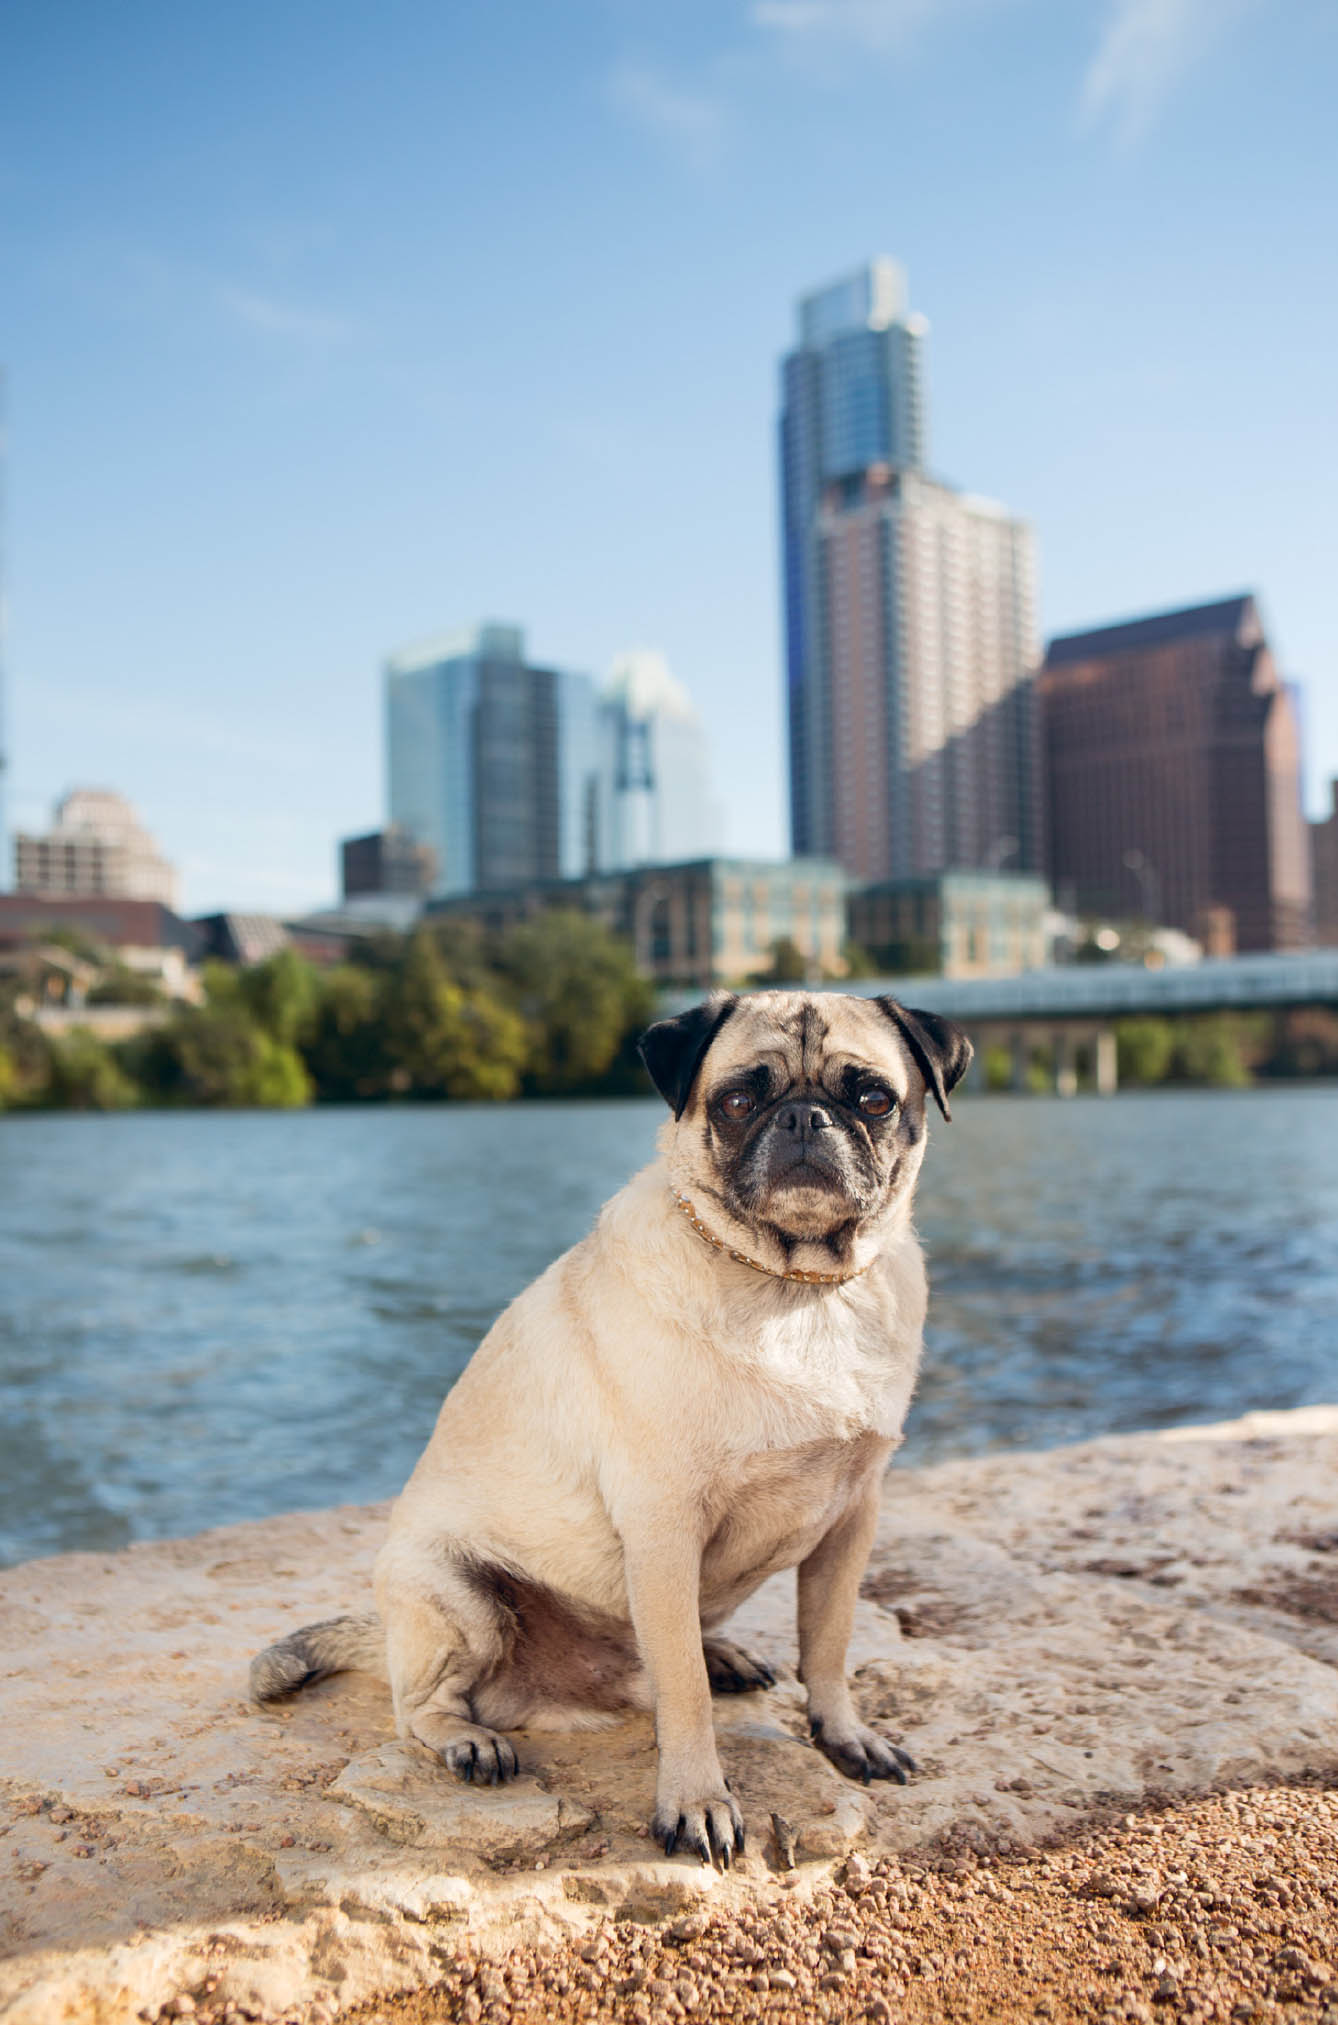
I was able to photograph Oliver from across the edge of the pond with my 70–200mm lens.
LENSES AS CREATIVE TOOLS
Fun lenses like fisheye and tilt-shift lenses can be great tools for adding a creative spark to your images. You might find yourself in a small space wanting to capture lots of environment and decide to utilize a really wide-angle lens. These tools support you in making your vision a reality, and there isn’t one choice for all photographers and all photographs. For pet photography, a wide-angle lens used closeup on a dog or horse can create distortion and become almost cartoon-like, which can be really playful. A Lensbaby can give you the chance to photograph a pet and transform the scene into a dreamlike environment. When I look at photographs, I don’t want the lens choice to become distracting or the first thing I notice; I want whichever lens I choose to be fully supportive of the image as a whole.
Spend some time learning and playing with how and when to use these different tools. Explore the many options before you invest (rent a lens or two for a day), and consider what works for you based on what you know to be true creatively and physically about yourself as a photographer.
This image was created with a Lensbaby, which helped produce a dreamlike feel for this horse portrait.
Tripods
I typically do not use tripods when I photograph pets. I might use a tripod to prevent camera shake when trying to capture pet images that involve low light or when I am trying to pan. Otherwise, I find using a tripod a bit limiting, because I have to close it up and reset it when I want to change positions or move around within the location. I feel a little stagnant when I shoot portraits using a tripod.
I CARE ABOUT MY EQUIPMENT, AND I HAVE WORKED VERY HARD TO BUILD MY TOOLBOX. HAVING SAID THAT, I WORK WITH PETS THAT OFTEN SLOBBER, SHED, POOP, PEE, SIT ON, JUMP ON, AND PLAY AROUND MY STUFF. I TAKE ALL POSSIBLE PRECAUTIONS TO ENSURE THE SAFETY OF MY EQUIPMENT AND, OF COURSE, OF THE PEOPLE AND ANIMALS I AM PHOTOGRAPHING.
I USE SANDBAGS TO WEIGH DOWN MY LIGHT STANDS, I CLOSE MY CAMERA BAG SO THE FOUR-LEGGED DON’T SHOP AROUND IN MY BAG OF TRICKS OR PEE ON MY GEAR, AND I KEEP OTHER BAGS AND EQUIPMENT OUT OF REACH AS MUCH AS POSSIBLE.
Postproduction
I love photography, but I don’t love spending time on my computer. But kudos to those of you who love to dive in and spend days editing and retouching. I do appreciate the powerful software programs we have available to us as digital photographers, and by no means do I take those programs for granted—I need them!
By looking at the images in my portfolio, you can likely tell that I am not heavy-handed when it comes to retouching, manipulation, or compositing. I do, however, strongly rely on a couple of programs to help get my images looking clean and polished, and to achieve any other specific creative goals I may have.
ADOBE LIGHTROOM
There are many excellent books and tutorials on Lightroom, so I won’t go into too much detail here. But I love using Lightroom for my pet photography for so many reasons, and at this point I cannot imagine my workflow without it. This software allows me to organize my images easily, cull them, make helpful adjustments both on a global and individual level, and export them at appropriate specifications for sharing—either personally or for client review. Here are some highlights about the software as they specifically relate to my workflow.
LIBRARY MODULE
I import directly from my memory card into Lightroom and may choose to add a few global keywords during that time. The Library module is perfect for comparing images from my photo shoots to determine which images make the cut based on my goals. I have definitely gotten faster at this process over time and find that choosing images can take as long as I allow for it. Lightroom does make things easier to choose, though, as I can easily compare two images of a dog and check for focus side by side, view multiple images of a cat tiled on the screen to pick out my favorites, and label my favorite images in a way that helps me stay organized (a term with which I don’t always identify).
DEVELOP MODULE
What I love most about working in Lightroom is that it is extremely intuitive, and navigating the Develop module feels a lot like how you might take an image from negative to print form in the darkroom.
SYNCING IN LIGHTROOM SAVES TIME
I LOVE USING THE AUTO SYNC FEATURE IN LIGHTROOM DURING MY POSTPRODUCTION OF PET PORTRAITS. FOR ANY GROUP OF IMAGES CREATED UNDER THE SAME CONDITIONS, YOU CAN ADJUST ONE IMAGE TO YOUR LIKING AND THEN SYNC THE REST WITH JUST A FEW MOUSE CLICKS.
Getting creative with your images in Lightroom is quite easy, and experimenting with different looks for your images via virtual copies can get addictive. In the end, however, most of my images are processed in a straightforward way. I check for focus and adjust the exposure, contrast, vibrancy, and clarity on most of my images. I cannot tell you how much I love the “sync” feature in the Develop module, as it saves a great deal of time. This feature allows me to make needed development adjustments to one image and then synchronize any other image created under the same conditions, such as light and color balance. I love this feature!
Cleanup and adjustments are really straightforward within Lightroom using the individual adjustment tools, but if I need to really clean up a dog’s face from debris or eye boogers, or clean up a cat’s eye in a detailed manner, I will open the file in Photoshop directly from Lightroom and save it. This process is seamless and painless.
Lightroom has so many excellent features to explore, and the program is constantly being improved. I highly encourage you to investigate and invest in this software, whether you are an avid hobbyist or professional-bound.
ADOBE PHOTOSHOP
Photoshop is an incredibly powerful program. I use Photoshop for images when I need to fine-tune details that I’m unable to change in Lightroom. I primarily use Photoshop when I am producing final images that are being published in some way—either in print or online. For culling and selection purposes, I adjust in Lightroom only, unless I absolutely need to make a change I can’t make within Lightroom.
COMPOSITING
On occasion, I take advantage of the opportunity to composite pet faces, ears, and eyes in situations where I love everything else about the image but can’t quite make the “perfect” image happen in-camera. I accomplish this through masking. This scenario is most likely to occur when I am photographing more than one animal at a time or when I am photographing animals and people together. For images of groups where there is not enough light to allow for great depth of field, I may choose to focus on one plane of subjects for one frame and then refocus on the other plane of subjects with the intention of compositing later. This means more time on the computer for me but can be quite handy.
RETOUCHING
I use Photoshop for more detailed retouching and cleanup. To do this work, I use a Wacom tablet and a pen, which I find very fluid and easy compared to using a mouse. This took some practice and time to get used to, but I love it now.
The primary purpose of retouching for me is to make my images look cleaner and more “finished” by removing distracting elements, lines, wrinkles in material, lint, unwanted or unruly pet hair, eye boogers, pieces of dirt, or other flaws that weren’t removed while the photographs were being created. When I photograph people with pets, I smooth out skin and hair as needed, but try to maintain a realistic look.
CREATIVITY AND RETOUCHING
I want my images to evoke an emotional response before the viewer notices a particular technique. My opinion on post-processing is the same as it is for lens choice: I don’t want to be distracted by a filter, plug-in, lens, composite, poor retouching, or oversaturation in an image.
I am not suggesting that your images look like mine or that you shouldn’t use plug-ins and filters, or create dramatic and fantastical composites, but rather, I encourage you to consider whether your adjustments and add-ons support your image and vision as a whole. If the image calls too much attention to the “process,” might the viewer miss out on what you’re trying to say with your work?
Experiment, play, and learn what works for you and your unique vision. If you haven’t done so already, spend some time learning the basic tools in Lightroom and Photoshop so that you can start to make these creative decisions for yourself. Software should serve a supportive role in your workflow.
Lighting modifiers are helpful for creating a variety of effects, and which ones you need will depend on your goals. You can modify available or natural light, as well as light from small flashes and larger studio strobe lights. Many photo- dedicated modifiers are available for purchase, and inexpensive household items can work brilliantly, too. You can read more about lighting modifiers and how I like to work with them when photographing pets in chapter 5, “The Light.”
POP-UP REFLECTORS
Pop-up reflectors are a must-have for every pet photographer’s tool bag and are an economical investment for anyone starting out in pet portraiture. I love using reflectors (mostly the white—and the silver, on occasion) for bouncing light back onto my subjects or into the scene in general. This bounced light helps make the animals and people stand out visually and can add a nice catchlight to eyes. Reflectors can also help increase the overall light, potentially allowing you to increase your shutter speed or decrease your aperture. They are convenient for pet photography, because they fold into smaller, flat shapes and are easy to carry around while on location. I have a variety of sizes ranging from smaller triangle-shaped reflectors (Lastolite TriGrip reflectors) to 4x6-foot panels.
I enjoy the multiple-use reflector panel kits that come with the sleeve, allowing you to use the silver, gold, black, and white sides with the option to remove the sleeve, which reveals a transparent diffusion material. I’ll talk more about this in chapter 5.
If budget is a concern, take a trip to the local art supply store and purchase some 1/4-inch white foam core pieces. Purchase the largest size you can find that fits in your car. You can then cut them into smaller pieces, as needed. I love using large pieces.
SOFTBOXES AND UMBRELLAS
When I am using my larger strobe systems (I currently use Elinchrom strobes) for pet portraits, I use a variety of softboxes to soften the light. For smaller flash units, I love using Joe McNally’s Lastolite Ezybox, which is specifically designed for use with a small flash unit.
DIFFUSION MATERIAL
I always keep some material in my bag to help diffuse harsh light. I carry Ripstop nylon material I purchased from a fabric store and also a 6’ x 6’ silk diffusion material made by Matthews.
Bag of Tricks
I literally bring a bag of tricks to every photo session. This bag contains squeakers, toys, treats, leashes, lint rollers, and many other objects that help me during a session with pets. I discuss the specific contents of my bag for each type of pet in their dedicated chapters. The bag of tricks is something that can be developed over time, as it can take a while to gather a wide variety of items. The bag I currently use was purchased from a craft store and contains lots of pockets and compartments, allowing me to keep my tools separate and easily accessible. (Although I admit that often the items end up collecting in the main area, and I find myself shuffling around for them—definitely something I recommend not doing during your session!)
Small Flash Units
Small flash units are an incredibly helpful tool to keep in your bag. Regardless of how you implement your pet photography (business, personal, volunteer, hobby), I highly recommend having at least one small flash unit and a general knowledge of how to use it.
WHY I LOVE THEM
Small flashes are cordless, which is really handy when working with pets. Animals move around a lot, and for simplicity and safety reasons, having no cords is a big benefit. Because they are battery-powered, you can use small flashes outdoors and anywhere else you’d like to without having to worry about plugging them into an outlet. The ability to move around quickly and easily offers a lot of room for creativity on location. Small flash units are also an excellent way to add just a little bit of fill light by bouncing or diffusing.
The power on small flash units can be set much lower than larger strobe units, which can really be helpful if all you want is a little fill light. Small flash units take up less space in my camera bag, are lighter-weight, and are generally more travel-friendly than large strobe units.
They have a few other perks as well. System-dedicated flash units communicate directly with your camera and can offer many options for automated exposure choices. Small flashes can sometimes cost less than large strobe lights. And small flashes can effectively be turned into larger light sources by bouncing them off a ceiling or wall. Pretty great!
This image of Renata and her beautiful pup, Kyra, was created with my Ezybox and an additional diffusion panel with a small flash Canon 600EX-RT speedlite. I was working alone, and using a small flash was pretty reasonable because of its cordless and lightweight features.
SMALL FLASH LIMITATIONS
While small flashes have a lot to offer, I don’t always love them for pet photography. Because they are powered by small AA batteries, the recycle time (time between flash output) isn’t very fast when you are using them at full power, which means you might miss the most adorable expression on an animal’s face. Extra battery reserve systems (many AA batteries linked to the flash unit) help, but this attachment makes for more weight to carry around during a session. I currently use the Canon CP-E4 Battery Pack and also have a Bolt brand version that has the same function.
Small flashes do not tend to work well for photographing stopped action because of the recycle time, flash duration, and sync speed of the flash. You’ll need bigger strobes with short flash durations to capture studio-lit action without blur.
Even though the units themselves are small and lightweight, you still need modifiers, light stands, and sandbags. Yes, these systems are cordless, but the reality is that you still need many items that accompany the small units to modify the light.
When I photograph with small flash units (or large, for that matter), I sometimes find that in focusing so much on the technical aspects and fussing around with equipment, I can miss important moments with the animal. Of course, this issue has lessened as I’ve gained experience, but regardless of experience, working with lights adds a lot of variables to the equation. Be sure to spend time getting to know your equipment so you can spend as little time as possible dealing with buttons and dials.
If you’re photographing with the flash off-camera, you’ll need a transmitter and receiver that is reliable and easy to use. Currently, my Canon uses the ST-E3-RT to transmit to the speedlites, and I find it to be reliable and fairly simple. Sometimes I use PocketWizards to trigger my small flashes and larger strobes. They are great, too, for implementing flash in a manual setting (versus a TTL), but the cords required for them make for extra variables that can come unplugged or lost, or malfunction. This is something to keep in mind. I usually carry a set of PocketWizards and appropriate cables as a backup to my regular transmitter device.
Larger Studio Strobe Lights
I use Elinchrom brand lights and have used Dynalites in the past, but there are many fantastic brands and models to choose from.
WHY I LOVE THEM
Large strobe lights are fantastic in many ways, and while not totally necessary for every pet photographer, they can be huge assets for your toolbox.
Studio lights are helpful for when there just isn’t enough light indoors or in-studio to capture animals and the environment properly. On countless occasions, I have photographed inside a client’s home and found that there wasn’t enough available light, either because the house was dark in general or because of cloudy or rainy weather.
If I need to photograph multiple pets or pets and people together, large strobe lights have enough power to allow me to photograph with a greater depth of field so that I can have everyone in focus (if that’s my desire).
I love the detail you can see in this image created with one of my Elinchrom strobe lights and a large softbox.
Because of the extra power in a studio strobe, I can use a lower ISO, and as a result I can see an extreme amount of detail in the pet’s fur or eyes if I use a smaller aperture. Studio strobes are great for getting the details to shine through.
Because these bigger units are typically plugged in, I don’t have to worry about running out of battery power or having the recycle time change due to batteries losing their power. Large studio lights that are battery-powered are also really handy, because I can use them outdoors and don’t have to worry about plugging them in. Manufacturers are rapidly improving battery longevity and performance overall, which is very exciting.
WHY I DON’T LOVE THEM
Large lights tend to be heavier, bulkier, and more expensive. As technologies advance, they are getting lighter and smaller, but at this point they’re still typically heavier than small flash units. Because of this weight and bulkiness, I find it more difficult to be spontaneous during a session when I am using them. Once I have set up my lights and tweaked them to where I am happy, I tend to feel pretty committed to staying there for a while. Moving the setup takes time, which is really valuable during a pet shoot.
The higher amounts of light power contained in large strobes make it more challenging to add a subtle amount of light behind a dog sitting on the couch, for example. Because of the high power and sync speed (required for most lighting systems), it is more difficult to photograph with a wide aperture, which can feel limiting to me during pet shoots if I’d like to create a blurred background.
This image was created with a battery-powered Elinchrom strobe and softbox. This shoot took place on a really windy day, which made things challenging, but fortunately, I had an assistant to hold my light in place.
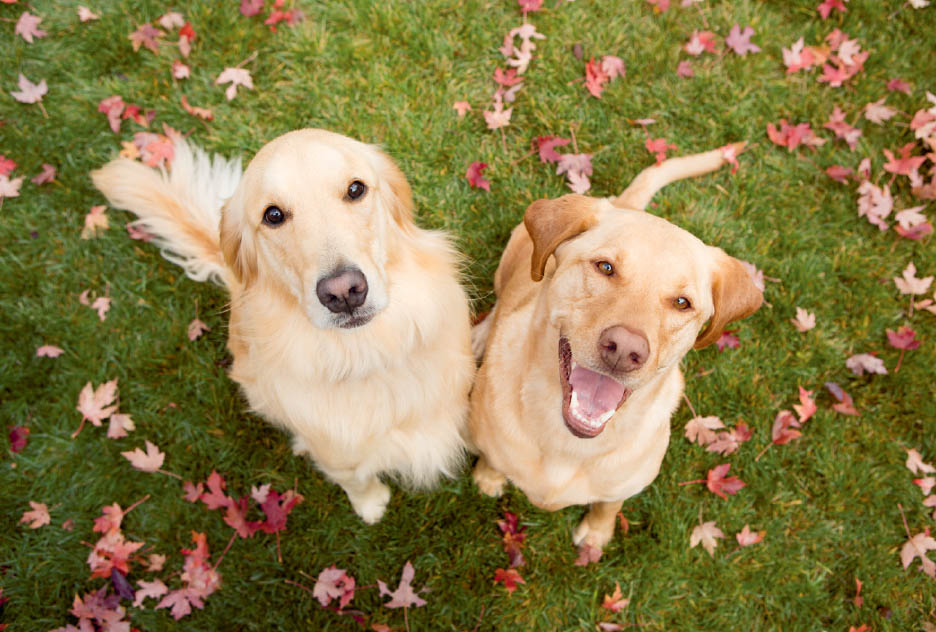
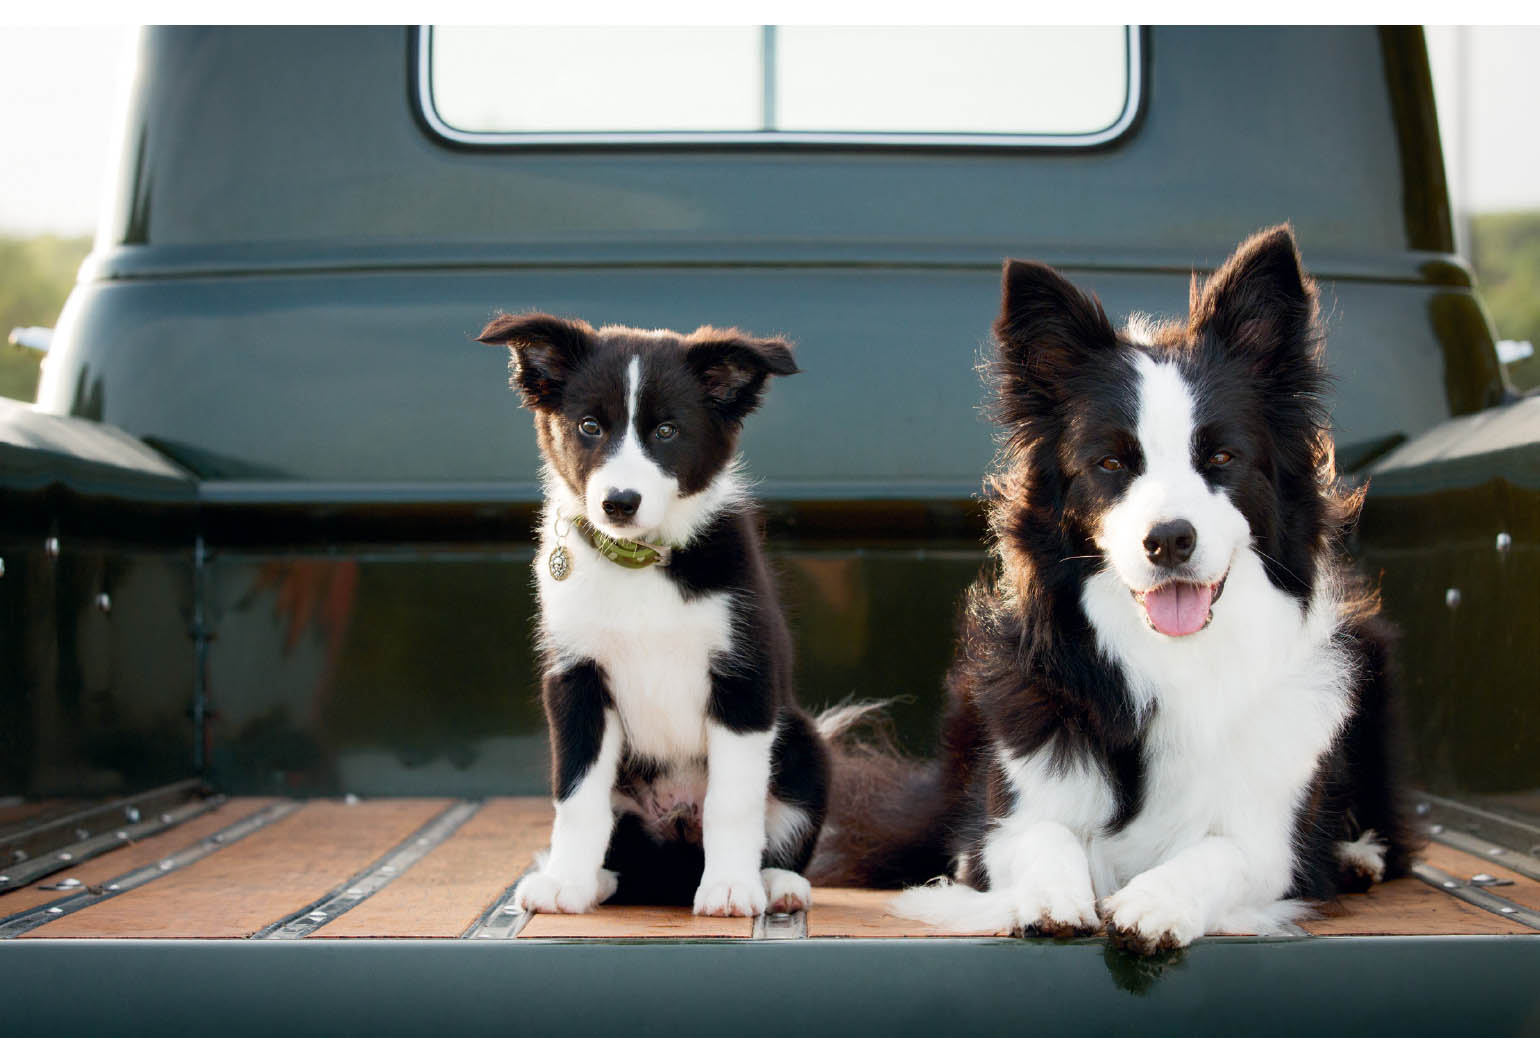
I loved the color contrast of the leaves and grass in this image. Because I had a ladder with me, I was able to change my perspective to surround the pups with just this background.
I always try to consider the balance of time during my sessions. I evaluate as best I can whether the scene I am lighting is worth me using the time and energy of the pet and the pet parent to light it with studio strobes. Don’t get me wrong, I love studio strobes and use them often in my pet photography. There are just some things I love about them—and some things I don’t. If you’re considering investing in studio strobes, I highly recommend renting a set to play with before you commit.
Working Alone
When I first started photographing pets, I worked alone (and sometimes still do), without an assistant. Here is some of the equipment I’ve used and methods I’ve adopted to help navigate working solo.
PET PARENTS: Often it can be helpful to enlist the help of a pet parent during the portrait session. They can help hold reflectors or draw the attention of a pet using a treat, noise, or gesture. This will require you to give proper and polite direction, which I’ll discuss further in chapter 6.
LADDER: I always bring a (very lightweight) ladder with me to photo shoots, because it can serve many functions. Ladders are great for photographing different angles and can also help support reflectors or bounce cards.
“A” CLAMPS: If I need to hold up a bounce card, either to a ladder or another support, an “A” clamp purchased from a hardware store helps keep the card in place.
LARGE FOAM CORE AND LARGE REFLECTORS: These are easier to use than small ones, because you can lean them up against tables, chairs, your ladder, the wall, or a tree, and they don’t necessarily require an extra set of hands.
TRIGRIP REFLECTORS: If you are using small reflectors by yourself and are good at holding your camera with one hand, this is a great option—Lastolite’s TriGrip reflectors are specifically made to hold with one hand.
YOUR MOUTH: If you are holding a camera and a reflector and trying to get an animal’s attention, you’ll benefit hugely from learning to use your mouth to make noises. Using your mouth to get an animal’s attention will help keep your hands free for other actions.
SANDBAGS AND TAPE: It is imperative that you keep yourself and your subjects safe during your photo sessions. Sandbags should be used to hold down light stands, and Gaffer’s tape works well for securing loose cables.
Gear Overwhelm
When considering your equipment needs, develop your list around what would be nice to have and what you feel might be necessary to take your work to the next level or reach certain creative goals. Your Priority group of items might include a camera, lens, computer (for editing and reviewing your work), and some kind of reflector to begin your pet photography practice.
Do your best to focus on what is available to you now, and learn how to create images within those parameters. Have fun exploring the options with regard to new lighting, cameras, and software, but try not to get dragged down by the choices. There will always be “better” and newer gear out there, and trust me, you don’t need all of it to create meaningful, authentic pet portraits.
PRIORITY LISTS FOR PET PHOTOGRAPHY EQUIPMENT
IF YOU FIND YOURSELF OVERWHELMED WITH THE OPTIONS FOR EQUIPMENT, AS I KNOW I HAVE BEEN, CONSIDER MAKING A LIST AND DIVIDING IT UP BY PRIORITY.
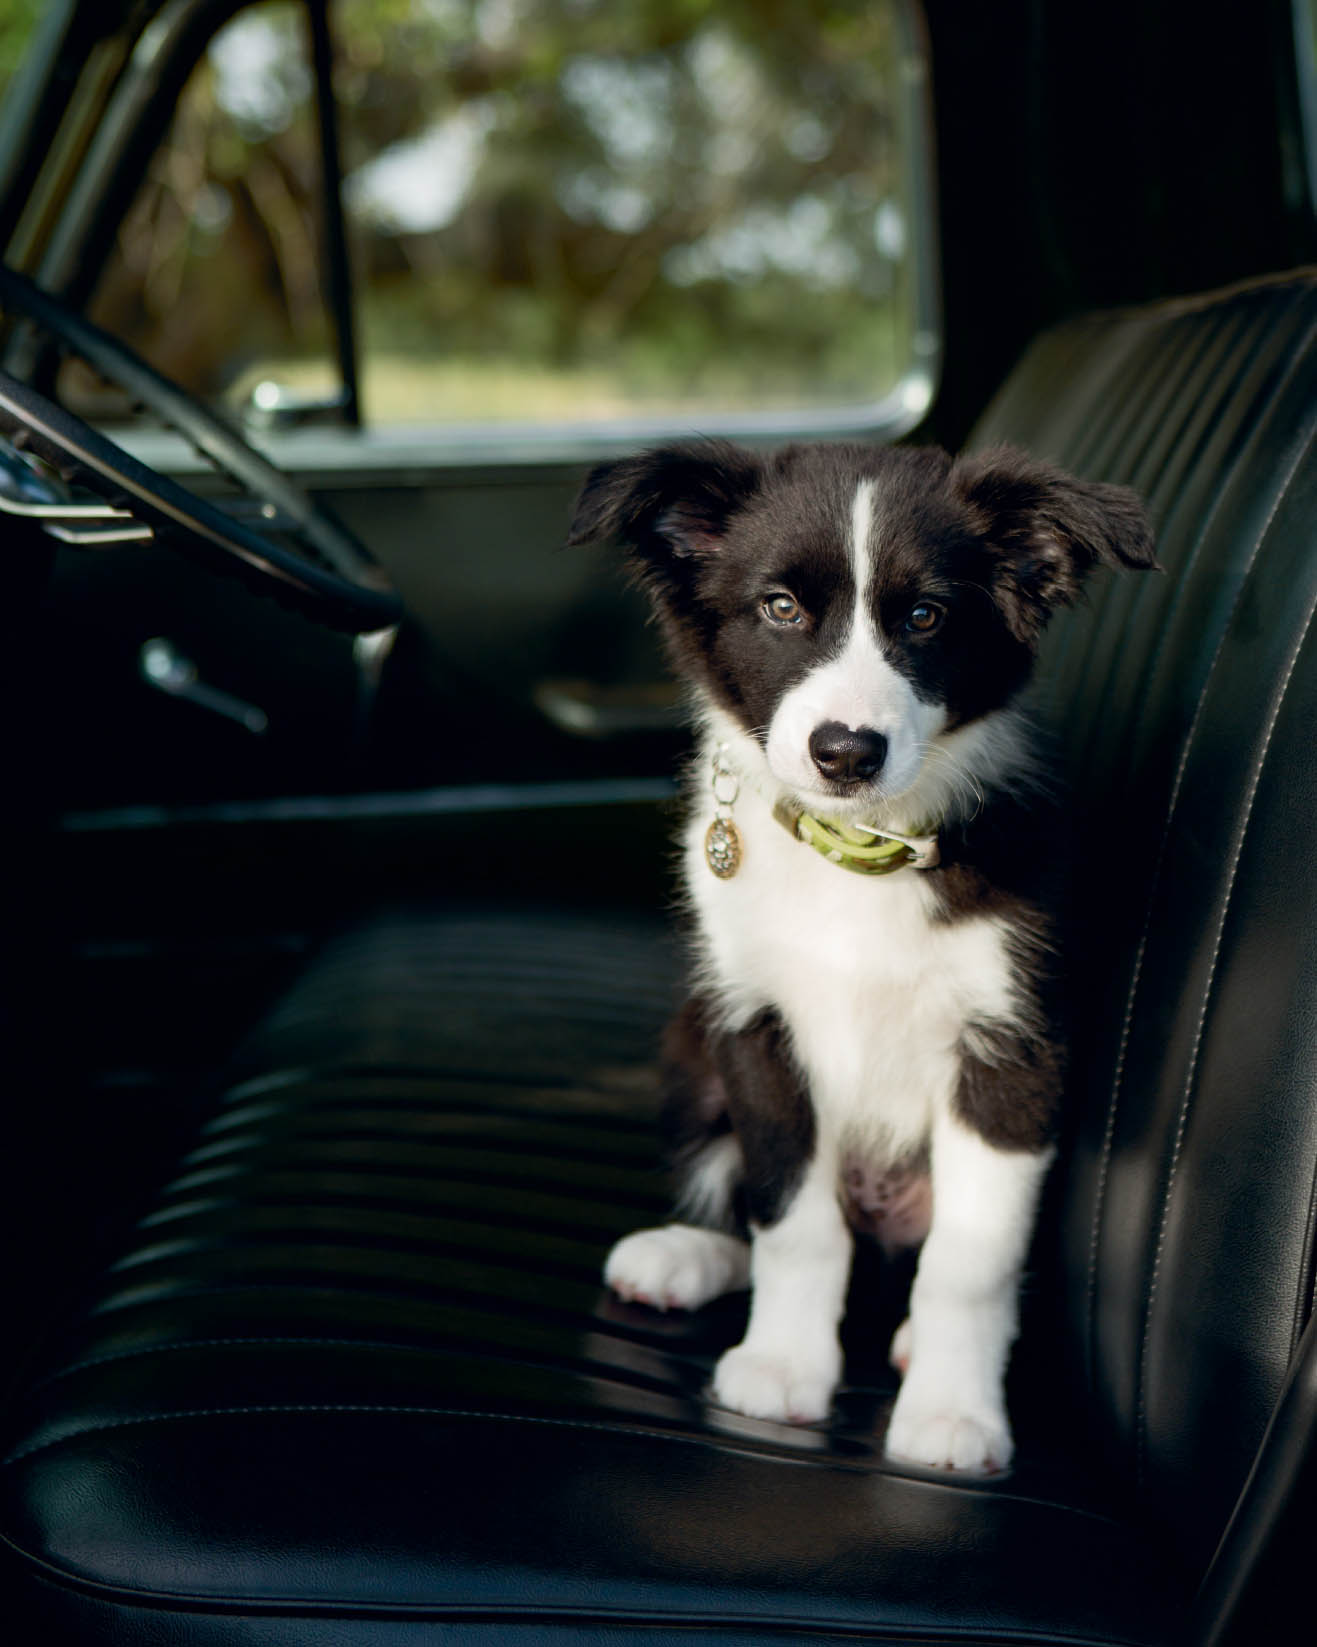
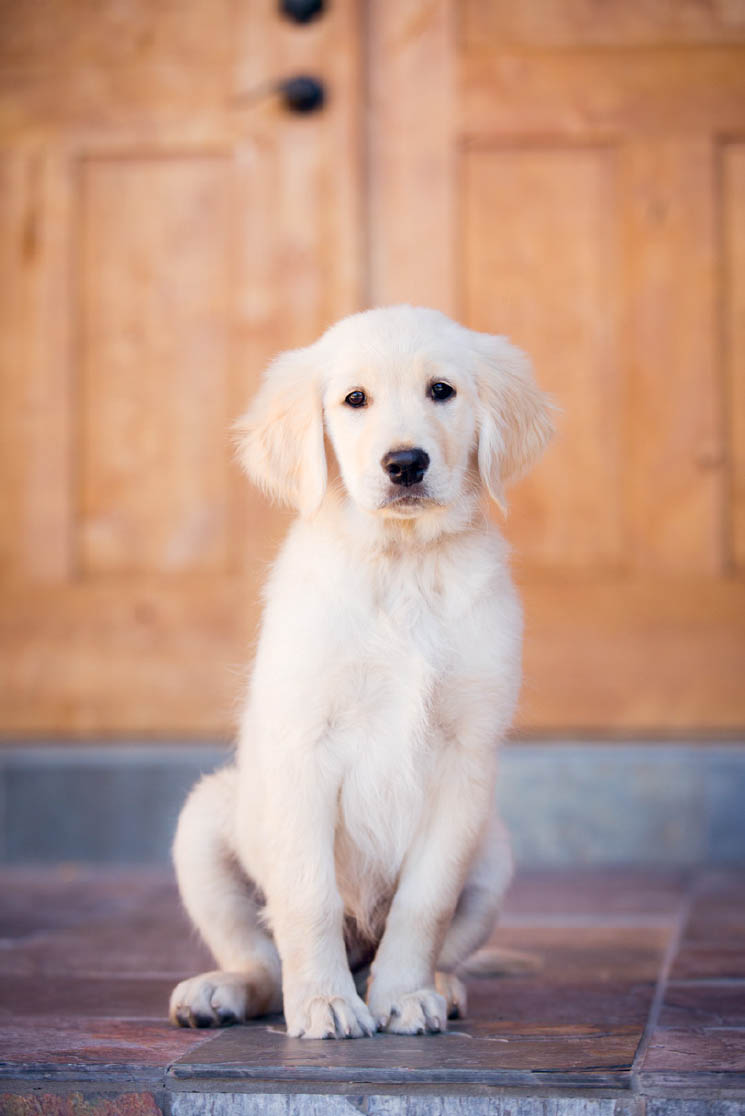
Jiffy the puppy moved around quickly, so I photographed this image at 1/500 second, f/3.2 with an ISO of 200 to keep noise levels at a minimum.