The secret of the white feather
![]()
Now you frame it. I’m getting dizzy . . .
Let’s keep investigating framing.
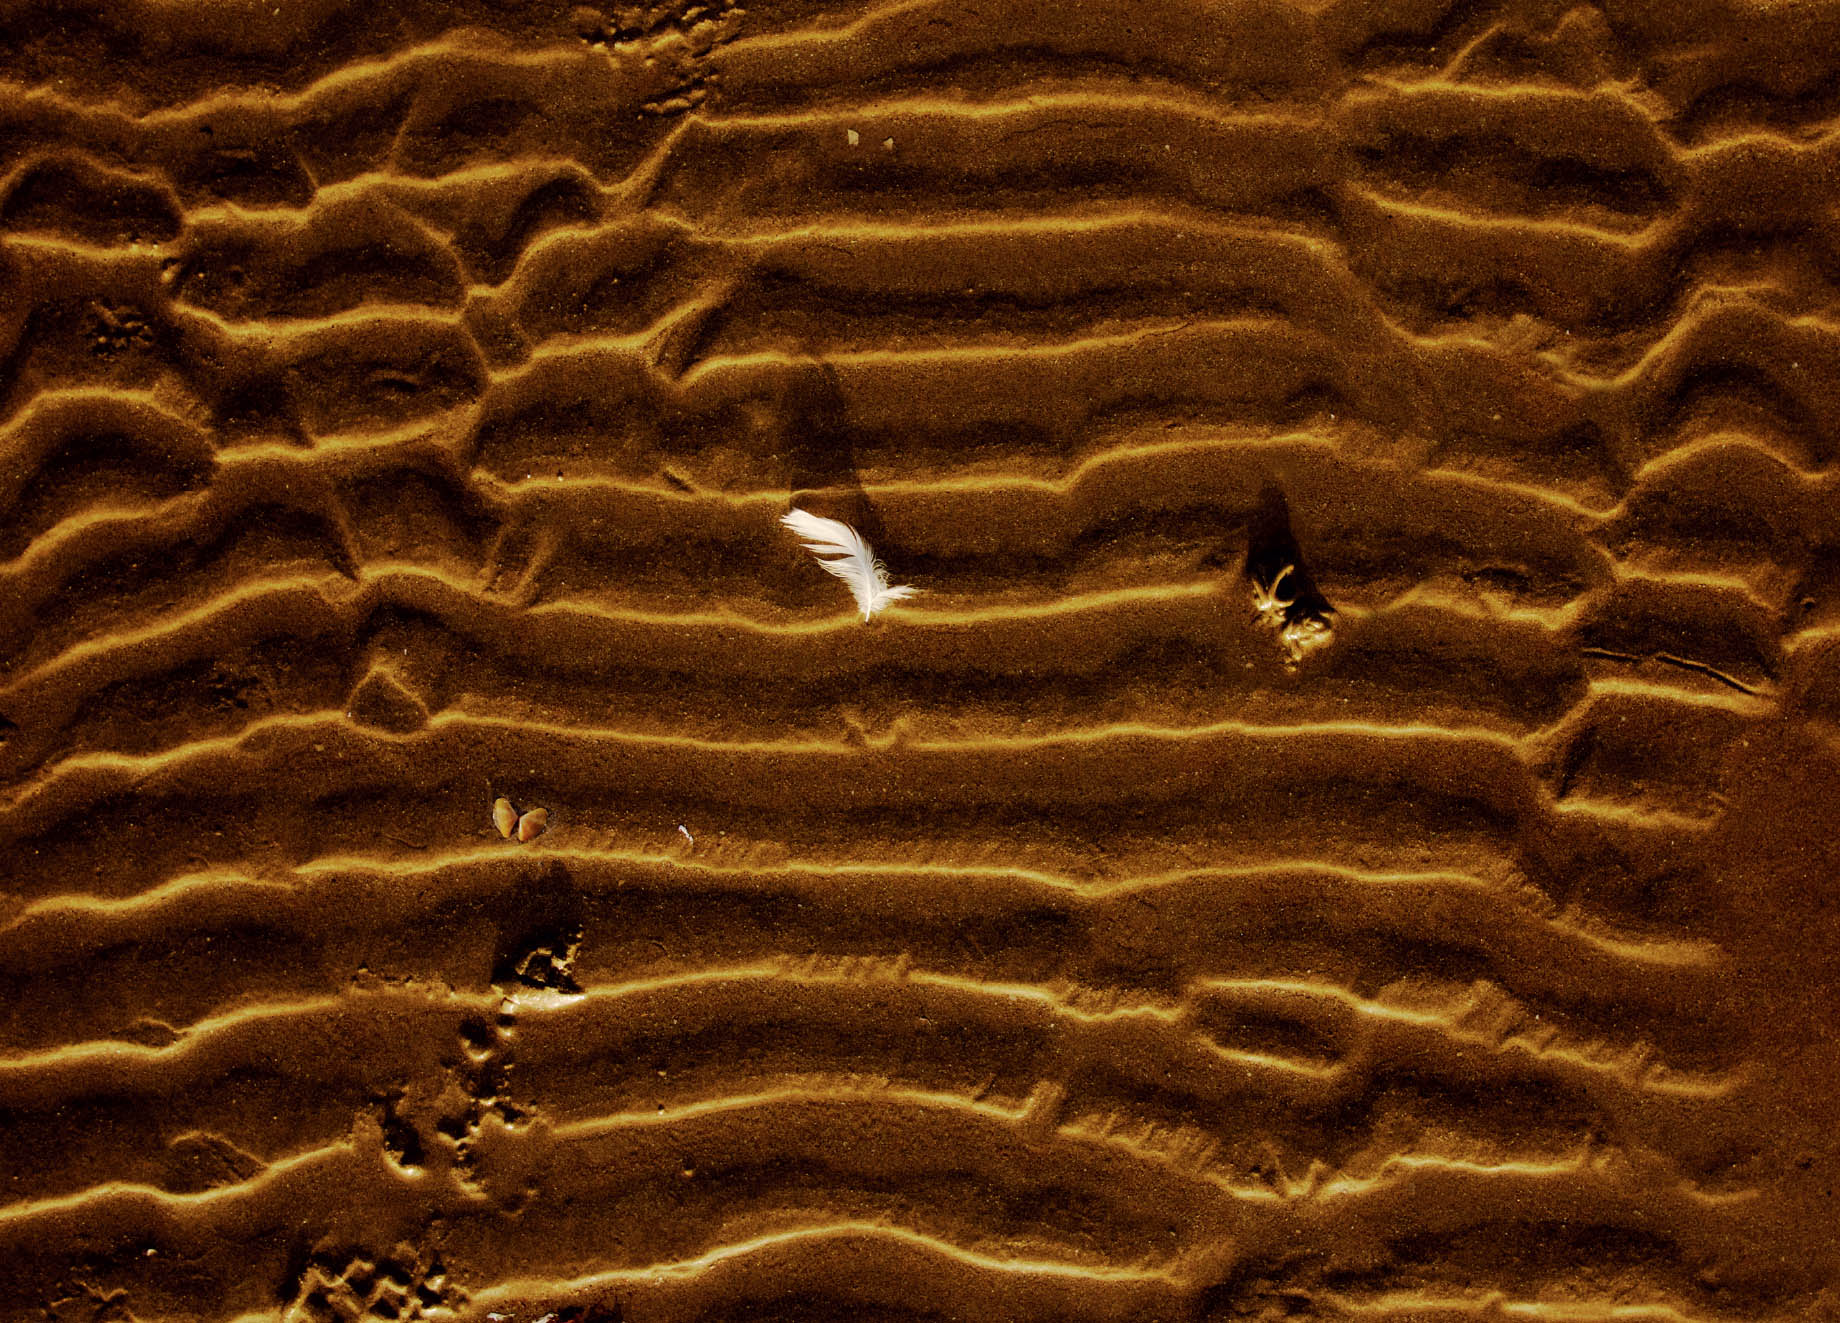
Our next topic of investigation: this lovely feather, waving in the ocean breeze!
The ocean has created sand waves, which are turned into lines written on the beach by the angle of the sun.
![]() Your assignment is to find out how to frame these pieces of evidence using your cardstock frame.
Your assignment is to find out how to frame these pieces of evidence using your cardstock frame.
Look at these pictures, one at a time, and then . . . you frame it!


Hint: What direction are the sand waves going in each picture? How do you think you need to move the frame in order to get this effect?
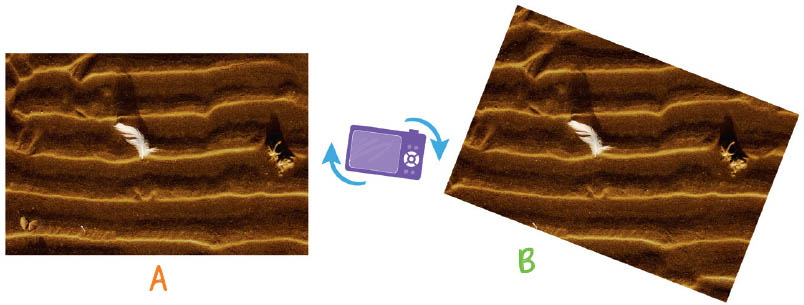
Deductions. Tilt the frame!
Have you figured out which new movement of the frame is the key to the mystery? That’s right, to make certain photos you had to tilt the frame sideways! You can also say “incline the frame.”

To make photo A, it was easy. All you had to do was set up the frame, nice and straight, and then place the feather approximately in the middle. The butterfly shell is in the bottom left corner and the sand swirl is near the right-hand edge.


In photo B, the sand waves are tilted. Did you guess that meant that what you had to do was tilt the cardstock frame? Here you tilt the frame to the right so that the waves of sand look like they are going up in the picture. The butterfly shell is not in the picture anymore and the sand swirl is now almost in the top right corner.
In pictures C and D, the lines are tilted in the other direction. So this time you have to tilt the frame to the left! When I do that in order to get photo C, the shell moves up along the left-hand edge and the swirl moves down along the right-hand edge; isn’t that cool?
You have to tilt the frame even more to make photo D, with the butterfly shell right in the corner. As for the sand swirl, it isn’t even in the picture any more!

Secret weapon. Tilting the frame
I now have the pleasure of solemnly handing over to you the second secret weapon of photography: tilting the frame!
Tilting the camera to the side (to the right or to the left) allows you to change your framing as well!


Considering the evidence. The ground is covered with clues!
![]() What about you? What do you have under your feet? Wood flooring? Tiles? Linoleum? A rug or a carpet? Even better: is the sun making lines on it?
What about you? What do you have under your feet? Wood flooring? Tiles? Linoleum? A rug or a carpet? Even better: is the sun making lines on it?
- 1. Direct your camera downward to take a picture of the ground.
- 2. If necessary, tilt your camera to the side in order to:
- - frame your picture to follow the lines on the ground (as in photo A on page 36: the lines should follow the edges of the frame);
- - frame your picture so that the lines run diagonally.
It can be fun if your feet are showing in the picture!
![]()
Deductions. Tilting the camera?
Maybe you thought that a tilted photo was always a failure, and that you’re not allowed to tilt the camera sideways? But in fact, that can’t be true, because tilting it is actually a secret weapon!
When I took this closeup picture of a plate of fruit, I didn’t like the picture that I took with the camera level.
Then I thought of trying to tilt it, just to see. And sure enough, the framing looked much, much better!

![]()
Picture quest. The prancing frame
Let’s play with tilting pictures!
![]() Take pictures of different subjects with the frame tilted to the side!
Take pictures of different subjects with the frame tilted to the side!
Take closeups of fruit or different objects as well as broader views of your room, the kitchen, or the yard. Is it fun playing with tilting the camera?
![]() Another challenge! Frame your picture the way you want to and then follow this coded message.
Another challenge! Frame your picture the way you want to and then follow this coded message.

Do you like the framing that you ended up with? Adjust it and make it better, if you like, before you finally take your picture.