

Chapter 10: Post-Production and Presentation
Establishing Your Workflow
Getting Started with Image Editing
Image-editing Workflow
Basic Retouching
Changing Colors for Impact
Cropping Tips
Presentation Gallery
Capturing the image with your camera has always been just the first step in creating a final image. In the film days, the darkroom became the next step in manipulating an image. Today, your darkroom is digital, and there are more possibilities than ever before.
This chapter encourages you to learn the basics of a digital darkroom and then experiment and play with your images. It’s like doodling: The more you play, the more you see what you can do with your images, which enables you to find styles that appeal to you.
Establishing your workflow
Post-production is the term photographers use to indicate everything that happens after the image is captured. That includes loading your images from your media card to your computer and working in an image-editing program, all the way to the final printed image hanging on your wall. There are a lot of steps to get you from here to there, and each photographer has his or her own unique way of working, which is called workflow. Workflow is defined by Wikipedia.com as a reliably repeatable pattern of activity.
A good, consistent workflow is critical for digital photographers. Digital files can be easily deleted, corrupted, or just plain lost, so establishing an easy-to-follow workflow for your images is critical. It allows you to:
• Consistently back up and archive your images
• Organize your images so you can find them quickly
• Preserve an untouched set of images so that you aren’t working on your originals
• Virtually eliminate the chance of lost or deleted images
If you are planning to use photo labs or do book publishing, it’s wise to invest in monitor calibration software, such as X-Rite or Spyder. This can assure WYSIWYG or what you see is what you get. You can save yourself angst and frustration by completing this easy process a couple of times a month. Many labs offer free test prints to confirm that your monitor is properly calibrated before you invest in your prints.
Even if you are “just a snapshooter” you have probably already accumulated a fair number of images on your computer. Can you find the image you need quickly? If not, set up a workflow that works for you. The following is a basic workflow that you can follow as you get started. Once you expand your skills and understand all the components of the workflow, you can begin to adjust it to fit your specific needs.
1. Transfer your images. Download your images from the media card as soon as possible after capturing the images to avoid accidentally formatting or overwriting the card. Create a folder on your computer desktop using a name or numbering system that makes sense to you (the important thing is to keep the naming consistent).
2. Back up your files. Back up the folder by dragging it to an external hard drive (recommended but optional) or burn a disc with the renamed images, label it ORIGINALS, and name it using your chosen naming/numbering system. Put this disc in a safe place (a fireproof safe or safe deposit box are good options). Another convenient option is to store your photo files in cloud storage online at sites such as Dropbox, Box, Sky and SugarSync. Some are free, but most charge per gigabyte. The obvious advantage to this type of storage is that is is accessible from any computer anywhere.
3. Retouch, crop, and enhance images as necessary in your chosen image-editing software. You now have at least one (hopefully two) backups on disc of your original out-of-camera images. That disc with your original images on it is just like your negatives with a film camera and should be treated as carefully. You should complete all the previous steps before you do any enhancements to any images. Now you can play all you want with the images in the folder on your computer desktop because you know that your originals are safe and untouched.
4. Back up your edited images. When you finish retouching and enhancing your images, back up those enhanced images to your external hard drive or burn another disc. This time you can label the disc FINAL PROOFS and reference your original number/naming system.
5. Output your finished images to a lab or printer. Output your final proofs to your favorite lab or your printer if you are printing your own images.
Ultimately, the key to a good workflow is consistency. If you unload, save, and file your images the same way every single time, you will have no trouble locating an image when you need it.
Getting started with Image Editing
Not long ago, when choosing imaging software, you would have been limited to Photoshop and Photoshop Elements, but now many entry-level programs are available, and some are free. For example, Gimp and Photoscape are available as a free download. If you work on a Mac, iPhoto is a very easy-to-use image manager. Lightroom has risen to the top of the line of image-editing software and is particularly helpful if you have hundreds of files to organize and edit at the same time. Additionally, many online vendors sell presets that allow you to create styles at the mere click of a button.
For $99 a year, you can join the National Association of Photoshop Professionals (NAPP) and receive its publications. This membership allows you to enter the website (www.photoshopuser.com) and learning centers to receive discounts and other perks. NAPP sponsors training workshops which are relatively economical and extremely thorough.
Image-editing software enables you to manage your photographs in the following ways:
• Batch-rename files (for example, change from IMG_0932_2.jpg to grace_2007.jpg)
• Organize and rate
• Crop and rotate
• Brighten, darken, increase, or decrease contrast
• Color correct
• Add filters, such as sharpening or blurring, adding noise and grain, and so on
• Correct red-eye
• Convert color to black and white or even sepia tone
If you are seriously entering the world of digital imaging, don’t spend a lot of time on entry-level programs — Adobe’s Photoshop Elements, Photoshop, and Lightroom, and Apple Aperture are industry standards for image-editing software.
You might as well spend your valuable time learning Photoshop Elements (PSE). I recommend finding a good, entry-level book on PSE such as Photoshop Elements 9 For Dummies (from Wiley).
Some excellent resources for learning include the following:
www.photoshopelementsuser.com/learningcenter
Photoshop Elements has many great, high-end features, and once you get comfortable with it, you should find it intuitive and easy to use. It also lays the groundwork for eventually stepping up to the full version of Photoshop. The commands and working space are identical between the two, with Photoshop providing more options and control.
USING CAMERA RAW
Many cameras offer the option of shooting RAW images as well as JPEGs. If you have the opportunity, you are better off using the RAW option for several reasons: The file you will obtain will allow you to perform non-destructive editing — nothing you do to it in post-production will alter or diminish the pixels; Photoshop Elements and all the state of the art post-production software perform RAW conversion to read and manipulate RAW image files; and you can then save those changed files as JPEGs, TIFFs, and so on. But the original RAW file remains the same complete, high-quality, original capture. Another advantage is that if you make a huge error in exposure or white balance, you can easily fix it in the RAW software. The disadvantages are that RAW files are huge and require a lot of storage space; if you are shooting rapid-fire shots, the camera can process many more JPEG images in a burst than RAW files.
Photoshop Elements is a great tool, but it’s important to remember that properly exposed images usually need very little done to them in post-production. Make it your goal to improve your technique on the front end or at the capture stage of photography rather than relying on an image-editing software fix later.
Image-Editing Workflow
Many budding photographers start image editing with Photoshop Elements, but even if you use different image-editing software, you can still follow the basics presented here. Setting up a consistent order of working in image-editing software allows you to work more quickly and achieve more consistent results. The following order is a generally accepted workflow for enhancing your images. The basic idea is to work from large changes to small changes in a logical order.
1. Make tonal adjustments. It’s best to make any exposure adjustments (a little bit lighter, little bit darker) as your first step. This includes any Levels or Curves adjustments that affect the overall lightness, darkness, or contrast of the image.
2. Make color corrections. Adjusting your white balance before you take the photo means much less work at this stage. Check Chapter 4 for white balance details. However, you might have an image that has a strange color cast, such as too blue or too orange that needs adjusting. Do color corrections after tonal corrections.
3. Retouch as needed. Only after you have corrected the exposure and color should you begin other adjustments or enhancements to the image. This means that all the adjustments that affect the entire image have been made and now you are working on refining the details.
4. Make any image enhancements. These include conversions to black and white or actions that give a different look to your image such as a super-saturated colors or high-contrast treatments.
5. Back up your files. After you finish fixing and retouching your image, back up the file that has been worked on, and save a copy for cropping and or sizing.
6. Crop and size your images. Working with a copy of your final file, crop to the size you want your final image to be. Because a digital file doesn’t fit into the standard 8 × 10, 5 × 7 crops you are used to seeing, you will need to size your image before uploading to a lab to ensure that the crop is how you want it to be. If you don’t resize/crop your image, the lab may do it for you and your final print might be different than what you originally envisioned.
Basic Retouching
Portrait photographers most often use retouching techniques to eliminate blemishes and wrinkles in their subjects and eliminate distractions in the background. Fortunately, kids don’t have wrinkles, so most retouching involved in children’s portraits is limited to removing any marks on the face, such as scratches; disguising a runny nose; or removing blemishes.
Here are the most commonly used techniques when retouching a portrait of a child:
• Removing a blemish such as a scratch, pimple, or mark on a face or body
• Whitening the teeth
• Enhancing the eyes
• Eliminating distractions in the background
Using layers
If your chosen image-editing software has layers or something similar, you are in luck! One of the best things about Photoshop Elements is that it allows you to work in layers; one use for layers is to create a quick copy of your image so you can manipulate it. If you mess it up, you can throw it away.
If it’s just right, you can save the image and you’re done. Before you try any of the following fixes, press Ctrl+J/![]() +J to create a duplicate layer of your image (this preserves your original working image without changes). Then try the following fixes. When you have your top layer the way you like it, you can flatten the image (merge the layers), which allows you to save the image as a smaller file that it would be with several layers.
+J to create a duplicate layer of your image (this preserves your original working image without changes). Then try the following fixes. When you have your top layer the way you like it, you can flatten the image (merge the layers), which allows you to save the image as a smaller file that it would be with several layers.
Removing blemishes and smoothing skin
The easiest way to remove a minor blemish or to smooth out the texture in your subject’s skin is to use the Clone tool set at 30-percent opacity so that it just smooths out the texture of the skin rather than drastically altering its appearance. Ideally you don’t want an image to appear to be altered, so it is important to develop a soft touch.
The Clone Tool allows you to clone copies of a portion of the image and apply that copy somewhere else in the image. This comes in handy when there are areas you would like to cover up or delete altogether.
Most children have beautiful skin, but when you are photographing adolescents, this is a great trick for smoothing out the occasional blemish. Select from unblemished skin close by the area you want to fix and brush over the area that needs to be fixed, and the blemish will slowly disappear. This is also a good fix for dark lines under the eyes, as in the before and after photos in 10-1 and 10-2.
The key to all retouching is to keep it subtle because you don’t want your subjects to look like plastic dolls. A little image editing goes a long way.

10-1
ABOUT THIS PHOTO Notice the dark circles under the girl’s eyes. Taken at ISO 500, f/3.5, and 1/2500 second. ©Ginny Felch / www.photographingchildren.com

10-2
ABOUT THIS PHOTO After using the Clone tool set at 30-percent opacity and selecting form the lighter skin on the cheeks, the dark circles have been eliminated. Taken at ISO 500, f/3.5, and 1/2500 second. ©Ginny Felch / www.photographingchildren.com
Eye and teeth enhancements
A quick fix for whitening the whites of the eyes and whitening the teeth is to set your Dodge tool at 20-percent opacity and carefully brush over the teeth and whites of the eyes until they are how you like them. Setting the tool at 20 percent allows you to lighten the teeth and the whites of the eyes without making them appear as though they are glowing.
You can also use the Dodge tool to put a little sparkle into the irises of the eyes, but be careful that you don’t overdo it and make your subject look like an alien child! You can see the results of both the Clone tool and the Dodge tool on this before image of a little girl (10-3) and the after image (10-4). The teeth were slightly whitened. The whites of her eyes were lightened, the edges of the iris darkened and the pupils darkened to give them more sparkle.

10-3
ABOUT THIS PHOTO A before photo of a girl before using the Dodge tool to brighten her eyes and the Clone tool to remove the blemish on her face. Taken at ISO 400, f/4.0, and 1/640 second. ©Ginny Felch / www.photographingchildren.com

10-4
ABOUT THIS PHOTO The results after using the Dodge tool at 30-percent opacity to lighten the whites of her eyes and lighten her iris, with a slight darkening on the edge. Taken at ISO 400, f/4.0, and 1/640 second. ©Ginny Felch / www.photographingchildren.com
Cloning out distractions in the background
Sometimes, no matter how hard you try, a distracting element makes its way into the background of your image. In this case (10-5), it was the purple flower and highlights on the plants. I used the Clone tool and a blurring filter to eliminate the distractions in 10-6.

10-5

10-6
ABOUT THESE PHOTOS I felt that the purple flowers in this cropping of the before photograph were distracting from the boy’s smooth face, so I cloned them out. After further observation, I decided to select some of the background and blur it so that it gave the effect of greater depth of field. Taken at ISO 400, f/3.2, and 1/250 second. ©Ginny Felch / www.photographingchildren.com
Please refer to Chapter 5 if you need help with the finer points of composition. If you want to spend more time behind your camera and less time behind your computer fixing images, improve your technique in composition.
Changing colors for impact
Many photographers exercise their artistic license by altering their original captures to enhance or refine their story or style. With the advent of digital photography, the toolbox is much bigger, and the possibilities are infinite.
Black-and-white conversions
Converting an image from color to black and white is probably the most common form of color manipulation you can use, and even the most basic image-editing software can handle this job fairly well. If you are just starting out, you may want to purchase ready-made actions, plug-ins, or presets for Photoshop Elements, Photoshop, and Lightroom that automate these steps for you, allowing you to manipulate your images quickly and easily.
Actions and plug-ins
Plug-ins and actions enable you to tone your color prints (10-7) in just about any direction you want once you convert them to black and white: for example, black and white (10-8), sepia (10-9), and brown tones. You can make your own actions, but if you are just starting out, it is easiest to just download them from the Internet. There are many free actions available on sites such as www.atncentral.com, or you can purchase actions from manufacturers such as Nik Software and Kevin Kubota. If you are using Photoshop Elements, make sure the actions you download are compatible with the Elements software. Many of them are only available for Photoshop and Lightroom.
Favorite Plug-Ins
You might not be ready to tackle some of these products now, but later on when your skills advance, you may want to try some of my favorite Photoshop plug-ins. I use them to enhance my images in a very natural way. This list steers away from filters and tools that distort things too drastically.
• Nik Color Efex Pro. Nik Color Efex Pro includes a myriad of different artistic filters, including Classical Soft Focus and Brilliance and Warmth. The use of these two filters together, modified to your taste, works really well to help make a digital image look more like a film image. Use them subtly, and you should find that they just decrease the sometimes harsh look of digital compared with film.
• Nik Sharpener Pro. This filter is used for sharpening images or parts of images as you see fit. There are varying degrees of sharpening available, and it is extremely user friendly.
• Alien Skin Software’s Exposure. This is a wonderful and useful filter system for those of you who want to replicate the qualities of certain vintage films. The software also enables you to see your image in various tones (selenium and sepia) as well as with grain or softening. Both color and black-and-white options are available. After your photograph is shown on the screen, you can simply scroll through the choices and see the changes as you go.
• Flaming Pear Software’s Melancholytron. This plug-in provides extra mood when you want to go a bit beyond the ordinary.
• Kitestrings Publishing’s On the Edge Photographic Edges. There are a stunning set of edges that are simple to use and artful. For more information about this software, visit www.kitestringspublishing.com.
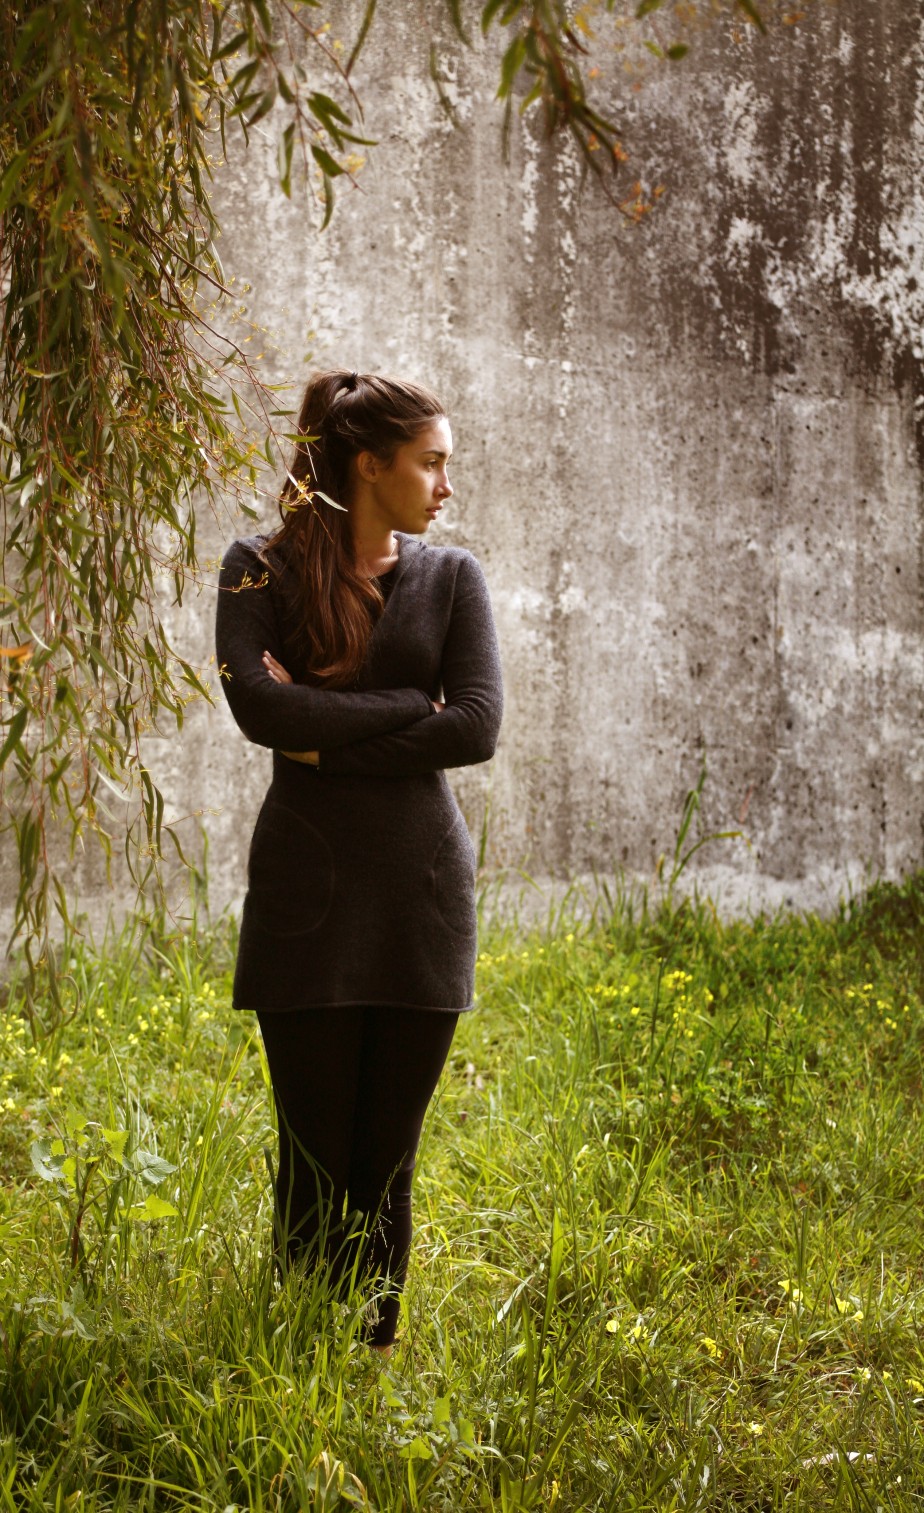
10-7
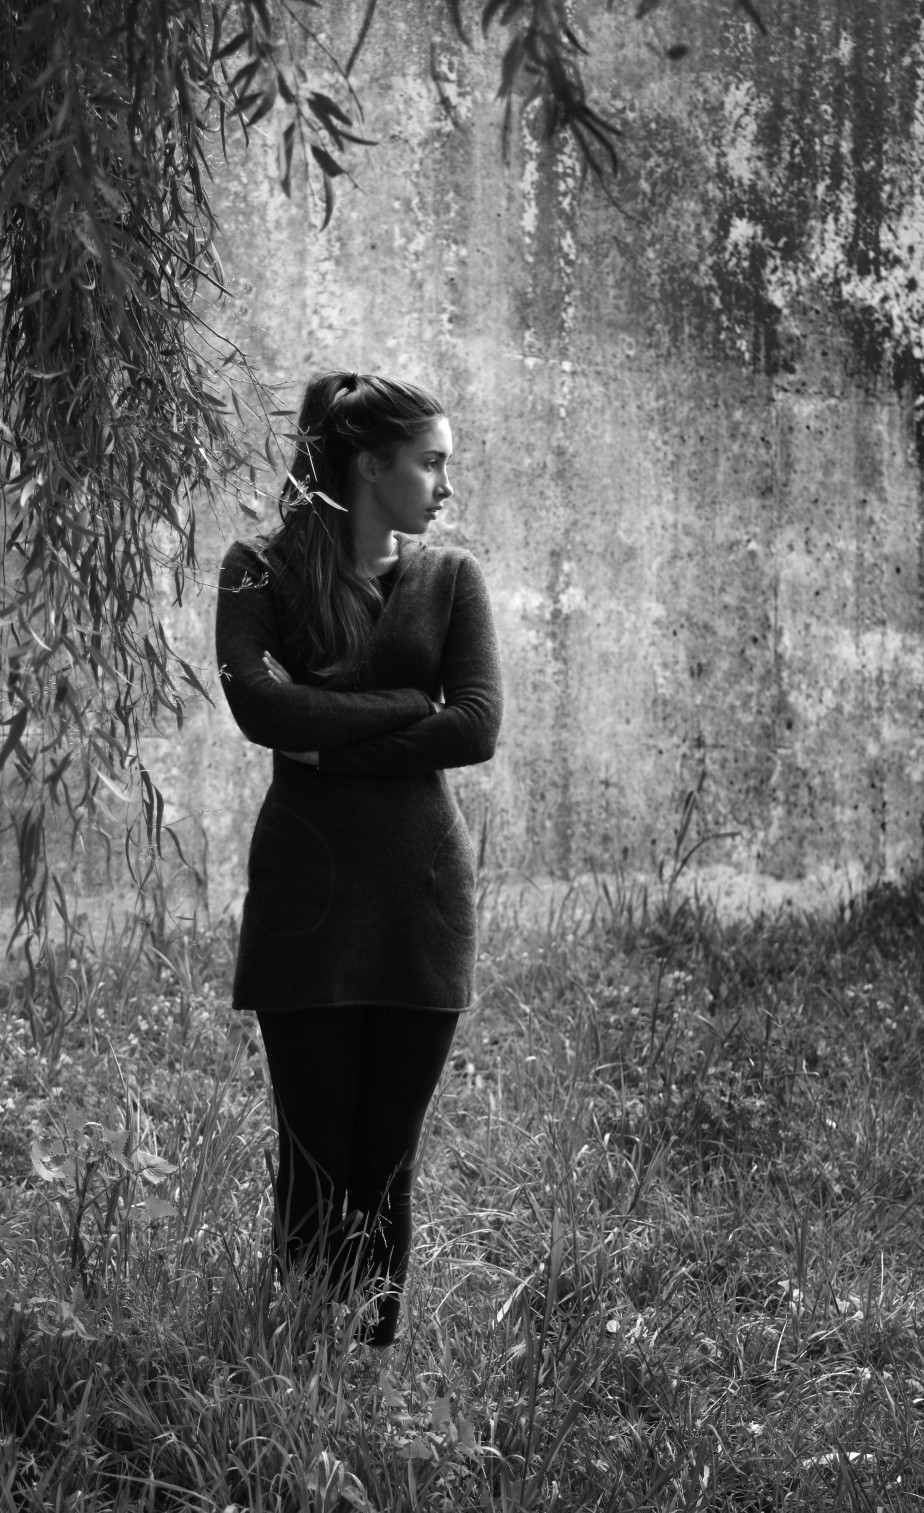
10-8
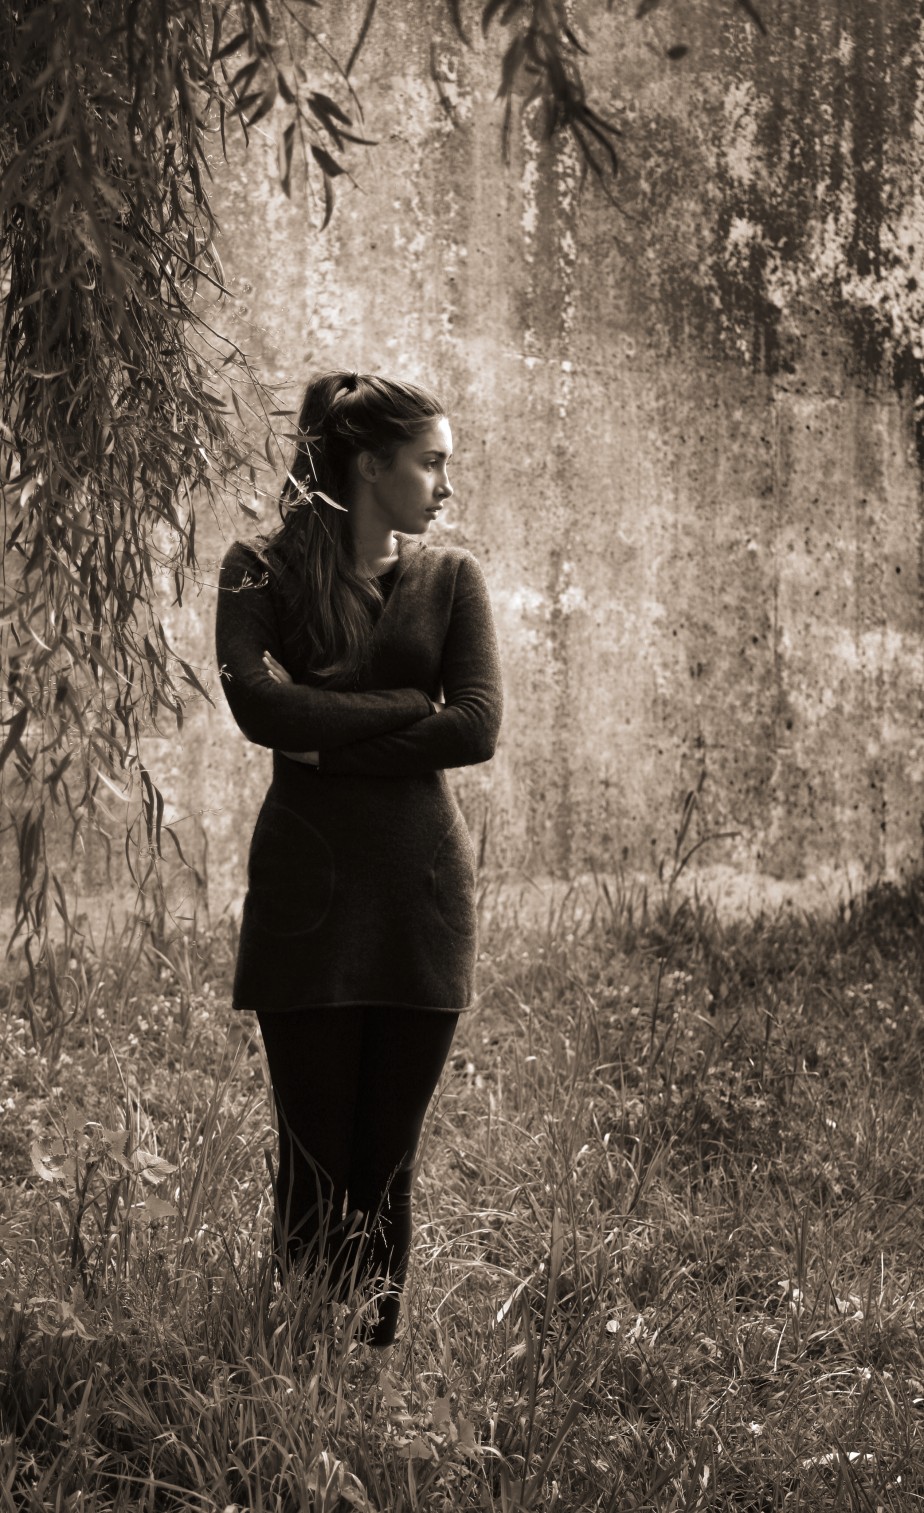
10-9
ABOUT THESE PHOTOS This senior portrait was photographed on an overcast day in San Francisco, creating a subtly colored photograph (10-7). 10-8 shows the same photograph reworked in Photoshop Elements; I followed the easy directions in one of the software’s tutorials to remove color to create a black-and-white photo. 10-9 shows the same photograph reworked in Photoshop Elements to create a sepia image by adjusting the color. Taken at ISO 500, f/4.0, and 1/500 second. ©Ginny Felch / www.photographingchildren.com
Cropping Tips
If you are absolutely certain of your framing and composition, go for it and press the shutter button. Otherwise, it is advisable to leave a little room around the image as you have composed it before you press the shutter button so that you can refine the cropping at a later date, especially if you are planning to print them at the standard photo sizes (4 × 6, 5 × 7, and so on).
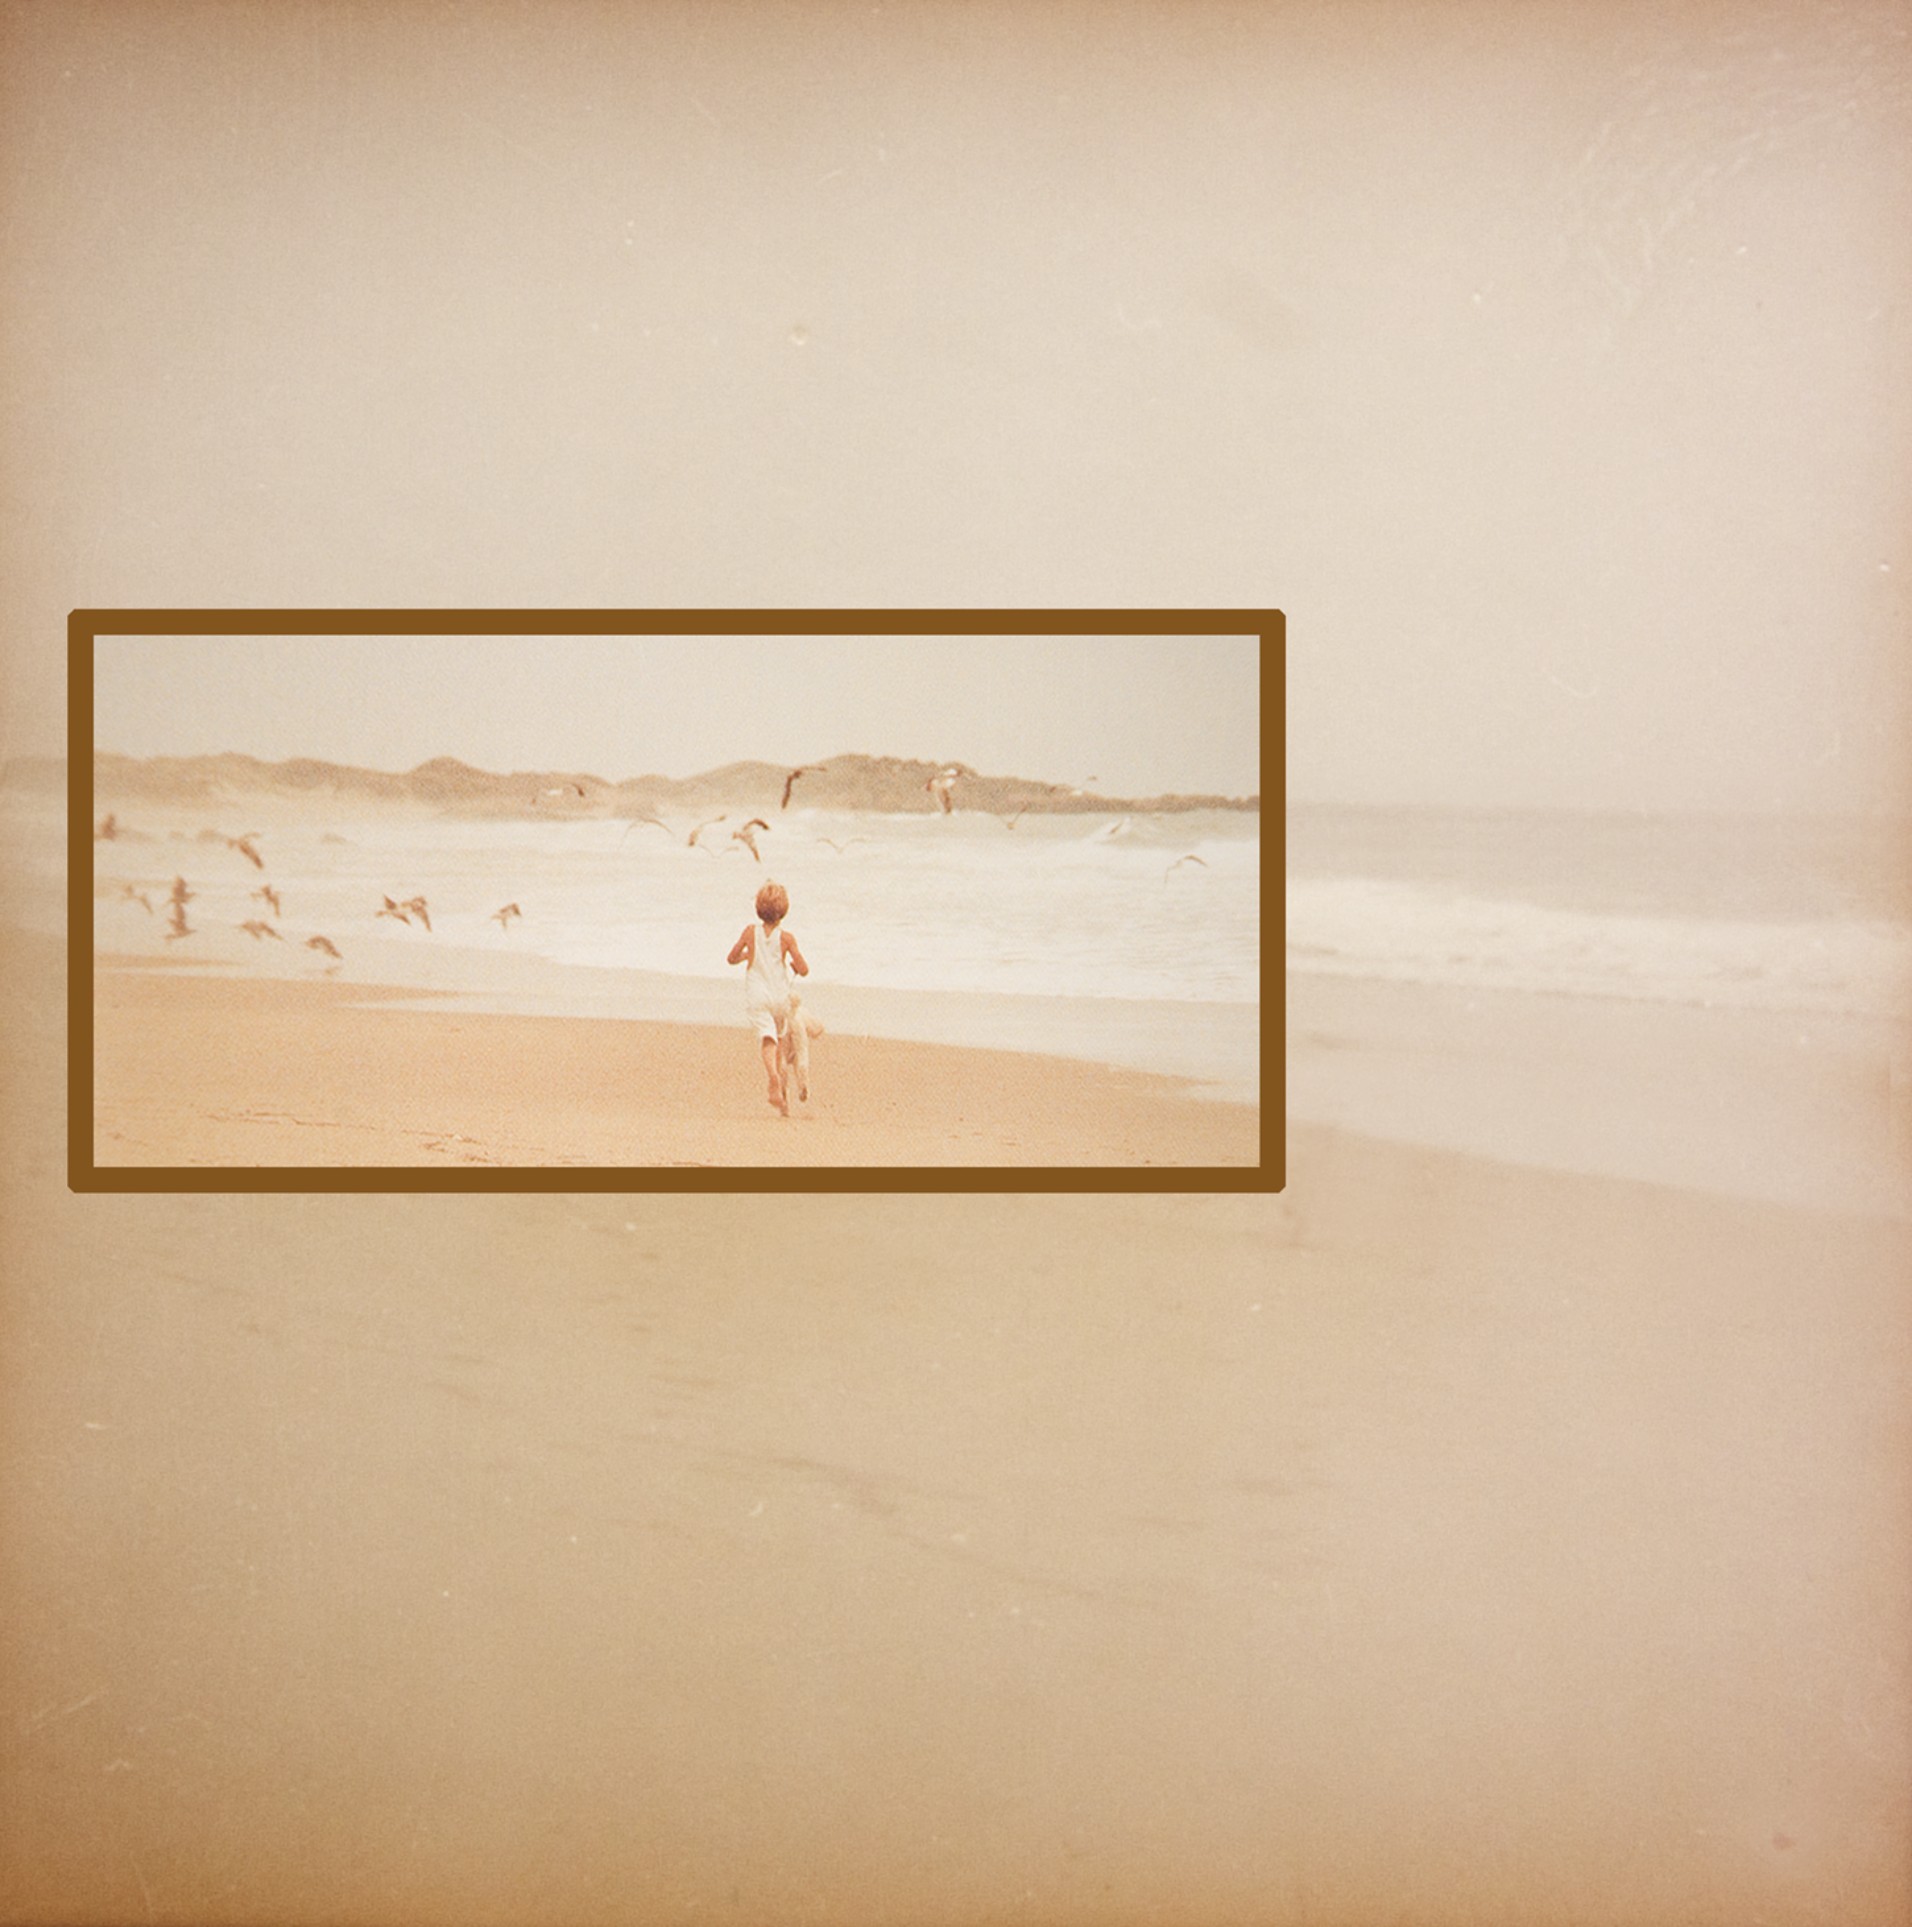
How you crop a photograph after you take it is as important as the original composition and final presentation of your image. After the photograph is made, you have a chance in post-production with imaging software to pay close and final attention to your cropping. Look at the example in 10-10. You can clearly see that cropping this image makes a huge difference in the impact it has.
10-10
ABOUT THIS PHOTO The cropped photograph is imposed on top of the entire original capture. You can see that cropping can change the story told by the image by either including or leaving out elements. Taken at ISO 400, f/8.0, and 1/250 second. ©Ginny Felch / www.photographingchildren.com
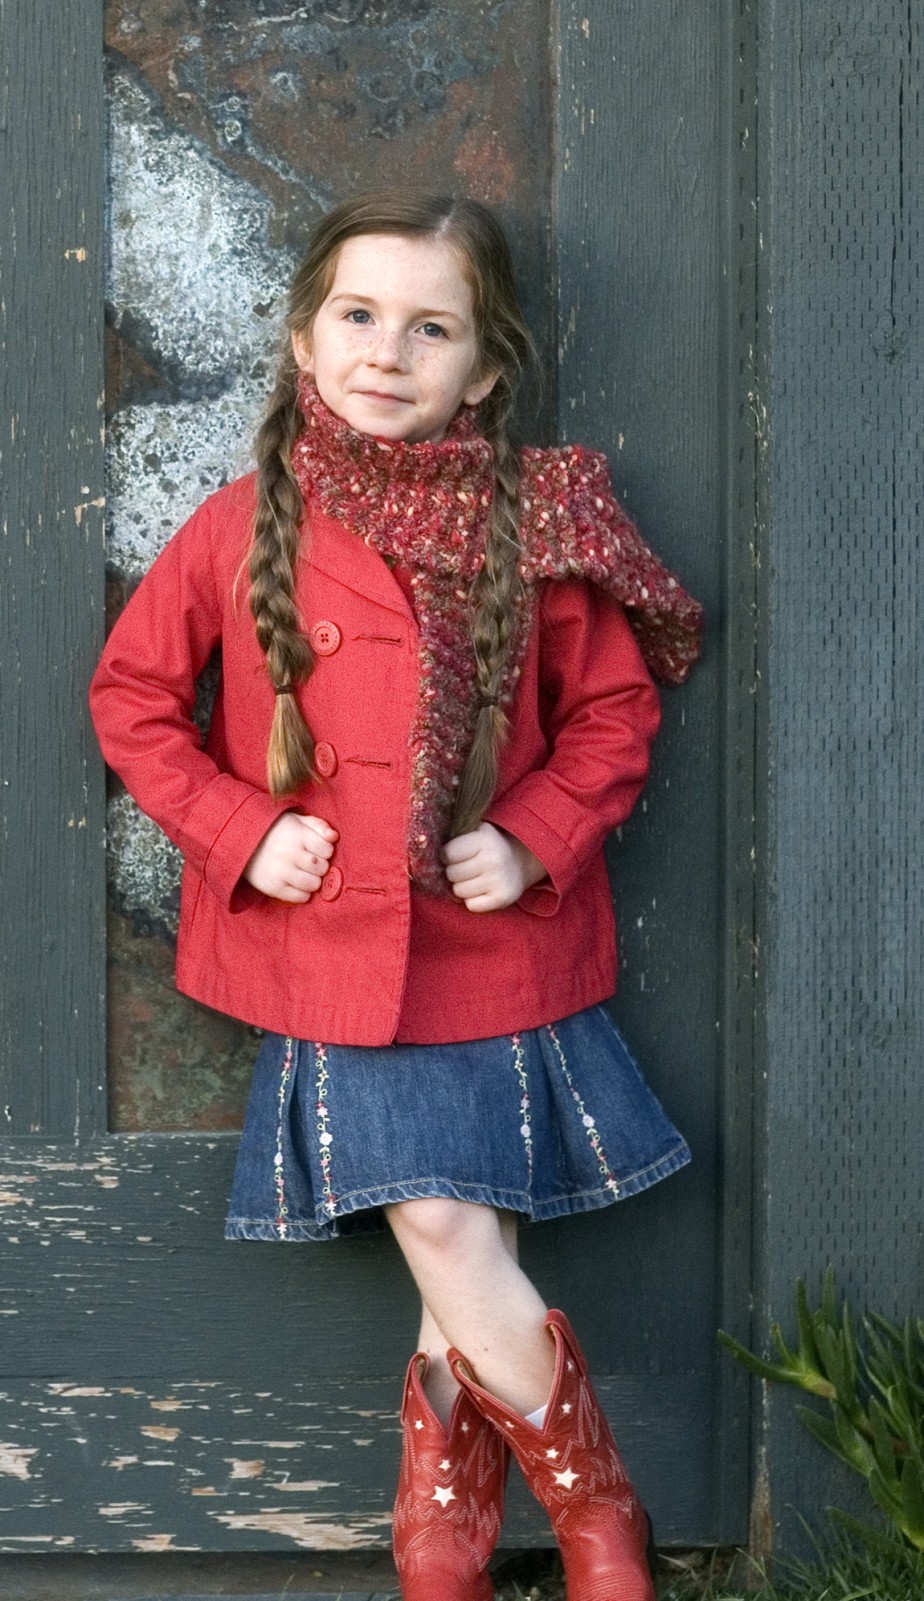
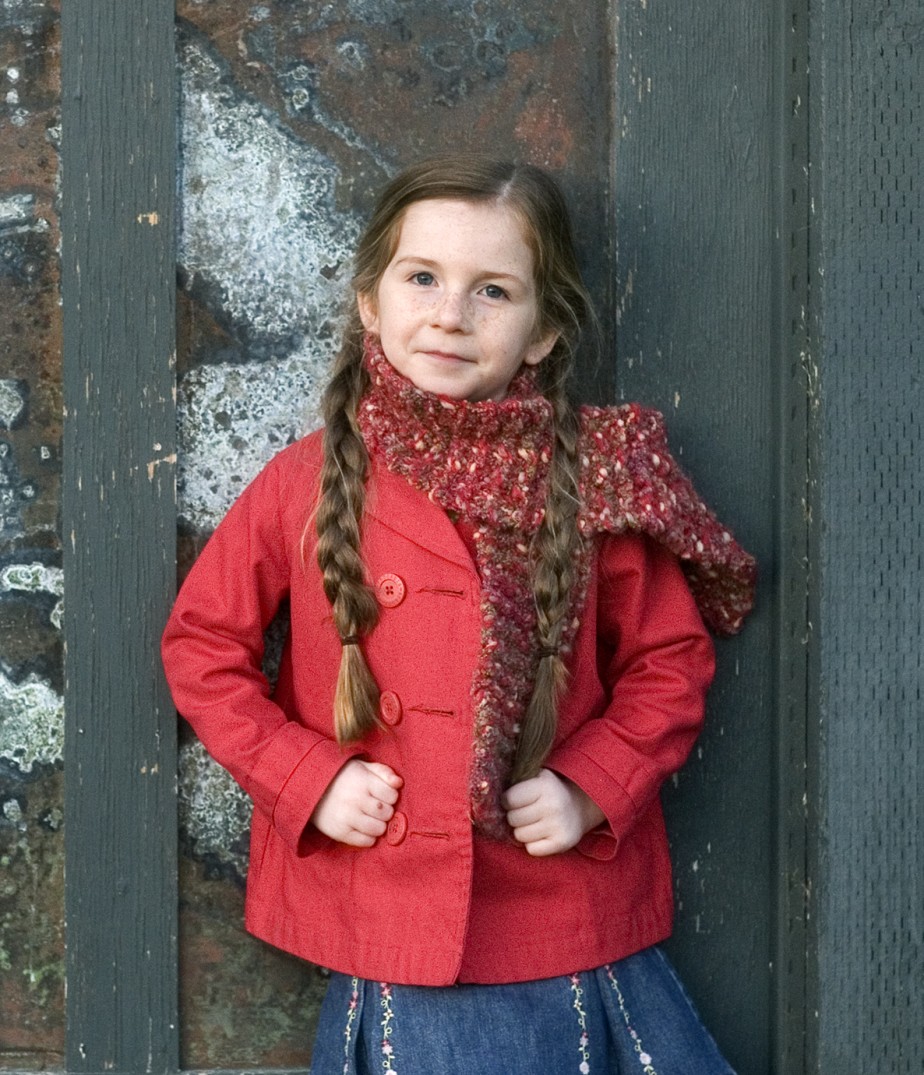
When trying to decide on a crop after the photo has been taken, such as the one in 10-11, keep the following guidelines in mind:
• Never crop off the hands or feet, as in 10-12. This cropping error is often referred to as amputation. Either crop close to the head and shoulders, or move out and crop below the hands, as in 10-13; or back off completely and include the whole body.
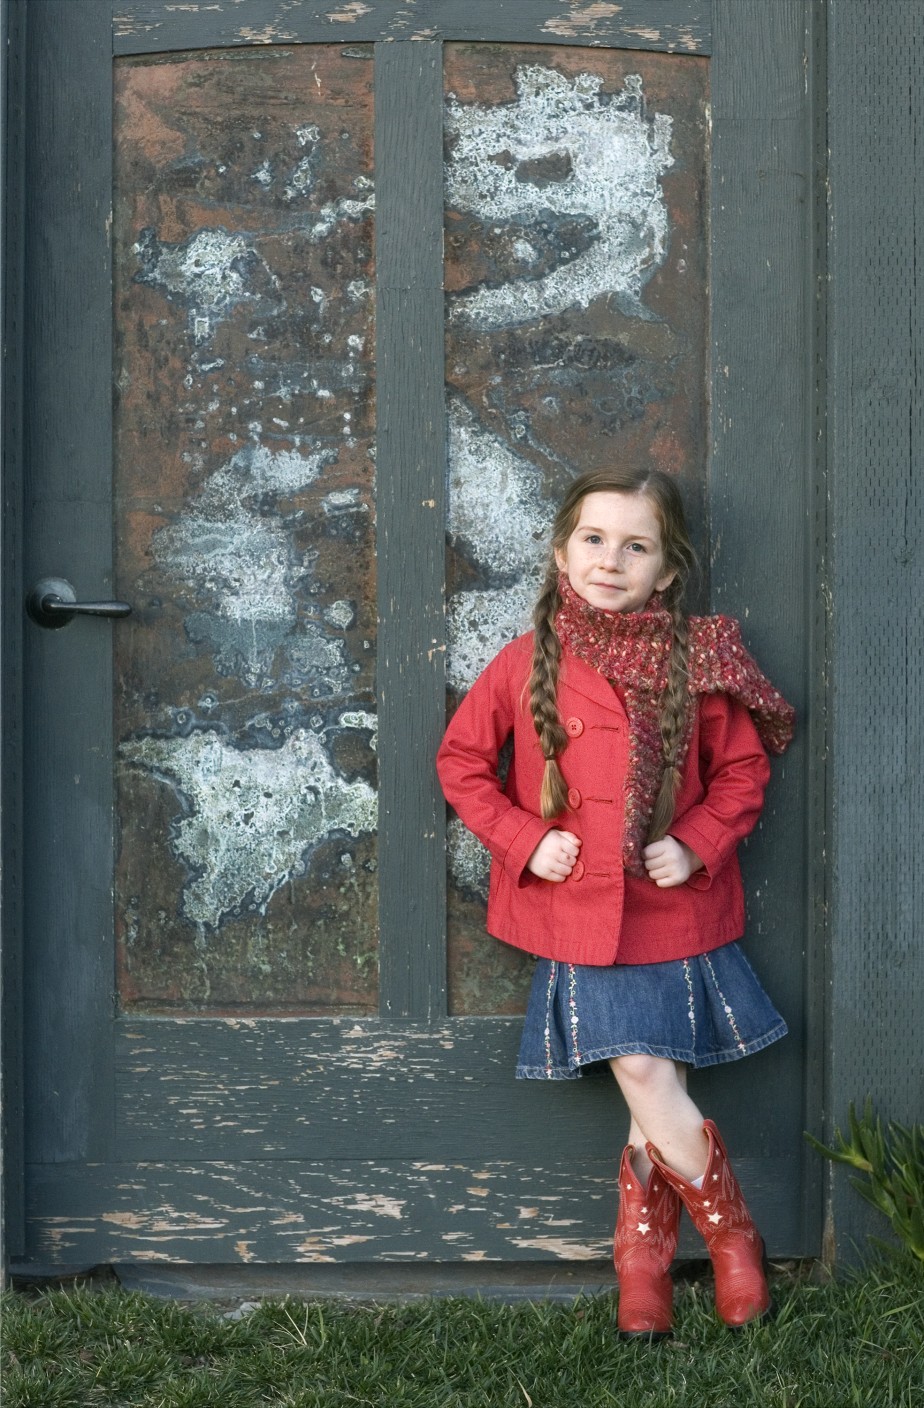
10-11
ABOUT THIS PHOTO This is the full image taken of Daisy. Taken at ISO 1600, f/4.0, and 1/320 second. ©Ginny Felch / www.photographingchildren.com
10-12
ABOUT THIS PHOTO Uh oh, no feet, no photo!
10-13
ABOUT THIS PHOTO Successfully cropping an image to 3/4 length requires you to leave in the hands and to crop at mid-thigh rather than chopping your subject off at joints, such as the knees, hips, and so on.
• Don’t automatically place the subject in the center of the photograph. Refer to general composition guidelines in Chapter 5, such as the Rule of Thirds. You may choose to center your subject, but look at other possibilities first.
In Chapter 11, you can find more ways to enhance your images creatively using textures and actions, as well as a list of resources.
• Leave plenty of growing room around the child, particularly above the head. It is comforting visually to create a sense of space, as in 10-14. This also applies if the child is moving: Leave space in the direction he is going or came from, which also helps to keep the subject off center.

10-14
ABOUT THIS PHOTO I wanted to focus on the perspective of the small children in the giant eucalyptus tree, so I placed them on the huge roots, stepped back, and created this image. Taken at ISO 400, f/5.6, and 1/250 second. ©Ginny Felch / www.photographingchildren.com
• If a horizon line is visible, be sure it is straight. You can do this in a variety of ways in post-production if you didn’t get it just right when taking the photo.
• If you weren’t able to eliminate all background distractions when composing, try to remove them with careful cropping afterward.
• If the children are looking away from the camera presenting a profile, crop leaving more space in front of their line of vision. This gives the impression there is space before them, creating a sense of openness.
Presentation gallery
Capturing your image digitally gives you so many more options when it comes to printing your photos. Not only can you create different crops from the same image and change color to black and white for printing, but you can also create online galleries at websites such as www.snapfish.com and www.shutterfly.com.
Additionally, many of these websites have products you can purchase to place your images on to give as gifts, such as mouse pads, note cards, calendars, and so on.
Many photographers present their work, and network on their blogs, on Facebook, and Flickr. You can join the Facebook Group, Photographing Children (based on this book) to share your images and ask for advice.
Storyboards
Once you learn your way around Photoshop Elements (or another chosen image-editing program), you know how to retouch, enhance, and crop your images. You can then create your own custom storyboards that will add a graphic element to your work. Storyboards use multiple images from a photo shoot to tell a larger story than a single image can.
Start with a blank document in Photoshop Elements, sizing the document to the desired size of your finished storyboard. Next, open several different images that you would like to use for your storyboard project. Using the Move tool, just drag and drop each image onto your original blank document. Press Ctrl+T/![]() +T to transform each image and size it to the desired size on your document. Creating storyboards can be addictive, and you can use them in many different ways.
+T to transform each image and size it to the desired size on your document. Creating storyboards can be addictive, and you can use them in many different ways.
For example, the image in 10-15 could be used as a large wall print, as the cover of a Christmas card, or for the cover of your very own coffee-table book, as mentioned later in this chapter.
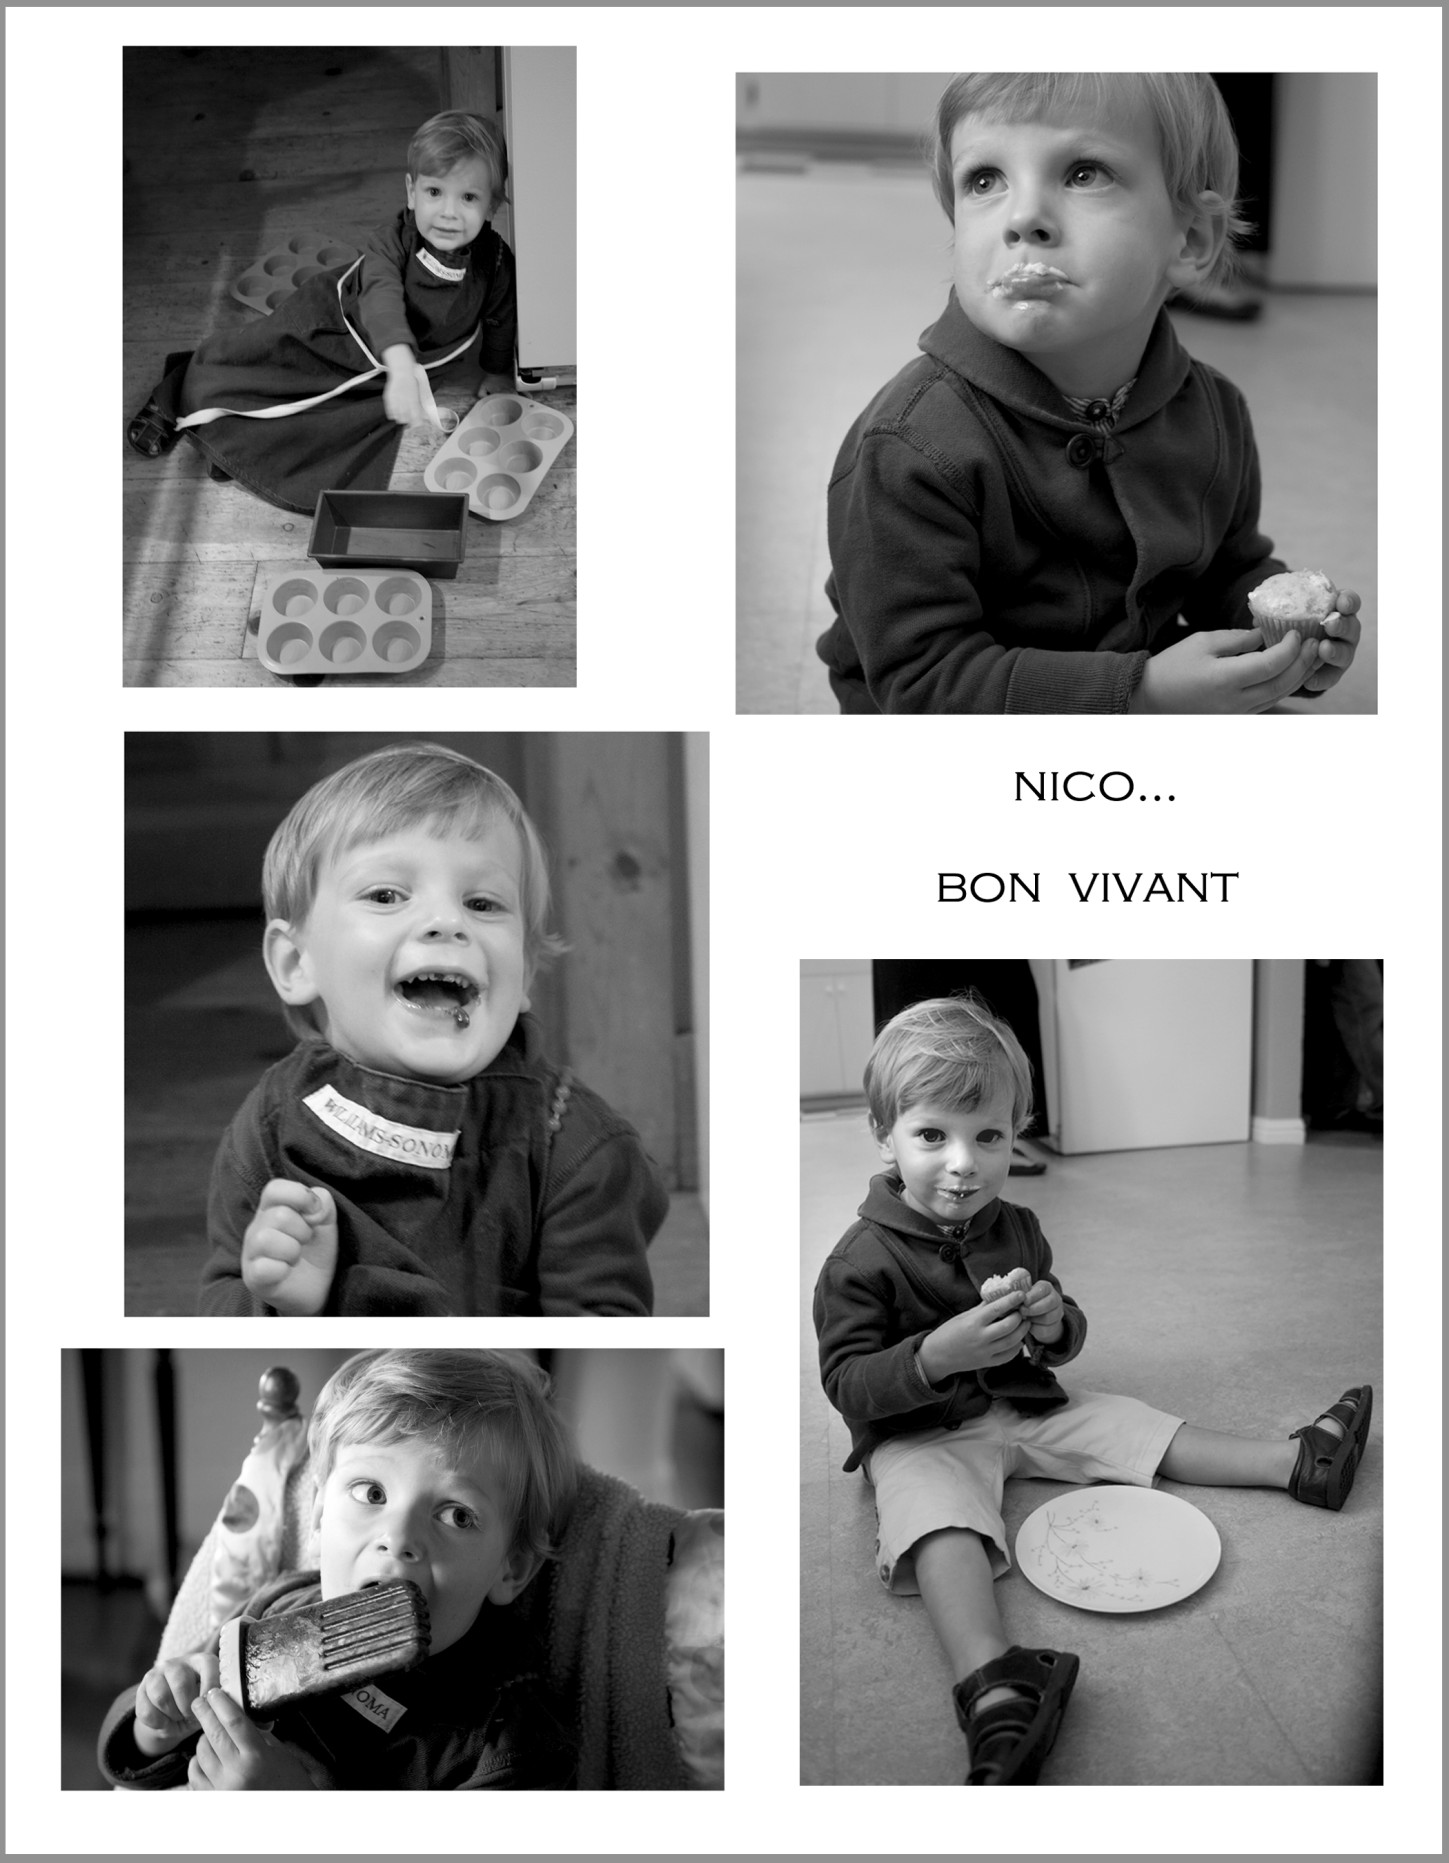
10-15
ABOUT THIS PHOTO Here is a storyboard that I created after a visit with my grandson. The theme of eating and food inspired the name Bon Vivant. The collection of expressions really captured his spirit. ©Ginny Felch / www.photographingchildren.com
Gallery-wrapped canvas prints
A gallery-wrapped canvas print is an image that is printed on heavy artist’s canvas and then stretched on stretcher bars with the image wrapping around the sides of the stretcher bars. Available through your local photo lab as well as many online outlets, gallery-wrapped canvases are a bold, contemporary statement and so fun to do with children’s portraits, as in 10-16. If you are planning to print a very large image, you will want to first check with your lab to make sure the file you have has a high enough resolution (size) to enlarge it to your specifications. Bay Photo (www.bayphoto.com) and other companies produce very high-quality canvasses.

10-16
ABOUT THIS PHOTO Photographer Mary Schannen decided to create a tryptic of her son’s photographs printed on stretched canvas. The impact is tasteful and entertaining. ©Mary Schannen / www.melangephoto.com
Coffee table digital books
It doesn’t cost thousands of dollars anymore to have your very own coffee-table book printed full of your own images, as in 10-17. Check your local photo lab as well as online companies such as www.mypublisher.com for hard- and softcover books that you can customize using the layout templates, fonts, and wording they offer.
The options for outputting your digital images are endless. Working with your photographs in a book format can really help you learn to edit and create beautiful portfolios.
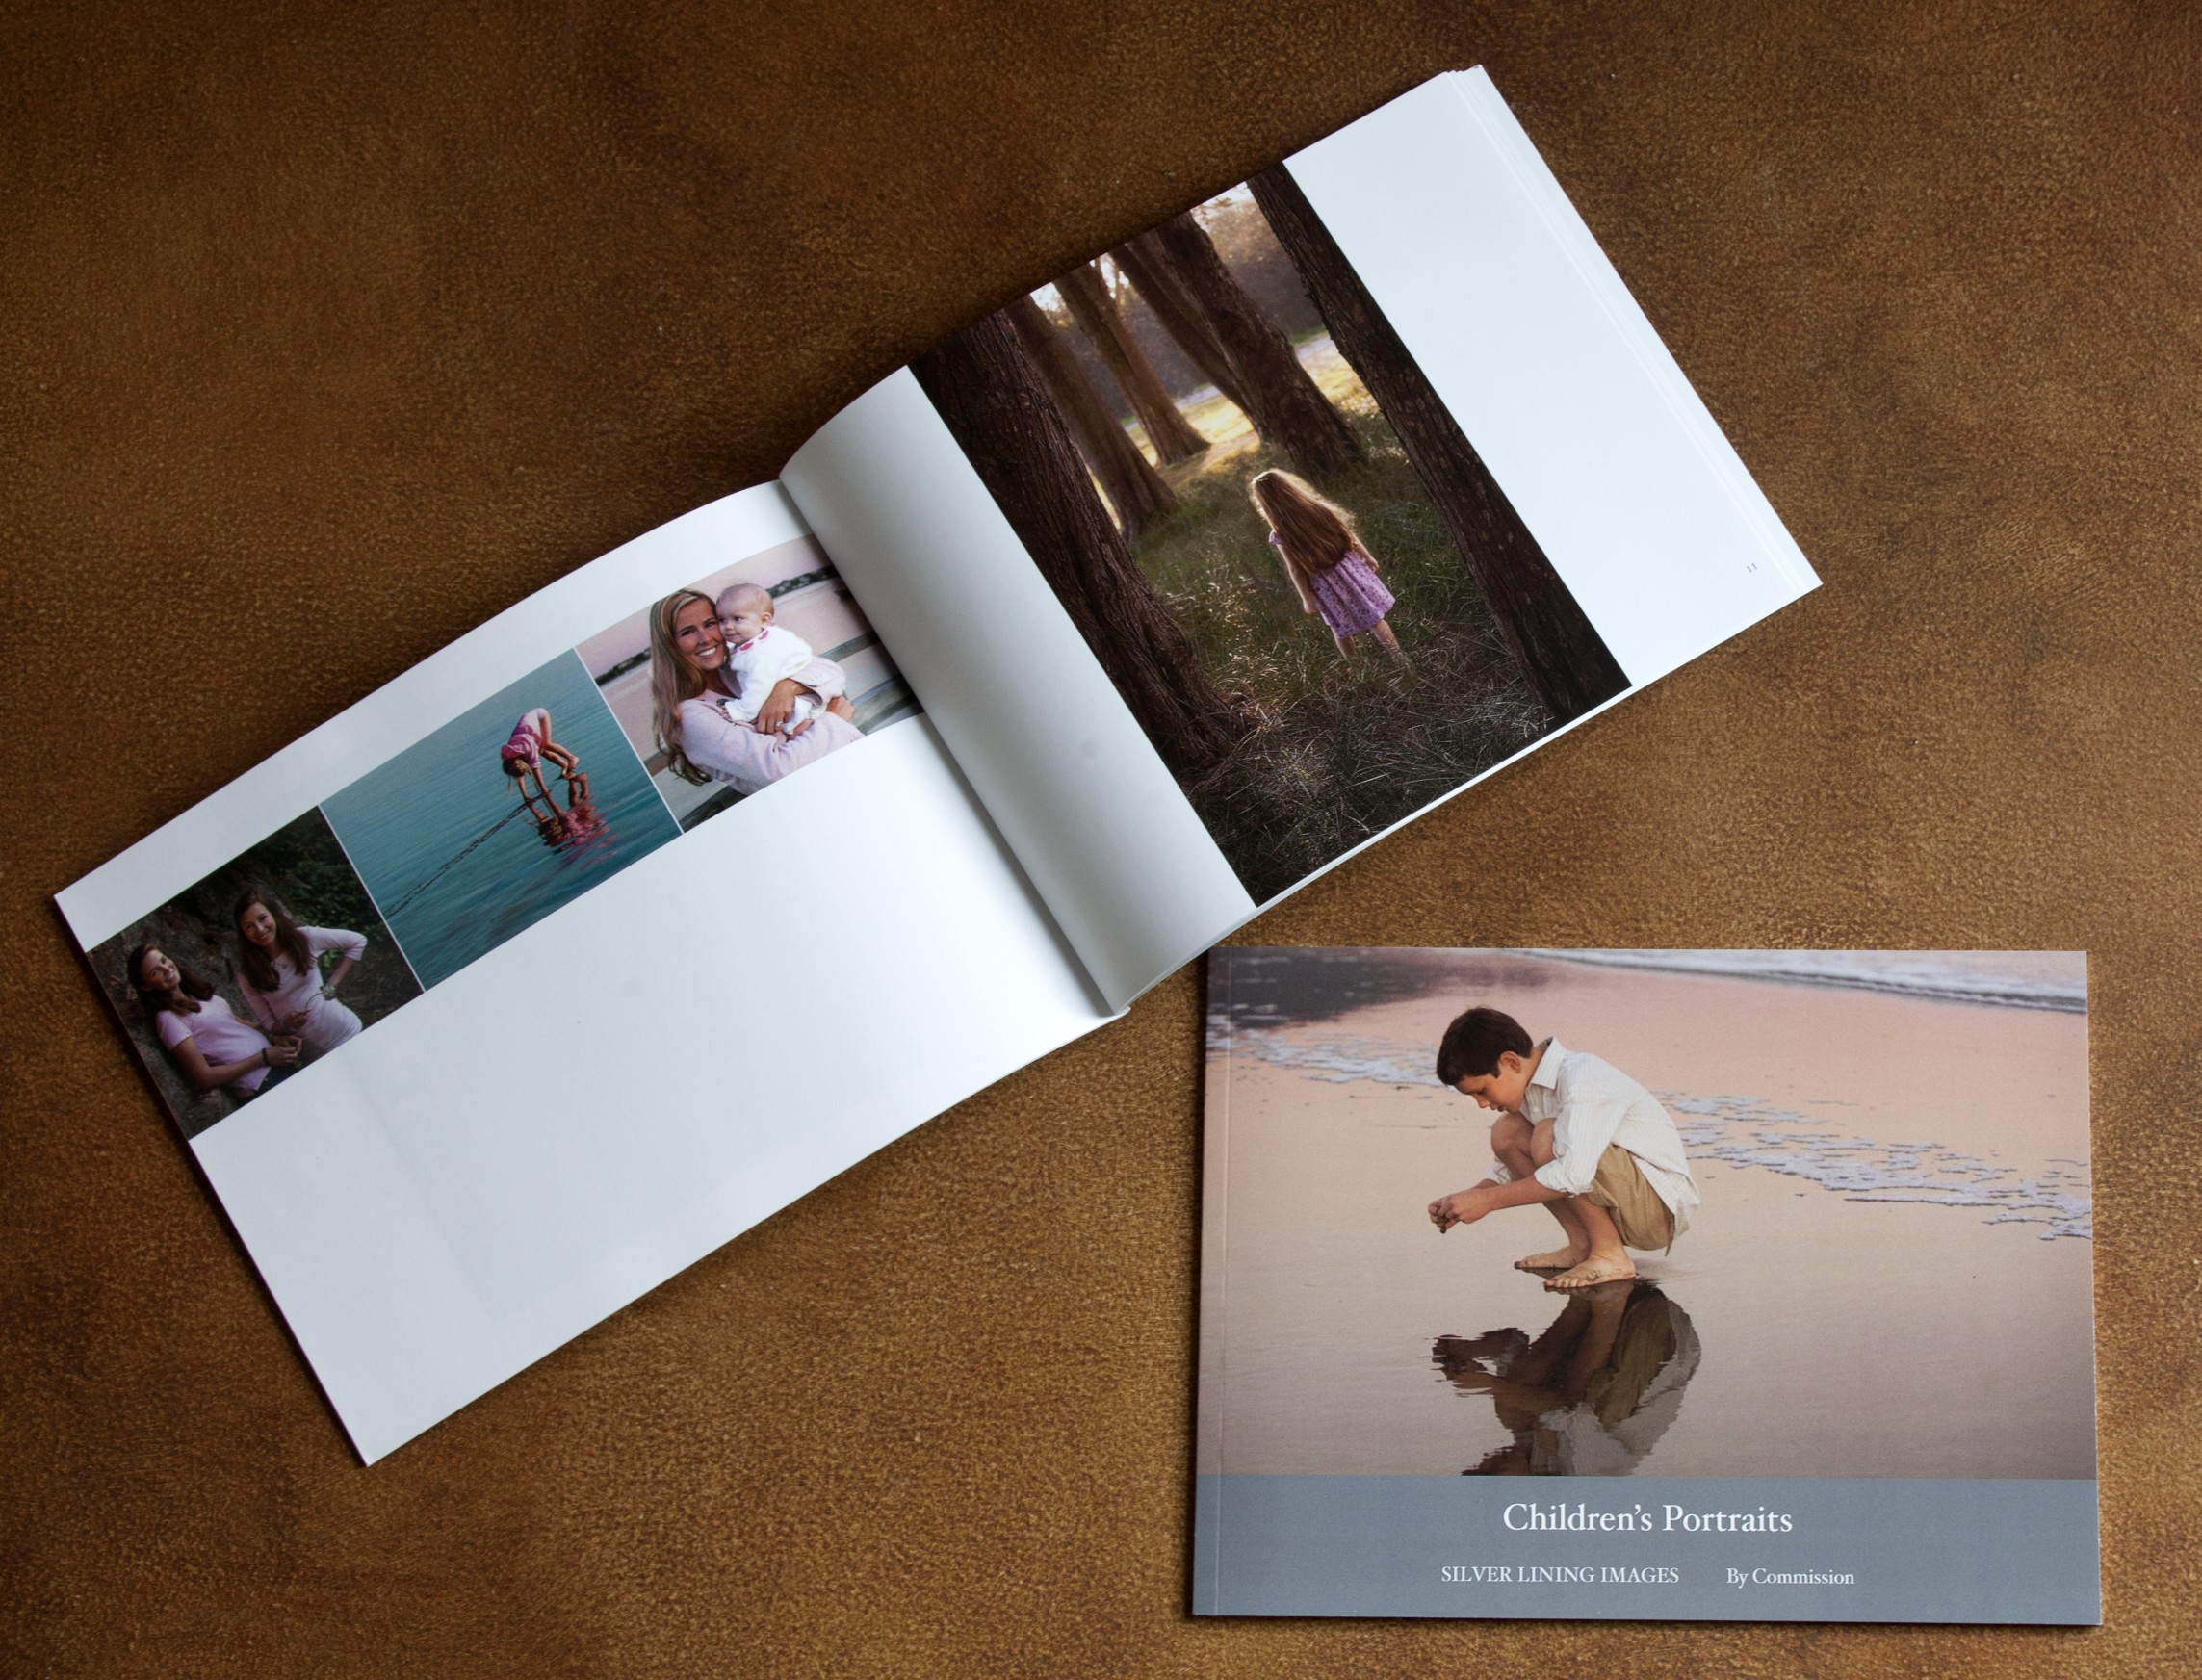
10-17
ABOUT THIS PHOTO I created a small portfolio for shops by uploading my images to www.mypublisher.com. It also manufactures coffee table books. Photos and book ©Ginny Felch / www.photographingchildren.com
Tablets and cell phone galleries
A very convenient way to present your photographs and galleries in person is to upload them to your tablet and cell phone galleries, as in 10-18. The portability enables great opportunities to show off your favorites to friends and co-workers, or even clients. The quality is excellent, and you can add or change galleries whenever you wish.

10-18
ABOUT THIS PHOTO I use my iPad to display my photographs to friends, family, and clients. ©Ginny Felch / www.photographingchildren.com
Assignment
Cropping for Impact
Create a photograph keeping in mind the cropping guidelines discussed in this chapter. Find an image that you like but could possibly be made better by creatively cropping it. Crop it three to four different ways and note how the impact of the image is changed for the better or worse.
My assignment photograph demonstrates three of the cropping tips. I chose to leave the little girl small in the photograph relative to the environment, and there is extra space before her as she skips down the stairs. This cropping gives the perspective of a little girl in a bigger environment, and you can see some of the foreground toward which she moves. If it had been cropped differently, to eliminate the stairs, for example, the girl might look as though she were flying. I also moved around so that the stairs formed a strong diagonal leading to the child. Taken at ISO 400, f/6.3, and1/200 second.
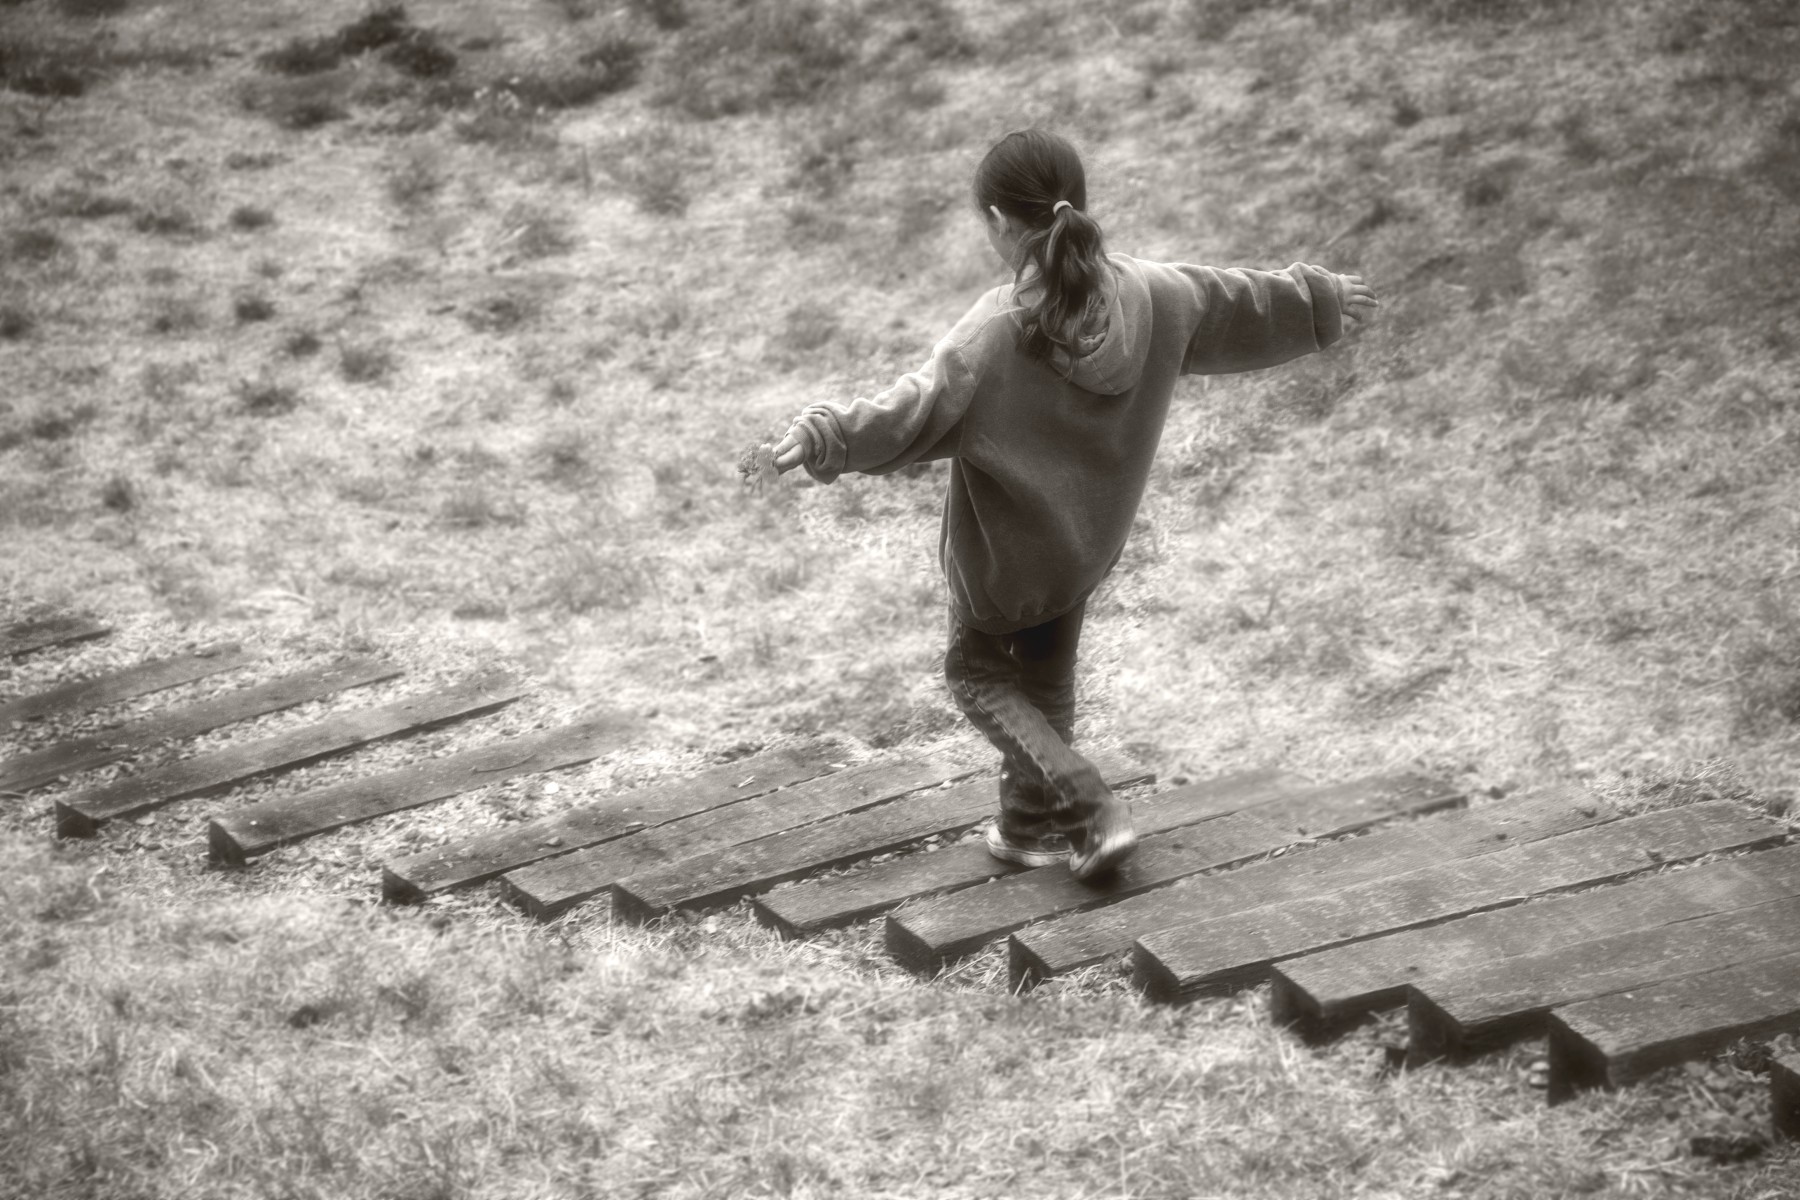
©Ginny Felch / www.photographingchildren.com
Remember to visit www.pwsbooks.com after you complete this assignment and share your favorite photo! It’s a community of enthusiastic photographers and a great place to view what other readers have created. You can also post comments, read encouraging suggestions, and get feedback.

©Shana Rae / www.florabellacollection.com