Chapter 6. Share Photos and Videos

One of the best documentaries I’ve seen recently is Finding Vivian Maier, about a nanny who shot amazing street photography throughout her life—but no one knew just how good she was because she never shared her photos during her lifetime. It wasn’t until someone bought her immense stash of negatives that her photos were discovered.
We all have our reasons for capturing photos, but I think it’s safe to say that most people want to share the images with family members, friends, or the entire world. This chapter is about taking the pictures you’ve organized and edited and making them available to other people. That ranges from sending shots to a select group using iCloud Photo Sharing, to posting them on social networking or photo-sharing sites.
iCloud Photo Sharing
My favorite feature of iCloud Photo Sharing—which is not part of iCloud Photo Library, although they work nicely side by side—has nothing to do with what happens on my Mac or iOS device.
The idea behind the service is that you create an album of photos and share it with people you invite. That can be one person or several, but here’s the great part: As soon as you add an image or video to the album, it’s copied to the devices of each subscriber. Before iCloud Photo Sharing, I’d send photos of my daughter to family members via email (which would sometimes get delayed by spam filters) or I’d post them to a photo-sharing service like Flickr (which anyone can view, and which some folks would forget to check).
Those methods are still viable ways to share photos, as I describe in this chapter, but with iCloud Photo Sharing, my family members receive a notification when new photos are added and the pictures are saved to their Photos libraries. I also set it up so that my wife can also post her own photos, so I also get a copy of the shots she takes.
Create a shared album
To get started, make sure iCloud Photo Sharing is enabled on your Mac in the Photos preferences, under the iCloud tab, or on an iOS device in Settings > iCloud > Photos.
Next create a shared album. In Photos for OS X, do the following:
1. Select one or more photos you wish to share.
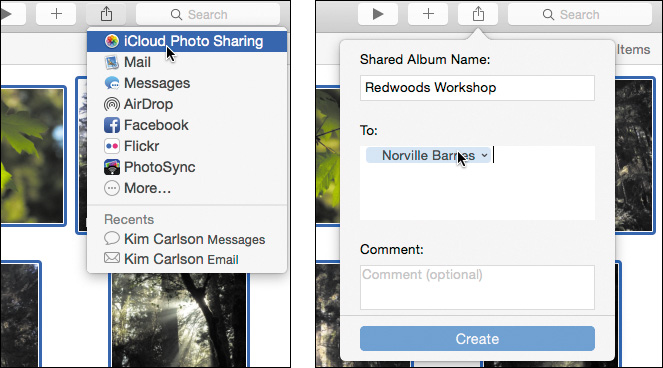
2. Click the Share button and choose iCloud Photo Sharing (6.1).
3. In the Add to Shared Album sheet that appears, click New Shared Album.
4. Give the album a name.
5. In the To field, enter the names or email addresses of the people you’d like to invite to view the album.
6. Optionally enter a comment that the people will see when they’re invited, and click the Create button.
The invitees will receive a notification (if you’ve provided an iCloud address) and an email asking if they would like to join the album. You’re notified when they do.
On an iPhone or iPad, create a new album using these steps:
1. Select one or more photos and tap the Share button.
2. Tap the iCloud Photo Sharing option.
3. In the dialog that appears, tap Shared Album.
4. Tap New Shared Album.
5. Give the album a name and then tap Next.
6. Enter the names or email addresses of the people you want to invite, and then tap Next.
7. Optionally type a comment and then tap Post to create and share the album.
Add photos and video to a shared album
The next time you capture or edit a photo you want to share with everyone subscribed to that album, there are two ways to do it: select photos first, or navigate to the shared album and add items from there.
1. Select the photo(s) you want to share.
2. Click or tap the Share button and choose iCloud Photo Sharing.
3. In Photos for OS X, add an optional comment and then select the shared album.
In Photos for iOS, add an optional comment and make sure the album you want is listed in the Shared Album field; if it’s not, tap it and select the right album. Tap Post.
To add items from within the shared album:
1. Tap the Shared button and navigate to your shared album (you may have to tap or click the Back button to exit the Activity screen).
2. In Photos for OS X, click the “Add photos and videos” button.
In Photos for iOS, tap the Add (+) button.
3. On each platform, you’re taken to the Moments view; click or tap the items you want to add, and then choose Add (Mac) or Done (iOS) to include them in the album.
The photos are added to the album on your Mac or device, and everyone else receives a notification that new photos are available. When they access the shared album, it opens to the Activity screen in the Shared albums section, where the photos appear (6.2).
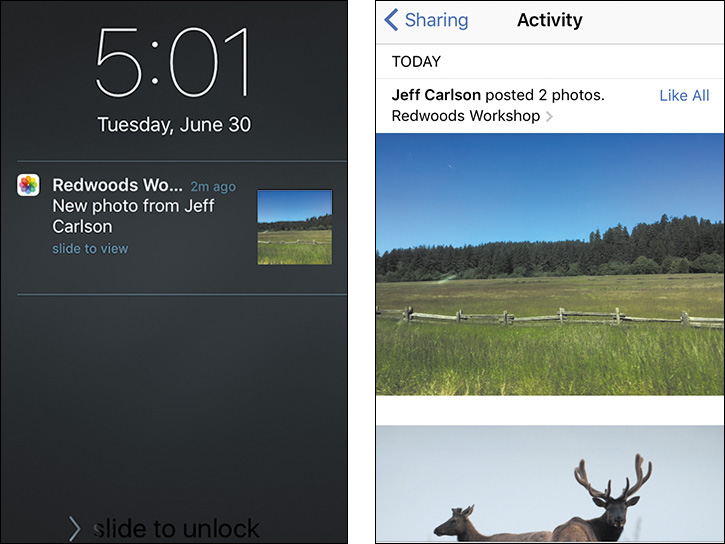
6.2 A notification arrives that new photos are available, found in the Activity screen of the Shared albums view.
![]() Note
Note
If you’ve enabled Family Sharing, a shared photo album is automatically created for the family to use. It’s just one album, but any family member can view it and contribute to it.
Invite people to a shared album
If you want to add other people to the shared album, extend an invitation:
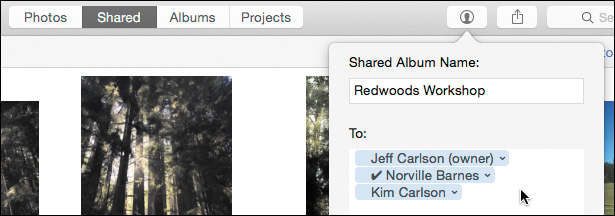
1. On the Mac and iOS versions of Photos, click or tap the Shared tab and open the shared album you want; you may need to click or tap the Back button first to exit the Activity screen.
2. On the Mac, click the People button and enter a name or email address in the To field (6.3).
In Photos for iOS, tap the People button, tap Invite People, and enter the person’s information.
This is also where you can remove people from the list of recipients or re-send invitations for those who didn’t receive them. You’ll also find the Subscribers Can Post option, which lets anyone contribute to the album, as well as an option to publish the album as a public Web site, a control to turn off notifications about the album, and the ability to delete the shared album entirely (for subscribers, the option is to unsubscribe).
![]() Tip
Tip
Subscribers can’t delete items from the album, even if the option to let others post is enabled.
Share via Messages or Mail
It wasn’t too long ago that sharing photos to someone via text messaging was an insane idea, because the phone carriers charged so much per message. Now, with iMessage, that worry is gone, and I find myself sending photos often.
At the same time, I almost never send photos via email because there are too many impediments between me and my recipients: mail servers get clogged, spam filters block images, and often large attachments are stripped away. Still, sometimes it’s the only way to pass along an image to someone, and the Photos apps on OS X and iOS can handle it.
To share one or more photos via Messages or Mail, do the following:
1. In Photos for OS X or iOS, select the photos and click or tap the Share button.
2. Choose Messages or Mail from the pop-up menu or share sheet. A new outgoing message containing the images appears; on the Mac, the message opens in the Mail application.
3. Enter the name or address of your recipient and click Send.
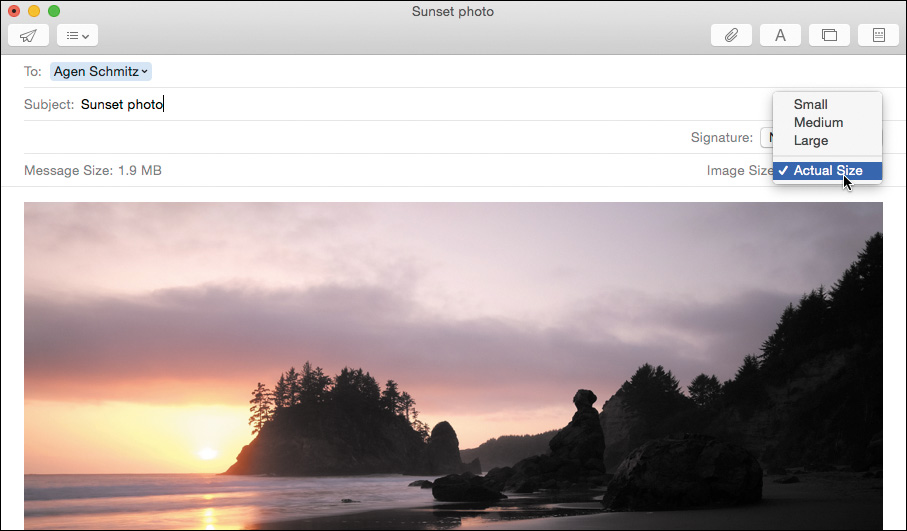
In the Mail application on the Mac, you can also choose the size of the image that gets sent. Click the Image Size pop-up menu and pick one before sending (6.4).
Share via AirDrop
Want to share a photo or video to someone who’s physically near you? Apple’s AirDrop technology makes it easy. Make sure the devices—iOS or Mac—are nearby, and then:
1. In Photos for OS X or iOS, select one or more photos to share.
2. Click or tap the Share button.
3. On the Mac, choose AirDrop and wait for your friend’s device or Mac to appear. The other person must have the iOS device on, or have AirDrop selected in a Finder window.
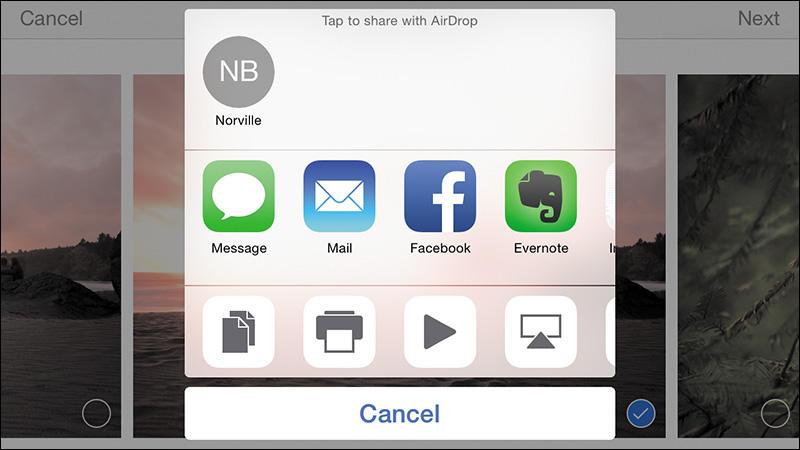
On an iOS device, the other person’s device will show up in the AirDrop area of the share sheet (6.5).
4. Click or tap the destination device’s icon; the other person must agree to receive the image(s) before the transfer begins.
![]() Tip
Tip
If the other person isn’t showing up in the AirDrop pane, try setting their AirDrop preference to Everyone. On iOS, swipe up to reveal Control Center and tap the AirDrop button; on the Mac, check your firewall settings in the Security & Privacy preference pane.
![]() Note
Note
To share via AirDrop between iOS devices and Macs, you need a Mac newer than 2012. Some earlier Macs can share via AirDrop with other Macs.
Share to Online Services
To share your photos and videos with the world, the most direct method is via social media services like Facebook, Twitter, and Flickr (among many others). Photos makes it easy to do so directly from within the app—no copying and pasting, exporting, uploading, and all that.
Instead, do the following:
1. Select one or more items in Photos for OS X or Photos for iOS.
2. Click or tap the Share button.
3. Choose a supported service, such as Facebook, from the list that appears.
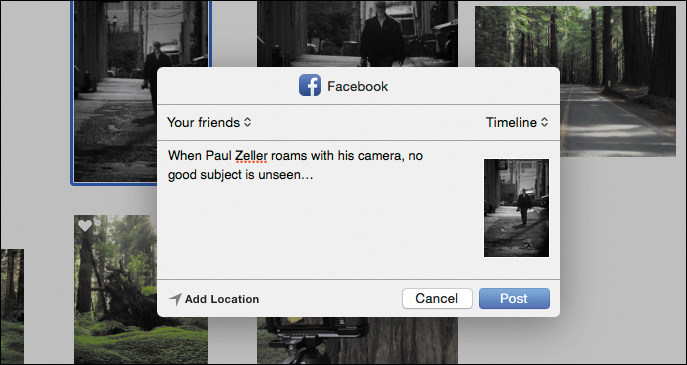
4. Type a message to accompany the images (6.6).
5. Set any service-specific options, such as an optional location, audience, or album name.
6. Click or tap Post to publish the images.
![]() Note
Note
Make sure you’re signed in to the supported services you wish to use: on a Mac, open System Preferences and log in using the Internet Accounts preference pane; on an iPhone or iPad, go to Settings and find the services in the list.
Share to Other Services
The Photos application on both platforms supports sharing extensions, which allow developers to support sharing directly to their apps. For example, you could send an image to your Pinterest, Evernote, or Slack account.
To configure services using sharing extensions, do the following:
1. Select a photo and click or tap the Share button.
2. Choose More from the options listed.
3. On iOS, enable the services you want to include in the Activities window (6.7), and then tap Done.
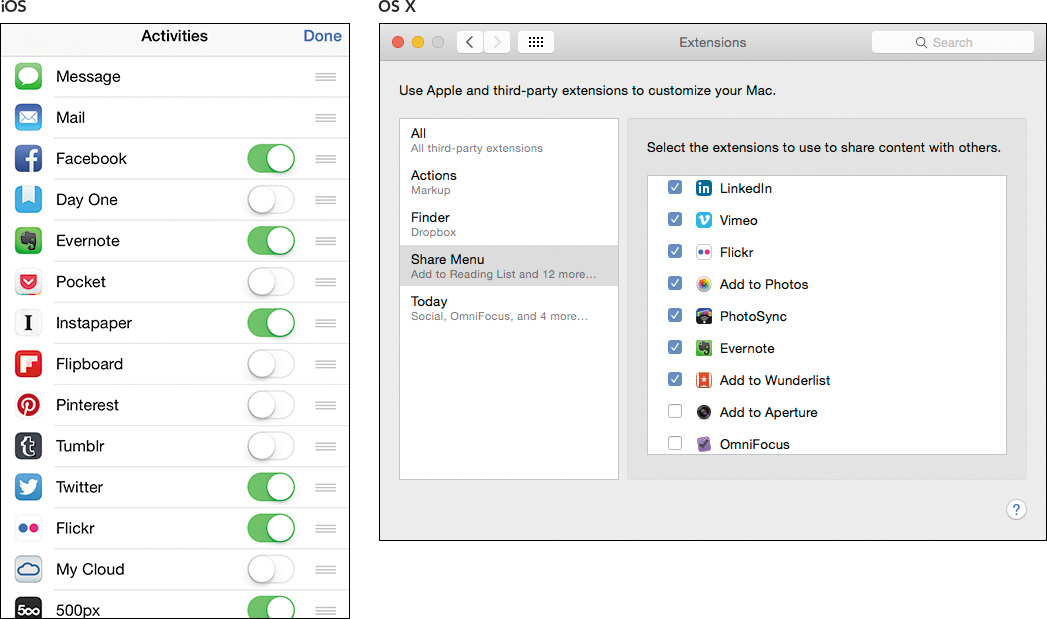
On OS X, choosing More opens the System Preferences with the Extensions pane selected. Select services to include in the Share Menu list.
Those items now appear in the Share menus.
![]() Note
Note
The Share menu also includes a helpful shortcut: Set Desktop Picture (Mac) or Use as Wallpaper (iOS). Turn your beautiful photos into backgrounds with no hassle.