
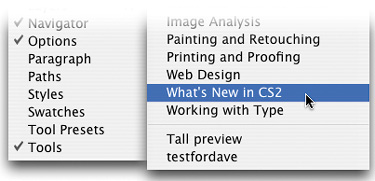
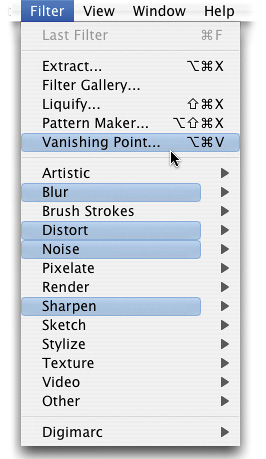
Want to instantly find all the areas where Adobe added something new in CS2? Then go under the Window menu, under Workspace, and choose What's New in CS2. This is a custom workspace that puts a color bar over every menu item that has something new in it. For example, now when you look under the Filter menu, you'll see that the filter Vanishing Point is highlighted, as are the submenus Blur, Distort, Noise, and Sharpen. Note: When you choose this option, you will likely get a warning dialog telling you that this will change your workspace—just click Yes and enjoy the colorful menus.
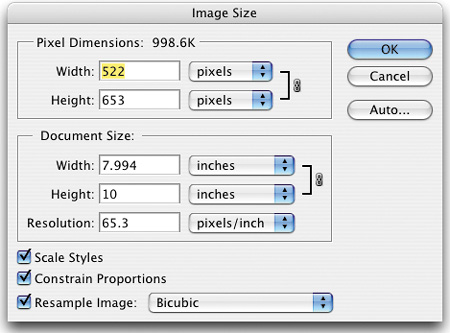
If there was a keyboard shortcut that we've been waiting for since Photoshop 1.0, it was one for the Image Size dialog. It's one of the most-used dialogs in all of Photoshop, but there's never been a “factory” shortcut for it until now. Press Command-Option-I (PC: Control-Alt-I) and it pops up. Luckily, while Adobe was at it, they went ahead and gave us one for the Canvas Size dialog as well: Command-Option-C (PC: Control-Alt-C).
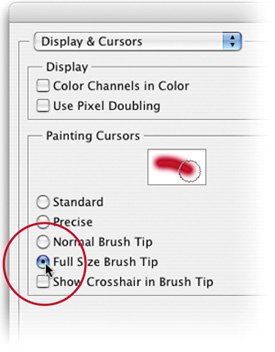
At long last, bigger brush cursors are here. Just go to Preferences under the Photoshop menu (or under the Edit menu in Windows), under Display & Cursors, and choose Full Size Brush Tip. You also have the option of adding a crosshair to the center of your brush cursor by turning on that option (which appears just below Full Size Brush Tip).
Want to compare two photos side-by-side? Just open both in Photoshop CS2, then go under the Window menu, under Arrange, and choose Tile Vertically, which places both photos onscreen, side-by-side, at their maximum “fit-in-window” size.
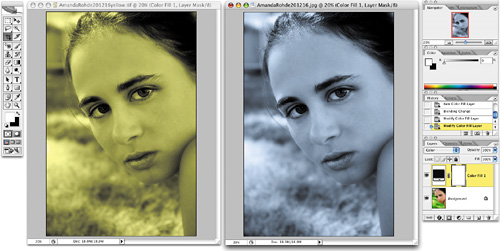
©ISTOCKPHOTO/AMANDA ROHDE
If you want some tips about the tool you currently have selected, just go to the Window menu and choose Info. This brings up the Info palette and at the bottom of the palette you'll find a tip or two for the tool you're using. If you don't see these tips, go to the Info palette's flyout menu and choose Palette Options. When the options appear, at the bottom turn on the checkbox for Show Tool Hints.
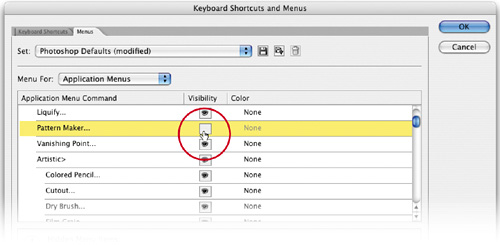
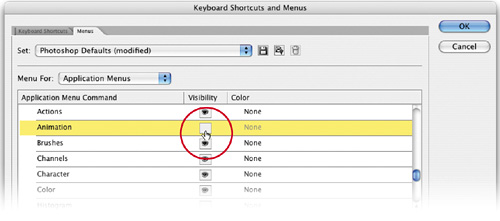
Photoshop has more than a hundred different filters, and most of us probably use just a handful in our daily work. In fact, so far as we've been able to determine (through years of user-testing), only three people in the world today use either the Pattern Maker filter or the Fiber filter, and even they don't like them. So, if there are filters you never use, do they have to hang around clogging up your filter menus? Absolutely not (if you have CS2). Just go under the Edit menu and choose Menus. In the list of Application Menus commands, double-click on Filter to reveal a list of all Photoshop filters. Now, just turn off the Eye icon (a.k.a. the Visibility button) beside the filters you don't want to see. Don't worry, if for some reason you decide you need to temporarily access one of those hidden filters, just go under the Filter menu, to the submenu where it used to appear, and choose Show All Menu Items.
If you're responsible for training beginners, especially in a corporate environment where you're training people to do specific tasks in a specific order (like prepress), you can use this and the previous tip to make your (and their) life easier. First, go to the Menus command (found under the Edit menu) and hide every menu item you don't want them to see or mess with, leaving only the items they'll actually use visible. You can even hide palettes they don't need to see (by double-clicking on the word “Window” in the dialog and turning off the Eye icons to hide palettes). This makes Photoshop appear less cluttered, and therefore less intimidating. As they learn more and get better, you can reveal additional features to them.
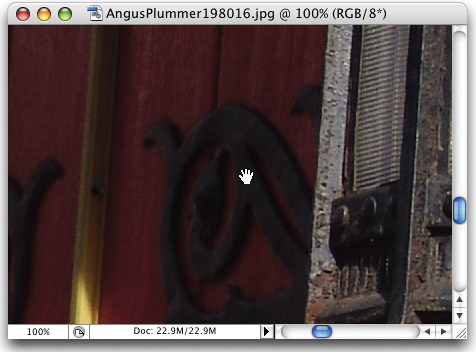
Photoshop's cursors can be easy to lose onscreen, especially if you're working on a big screen or with the crosshair cursor (meaning you have the Caps Lock key active). Well, the next time you're working on an image, and you say to yourself, “Hey, where in the heck is my cursor?” (but you use a different word in place of “heck”), try this—just hold the Spacebar down for a moment. This temporarily changes your cursor into the Hand tool, whose icon is larger, white, and easy to see. Once it appears, you'll see right where your cursor is, and you can release the Spacebar.
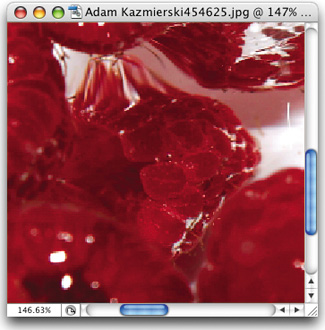
Where's my cursor?
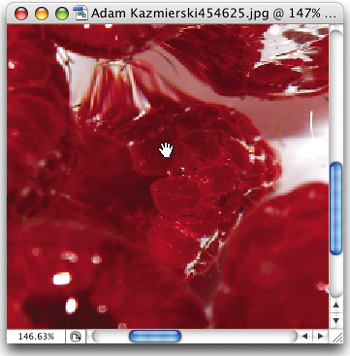
©ISTOCKPHOTO/ADAM KAZMIERSKI
There it is.
You probably already know the trick about entering values in measurement fields in the Options Bar. You can change your unit of measure by typing the appropriate abbreviation after the value (for example, if you want 100 pixels, you'd type in “100 px”). But there's an even easier way (and you don't have to memorize a bunch of abbreviations). Just type your number, Control-click (PC: Right-click) in the field, and a pop-up menu of measurement units will appear. Just choose the one you want and it'll take care of the rest.

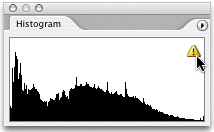
When you have the Histogram palette open to monitor your tonal adjustments to an image, you may see a tiny warning symbol in the top-right corner of your histogram. That's its way of letting you know that you're looking at a histogram reading from the histogram's memory cache—not a fresh reading. If you want to refresh the histogram and get a new reading (and you should), you can click directly on the tiny warning symbol and it will refresh immediately for you.
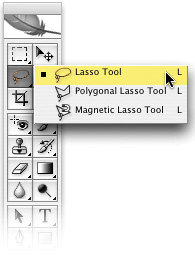
We normally use the Lasso tool (L) for drawing freeform selections, but sometimes you'll find that while drawing your selection you'll need to draw a perfectly straight segment, even for just a few pixels. You can do just that by holding the Option key (PC: Alt key), releasing the mouse button, and continuing to draw your selection. You'll notice that your cursor changes to the Polygonal Lasso tool, and that as you move the mouse, a perfectly straight selection will drag out. When you've dragged the straight selection where you want, click-and-hold the mouse button (to add a point), release the Option/Alt key, and you'll be back to the regular Lasso tool again. Drag the mouse to continue drawing your selection.
If you've made a selection and want to add to that selection, just hold the Shift key and you can add more area to it. Of course, we just told you it was the Shift key, but what if you couldn't remember which key it was? Just press a modifier key (such as Shift, Option/Alt, Command/Control, etc.) then look at your cursor. When you hold the Shift key, a little plus sign appears at the bottom right-hand corner of the cursor to tell you that you can add to the selection. Hold Option (PC: Alt) and a minus sign appears to tell you that you can subtract from the selection. Hold Command (PC: Control) and a pair of scissors appears, telling you that if you click-and-drag the selection, it will cut out the image inside of the selection and move it right along with the cursor.

©ISTOCKPHOTO/JAMI GARRISON
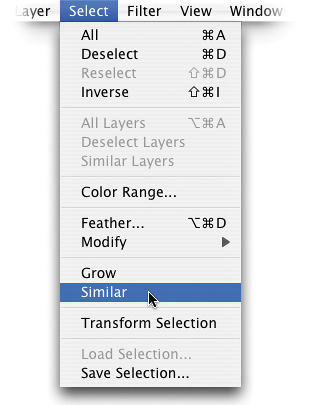
A popular trick for making selections of large areas (such as backgrounds) is to select part of the background that contains most of the colors that appear within that background. Then you can go under the Select menu and choose Similar. Photoshop will then select all the similar colors in your image. This can really speed up the task of selecting an entire background, especially if the background is limited to just a few colors. Here's the tip: Do you know what determines how many pixels out the Similar command selects? Believe it or not, it's controlled by the Magic Wand's Tolerance setting. The higher the setting, the more pixels it selects. Eerie, ain't it? Sooooooo… if you use Similar, and it doesn't select enough colors, go to the Magic Wand tool, increase the Tolerance setting, and then try running Similar again. This all makes perfect sense (at least to an engineer at Adobe).
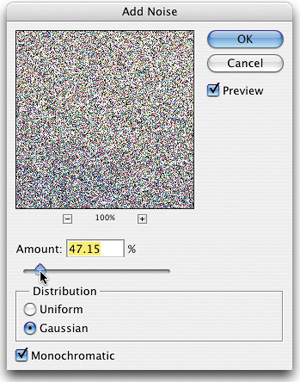
Want a convenient shortcut that lets you run the last filter you applied, without going to the Filter menu? Too bad (just kidding). Simply press Command-F (PC: Control-F). What if you don't want the same settings (ah, I knew you were going to ask that)? Try pressing Command-Option-F (PC: Control-Alt-F), which brings up the dialog for the last filter you applied with the last settings you used.
Adobe borrowed scrubby sliders, a very cool feature from Adobe After Effects, and put it in Photoshop. You use it by clicking on a field's name, rather than in the field itself, and the value in the field changes as you drag (scrub) over the field's name. However, it scrubs in very small increments. That is, unless you hold the Shift key, which is ideal when you need to make big changes in the field (like from 0 to 256).

©ISTOCKPHOTO/GARTH HUMBERT
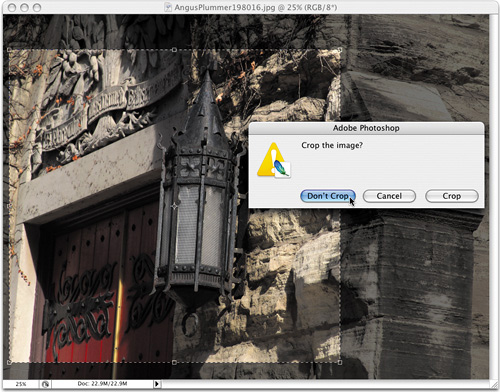
Sometimes when you're using the Crop tool (C), you change your mind and decide not to crop. If this happens to you, do you have to crop and then press the undo shortcut? Nah, press the Escape key to cancel your crop and remove the cropping border. You can also click on the circle with a slash icon (the international symbol for “NO”) on the far right of the Options Bar to cancel a crop. Okay, there's one more way: just switch tools—a dialog will appear asking you if you want to complete the crop or not. Just hit Don't Crop.
©ISTOCKPHOTO/ANGUS PLUMMER
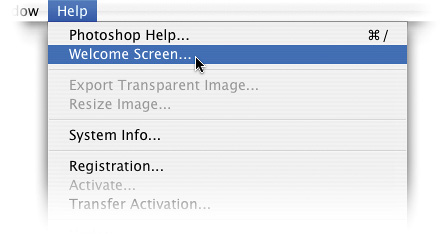
When you first launch Photoshop CS2, it brings up a Welcome Screen that has links to tutorials, a list of what's new, etc. There's also a checkbox at the bottom called Show This Dialog at Startup that you'll probably uncheck before too long, because after a short while the Welcome Screen tends to get on your nerves (that's why Adobe put that checkbox there in the first place). However, if you've turned off that checkbox, and then one day you have some extra time and you'd like to explore what the Welcome Screen has to offer, you can temporarily bring it back by going under the Help menu and choosing Welcome Screen.
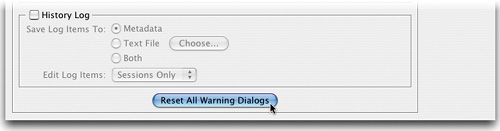
One thing I love about Photoshop is that a number of warning dialogs have a magical checkbox that says “Don't show this dialog again” (or something along those lines). However, if you later decide you want these warning dialogs put back into play (this is especially helpful if you're training someone new on your computer), you can have them become active again. Just go under the Photoshop menu (PC: Edit menu), under Preferences, and choose General. In the General section of the Preferences dialog, click on the button at the bottom of the dialog named Reset All Warning Dialogs.
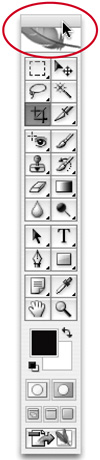
Is that Toolbox taking up too much space, but you don't want to close it, because a few seconds later, sure enough, you'll need a tool? Then just double-click on the very top of your Toolbox and it will tuck up out of the way, leaving just that little tab showing. Need it back fast, just double-click the little tab again and it comes right back.
If you look in the expanded Brushes palette (docked in the Palette Well by default), there's a list of controls on the left side of the dialog. At the top it shows Brush Presets, and you might figure that you can click on that and get some options, but the one that catches just about everyone off guard is just below that. It's the header for Brush Tip Shape. It appears to be a header for a list of brush tip options below it, but in reality, it's a button (I know, it doesn't look like a button, but it is). Click right on the words “Brush Tip Shape” and the Brush Tip Shape options are revealed in the main panel on the right.

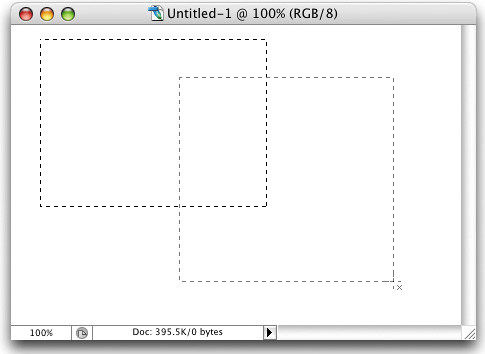
You've already learned that if you're using a selection tool (Lasso, Rectangular Marquee, etc.) and you need to add an additional area to your currently selected area, you can hold the Shift key, then any selection you draw with one of those tools will be added. But what if you have a selection and instead you want to create a new selection that will intersect with your existing selection to create an entirely new selection (Whew! That sounds complicated just explaining it)? Here's how: Draw your first selection, then up in the Options Bar you'll find four icons for various selection options. The fourth icon is Intersect with Selection. Click on it, then draw another selection that overlaps your existing selection and all will become clear (grasshopper).


As you know, as long as you have the Move tool (V) selected, you can move (or nudge) your current layer using the Up/Down/Left/Right Arrow keys on your keyboard. For every press of an Arrow, it nudges your layer 1 pixel in that direction. However, if you hold the Shift key and use the Arrow keys, it nudges the object 10 pixels at a time.
©ISTOCKPHOTO/BRYCE KROLL
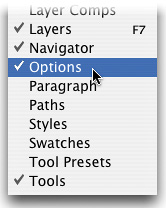
You may not realize it, but the Options Bar, which seems permanently docked to the top of your work area, can actually be redocked to the bottom of your screen, or you can make it into a floating palette. To make it float, just click on the little tab on the far-left side of the bar, drag it away, and voilà, it floats. To dock it at the bottom of your screen, drag the tab down to the bottom left-hand side of your screen and it snaps into place. You can even hide the Options Bar altogether by choosing Options from the Window menu. You can always get it back by double-clicking on any tool.

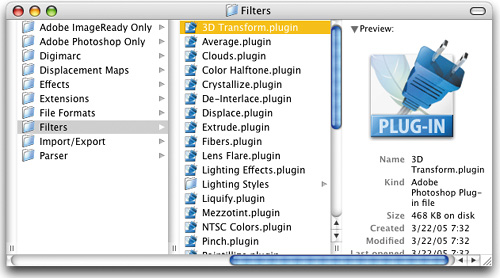
You can kill a lot of otherwise productive time searching for the 3D Transform filter that's been in Photoshop for years. That's because—it ain't there. It no longer installs when you install Photoshop, but Adobe thought that somebody, somewhere, might want to use it for something, so even though it doesn't install, you can find it in the Goodies folder on the Photoshop CS2 Resources and Extras disc. Just drag it into Photoshop's Filters folder (inside the Plug-Ins folder) to get it back in your Filter menu (under Render).
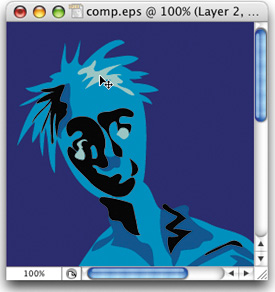
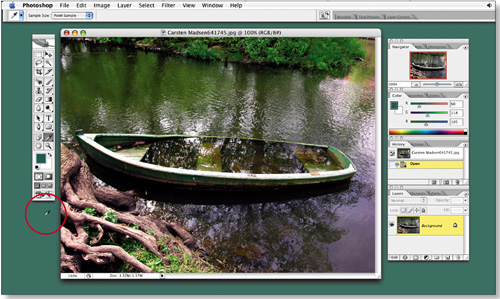
This is a super speed trick for getting your image view up (or down) to size. To instantly view your image at 100% size, double-click on the Zoom tool in the Toolbox. To have your image fit as large as possible on your screen (using the Fit On Screen command), double-click the Hand tool.
Double-clicking the Zoom tool

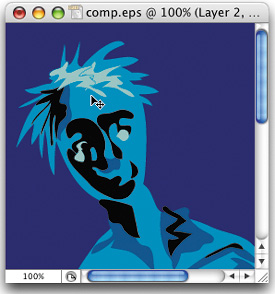
Double-clicking the Hand tool
©ISTOCKPHOTO/CARSTEN MADSEN
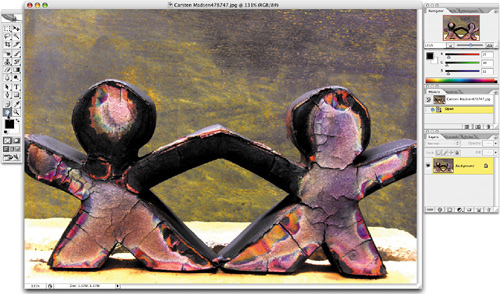
In previous versions of Photoshop, you could click the Eyedropper tool (I) on any color within your image, and it would steal that color and make it your new Foreground color. The only drawback was you could only steal colors from within an open document window. Back in Photoshop 7.0, Adobe cut the Eyedropper tool loose from the chains that bound it, and now, as long as you click within an open image first, you can drag right out of your image window and sample a color from, well, anywhere. That includes sampling colors from other applications, Photoshop's own Toolbox and menu bars, and even your computer's desktop pattern. Just remember to click in your image first, and then drag that Eyedropper to a new world of color delights that dare not speak its name.
©ISTOCKPHOTO/CARSTEN MADSEN
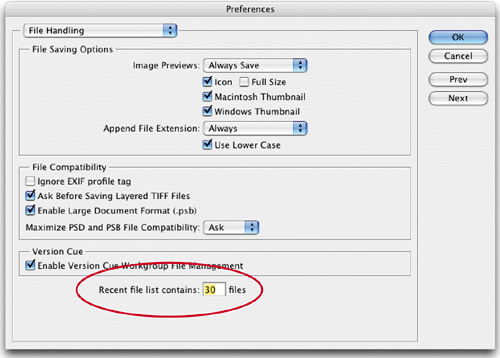
Photoshop CS2 remembers the last 30 documents that you had open, but by default it only displays the last 10 under the File menu, under Open Recent. However, you're not limited to just 10. Would you rather Photoshop displayed the last 15 instead? Then in Mac OS X, go under the Photoshop menu, under Preferences, and choose File Handling (in Windows, Preferences can be found under the Edit menu). When the dialog appears, under Recent File List Contains, enter the desired number of files (up to 30) that you want to have quick access to under the Open Recent menu.
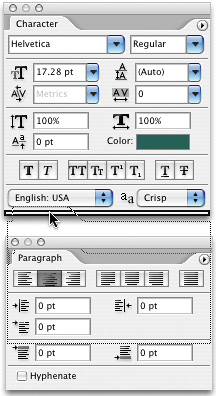
Are your palettes in the way, but you don't want to hide them all using the Tab key? You can double-click the palette's name tab, and the palette (and any nested palettes) will minimize to just the tab itself, giving you lots of screen real estate. Need the palette back, just double-click on its tab again.

You've been able to nest one or more palettes into another palette since Photoshop 3.0. No big deal, but now you can not only nest but also dock palettes one atop the other, creating a giant über palette. Here's how: Drag the name tab of one palette to the bottom edge of a second palette and slowly drag upward. A thin, black double-line will appear at the bottom of the top palette, letting you know it's “time to dock.” Release the mouse button and your palettes will be docked, one on top of the other. Now, when you move the top palette, all docked palettes will move with it as a group.
There's no doubt you'll be “messing” with many, if not all, of the options for the tools you use every day in Photoshop. One day you'll go to use a tool, and you'll have messed with it to the extent that something's just not right. To quickly get back to any tool's default settings, choose the tool from the Toolbox, then Control-click (PC: Right-click) on the tool's icon that appears in the Options Bar on the far left. A contextual menu will appear where you can choose Reset Tool to set it back to its factory-fresh defaults. By the way, while you're there, you can also choose Reset All Tools and they will all revert to their defaults.

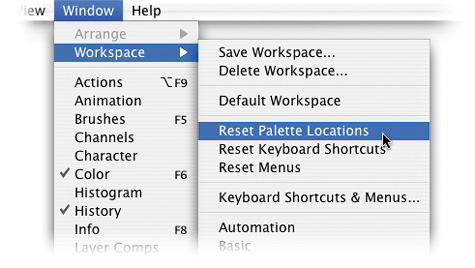
In Photoshop, you're constantly moving your palettes around, and before long, you've got one messy set of palettes littering your screen. If your palettes get messy, you're only one simple menu command from having them back at their factory-fresh default locations. Just go under the Window menu, under Workspace, and choose Reset Palette Locations, and all will be right with your world once more (that is, until you mess 'em up again).
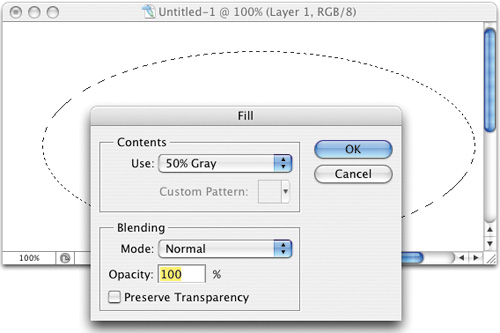
There are all sorts of keyboard shortcuts for filling selections, entire layers, and stuff like that, but if you look under the Edit menu, next to the Fill command there's a new little shortcut in CS2 for bringing up the Fill dialog itself (about time!). It's Shift-F5. However, there's an undocumented keyboard shortcut that will do the same trick—it's Shift-Delete (PC: Shift-Backspace). This is a good one to pull on your Photoshop buddies and co-workers as a Photoshop trivia question, because few people know it exists.
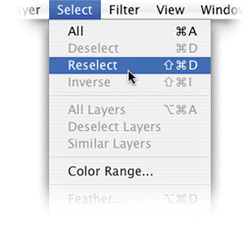
If, after you've created a selection in an image, deselected it, and moved on to other things, you suddenly wish you had that selection back, you're not out of luck. As long as you haven't made another selection (since the one you want to get back), Photoshop remembers your last selection and lets you get it back by going under the Select menu and choosing Reselect. When you choose it, the last selection you created reappears within your image. If you create a selection that, while it's still active, you know you want to keep for later use, then go under the Select menu and choose Save Selection. When the Save Selection dialog appears, click OK, and Photoshop saves it. You can reload it anytime by going under the Select menu and choosing Load Selection. Your selection will be named “Alpha 1” by default, and you can choose to load it (or other subsequent saved selections) from the Channel pop-up menu in the Load Selection dialog.
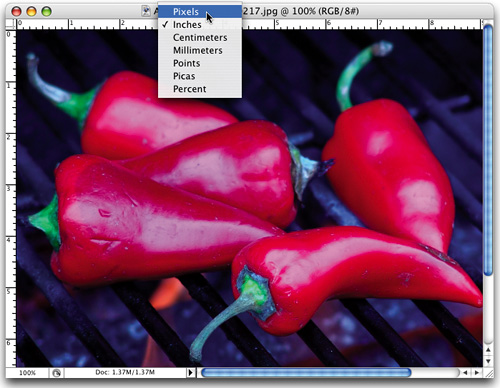
Want to change the unit of measurement for your image? Don't go digging through Photoshop's menus for the Preferences dialog, just Control-click (PC: Right-click) on Photoshop's rulers and a contextual menu will appear with a list of measurement units. (Note: If your rulers are not showing, press Command-R [PC: Control-R]). Choose the one you want, and your rulers will instantly reflect the change. If you feel you must access the Units & Rulers Preferences dialog, just double-click anywhere on one of Photoshop's rulers and the dialog will appear.
©ISTOCKPHOTO/ANGUS PLUMMER
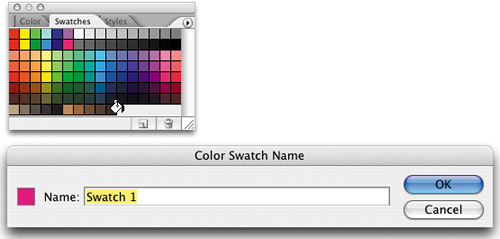
Here are a few tips for using the Swatches palette (found under the Window menu). I'm sure you know that if you click on a color in the Swatches palette, that color becomes your new Foreground color. Here's one you may not have realized—if you Command-click (PC: Control-click) on a swatch, that color now becomes your Background color. Also, you can delete any swatch by holding the Option key (PC: Alt key) and clicking on the swatch you want to remove. You can also add a color to your swatches by setting your Foreground color to the color you want to save and clicking on any open space at the bottom of the Swatches palette.
If you've zoomed in on an image, using the scroll bars can be incredibly frustrating, because you move just a tiny bit. Here's how to get around that—don't use the scroll bars. (Okay, there's more to it than that.) Instead, when you're zoomed in, use the Hand tool, but to save time, access it by simply pressing the Spacebar. It temporarily switches you to the Hand, letting you easily navigate through your zoomed image.
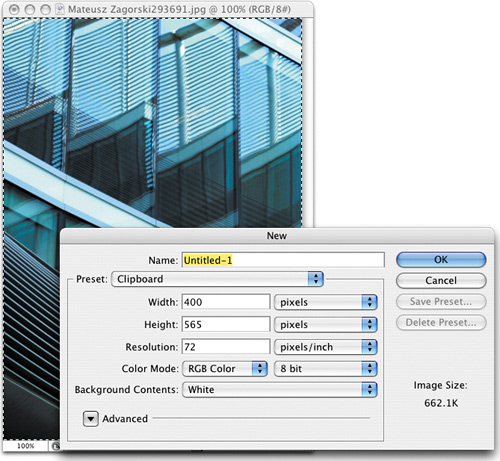
If you've selected something within your Photoshop document and you want to copy-and-paste that item into its own separate document, don't worry about typing the Width and Height into Photoshop's New document dialog. Photoshop automatically figures that you're going to paste that image into a new document, so when you open the New dialog, the exact size of your copied selection has already been entered for you, so just click OK, and then paste your image inside—it'll be a perfect fit.
©ISTOCKPHOTO/MATEUSZ ZAGORSKI
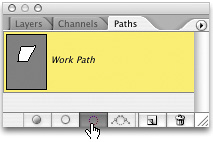
When you're using the Pen tool (P) to create a path, you can go to the Paths palette (under the Window menu) and click on the third icon from the left (at the bottom of the palette) to turn your path into a selection, or you can use the keyboard shortcut Command-Return (PC: Control-Enter). We prefer the keyboard shortcut, because it will do the exact same job faster and saves us from opening the Paths palette, taking up valuable screen real estate. Note: If you want to create a selection from an existing path, select that path in the Paths palette and then use the shortcut.
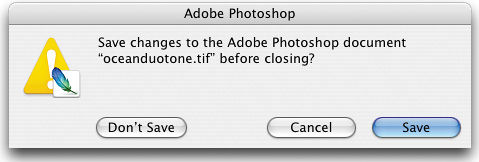
This is such a quick little tip that you might not think that it matters, but it saves a few seconds every time you close a document. If you close a number of documents a day (and my guess is, you do), it really starts to add up fast. When you close a document, Photoshop presents you with a dialog asking, “Save changes to the Adobe Photoshop document before closing?” You have three choices: (1) Don't Save, (2) Cancel, and (3) Save. Here's the shortcut: Press the letter D for Don't Save, press S for Save, and C for Cancel.
What do you do if the dreaded “Not enough RAM to complete this function” dialog appears? Outside of buying more RAM and installing it on the spot, you might want to purge some of the “junk” hanging around in RAM so you can free up some space to complete the project you're working on. You do this by going under the Edit menu, under Purge, and choosing to empty your Undo, Photoshop's Clipboard, your History States, or everything at once (All). They're in the order you should proceed, so first try purging your Undo and see if that frees up enough memory. If that doesn't do it, try the Clipboard, then Histories. If that doesn't do it, try this super-slick insider tip: Make a tiny (1x1") selection within your document, and then go under the Edit menu and choose Copy three times in a row. Believe it or not, it often works, and has gotten us out of more than one sticky situation.

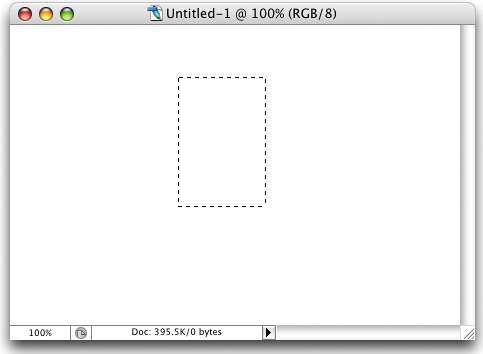
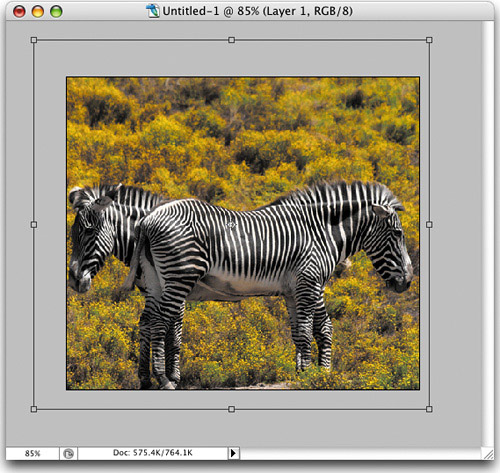
If you want to use Free Transform on a layer, but your image extends beyond the edges of your document window (and this happens frequently if you're collaging different photos together), you won't be able to reach the Free Transform handles to scale your image down to size. Here's the keyboard shortcut that lets you reach each and every handle, no matter how far the image extends outside your current canvas area. Just press Command-T (PC: Control-T) to bring up Free Transform, then press Command-0 (zero) (PC: Control-0) and your window will zoom out to exactly the right size to enable you to reach all the handles. Cool!
©ISTOCKPHOTO/GALINA BARSKAYA
Generally, when you apply a transformation to an object (scaling, rotating, distorting, perspective), you apply that transformation to the object itself. However, here's a cool tip if you want to apply a transformation (using Free Transform) on a duplicate of your object, rather than on the original: Press Command-Option-T (PC: Control-Alt-T), then use Free Transform as you usually would. You'll notice that as you begin to transform, the original object remains untouched, and a copy is transformed instead.
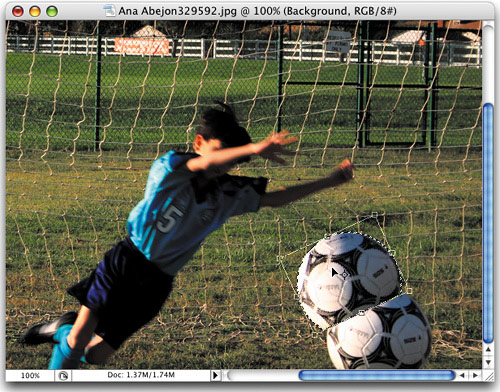
©ISTOCKPHOTO/ANA ABEJON