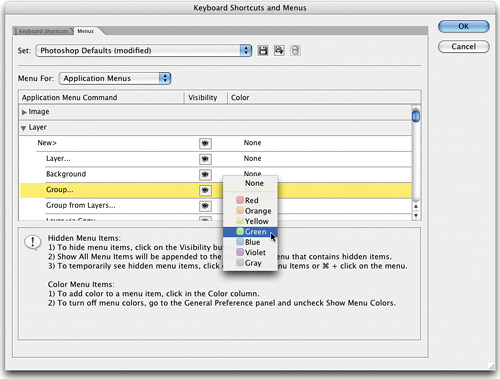
If there are particular areas of Photoshop you use a lot, you can make finding them in the menus even faster by color-coding your favorite menu items. Here's how: Go under the Edit menu and choose Menus. When the dialog appears, scroll down to the menu you want and double-click on it. Now scroll down until you find the command you want to color-code, and then click on the word “None” to the far right of that item (under the Color column) and a menu of colors will appear. Choose the color you want for that item, and from now on it will appear highlighted in that color. This is ideal if you're training new Photoshop users. For example, you could color-code certain items for when they're doing prepress (maybe make those items appear in red) and choose another color for when they're designing Web graphics.
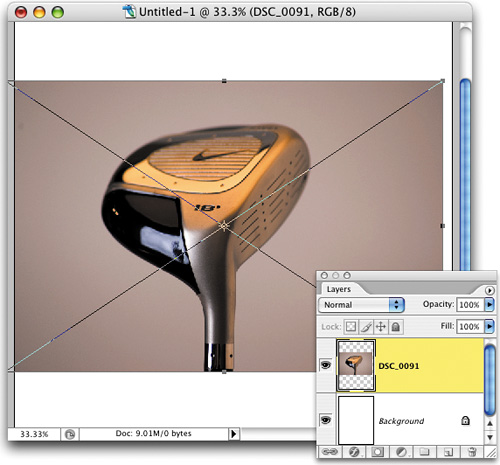
You can add any RAW image to your existing document as a Smart Object. Just use the Place command (under the File menu) and navigate your way to the RAW image. When you choose the RAW image, Photoshop will first open Camera Raw so you can process it. When you click Open in the Camera Raw dialog, it will place itself into your document as a Smart Object (and it will have a bounding box around it so you can determine the size you want it to appear within your document). Once you've sized the placed image, press Return (PC: Enter) to lock it into position. If you need to make any edits to the RAW photo after it's placed into your document as a Smart Object, just double-click on the Smart Object's thumbnail in the Layers palette and your RAW image will reopen in Camera Raw. Make your changes, click OK, and it will automatically update in your main document. Sweeeeeettttt!
©SCOTT KELBY
When you apply the Vanishing Point filter, by default it applies the effect to your Background layer, which means once Vanishing Point “does its thing,” you don't have any control over the results. If it's too light, too dark, you want to change the color, blend mode, etc., you're out of luck. That's why, before you run the Vanishing Point filter, you should create a new blank layer by clicking on the Create a New Layer icon at the bottom of the Layers palette. That way, the object (text, whatever) to which you apply Vanishing Point winds up on its own separate layer, where you can control everything from color to opacity and more.
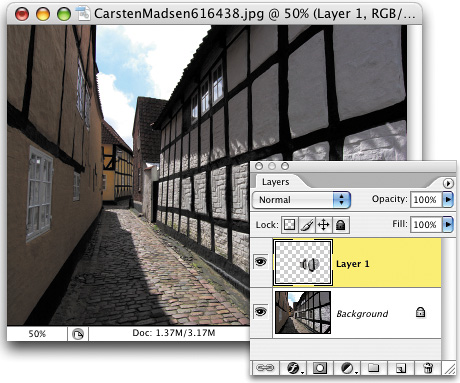
©ISTOCKPHOTO/CARSTEN MADSEN
Need to wrap your Vanishing Point filter grid around a corner? No sweat—just hold the Command key (PC: Control key), drag a center point, and the grid will bend around the corner.
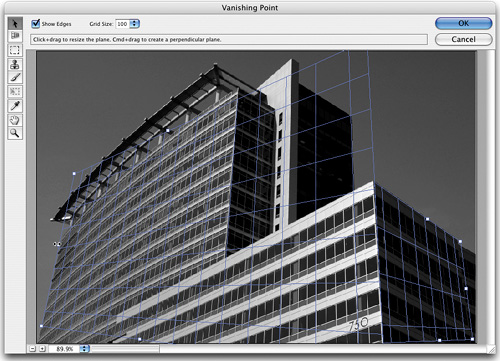
©ISTOCKPHOTO/BRIAN PALMER
If you're using Vanishing Point and need to quickly zoom in on an area, just move your cursor over that area, then press-and-hold the letter X on your keyboard to zoom in on the area where your cursor is. To zoom back out, release the X key.
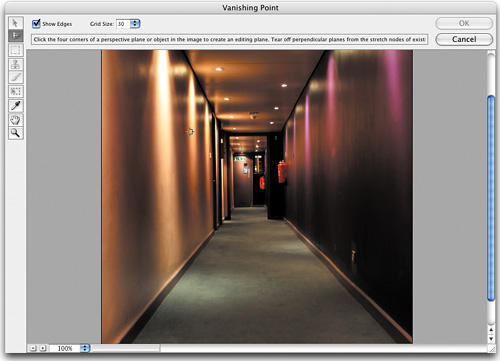
Before
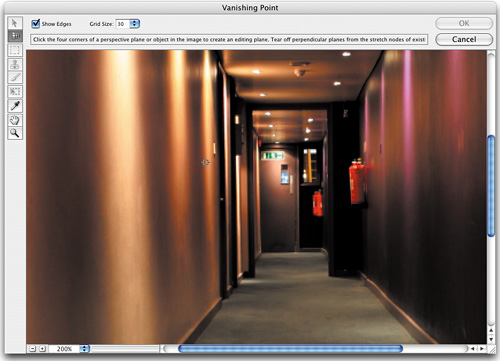
After
©ISTOCKPHOTO/MATTHEW GOUGH
If you're building a collage, or some other document that has images on different layers, and you think you might wind up resizing some of the images, rather than just dragging-and-dropping opened photos into your main document, make them Smart Objects. That way, when you resize them (especially helpful if you increase their size), it calls upon the original image to make a clean resize (instead of a blurry, pixelated version). To create a Smart Object, you only have to change one thing—instead of opening the photo, go under the File menu and choose Place instead.
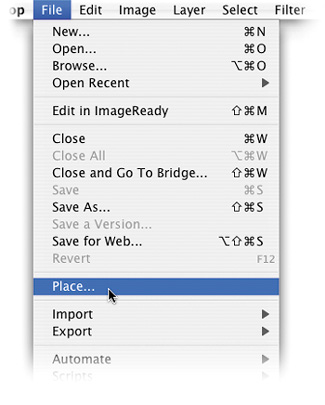
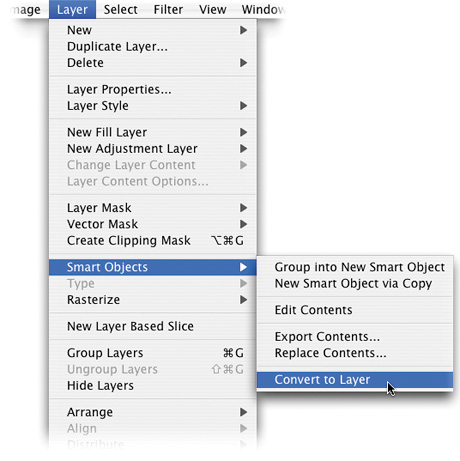
If you're using CS2's Smart Objects (by using the Place command under the File menu to add images to your document rather than opening them and dragging-and-dropping them in with the Move tool [V]), you'll also want to know how to convert your Smart Object layer into a regular ol' layer. To do that, click on the Smart Object layer, then go under the Layer menu, under Smart Objects, and choose Convert to Layer.
If you're using CS2's Warp Image feature (which is accessed by pressing Command-T [PC: Control-T] to bring up Free Transform, then Control-clicking [PC: Right-clicking] inside the Free Transform bounding box and choosing Warp from the contextual menu), there's a good chance you'll need to resize the image once you start warping it. If that happens, there's a button you can click that will switch back to Free Transform. It's near the top-right corner of the Options Bar, and clicking the button will toggle you between Warp and Free Transform.

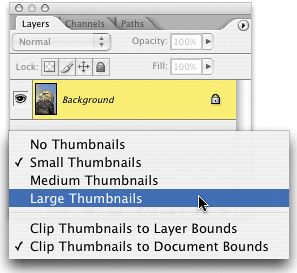
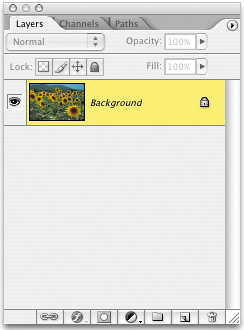
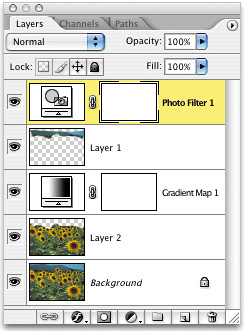
Want to change the size of your thumbnail preview in your Layers, Channels, or Paths palette? Just hold the Control key (PC: Right-click) and click in an open area of the palette (such as the space under your Background layer, or beneath the bottom channel in the Channels palette), and a pop-up menu of thumbnail sizes will appear. For instance, in the Layers palette you can choose from No, Small, Medium, or Large Thumbnails, instantly changing your thumbnail view.
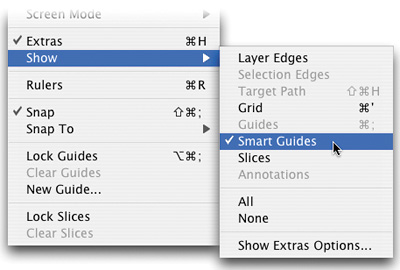
Oh wait. I know this one. It's…it's…Smart Guides! (That's right, for 500 points.) These little below-the-radar additions to CS2 are there to help you align objects on layers, but they don't show up just on the edges of your object. As you drag your layer, they look for angles and corners within your layer, and the guides then extend out from there. That's why they're called “Smart.” To turn them on within your multilayered file, all you have to do is go under the View menu, under Show, and choose Smart Guides. Once they're enabled, they appear auto-matically as you drag. They're handier—and smarter—than you'd think.
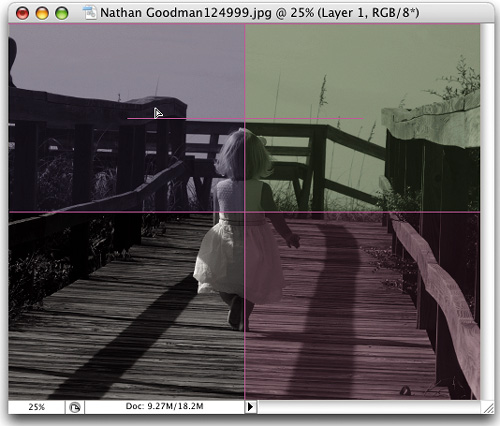
©ISTOCKPHOTO/NATHAN GOODMAN
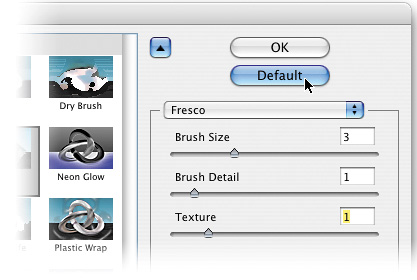
Let's say you've tried all the filters in the Filter Gallery, and changed each setting so much that you can't remember what the default, out-of-the-box settings were. Well, you're out of luck (kidding). Here's a trick for getting back to those default settings for any filter the Filter Gallery supports (like any of the Artistic filters, the Sketch filters, etc.): Open one of these filters (by choosing it from the Filter menu) and when it opens in the Filter Gallery, press-and-hold the Command key (PC: Control key) and you'll see that the Cancel button changes into the Default button. Click it (while still holding down Command/Control) and the default settings will magically reappear.
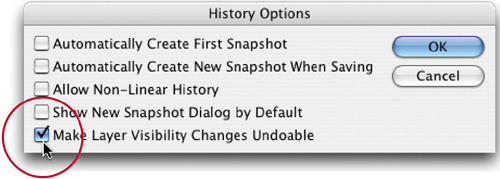
By default, the History palette tracks the last 20 things you did in Photoshop, but (weird as this may sound) it doesn't track when you hide or show a layer. For some reason, it just doesn't record that. Well, that is unless you know this tip: Go to the History palette's flyout menu and choose History Options. When the History Options dialog appears, turn on the checkbox for Make Layer Visibility Changes Undoable. Now, you can undo your showing and hiding of layers from the History palette.
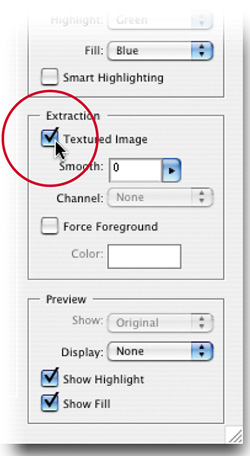
Adobe's own Julieanne Kost (Photoshop guru and instructor supreme) showed this at the Photoshop World Conference & Expo, and it had everybody's jaw dropping, but little has been said of it since, even though it's built into Photoshop CS2's Extract function (found under the Filter menu). It's called Textured Image and you use it when you're dealing with a tough extraction—a person with a dark shirt posing on a dark background, for example—and Extract can't really tell where the shirt ends and the background begins. Turning this on helps detect the edges by examining the texture, and if it detects a texture (like you might find in a shirt), it can often help pull you out of a tight situation.
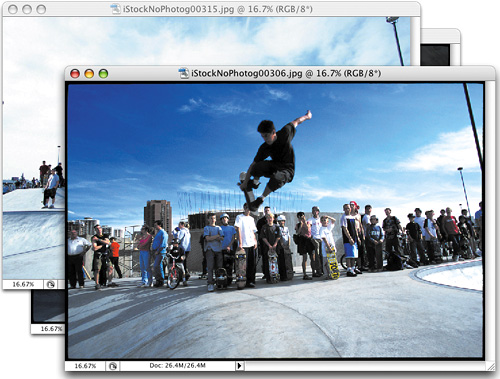
If you've chosen to tile your open windows (in the Window menu, under Arrange, choose Tile Horizontally [or Vertically]), in Photoshop CS2 you get some hidden functionality. If you want all the tiled images to be displayed at the same level of magnification, just hold the Shift key, grab the Zoom tool (Z), zoom in on one of the images, and all the other tiled images will jump to that same magnification. This is great when you're trying to compare a number of similar images for detail.

©ISTOCKPHOTO/CHRIS CRAFTER
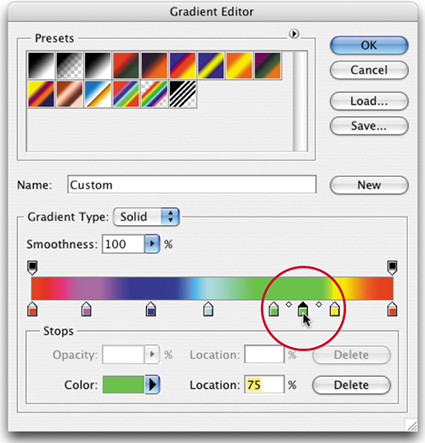
Here's the scenario: You're making a custom gradient using the Gradient tool (G) (by double-clicking the gradient thumbnail in the Options Bar to get to the Gradient Editor) and you need to duplicate one or more of the color stops. No problem. Once you've created one gradient color stop, you can make copies by Option-dragging (PC: Alt-dragging) it. Also, as long as you keep the Option key (PC: Alt key) down while you drag, you can jump right over other existing stops. It's a color stop love fest, can you feel it?
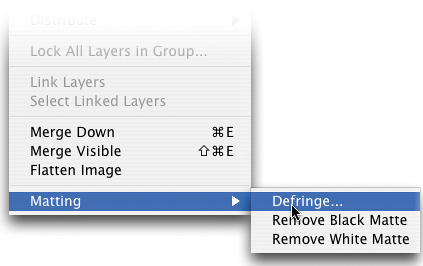
Any time you're creating a collage, you'll eventually add an image that has little white pixels around the edges of your object. Here's a tip for getting rid of that “fringe.” Go under the Layer menu, under Matting, and choose Defringe. Try the default setting of 1 pixel and click OK. What this does (here's the techno speak) is replace the edge pixels with a combination of the pixel colors in your object and the colors in the background (whew, that hurt). That usually does the trick. If it doesn't, undo it, then try a 2- or 3-pixel Defringe.
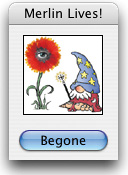
Easter Eggs are usually funny little messages hidden within an application (engineer humor just cracks us up). Photoshop has a few of its own, but one of the lesser-known Easter Eggs is Merlin Lives. To see this Easter Egg, go to the Paths palette (under the Window menu), hold the Option key (PC: Alt key), and in the palette's flyout menu, choose Palette Options. When you do, a tiny floating palette will appear with a picture of Merlin and just one button named “Begone,” which closes the dialog. I have to party with those engineer guys.
If you apply a technique (such as a filter or a paint stroke) and the effect is too intense, you can always undo the effect by pressing Command-Z (PC: Control-Z). But if you just want to decrease the intensity, instead of completely undoing it, go under the Edit menu and choose Fade. Want a less intense effect? Just move the Opacity slider to the left. The farther you drag, the less intense the effect. Drag all the way to the left, and the effect is undone.
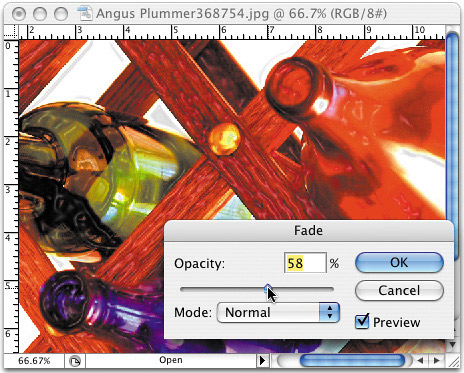
©ISTOCKPHOTO/ANGUS PLUMMER
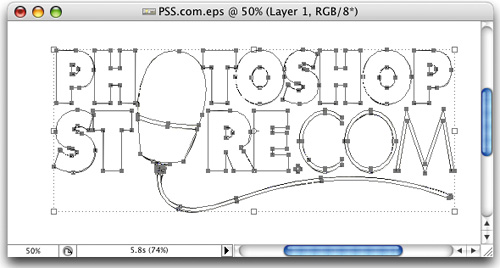
When you're working with paths, you can visually resize your path by using the Path Selection tool. To do this, press A to get the tool, then go up in the Options Bar and turn on the checkbox for Show Bounding Box. This puts a Free Transform-like bounding box around your path, and you can use this bounding box to resize your path by dragging the handles (remember to hold the Shift key to resize it proportionately).

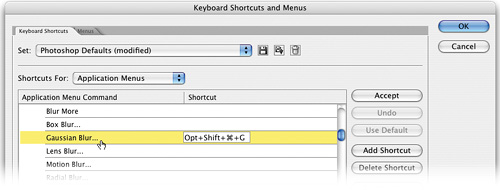
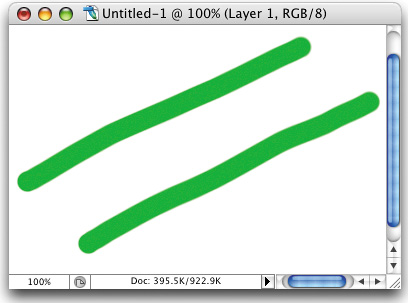
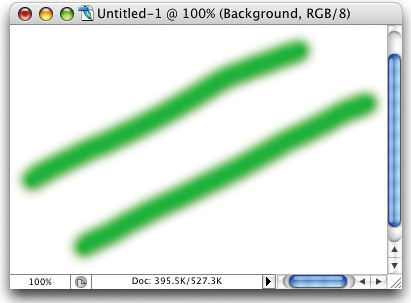
I thought that would get your attention. That's because you know there's no keyboard shortcut for applying a Gaussian Blur. But there is in my copy of Photoshop CS2. How is that possible? Because I created one, and you can too. Just go under the Edit menu and choose Keyboard Shortcuts to bring up the Keyboard Shortcuts dialog. Then, from the Shortcuts For pop-up menu, choose Application Menus. In the list of menus in the window beneath it, double-click on Filter to reveal all the choices under the Filter menu. Scroll down to Gaussian Blur, then click on its name. This brings up a field where you can enter the shortcut by pressing the keys you want to use. I recommend using Option-Shift-Command-G (PC: Alt-Shift-Control-G) because there are so few shortcuts not already being used by Photoshop. Click OK, and not only is the shortcut activated but your custom shortcut now appears in the Filter menu to the right of Gaussian Blur.
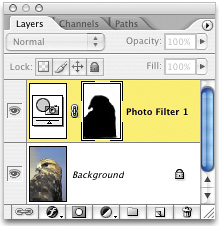
One of the most brilliant things Adobe did when they added Photo Filters to Photoshop (these filters replicate the old traditional screw-on lens filters) was to make them adjustment layers. You can create one by clicking on the Create New Adjustment Layer pop-up menu in the Layers palette and choosing Photo Filter. After you apply a Photo Filter from the resulting dialog (let's say, for example, you used Warming Filter 81 to warm a cool photo), you can get the Brush tool (B), set your Foreground color to black, and paint over any areas of the photo you don't want to be warmed. This gives you a level of flexibility you wouldn't get any other way.
©ISTOCKPHOTO/PETER LLEWELLYN
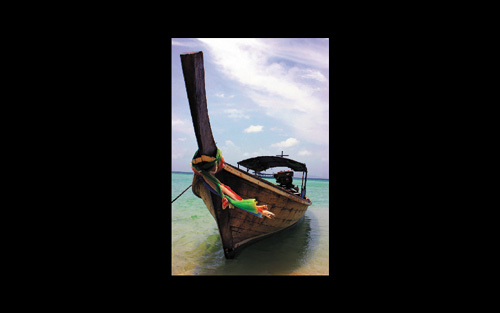
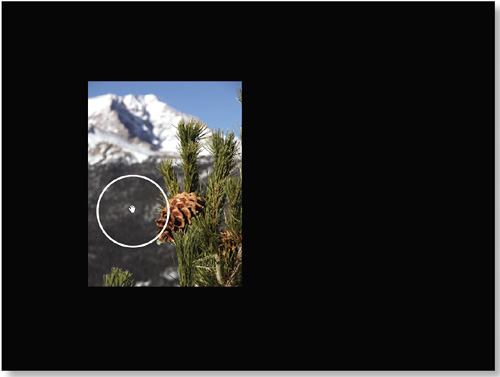
To hide all your palettes and all your menus, and to display your current image centered on your monitor with a cool black frame around your image, just press the letter F twice, then press the Tab key (F, F, Tab). To return to your regular Photoshop work area, press F, then Tab. You'll be the envy of all your friends, and eventually they'll write folk songs about you. It's almost embarrassing.
©ISTOCKPHOTO/VICKY BENNETT
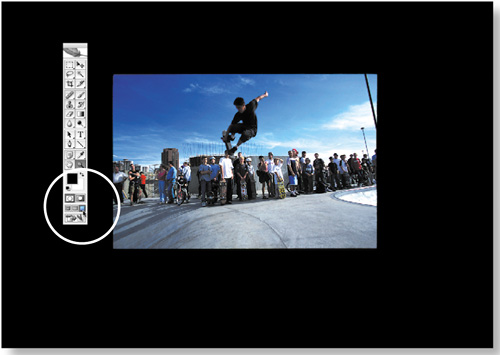
In Photoshop CS2 you can pull off something users have been wanting for years—the ability to change the placement of your entire image once you're in Full Screen mode (where your image is centered onscreen, surrounded by a black border with no menus, palettes, or tools visible). Just enter Full Screen mode (press F, F, then Tab), hold the Spacebar, and your cursor will change into the Hand tool. Click-and-drag your entire image anywhere on the screen you'd like. To return to regular mode, press F, then Tab.
©ISTOCKPHOTO/PETER RANERI
Here's a tip that many photo retouchers use—do all your retouching on a layer above your image. That way, you don't damage the underlying image, and you have control over opacity and blend modes you normally wouldn't have. It's also easy to erase areas you wish you hadn't retouched. The key to making this work is to get the Clone Stamp tool (S) and in the Options Bar, turn on the Sample All Layers option. That way you can sample from the underlying image and then paint on the layer above it (believe it or not, by default Photoshop doesn't let you do that—it only lets you clone from the active layer to that same layer).
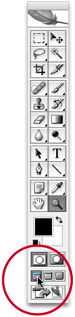
You can create a mock slide show presentation by opening multiple images in Photoshop and then pressing Control-Tab to rotate through the images. Plus, you can hold the Shift key and click on the Full Screen Mode icon near the bottom of your Toolbox to allow your images to fill the full screen (holding Shift will switch all of your open images to the Full Screen mode at once). Press Tab to hide your palettes and you're all set to give a slick presentation. To exit your mini-slide show, press Tab to see the Toolbox, and then Shift-click on the Standard Mode icon.
©ISTOCKPHOTO
Shift-click to see multiple photos in Full Screen mode.
Shift-click to exit your slide show in Full Screen mode.
Although Photoshop doesn't have a visible Step and Repeat function (like many vector or page-layout programs do), it still has the feature—it's just a bit hidden. For example, let's say you have an object on a layer, and you want to duplicate and move or rotate that object a number of times in succession (a typical step-and-repeat), here's how you can do it in Photoshop CS2: Start by going to the original layer with the object, then press Command-Option-T (PC: Control-Alt-T) to bring up a special version of Free Transform. Now you can transform your object (move it, rotate it, skew it, etc.), then press Return (PC: Enter) to lock in your transformation. You'll notice that your original object remains untouched on its layer and you now have a new layer with the transformed object. Now press Command-Option-Shift-T (PC: Control-Alt-Shift-T) and this will create a duplicate of your last move, and at the same time it creates a new layer, thereby giving you a step-and-repeat (you have to try this once, and you'll immediately “get it”).
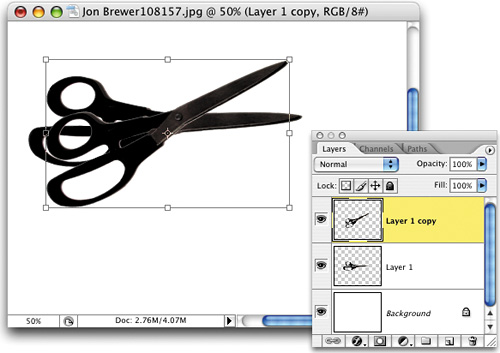
©ISTOCKPHOTO/JON BREWER
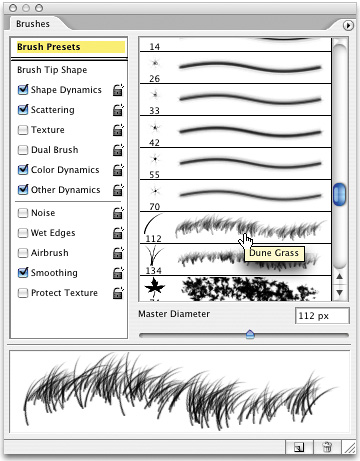
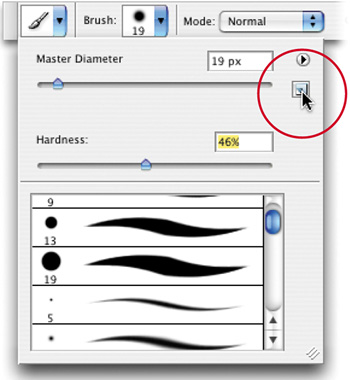
If you're choosing your brush tips from the expanded Brushes palette, you don't have to actually click on a brush to see the large preview of it at the bottom of the Brushes palette (which is nested in the Palette Well by default). Instead, pause your cursor right over the brush you want to preview, and in just a second the preview will appear, even though you didn't actually click on the brush tip. The catch is: The Show Tool Tips checkbox must be turned on in the General Preferences for this “pause preview” to work.
This cool, undocumented shortcut comes from our good friend, Web wizard, and all-powerful overlord of every Photoshop keyboard shortcut known to man, Michael Ninness (author of the book Photoshop 7 Power Shortcuts, from New Riders, ISBN 0735713316). Here's the tip: As you probably know by now, the Airbrush tool has been gone from the Toolbox since 7.0, but you can add Airbrush control to some painting tools by clicking on the Airbrush icon found in the Options Bar of most Brush tools. However, that takes a lot of trips up to the Options Bar. Ah, if only there were a keyboard shortcut that would let you toggle this Airbrush feature on and off at will. Well, there is, and thanks to Michael, we can share it here—it's Option-Shift-P (PC: Alt-Shift-P). Makes you want to buy Michael's book, doesn't it?
Adobe snuck a little button into the Options Bar that's hardly noticeable. It works with tools such as the Crop tool (C), and it's a big time saver. For example, for the Crop tool it swaps the measurements in the Width and Height fields, so if you have the Crop tool set to crop to exactly a 5x7", if you click this Swaps button, it will now crop to 7x5". See? I told you it was handy.
Before
After
Since version 3.0, Photoshop has done something called “protecting the palettes” (I don't know if that's its official name, but we've always heard it called that). What it means is that as you increase the size of your image using the Zoom tool (Z), Photoshop stops increasing the size of the image window when it reaches the left edge of your open palettes (if you have turned on the Resize Windows To Fit checkbox in the Options Bar). When it reaches this safety zone, the window stops growing, and only the image within the window continues to zoom. The only way to get around this (in previous versions of Photoshop) was to close your palettes. Then you could zoom the window as large as you'd like. However, Adobe addressed this problem back in Photoshop 6.0, and now if you want to keep the window growing, choose Ignore Palettes in the Options Bar when using the Zoom tool.
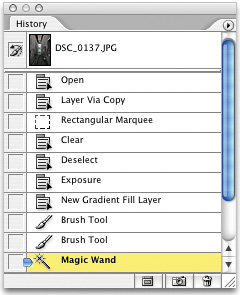
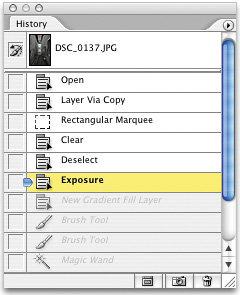
Need to back up a few steps to readjust a setting? Piece of cake. Here's a shortcut to do just that. You can step back through your History palette (found under the Window menu) by pressing Command-Option-Z (PC: Control-Alt-Z) a few times. This doesn't delete the items, but takes you back a step in the History palette each time you apply the shortcut.
Before
After
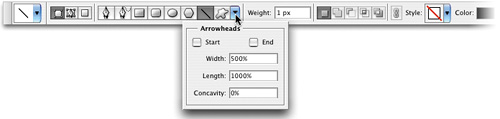
This one is pretty slick because it's been a feature in Photoshop for a while, but eight out of 10 Photoshop users will tell you Photoshop can't create arrowheads on the ends of lines (if it makes you feel any better, nine out of 10 dentists didn't think Photoshop could do it either). Here's how: First, go under the Shape tools (in the Toolbox) and choose the Line tool. Then, up in the Options Bar, you'll see icons for the Shape tools. Directly to the right of these eight icons is a down-facing triangle. Click on that triangle and out pops a dialog where you can click a checkbox to add arrowheads to either the beginning or end of your line, and you can choose the Width, Length, and even the Concavity (there's that dentist thing again).
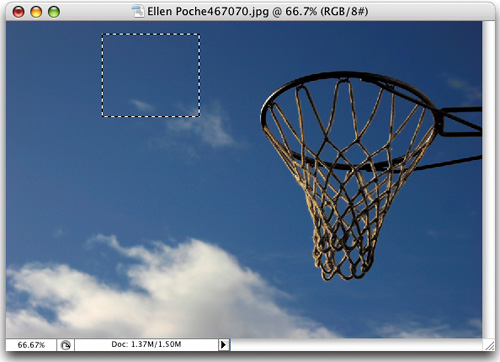
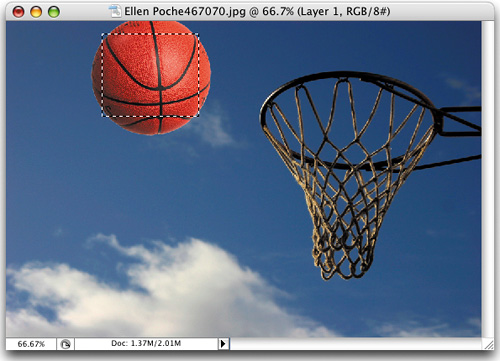
If you drag an image from one document to another, the dragged image appears right at the spot where you let go of the mouse button. You may know that if you hold the Shift key when you drag-and-drop the image, the dragged image will automatically be centered within the receiving image. But you can go one better—make a selection in the receiving document, then hold the Shift key before you drag. Your image will be centered within the selection, instead of within the entire document. Scary, isn't it? You can also copy-and-paste the selection and Photoshop will center the pasted image in the selection.
©ISTOCKPHOTO/ELLEN POCHE
©ISTOCKPHOTO/ALAN GOULET
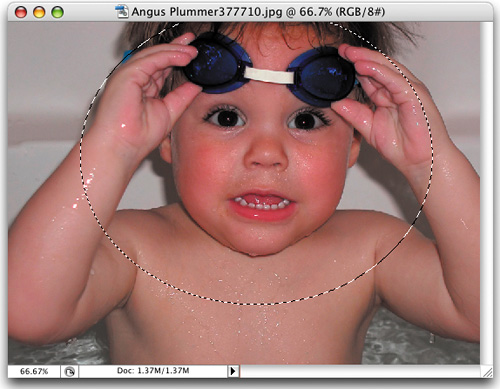
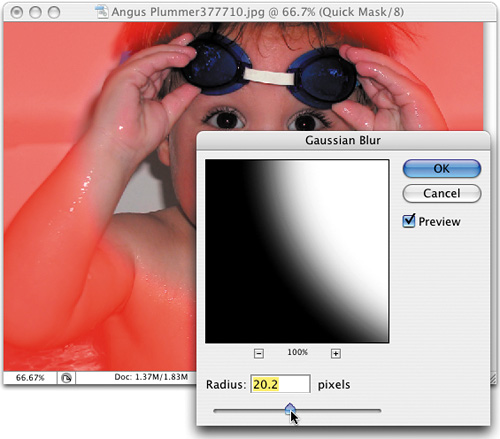
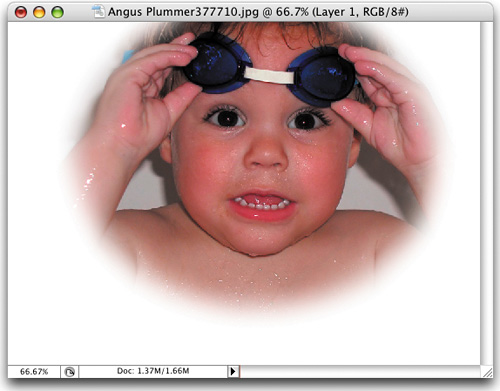
Most of us try to guess how many pixels will give us the nice, soft selection we're looking for when we use the Feather Selection dialog (under the Select menu). Sometimes we guess right, and other times we press Command-Z (PC: Control-Z) to undo the damage before trying again. Try this instead: Make your selection first, and then press Q to turn on the Quick Mask mode. Now make the edge fade out by going under Filter, under Blur, and choosing Gaussian Blur. You can see how much of a blur you'll need to soften the edges as you adjust the Radius amount. When you're done, press Q to get back to Standard mode with the selection already made with the exact amount of feathering that you want.
©ISTOCKPHOTO/ANGUS PLUMMER
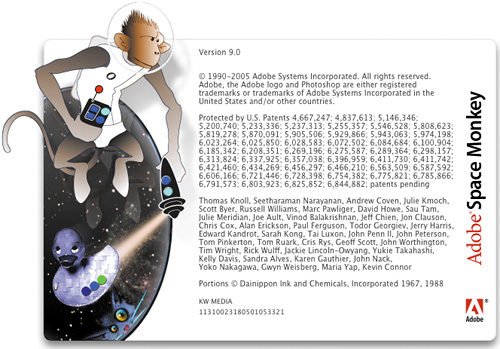
If you want to see the secret Photoshop beta startup screen (the pre-release version of Photoshop CS2), just hold the Command key (PC: Control key) and choose About Photoshop from the Photoshop menu (or Help menu on a PC). It will show you the splash screen, displaying CS2's secret pre-release code name. I'm telling you, those engineers know how to party.
You can create a temporary brush anytime in Photoshop by playing with the options in the Brushes palette (which is nested in the Palette Well by default). After you make your choices, start painting. When you switch to another brush, the temporary brush you just created is gone. If you fall in love with your temporary brush (which is considered illegal in 48 states) and want to save it, before you change brush sizes, click on the Brush thumbnail in the Options Bar, and when the Brush Picker appears, click on the New Preset Brush icon in the upper right-hand corner, you sick pup.
This is a great trick we learned from our buddy Mike Ninness, and the first time we saw it, we said, “Hey, wait a minute, that can't be.” Oh, but it be. It's how to undo a Save. This is especially helpful after you've flattened an image, saved the file, then realized that you needed to change something on a layer. This only happens to us about every other day, and here's the keyboard shortcut to fix it: Command-Option-Z (PC: Control-Alt-Z). Press it a few times after you've flattened and saved, and look in your Layers palette to see all the layers come a-rumbling right back. Pretty slick stuff.
©ISTOCKPHOTO/ALFRED DEKKER
You can increase or decrease the softness of a round brush in Photoshop without changing the size of the brush by pressing Shift-Left Bracket or Shift-Right Bracket. That's almost too easy.
Let's say you have an image, but the sky doesn't look as vibrant as you'd like, and you want to increase the amount of blue without affecting the rest of the image. Try this on for size: Open an image that contains a daylight sky. Click on the Create New Adjustment Layer pop-up menu at the bottom of the Layers palette and choose Color Balance. In the Color Balance dialog, drag the Blue slider all the way to the right (it looks bad now, but trust me) and click OK. Now, press B to switch to the Brush tool. Press the letter X until your Foreground color is black, and with a large, soft brush, start painting over the areas you don't want blue. As you paint, the blue Color Balance you added is painted away. The sky is much bluer, but you can paint away the added blue from the other areas. To really see the before/after difference, click the Eye icon next to the adjustment layer.
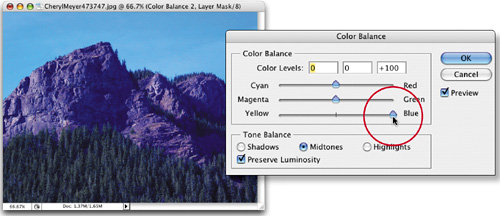
©ISTOCKPHOTO/CHERYL MEYER
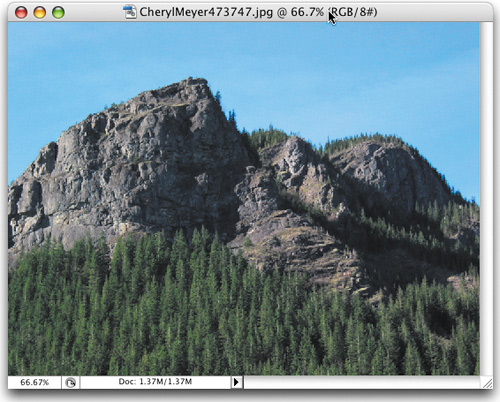
Before
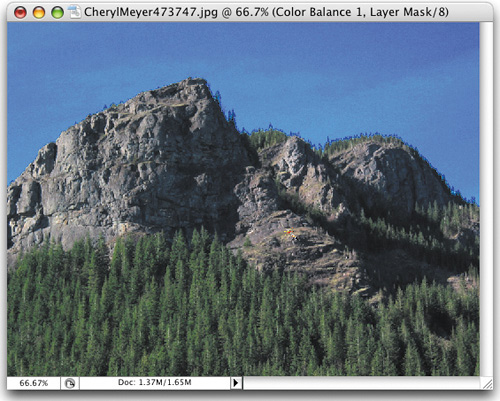
After
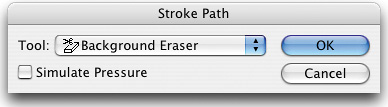
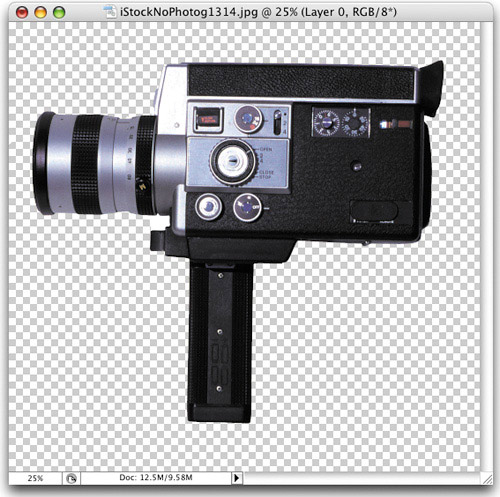
Here's a tip for making Photoshop's Background Eraser tool much more effective. Choose the Background Eraser tool (it's in the Eraser tool's flyout menu in the Toolbox), and in the Options Bar, lower the Tolerance setting to 20%. Click on the Brush thumbnail to open the Brush Picker and choose a large, hard-edged brush. Then, press P to switch to the Pen tool, making sure that the Paths icon (middle one at left in the Options Bar) is selected. Draw a path just outside the edge of the object you want to isolate (you don't have to be precise; in fact, stay just outside the edges of the object and draw straight lines all the way around the image). Go to the Paths palette (under the Window menu), and in the palette's flyout menu, choose Stroke Path. When the dialog appears, under Tool, choose Background Eraser, and click OK. The Background Eraser will instantly trace around your image, following the path you created. Now that the edges have been erased, you can use the regular Eraser tool to erase the rest of the background area.
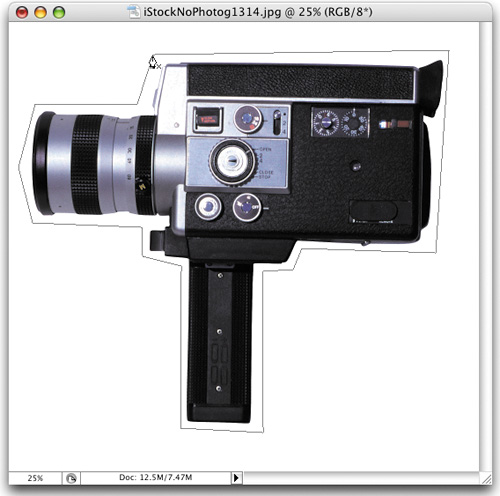
©ISTOCKPHOTO

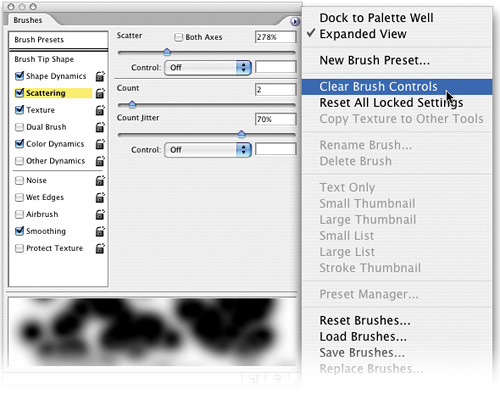
If you're going to build your own custom brush in Photoshop, sometimes it's easier to start with an existing brush and edit it. The problem is that you may have all sorts of settings already in place (Texture, Scattering, Shape Dynamics, etc., along with all their individual options). To set everything back to their defaults could take a while. At least it would if you didn't know this cool little trick: Click on the brush you want to use as your starting point for your custom brush, and in the Brushes palette, click on the options you want to edit (like Texture, Scattering, etc.). Then, from the palette's flyout menu, choose Clear Brush Controls, and all the selected options will be instantly reset to their default settings.
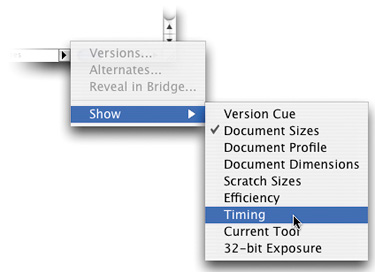
Want to know how long a particular Photoshop command takes? Click on the right-facing triangle toward the bottom left-hand corner of your image window. From the pop-up menu that appears, under Show, choose Timing. This starts the equivalent of a stopwatch that times your Photoshop commands in seconds. This is great for speed tests, pitting one machine against another. Which one runs the fastest Smart Sharpen? Time it and find out.