
III. Your Magical Adventure Begins
In This Section
• Begin Your Pottermore Adventure
• Discover Items, Potions, Characters, and New Places
• Read Exclusive New Information from J.K. Rowling
• Experience Harry’s the Adventure in Harry Potter and the Sorcerer’s Stone in a Whole New Way
One aspect of your Pottermore.com online adventure follows each chapter of each Harry Potter book, starting with Harry Potter and the Sorcerer’s Stone.
Pottermore.com Secrets and Mysteries Revealed includes everything you need to know to work your way through the entire first book, plus become an expert at casting spells when participating in Wizard’s Duels and when brewing potions.
Just like Harry Potter himself, your adventure kicks off on Privet Drive. Soon, however, you’re visiting Diagon Alley and Gringotts to gather up all the items you need to begin your studies at Hogwarts School of Witchcraft and Wizardry.
Everything you experience as you work your way through your adventure follows what happens in the Harry Potter books. However, not everything happens just like it did to Harry. Based on how you respond to challenges and questions, the Sorting Hat decides which house to place you in as your witch or wizard training begins. Then, some aspects of your adventure are totally unique. Plus, your ability to duel and mix potions relies on your own personal skills.
Even if you’ve read the Harry Potter books and have seen the movies, you’re about to encounter many surprises and challenges that put your magical abilities to the test.

As you explore each chapter of Harry Potter and the Sorcerer’s Stone on Pottermore.com, you visit many familiar locations from the books and movies. Within each location, you collect specific items and place them within your trunk for safekeeping.
As you progress through your adventure, some of the items you discover are needed later. So, if you forget to pick up an important item, you might have to return to a location to find and retrieve it. When you need an item you’ve already found, just open your trunk and grab it.
Also, hidden within the various places you visit are galleons. This is the money you use to buy school supplies and items needed for mixing potions, for example. So, when you discover a galleon, be sure to grab it.
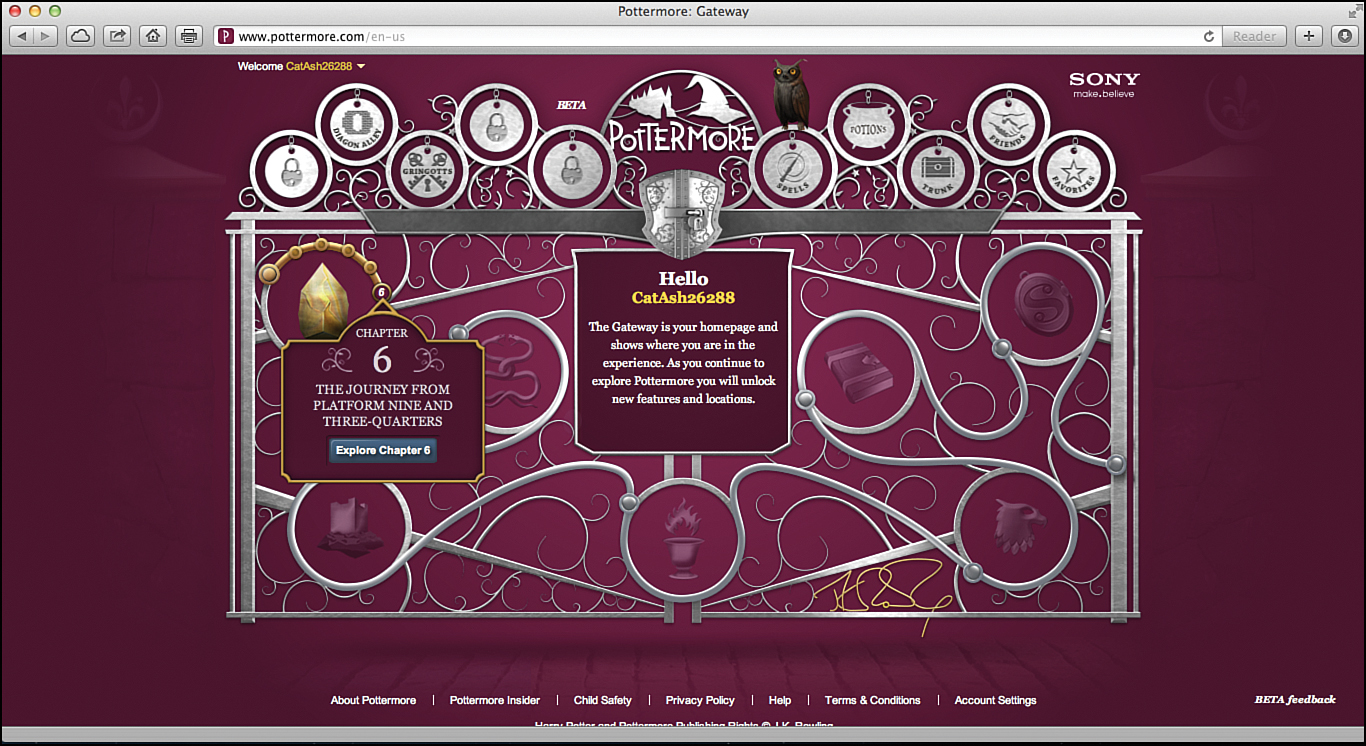
The Magical Gateway
A magical iron gate serves as your entranceway to the online world of Pottermore. Because you’re magical, opening the gate is easy. The area of the gate you click the mouse on determines where you wind up within your adventure.
The circle near the upper-left corner of the gate is the entranceway to Harry Potter and the Sorcerer’s Stone. Click it to begin your adventure. As you complete chapters during your adventure, they are unlocked and become accessible from the gateway.
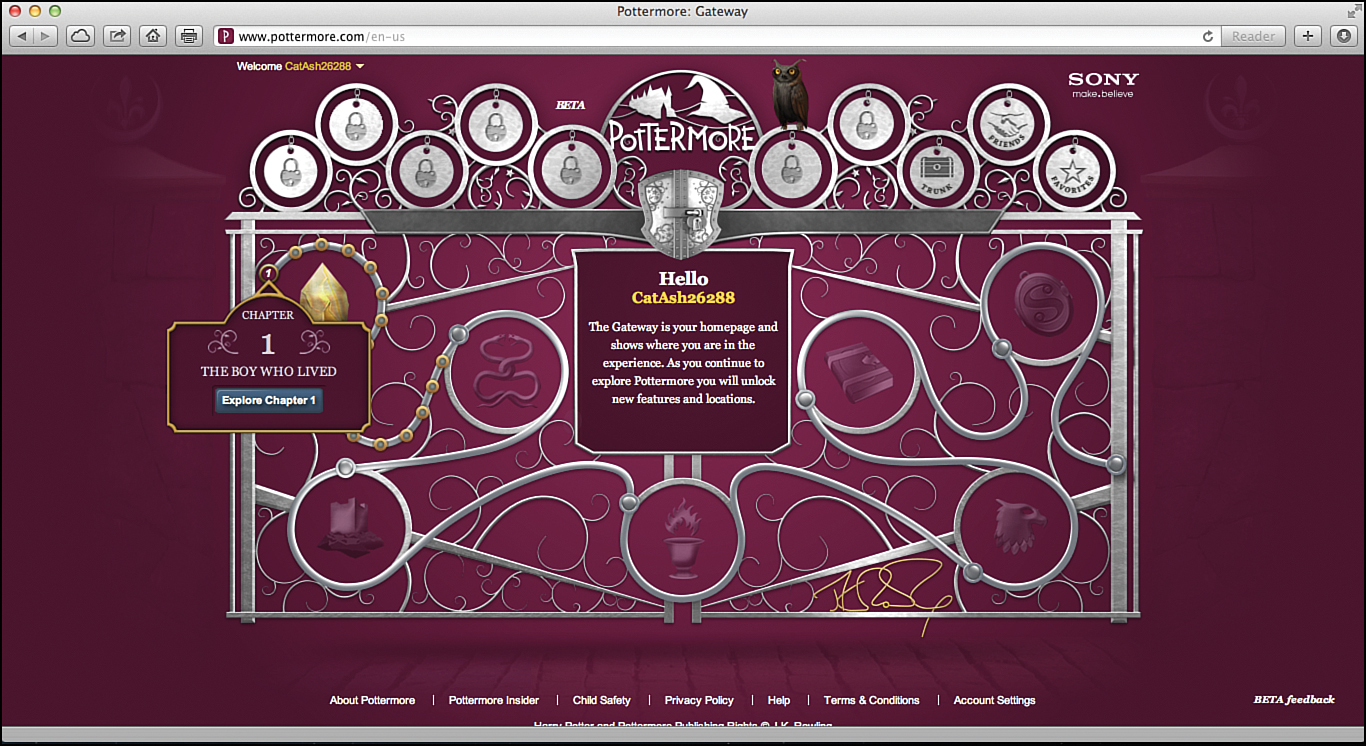
Each circle within the gateway serves as a portal to one of the Harry Potter books.

When you place your computer’s mouse over the icon for the first book, if the title that appears says Harry Potter and the Philosopher’s Stone, this means you’ve selected English (UK) as your language when setting up your account. You can change this easily to English (US) by locating your username in the upper-left corner of the screen and clicking it. Then, from the menu, click Account Settings.
When looking at the Account Settings page, click the Edit button below the Personal Details heading. For the Your Language of Choice option, choose English (US), and then click the Save button.
Click the Pottermore title near the top of the screen to return to the Magical gateway.
Chapter 1: The Boy Who Lived
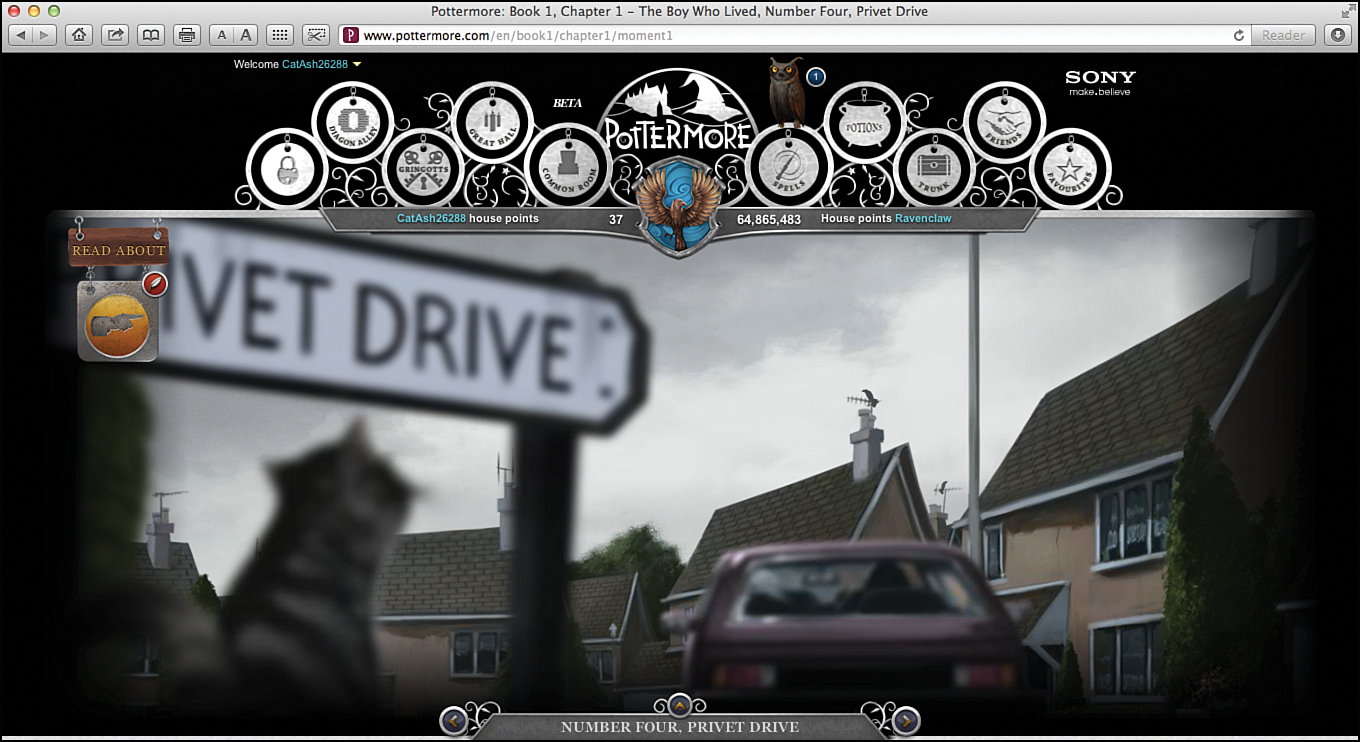
Chapter 1 of Pottermore.com begins at the beginning of the Harry Potter and the Sorcerer’s Stone book. You find yourself on Privet Drive. It’s nighttime. On the dark street, all you see is a lonely cat and an old parked car.
Remember, while exploring any of the scenes in Pottermore, you can double-click the mouse to zoom in or double-click again to zoom out. Unless you zoom in on certain characters, creatures, or objects, you aren’t able to interact with them, even if they’re visible.
Another way to zoom in or out of a scene is to use the up- or down-arrow keys on the keyboard. You can press the up-arrow key once or twice, depending on how much you want to zoom in, and then press the down-arrow key once or twice to zoom back out.
Scene 1: Number Four, Privet Drive
As you’re looking at the magical gateway, click once on the Chapter 1 icon for Harry Potter and the Sorcerer’s Stone to enter Pottermore.com. When the small Chapter 1: The Boy Who Lived window opens, click the Explore Chapter 1 button. You are then magically transported to Privet Drive.
Every chapter begins with an introduction screen. It tells you where you are in the story and how many scenes you’re exploring. Here in Chapter 1, Scene 1 is called “Number Four, Privet Drive.” Scene 2 is called “Something Peculiar Is Happening,” and Scene 3 is called “Harry Is Delivered.” Click the Explore Chapter 1 button to begin.
As you’re working your way through your exciting Pottermore adventure online, you can follow along by reading the Harry Potter books. You discover that each of the chapters and scenes within Pottermore follow each chapter of each book in order. So, when you open the book Harry Potter and the Sorcerer’s Stone, Chapter 1 is called “The Boy Who Lived,” just like on Pottermore.
At the beginning of this scene within Pottermore, a series of pop-up windows explain what’s about to happen. After you read the text within each window, click the right-pointing arrow on the right side of the window to continue.
In this case, after reading what’s in the four windows, click the X in the upper-right corner of the last window to enter into the scene and begin your exploration.
Welcome to Privet Drive! Using a bit of technological wizardry, you find yourself transported to the street where the Dursley’s house is located.
Of course, you remember Harry’s Aunt Petunia Dursley, Uncle Vernon Dursley, and cousin Dudley Dursley. Harry has been living with them since he was a little boy, but as we quickly discover, nobody is too happy about the living arrangement.
At the bottom of the screen, you see the scene title banner. It’s surrounded by a left-, right-, and up-arrow icon. Wave your mouse over the left arrow and click to return to the previous scene. Place your mouse over the right arrow and click to proceed to the next scene. Or to read a short description of the scene you’re in, wave your mouse over the up-arrow icon.
Move the mouse around to explore Privet Drive and look for hidden items to gather.
Wave your mouse over the cat’s tail to make it move. Wave your mouse over the car’s rear lights to turn on the windshield wipers and lights. Did you hear the car’s horn honk?
Now’s a good time to click the Privet Drive street sign to “discover” this location. A pop-up window enables you to access new information about Privet Drive that comes directly from J.K. Rowling herself. Click the New from J.K. Rowling button to read this exclusive information.
After you’ve discovered something new, you can then wave your mouse over the Places icon on the left side of the screen under the Read About sign, and then click the Number Four, Privet Drive listing to read the content from J.K. Rowling.
When looking at any Places screen that’s full of new details from J.K. Rowling, click the Back button to return to your adventure. You find it near the upper-left corner of the screen.

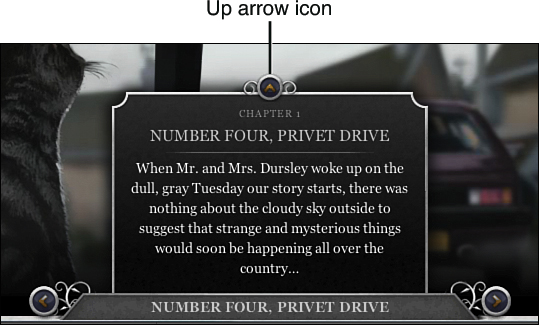
A scene title banner is always visible. Here, the mouse is placed over the up-arrow icon to make this scene description appear as well.
When you’re done exploring any scene, click the right arrow near the bottom center of the page. You find it to the right of the scene title banner. This transports you to the next scene. Wave your mouse over the up arrow icon to read a description about the scene you’re in.
Scene 2: Something Peculiar Is Happening
This scene also takes place on Privet Drive. Now, however, you find yourself standing directly outside of the Dursley’s house.
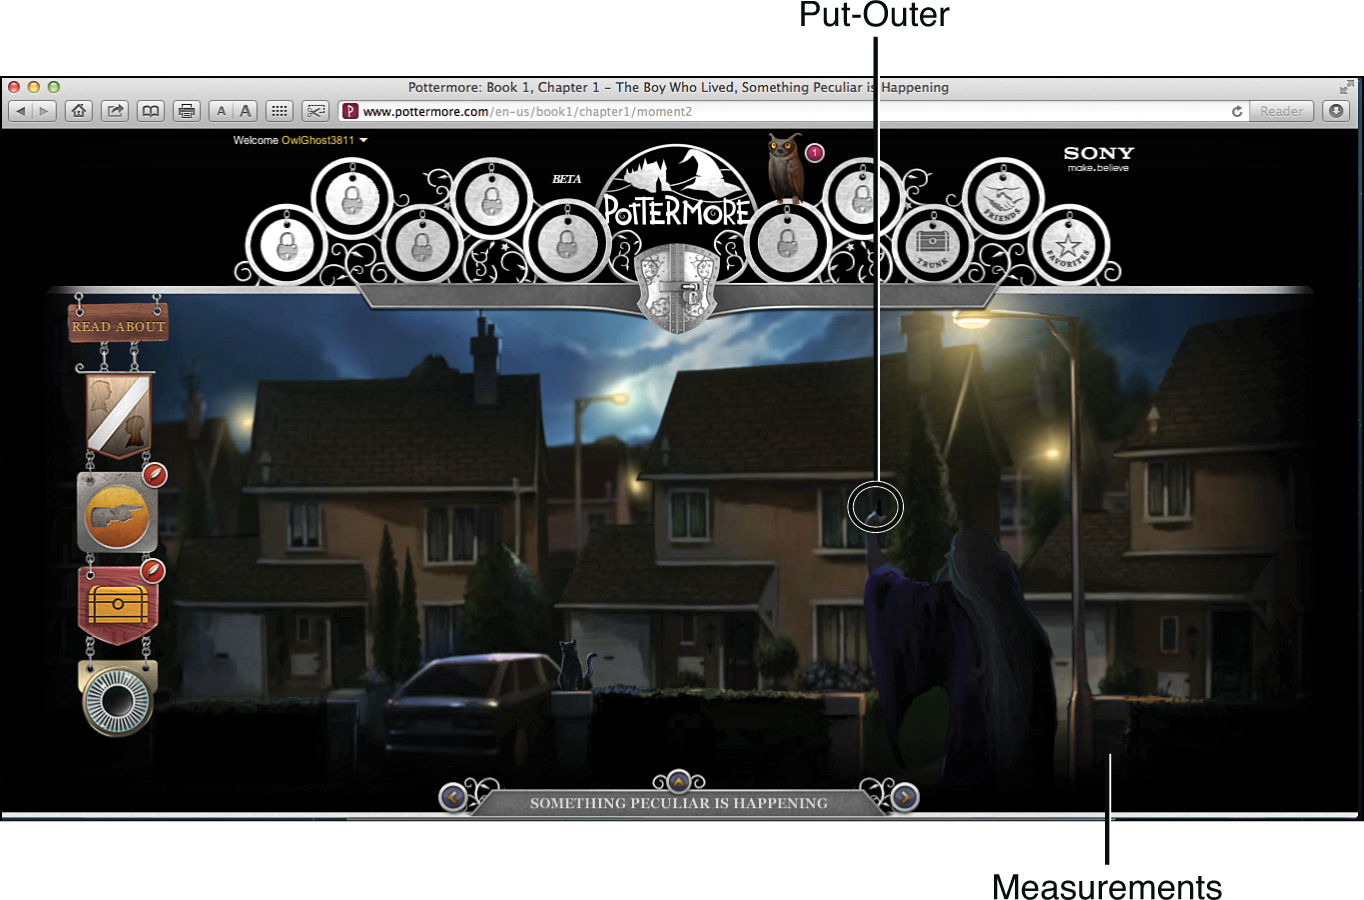
Spend a few minutes exploring this area of Privet Drive carefully.
Hidden here are a few important items. Oh, and by the way, that’s none other than Professor Dumbledore hiding in the shadows under the streetlight!
Don’t forget, you can learn all about the various characters you encounter in Pottermore by waving your mouse over the Characters icon that’s along the left side of the screen under the Read About sign.
Wave your mouse over the Characters icon to display a Characters menu that lists the characters you’ve discovered in that scene. Click any of the character’s names, like Professor Dumbledore.
Move the mouse over the Places icon to see a menu of places you’ve visited to learn more about them.
Harry Potter’s world is filled with magical and enchanted items. To learn more about the items you discover during your adventure, wave your mouse over the Objects icon below the Places icon, and then click an object’s listing to learn more about it.
When you’re a witch or wizard, creatures play an important role in your life. Throughout his adventure, Harry encounters many exotic creatures—some friendly, some magical, and some that are rather dangerous. To learn more about the creatures you come across during your Pottermore adventure, wave your mouse over the Creatures icon. You find it below the Objects icon.
Some characters, places, objects, and creatures that are listed under the Read About sign need to be found and unlocked. However, you also discover some information that’s listed here appears automatically.
Click Professor Dumbledore’s put-outer (in his hand) to make it light up for a few seconds. This gadget, which looks like a lighter, is used to magically turn off the lights along Privet Drive.
Here on Privet Drive, when you click the base of the streetlight on the right side of the screen, you unlock the Measurements object.
To read about the Measurements object, click the New from J.K. Rowling button that appears. You discover that witches and wizards do not use the metric system to measure things. They have their own measuring system, which for them works just fine. Later, to reread details about measurements, click the link for it on the left side of the screen when you wave your mouse over the Objects icon (which looks like a trunk).
Scene 3: Harry Is Delivered
As you enter into this new scene, you discover that an owl remains perched at the top of your gateway. He brings you important notifications related to Pottermore.com. Can you see the owl hiding among the icons near the top of the screen, just above the Spells icon? At anytime, click the owl to access the Notifications page.
Now, look up in the sky. It’s a flying motorcycle! Hagrid rides it to get around. Zoom in on the motorcycle and on Hagrid to get a closer look.

Aside from clicking the motorcycle to hear its engine roar, there’s not too much to do here.
Each time you enter into a new scene, the Read About information available to you (by waving your mouse over the Characters, Places, Objects, or Creatures icons) will change.
In some cases, new entries are featured. Plus, additional information under entries you’ve already unlocked in previous chapters might be updated with new and interesting information.
Place your mouse over the right-pointing arrow at the bottom of the screen to make the Chapter 1 summary screen appear. From this screen, you can read a recap of what’s happening in the story, click links that you unlocked to access special content from J.K. Rowling, plus you can add a comment of your own that other Pottermore fans are able to read.
While reading any chapter summary screen, click the Add to Favorites icon if you want to save this as one of your favorite Pottermore scenes. You can also like a scene or chapter by clicking the Like icon. To return quickly to any of your favorite places, click the Favorites icon on the right side of the gateway (at the top of the screen).
When you’re ready to move on, click the right-pointing arrow near the bottom of the screen, next to the scene title banner. After reading the introduction screen for Chapter 2, click Explore Chapter 2 to enter into the first scene of this chapter.
Chapter 2: The Vanishing Glass
For almost 10 years, Harry has been living with the Dursleys, totally unaware of his magical powers, but all that is about to change.
Like every new chapter in Pottermore, Chapter 2 begins with an introductory page that offers a preview of the scenes you’re about to explore firsthand. As you see from the preview images near the center of the screen, Chapter 2 includes two scenes. Click the Explore Chapter 2 button near the center of the page to continue your adventure.
It’s here in Chapter 2 that you start collecting items that you store in your trunk during your adventure. These are items that you might want or need to use later. At anytime, to view the contents of your trunk, click the Trunk icon on the right side of the gateway.
As you make your way through your Pottermore adventure, more and more of the icons displayed within the gateway unlock and new Pottermore features are revealed.
The gateway is constantly displayed at the top of the screen. Right now, the majority of the icons on the gateway remain locked, except for Trunk, Friends, and Favorites.
Scene 1: The Cupboard Under the Stairs
Most young people have their own bedroom or share a bedroom with their brothers or sisters. The Dursleys didn’t give Harry his own bedroom. Instead, he slept in a small storage space under the staircase. It doesn’t look too comfortable, does it?
Start looking for the items hidden here. As you explore this area of the Dursley’s home, remember that you can double-click the mouse (or use the up-arrow and down-arrow keys) to zoom in and out on certain areas or to look more closely at specific items. For example, zoom in and look at the picture frame on the small table near the staircase.
When you click the picture frame near the staircase, a pop-up window says, “You’ve unlocked Vernon and Petunia Dursley.” Click the New from J.K. Rowling button to read more about these popular characters.
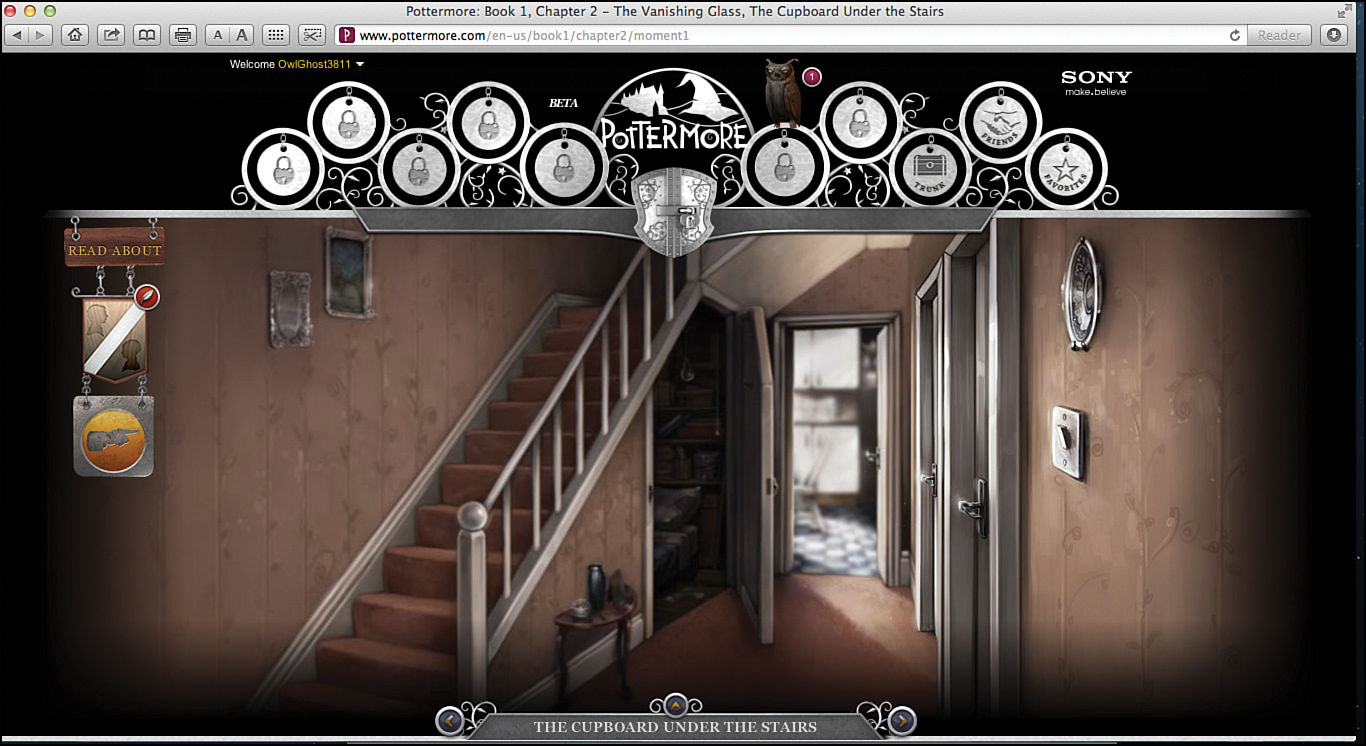
This is what “The Cupboard Under the Stairs” scene looks like when you first enter into it. You need to zoom in, however, to see everything that’s important.
Now that you’ve unlocked the information about the Dursleys, you can click the Vernon & Petunia Dursley listing under the Characters heading on the left side of the screen to learn more about Harry’s aunt and uncle.
Next, zoom in twice on the doorway near the small area under the staircase to get a closer look (or press the up arrow twice). Do you hear that ticking sound?
Tick, tick, tick. Sounds like an alarm clock. Look for the clock on the floor. Zoom in to see and click it. Congratulations! You’ve discovered your first item: the alarm clock. Click the Collect button to store this newfound treasure within your trunk.
Scene 2: The Trip to the Zoo
From Harry Potter and the Sorcerer’s Stone, do you remember one of the first times Harry discovered he had magical powers and could communicate with animals? It happened during a trip to the zoo.
When you’re exploring the zoo, the key to discovering everything within this exhibit is to zoom in on the various cages and to wave your mouse over objects or creatures that look interesting.
Zoom in on the cage to the right and wave your mouse over it to see a lizard crawl up the tree.
Next, zoom in again and click the large snake cage near the center of the screen. To reach this boa constrictor, you need to zoom in twice from the point where you first entered the scene.
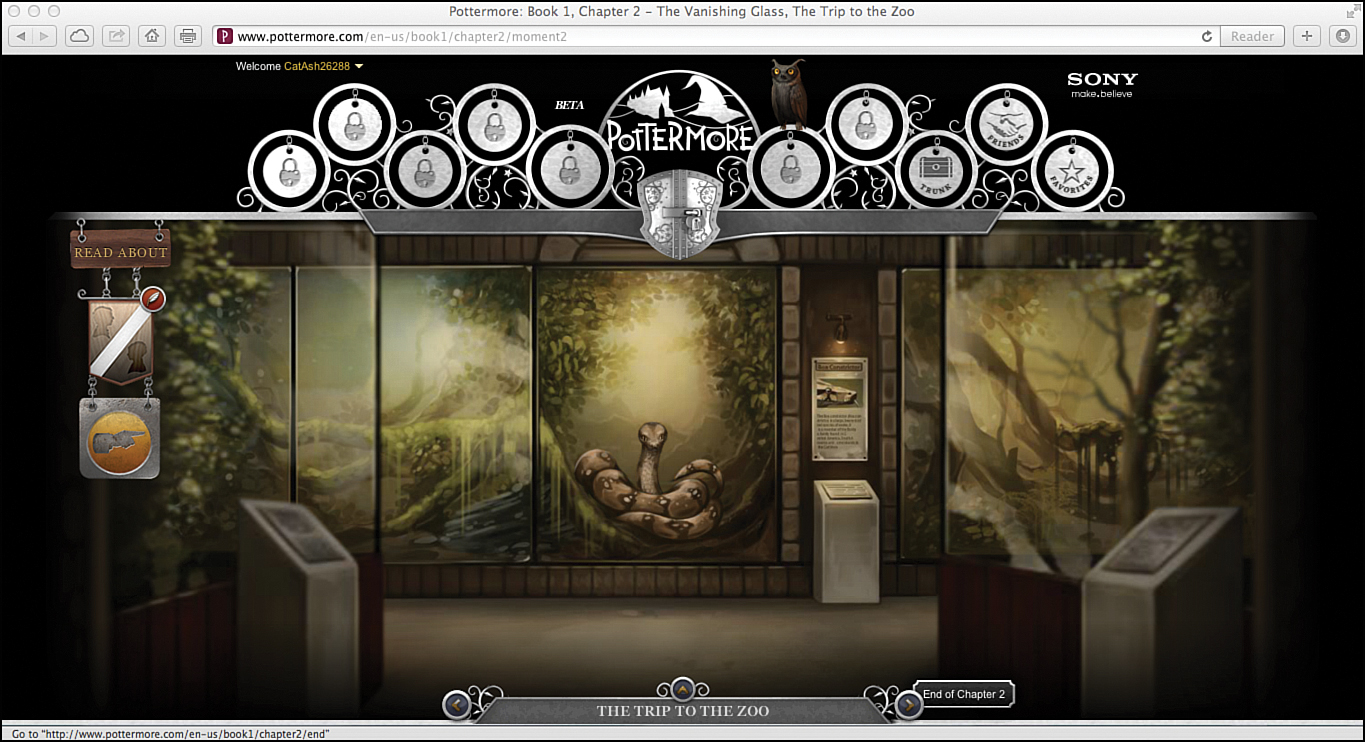
Use your magical powers to wake up the snake and look directly into his eyes. Don’t be afraid, between you and the scary-looking boa constrictor is a clear, solid, and thick glass wall. Or is there?
Wave your mouse over the sign to the right of the snake. A Closer Look button appears. Click it to learn more about this boa constrictor. Click the X in the upper-right corner of the Boa Constrictor window to make it disappear.
When you finished exploring the zoo, move your mouse to the bottom of the screen and click the right-pointing arrow next to the banner that now reads “The Trip to the Zoo.”
Read the Chapter 2 summary screen, and when you’re ready, click the right-pointing arrow next to the chapter title banner at the bottom of the screen. It now says “The Vanishing Glass.” You can now begin Chapter 3.
Chapter 3: Letters from No One
From the Chapter 3 introduction screen, click the Explore Chapter 3 button to enter the first scene. It’s called “Harry Receives a Mysterious Letter.”
At this point, Harry’s aunt and uncle were very unhappy with him after what happened at the zoo.
Back at the Dursley’s home, Harry receives a mysterious letter. It wasn’t delivered by a postman, however.
Scene 1: Harry Receives a Mysterious Letter
Someone has written Harry a letter. Well, actually, a lot of letters were sent. This marks the first time someone has ever sent Harry a letter. The young wizard-to-be was excited, confused, and curious, all at the same time.
As you watch a handful of letters magically fly around, take a few minutes to explore the Dursley’s kitchen. See what else you can find.
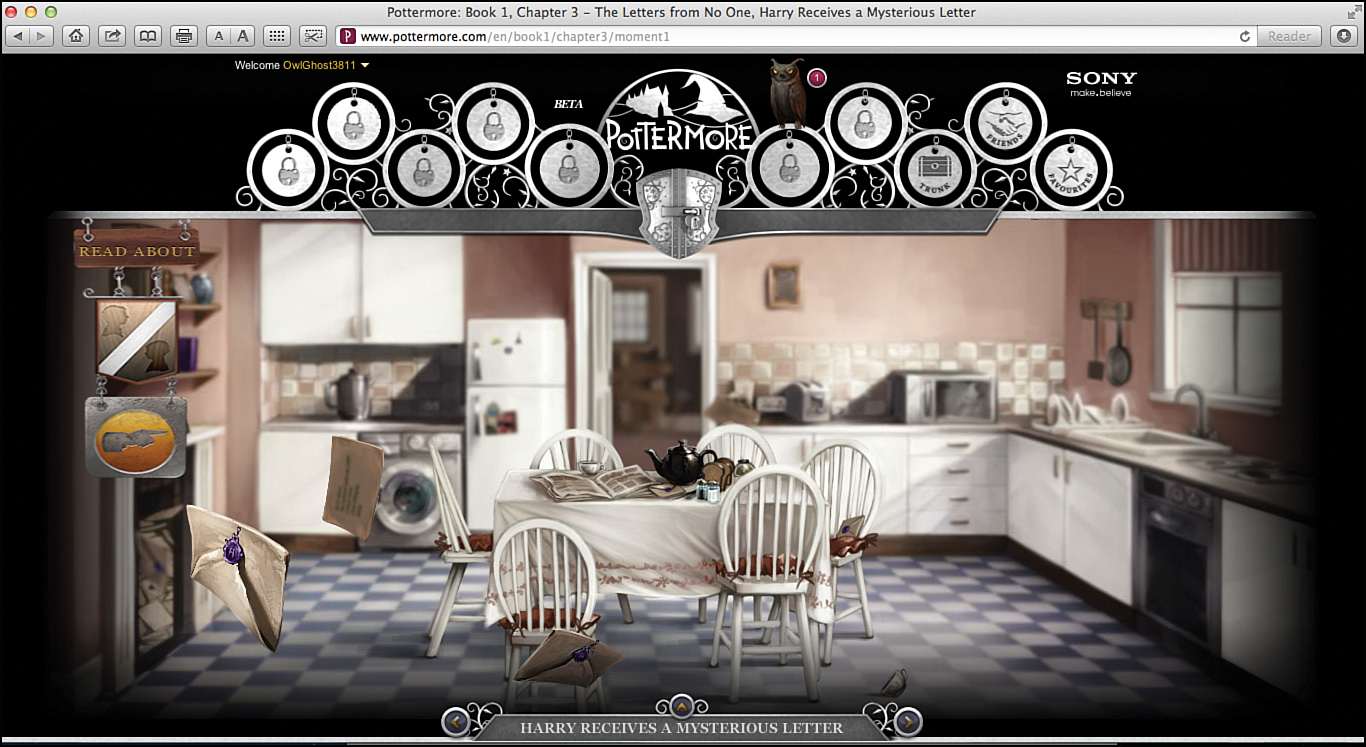
Click the letter sitting on the kitchen table.
Look on the kitchen table. You discover a salt and pepper shaker that you can click. Be sure to click the Collect button to add these items to your trunk.
On the refrigerator door, there’s a postcard. Zoom in and click it. This, too, is an item you want to look at closely and then store in your trunk. Click the Collect button that appears when you move your mouse over the postcard. When the You’ve Found the Postcard pop-up appears, click the Collect button again. The message “This item has been added to your trunk” displays.
Next, zoom in again and look through the door behind the table. On the floor, you see a hammer and nails. Click them and add them to your trunk.
At first, when Harry received his letter, his aunt and uncle tried to hide it from him. So, using a bit of magic, the mysterious sender delivered a few more letters. Well, actually, a lot of letters. Wave your mouse over the fireplace to see what showed up at the Dursley’s house.
Remember that at anytime you can see what’s already stored within your trunk. Click the Trunk icon within the gateway. So far, you’ve collected the alarm clock, hammer and nails, a postcard, and the salt and pepper shakers.
Click the chapter title banner at the bottom of the screen to return to the scene you were in. Then, when you’re ready, click the right-arrow icon next to the banner that says “The Hut on the Rock” to move on.
In between the scenes “Harry Receives a Mysterious Letter” and “The Hut on the Rock,” a message appears reminding you to check out your profile page. Click the X in the upper-right corner of this window to continue.
Scene 2: The Hut on the Rock
Standing on land, you can look out into the water and see the waves crashing along the shoreline. It’s nighttime, and the wind is howling.
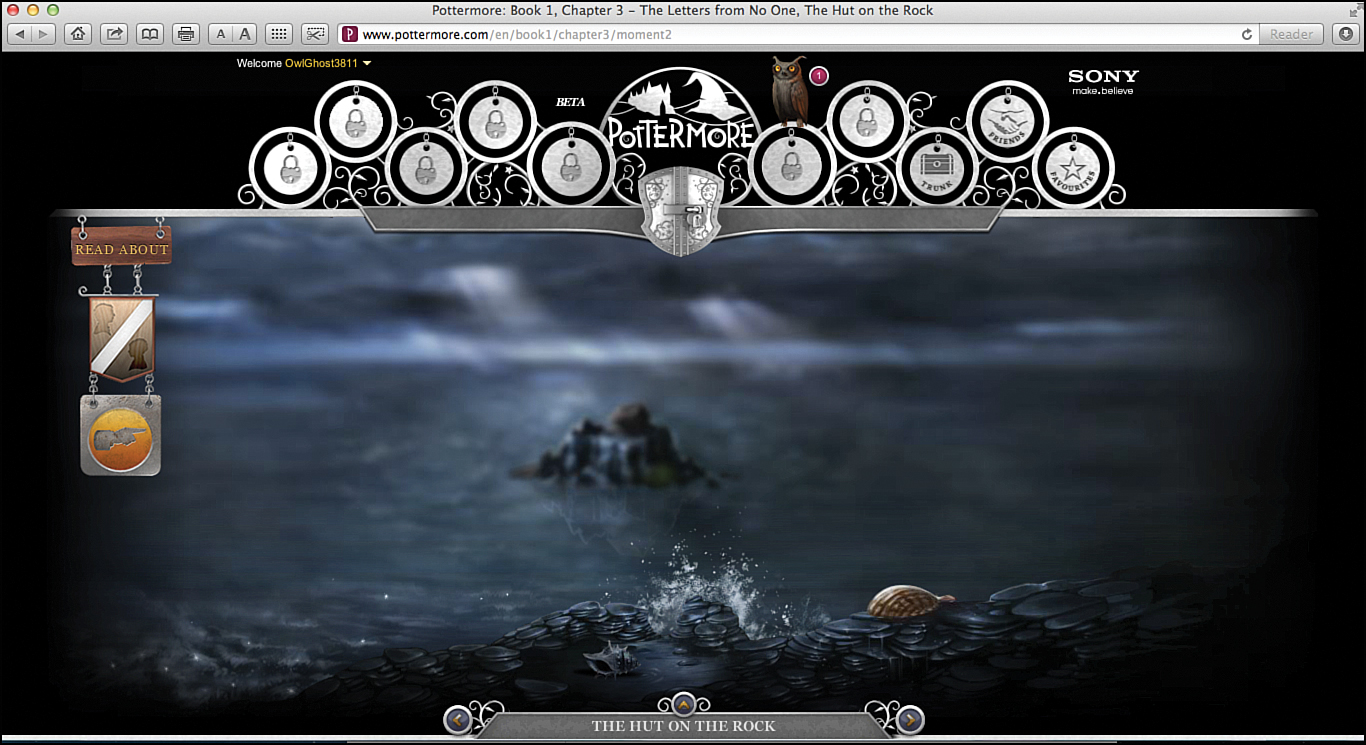
Do you see a small hut on an island in the middle of the water?
When you first enter this scene, click the seashells over to the right. You want to collect the shells and place them in your trunk.
Near the bottom center of the screen, hover the mouse over the hermit crab to make him crawl around a bit.
Now, take a closer look at the hut. Zoom in twice. Examine the rock on which the hut is sitting. Be sure to click the seaweed to collect it. It’s hard to spot, so keep your eyes peeled. After collecting the seaweed, wave your mouse over the hut to turn on the light. Is anyone home?
When you’re ready to move on, click the right-pointing arrow next to the banner that says “The Hut on the Rock.”
Once again, a chapter summary screen appears. Click the right-arrow icon next to the “Letters from No One” banner to exit the Chapter 3 summary page and view the Chapter 4 introductory page.
Chapter 4: The Keeper of the Keys
The days of Harry living as an ordinary muggle are about to end! It turns out that Hagrid is inside the hut on the rock. He’s ready to take Harry with him on an adventure. From the Chapter 4 introduction page, click the Explore Chapter 4 button to continue your adventure and exploration.
By clicking the Like button of a chapter summary or chapter introductory page, you can add your vote to the ever-growing number of Harry Potter fans who also enjoyed this area of Pottermore.
Scene 1: Hagrid Arrives
It’s a dark, rainy, and thundery night. Lurking in the shadows by the door is a massive figure. Who could this be? It’s Hagrid, of course. He’s come to pick up Harry.
The door that was keeping the wind and rain outside is torn off its hinges as Hagrid enters the room. Hover your mouse over the light bulb that’s hanging from the ceiling. Watch as it swings back and forth.
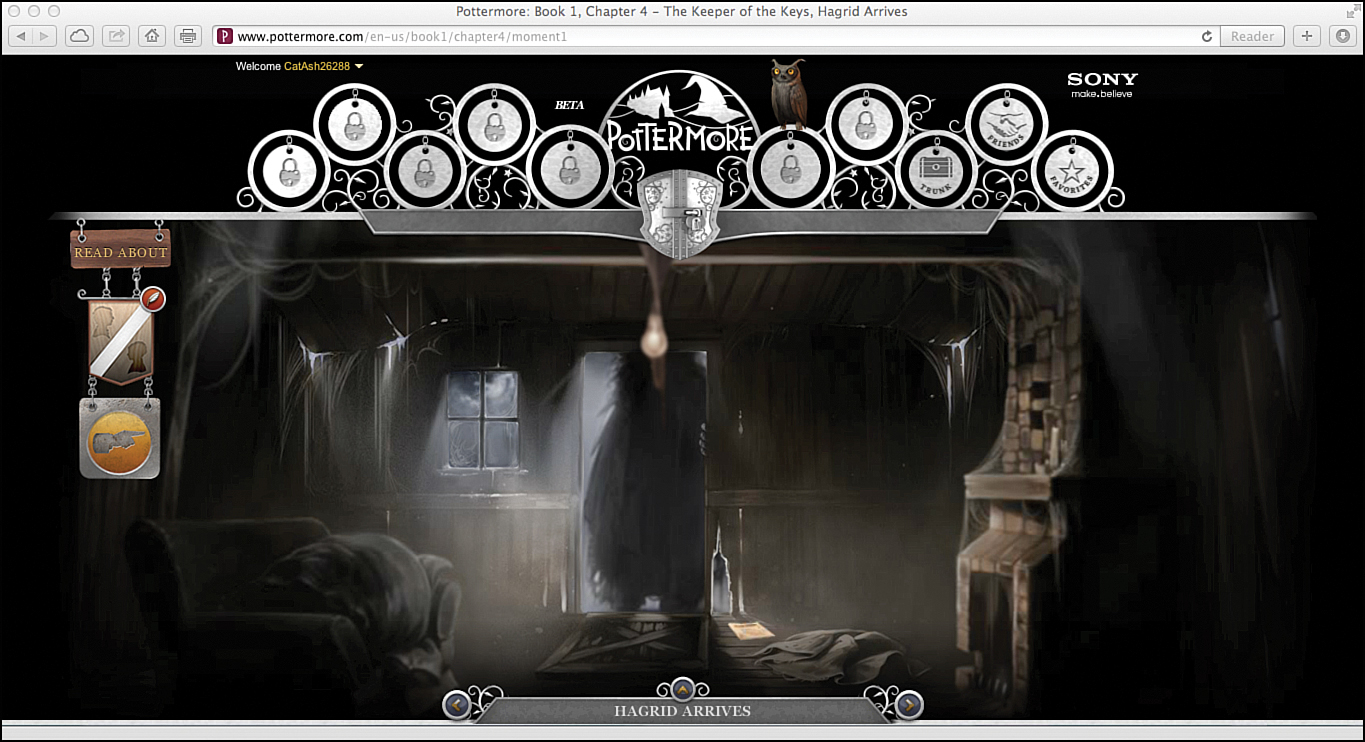
This scene takes place inside the hut.
Be sure to search the fireplace mantle to the right. Click the candle and collect it. You definitely want to add this item to your trunk.
Also, look around carefully near Hagrid’s feet, over to the right. There are some papers on the floor. Zoom in and click them. A Read About button appears. When you click these papers, you reveal and unlock the Ghost Plots. Click the New from J.K. Rowling button to read about them right now, or you can click the Ghost Plots listing under the Characters heading of the Read About banner.
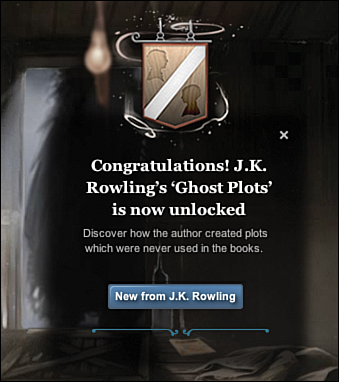
Whenever you unlock something new, a pop-up message congratulates you. Be sure to click the New from J.K. Rowling button to read exclusive information about the item you’ve unlocked.
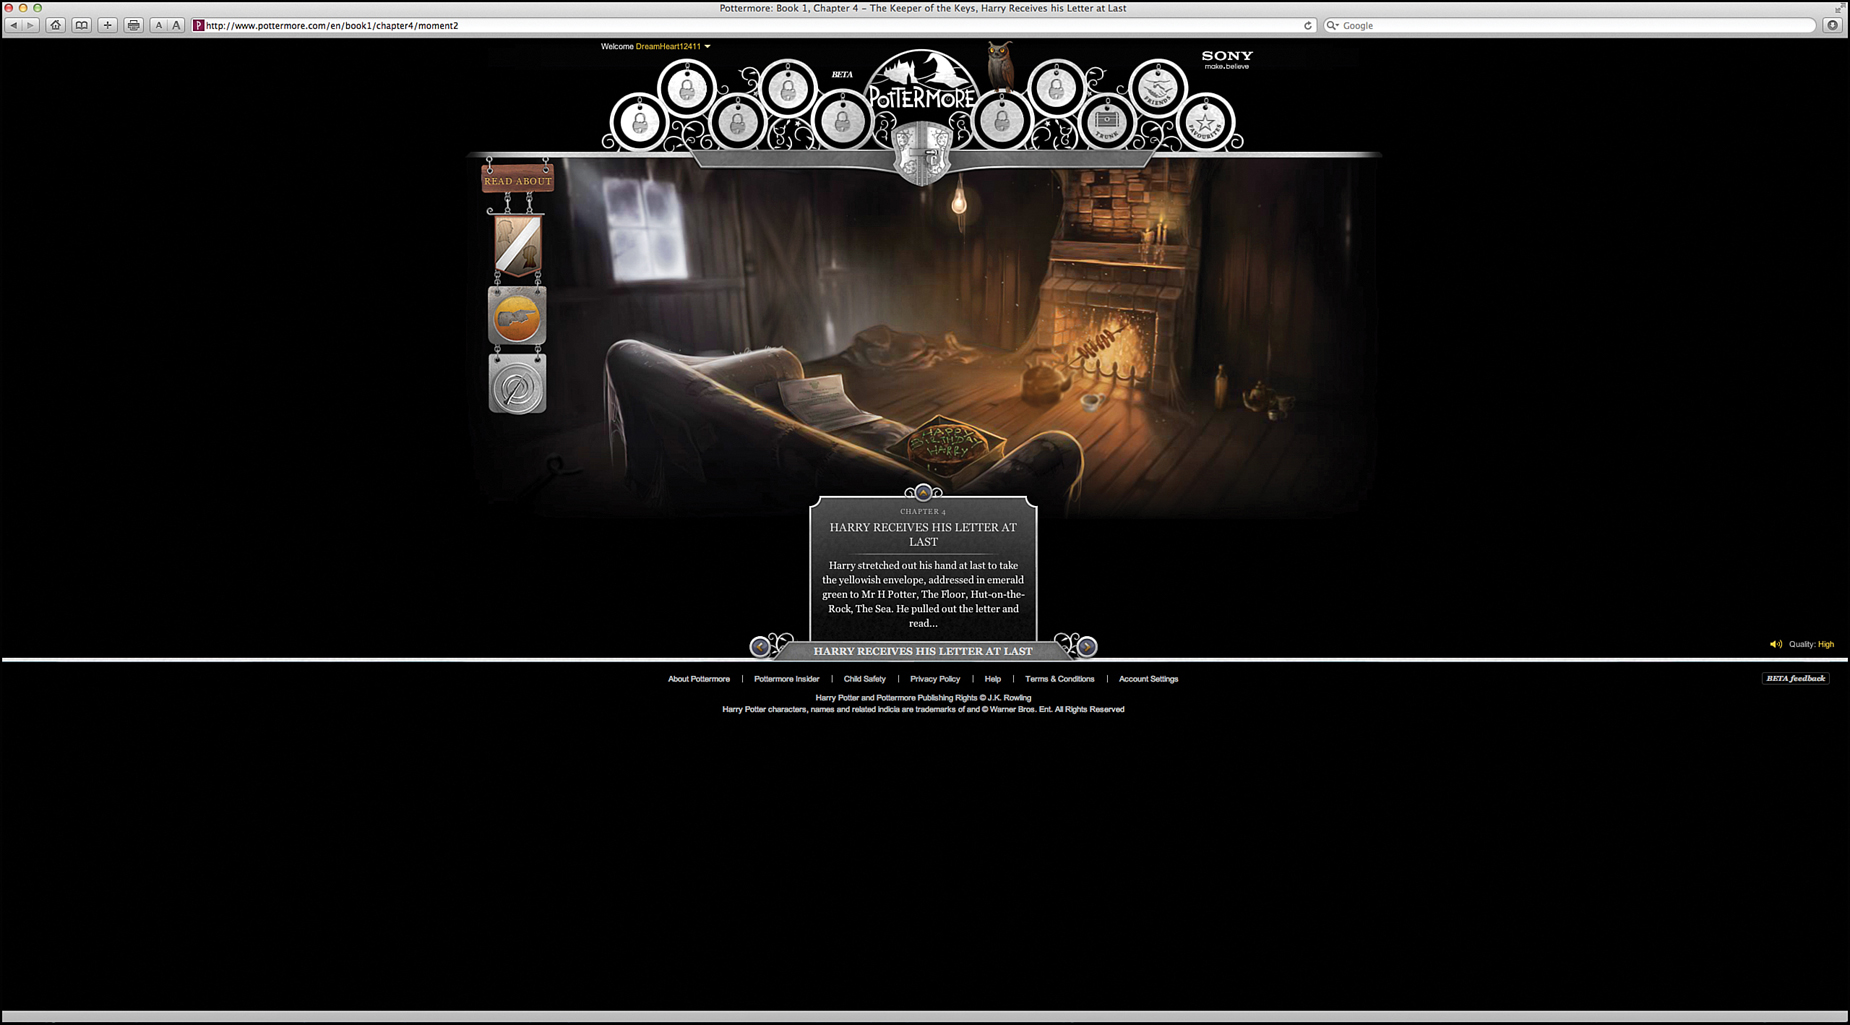
Scene 2: Harry Receives His Letter at Last
Harry is about to experience the most amazing birthday of his life. He finally gets to read the mysterious letter that arrived and was addressed to him. From this letter, he discovers details about his parents, his past, and what’s in store for his future.
Wave your mouse over the light bulb to make it swing. Sitting on the couch, next to the birthday cake, is a letter addressed to Mr. H. Potter. Hover the mouse over the letter and click the Closer Look button to read what it says.
As Harry reads his letter, he discovers that he’s been invited to study at Hogwarts. Before classes begin, however, he needs to stock up on a ton of supplies. Hagrid ultimately invites Harry to Diagon Alley for a shopping experience he won’t soon forget. To close the letter, click the X in the upper-right corner of it.
As you explore this room, zoom in once and wave the mouse over the door to make it open and close.
On the floor near the fireplace, be sure to check out the small cup. (You need to zoom in once from where you first entered the scene to grab this item.) You discover it’s a chipped cup. Click the Collect button and add it to the contents of your trunk.
When you hover your mouse over the hotdogs that are cooking in the fireplace, you see them sizzle. Then, wave your mouse over the candles sitting on the fireplace mantle. Doing this makes them light up or blow out.
When you’re ready to move on, click the right-pointing arrow next to the “Harry Receives His Letter at Last” banner. It’s located near the bottom center of the screen. Next, you see the Chapter 4 summary screen.
Continue on your quest by clicking the right-arrow icon next to “The Keeper of the Keys” banner near the bottom center of the screen.
What happens next in your adventure not only impacts what happens to Harry but also influences the rest of your own personal magical adventure.
Chapter 5: Diagon Alley
A lot happens here in Chapter 5, both to Harry and to you. As every witch and wizard knows, Diagon Alley is they place to shop for the very best magical supplies and items available.
During this particular visit to Diagon Alley, you adopt a pet (an owl, cat, or toad) from the Eeylops Owl Emporium & Magical Menagerie, plus you visit Ollivanders: The Makers of Fine Wands. There, you receive your very own magic wand.
Scene 1: Arriving at Diagon Alley
Follow the cobblestone streets and make your way through the hustle and bustle of the crowds as you begin exploring Diagon Alley.
You soon head into a few of the shops to buy the important items needed by new students who will be attending Hogwarts.
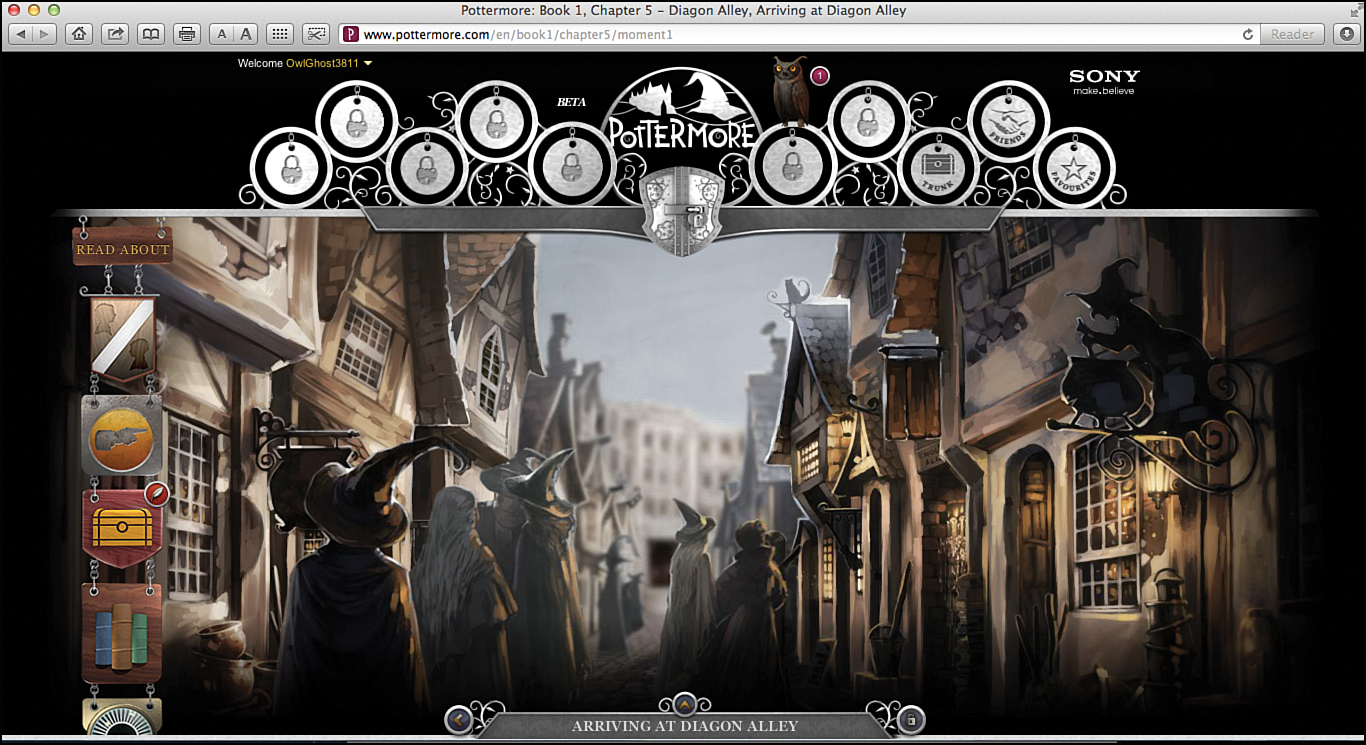
There are many shops along Diagon Alley. However, you cannot enter into all of them yet. Make your way forward by zooming in on the scene.
Look to the left and click the storefront doors. You discover clothing. When the Read About button appears, click it. Then, after seeing the “You’ve discovered ‘Clothing’ by J.K. Rowling” message, click the New from J.K. Rowling button to read some exclusive content.
Be sure to look on the ground for a sheet of paper. When you find it, pick it up. Printed on this paper is your shopping list. It tells you all the items you need to purchase during this visit to Diagon Alley.
For example, you need your uniform, books, a few other items (like a cauldron, telescope, brass scales, and a set of glass or crystal phials). Oh, and you can’t leave Diagon Alley without your magic wand and your new pet.
But first, Harry needs galleons so that he can buy all the items on his list.
Scene 2: Harry and Hagrid Visit Gringotts
Before you and Harry can start buying the items on the shopping list, your immediate goal is to find Gringotts and to withdraw some galleons. As you explore Diagon Alley, you can find this legendary bank straight ahead.
Gringotts is located within a large white building. When you see it at the end of the street, zoom to automatically enter into the bank. Much to your surprise, an account is already open for you.
The money you spend in Pottermore.com is called galleons. Your Gringotts bank account has all the galleons you need to buy everything on your shopping list. However, as your exploration continues, you want to collect additional galleons so that you can buy more items later. You can find hidden golden galleons within many of the places you’ll soon be visiting.
As soon as you enter into Gringotts for the first time, the Gringotts icon that’s part of the Pottermore gateway (at the top of the screen) unlocks. It’s the third icon from the left. From this point on, you can click the Gringotts icon at anytime to return here.
Gringotts is a very secure building with lots of safes. To access your galleons, you must unlock your safe. Drag the golden key that appears directly over the lock.
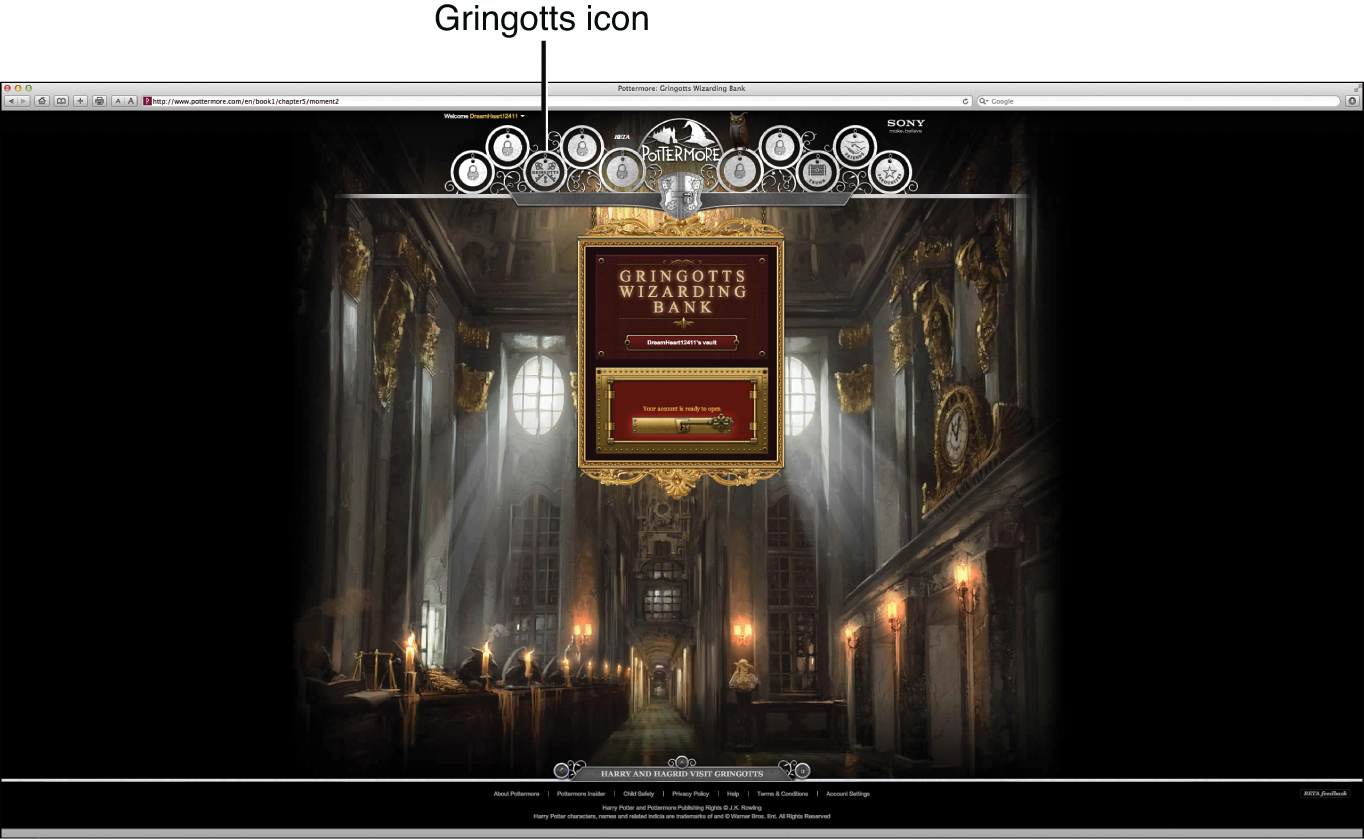
To access your money, drag the golden key downward onto the lock using your mouse.
From the main Gringotts Wizarding Bank screen, you can view your current balance (which is 500 galleons). Click the Go to Diagon Alley button on the left to return to Diagon Alley and start shopping.
As soon as you leave Gringotts, you can review your shopping list more closely and figure out what you need to buy (and from which stores). When you’re ready, click the Go Shopping button.
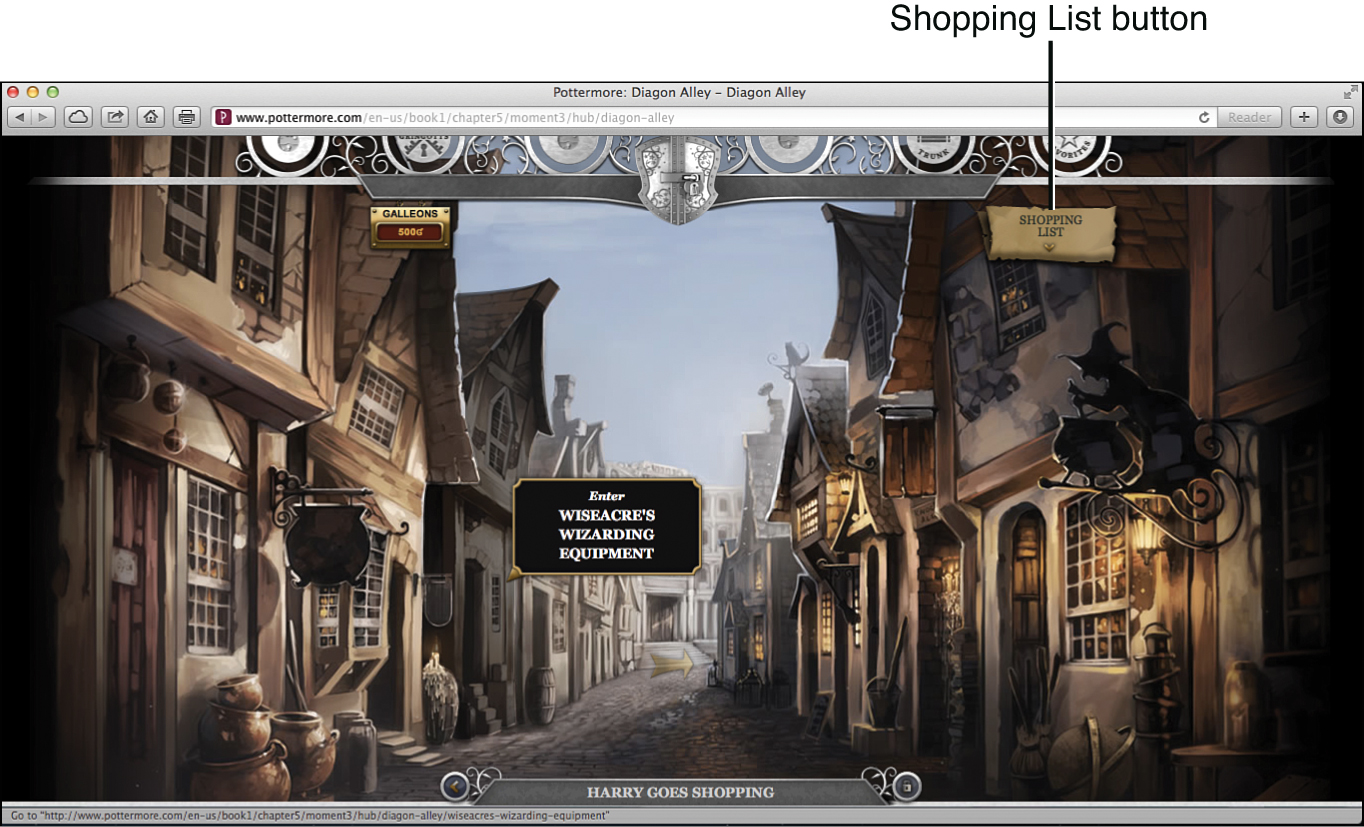
Scene 3: Harry Goes Shopping
As soon as you’re back on the streets of Diagon Alley, you discover that it’s easier to navigate your way around. The crowds seem to have thinned out a bit, and the area is much calmer.
Now, when you pass your mouse over each storefront, you can see the name of the store. Click a store’s front door to go inside and shop.
On the left side of Diagon Alley, closest to where you’re standing, is Potage’s Cauldron Shop. If you check your shopping list, you see that you need to drop in here to buy a size 2 pewter cauldron.
Near the upper-right corner of the screen, you see a Shopping List button. Click it at anytime to review the list of items you need to shop for. Then, click the Go Shopping button or the X on the shopping list to return to Diagon Alley.
When you enter any store along Diagon Alley, including Potage’s Cauldron Shop, you see many items on display, along with their prices.
According to your shopping list, you need one size 2 pewter cauldron. It costs 15 galleons. Click the item to view a detailed description of it. Then, click the Buy button to purchase it.
After your purchase is completed, click the Back button near the upper-left corner of the window. After you make sure that there’s nothing else from the store you need (based on what’s on your shopping list), click the Exit Shop button in the upper-left corner of the store’s page.
Located to the right of Potage’s Cauldron Shop is the Apothecary. From here, you want to stock up on items needed to create potions. Later, when you begin your potion mixing studies, you need to return here often to buy more supplies. Right now, however, you don’t need anything from the Apothecary.
To the right of the Apothecary is Wiseacre’s Wizarding Equipment.
Drop into Wiseacre’s Wizarding Equipment to buy some of the items on your shopping list, such as the brass scales, telescope and the glass or crystal phials.
After you’re inside Wiseacre’s Wizarding Equipment, start by clicking the brass scales on the left side of the screen to purchase it for 3 galleons.
Read the description for the brass scales and make sure it matches up with the item listed on your shopping list. Click the Buy button. Then, click the Back button to return to the main store.
This time, click the brass telescope. View the item, click the Buy button, and then click the Back button once again.
Refer back to the shopping list by clicking the Shopping List button once again near the upper-right corner of the Wiseacre’s Wizard Equipment store screen. You discover that the items you’ve already purchased from the list have been crossed off. However, from this shop, you still need to buy the glass or crystal phials.
As you’re browsing through Wiseacre’s Wizarding Equipment, click either the glass phials or crystal phials to view the item description. Glass phials cost 3 galleons, and crystal phials cost 7 galleons. Either item is ideal for holding potions. Pick one of the phial sets and purchase it.
Right now, it doesn’t matter if you purchase glass or crystal phials. Later, as you become skilled at brewing potions, certain recipes specifically require glass or crystal phials, so ultimately, you’ll need to buy both.
When you’re done shopping here, exit out of the store.
Also on the right side of Diagon Alley is Florean Forescue’s Ice Cream Parlor and Madam Malkin’s shop. However, at this point in your adventure, these destinations remain locked. In the future, when you return to Diagon Alley, these shops might be open.
On the right side of Diagon Alley, starting closest to you, you discover Flourish and Blotts. This is the bookstore where you buy all the magic and spell books needed for Hogwarts, like A History of Magic and Magical Theory. When you enter this shop, check your shopping list for a complete list of books you need to buy. According to your shopping list, you have eight different books to buy.
Start with The Standard Book of Spells (Grade 1) and continue buying one book at a time until they’re all crossed off your shopping list. So, you also need to buy A History of Magic, Magical Theory, A Beginner’s Guide to Transfiguration, One Thousand Magical Herbs and Fungi, Magical Drafts and Potions, Fantastic Beasts and Where to Find Them, and The Dark Forces: A Guide to Self-Protection.
Exit out of Flourish and Blotts after buying all the required textbooks.
Be sure to check your shopping list one last time before you leave the Flourish and Blotts bookstore. Make sure you didn’t forget any of the books. If you forget to buy an item from your shopping list, you have to return to buy that item before you can leave Diagon Alley.
Located to the left of Flourish and Blotts is Quality Quidditch Supplies. You can’t enter into this store just yet. However, to the left again is Eeylops Owl Emporium & Magical Menagerie. This is where you soon select your pet. You can choose between an owl, cat, or toad.
Next Stop, Eeylops Owl Emporium & Magical Menagerie
It’s time to choose your new pet, who serves as your loyal and loving avatar animal in Pottermore. Enter into Eeylops Owl Emporium & Magical Menagerie. It’s a really awesome pet store for wizards and witches. You find it on the right side of Diagon Alley.
Inside Eeylops Owl Emporium & Magical Menagerie, several shelves display individual cages. Within each cage is one animal. The selection here is extensive. Click the More Pets button on the right side of the screen to view even more exotic owls, cats, and toads.
Remember, a wizard or witch can have only one special pet, so choose your favorite.
The animal you pick represents you whenever you post a comment on Pottermore.com. Plus, your pet is also displayed on your profile page and follows you throughout the rest of your Pottermore.com adventure.
Out of all the animals available from Eeylops Owl Emporium & Magical Menagerie, choose your absolute favorite and click its Buy button.
After you purchase one animal from Eeylops Owl Emporium & Magical Menagerie, you can continue to browse through the store, but you aren’t able to buy another pet or exchange the one you’ve purchased. All sales are final, so think carefully before you click an animal’s Buy button.
After adopting your pet, there’s only one more item to buy on your shopping list. You still need your very own, one-of-a-kind magic wand that’s selected just for you!
Exit Eeylops Owl Emporium & Magical Menagerie and return to Diagon Alley. Notice that the entranceway to Diagon Alley South Side is now unlocked.
After you’ve purchased the majority of the items from your shopping list from the stores along Diagon Alley, click the gold arrow in the middle of the street. You can then walk past Gringotts Wizarding Bank and check out the shops along Diagon Alley South Side.
Displayed below the Pottermore gateway icons near the top-left side of the screen, look for a golden icon that says Galleons. A number appears within it. This number indicates how many galleons remain within your Gringotts bank account. When you spend money, your balance goes down. When you find galleons, the balance goes up.

The very best place to go wand shopping is Ollivanders: Makers of Fine Wands. This famous store is located along Diagon Alley South Side. To get to it, click the gold right-pointing arrow that appears near the center of the street.
Diagon Alley South Side features a handful of additional shops, like The Daily Prophet, Whizz Hard Books, Second-Hand Robes, The Junk Shop, Obscurus Books, Gamol and Japes, and Twilfit and Tattings.
Purchase Your Magic Wand at Ollivanders: Makers of Fine Wands
At this point in your adventure, most of the shops along Diagon Alley South Side are closed. However, located in the center of the alleyway is Ollivanders—your next destination. Click the doorway to go inside.
To make sure you wind up with a magic wand that’s perfect for you, Mr. Ollivander asks you seven questions. After reading the message that appears when you enter the store, click the Let Your Wand Choose You button.
That magic wand that’s selected for you at Ollivanders: The Makers of Fine Wands is the one you use later in your adventure for dueling. Every wand is selected specifically for its owner. Or, more accurately, the wand selects you. You are asked a handful of questions as part of the wand-selection process. Be sure to answer each question as honestly as you can.
Let’s take a quick look at just three of the possible questions you might be asked as Mr. Ollivander selects your own personal and unique wand.
There are no right or wrong answers, but how you answer Mr. Ollivander’s questions determines which wand you wind up with as your very own. As you answer each question, don’t think about how Harry would respond. Instead, answer each question based on your own thoughts.
The first question you’re asked is “Would you describe yourself as....” Your three options for answers are these:
• Short for your age
• Average height for your age
• Tall for your age
Click your answer to highlight it. Next, click the Next Question button.
You might be asked about the day you were born and need to inform Mr. Ollivander if it was on an odd-number or even-number day. So, if you were born on July 7, for example, that would be an odd number. But, if you were born on December 6, that would be an even number. Figure out if your own birthday falls on an even or odd number.
For odd-numbered birthdays (these days of the month: 1, 3, 5, 7, 9, 11, 13, 15, 17, 19, 21, 23, 25, 27, 29, and 31), click the card displayed on the left.
For even-numbered birthdays (these days of the month: 2, 4, 6, 8, 10, 12, 14, 16, 18, 20, 22, 24, 26, 28, and 30), click the card displayed on the right.
Some of the questions require you to make a decision.
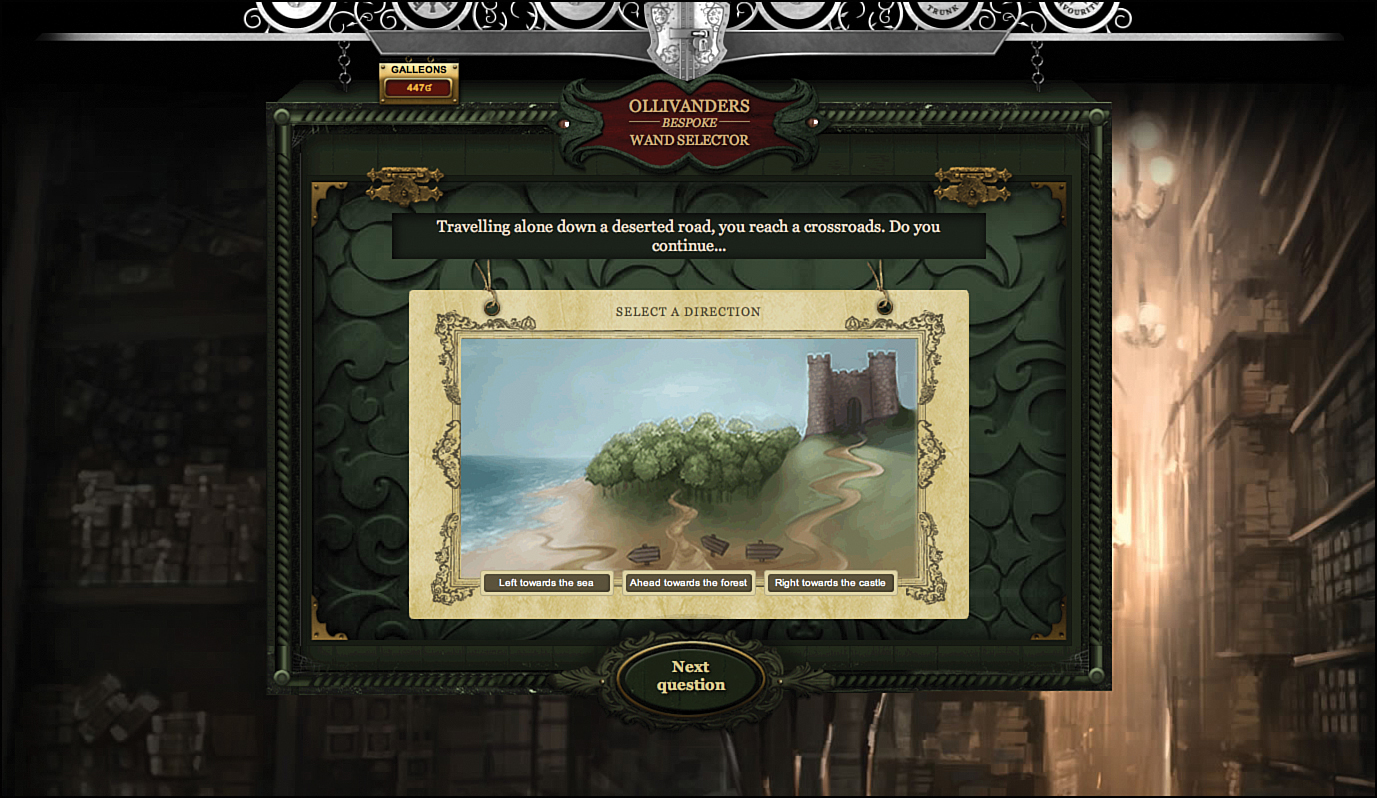
Sometimes, witches or wizards need to make important decisions. The decisions they make later impact the events that happen in their lives. To test your decision-making skills, Mr. Ollivander might ask a question like this:
Traveling alone down a deserted road, you reach a crossroads (a split in the road). Do you continue... Left, toward the sea? Ahead toward the forest? Or, right toward the castle?
Take a look at the map on the screen and choose one destination.
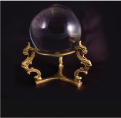
When you finish answering Mr. Ollivander’s questions, you are given the chance to change any of your answers. Remember, how you answer each of these questions determines which wand you receive. Now, you can start again and re-answer each of the seven questions and change one or more of your answers. Or, you can click the Get Your Wand button to receive your magic wand. The decision is yours.
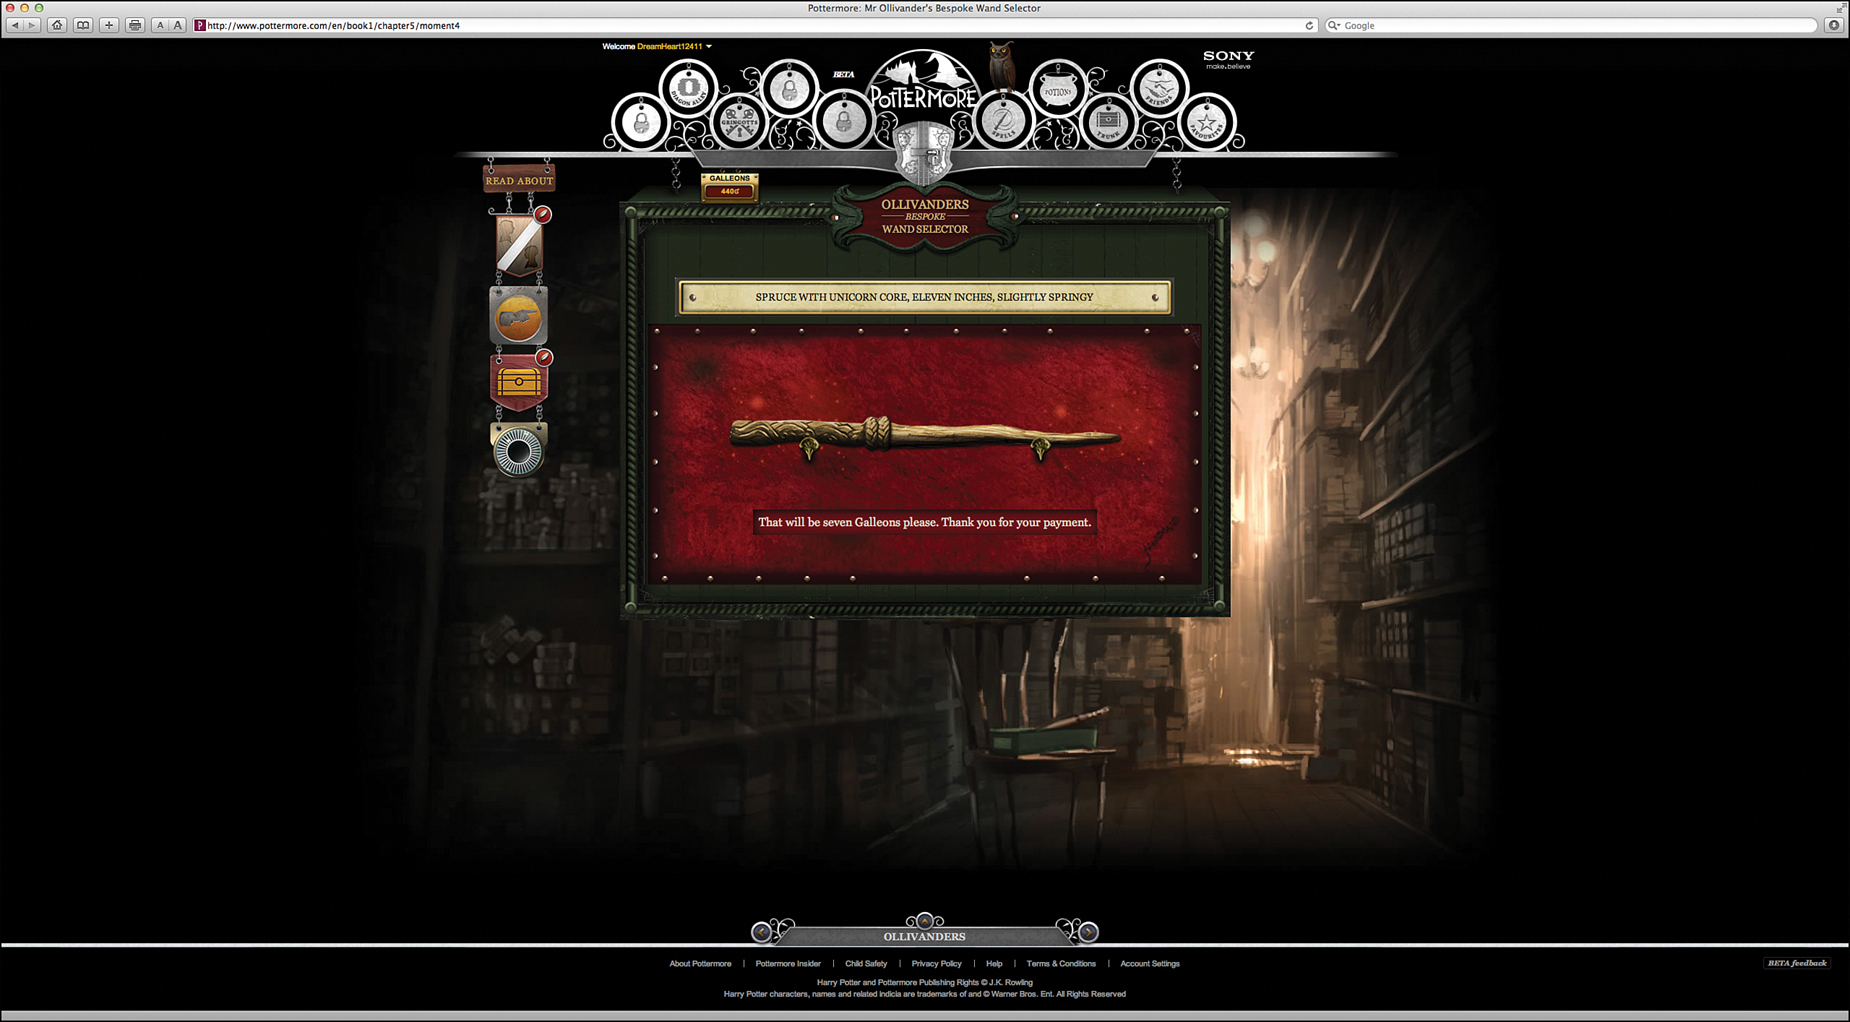
Congratulations! Your unique wand has been selected. This is the wand you use as you progress through your adventure and then participate in duels. The wand you receive might look totally different from the one shown here. That’s because your wand is unique.
By now, you should have everything you need to begin your education at Hogwarts. At this point, return to Diagon Alley and finish up Chapter 5. To do this, click the right-arrow icon at the bottom of the screen, next to the “Ollivander’s” banner. The Chapter 5 summary screen will appears.
You always have the option to view your profile page. To do this, click the silver Shield icon up in the gateway (near the top center of the screen).
At anytime, to view your profile page, from the gateway, click the Shield icon directly below the Pottermore title near the top center of the screen. From your profile page, you can do the following:
• View your wand.
• See how many house points you’ve earned.
• View your Pottermore username and avatar animal.
• Read notifications.
• Check out the areas of Pottermore you’ve labeled as your favorites.
• View drawings you’ve posted on Pottermore.
• Review spells.
• View your available potions.
• Access the contents of your trunk.
• Take a closer look at other items you’ve collected so far in your adventure.
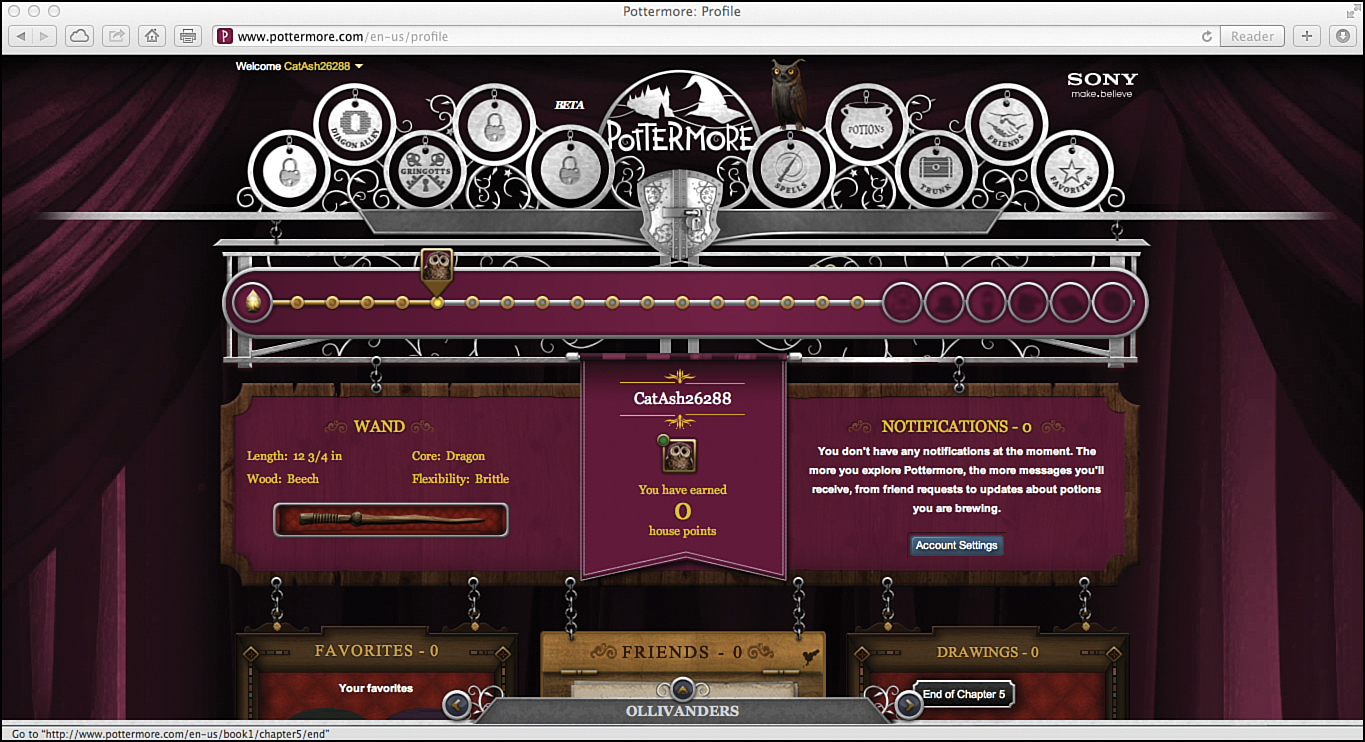
Let’s take a moment and check out your profile page. After you’ve been placed in a house within Hogwarts, your house’s insignia replaces the Shield icon on the gateway.
Each time you accomplish something new within Pottermore, your profile page is updated automatically.
You’ve successfully completed Chapter 5. You’ve accomplished a lot so far, but so much more magic and mystery awaits you. Now, Harry must wait until September 1, when he boards the train at King’s Cross and makes his way to Hogwarts for the very first time. But, your adventure within Pottermore.com can continue right now!
If you look at the gateway icons near the top of the Pottermore screen, several more of them have now been unlocked, including Diagon Alley, Gringotts, Spells, Potions, Trunk, Friends, and Favorites. Click any of these icons to transport yourself to that location or screen within Pottermore.
You can also click the Shield icon (displayed below the Pottermore title) to view your profile page. The Messenger Owl continues to be perched on the Spells icon. Click him to view any messages you’ve received from friends or from the Pottermore.com website.
New gateway icons have been unlocked.
Do you think you know everything there is to know about the world of Harry Potter? Well, guess again! As you make your way through your adventure, you unlock exclusive new information from J.K. Rowling.
From a chapter summary page, you can view the new content headings you’ve unlocked. In Chapter 5, for example, you’ve unlocked Clothing, Mr. Ollivander, Wand Cores, Wand Lengths & Flexibility, and Wand Woods. Before moving on, take a few minutes to read this information.
Also, some of the entries for the Characters, Places, Objects, and Creatures you unlocked earlier in your adventure might have been updated, so check to see what’s new there as well.
If you don’t want to read everything that’s new right now, you can add individual pages to your collection of favorites and then easily return to read those entries later.
Before moving on, post your own Comments about Pottermore.com in the Comments section displayed farther down on the chapter summary page.
If you decide to take a break from Pottermore and want to return to your adventure later, picking up where you left off is easy: just pass through the magical gateway.
If you exit out of Pottermore.com and return later, you might need to reenter your Pottermore password. When you sign in to Pottermore.com, add a check mark to the Keep Me Signed In option on the Sign In To Pottermore screen so that your username and password is remembered.
At this point in your adventure, if you take a look at the gateway screen, you see that around the Harry Potter and the Sorcerer’s Stone icon that Chapters 1 through 6 have already been unlocked.
Click the Chapter 6 dot to enter back into Pottermore and pick up at the beginning of this next chapter, where you last left off.
Chapter 6: The Journey from Platform Nine and Three-Quarters
This chapter begins when Harry is about to leave the Dursleys and hop aboard the Hogwarts Express. His next stop is Hogwarts. Chapter 6 has two scenes: “The Hogwarts Express,” and “The Journey to Hogwarts.” Click the Explore Chapter 6 button to begin this part of your adventure.
Scene 1: The Hogwarts Express
At the train station, Harry has figured out how to enter platform nine and three-quarters. The train has already arrived, and everyone’s luggage is being loaded.
As you explore platform nine and three-quarters, you see a handful of cats and owls; some are in cages, others are roaming around freely. Wave your mouse over them to hear them purr or hoot. Also, if you run your mouse over one of the packages near where you’re standing (to the left of some textbooks), a strange creature attempts to crawl out.
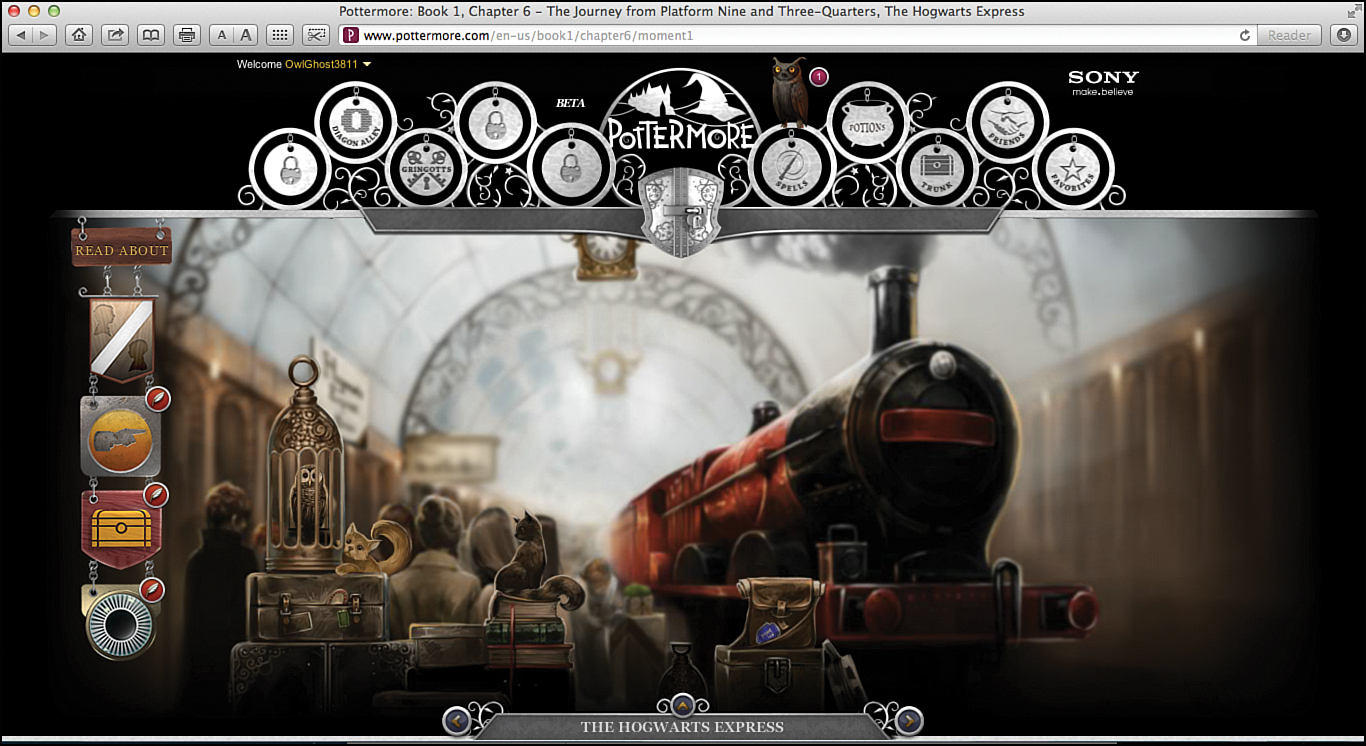
Before boarding the Hogwarts Express train, explore platform nine and three-quarters.
Now, if you look slightly to the right, you see a bag with a purple object lying against it. Wave your mouse over the object. When the Collect icon appears, click the object. You discover the prefect badge. Add this item to your trunk.
Zoom in once. Above the passengers’ heads and to the left, you see a sign. When you wave your mouse over it, a Read About button appears. Click the button. The sign says “The Hogwarts Express.”
Next, look down and straight ahead. Listen for the sound of a toad croaking. Find the toad and click it. He’s hiding near the center of the screen, to the left of the Hogwarts Express engine. When you click the Read Me button next to the toad, you unlock Toads.
Did you know that toads are one of three approved pets that Hogwarts allows students to have? By unlocking Toads, you can click the New from J.K. Rowling button to read more about these creatures.
Or, after you’ve unlocked Toads, wave your mouse over the Creatures icon on the left side of the screen (under the Read About sign), and choose the Toads option.
Zoom in one more time. This time, when you look up and to the left, you see a second sign. Wave your mouse over it to reveal a Read About button. Click it to discover “Platform Nine and Three-Quarters.” To read exclusive information, click the New from J.K. Rowling button.
Scene 2: The Journey to Hogwarts
For all Hogwarts students, the trip aboard the Hogwarts Express is a time to meet up with old friends and to be introduced to new students. It’s also a great time to start collecting chocolate frog cards.
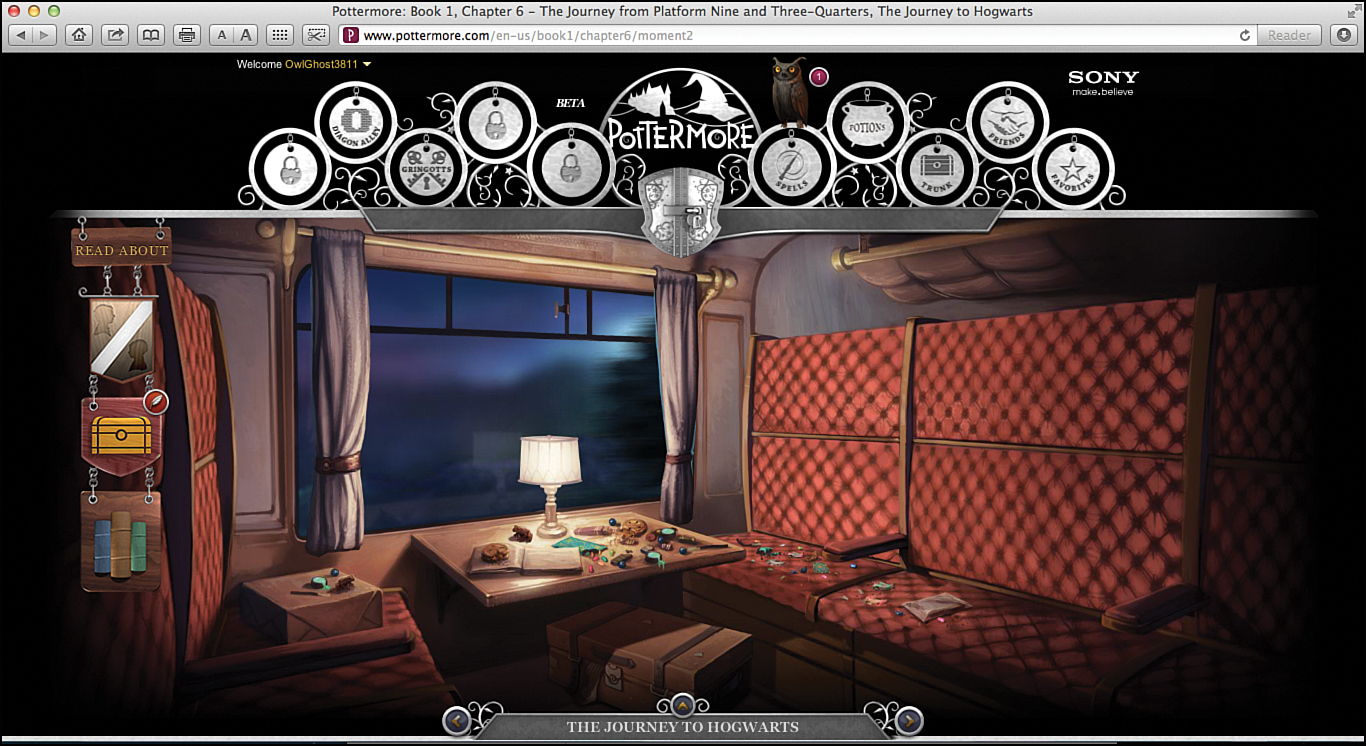
As the Hogwarts Express train races toward Hogwarts School of Witchcraft and Wizardry, take a few minutes to explore. The train car you’re riding in contains several interesting items to be found.
One way to learn all about famous wizards and witches, like Professor Dumbledore, is to collect chocolate frog cards. Throughout Book 1 of your adventure, there are 11 cards for you to find and collect. From this point forward, keep on the lookout for them.
On the floor, there’s a large trunk. Click it to open the trunk and see what’s inside. Surprise! You just discovered the Dumbledore chocolate frog card. Click the Collect button to add it to your collection. Now, you only have 10 more chocolate frog cards to find and collect!
You discover the Morgana chocolate frog card sitting on the right seat of the train car, near the arm rest. Click it, as well, to collect it.
Zoom in and wave your mouse slowly over the tabletop in the train car. You find and are able to collect Bleaaargh, a sprout-flavored bean. Also, when you wave your mouse over the open book that’s on the table, the pages turn. Plus, when your mouse passes over the right curtain, a tiny creature pops its head out to greet you.
Soon, the Hogwarts Express arrives at its destination. The passengers unload and follow Hagrid to the main castle door of Hogwarts.
Chapter 7: The Sorting Hat
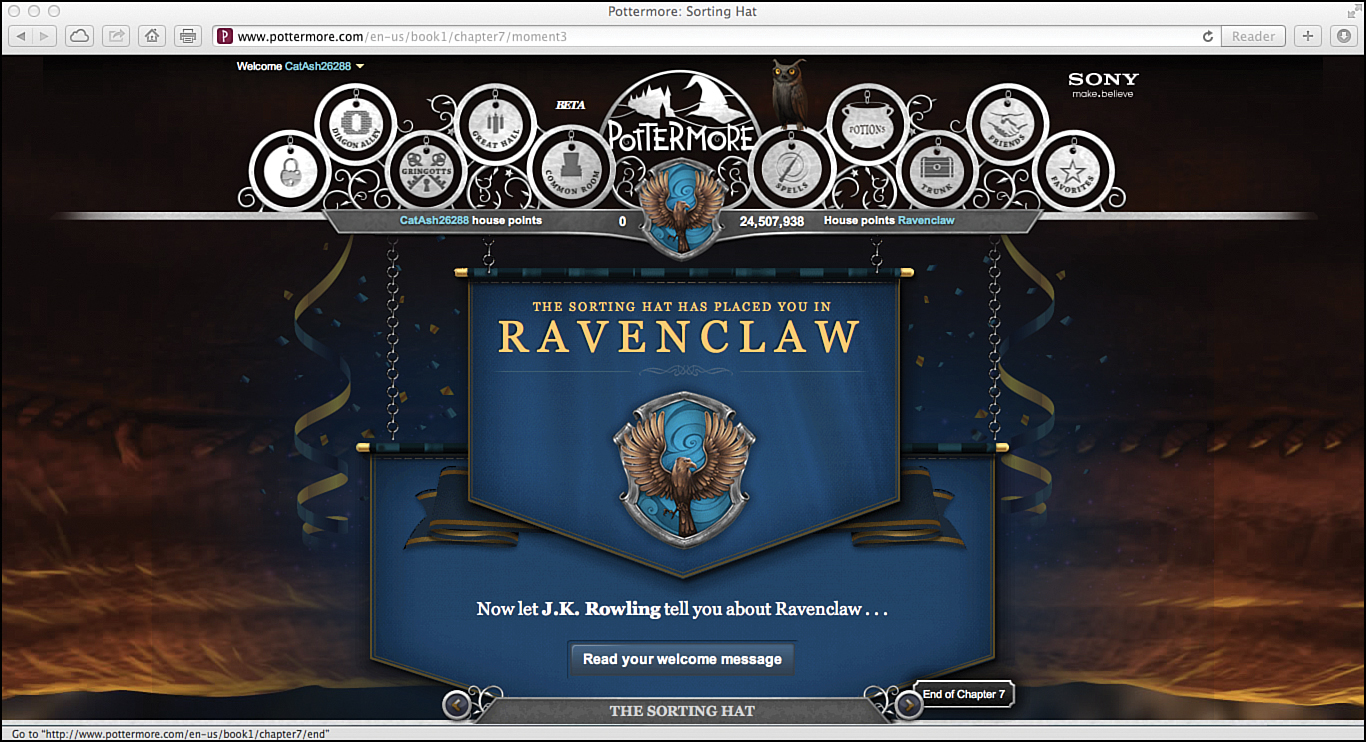
For every new Hogwarts student, putting on the Sorting Hat and being assigned to a house is a huge deal. Like all the other new Hogwarts students, you’re about to be sorted and placed into a house, where you remain for your entire adventure.
What do you think? Will you be placed into Gryffindor, Hufflepuff, Ravenclaw, or Slytherin? Unfortunately, that decision isn’t up to you. It’s for the Sorting Hat to decide. In Pottermore, the Sorting Hat chooses a house for you, based on how you answer a series of questions.
Scene 1: The Entrance Hall
Chapter 7, “The Sorting Hat,” includes three scenes. First, you arrive at Hogwarts. Then, you participate in the sorting ceremony. Finally, you are placed into one of the four houses. Just like in the Harry Potter and the Sorcerer’s Stone book, after the Sorting Hat places you into a house, the decision is final, and that’s the house where you remain as long as you continue playing Pottermore using the same account.
The Entrance Hall at Hogwarts is massive and quite beautiful. Be sure to take a close look at the staircase as you explore. On the fourth step from the bottom, you find and are able to collect your first galleon. This gives you extra spending money when you visit Diagon Alley again later.
Zoom in once and wave your mouse over the large wooden doors on the right to make them open and close.
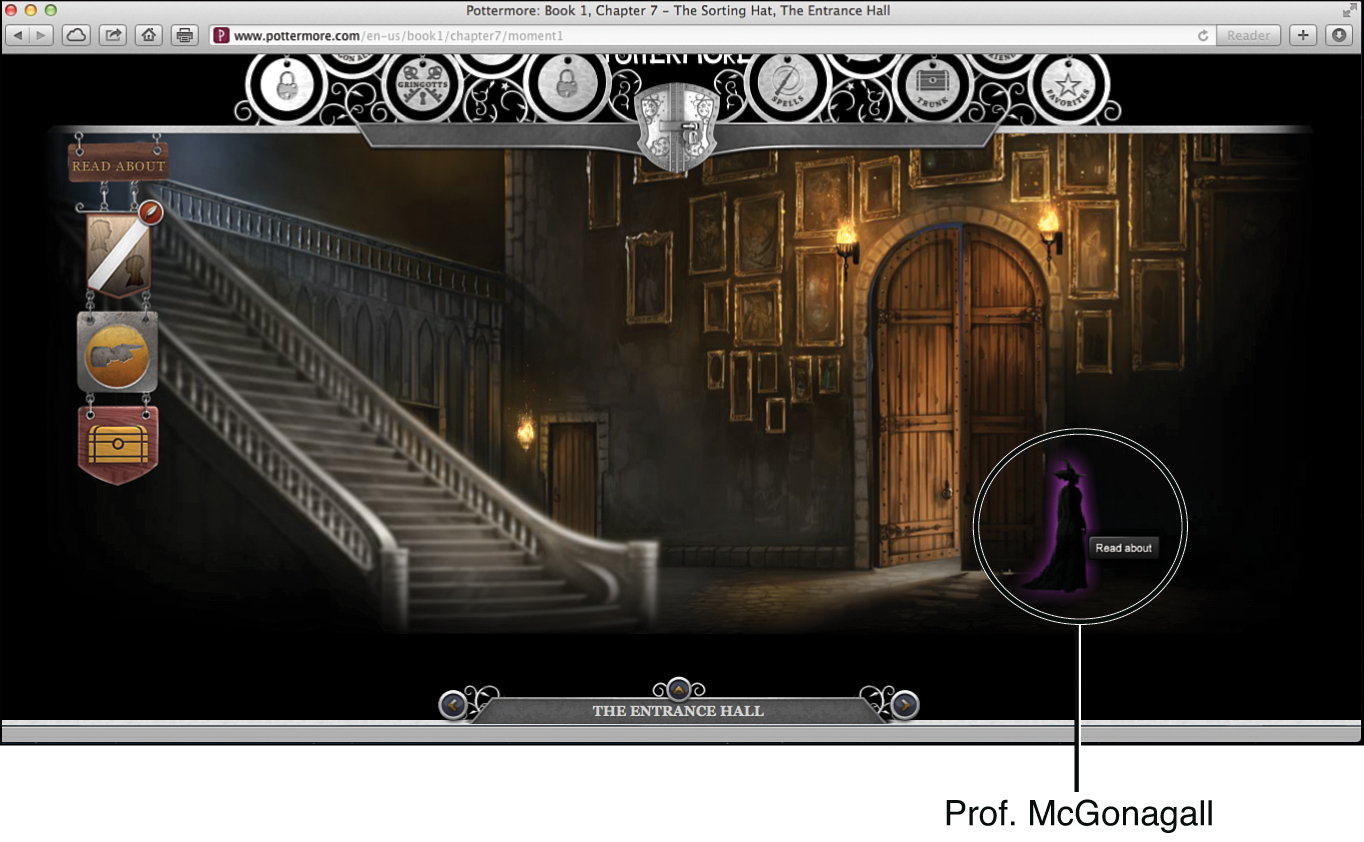
Welcome to Hogwarts!
After zooming in to take a closer look at the wooden doors, move your mouse slowly around in the area to the right of the large wooden doors. You come across Professor McGonagall lurking in the shadows and are able to unlock some new information.
After you’ve unlocked the information about Professor McGonagall, click the New from J.K. Rowling button to learn more. You discover the entry about this Hogwarts-educated witch has been updated from earlier.
When you exit from this area of Hogwarts by clicking the right-arrow icon next to “The Entrance Hall” banner, kick back and watch a short video starring J.K. Rowling. She explains more about the Sorting Hat.
Scene 2: The Sorting Ceremony
The time has come for you to step up to the Sorting Hat and discover which house you’ll become a lifetime member of. After watching the J.K. Rowling video, click the Try On the Sorting Hat button to begin the Sorting Ceremony.
The Welcome to Hogwarts page is displayed next. You’re instructed to answer a series of questions to help the Sorting Hat place you into the proper house. Click the Begin button to continue.
You’re asked a series of questions, to which there are no right or wrong answers, so answer honestly.
The following are three possible questions you might be asked before the Sorting Hat makes a decision about which house to place you in.
Question:
You’re given a choice to invent a potion. What would be the purpose of the potion you invent? Click the cards to make your selection. Here, your choices include: Love, Glory, Wisdom, or Power.
Click the Select This Option button on the card that displays your selection. Then, click the Yes, Please Proceed button to continue.
Here’s what another question might be:
If a troll were to wreak havoc in the headmaster’s study and try to destroy what’s inside, in which order would you protect the following items: Merlin’s Book, Hogwarts student records (that go back 1,000 years), and the dragon pox cure.
Using your computer’s mouse, drag each card into the first, second, or third position.
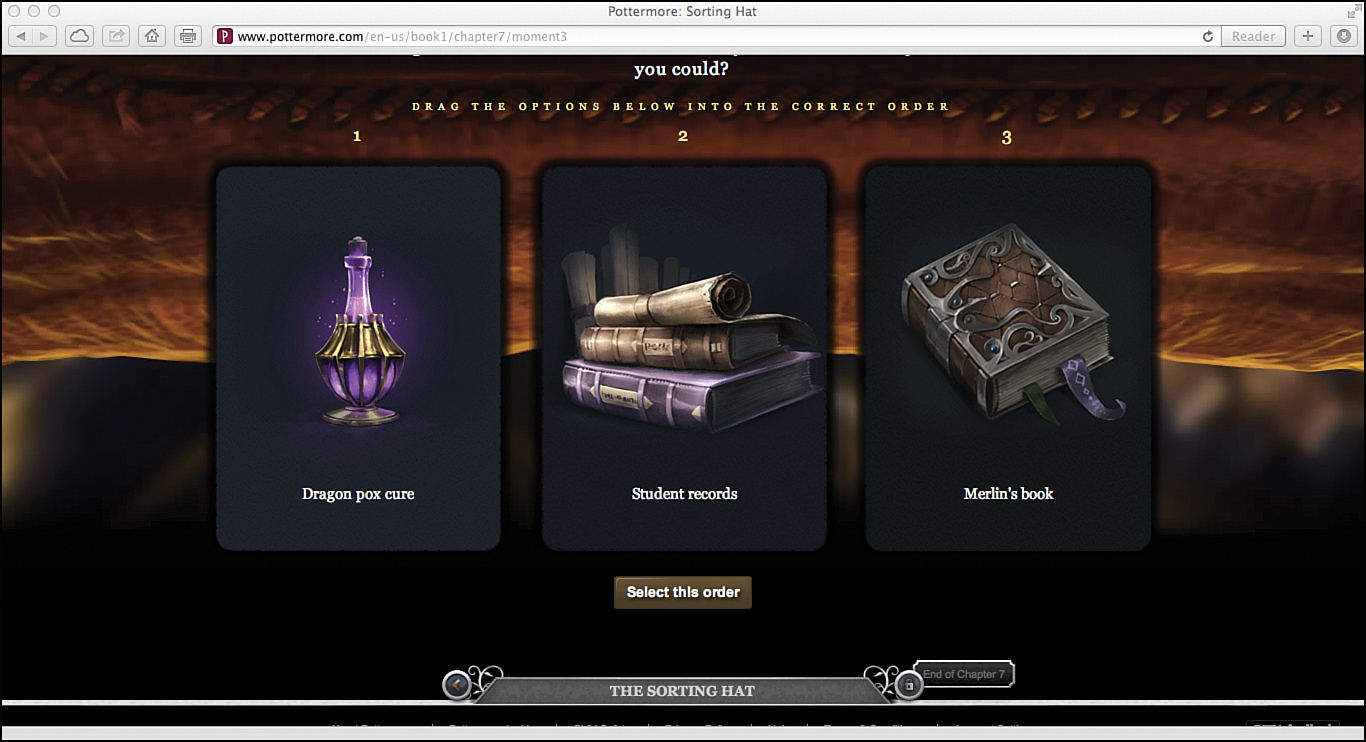
If you’re asked the question about a troll wreaking havoc in the headmaster’s study and which items you’d protect, place the items in the order you think appropriate. Click the Select This Order button to continue.
Some questions might give you a handful of options and ask you to choose just one. Here’s an example:
During your years studying at Hogwarts, you will learn many different lessons and skills. Which classes are you most excited to take? What magical skills are you looking forward to learning?
Your choices are as follows:
• Apparition and Disapparition
• Transfiguration
• Flying on a Broomstick
• Hexes and Jinxes
• All About Magical Creatures and How to Befriend/Care for Them
• Secrets About the Castle
• Every Area of Magic
Click the Select This Option button for the skill you most want to learn. Then, click the Yes, Please Proceed button to lock in your answer.
For several of the questions the Sorting Hat might ask, you might simply be asked to choose between two options. Which you select is a matter of personal preference. Again, there is no right or wrong answer.
Scene 3: The Sorting Hat
The Sorting Hat now announces which of the four houses you’ll be placed in! The decision is based on how you answered the questions. When your house name is revealed, click the Read Your Welcome Message button to learn more about your house.
From this point forward, you can earn house points for your house. The house with the most points at the end of the school year wins the Pottermore House Cup. At anytime, click the Great Hall icon on the gateway to see which house is currently ahead.
Take a look at the top of the Pottermore screen. The gateway has once again changed. Now, when you look at the gateway, the Common Room and Great Hall icons have now been unlocked. When you click one of these icons, you can revisit these locations within Hogwarts at anytime during your adventure.
Notice that the Shield icon for your profile page (displayed just below the Pottermore title) now displays your house’s insignia. Plus, to the left, just below the gateway, the number of house points you’ve personally earned is displayed.
Look to the right to see the total number of house points your house has earned thus far. Now, only one gateway icon remains locked. What this mysterious icon unlocks is revealed soon!
Chapter 8: The Potions Master
Now that you’re a Hogwarts student, it’s time to get to work and begin your studies. It’s an interesting time to be a student at Hogwarts. After all, Harry Potter is attending the school for the first time, and you’re one of his classmates. To continue, click the right-arrow icon at the bottom of the screen next to the banner that says “The Sorting Hat” to access the Chapter 7 summary page.
Click the right arrow again to view the Chapter 8 chapter introduction page. You discover that Chapter 8, “The Potions Master,” has three separate scenes. To enter into the first scene, click the Explore Chapter 8 button.
Scene 1: Harry’s Early Days at Hogwarts
Just as Harry Potter did, you want to explore Hogwarts and try to learn about some of the mysteries that surround this massive and very old castle. Start exploring the staircase and hallway. As you find items from this point forward, you now also earn house points.
Before Scene 1 begins, a message announces that the Great Hall is now open. This means you can begin earning house points for the house you’ve been assigned to. To enter into the Great Hall and see how many house points your house has collected, click the Great Hall icon that’s been unlocked at the top of the screen, within the gateway.
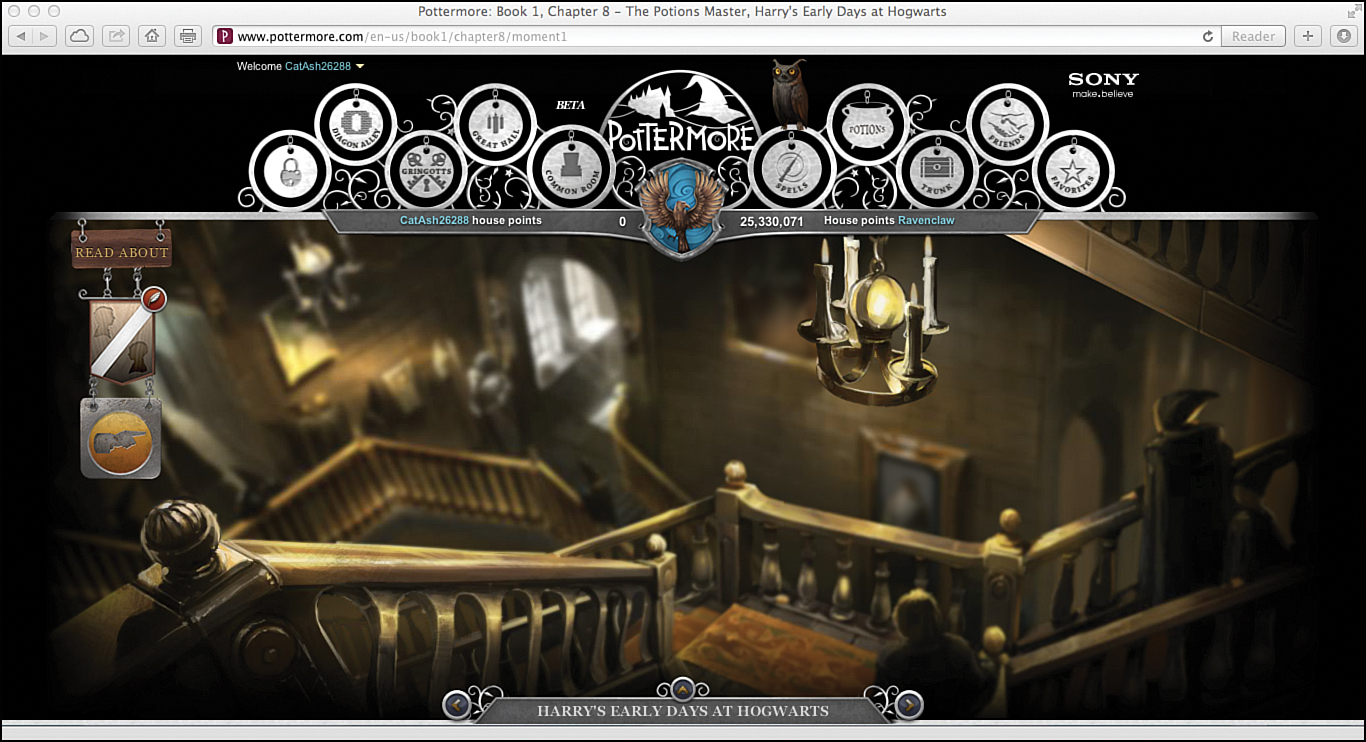
When you enter this scene, you find yourself at the top of a staircase.
When standing at the top of the stairs, zoom in once and be sure to pick up the galleon on the floor. It’s located between the carpet and the banister.
On the first step (after zooming in once), not too far from where you picked up the galleon, you encounter the Circe chocolate frog card. Be sure to pick it up and add it to your collection as well.
Zoom in again and look near the windowsill at the bottom of the staircase. Here, you find a book called Hogwarts: A History. Add it to your collection of items.
Next, wave your mouse over the knight’s armor to make it move. Be sure to study the painting on the right carefully. You might see the person within the picture move or leave the magical canvas altogether.
Scene 2: Harry’s First Potions Lesson
Learning how to mix potions is an important skill for every young wizard or witch. As you make your way through your adventure, you can practice your potion-mixing skills. For every potion you successfully create, you earn house points.
Whenever you feel like mixing a potion, from this point forward, you can simply click the Potions icon within the gateway (at the top of the screen).
Right now, it’s time to start brewing your very first potion. Your first lesson involves creating the Cure for Boils. Click the Practice Brewing Cure for Boils button to get started.
Whenever you set out to create and mix a potion, you need to look up the recipe within a potions book. On the left side of the book’s page, you find a list of required ingredients. Meanwhile, on the right page of the book, you see the step-by-step directions for mixing that potion.
Potion mixing takes practice. If you don’t follow the directions, or you mix in the wrong ingredients, who knows what could happen? Plus, you always have to work quickly.

Before you try mixing a potion, click the potions book to review the recipe.
Not only is it necessary to mix all the right ingredients in the correct order, you also need to complete the potion within the designated time period.
Like the spell book says, for this practice potion, your first step involves adding six snake fangs to the mortar. Then, crush them into tiny pieces. Pour four measures of crushed fangs into the cauldron. Next, heat up the mixture to 250, and hold it there for 10 seconds. Give your wand a wave, and then let the brew sit.
Use your mouse to move the various ingredients into the mortar or cauldron. The mortar and pestle, which is used for crushing ingredients, is on the left. The cauldron (a large pot) is to the right of it.
Just above the caldron is the hourglass. When it runs out, so does the time you have for mixing the potion, so work quickly.
You learn more about mixing potions later in Pottermore Secrets and Mysteries Revealed.
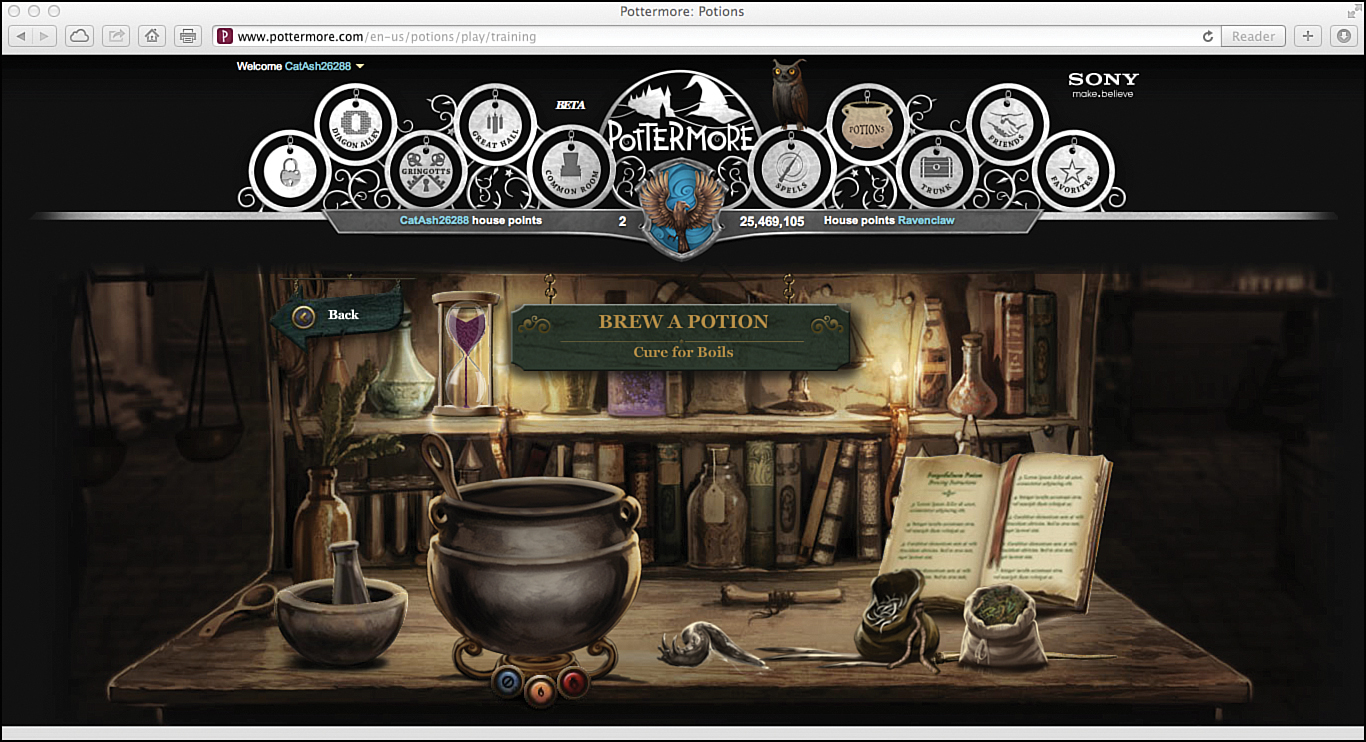
Below the cauldron are its heat controls. On the right, you see the potions book that contains your recipe. Your ingredients are sitting on the table, waiting to be mixed.
Scene 3: Hagrid’s Wooden House
It’s time to visit Hagrid at his wooden house. It’s located outside of the Hogwarts Castle, along the edge of the Forbidden Forest. By the way, Hogwarts students are not allowed to visit this area outside the castle without permission. Are you going to follow the rules, or do whatever is necessary to help out your good friend?
Hmm. Decision made! Before going inside, see what you can find outside of Hagrid’s house.
You stumble upon the Paracelsus chocolate frog card to the immediate right of the barrel, near Hagrid’s front stoop. It’s on the ground.
To the immediate left of the barrel, also on the ground, is the wolfsbane. Add it to your collection.
Next, on the window ledge to the right, wave your mouse around until you find the dried billywig stings. Click the Collect button to grab it.
On the front of the hut (to the extreme left, next to the window), you also discover dried nettles, which you should collect as well.
Zoom in toward the front door of the house, and then wave your mouse around. You discover both a Collect button and a Closer Look button. Click the Closer Look button to reveal a newspaper article about the break-in at Gringotts. What was being stored within the vault that was broken into? This is a mystery you need to solve a bit later.
Next, click the Collect icon to unlock the homemade rock cake and add it to your collection.
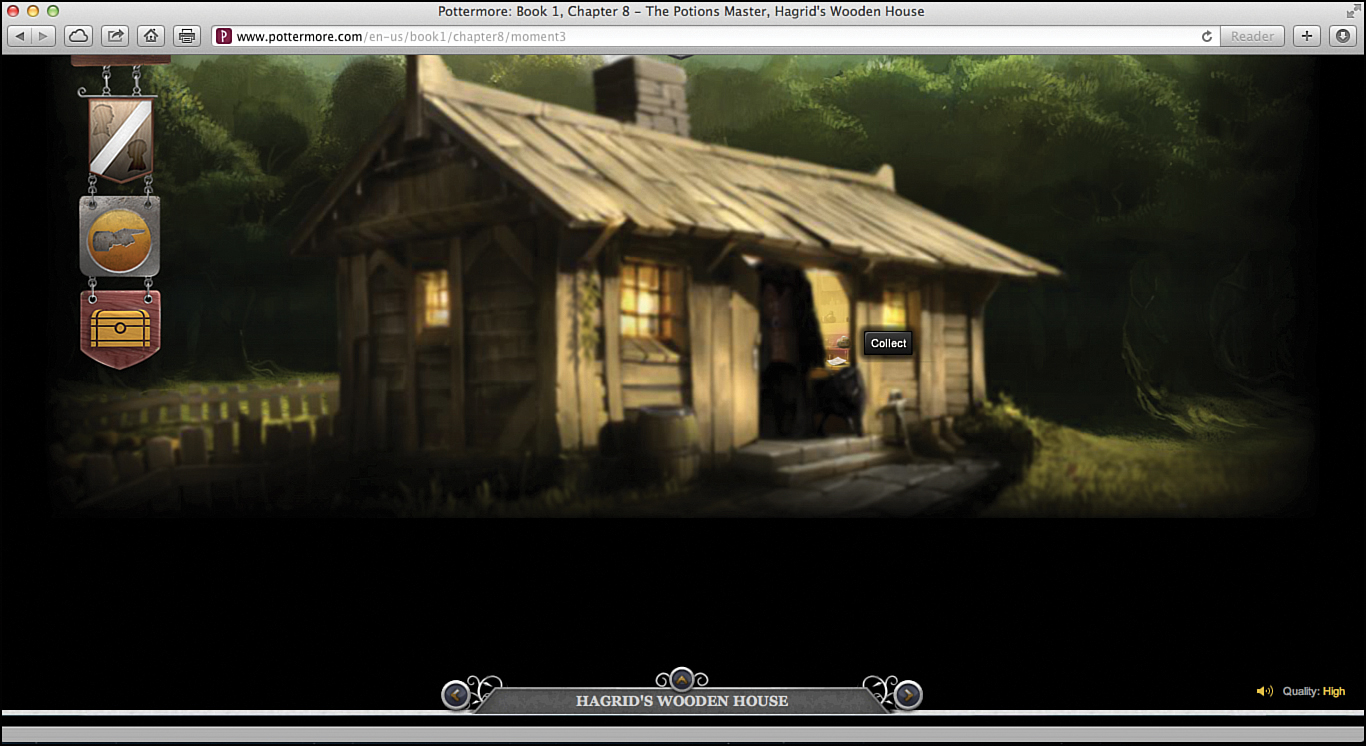
Zoom in to get a closer look at what’s located near the front door to Hagrid’s house.
Now that you’ve completed Chapter 8, it’s a great time to check out the Great Hall and see how your house is doing compared to the others. To do this, click the Great Hall icon within the gateway at the top of the screen. Then, to return to the Chapter 8 summary page, click the right-arrow icon that’s located next to “The Potion Master” banner (near the bottom center of the screen).
Chapter 9: The Midnight Duel
When Harry Potter first got to Hogwarts, he made some really great friends, including Ron. However, there were some classmates, like Draco Malfoy, that he just didn’t get along with.
From the Chapter 9 introduction page, click the Explore Chapter 9 button so that you can continue on in your adventure.
Scene 1: Flying Lesson
It’s time for Harry to learn how to fly on a broomstick. This is an important skill for all Quidditch players to have, not to mention a quick way for all witches and wizards to travel around.
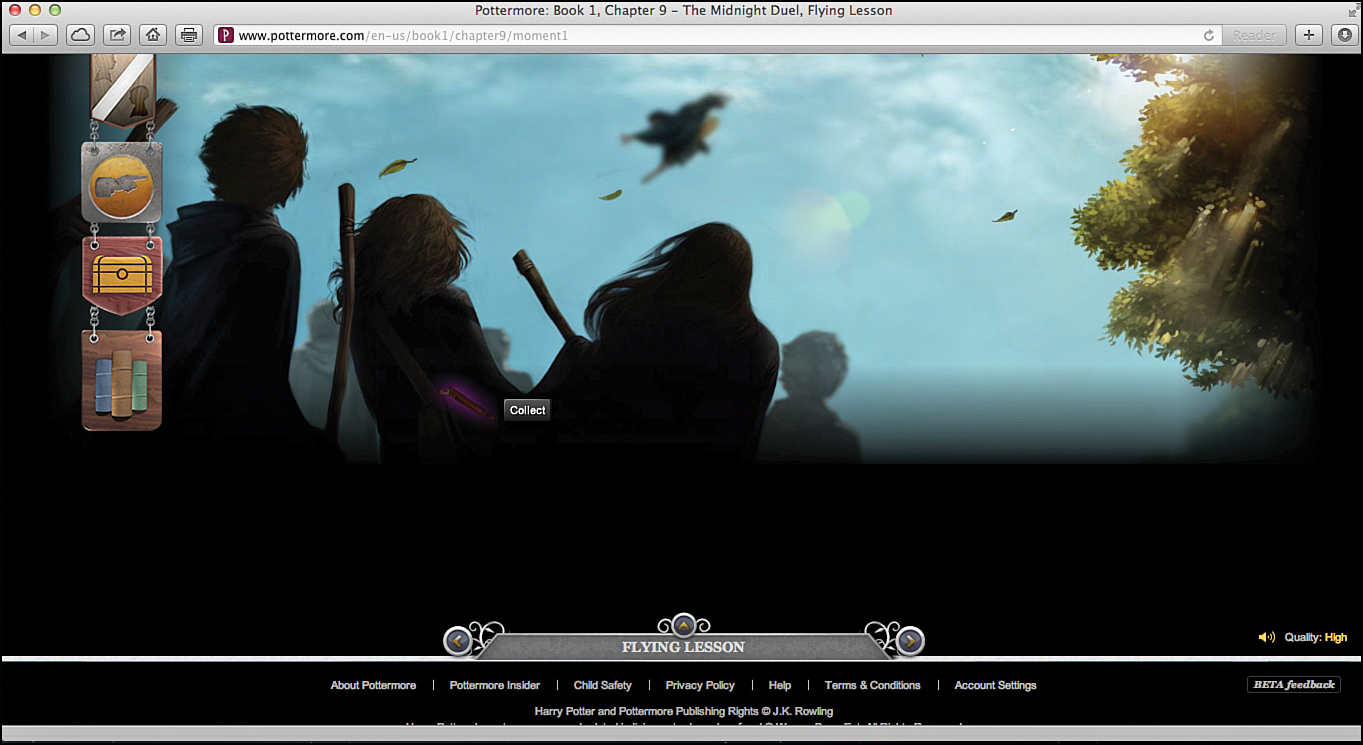
It’s time to attend a Quidditch game.
Start by waving your mouse over Hermione’s book bag. (She’s the student in the middle.) You discover a hidden book, called Quidditch Through the Ages.
Now, zoom in two times to get a better look at Harry. He’s riding his broomstick (in the sky). Click the object in front of him. You discover a remembrall. Grab it! If you wave your mouse over the Objects icon on the left side of the screen (under the Read About sign), a listing for the remembrall is now featured.
You’re ready to move on to Scene 2 by clicking the right-arrow icon to the right of the “Flying Lesson” banner near the bottom center of the screen.
Scene 2: The Trophy Room
The Hogwarts Castle is filled with large rooms that are full of old and interesting, often magical objects. The Trophy Room is no exception.
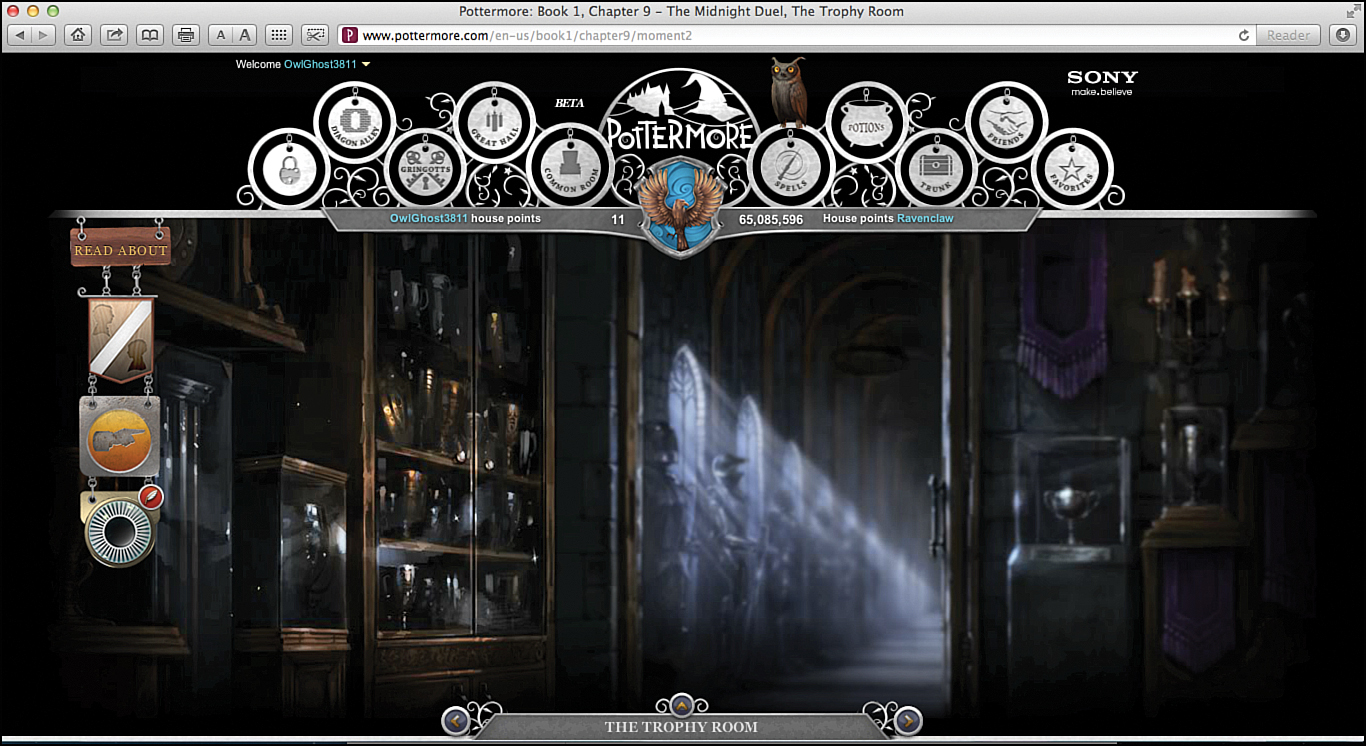
You definitely want to spend a few minutes exploring this room to find some useful items.
Look carefully on the trophy shelf to the immediate left of the doorway. Hidden on the third shelf from the bottom is the Salazar Slytherin chocolate frog card.
Zoom in once to view the doorway that leads to a hallway. Wave your mouse over the second suit of armor’s head. The helmet opens, and inside is another shiny galleon for you to collect.
Zoom in a second time after grabbing the galleon. On the floor is an item. Upon closer inspection, it appears to be a jar of eels’ eyes. Click the jar to collect it. The eels’ eyes come in handy when mixing potions, so add them to your trunk.
After grabbing the jar of eels’ eyes, look down near the feet of the first body of armor that’s closest to you in the hallway. Lurking in the shadows is Mrs. Norris (a cat). Wave your mouse over the creature and click the Read About button.
You’ll discover and unlock familiars. These are animal-shaped spirits that serve witches in various ways. You can now read all about them by clicking the New from J.K. Rowling button. Plus, the entry for Familiars are included when you wave your mouse over the Creatures icon on the left side of the screen.
Scene 3: The Forbidden Corridor
Some places within Hogwarts Castle are very dangerous, and students are simply not allowed to enter these. As we all know, young Harry is very brave, as well as curious, so when he needs to accomplish something, he doesn’t always follow the rules.
To continue exploring Hogwarts, it’s now necessary to cast a spell to open a locked door. In this case, the spell you need to conjure up is called ALOHOMORA. Like potion mixing, spell casting is an essential skill that every Hogwarts student must learn and continuously practice.
By clicking the Spells icon within the gateway at the top of the screen, you can practice spell casting at anytime.
It’s time to try casting your first spell. To do this, press the first letter of the spell using your mouse or the keyboard. You then notice a circle around each letter that starts to get brighter. When it’s at its brightest, press or click the letter again. Watch as the magic flame proceeds to the next letter, and press it at the proper moment. When the circle is at its brightest point, click again. Timing is absolutely essential for proper spell casting.
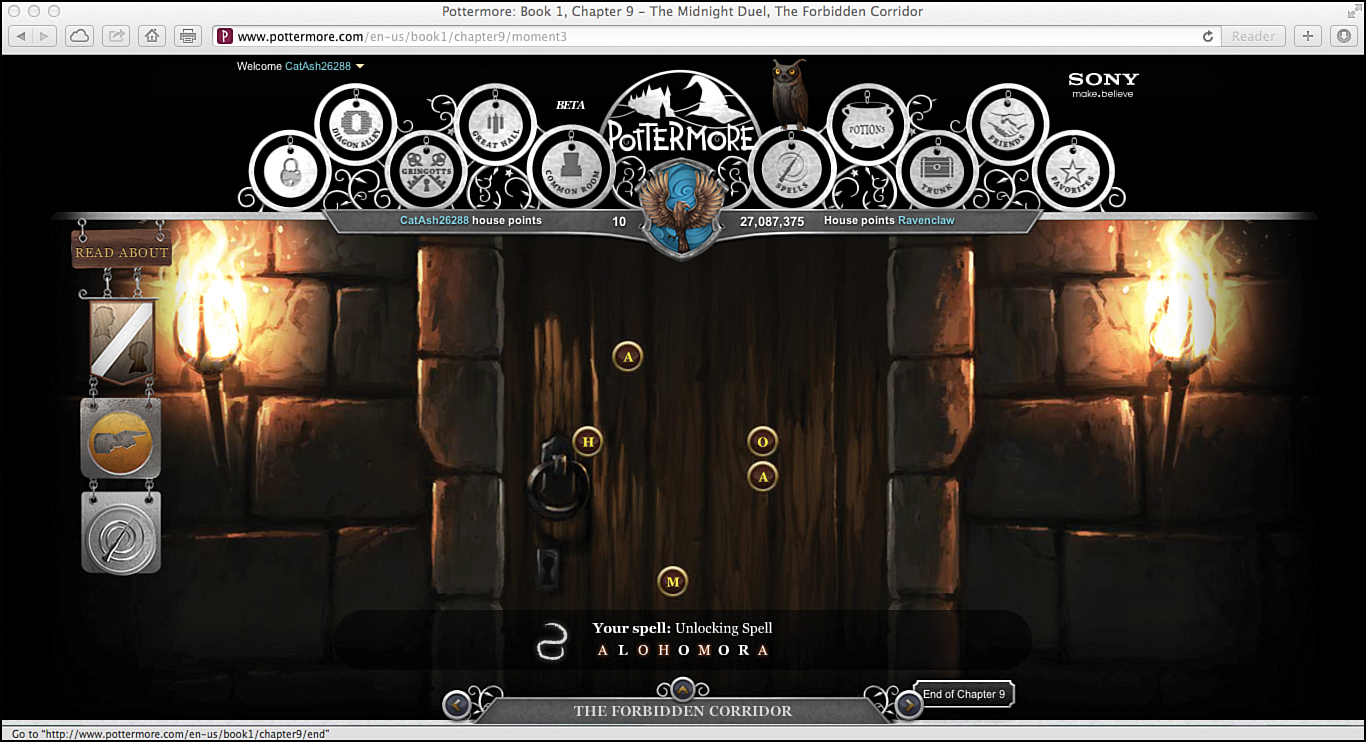
The Unlocking spell includes the letters A-L-O-H-O-M-O-R-A, but not all the letters are used. Notice the letters that are highlighted near the bottom of the screen, where it says “Your Spell.”
To cast this particular spell, click the A that’s above the lock to get started. When the circle around it is at its brightest, the press the A key again.
Now, follow the moving flame to the O, and when the flame touches it, press the O key. Press it again when the circle reaches its brightest point.
Then, follow the moving flame to the H. Repeat the previous steps again for the H, M, and the second A.
If you get the timing right, the door magically unlocks and opens. This means you’ve mastered the ALOHOMORA spell.
However, if you didn’t get the timing just right, or you pressed the wrong key at the wrong time, the spell doesn’t work properly, and you need to try again.
After unlocking and opening the door, click the entranceway to walk inside. You’re about to discover why this room was locked.
Can you hear a strange sound coming from ahead of you in the darkness? Zoom in twice. Yikes! Harry has discovered where the item from vault 713 that’s missing from Gringotts is now being stored. You read about this theft earlier, in the newspaper article you found outside of Hagrid’s house. This item is currently being very well protected by a monstrously large three-headed dog.
Click the right arrow next to “The Forbidden Corridor” banner to proceed to the Chapter 9 summary page. Then, click the right-arrow icon again to view the Chapter 10 introduction page. Click the Explore Chapter 10 button to continue.
Chapter 10: Halloween
Life at Hogwarts goes on for Harry. Each day is filled with new lessons and new adventures. But holidays, especially Halloween, are always a special time for Hogwarts students.
Scene 1: Harry’s Special Delivery
Someone has sent Harry a special gift: a new broomstick. Right now, it’s on his bed within his dormitory.
Start by zooming in twice so that you can get a peak inside Harry’s dorm room. Sitting next to the brand new Nimbus Two Thousand broomstick is a letter from Professor McGonagall. Click it to take a closer look.
As you discover, Harry is instructed to be at the Quidditch field at 7 p.m. for a special training session.
Zoom all the way into the dorm room, and then wave your mouse over the lamp on the dresser to turn it on and off. Next, wave the mouse over the dresser drawers to make them open and close. Inside the bottom drawer, you discover a galleon. It pops out and lands on the floor. Pick it up.
Scene 2: Charm Class
Pay attention! Professor Flitwick is about to teach the class how to make objects levitate and fly around.
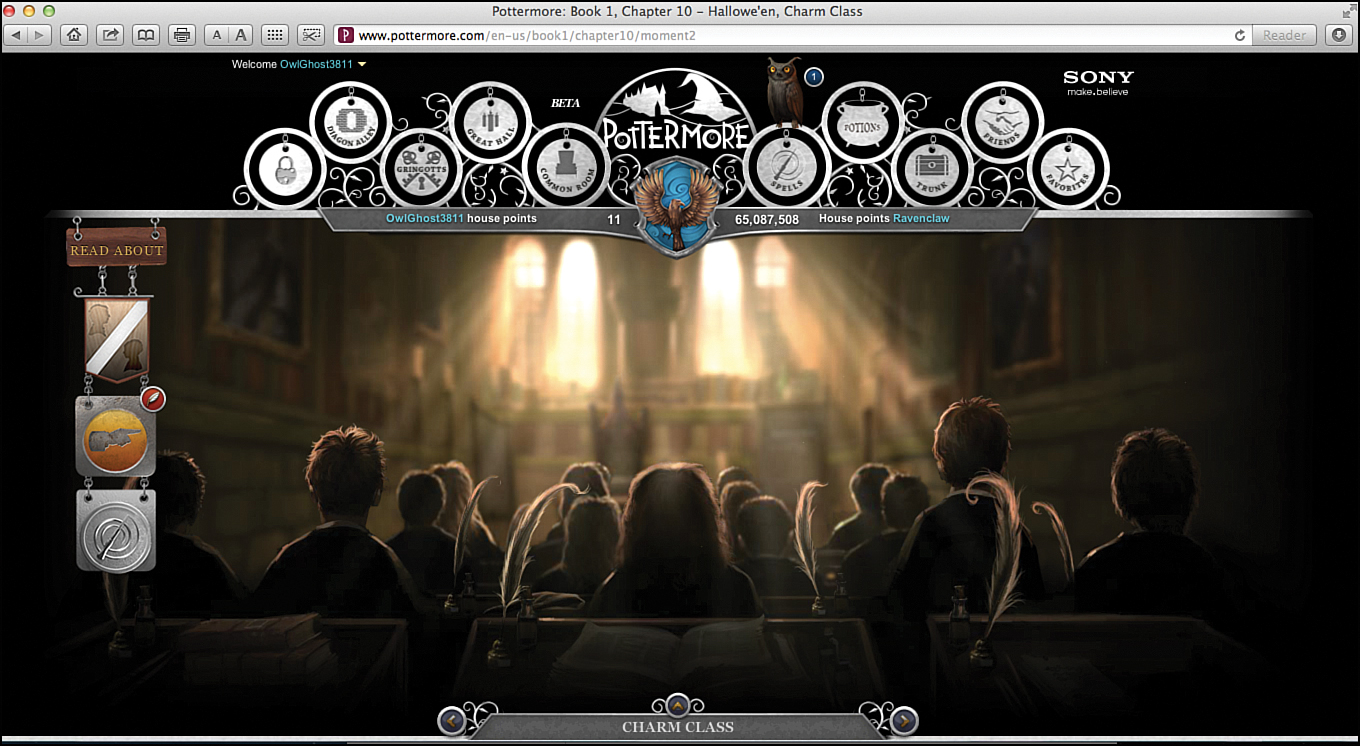
There’s a lot more to do during this class than just listen to the professor speak.
Wave your mouse around to make a quill float into the air. Ugh. The quill quickly bursts into flames. Looks like you need more practice.
From the back of the classroom where you’re sitting, zoom in just once. Look on the right side of the screen. Sitting on another student’s desk is a galleon. Grab it.
The more galleons you collect, the more items you can buy later during visits to the shops along Diagon Alley.
Zoom in again and then click the chalkboard on the right side of the screen. Here, you unlock Hogwarts school subjects. Click the New from J.K. Rowling button to read more about it.
A listing for Hogwarts school subjects also appear on the left side of the screen, under the Places heading.
Scene 3: The Mountain Troll
The bathroom within Hogwarts seems to have sprung a leak. Is it faulty plumbing, or is there something more sinister behind this flood?
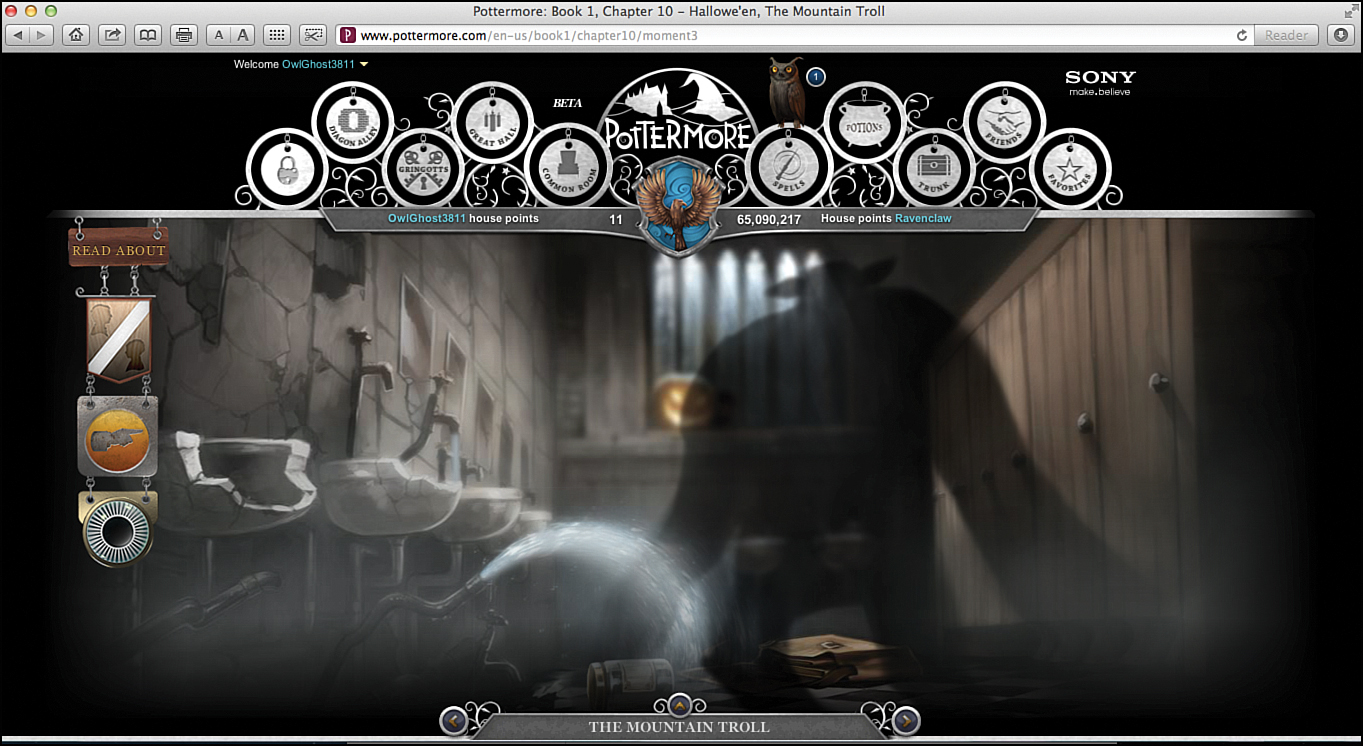
You’re about to discover that the cause of the plumbing problems is a 12-foot tall mountain troll who’s not too happy.
Lying on the floor in the bathroom is a jar. Take a closer look at what’s inside, then pick up the jar. Nice work. You just found some bat spleens. They are awesome ingredients to use in potions.
After zooming in once, look on the wall, just past the last sink. You see a slug climbing up the wall. Collect it. It’s a horned slug. These ugly little creatures are also used in potions as a cure for boils. Collect it.
Now zoom in again (as far as you can). This time, look around near the jack-o-lantern. Sitting on the ledge to the right of the jack-o-lantern is the Hengist of Woodcroft chocolate frog card. Be sure to collect it. It’s hidden by the shadow cast by the troll, so look carefully. There are now only five more chocolate frog cards to find and collect, so keep looking.
Chapter 11: Quidditch
As fall and winter roll around, the temperature outside drops. Harry Potter and the other students at Hogwarts continue their studies. Just like in any school, being a student at Hogwarts requires a lot of hard work, including hour after hour of studying, and participating in countless classes and lectures.
However, Hogwarts students are allowed to have some fun, too. For example, the most popular sport at the school is Quidditch, and young Harry has discovered that he’s an awesome player.
Scene 1: Charms Homework
The Gryffindor common room is where Harry, Ron, Hermione, and the rest of the Gryffindor gang often gather to do their homework and study. As you enter into the room, check out what’s on the table in front of you.
Click the open book near the center of the table. You discover the original forty. A listing for the original forty unlocks and appears under the Characters heading on the left side of the screen.
From this newly unlocked information, you get a true behind-the-scenes look at J.K. Rowling’s original thoughts and notes from when she was creating the Harry Potter series. After you read this information, when you wave your mouse over the book, the pages magically turn.
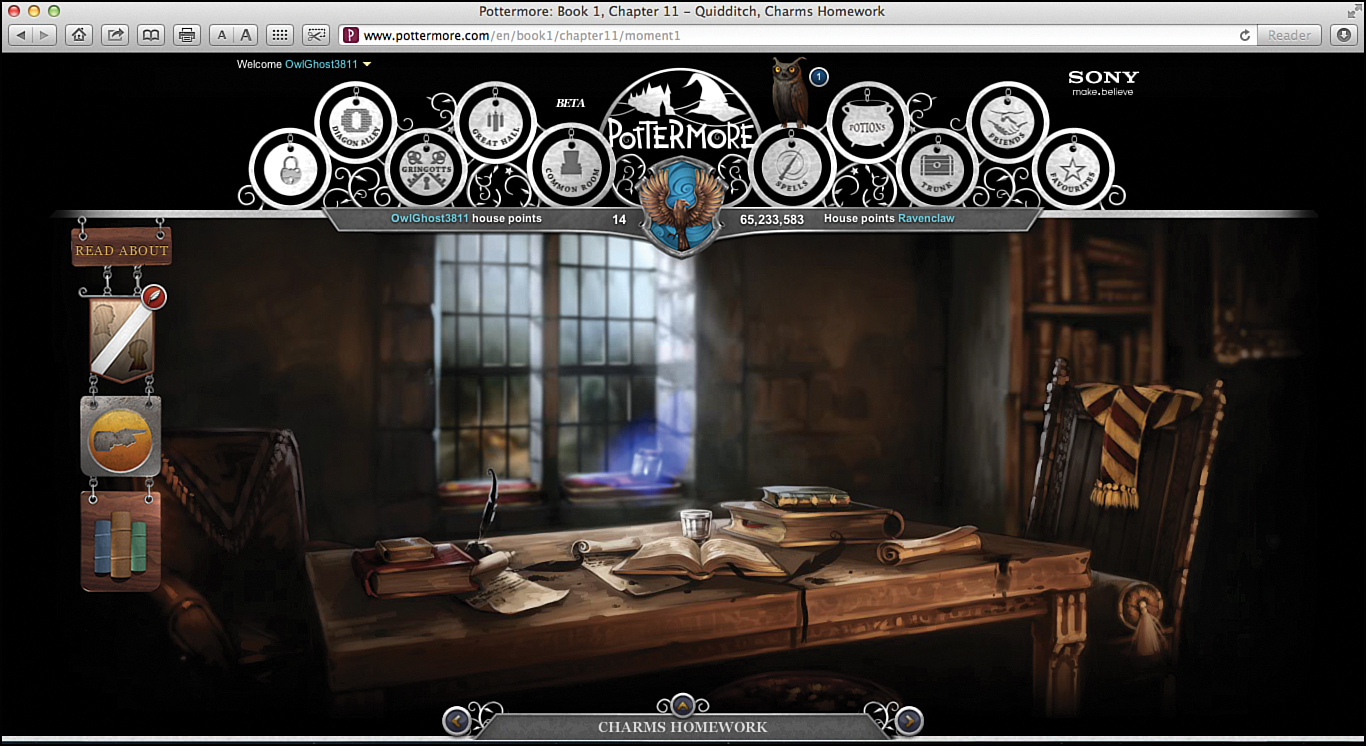
Here’s how the Gryffindor common room looks when you first enter.
You have another chance to increase your bank account in this scene. Look to the left of the glowing blue jar on the window sill. You discover a galleon that you can collect.
Zoom in on the glowing jar on the windowsill. It contains Hermione’s blue fire. Wave your mouse over the jar and the glow turns on or off. While you’re looking at the jar, if you zoom in a second time, you get a good view of Hagrid’s house through the window.
Scene 2: The Golden Snitch
Young witches and wizards at Hogwarts love to play Quidditch. In fact, the competition between the four houses gets rather intense when it comes to winning the Quidditch Cup.
In this game, the objective is to catch the golden snitch, but it’s a very difficult task that’s left to only the most highly skilled players.
Zoom in twice and try to catch the golden snitch. First, get the snitch in focus. Then, try to click it. Be quick!
To catch the golden snitch, study its flight pattern. It follows a somewhat-predictable triangular path. Instead of trying to chase it with your mouse, wait for it to stop at one location, and then click it. After you’ve grabbed the golden snitch, click the Collect button and add it to your trunk.
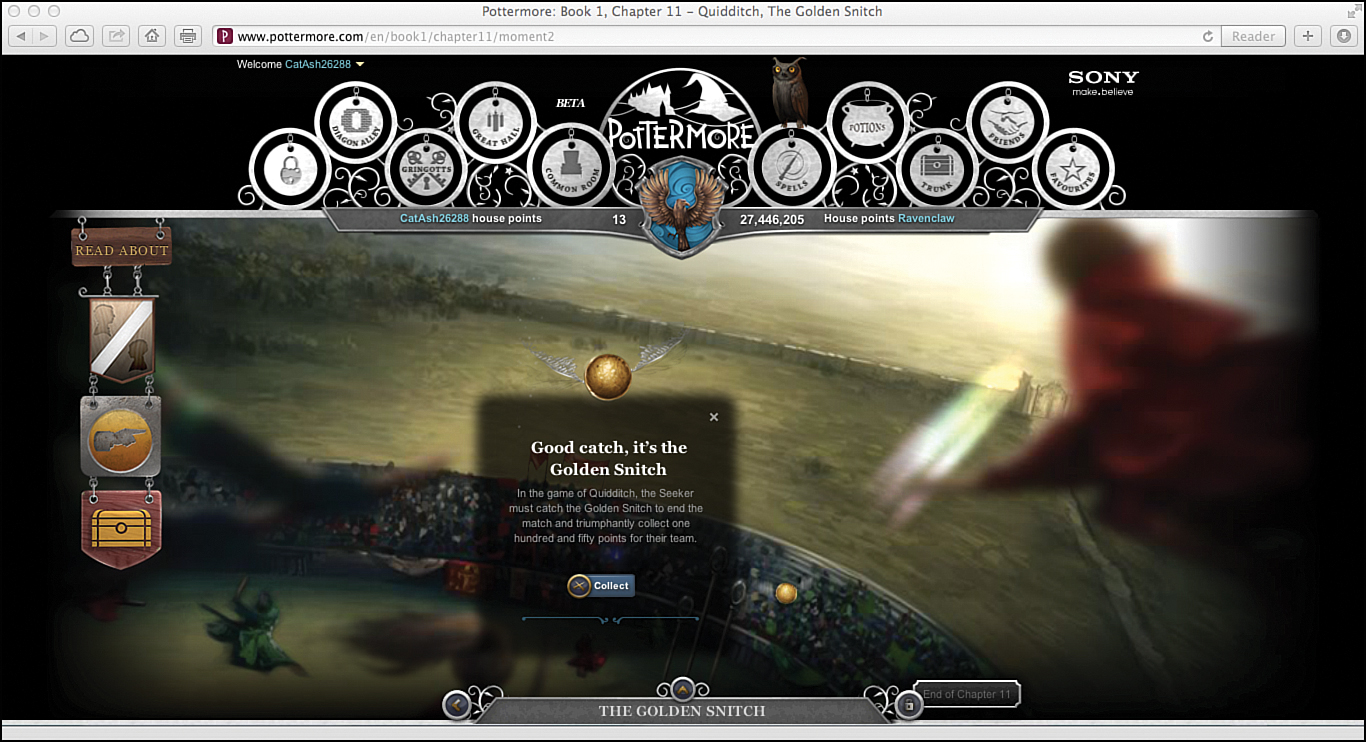
The main objective in this scene is to help Harry catch the snitch.
Can you spot Hermione in the crowd below? She’s the one with the blue flame. After grabbing the snitch (while still zoomed in twice), look for the glowing blue jar she’s holding. When you wave the mouse over it, the glow intensifies.
Chapter 12: The Mirror of Erised
The Christmas season has arrived at Hogwarts and everyone is in a festive mood. It might be snowing outside, but it’s toasty warm inside the library, where the next scene takes place.
Scene 1: The Library
Looking from left to right within the library, you see four bookshelves that are stacked from floor to ceiling with all sorts of fascinating books about magic, potions, and other enchanted topics.
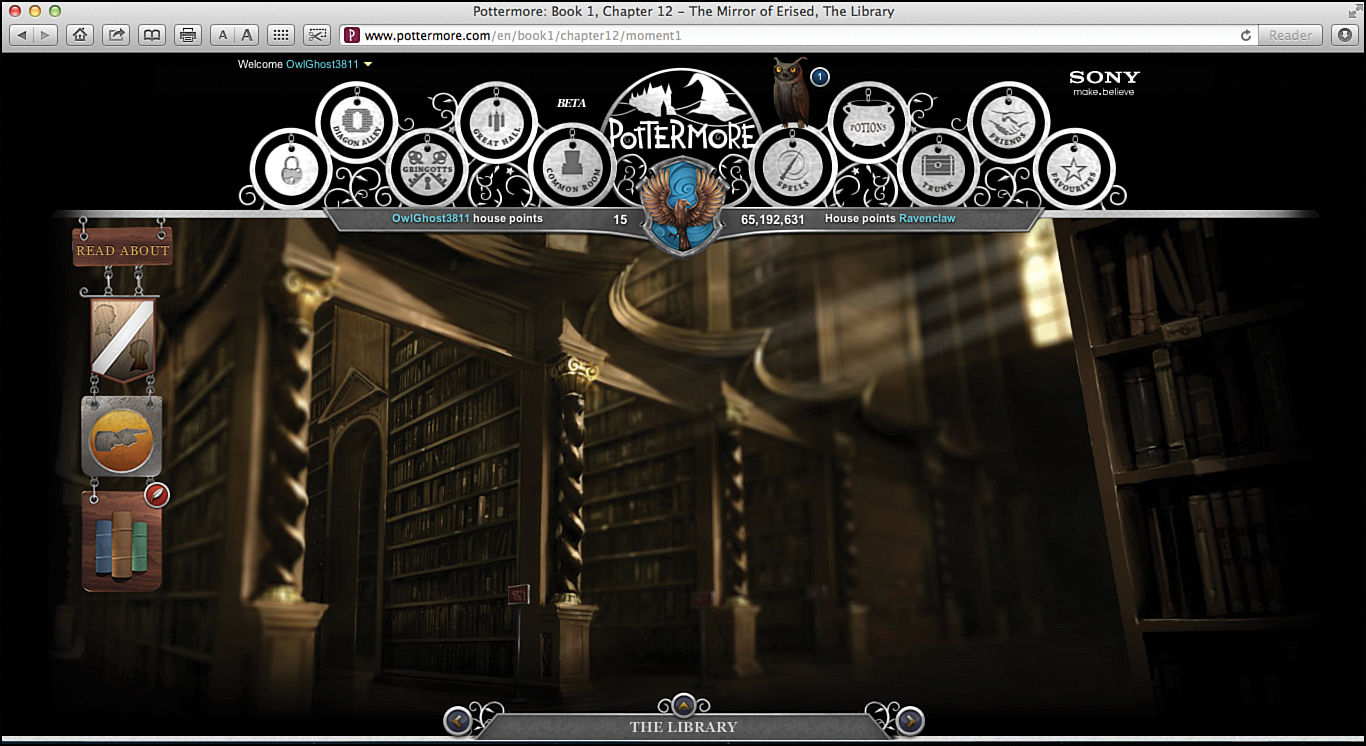
You discover some important books here in the library.
Without zooming in, wave the mouse over the second bookshelf from the left. About halfway up on the shelf, you discover a book called A Study of Recent Developments in Wizardry. Collect it.
Also while exploring the library, you want to locate and collect another book, called Important Modern Magical Discoveries. It’s located in the same general area as A Study of Recent Developments in Wizardry.
Now, zoom in and take a look at the third shelf from the left. Look around here for a third book, called Notable Magical Names of Our Time. It’s another great volume to add to your collection.
Finally, be sure to locate the book Great Wizards of the Twentieth Century before leaving the library. It now looks like you have some reading to do with all the new books that you’ve discovered in the library.
From the point when you first enter the library, zoom in twice on the last bookshelf from the left. Look toward the bottom, you find the Merlin chocolate frog card. It’s hidden between some books.
Scene 2: Christmas at Hogwarts
One of the wonderful things about Pottermore is that you can share your adventure with other online friends. In the spirit of Christmas, you can send any of your online friends gifts. To do this, click the Friends icon within the gateway at the top of the screen.
As you partake in this holiday feast, navigate your way around the floating candles, scrumptious food, and the multitude of presents to see what you can discover and collect.
It’s in this chapter of Harry Potter and the Sorcerer’s Stone that Harry receives his invisibility cloak as a very special Christmas gift. He later uses this cloak to explore Hogwarts without being detected.
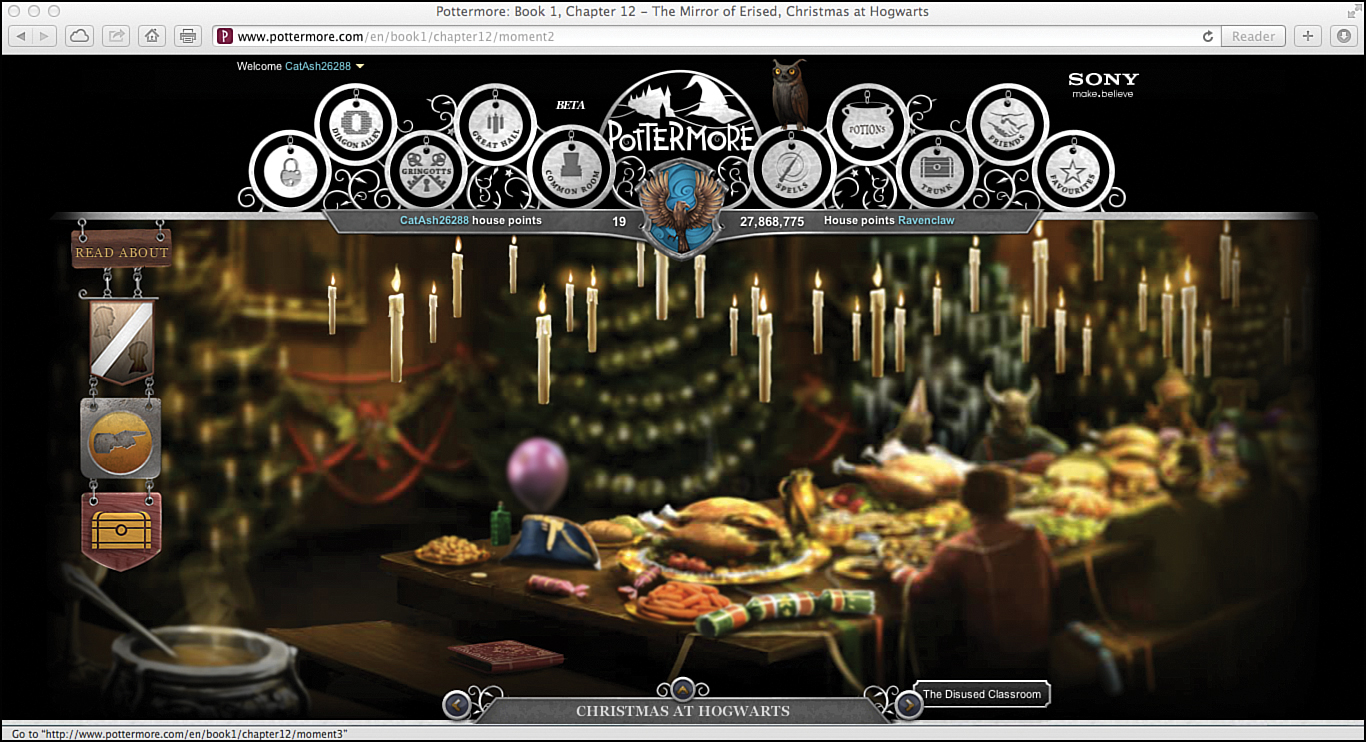
The holiday season is a time to celebrate.
On the bench right in front of you, click the book Curses and Counter Curses and add it to your collection. Then zoom in a bit, just above where you found the book and collect a galleon.
Zoom in once and wave your mouse over the pink colored party favors that are on the table in front of you. You see a few adorable white mice scampering around. Also, look for the green and white party favor that’s sitting on the corner of the table that’s closest to you. Click it to make it levitate and explode. Surprise! You’re given a brand new chess set that you can now collect.
Also, after zooming one once, be sure to click the green jar on the left side of the table. It contains infusion of wormwood. This is another powerful ingredient that can be used when mixing potions. A golden galleon is also now visible and can be collected.
From the point where you first entered the scene, zoom in twice (as close as you can on the table). Wave your mouse over the balloon. Watch as it floats into the air and then pops. Then, to the right of where you found the balloon, in between the two trees, look between the floating candles to find and collect mistletoe berries.
Scene 3: The Disused Classroom
When Harry walks into this dark room, he figures it’s just an old classroom that’s no longer used for anything but storage. Can you see the chairs and desks piled up in the left corner?
Zoom in twice, and then click the Mirror of Erised. You can read some new information about this enchanted object as soon as the Read About button appears and you click it.
Notice that the entry for the Mirror of Erised is now unlocked and accessible from within the Objects box on the left side of the screen.
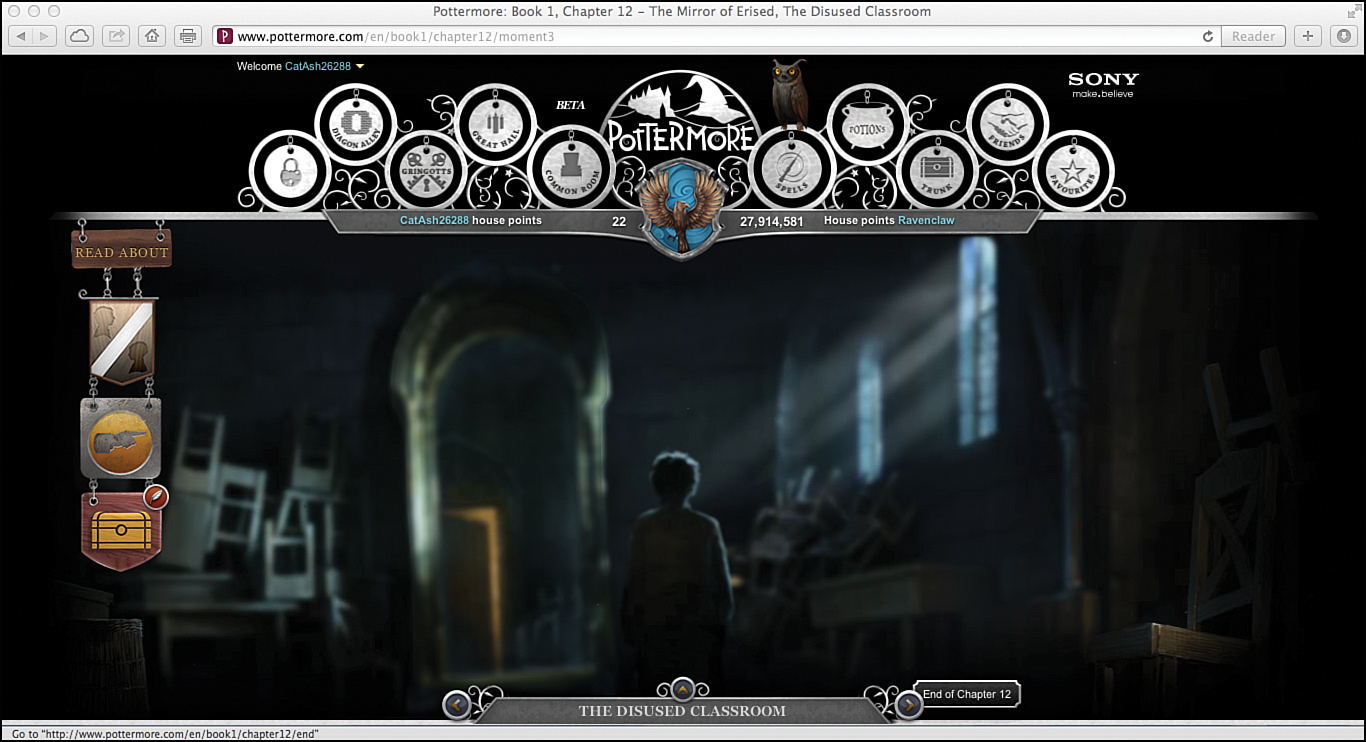
Directly in front of Harry is the old and very large Mirror of Erised.
What could the Mirror of Erised possibly be used for? The only clue is the inscription on it: Erised stra ehru oyt ube cafru oyt on wohsi.
While zoomed in on the mirror, search around to the immediate right of Harry. You find another galleon.
Chapter 13: Nicolas Flamel
What Harry saw in the Mirror of Erised confused him a bit. However, Professor Dumbledore convinced the young wizard not to return to the mirror—at least for a while. After the Christmas break, Harry becomes busier than ever with his studies and Quidditch practice.
After one particularly tiring practice, Harry goes back to the Gryffindor common room to meet up with Ron and Hermione.
Scene 1: Nicolas Flamel Is Finally Revealed
This lovely room is filled with interesting items. As you stay warm in front of the crackling fire, take a look around. See what you uncover.
Start by waving your mouse over the chessboard to move pieces around. When you wave the mouse over the candle next to the chessboard, it blows out, but with another wave, you can relight it.
Did you know that Nicholas Flamel was an alchemist and the maker of the Sorcerer’s Stone? This object is believed to hold amazing powers.
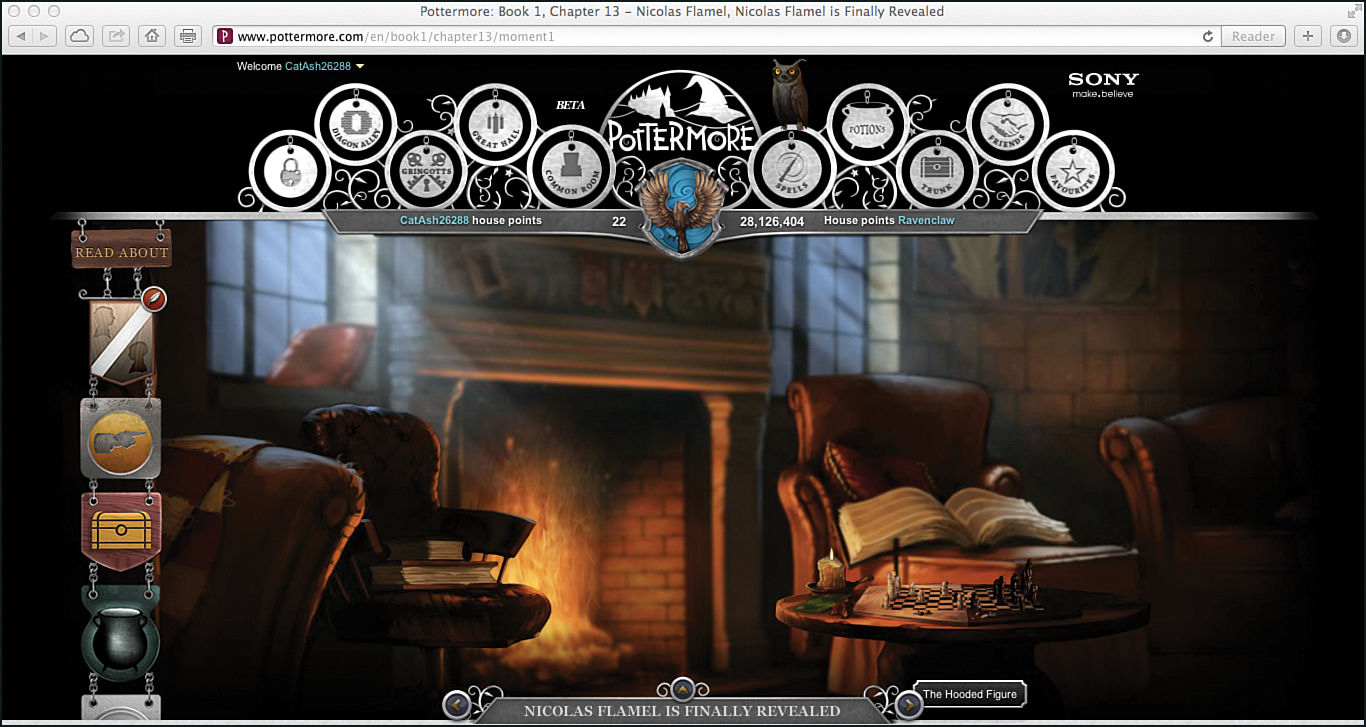
While in this room, you learn a bit more about Nicholas Flamel and perhaps about the infamous and much-needed Sorcerer’s Stone as well.
Now, zoom in and take a closer look at the open book that’s sitting on the chair to the right. Read a bit about the study of alchemy from the pop-up window that appears on the screen. Next, click the right side of the book to unlock information about Nicolas Flamel.
When you unlock the information about Nicolas Flamel, click the New from J.K. Rowling button. Plus, details about him appear under the Characters heading on the left side of the screen. According to J.K. Rowling, Nicolas Flamel was a real-life person. He was a businessman and philanthropist from Paris.
If you look closely on the table near the chess set, there appears to be a chocolate frog card sitting on the table. However, this particular card is not collectible, so just leave it where it is.
Scene 2: The Hooded Figure
This scene takes place outside, near the edge of the Forbidden Forest. Once again, some exploration is needed to discover what’s hidden here.
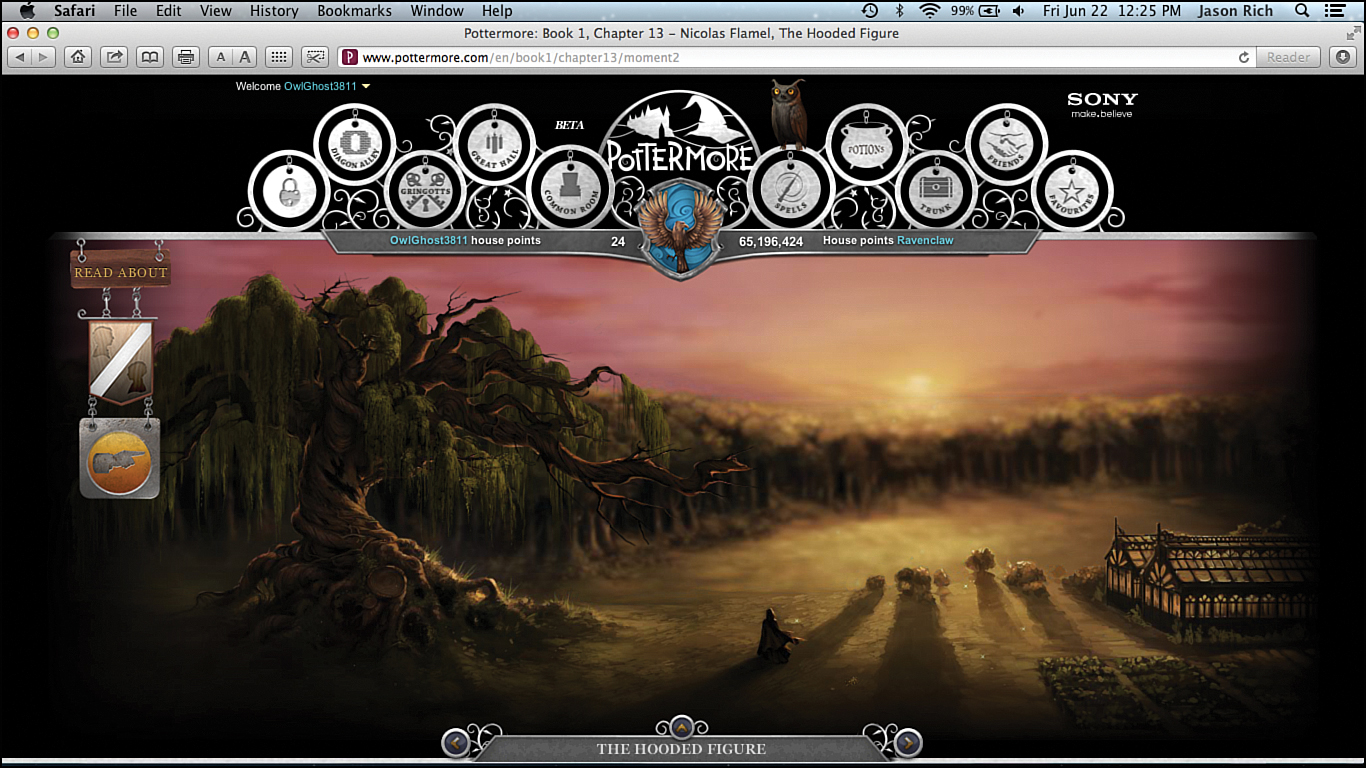
There’s probably a good reason why Hogwarts students aren’t allowed to explore the Forbidden Forest. But, Harry is brave and on a mission, so nothing is going to stop him.
Start by waving your mouse over the large tree on the left to make its branches move. Then, on the ground, almost directly in front of where you’re standing (in front of some bushes that are to the left of the greenhouse), you find another galleon. Collect it.
Also on the ground in front of you, even closer to you than the galleon’s location, you discover the Helga Hufflepuff chocolate frog card. It’s very difficult to spot, so slowly move your mouse around until you stumble upon it. Grab the card for your collection.
Chapter 14: Norbert the Norwegian Ridgeback
Here in Chapter 14, there are three scenes to explore, starting with “Hagrid’s Secret,” which takes place in the Hogwarts library.
Remember, you can leave Pottermore.com at anytime and return to your adventure. Pick up exactly where you left off by entering through the magical gateway. Just click the book and chapter number you want to return to. In this case, click Chapter 14 of Harry Potter and the Sorcerer’s Stone.
Scene 1: Hagrid’s Secret
This scene takes place in a different section of the library. Harry and his friends again find themselves surrounded by old books. These volumes contain knowledge obtained by thousands of witches and wizards who came before them.
Once again, the search is on for a few important books. Along with Harry and his friends, someone else is lurking in the shadows and secretly searching for books. By the size of the shadow being cast, it can only be Hagrid.
Harry wants to help out his friend Hagrid, but to do this, he needs to learn more about whatever it is that Hagrid is researching.
Pass your mouse over the light on the desk to turn it on and brighten up the room.
Be sure to zoom in once on the bookshelf that’s to the left of the doorway. On the second shelf from the bottom, there’s a book to collect. It’s From Egg to Inferno, A Dragon Keeper’s Guide. This could be useful to Hagrid who just so happens to be raising a dragon.
You discover another book that needs to be collected to the left of Ron, on the second shelf from the bottom. This one is called Dragon Species of Great Britain and Ireland.
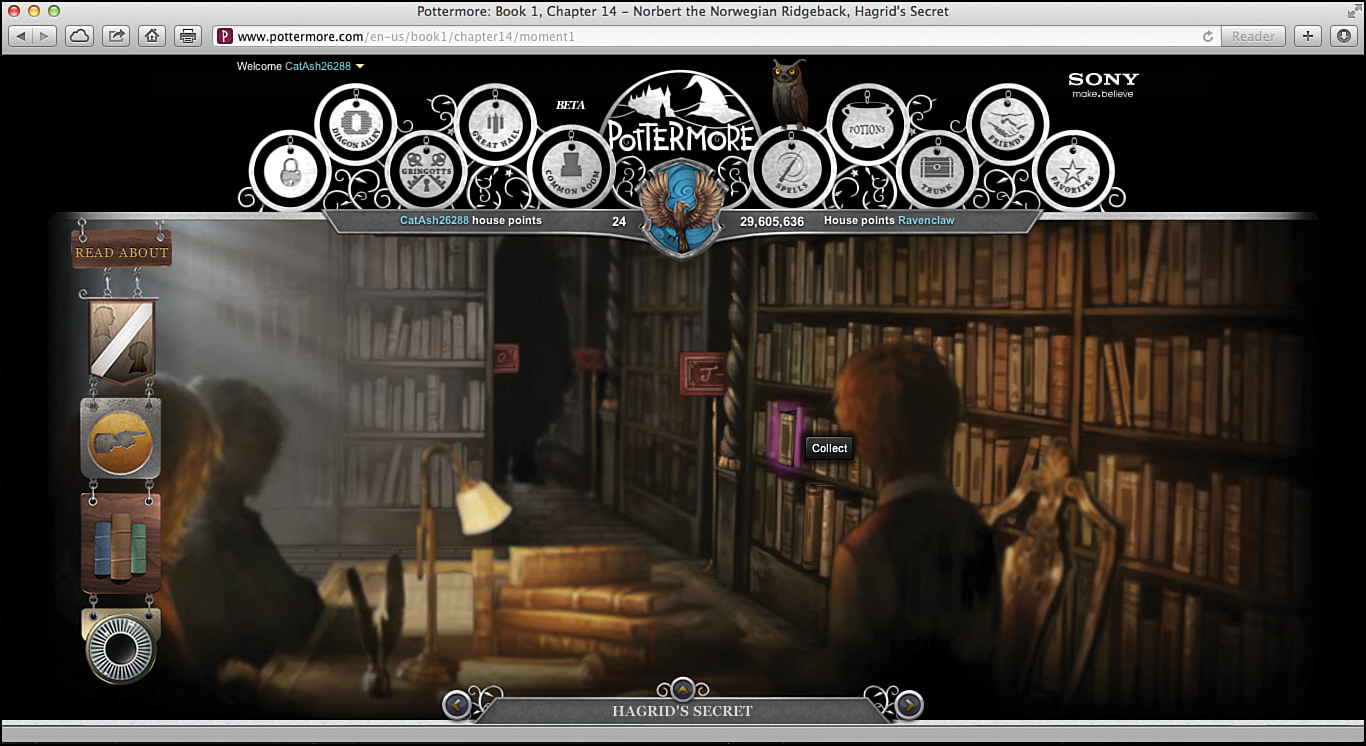
To find some of the books in the library, you have to zoom in.
Directly below that book, there’s another one called Modern Magical History that also needs to be picked up.
Scene 2: The Egg in the Fire
Back at Hagrid’s house, something is warming up in the fireplace. No, this isn’t Hagrid’s next meal, and it doesn’t look like an ordinary egg.
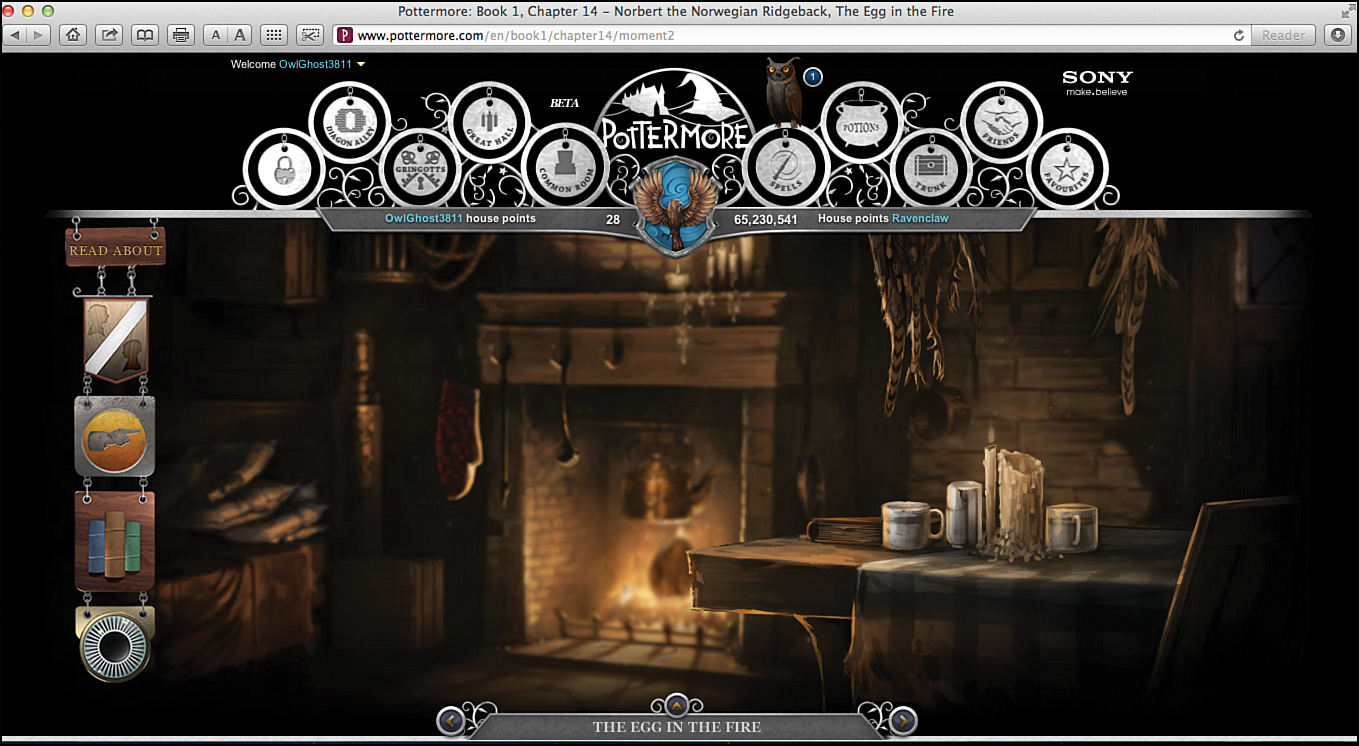
Harry is determined to figure out what Hagrid is hiding. You can discover some clues within his house.
Check out the table on the right. Click the book. It’s called Dragon Breeding for Pleasure and Profit. Add it to your collection. You can also wave your mouse over nearby objects to make them move.
Zoom in twice. When you pass your mouse over the kettle, steam comes out of its spout. Or, when you wave your mouse over the cooking utensils hanging by the fireplace, they move slightly, and you hear the screeching sound of metal.
Now, click the giant egg surrounded by flames. Just as you suspected, it’s a dragon egg. Collect it.
Scene 3: A Plan for Norbert the Baby Dragon
Having a pet is a wonderful experience. Muggles love dogs, cats, and hamsters. Wizards also like cats, but sometimes prefer owls or toads to be their magical companions.
Hagrid, however, has a pet dragon. He’s named it Norbert. The problem with dragons is that they’re cute when they’re babies, but they grow up to be very large... and they breathe fire!
Harry and Hermione agree to help give Norbert away when Hagrid can no longer care for the fast-growing creature in secret. But, Harry and Hermione can’t get caught wondering around the halls of Hogwarts at night. Lucky for Harry, he has his invisibility cloak to keep them hidden.
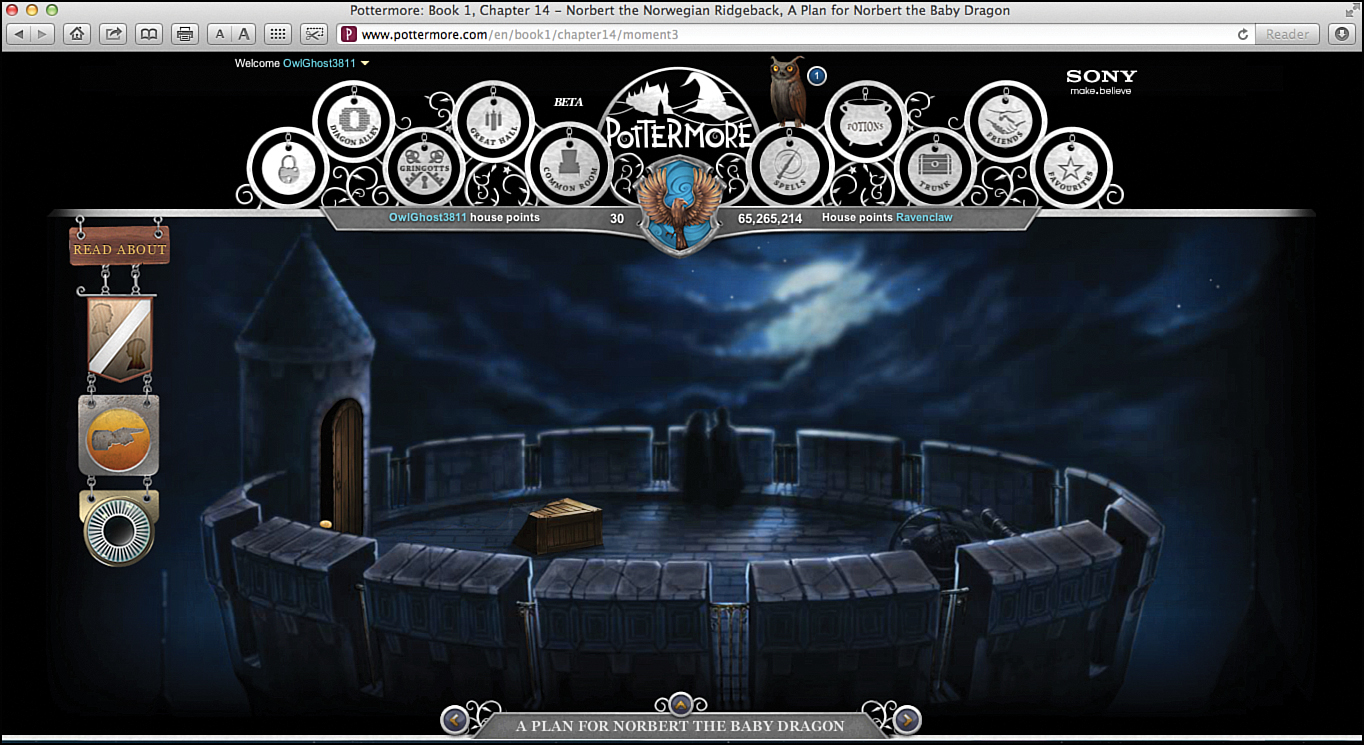
Harry and Hermione come up with a plan about what to do with Norbert.
On the roof of this castle tower, wave your mouse over the wooden box in the center. Can you hear Norbert trying to escape?
Move your mouse slightly to the left. What’s that glimmering next to the carton? It’s Harry’s invisibility cloak.
Now, take a look to the left near the door. Pick up the galleon that’s on the floor. When you wave your mouse over the doorway, it opens and closes. As you can see, it’s late at night. In fact, it’s around midnight on a Saturday.
Zoom in twice and look up into the sky, to the right of Harry and Hermione. Can you see Charlie’s four friends flying in on broomsticks. They’re coming to pick up Norbert.
Harry and Hermione are so relieved to hand Norbert over to Charlie’s friends that they accidentally left the invisibility cloak outside on the roof of the castle tower. That means they could easily be spotted roaming around Hogwarts at night. Getting caught means detention!
Chapter 15: The Forbidden Forest
Harry and Hermione now have to face Professor McGonagall and explain what they were doing roaming around Hogwarts alone late at night. If they tell the truth about helping Hagrid give away his pet dragon, it will get them into even more trouble, because dragons are not allowed to be kept as pets at Hogwarts.
Scene 1: Harry Becomes an Outcast
Back in the library once again, there are a handful of items to collect and several things to discover.

Collect some books and make other books levitate while you’re visiting the library this time.
First, wave your mouse over the open book directly in front of you. This makes the pages magically turn.
To the right of the book, also on the desk, you discover a galleon. Pick it up. If you don’t see the galleon right away, wave your mouse over the desk lamp to turn it on. When the room is brighter, you easily spot the galleon.
It’s now time to test your magical powers for making objects levitate. Wave your mouse near the top of the bookshelves on the left. This causes books to fly off the shelf from each side of the library, spin around, and then switch places.
Zoom in once and see whether you can find any additional books that are worthy of collecting. You discover A Beginner’s Guide to Transfiguration on the second set of bookcases on the left. This is a difficult one to spot, so wave your mouse slowly around the area until the Read About button appears.
When you zoom in twice (as far as you can), you can also turn on the lamp on the desk in the back of the library.
Zoom in toward the stained glass window in the back of the library. Near the windowsill, you discover the book One Thousand Magical Herbs and Fungi. Click the New from J.K. Rowling button to read a short but informative excerpt from the book.
On the windowsill to the left, you find the Rowena Ravenclaw chocolate frog card. Add it to your collection.
While still zoomed in twice, look at the very top shelf on the left (near the ceiling) for a book called The Dark Forces: A Guide to Self-Protection. Again, when you click the New from J.K. Rowling button, you’re able to read a portion of this book.
Scene 2: Into the Forbidden Forest
It’s a dark night. The perfect time for Harry to experience another exciting adventure. He’s off to explore the Forbidden Forest.
To the immediate left when you enter the Forbidden Forest, click the mushroom that’s growing on the ground. It’s a leaping toadstool—another powerful ingredient that can be used in potions.
Wave your mouse over the birds perched in the trees to make them fly away. Then, near the base of the tree on the right, you can see spiders moving around. If you look closely, you also see the glowing eyes of other tiny creatures who are hiding within the tree.
Zoom in once and pick up the wolfsbane that’s also on the ground, a bit to the left of where you’re standing.
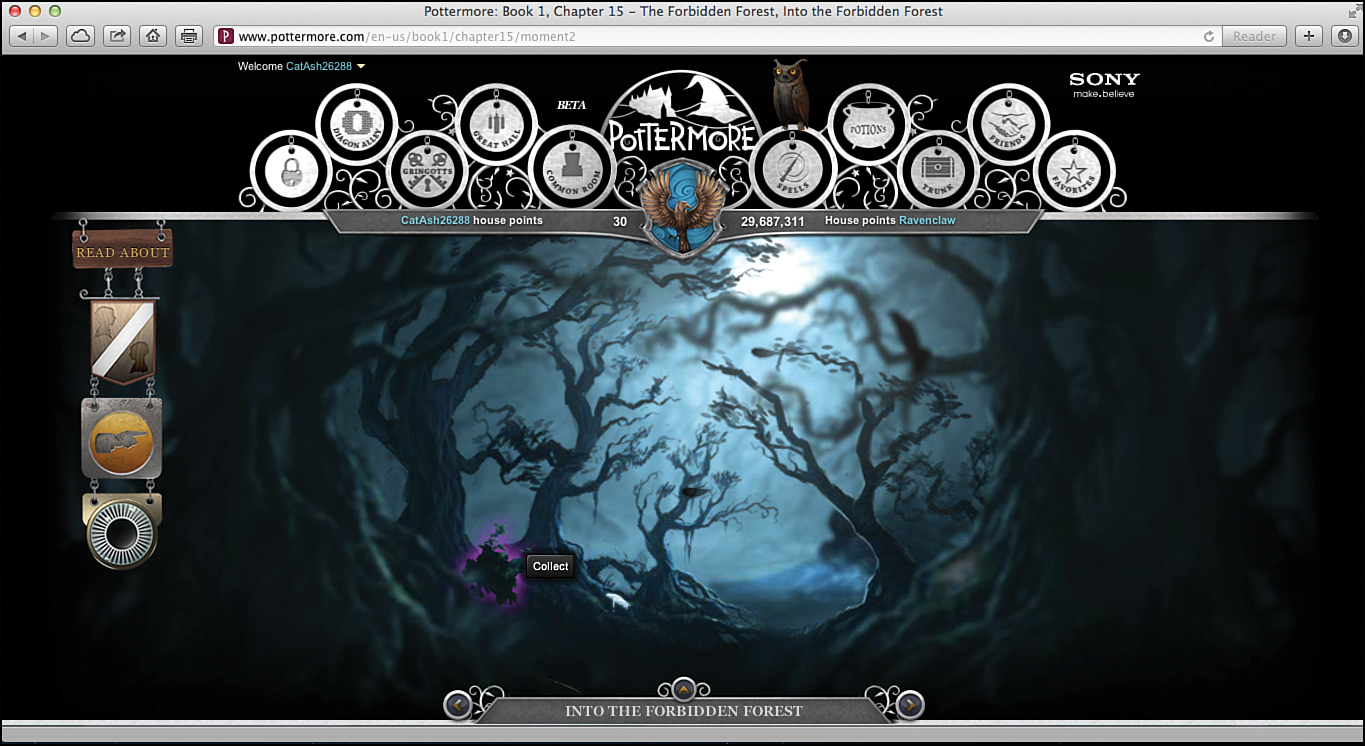
Something or someone evil is lurking within the Forbidden Forest. Shown here is the wolfsbane after zooming in once. Click the Collect button to grab it.
Now, while you’re still zoomed in once, move to the right, just a tad, and pick up the bright silver object lying on the ground. It’s unicorn blood. This is an incredible find!
Unicorn blood can be used to keep someone alive who is very close to death. However, it’s a very serious crime if you harm a unicorn.
Finding unicorn blood in the forest can mean just one thing: A unicorn has been injured or killed. Who would possibly do such a thing? Only one evil person comes to mind!
Zoom in as far as you can (twice) and look to the right. What you see is none other than Lord Voldemort. He’s leaning over the magical creature stealing its blood. This is some of the dark magic that You-Know-Who is using to stay alive.
Chapter 16: Through the Trapdoor
Lord Voldemort is making his evil plans to return. Only one young wizard, with the help of his loyal friends, has the power to stop him. Harry Potter might be young and inexperienced as a wizard, but he’s brave and has vast magical powers that not even he truly understands yet.
Scene 1: The Winged Keys
Harry finds himself in a room with a locked door. Winged keys are flying around everywhere. However, only one key opens the door he must pass through. Your objective is to find the correct key.
The easiest way to find the winged key you’re looking for is to wave your mouse around slowly until the Collect button appears.
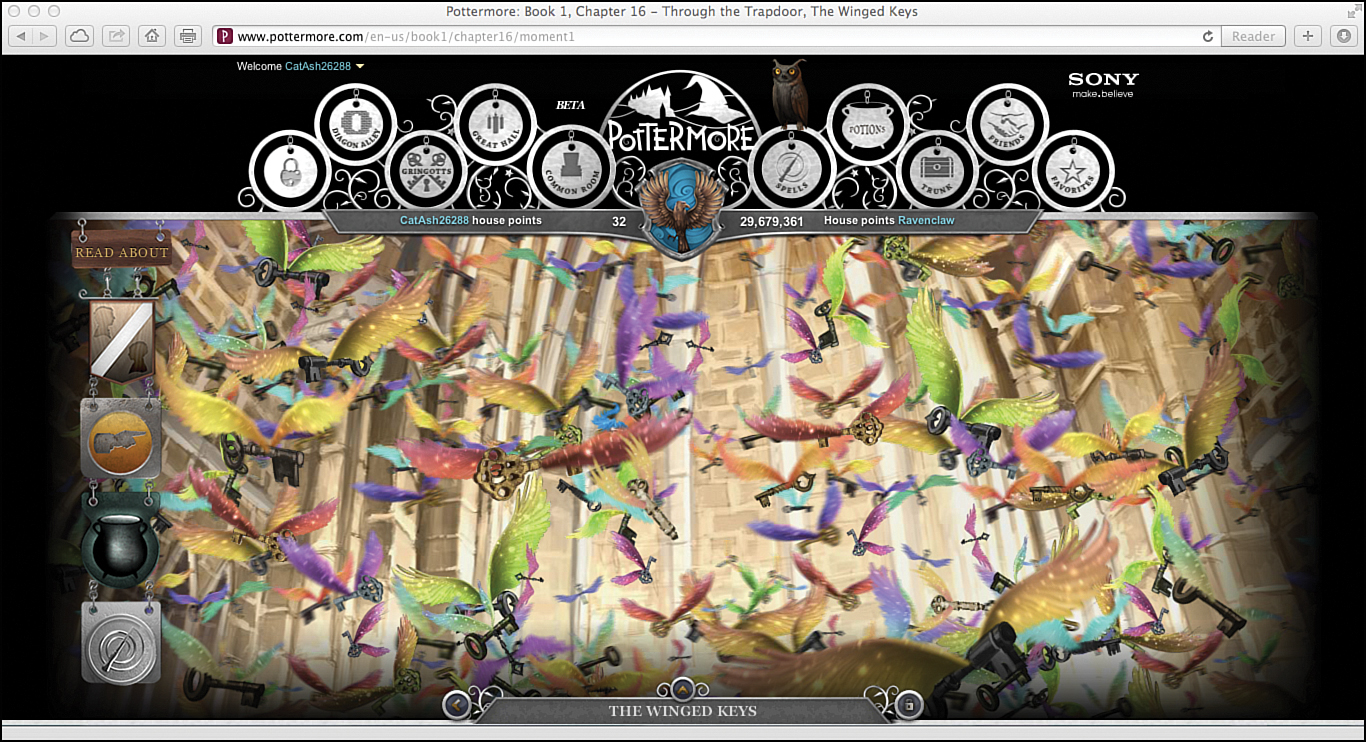
Harry comes face to face with hundreds, maybe thousands, of colorful winged keys. Click as many fast-moving keys as you can until you find the right one.
When you find the correct key, you can collect it and add it to your trunk. After you have the key, click the right arrow next to “The Winged Keys” banner at the bottom of the screen to move on to Scene 2.
Scene 2: The Chessboard Chamber
What you discover within this room is a giant chessboard. Unfortunately, you don’t have time for a game right now. Instead, you need to discover a way out of the room through a door located just past the king and queen chess pieces.
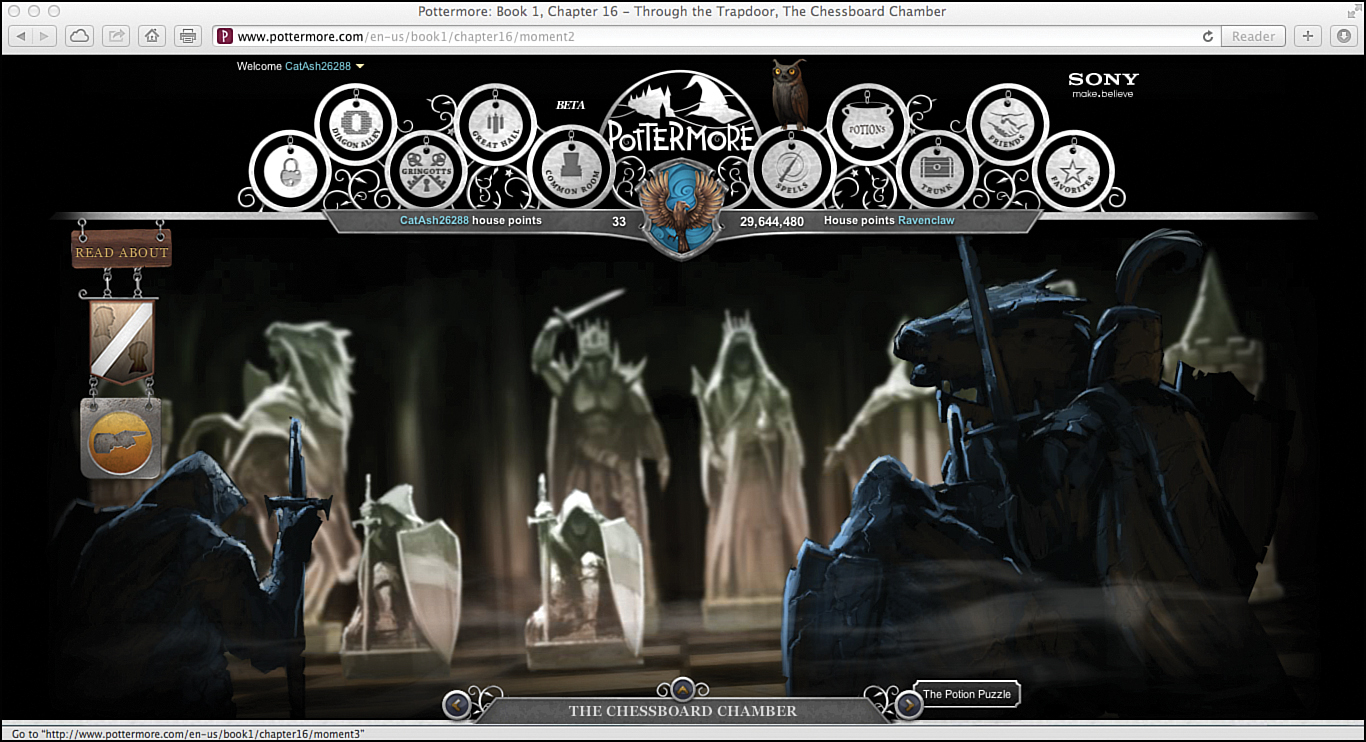
Wave your mouse around on the right side of the screen to move one of the knights and turn on some lights.
Zoom in twice and wave your mouse between the king and queen chess pieces to light up the room.
Scene 3: The Potion Puzzle
Throughout his time at Hogwarts, Harry experiences many challenges. Here, you must choose the correct potions to solve a puzzle. To learn more, click the scroll that’s sitting on the right side of the desk.
Go ahead, take a closer look at the scroll. It seems that danger lies ahead, while safety is behind you. The scroll reveals clues about which potions to select.
Based on what you learn from the scroll, click the smallest blue bottle first. It’s the one that’s third from the left.
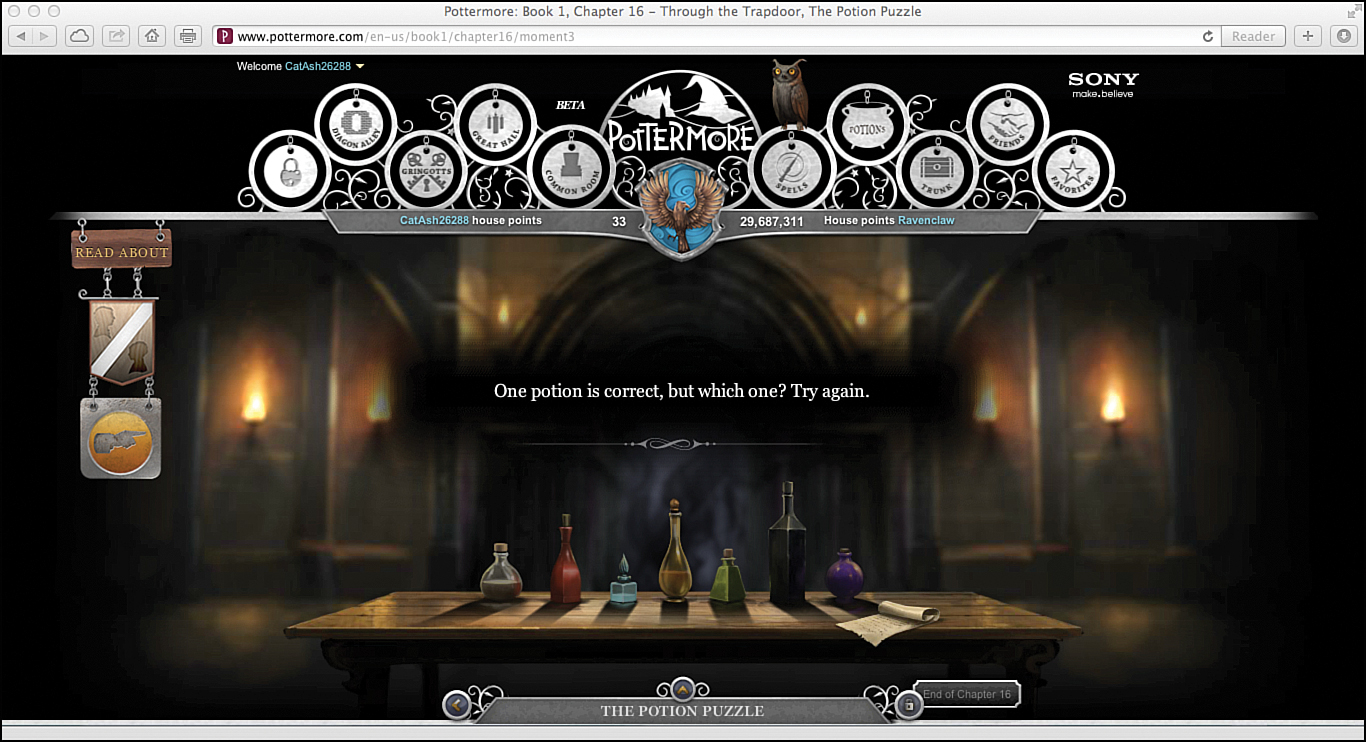
Choose the right potion bottles to solve the puzzle.
After you select the first correct potion, you still need to choose the second. You have six possible options. Based on the clues you read within the scroll, click the purple potion bottle on the right to solve this puzzle.
After solving this puzzle, click the right arrow at the bottom of the screen next to “The Potion Puzzle” banner. You’re ready to move on to Chapter 17.
Chapter 17: The Man with Two Faces
The adventures Harry Potter experiences within Harry Potter and the Sorcerer’s Stone are coming to an end. However, as we all know, so much more lies ahead for him as his battle against Lord Voldemort escalates!
The final chapter of this book within Pottermore still awaits. Your immediate goal is to find the Sorcerer’s Stone and confront You-Know-Who. This ultimately enables you to unlock more of the magical gateway within Pottermore and continue your adventure.
Scene 1: The Sorcerer’s Stone
“The final chapter awaits...” is the message you’ll see displayed on the screen before you enter into the first scene of Chapter 17. It’s time to find and unlock the Sorcerer’s Stone.
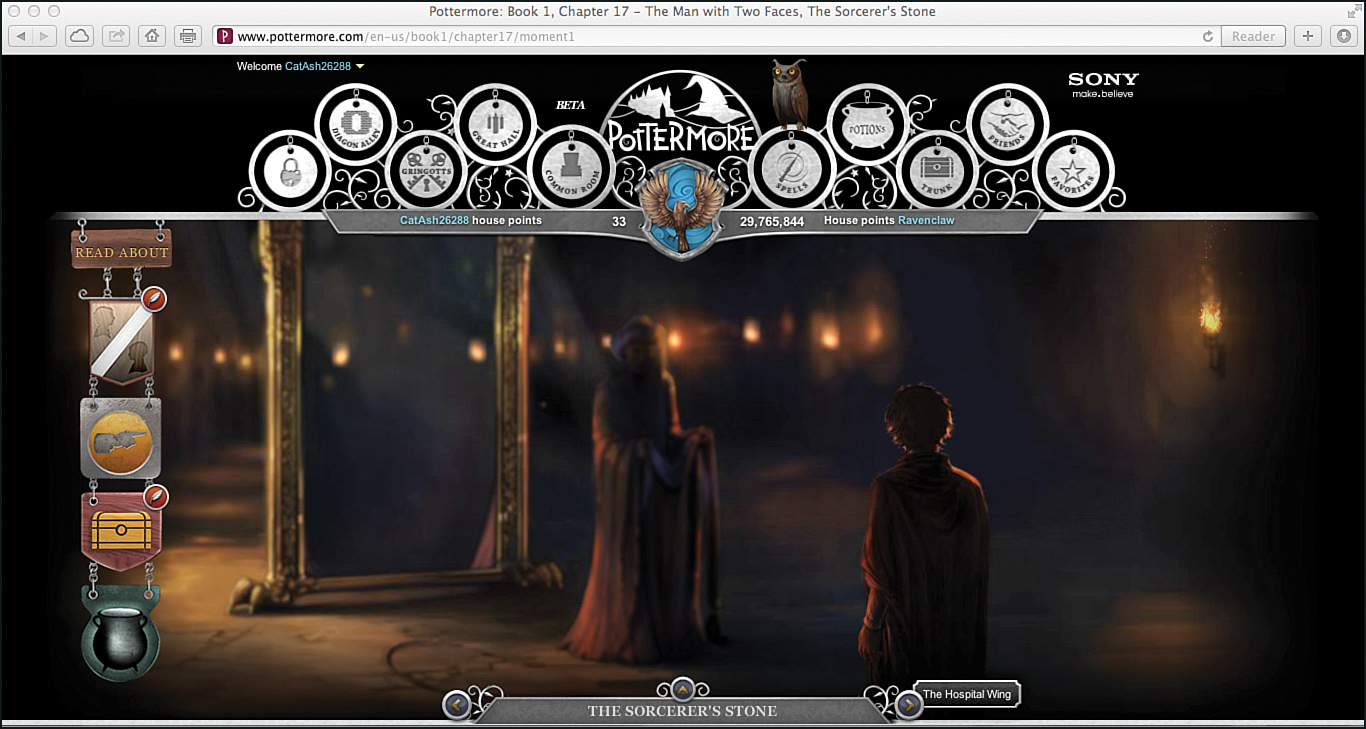
A shadowy figure in a robe stands before you. It’s Professor Quirrel.
Harry is standing the closest to you. Wave your mouse around his robe, near his hand. What’s that sitting in his pocket? Click the Read About button to find out. You’ve found the Sorcerer’s Stone.
If you haven’t already done so, be sure to read the exclusive new information about the Sorcerer’s Stone. After locating and unlocking it, you can do this by clicking the New from J.K. Rowling button, or by clicking the Sorcerer’s Stone listing under the Objects heading on the left side of the screen.
Now zoom in once and click Professor Quirrel’s face. He’s the shadowy figure who is facing Harry. You unlock Quirinus Quirrell and are able to learn more about him by clicking the New from J.K. Rowling button.
Harry has done it! He’s found and unlocked the Sorcerer’s Stone and, at least temporarily, slowed down the evil plans of You-Know-Who.
Scene 2: The Hospital Wing
Luckily, Harry survived his first major encounter with Lord Voldemort. He now finds himself recuperating within the infirmary at Hogwarts.
There’s not much for Harry to do here but to relax and recover from his ordeal. When you explore the infirmary room, you find a few things to collect.
Start by finding and grabbing the chocolate frog card sitting on the leftmost chair. Zoom in once to find it. It’s the Cliodna chocolate frog card.
Zoom in again and look for the bottle that’s on the shelf next to the bathroom door. When you collect it, you discover it’s filled with salamander blood. This is the perfect ingredient to increase the power of certain potions.

In the infirmary, you need to zoom in twice to collect the bottle on the shelf and obtain the salamander blood.
Also, while zoomed in twice, be sure to search the medicine cabinet near the back wall. You come across a bezoar. It’s a stone that comes from the stomach of a goat. It’s used to protect wizards and witches from some poisons.
Scene 3: The End-of-Year Feast
What an extraordinary year it’s been at Hogwarts—not just for Harry but for all the students (and the faculty, too).
Yes, Lord Voldemort has returned (at least he’s trying to). But, for the moment, everyone is safe. It’s the perfect time for a celebration!
Click near the center of the professor’s table to discover the Godric Gryffindor chocolate frog card. It’s between Professor McGonagall’s cup and Professor Dumbledore’s podium.
There’s also a galleon on the floor that you can pick up. It’s directly in front of Professor Dumbledore.
Wave your mouse across the colorful banners on the wall. Magically, a video window featuring J.K. Rowling appears.

It’s the end-of-year feast at Hogwarts. Everyone deserves to celebrate!
In this final scene, you can’t zoom in. But you can move slightly left or right as you enjoy the festivities.
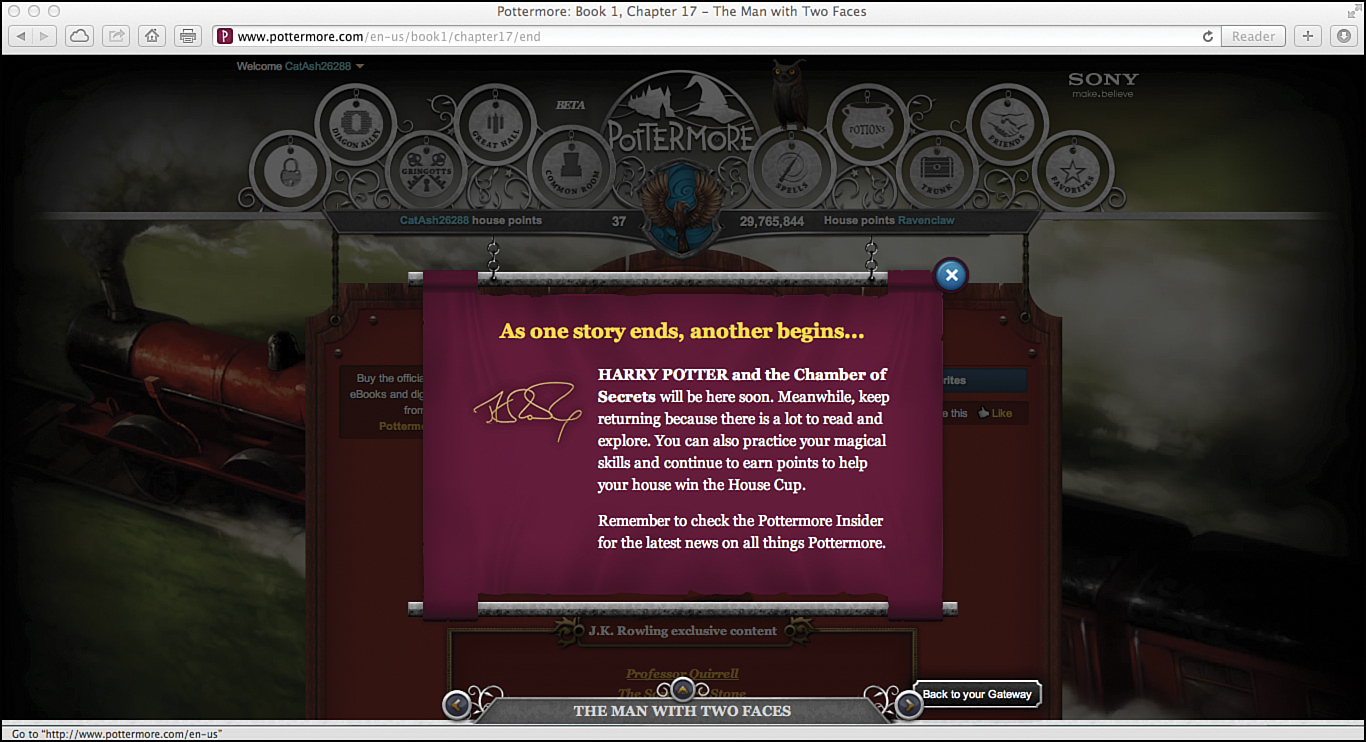
One riveting Harry Potter adventure has come to an end. However, another is a about to begin.
In the months and years to come, Pottermore.com will be your portal to experience many more interactive adventures that re-create memorable scenes from the bestselling books in the Harry Potter series.
Up next, of course, is Harry Potter and the Chamber of Secrets.
You’ve now made it through Book 1 within Pottermore. But, you can still return often to re-read the exclusive information offered by J.K. Rowling. Plus, you can share your thoughts and ideas about your favorite moments by posting comments or your own artwork.
Of course, you can also continue earning house points for your particular house by casting spells or mixing potions, while also exchanging gifts and interacting with your fellow Harry Potter fans.
To do this, click the Spells or Potions icon within the gateway at the top of the screen. By experiencing these other elements of Pottermore, you can break away from Harry’s adventure and experience more of your own magical moments!
Since Pottermore.com first went online, a few new items have been added throughout Book 1 that you can collect. Go back and see what you can find.
Now is a good time to click the Trunk icon within the gateway at the top of the screen. As you’re looking at the Trunk page, click the Chocolate Frog Cards button to see your collection. By now, you should have all 11 of the cards. Also within your trunk should be 15 books and 21 objects.
Before moving forward onto Book 2, consider clicking your profile. Review all of your character’s accomplishments. How many house points have you personally earned so far? How many spell books do you have, and how many spells have you cast? Have you started mixing potions yet? There’s still so much more to experience within Pottermore.