
This chapter discusses how to record a JMeter test script by using HTTP(S) Test Script Recorder. We cover the WorkBench and Recording Controller, how to configure a proxy port for recording HTTP(S) calls, and inclusion and exclusion of specific URL patterns. You will also see how to record an example using the Digital Toys Inc. web application.
At the end of this chapter, you will have a good idea of recording user actions via a browser and will be able to develop a simple JMeter test script. Those who are already familiar with the HTTP(S) Test Script Recorder can proceed to the next chapter.
Before starting with the HTTP(S) Test Script Recorder, you need to make sure that JMeter understands browser actions. You need to configure the browser and use JMeter as a proxy server.
Once you complete the configuration, you can use the browser and perform the use-case specific steps on a browser. JMeter, being in the middle, can intercept the requests from the browser, record them, and forward them to the server. Similarly, JMeter can record the web application responses before forwarding them back to the browser. See Figure 4-1.

Figure 4-1. JMeter as a proxy server
JMeter WorkBench
JMeter’s WorkBench provides a temporary workspace to store test elements, including a thread group. When the JMeter GUI starts, it is pre-populated with an empty test plan and an empty WorkBench. When JMeter is configured as a proxy, it can record the browser activity in the WorkBench. Users can then copy/paste recorded requests from the WorkBench into the test plan.
Test elements in the WorkBench are considered a work-in-progress. They are not saved with the test plan unless you check the Save WorkBench check-box. See Figure 4-2.
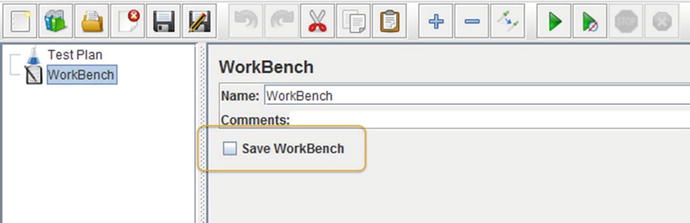
Figure 4-2. Save WorkBench
Apart from the test elements, it can contain non-test elements like a HTTP(s) Test Script Recorder. See Figure 4-3.
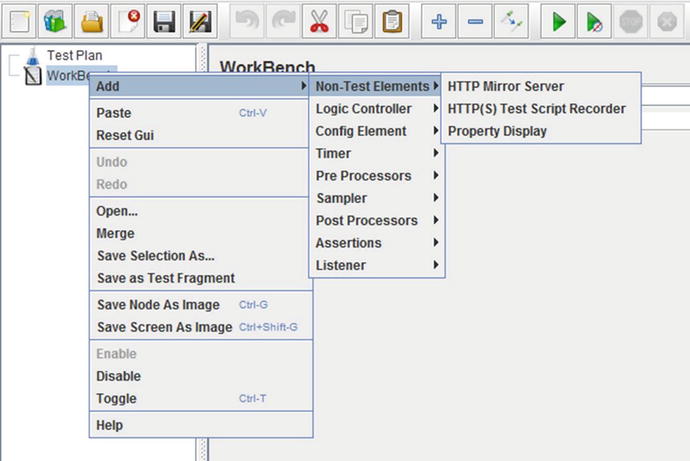
Figure 4-3. WorkBench options
WorkBench provides us with a few configuration options for recording test scripts, such as global settings, test plan content, URL patterns to include, URL patterns to exclude, and notify child listeners of filtered samplers. See Figure 4-4.
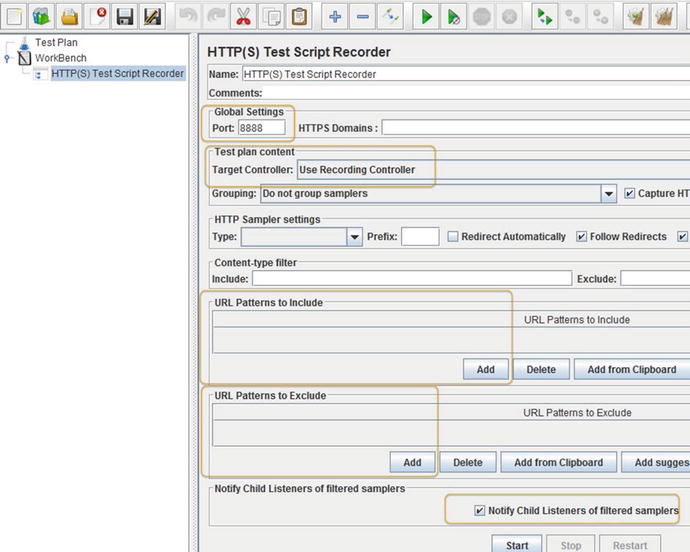
Figure 4-4. WorkBench
In Global Settings, the Port configuration is used to configure JMeter to listen on a specified port.
Test plan content allows you to specify the controller where the proxy will store the generated samples. It is set to Recording Controller by default.
The URL Pattern to Include option allows you to add a regular expression that specifies the URLs to include. For example, use the regular expression ./product/. to specify a URL containing the product.
The URL Patterns to Exclude option allows you to add a regular expression to specify the URLs to exclude. For example, you can use the regular expression ..(css|js). to indicate that you don’t want CSS or js.
Selecting the Notify Child Listeners of Filtered Samplers check box causes the child Listener (for example, the View Results Tree) not to see these requests .
JMeter Recording Controller
By using Recording Controller in the WorkBench , you can capture the recording of the user actions performed in the browser.
After recording the test via the WorkBench, the user can run the test to check if it is working as expected.
Browser Proxy Settings
We need to set the JMeter Port setting in Global Settings and the browser proxy port to the same value: --7070.
Let’s set up the proxy in the Firefox browser. See Figure 4-5.

Figure 4-5. Firefox proxy settings
Open Firefox browser and choose Preferences ➤ Advanced ➤ Network ➤ Connection Settings ➤ Manual Proxy Configuration. Configure HTTP Proxy as localhost and Port as 7070.
Select Use This Proxy Server for All Protocols.
Clear the No proxy For text area.
Click OK.
JMeter is now the proxy between the Firefox browser and the web server.
Recording Example
Using the Digital Toys Inc. web application , we will now place an order. Because JMeter has been set up as the proxy, you can record all the user interactions on the browser.
Follow these steps.
Sign in (user: [email protected], password: user1).
Go to Check Detail ➤ Add To Cart ➤ Checkout ➤ Add Billing/Shipping Address ➤ Add Credit Card ➤ Place Order ➤ Sign Out.
Let’s illustrate the process of developing a test script by recording the user actions.
Follow these steps or download FirstRecordingTestPlan.jmx 1:
Create a test plan and give it a meaningful name, such as First Recording Test.
Click on WorkBench and go to Edit ➤ Add ➤ Non-Test Elements. Then add HTTP(S) Script Test Recorder. In Global Settings, configure Port as 7070. Select Target Controller as WorkBench > HTTP(S) Test Script Recorder.
Click on the Start button. JMeter will show a Root CA Certificate dialog box. Click OK.
Perform the use-case actions in the browser; they will be shown as in Figure 4-6.

Figure 4-6. Recording browser actions
Click on the Stop button.
After recording, you will notice requests for .js, .css, and other resources that are not needed. You can exclude these requests by specifying Exclude Regular Expression. Click on Add Suggested Excludes, and this action will add a sample expression. Modify this expression, as shown in Figure 4-7.

Figure 4-7. Exclude regular expression
.*.(bmp|css|js|gif|ico|jpe?g|png|swf|woff|woff2|ttf).*Note We have excluded .bmp, .css, .js, .gif, .ico, .jpeg, .png, .swf, .woff, .woff2, and .ttf requests. This is because our focus was to test the performance of the dynamic responses from the server.
Clear the previous recording .
You will now re-record the use-case without the unwanted requests.
Click on the Start button. JMeter will show a dialog box. Click OK.
Perform the use-case actions in the browser.
You will now see that the recorded calls have been filtered for unwanted resources. See Figure 4-8.
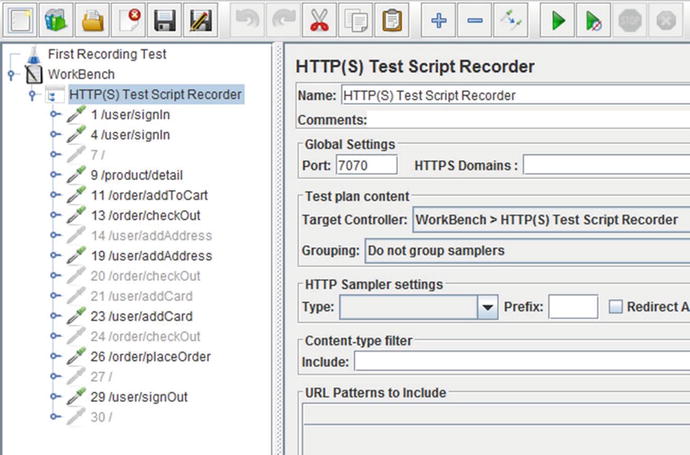
Figure 4-8. Recording browser actions
Click on Test Plan and go to Edit ➤ Add ➤ Threads (Users). Add a thread group.
Select all recorded browser actions from WorkBench and then drag and add them as child elements of the thread group. The result will look as shown in Figure 4-9.

Figure 4-9. Final recording
Click on Thread Group and go to Edit ➤ Add ➤ Listener. Add View Results Tree.
Save the test plan .
Note
Each of the requests in the HTTP(s) Test Script Recorder starts with a request number. However, these numbers may not be in sequence, as some requests may have been discarded based on the URL exclusion/inclusion filters.
To verify that the test is working correctly, follow these steps.
Click on Test Plan and go to Edit ➤ Add ➤ Config Element. Add HTTP Cookie Manager.
Run the test. Results will be similar to those shown in Figure 4-10.
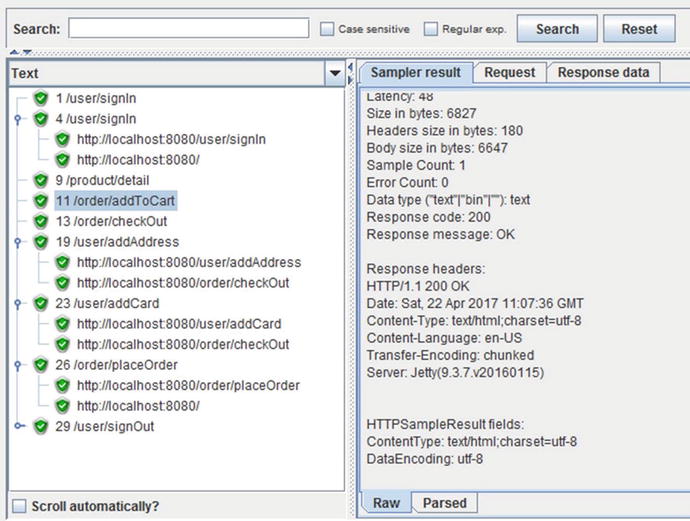
Figure 4-10. View results
After the test executes, open the browser, navigate to the Digital Toys Inc. web application, log in with the [email protected] username and user1 password, then navigate to Order History and check if the order is present. You should see two orders—the first order was created while recording the test and the second order was created due to the test execution. See Figure 4-11.

Figure 4-11. Order history
Note
We excluded .js, .css, .ico, .ttf, .woff, etc. requests, which are basically browser-based calls instead of server calls. This is because the focus here is to test the performance of dynamic responses from the server.
Conclusion
In this chapter, you learned to configure JMeter as a proxy and use the HTTP(S) Test Script Recorder. You used regular expressions to include/exclude specific URLs in your test script and successfully developed a JMeter test script. In the next chapter, you will learn about the test plan and its components and explore various options for each of those components.