
![]()
Extending NuGet
In the previous chapters, we’ve shown you how you can leverage NuGet in more-advanced scenarios and how NuGet can be the tool of preference for managing external dependencies in your software projects. We’ve even touched on some alternative scenarios, where NuGet can be used to distribute releases and deploy them onto your server infrastructure.
While all of this is great, there are some use cases we haven’t covered yet. The power of NuGet is its simplicity: it enables you to publish and consume packages. There are three major clients that work with NuGet. And all three of them can be extended to give you more power. For example, wouldn’t you like to know how you can make yourself or your development team more productive? Or how you can get a grasp on what external dependencies are being used in your projects?
This chapter will focus on these questions and will provide the required starting points to extend NuGet on your machine, or the machines of your team, to make software development more fun. We’ll start with a quick why before we dive into the more technical part, where we’ll be creating plug-ins and extensions for all three clients—simple, basic things that you can extend or build upon to achieve super powers.
Why Extend NuGet?
The enthusiast software developer in you may answer the question of why one should extend NuGet with an energetic “because I can!” While that is a valid reason (and also the reason why we started looking into extending NuGet), there are some better reasons to do so as well.
If you’ve heard about Git, a distributed version control system (DVCS) that gained enormous popularity in the open source world thanks to GitHub.com, you may be aware that Git offers various extensions. In fact, the Git source control system is fairly easy and does not contain a lot of commands at its core. The real value of Git as a source control system comes from its easy-to-create extensions, of which a lot are available.
A parallel can be drawn to NuGet. Out of the box, the NuGet command line knows the commands list, pack, push, setApiKey, install, restore, upgrade, and uninstall. Those commands give you a great base set of functionality; you can do everything you probably want to do with them. But what about copying a package from one feed to another? A nuget copy command would come in handy there. What about knowing about all packages and their dependencies without having to open every single project in Visual Studio? Wouldn’t nuget analyze be useful?
Similarly, for the NuGet Package Manager Console, it’s great to have some functionality out of the box. Knowing that the Package Manager Console is just a PowerShell console with some added variables (such as $dte, an object representing Visual Studio) makes it an incredibly powerful tool to extend your development process. What about creating Team Foundation Server (TFS) work items or YouTrack issues from the Package Manager Console? What about writing packages that add some to-do tasks to your list of work items? What about adding code generation or even a Bing search in there?
NuGet Package Explorer (NPE) is a great tool to work with NuGet packages and inspect what is going on in there. The lib folder in NuGet packages typically contains only an assembly and not source code. How about creating an NPE plug-in that allows you to decompile assemblies in a NuGet package and browse through the source code of the packages you download?
We’ve just scratched the surface in this section: all tools are there for you to use; all extension points are available. This chapter will give you some starters on how to extend the various tools, but we’ll leave the implementation of the cool stuff to you. And when you’re finished, why not publish your extensions on NuGet so everyone can use them?
Extending the NuGet Command Line
The NuGet command-line tool is built in a very extensible fashion. For starters, every command that the command-line tool exposes implements the same ICommand interface. In addition, the tool is using the Managed Extensibility Framework (MEF) to import (actually ImportMany) these commands within the scope of the application’s lifetime. It does this by scanning its own assemblies and a special extensions folder defined by the command-line tool. It is the exact same folder used when deploying a custom package analysis rule. This special extensions folder can be found in the following location on your system:
%LocalAppData%NuGetCommands
Because the NuGet command line is scanning this extension folder upon startup, it will automatically detect any assembly within that directory or any of its subdirectories that contains an export of a well-known type.
![]() Note The NuGet command-line tool is a very nice example of how one could design an application open for extensibility, by making good use of the Managed Extensibility Framework (MEF). MEF is an interesting topic on its own and has shipped as part of the .NET Framework since version 4.0. If you haven’t heard about it before, we highly recommend you read up on MSDN (http://msdn.microsoft.com/en-us/library/dd460648.aspx). And you can also dive into the sources and examples on CodePlex (http://mef.codeplex.com).
Note The NuGet command-line tool is a very nice example of how one could design an application open for extensibility, by making good use of the Managed Extensibility Framework (MEF). MEF is an interesting topic on its own and has shipped as part of the .NET Framework since version 4.0. If you haven’t heard about it before, we highly recommend you read up on MSDN (http://msdn.microsoft.com/en-us/library/dd460648.aspx). And you can also dive into the sources and examples on CodePlex (http://mef.codeplex.com).
Some of the exports that will be scanned for are implementations of NuGet’s ICommand interface. The ICommand interface is decorated with MEF’s InheritedExport attribute, as shown in Listing 9-1, declaring that any implementing type will be exported as an implementation of type ICommand.
Listing 9-1. The NuGet Command-Line ICommand Interface
[InheritedExport]
public interface ICommand
{
    CommandAttribute CommandAttribute { get; }
    IList<string> Arguments { get; }
    void Execute();
}
To be able to create your own custom ICommand implementation, you’ll have to add a reference in your project to the nuget.exe file—that’s right, to the NuGet command-line tool itself! All you need to do is implement the interface, compile your assembly that exports your custom commands, and deploy it into the NuGet extensions directory. The concept is very simple yet so powerful.
![]() Tip The commands available in NuGet are implemented in the same way as a command-line extension is created for NuGet. This means that, if you want to create a command similar to the existing NuGet commands, you can easily peek at the NuGet source code. Also, if you want to borrow code that accesses an external package source, many good examples can be found in the NuGet source code.
Tip The commands available in NuGet are implemented in the same way as a command-line extension is created for NuGet. This means that, if you want to create a command similar to the existing NuGet commands, you can easily peek at the NuGet source code. Also, if you want to borrow code that accesses an external package source, many good examples can be found in the NuGet source code.
One such example is the nuget install command, for which you can find the sources at https://nuget.codeplex.com/SourceControl/latest#src/CommandLine/Commands/InstallCommand.cs.
Creating a Custom NuGet Command
Creating a custom NuGet command is as easy as implementing the ICommand interface or its easy-to-use companion, the Command class. This interface (and companion class) can be found in the nuget.exe assembly. Here are the steps required to get started in Visual Studio:
- Create a new Visual Studio solution, and add a class library project by using the full .NET 4.0 Framework.
- Add a NuGet reference to Nuget.CommandLine (Install-Package Nuget.CommandLine).
- Manually add a reference to nuget.exe. You’ll find it in your solution’s packages folder, where you installed Nuget.CommandLine in the previous step. Adding a reference to nuget.exe gives you access to the ICommand interface, the Command class, and the CommandAttribute class.
- Add a reference to System.ComponentModel.Composition (the Managed Extensibility Framework).
The ICommand interface is very straightforward to implement, as it contains only one method, Execute, and a read-only property, IList<string> Arguments. Obviously, the Execute method executes the command, and the Arguments property gives you access to any command-line arguments received by the console.
To make things even easier for you, you can also inherit from a base class implementing this ICommand interface and providing you with some common NuGet command behavior, such as integrated help from the command line. This integrated help gives your custom command support for the help (or ?) option, so you can output some help information to the user instead. This way, you can provide guidance to users requesting help by executing the command nuget help or nuget help myCustomCommand. The base class we refer to is called Command and can be found in the NuGet.Commands namespace of the nuget.exe assembly.
![]() Tip We really encourage you to reuse this base class and benefit from its integrated help functionality to provide your users with a consistent NuGet command-line experience.
Tip We really encourage you to reuse this base class and benefit from its integrated help functionality to provide your users with a consistent NuGet command-line experience.
To get started, take a look at the NuGet.Analyze package , which provides some analysis functionality on top of source code repositories consuming NuGet packages. The package is a first attempt to automate the creation of a dependency grid for a given project, which is currently a manual and time-consuming task, often forgotten or allowed to become out-of-date. However, NuGet stores all your dependencies in a nice XML file (the packages.config file) relative to each Visual Studio project, as well as storing a reference to all these XML files in a central repositories.config file in the solution’s packages folder. This is very useful information stored in a well-known format, so analysis of these files should be pretty straightforward.
For any solution that is consuming NuGet packages, you can find out which module of the product (or project of the solution) has which dependencies, even without parsing the information inside the source code itself. Therefore, one should be able to point NuGet to a solution file and get a real-time view on its dependencies. The output could be used as a generated dependency matrix for the given target solution.
The NuGet.Analyze package has support for both Team Foundation Server source control and local (or remote) file system folders. This should cover most source control systems in a first attempt. Of course, as the entire thing is open source as well, feel free to contribute your own ideas and send a pull request. The source code can be found at https://github.com/xavierdecoster/NuGet.Analyze.
Let’s take a closer look at AnalyzeCommand, which you can find in the source code. You’ll notice the usage of a few attributes in that class, as shown in Listing 9-2.
Listing 9-2. Implementing a Custom NuGet Command-Line Command
[Command(typeof(AnalyzeCommandResources), "analyze", "AnalyzeCommandDescription",
UsageSummaryResourceName = "AnalyzeCommandUsageSummary",
MinArgs = 0, MaxArgs = 1,AltName = "analyse")]
public class AnalyzeCommand : Command
{
    public override void ExecuteCommand()
   {
      ...
   }
}
To create a basic command, you simply inherit from Command and implement the abstract ExecuteCommand method. However, you still need to expose a little metadata for the NuGet command line to know how to deal with this command. That’s where CommandAttribute comes in, which you can see decorated on top of the class declaration. Nuget.exe will process this information and learn that the analyze command corresponds to the AnalyzeCommand type. An alternative name for the command has been provided as well: analyse.
Helpful information, such as a usage summary, can be found in the AnalyzeCommandResources file by using the key AnalyzeCommandUsageSummary. Figure 9-1 shows you what the AnalyzeCommandResources file looks like.

Figure 9-1. The AnalyzeCommandResources file containing all messages related to the Analyze command we are creating
Using the CommandAttribute, the NuGet command line also knows that zero or one argument can be passed to this command. That’s a lot of information in a single attribute, but it gives you a lot of flexibility to implement your command as you want, without needing to take care of plumbing your command into the command-line tool to make it integrate nicely.
We already mentioned that you inherit support for the help option when deriving from Command, but you can create additional options or flags that can give an extra meaning or different behavior to your custom command. For example, Listing 9-3 implements an argument as a simple property, decorated with the OptionAttribute. Figure 9-1 contains the messages referred to by the OptionAttribute as well.
Listing 9-3. Implementing an Optional Flag for a Custom Command
[Option(typeof(AnalyzeCommandResources), "AnalyzeCommandVerboseDescription")]
public bool Verbose { get; set; }
Installing a Custom NuGet Command
You now have learned all there is to extending the NuGet command line with your own custom commands: inherit Command and distribute the compiled assembly to the NuGet extensions directory. The classical way of installing a command-line extension is shown in Listing 9-4.
Listing 9-4. Installing a NuGet Command-Line Extension the Classical Way
nuget.exe install /excludeversion /outputdir "%LocalAppData%NuGetCommands" MyCustomExtension
How do you feel about distributing those assemblies? What if we could make NuGet extend itself and distribute NuGet command-line extensions by using NuGet packages?
Luckily for you, there is a package for that! It’s called NuGet.InstallCommandLineExtension and is available at NuGet.org. Figure 9-2 shows NuGet.InstallCommandLineExtension in action.

Figure 9-2. Installing the NuGet.InstallCommandLineExtension package using the NuGet Package Manager Console
Installing the NuGet.InstallCommandLineExtension package performs two actions: it will install a first NuGet command-line extension, called AddConsoleExtension, and it will install a custom PowerShell cmdlet into the Package Manager Console, called Install-CommandLineExtension. This gives you two different ways of extending the NuGet command line in a way you already know and love—by using NuGet itself.
Now let’s install the NuGet.Analyze extension containing the nuget analyze command. From the Visual Studio Package Manager Console, we can execute the following command:
Install-CommandLineExtension NuGet.Analyze
Once our NuGet command-line extension is installed, we are able to run it. We even get help information, by running the nuget help analyze command. Figure 9-3 shows the help command in action.

Figure 9-3. Help information for our NuGet command-line extension
Go on and create your own extensions! Maybe an extension to clean the NuGet cache would be nice. Or one that copies NuGet packages from one feed to another. Or one that downloads all packages from a given feed to create a backup.
![]() Note The NuGet Package Source Discovery (PSD) protocol that is described at https://github.com/myget/PackageSourceDiscovery also offers a custom NuGet command. NuGet PSD allows for NuGet-based clients’ tools to discover the feeds that are hosted by a user or organization by using the blog or web site URL. For example, if you have a blog, you could add a simple <link /> tag to your site (such as <link rel="nuget" type="application/rsd+xml" title="GoogleAnalyticsTracker feed on MyGet" href="https://www.myget.org/discovery/feed/googleanalyticstracker"/>). By installing the PSD extension to the NuGet command line, users of your custom NuGet feed will be able to automatically discover the feed URL and its name by running nuget discover -Url "http://yoursite.com. Source code for this extension can be found at https://github.com/myget/PackageSourceDiscovery/tree/master/src/Extension.
Note The NuGet Package Source Discovery (PSD) protocol that is described at https://github.com/myget/PackageSourceDiscovery also offers a custom NuGet command. NuGet PSD allows for NuGet-based clients’ tools to discover the feeds that are hosted by a user or organization by using the blog or web site URL. For example, if you have a blog, you could add a simple <link /> tag to your site (such as <link rel="nuget" type="application/rsd+xml" title="GoogleAnalyticsTracker feed on MyGet" href="https://www.myget.org/discovery/feed/googleanalyticstracker"/>). By installing the PSD extension to the NuGet command line, users of your custom NuGet feed will be able to automatically discover the feed URL and its name by running nuget discover -Url "http://yoursite.com. Source code for this extension can be found at https://github.com/myget/PackageSourceDiscovery/tree/master/src/Extension.
Creating Custom Package Analysis Rules
When creating NuGet packages by using the NuGet command line, you may have encountered warnings. For example, when you are working with a generated .nuspec file and don’t make any changes, chances are you might be seeing a lot of these warnings. Figure 9-4 shows what we mean by them.

Figure 9-4. A number of warnings when creating a NuGet package
What is interesting is that these warnings can be extended. For example, imagine you are building NuGet packages inside your team. What would happen if, say, a certificate file would be shipped inside a NuGet package? Perhaps you require a .cer or .pfx file to be present in your local working folder, but if this file happens to get packed into a NuGet package, that may turn into a disaster: all team members would suddenly have this certificate. Or even worse, the entire world would be able to use it when publishing it to NuGet.org. Let’s build a custom package analysis rule that prevents us from adding certain file extensions to our packages.
Just as when creating custom NuGet commands, you have to create a new class library project targeting the .NET 4.0 Framework, reference the System.ComponentModel.Composition namespace in which MEF resides, install NuGet.CommandLine into the project, and add an assembly reference to the nuget.exe file it installed.
Once all that is done, we can start creating our custom validation rule. First of all, you’ll have to implement the IPackageRule interface, which is located in the nuget.exe file that is referenced. Also add ExportAttribute to the class, which will hold the custom package analysis rule, so nuget.exe will be able to pick it up and run it when creating a NuGet package.
[Export(typeof(IPackageRule))]
public sealed class CertificateRule : IPackageRule
{
    public IEnumerable<PackageIssue> Validate(IPackage package)
    {
        // code will go here
    }
}
The actual package validation logic will go in the Validate method. This method will be called by nuget.exe when creating a NuGet package and receives all package data: metadata such as package ID and version, as well as the files included in the package, their names, and data. If you don’t want .cer or .pfx files included in a NuGet package, simply scan for any file that matches these extensions and yield a PackageIssue instance, which can return either a warning or an error. The full code for the CertificateRule class that holds our custom validation can be seen in Listing 9-5.
Listing 9-5. A Custom Package Analysis Rule for NuGet That Scans the Package for Forbidden File Extensions
[Export(typeof(IPackageRule))]
public sealed class CertificateRule : IPackageRule
{
    private readonly string[] _forbiddenExtensions = { ".cer", ".pfx" };

    public IEnumerable<PackageIssue> Validate(IPackage package)
    {
        // Loop through all files and match them with _forbiddenExtensions
        foreach (var packageFile in package.GetFiles())
        {
            if (_forbiddenExtensions.Any(
                extension => extension == Path.GetExtension(                                                packageFile.Path).ToLowerInvariant()))
            {
                yield return new PackageIssue(
                    "Forbidden file extension found",
                    string.Format("The file {0} is of a forbidden file extension and may not be
                                   included in a NuGet package.", packageFile.Path),
                    "Remove it from the package folder.",
                    PackageIssueLevel.Error);
            }
        }
    }
}
If you compile the project and copy its assemblies into the %LocalAppData%NuGetCommands folder on your system, the NuGet command line will pick up the package validation rule. This folder can hold NuGet command-line extensions as well as custom package analysis rules. If you now try to create a NuGet package that holds a .cer or .pfx file, a package issue will be shown, as can be seen in Figure 9-5.

Figure 9-5. A custom package analysis rule in action, scanning for forbidden file extensions
![]() Note Xavier has written a package analysis rule that ensures the package version complies with semantic versioning. It can be found on his blog at www.xavierdecoster.com/nuget-package-analysis-encouraging-semantic-versioning. This is a good example of a useful package analysis rule, and we think every package author should have it installed.
Note Xavier has written a package analysis rule that ensures the package version complies with semantic versioning. It can be found on his blog at www.xavierdecoster.com/nuget-package-analysis-encouraging-semantic-versioning. This is a good example of a useful package analysis rule, and we think every package author should have it installed.
Extending the Package Manager Console
So far, you’ve seen how you can extend the NuGet command line. While handy, NuGet extensions of this type worked only from the command prompt. What about extending Visual Studio? The Package Manager Console is just a PowerShell console with additional variables such as $dte, an object representing Visual Studio itself.
NuGet already speeds up your development in terms of dependency management, but having the Package Manager Console at hand, inside Visual Studio, makes NuGet incredibly powerful for extending your Visual Studio environment as well.
This section will guide you through the creation of PowerShell cmdlets that can be run in the Package Manager Console. It starts with some simple cmdlets that (of course) will be distributed through NuGet. After that, we’ll create a more advanced cmdlet that also includes tab completion to make using the cmdlet even easier.
![]() Tip An interesting Package Manager Console extension we’ve found is Steve Sanderson’s MvcScaffolding package. It adds PowerShell cmdlets to the NuGet Package Manager Console and enables you to generate code in ASP.NET MVC.
Tip An interesting Package Manager Console extension we’ve found is Steve Sanderson’s MvcScaffolding package. It adds PowerShell cmdlets to the NuGet Package Manager Console and enables you to generate code in ASP.NET MVC.
Creating and Distributing a Package Manager Console Extension
Let’s start the creation of a NuGet Package Manager Console extension by defining what we want to achieve. Visual Studio exposes a lot of functionality hidden in menus and keyboard shortcuts. Some developers are very keyboard-oriented in their day-to-day jobs, and to support them, we want to provide two PowerShell cmdlets for use in the Package Manager Console.
The first cmdlet, Remove-Usings, will enable any developers who have installed the extension we’re creating to sort and remove using directives in their source code for the entire project. The second cmdlet, Find-Symbol, will enable those developers to find symbols, such as a class or interface, using the Package Manager Console. Don’t worry: we’ll cover the source code for these two commands later on. Let’s first see how they work and how we can create a so-called tools package.
Figure 9-6 shows you the NuGet Package Manager Console, where the cmdlet Find-Symbol DeckController has been invoked. This cmdlet is not available out of the box but has been defined in a PowerShell module added to the Package Manager Console.

Figure 9-6. The Package Manager Console executing a custom cmdlet named Find-Symbol
Creating a NuGet Package Folder Structure
The Package Manager Console extension we are creating will be distributed through NuGet, so we’ll have to create a NuGet package for that. In this section, we’ll be using a simple approach to create a NuGet package: create a folder, create a NuGet package manifest, and invoke the nuget pack command.
Let’s do that step by step.
- First of all, create a folder on your hard drive that will mimic the NuGet package contents. Maarten has created C:TempVsCommands for that, but the exact location does not really matter.
- Next, open a command prompt and run the nuget spec VsCommands command. This will create a NuGet package manifest (the .nuspec file) named VsCommands.nuspec. Open the file in Notepad (or any other text editor) and update the XML to something along the lines of Listing 9-6.
Listing 9-6. The NuGet Package Manifest for Our Package Manager Console Extension
<?xml version="1.0"?>
<package>
  <metadata>
    <id>VsCommands</id>
    <version>1.0.0</version>
    <authors>Maarten Balliauw</authors>
    <owners>Maarten Balliauw</owners>
    <requireLicenseAcceptance>false</requireLicenseAcceptance>
    <description>Adds cmd-lets NuGet PowerShell Console.</description>
    <releaseNotes>Adds cmd-lets to the NuGet PowerShell Console.</releaseNotes>
    <copyright>Copyright Maarten Balliauw 2011</copyright>
    <tags>nuget powershell pronuget apress</tags>
  </metadata>
</package>
![]() Tip Did you know that Windows (since Windows 95, according to http://support.microsoft.com/kb/126449) has a hidden context menu item to open a console window at the current location? In Windows Explorer, hold the Shift key and right-click a folder. This will show a context menu containing the Open Command Window Here item.
Tip Did you know that Windows (since Windows 95, according to http://support.microsoft.com/kb/126449) has a hidden context menu item to open a console window at the current location? In Windows Explorer, hold the Shift key and right-click a folder. This will show a context menu containing the Open Command Window Here item.
- The next step is to create a folder called ools under your VsCommands folder structure. As you saw in Chapter 3, the ools folder can contain scripts such as install.ps1 (runs when the package is installed into a project), uninstall.ps1 (runs when the package is uninstalled from a project), and init.ps1 (runs every time you open the project into which the package is installed).
As you may have already guessed, we’re going to take advantage of one of these scripts to dynamically load our Remove-Usings and Find-Symbol cmdlets into the Package Manager Console.
- Create a file called init.ps1 under the tools folder, and add the code you see in Listing 9-7. This code is a (short) PowerShell script that will be executed every time Visual Studio loads a project containing the VsCommands NuGet package we are creating.
Listing 9-7. The init.ps1 PowerShell Script for our Package Manager Console Extension
param($installPath, $toolsPath, $package)
Import-Module (Join-Path $toolsPath VsCommands.psm1)
There are two important things to note in the init.ps1 script. The first line of code accepts some parameters the Package Manager Console hands to our PowerShell script. These contain the installation path to your package, the tools path, and the package itself. You are not obliged to use them, but there are scenarios where you may want to use this data to take action. For example, you can use the $installPath parameter to write additional files into the project.
The second line of code imports a PowerShell module into the Package Manager Console. As you can see, we’re loading the module named VsCommands.psm1. Aha! This is where the actual Package Manager Console extension is defined. The VsCommands.psm1 file is a regular PowerShell module, which is simply being imported into the Package Manager Console PowerShell host.
- Create a new file named VsCommands.psm1 in the tools folder.
![]() Note Advice on writing PowerShell script modules, as we will be doing in the VsCommands.psm1 file, is worth a book in itself. If you want to know everything about it, or just want to dive into specifics such as providing output when the Get-Help cmdlet is invoked on your extensions, refer to the MSDN pages at http://msdn.microsoft.com/en-us/library/dd878340(v=VS.85).aspx. Also, the Apress book Pro Windows PowerShell by Hristo Deshev (ISBN: 978-1-59059-940-2) may come in handy.
Note Advice on writing PowerShell script modules, as we will be doing in the VsCommands.psm1 file, is worth a book in itself. If you want to know everything about it, or just want to dive into specifics such as providing output when the Get-Help cmdlet is invoked on your extensions, refer to the MSDN pages at http://msdn.microsoft.com/en-us/library/dd878340(v=VS.85).aspx. Also, the Apress book Pro Windows PowerShell by Hristo Deshev (ISBN: 978-1-59059-940-2) may come in handy.
Creating the Package Manager Console Extension
In the previous section, we created the required NuGet package folder structure. The VsCommands.psm1 file in the tools folder is still empty. In this section, we’ll add the required PowerShell code that implements our Remove-Usings and Find-Symbol cmdlets.
The VsCommands.psm1 script will have access to the NuGet Package Manager Console and therefore to global variables such as $dte, an object representing Visual Studio. Cmdlets you already know (and love?) such as Get-Project and Install-Package are available as well; the complete list of available NuGet PowerShell cmdlets can be found in Appendix C.
Given the fact that we have access to the $dte object, the Package Manager Console has access to the Visual Studio environment. This opens the possibility we are looking for: to interact with Visual Studio.
![]() Tip A list of properties and methods available on the $dte object can be found on the MSDN page at http://msdn.microsoft.com/en-us/library/envdte.dte.aspx. James Chambers also did a great job collecting some PowerShell snippets in various NuGet packages and posted a list of $dte interactions and other samples at http://jameschambers.com/blog/powershell-script-examples-for-nuget-packages.
Tip A list of properties and methods available on the $dte object can be found on the MSDN page at http://msdn.microsoft.com/en-us/library/envdte.dte.aspx. James Chambers also did a great job collecting some PowerShell snippets in various NuGet packages and posted a list of $dte interactions and other samples at http://jameschambers.com/blog/powershell-script-examples-for-nuget-packages.
Let’s start with implementing the Remove-Usings cmdlet. Since it will accept no parameters, it’s just a PowerShell function that executes a method on the $dte object. Here’s the definition of the Remove-Usings cmdlet:
function Remove-Usings {
    $dte.ExecuteCommand("ProjectandSolutionContextMenus.Project.RemoveandSortUsings")
}
When the Remove-Usings command is executed, the $dte object’s ExecuteCommand method is called, passing the Visual Studio command name we expect to be executed. A list of possible Visual Studio commands is hidden inside Visual Studio: open the Tools ![]() Options menu and find the Environment
Options menu and find the Environment ![]() Keyboard tab. This will give you a searchable list of all commands available in Visual Studio.
Keyboard tab. This will give you a searchable list of all commands available in Visual Studio.
The Find-Symbol cmdlet for our VsCommands Package Manager Console extension will accept a parameter: if we want to find a class or interface, it’ll be crucial to know what to search for. Here’s the code for the Find-Symbol cmdlet:
function Find-Symbol {
    param(
        [parameter(ValueFromPipelineByPropertyName = $true)]
        [string]$Name
    )

    $dte.ExecuteCommand("Edit.FindSymbol", $Name)
}
Again, we’re simply delegating the actual work to Visual Studio. The Edit.FindSymbol cmdlet exposed by the $dte object’s ExecuteCommand method will search for the symbol.
There is one missing part in our VsCommands.psm1 file: we need to tell PowerShell to expose all cmdlets to the outside world. In their current state, the only place where Remove-Usings and Find-Symbol can be executed is inside the VsCommands.psm1 file itself. Solving that is easy: PowerShell’s Export-ModuleMember cmdlet will allow you to expose all (or some specific) functions to the Package Manager Console PowerShell host.
The complete source code for VsCommands.psm1, including the call to Export-ModuleMember at the bottom, can be seen in Listing 9-8.
Listing 9-8. The VsCommands.psm1 File Containing the Actual Implementation of the Package Manager Console Extension
function Remove-Usings {
    $dte.ExecuteCommand("ProjectandSolutionContextMenus.Project.RemoveandSortUsings")
}

function Find-Symbol {
    param(
        [parameter(ValueFromPipelineByPropertyName = $true)]
        [string]$Name
    )

    $dte.ExecuteCommand("Edit.FindSymbol", $Name)
}

Export-ModuleMember -Function *
Distributingthe Package Manager Console Extension
Now that the PowerShell scripts for our Package Manager Console extension are ready, it’s time to gather everything as a NuGet package and get the extension out there. Packaging the extension is easy; by now, you should know the nuget pack command. Distributing the package is easy as well; nuget push should do the trick.
In the folder containing the VsCommands.nuspec file, open a command prompt and run the nuget pack command. After you’ve run this command, a NuGet package for your Package Manager Console extension has been created.
The VsCommands.1.0.0.nupkg file can be pushed to NuGet.org or to your private NuGet feed. For this book, Maarten has pushed the package to a feed on MyGet that we’ve created for this book, https://www.myget.org/F/pronuget. Feel free to add this package source in Visual Studio and install the VsCommands package. Figure 9-7 shows the output for both the nuget pack and nuget push commands.

Figure 9-7. Results of packaging and publishing the VsCommands.1.0.0.nupkg package
Adding Tab Expansions to Package Manager Console Extensions
The VsCommand commands we created in the previous section were simple to create and use. There was no need for a lot of documentation or samples because both cmdlets were straightforward. Things are different if you create more-complex cmdlets.
One of the things you may have noticed when using the NuGet Package Manager Console is the support for tab expansions, an idea similar to the IntelliSense you know and love when editing code in Visual Studio. Figure 9-8 shows you an example of tab expansion. When working with the Get-Package cmdlet, every option available features a menu of possible values when pressing the Tab key.

Figure 9-8. Tab expansion in action after pressing the Tab key in the Package Manager Console
For this section, find the source code related to this book on the Apress website at www.apress.com/9781430260011 or in our GitHub repository at www.github.com/myget/pronuget. We won’t dive into creating a Package Manager Console extension from scratch again; instead, we’ll have a quick look at the TfsCommands.psm1 PowerShell module, which you can download from the Apress web site. If you just want to test the TfsCommands commands, find them on the www.myget.org/F/pronuget NuGet feed for this book.
The TfsCommands extension features several PowerShell cmdlets that can be used when your project is added to a Team Foundation Server (TFS)server and a connection to that server has been established in Visual Studio. It features the following cmdlets:
- Get-CurrentTfsCollectionUri: Returns the URL for the TFS server to which you are currently connected
- Get-CurrentTfsProjectName: Returns the TFS project name to which you are currently connected
- Get-TfsProjectNames: Returns all projects for the TFS server to which you are currently connected
- Get-WorkItemTypes: Returns the work item types available in the TFS project to which you are currently connected
- Add-WorkItem: Creates a TFS work item in a specified project
The Add-WorkItem cmdlet is hard to use in the Package Manager Console. It requires you to specify a number of parameters (-Title, -Description, -WorkItemType, -TfsCollectionUri, and -Project). Wouldn’t it be great to have tab expansions for these cmdlets? Figure 9-9 shows you what we are aiming for.

Figure 9-9. Our Add-WorkItem cmdlet featuring tab expansions
The Add-WorkItem cmdlet has been implemented just as we’ve implemented the cmdlets in the previous section. To achieve tab expansions, we’ve added some code at the bottom of the TfsCommands.psm1 file. Using the Register-TabExpansion PowerShell cmdlet, which is provided by the NuGet Package Manager Console, we can instruct the Package Manager Console to enable tab expansions for a given cmdlet. Listing 9-8 shows you how to do this.
Tab expansions can be static, based on an array of possible values, or dynamic, querying for data through other PowerShell cmdlets or remote servers. In Listing 9-9, note the Title and Description tab expansions will simply return a list of strings containing some sample data of what the user may pass into these cmdlet parameters. The WorkItemType, TfsCollectionUri, and Project tab expansions are slightly more complicated: these call into another PowerShell cmdlet to retrieve their data.
Listing 9-9. The Tab Expansion Registration
Register-TabExpansion 'Add-WorkItem' @{
    'Title' = {
        "Implement feature X",
        "Verify bug Y"
    }
    'Description' = {
        "Please implement feature X",
        "Bug Y has not been verified yet. Please take care of it."
    }
    'WorkItemType' = { Get-WorkItemTypes | Select -ExpandProperty Name }
    'TfsCollectionUri' = { Get-CurrentTfsCollectionUri }
    'Project' = { Get-TfsProjectNames | Select -ExpandProperty Name }
}
PUTTING TOGETHER THE MODULE’S CODE
In this section, you’ll find the complete source code for this module.
Extending NuGet Package Explorer
If you often use NuGet Package Explorer, you’re probably doing some repetitive work without even paying too much attention to it. For example, you might need to take a look at the sources of a given assembly inside a NuGet package. We personally like to use ILSpy, a free and open source .NET assembly browser and decompiler, to disassemble binaries and investigate their inner workings. If you want to do this for an assembly inside a NuGet package you opened in NuGet Package Explorer, you would first need to extract it, save it to disk (and remember its location), open ILSpy, and open the assembly you just saved. This is too much manual effort, and if you do this a lot, you can easily consume too much valuable time.
When dealing with scenarios like these, it’s worth considering whether a plug-in could help you with this task. That’s exactly what Xavier’s ILSpy plug-in for NuGet Package Explorer does! We will use this plug-in as an example of how to create plug-ins, and we’d like to invite you to create your own and share them with the world. The ILSpy plug-in is open source and can be found at http://npeilspy.codeplex.com.
NuGet Package Explorer has been designed to support plug-ins by making good use of the Managed Extensibility Framework. It has a full-blown plug-in manager built in, allowing you to add plug-ins from within the application itself. Starting from version 2.5, it has pushed the limit even further by supporting plug-ins to be delivered through NuGet packages, hosted on a dedicated NuGet feed on MyGet.org, available at https://www.myget.org/F/npe. As such, NuGet Package Explorer supports both local and feed plug-ins. You can see the dialog box for adding a plug-in in Figure 9-10.
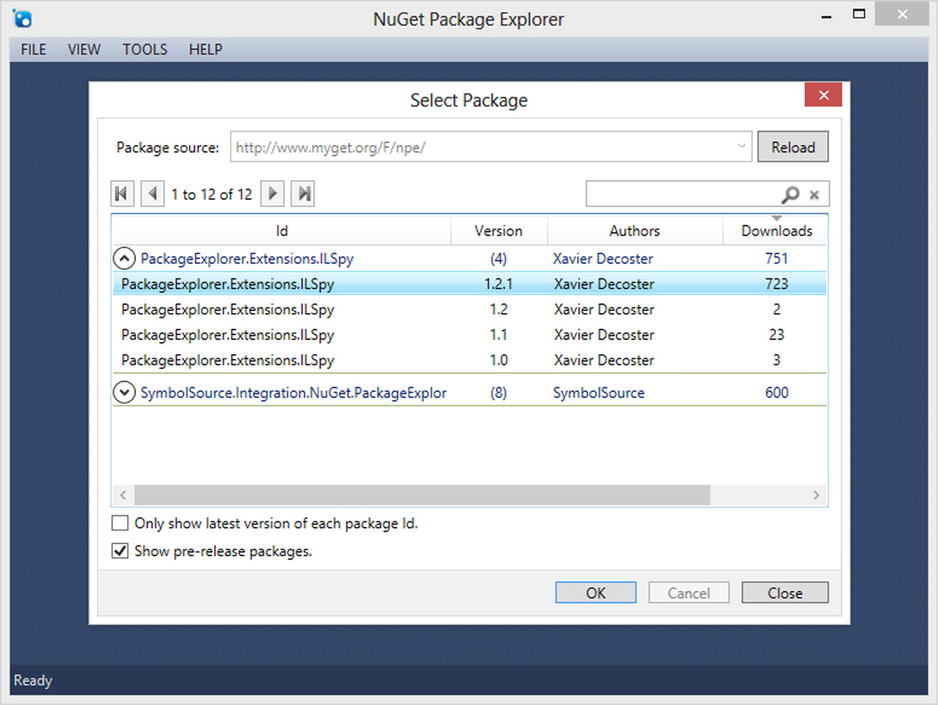
Figure 9-10. Adding a feed plug-in in NuGet Package Explorer’s built-in plug-in manager
NuGet Package Explorer features three different types of extensions:
- Content viewer extensions provide support for visualizing files in NuGet packages. For example, if you open a package containing an image, the standard NPE image visualizer will show you a preview of the selected image.
- Package validation rules provide the ability to analyze packages you create using NPE. When a user clicks the Analyze Package command, your custom package validation rules will be activated to check that the package you are creating conforms to the rules you define for creating packages.
- Package commands provide support to add menu items and actions to the NPE application. For example, if you always publish a package to a specific feed using the exact same API key, why not create a PublishToMyFeed command to do exactly that without interrupting you with other dialog boxes?
Creating any of these three types of extensions is done using the same pattern:
- Create a new Visual Studio Solution and add a class library. (Make sure you target the .NET 4.5 Framework.)
- Add a NuGet reference to the NuGetPackageExplorer.Types package, which will come from NuGet.org (Install-Package NuGetPackageExplorer.Types).
This will make sure your project has the required references and will install some sample code files into your project, ready for modification to suit your needs.
Creating a Custom Content Viewer
The main purpose of the NuGet Package Explorer content viewer plug-in is to attach custom visualizers to certain file types. By default, NuGet Package Explorer does not handle every possible file extension, except for the most common NuGet package contents. Whenever a user triggers the View Content command on a certain file (by double-clicking it, for instance), NuGet Package Explorer scans the application for a command that can handle the requested file extension.
After installing the NuGetPackageExplorer.Types package, described in the previous section, the installer has injected your project with a class named MyCustomContentViewer, shown in Listing 9-10. This class is a sample content viewer that you can adjust to suit your needs. For starters, you might want to pick a proper file extension to tell the tool what kind of files your plug-in will target. Notice that your plug-in can register itself for more than one extension at the same time. The integer parameter of the PackageContentViewerMetadata attribute sets your plug-in’s priority. The lower the value, the higher its priority.
Listing 9-10. Default Sample of a Custom Content Viewer for NuGet Package Explorer
// TODO: replace '.extension' with your custom extension
[PackageContentViewerMetadata(0, ".extension", ".anotherextension")]
internal class MyCustomContentViewer : IPackageContentViewer
{
    public object GetView(string extension, Stream stream)
    {
        throw new NotImplementedException();
    }
}
The content viewer has only one significant method—GetView. It returns an object, but please bear in mind that NuGet Package Explorer is a WPF application and will put the result of this method into a ContentPresenter control’s Content property. Therefore, you can return either a simple string or any deriving object of the Visual class. The GetView method has access to information regarding the file it will need to handle: its file extension and its content stream.
A simple sample is shown in Listing 9-11. This is an NPE content viewer plug-in that handles .txt files and simply returns their content stream as a string.
Listing 9-11. A Simple .txt file Content Viewer Example
[PackageContentViewerMetadata(0, ".txt")]
internal class TextFileContentViewer : IPackageContentViewer
{
    public object GetView(string extension, Stream stream)
    {
        StreamReader reader = new StreamReader(stream);
        return reader.ReadToEnd();
    }
}
The ILSpy plug-in for NuGet Package Explorer goes a little further and works with a modal WPF dialog box showing a custom ConfigurationControl, as shown in Listing 9-12. Because it targets files with a .dll or .exe extension and has a priority of 0, it will be used as the default content viewer for assembly files inside a NuGet package.
Listing 9-12. A Content Viewer Using a Custom WPF Control in a Modal Dialog Box
[PackageContentViewerMetadata(0, ".dll", ".exe")]
internal class ILSpyPackageContentViewer : IPackageContentViewer
{
    private ConfigurationControl configControl;
    private Window dialog;

    public object GetView(string extension, Stream stream)
    {
        try
        {
            configControl = new ConfigurationControl(extension, stream);
            dialog = new Window();
            dialog.Content = configControl;
            dialog.Topmost = true;
            dialog.Width = 300;
            dialog.Height = 120;
            dialog.ResizeMode = ResizeMode.NoResize;
            dialog.WindowStartupLocation = WindowStartupLocation.CenterOwner;
            dialog.ShowInTaskbar = false;
            dialog.ShowDialog();

            return configControl.Assembly.FullName;
        }
        catch (Exception exception)
        {
            return exception.ToString();
        }
    }
}
If you have the ILSpy plug-in installed in NuGet Package Explorer, double-clicking an assembly inside a NuGet package will prompt the user for the path to ILSpy, as shown in Figure 9-11.

Figure 9-11. The configuration control of NuGet Package Explorer’s ILSpy plug-in
After choosing the correct path to your ILSpy executable and clicking the OK button, you’ll see ILSpy opening up the requested file, as shown in Figure 9-12.

Figure 9-12. Browsing and decompilling a .dll assembly with ILSpy
Creating a Custom Package Validation Rule
You’ll notice that after installing the NuGetPackageExplorer.Types package, two more classes were injected into your project, in addition to a custom content viewer. One of them, the MyCustomPackageRule class, is implementing IPackageRule, which allows you to add your own validation logic for NuGet packages—for example, to enforce that all packages produced in your company have correct copyright information and a proper logo in the manifest. Do not forget to export these package rules by marking them with the Export attribute, as shown in Listing 9-13.
Listing 9-13. Default Sample of a Custom Package Rule for NuGet Package Explorer
[Export(typeof(IPackageRule))]
internal class MyCustomPackageRule : IPackageRule
{
    public IEnumerable<PackageIssue> Validate(IPackage package)
    {
        throw new NotImplementedException();
    }
}
Whenever a user triggers the Analyze Package command in NuGet Package Explorer for the first time, the application will import all available IPackageRule implementations and call their Validate method for the currently opened package.
A sample of a package validation rule can be found in Listing 9-14. The SamplePackageRule yields one PackageIssue of the PackageIssueLevel.Error. A title, description, and a possible solution are added to the PackageIssue object to provide the user running this validation rule with enough information to comply with the rule defined.
Listing 9-14. A Sample Package Validation Rule
[Export(typeof(IPackageRule))]
internal class SamplePackageRule : IPackageRule
{
    public IEnumerable<PackageIssue> Validate(IPackage package, string packageFileName)
    {
        yield return new PackageIssue(
            PackageIssueLevel.Error, "Sample error",
            "The sample error is just being used for sample purposes.",
            "There's no solution to this.");
    }
}
The PackageIssue(s) being returned will be shown in the package analysis pane of NPE, as shown in Figure 9-13.

Figure 9-13. NuGet Package Explorer displaying an error message created by a package validation rule
![]() Warning Do not store any state into your custom rule classes, because all package rules will be instantiated only once per session of the NuGet Package Explorer application. As such, all package rule instances are likely to be shared among multiple invocations of the Analyze Package command.
Warning Do not store any state into your custom rule classes, because all package rules will be instantiated only once per session of the NuGet Package Explorer application. As such, all package rule instances are likely to be shared among multiple invocations of the Analyze Package command.
Creating a Custom Package Command
The third piece of code that has been added to your project after installing the NuGetPackageExplorer.Types package is a sample custom package command. A custom package command has access to the opened package and appears as a menu item in the Tools menu. A custom package command implements the IPackageCommand interface and exposes some metadata through the PackageCommandMetadata attribute, as shown in Listing 9-15.
Listing 9-15. Default Sample of a Custom Package Command for NuGet Package Explorer
[PackageCommandMetadata("My custom command")]
internal class MyCustomPackageCommand : IPackageCommand
{
    public void Execute(IPackage package)
    {
        throw new NotImplementedException();
    }
}
By implementing your own custom package commands, you can plug your own useful commands into NuGet Package Explorer and reuse them for any NuGet package—for instance, a command that easily clones a package and saves a copy on disk. Or how about adding a menu item under the Tools menu that can open the current package in a different tool, such as JetBrains’ decompiler, dotPeek? Figure 9-14 shows what this menu entry could look like. The code for this menu entry would be a call to Process.Start with the correct parameters.

Figure 9-14. NuGet Package Explorer showing a new menu entry loaded from a plug-in
NuGet Package Explorer offers you a lot of extensibility in three different domains: file content viewers, package validation rules, and custom package commands. Each of them are useful on their own, and combined, they can possibly be a huge asset in your NuGet tool belt. Here are some ideas for extensions to NuGet Package Explorer we would like to see:
- A content viewer that shows decompiled assembly sources straight within NuGet Package Explorer.
- A custom validation rule that checks NuGet.org to see whether the package version you are creating already exists. (I hate it when I have to repackage because of this.)
- Maybe a tool menu that finds the GitHub project for a package and loads the readme file on demand?
There is more we can think of, and we are pretty sure that you might come up with some great plug-ins as well.
Invoking NuGet Services from Inside Visual Studio
There is one other extensibility point for NuGet. When creating your own Visual Studio extensions, some NuGet services can be used to interact with NuGet. For example if you are creating a unit test runner plug-in for Visual Studio, the NuGet services can be used to install the unit-testing framework. Or if you are creating a Visual Studio extension with additional features for a specific open source project, the related NuGet package can be installed (or upgraded) from within that extension.
NuGet exports several interfaces that can be used in your own Visual Studio extension (after installing the NuGet.VisualStudio package into your extension project):
- IVsPackageInstaller: Contains methods to install NuGet packages into projects.
- IVsPackageInstallerEvents: Offers events that raise when packages are installed and uninstalled in the current solution.
- IVsPackageInstallerServices: Contains a method to retrieve installed packages in the current solution, as well as methods to check whether a specified package ID is installed in a project.
- IVsPackageUninstaller: Contains methods to uninstall NuGet packages from projects.
- IConsoleInitializer: Triggers eager initialization of the NuGet Package Manager Console.
- IVsTemplateWizard: This interface is designed for project/item templates to include preinstalled packages, and is not meant to be invoked from code.
For more information regarding these services, check out the documentation at http://docs.nuget.org/docs/reference/invoking-nuget-services-from-inside-visual-studio.
Summary
In this chapter, we covered the power of NuGet: its simplicity (it enables you to publish and consume packages) and its extensibility (the three mayor clients to work with NuGet can be extended with more power).
We’ve created extensions for all three clients. We’ve extended the NuGet command line with custom package analysis rules and a custom analyze command. We’ve seen how to install these extensions as well.
The Package Manager Console was extended with several cmdlets—some simple commands that instruct Visual Studio to search for symbols or remove and sort using directives. We’ve covered how to create more-complex commands with tab expansion support for creating an experience similar to IntelliSense for the users of your extensions.
NuGet Package Explorer can also be extended. We’ve demonstrated this with a plug-in providing you with ILSpy integration, allowing you to disassemble binary package content right from within NuGet Package Explorer. No need to extract the desired assembly from the package, open Windows Explorer windows to find ILSpy.exe, and then manually drag the assembly onto the ILSpy window. It is a much better experience to automate such things.
We have also seen that it is possible to invoke NuGet services from inside Visual Studio when creating our own Visual Studio extensions.
If you find yourself executing repetitive tasks when working with any of these NuGet client tools, consider whether writing a simple extension or plug-in could help you out and save you, and others, lots of time in the future.
In the next chapter, we’ll go one step further. NuGet is great for managing packages, but if we change perspective, you’ll see that NuGet can be considered a protocol too—a protocol that enables you to automatically update your applications or to extend your own applications with plug-ins that are distributed through NuGet. And that’s exactly what we’ll do in the next chapter.