
“Truth can only be found in one place: the code”—Robert C. Martin
This will be the most ambitious chapter in the entire book. I’ll attempt to walk you through a common technical product manager interview question that will give you insight into the way the Internet works, then cover the elements of a website to show you all the web technologies that play a part in the page being loaded in your browser. You will not magically become a web developer or immediately understand the nitty gritty of networking, but with additional study you will be able to firmly grasp the concepts we cover. If you already have a background in software development, skip past this chapter and move onward.
Why cover web instead of other technologies?
We’re deeply rooted in the age of web and mobile development, and this will stay true for at least the next decade. More users around the globe are able to get online, and this opens up access to applications and experiences they weren’t previously able to participate in. In addition, engineers are able to spin up web apps and build upon Internet technologies at a faster rate than ever, so it’s a stable jumping off point as a first introduction. Lastly, coding bootcamps, both domestic and international, are focusing on training web engineers, since one can be brought up to an intermediate level of ability in a relatively short period of time (4-6 months).
The question
“What happens when I type
www.amazon.com
into a web browser and hit enter?”
Non-technical users are abstracted away from all of the systems and technologies that power an ordinary page request on the Internet. Although it may seem simple and straightforward, a lot of connected gears have to work properly for you to have a seamless browsing experience. If you perform a simple search on “technical product manager interview questions” on Google, you’ll easily discover a variation of this question surfacing over and over again.
Why is this question such a popular one? It is because it tests the systems-level knowledge of the product manager, and provides a platform for the PM to put their technical know-how on display without explicitly coding on a whiteboard or referencing specific functions of programming languages. When this question is posed to a PM, there are three tiers of responses that are common among interviewees.
Expert-level knowledge:
References DNS (including methods of load balancing and limitations), caching, CDNs, ARP, sockets, web stack, page rendering, load balancers, performance expectations, availability, SYN/ACK, TCP/IP, HTTP(S), user agent, security implications, and so on.
Basic knowledge: References DNS, CDNs, caching, TCP/IP, HTTPS, and so on.
Lack of understanding: References DNS only, talks about how it hits a server, or fails to deliver an answer due to lack of technical knowledge.
In this section, we’ll float between expert-level and basic concepts, boiling them down to understandable terms. The goal isn’t to remember the details, but to burn the concepts deep in your mind so you can have a broad strokes view into how it all happens in the blink of an eye.
Let’s get started.
Step 1: www.amazon.com is typed into the web browser
Self-explanatory. Fire up Chrome, Firefox, Safari, or Edge browser and type in the URL (in this case, amazon.com). Hit enter, and activate the set of digital dominos that follow.
Fun fact: Sometimes you will see references to
www.amazon.com
, sometimes to just amazon.com. The abbreviation www is a reference to the mostly deprecated phrase “World Wide Web
” which gained prominence in the late 1990s. Today, in most cases, you do not need to use www in an address when going to a website, but some websites do still require it.
Step 2: DNS (Domain Name Server / System)
In its simplest form, the Internet is just a connected set of computers or servers that contain files that people want to access. When you input amazon.com in the browser, you’re requesting a set of resources from a server that exists in the digital ether, and asking it to execute a particular task. In order to send the request to the right server, the Internet uses IP addresses
to communicate. An IP address is a unique sequence of numbers used to identify devices connected to the Internet. In the case of amazon.com, we can find the IP address that corresponds to the website by using the “ping” command
.
If you are on a Mac, use Spotlight search to open the Terminal app. Type in the command “ping amazon.com” and press enter to execute it. You should see the following screen returned:
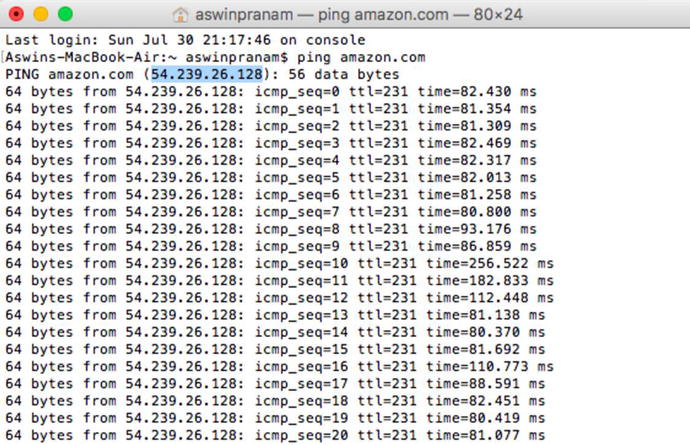
Ignore the rows and rows of data that show up, and focus entirely on the highlighted IP address (in this case, 54.239.26.128). This is the identifier for the server that our request to load amazon.com goes to.
Now, as a user, if we had to remember the IP addresses of every website we wanted to visit, we’d have to keep a paper Rolodex or Word doc handy. This also limits our ability to visit a lot of sites because the process becomes too cumbersome. Not ideal.
DNS (Domain Name System) solves this problem. Instead of remembering 54.239.26.128 each time we want to buy an item from Amazon, we only have to remember “amazon.com
”. DNS is a virtual phonebook
; the URL is an easy-to-remember domain name that we’re able to commit to memory, and DNS converts it into an IP addresses that finds the correct resource on the internet. Think about it like storing contacts on your phone; you can’t remember the phone numbers of every contact on your phone, but you don’t need to because they’re saved behind a contact name.
To further illustrate how this system works, it’s entirely acceptable to use the IP address in the search bar and get the same result.
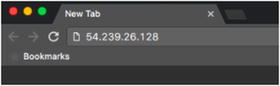
Here, the IP address 54.239.26.128 is typed into the search bar.

DNS finds the correct web resource, and the browser reverses the IP address to amazon.com for readability.
Now that we understand how DNS is used, it’s important to keep in mind that web requests take time. Even if it’s in the order of milliseconds, it can affect the experience of content delivery. To speed up the request each time, your browser will store data locally (known as caching
). In the case of DNS, once we’ve accessed amazon.com once, there’s no reason to hit the DNS each time because that slows performance. Instead, the browser will create a local DNS cache of the websites you’ve been to so the next time you visit amazon.com, it can directly you immediately to the website without hitting the DNS upstream. There are other caches (OS cache, router cache) along the way that can improve performance, but we’ll leave them out since that’s dipping too deep.
DNS isn’t just one big server that all computers know how to reach. It is a decentralized system of servers that are provided by Internet Service Providers (ISPs)
and network operators
as resources to computers on their network. In addition, large companies like Google provide their own DNS services internally and to the public.
To further simplify, DNS follows the path defined below:
Browser cache
(if website was accessed at least once) ➤ intermediary DNS ➤ root / authoritative DNS
The intermediary DNS is usually controlled by your ISP (Internet Service Provider) and configured automatically unless you change it, but the authoritative DNS is the source of truth that contains ALL of the webpages that are newly created. If you register
www.newwebsite.com
, it will be added to the root DNS and flow downstream to all of the domain name systems across the Internet. This is partly why you need to wait anywhere between 1 hour to 24 hours after buying a domain name to actually see your website up and running.
Fun fact: groups of websites have gone down in the past because hacker groups have targeted DNS specifically. If you disable the phonebook that controls Internet routing, people no longer can access the website in the way they’re used to. However, if you know the corresponding IP address, you can access the website directly and circumvent the problem of failed DNS requests.
Step 3: TCP (Transmission Control Protocol)
TCP is an underlying protocol that powers communication of data between interconnected systems. In our use case, TCP establishes a line of contact with the server using a
handshake
.
To decompose this concept, you can think of the handshake in the following way:
- Alice sends a message to Bob saying, “did you get my message?”
- Bob sends a message back to Alice saying “Yes I got your message. Did you receive this message back?”
- Alice receives the message and says “Yes, I received your message back”
The technical implementation follows a similar exchange:
- System A (browser) send a SYN packet (small unit of data) to System B (Amazon server)
- System B receives the SYN packet, and sends a SYN-ACK response to System A
- System A receives the SYN-ACK response and sends an ACK response to System B
This confirms to both parties that an active line is established, and now requests can be sent over the established TCP connection.
Step 4: HTTP (Hypertext Transfer Protocol)
HTTP is an application-layer protocol
that sits on top of TCP to enable web activity and navigation on the Internet. After the TCP connection is established, the web browser sends an HTTP GET request. A GET request basically says, “I want to GET some data from your server”; in our case, the Amazon landing page. The GET requests sends additional data in the header of the request called the
user-agent, which communicates the user’s browser and device type, in order to deliver the content in the relevant format, among other things.
Optional Step 5: Load balancing
A website at the scale of Amazon is hammered by millions of requests and transactions each day. If they only had one server to handle all requests, the site would go down immediately. To combat this situation, Amazon will have multiple servers across strategic geographic locations that can handle user requests. To decide which server to send your particular request to, they use a technique known as load balancing.
A load balancer (either hardware or software based) accepts a request, and uses a set of procedures to determine which server to forward the request to. In a simple case, let’s say we receive 10 requests in the span of 1 second. A round robin method can be used to send request #1 to server 1, request #2 to server 2, request #3 to server 3, and request #4 back to server 1. This process continues in a predictable, repeatable manner so requests are evenly distributed. When it comes to setting up and using a load balancer, it is advisable to use two for the purposes of redundancy. If only one load balancer exists, and it fails for any reason, it can create a bottleneck that swallows up all the requests and prevents them from being routed to the web servers correctly. Using two load balancers that communicate with each other using a heartbeat (simple ping to see if the other is alive / active) protects the system and creates a fail-safe mechanism.
Optional Step 6: CDNs (Content Delivery Network)
A CDN is a system of distributed servers that organizations can use to deliver content to users in a faster way. For example, if a new startup wants to increase performance without buying expensive bare metal servers or spinning up virtual machines, they can tap into the power of a CDN and host their files on this widespread network of servers. Since CDNs are designed to have servers available in locations that deliver content to users quickly, the CDN servers will absorb the traffic and alleviate pressure on the startup’s central hosting solution. Not all products or companies will need to use a CDN, but it’s important to know they exist if scaling is called into the conversation. One popular CDN is Cloudflare
.
Step 7: Web server response
The HTTP request sent earlier by the browser is accepted by the web server, and HTML content is sent back to the client browser. When the HTTP request is accepted, there is a web server (Apache, Nginx) that is responsible for handling the request, and a back-end programming language or framework (PHP, Ruby, Python) that handles what actions to take.
Step 8: Browser generates content
The server sends the requested content to the user’s browser, and the HTML content is loaded, along with linked style sheets, scripts, and associated content. All of this comes together to display the
www.amazon.com
landing page.
Voila, we’ve covered the highlights of how content is delivered on the Internet! It’s certainly possible to expand on each step, but this level of granularity is acceptable for a product manager’s body of knowledge. Going a tier deeper in understanding is not expected, and is usually better left for a software engineering or technical architect interview setting.
Software Engineering: Through the lens
I am a software engineer who works with product managers on a daily basis. Week-to-week, product managers do a ton of research on where the market is headed, and based on their research, they come up with a product vision for the next generation of products. Additionally, they consult software engineers to see how much their product vision can become a reality. Product managers provide a lot of value because they are thinking about what is best for the customers. Their vision helps gain customer attraction to the product, and indirectly, they help drive the revenue for the company.
While it is not needed for product managers to have technical knowledge
, it really helps the engineering team if they do. One of the primary reasons for this is because having the technical knowledge helps the product manager connect well with the engineering team, and have a clear end-to-end discussion of how a product might get built up. Additionally, while building a product, if there are technical obstacles, then a product manager’s technical background really helps drive the product vision and decision forward.
I do have a couple of tips for PMs to work well with engineering teams. First, keep dreaming high. By dreaming high, a PM’s vision really helps the engineer push for the best product out there. Second, when there is a problem, try to understand the problem and help the engineers come up with a better solution. Often times, without understanding the full picture, PMs often try to give an alternate solution which confuses the software engineer even more. So, it is really advisable to get a deeper understanding of the problem they are facing. Finally, while it is good come up with tight deadlines, realize that software engineers are humans too. A PM who treats fellow engineers as humans really stands out as way more likeable and efficient than someone who treats them as a working machine to fulfill their vision.
- Ayanjyoti Ghosh, SDE at Amazon. Previously Software Engineer at Microsoft & Intel.
The web stack
Now that we have an understanding of the process of servicing a web request, let’s cover the web stack. A stack is a collection of technologies that power a software product. A product manager will frequently be in the room for discussions regarding the stack, but they’re not expected to contribute in meaningful ways that define the architecture. Still, it’s useful to know the basic terminology so the entire conversation doesn’t go over your head. Over time, as you close knowledge gaps, you can establish goodwill with the engineering team and make recommendations on frameworks, tradeoffs, and pros / cons of the design of the product.
In web programming
, the two most commonly used stacks are LAMP and MEAN.
LAMP stands for Linux, Apache, MySQL, and PHP. Linux is the underlying operating system, Apache
is the HTTP web server, MySQL is the database, and PHP is the back-end programming language. The MEAN stack stands for MongoDB, Express.js, Angular.js, and Node.js. In this model, MongoDB is the database, Express.js (known as Express) is a web application framework, Angular.js (known as Angular) is a front-end framework, and Node.js (known as Node) is a server-side framework. The LAMP stack was the popular choice in the last 5-10 years of web development, but MEAN is quickly picking up steam. It is becoming the preferred stack because the entire top-down stack consists of JavaScript as both the front and back-end programming language, whereas LAMP requires knowledge of JavaScript on the client end and a supporting back-end language like PHP. We won’t be walking through each set of technologies listed, but it’s worth looking into.
Front end vs. Back end
Up to this point, we’ve made several references to front-end and back-end technologies. Let’s clarify the difference.
Front end: The software development that happens on the user-side. When you interact with buttons, forms, input boxes, images, banners and other elements of a webpage on a browser, all of this falls under the purview of the front-end developer. On this side, the primary technologies a front-end developer will work with are HTML, CSS, JavaScript, and any associated libraries (jQuery, Angular.js, etc.).
Back end:
The code running on the back-end server that processes front-end queries and returns data back to the user. The back-end interactions are hidden from the user view, and relate to databases and application languages like PHP, Ruby (with the framework Ruby on Rails), Python (using the Django framework), and so on. The back-end language processes user logins, fetches your personalized content, manages state, etc.
Companies tend to hire front-end developers, back-end developers, and full-stack developers (engineers who can float between both disciplines) for web application development.
Getting started with front-end development
In this section, we’ll walk through the basics of three languages that define front-end development: HTML, CSS, and JavaScript. Each language has a place and purpose, and come together to display a webpage and all of its elements on the browser you’re using. If we simplify the job of each language down to two key terms each, they are all described in the following way:
- HTML – content & structure
- CSS – styling & design
- JavaScript – action & interactivity
As we step through each language, the distinctions will become clear and you’ll naturally understand the separation.
HTML (Hypertext Markup Language)
HTML structures content using tags. A tag
helps define an element on a page and render content on the browser. For an element to be considered valid, it must consist of an opening and closing tag with angle brackets, with the closing tag using a forward slash (/) to indicate closure.
Tag examples:
<div></div>
<p></p>
<title></title>
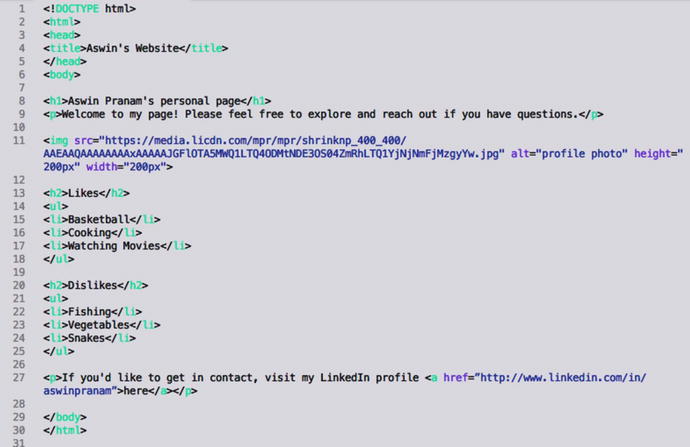
To visualize this, let’s step through an example HTML file. Open up a text editor on your computer (Notepad++, Sublime Text, Visual Studio Code), create a file called index.html, copy & paste the following code, and save.

- <!DOCTYPE html> - the DOCTYPE declaration indicates the HTML version of the file and doesn’t require a closing tag. In this case, the version is HTML5 (default).
- <html> - the HTML tag is the parent element of every HTML file, and all elements fall between the start and end tags of this element.
- <head> - HEAD is used to capture metadata, non-visible content, links to stylesheets or scripts, and the title of the webpage.
- <title> - TITLE sets the browser tab title.
- <body> - The space for BODY is used for all of the content visible to the user and rendered on the browser.
- <div> - DIV is used to separate sets of data into logical groups. As you can imagine, a page with a lot of content can easily become difficult to manage, so you can use DIVs to create sections to reference later on.
- <h1> - H1 is the header tag, and bolds section titles and increases font size for headlines.
- <p> - The P tag (paragraph) is used to define a paragraph.
If we refer back to the index.html file we created and double click into it, a browser window will open and our page will be displayed.

- The browser tab title is “random title”, as defined by the <title> tag
- The header name is “header1”, as defined by the <h1> tag
- “Paragraph 1” is defined by the <p1> tag
- “Paragraph 2” is defined by the <p2> tag
- <div> is hidden from the user view, and used only to the benefit of the developer to split content in the HTML file
In short, meshing tags together to display content is at the heart of what HTML does. To supplement your learning, go to popular web pages, right-click, and select “View Page Source”. Since HTML is a frontend language, you’ll be able to freely view how any website has managed to build out their frame (unless they purposely obfuscate the content).
Tags, tags, and more tags
<img> - Image tag
The image tag allows the developer to link images to the page. The <img> tag doesn’t require a closing tag, but needs two attributes to be specified: src and alt. Src (source) points us to the location of the image so we can appropriately paste it into the page, and alt (alternate text) shows users a text explanation of the image if it doesn’t load properly. Alt is also used for accessibility users who use screen readers to ingest web content, so it is important to include it.
Example image tag: <img src=“aswin.png” alt =“profile photo”>
<ul> / <ol> - Unordered and ordered list tags
To create list items in HTML, you can use the ordered list tag (<ul>) or unordered list tag (<ol>). The key difference is that <ul> will number the items in the list, whereas <ol> will be unordered. Both lists use the <li> tag to signify a single item in the list.
Example lists:
<ul>
<li>Basketball</li>
<li>Cooking</li>
<li>Watching Movies</li>
</ul>
<ol>
<li>Fishing</li>
<li>Vegetables</li>
<li>Snakes</li>
</ol>
<a> - Hyperlink tag
The <a> tag links one page to another (hyperlink). <a> requires the use of the “href” attribute to define the linked page, and the text in between the opening and closing <a> tag specifies the text you want hyperlinked.
Example hyperlink tag: <a href="www.linkedin.com/in/aswinpranam">Aswin's resume</a>
Nesting
Tags open up a world of possibility and flexibility to the developer, but often we’ll want to combine individual tags together to take advantage of new functionality. For example, what if we want to create an ordered list of our favorite websites, with each list item hyperlinked to the respective webpage? That’s where nesting comes in.
We’re able to nest as many tags as we want, and it helps us structure our content in new ways. Just remember: we still need to abide by HTML rules and close each tag (if required) and be careful to close the tags in an inside-out manner.
Nesting #1: Linking an image to a webpage
<a href="www.linkedin.com/in/aswinpranam"><img src="aswin.png" alt ="profile photo"></a>
Nesting #2: Creating an ordered list of links
<ol>
<li><a href="www.amazon.com">Amazon homepage</a> </li>
<li><a href="www.google.com">Google homepage</a></li>
<li><a href="www.facebook.com">Facebook homepage</a></li>
</ol>
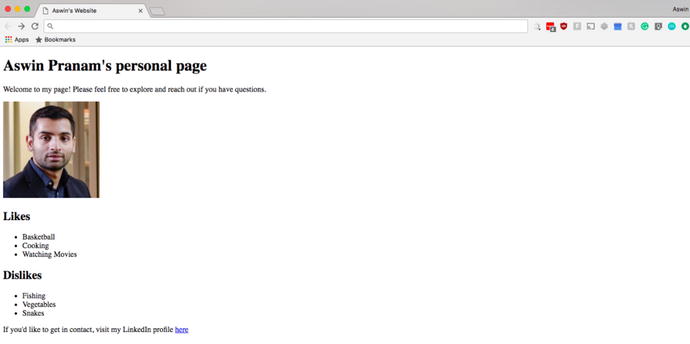
Now that we’ve gone through the fundamental makeup of an HTML page and the basic tags that create the content hierarchy, let’s put all of this together to build a personal profile page. See if you can understand the code, and how it corresponds to the finished output below.
Source code:
Profile webpage:
And that’s it! Next up, CSS.
CSS (Cascading Style Sheets)
CSS is used for styling, decorating, and presenting the overall aesthetic of the webpage. The profile page we created using HTML is a start, but it’s barebones: no colors, font styling, or patterning. CSS works by using selectors to select elements on the page, then assigns a set of properties to those elements.
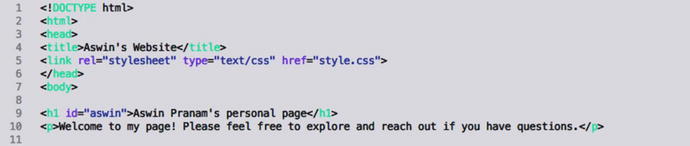
Let’s look at a quick example. To begin, create a new file using your editor called style.css. Next, open index.html and add a <link> tag to the <head> section. The <link> tag connects CSS code to the HTML file.

Once the style.css file is linked, we can start altering the elements in the index.html file. To select elements to style, we use the HTML tag name. If we want to change the color of <h1> elements to red and set a background color of black, we can use the code below in style.css. In parallel, we can change all of the <p> elements to have a blue background color and a dotted border by using similar syntax.

HTML + CSS profile website:
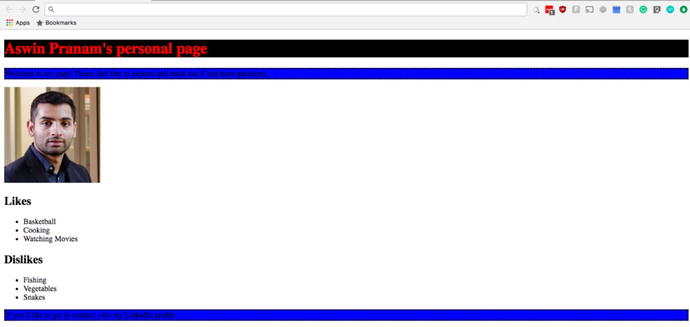
It’s not pretty, but it drives the concept home. The process of building a beautiful web page is painstaking, and a solid reason why we should thank our front-end developers and web designers.
One additional point to know about CSS is the concept of an ID and Class. In the above example, we chose to style headers and paragraphs, but the commands we coded styles every single header and paragraph on the page. What if we only want to target one header, or select paragraphs?
To do this, we need to open our index.html file, and add an ID or Class to the element we want to change exclusively. In our case, we can append an id attribute to <h1> and call it “aswin”.
Then, we can replace h1 in the CSS file to #aswin and the styling that follows will only apply to the element with the ID.

IDs are defined using the “id” attribute, whereas classes are defined using “class
” in the HTML file. IDs can only be used on one element, but classes can be assigned to multiple elements simultaneously for batched styling.
Content & structure: check.
Styling & design: check.
JavaScript
JS (JavaScript) is the third and most expansive language on the front-end web stack. JavaScript can be used for front-end interactivity, but it can also be run on the server as a back-end language using Node.js, or even as a desktop development language using third-party frameworks and libraries. If there’s ever a time to master one language and one language alone, JavaScript would be a prime candidate for the top spot.
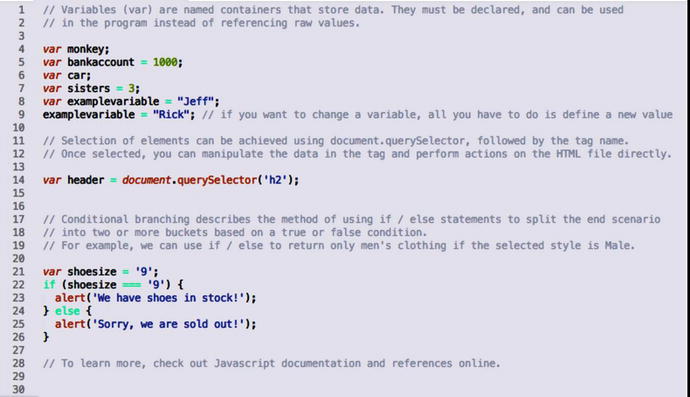
The purpose of JavaScript on the front-end is to enable actions across the website; button click responses, submitting content to the server, animations, and pushing / pulling content as needed. It’s impossible to cover all the intricacies of JavaScript as a language in a handful of pages (refer to additional resources below for further learning), but I’ll add a block of code with basic functions below for the curious.
Additional Resources
- HTML / CSS
- HTML & CSS, design and build web sites by Jon Duckett
- W3Schools online web tutorials / documentation
- Head First HTML with CSS by Elisabeth Freeman and Eric Freeman
- JavaScript
- Javascript: the definitive guide by David Flanagan
- Beginning Node.js by Basarat Syed
- Pro Angular by Adam Freeman
- Pro Mean Stack Development by Elad Elrom
- Back-end software development
- Head First Rails by Thomas Asbridge
- Django by Example by Antonio Mele
- Murach’s PHP & mySQL by Joel Murach and Ray Harris
- Udacity / Coursera free online classes on back-end programming languages
Final Thoughts
Technical expertise can be a powerful differentiator for a product manager. Although not required, a high-level understanding of how a collection of technologies come together and the benefits & limitations of each is never a bad skill to possess. You’re not an expert on web development after covering this chapter; not even close. But, breaking complex ideas down to simple terms hopefully has inspired you to learn on your own time. A lot of the technologies you interact with frequently can be mastered in a short time window, and it doesn’t have to be just an engineer’s task to think through decisions about architecture and technical design.