
WHAT'S IN THIS CHAPTER?
Discovering remote Bluetooth devices
Managing discovery mode
Communicating over Bluetooth
Monitoring Internet connectivity
Obeying user preferences for background data transfer
Monitoring Wi-Fi and network details
Configuring networks and Wi-Fi configurations
Scanning for Wi-Fi access points
In this chapter you'll continue to explore Android's low-level communications APIs by examining the Bluetooth, network, and Wi-Fi packages.
Android offers APIs to manage and monitor your Bluetooth device settings, to control discoverability, to discover nearby Bluetooth devices, and to use Bluetooth as a proximity-based peer-to-peer transport layer for your applications.
A full network and Wi-Fi package is also available. Using these APIs you can scan for hotspots, create and modify Wi-Fi configuration settings, monitor your Internet connectivity, and control and monitor Internet settings and preferences.
In this section you'll learn how to interact with the local Bluetooth device and communicate with remote devices on nearby phones.
Using Bluetooth you can search for, and connect to, other devices within range. By initiating a communications link using Bluetooth Sockets you can then transmit and receive streams of data between devices from within your applications.
Note
The Bluetooth libraries have been available in Android only since Android version 2.0 (SDK API level 5). It's also important to remember that not all Android devices will necessarily include Bluetooth hardware.
Bluetooth is a communications protocol designed for short-range, low-bandwidth peer-to-peer communications. As of Android 2.1, only encrypted communication is supported, meaning you can only form connections between paired devices. In Android, Bluetooth devices and connections are handled by the following classes:
BluetoothAdapterThe Bluetooth Adapter represents the local Bluetooth device — that is, the Android device on which your application is running.BluetoothDeviceEach remote device with which you wish to communicate is represented as aBluetoothDevice.BluetoothSocketCallcreateRfcommSocketToServiceRecordon a remote Bluetooth Device object to create a Bluetooth Socket that will let you make a connection request to the remote device, and then initiate communications.BluetoothServerSocketBy creating a Bluetooth Server Socket (using thelistenUsingRfcommWithServiceRecordmethod) on your local Bluetooth Adapter, you can listen for incoming connection requests from Bluetooth Sockets on remote devices.
The local Bluetooth device is controlled via the BluetoothAdapter class.
To access the default Bluetooth adapter on the host device call getDefaultAdapter, as shown in Listing 13-1. It is possible that some Android devices will feature multiple Bluetooth adapters, though it is currently only possible to access the default device.
Example 13-1. Accessing the default Bluetooth Adapter
BluetoothAdapter bluetooth = BluetoothAdapter.getDefaultAdapter();
To read any of the local Bluetooth Adapter properties, initiate discovery, or find bonded devices you will need to include the BLUETOOTH manifest permission. In order to modify any of the local device properties the BLUETOOTH_ADMIN uses-permission is also required.
<uses-permission android:name="android.permission.BLUETOOTH"/>
<uses-permission android:name="android.permission.BLUETOOTH_ADMIN"/>
The Bluetooth Adapter offers methods for reading and setting properties of the local Bluetooth hardware.
Note
The Bluetooth Adapter properties can be read and changed only if the Bluetooth adapter is currently turned on (that is, if its device state is enabled). If the device is off, these methods will return null.
If the Bluetooth Adapter is turned on, and you have included the BLUETOOTH permission in your manifest, you can access the Bluetooth Adapter's friendly name (an arbitrary string that users can set and then use to identify a particular device) and hardware address, as shown in Listing 13-2.
Use the isEnabled method, as shown in Listing 13-2, to confirm the device is enabled before accessing these properties.
Example 13-2. Reading Bluetooth Adapter properties
BluetoothAdapter bluetooth = BluetoothAdapter.getDefaultAdapter();

String toastText;
if (bluetooth.isEnabled()) {
  String address = bluetooth.getAddress();
  String name = bluetooth.getName();
  toastText = name + " : " + address;
}
else
  toastText = "Bluetooth is not enabled";

Toast.makeText(this, toastText, Toast.LENGTH_LONG).show();
If you also have the BLUETOOTH_ADMIN permission you can change the friendly name of the Bluetooth Adapter using the setName method:
bluetooth.setName("Blackfang");To find a more detailed description of the current Bluetooth Adapter state, use the getState method, which will return one of the following BluetoothAdapter constants:
By default the Bluetooth adapter will be turned off. In order to conserve battery life and optimize security, most users will keep Bluetooth disabled unless it's in use.
To enable the Bluetooth Adapter you can start a system sub-Activity using the ACTION_REQUEST_ENABLE Bluetooth Adapter static constant as a startActivityForResult action string:
String enableBT = BluetoothAdapter.ACTION_REQUEST_ENABLE;
startActivityForResult(new Intent(enableBT), 0);
The sub-Activity is shown in Figure 13-1. It prompts the user to turn on Bluetooth and asks for confirmation. If the user agrees, the sub-Activity will close and return to the calling Activity once the Bluetooth Adapter has turned on (or has encountered an error). If the user selects no, the sub-Activity will close and return immediately. Use the result code parameter returned in the onActivityResult handler to determine the success of this operation.

Note
It is also possible to turn the Bluetooth Adapter on and off directly, using the enable and disable methods, if you include the BLUETOOTH_ADMIN permission in your manifest.
Note that this should be done only when absolutely necessary and that the user should always be notified if you are manually changing the Bluetooth Adapter status on the user's behalf. In most cases you should use the Intent mechanism described earlier.
Enabling and disabling the Bluetooth Adapter are somewhat time-consuming, asynchronous operations. Rather than polling the Bluetooth Adapter, your application should register a Broadcast Receiver that listens for ACTION_STATE_CHANGED. The broadcast Intent will include two extras, EXTRA_STATE and EXTRA_PREVIOUS_STATE, which indicate the current and previous Bluetooth Adapter states, respectively.
Listing 13-3 shows how to use an Intent to prompt the user to enable Bluetooth and a Broadcast Receiver to track changes in the Bluetooth Adapter status.
Example 13-3. Enabling Bluetooth and tracking the adapter state
BluetoothAdapter bluetooth = BluetoothAdapter.getDefaultAdapter();

BroadcastReceiver bluetoothState = new BroadcastReceiver() {
  @Override
  public void onReceive(Context context, Intent intent) {
    String prevStateExtra = BluetoothAdapter.EXTRA_PREVIOUS_STATE;
    String stateExtra = BluetoothAdapter.EXTRA_STATE;
    int state = intent.getIntExtra(stateExtra, −1);
    int previousState = intent.getIntExtra(prevStateExtra, −1);

    String tt = "";
    switch (state) {
      case (BluetoothAdapter.STATE_TURNING_ON) : {
        tt = "Bluetooth turning on"; break;
      }
      case (BluetoothAdapter.STATE_ON) : {
        tt = "Bluetooth on";
        unregisterReceiver(this);
        break;
      }
      case (BluetoothAdapter.STATE_TURNING_OFF) : {
        tt = "Bluetooth turning off"; break;
      }
      case (BluetoothAdapter.STATE_OFF) : {
        tt = "Bluetooth off"; break;
      }
      default: break;
    }

    Toast.makeText(this, tt, Toast.LENGTH_LONG).show();
  }
};

if (!bluetooth.isEnabled()) {
  String actionStateChanged = BluetoothAdapter.ACTION_STATE_CHANGED;
  String actionRequestEnable = BluetoothAdapter.ACTION_REQUEST_ENABLE;
  registerReceiver(bluetoothState,
                   new IntentFilter(actionStateChanged));
  startActivityForResult(new Intent(actionRequestEnable), 0);
}The process of two devices finding each other in order to connect is called discovery. Before you can establish a Bluetooth Socket for communications, the local Bluetooth Adapter must bond with the remote device. Before two devices can bond and connect, they first need to discover each other.
Note
While the Bluetooth protocol supports ad-hoc connections for data transfer, this mechanism is not currently available in Android. Android Bluetooth communication is currently supported only between bonded devices.
In order for remote Android Devices to find your local Bluetooth Adapter during a discovery scan, you need to ensure that it is discoverable.
The Bluetooth Adapter's discoverability is indicated by its scan mode. You can find the adapter's scan mode by calling getScanMode on the BluetoothAdapter object. It will return one of the following BluetoothAdapter constants:
SCAN_MODE_CONNECTABLE_DISCOVERABLEInquiry scan and page scan are both enabled, meaning that the device is discoverable from any Bluetooth device performing a discovery scan.SCAN_MODE_CONNECTABLEPage Scan is enabled but inquiry scan is not. This means that devices that have previously connected and bonded to the local device can find it during discovery, but new devices can't.SCAN_MODE_NONEDiscoverability is turned off. No remote devices can find the local adapter during discovery.

For privacy reasons, Android devices will default to having discoverability disabled. To turn on discovery you need to obtain explicit permission from the user; you do this by starting a new Activity using the ACTION_REQUEST_DISCOVERABLE action:
String aDiscoverable =BluetoothAdapter.ACTION_REQUEST_DISCOVERABLE;startActivityForResult(new Intent(aDiscoverable), DISCOVERY_REQUEST);
By default discoverability will be enabled for two minutes. You can modify this setting by adding an EXTRA_DISCOVERABLE_DURATION extra to the launch Intent, specifying the number of seconds you want discoverability to last.
When the Intent is broadcast the user will be prompted by the dialog shown in Figure 13-2 to turn discoverability on for the specified duration.
To learn if the user has allowed or rejected your discovery request, override the onActivityResult handler, as shown in Listing 13-4. The returned resultCode parameter indicates the duration of discoverability, or a negative number if the user has rejected your request.
Example 13-4. Monitoring discoverability modes
@Override
protected void onActivityResult(int requestCode,
                                int resultCode, Intent data) {
  if (requestCode == DISCOVERY_REQUEST) {
    boolean isDiscoverable = resultCode > 0;
    int discoverableDuration = resultCode;
  }
}
Alternatively you can monitor changes in discoverability by receiving the ACTION_SCAN_MODE_CHANGED broadcast action, as shown in Listing 13-5. The broadcast Intent includes the current and previous scan modes as extras.
Example 13-5. Monitoring discoverability modes
registerReceiver(new BroadcastReceiver() {
  @Override
  public void onReceive(Context context, Intent intent) {
    String prevScanMode = BluetoothAdapter.EXTRA_PREVIOUS_SCAN_MODE;
    String scanMode = BluetoothAdapter.EXTRA_SCAN_MODE;
    int scanMode = intent.getIntExtra(scanMode, −1);

    int prevMode = intent.getIntExtra(prevScanMode, −1);
  }
},
new IntentFilter(BluetoothAdapter.ACTION_SCAN_MODE_CHANGED));In this section you'll now learn how to initiate discovery from your local adapter to find discoverable devices nearby.
Note
The discovery process can take some time to complete (up to 12 seconds). During this time, performance of your Bluetooth Adapter communications will be seriously degraded. Use the techniques in this section to check and monitor the discovery status of the Bluetooth Adapter, and avoid doing high-bandwidth operations (including connecting to a new remote Bluetooth Device) while discovery is in progress.
You can check to see if the local Bluetooth Adapter is already performing a discovery scan using the isDiscovering method.
To initiate the discovery process call startDiscovery on the Bluetooth Adapter. To cancel a discovery in progress call cancelDiscovery.
bluetooth.startDiscovery();
bluetooth.cancelDiscovery();
The discovery process is asynchronous. Android uses broadcast Intents to notify you of the start and end of discovery as well as remote devices discovered during the scan.
You can monitor changes in the discovery process by creating Broadcast Receivers to listen for the ACTION_DISCOVERY_STARTED and ACTION_DISCOVERY_FINISHED broadcast Intents, as shown in Listing 13-6.
Example 13-6. Monitoring discovery
BroadcastReceiver discoveryMonitor = new BroadcastReceiver() {

  String dStarted = BluetoothAdapter.ACTION_DISCOVERY_STARTED;
  String dFinished = BluetoothAdapter.ACTION_DISCOVERY_FINISHED;

  @Override
  public void onReceive(Context context, Intent intent) {
    if (dStarted.equals(intent.getAction())) {
      // Discovery has started.
      Toast.makeText(getApplicationContext(),
                     "Discovery Started...", Toast.LENGTH_SHORT).show();
    }
    else if (dFinished.equals(intent.getAction())) {
      // Discovery has completed.
      Toast.makeText(getApplicationContext(),
                     "Discovery Completed...", Toast.LENGTH_SHORT).show();
    }
  }
};
registerReceiver(discoveryMonitor,
                 new IntentFilter(dStarted));
registerReceiver(discoveryMonitor,
                 new IntentFilter(dFinished));
Discovered Bluetooth Devices are returned via broadcast Intents by means of the ACTION_FOUND broadcast action.
As shown in Listing 13-7, each broadcast Intent includes the name of the remote device in an extra indexed as BluetoothDevice.EXTRA_NAME, and an immutable representation of the remote Bluetooth device as a BluetoothDevice parcelable object stored under the BluetoothDevice.EXTRA_DEVICE extra.
Example 13-7. Discovering remote Bluetooth Devices
BroadcastReceiver discoveryResult = new BroadcastReceiver() {
  @Override
  public void onReceive(Context context, Intent intent) {
    String remoteDeviceName =
      intent.getStringExtra(BluetoothDevice.EXTRA_NAME);
BluetoothDevice remoteDevice;
remoteDevice = intent.getParcelableExtra(BluetoothDevice.EXTRA_DEVICE);
Toast.makeText(getApplicationContext(),
"Discovered: " + remoteDeviceName,
Toast.LENGTH_SHORT).show();
// TODO Do something with the remote Bluetooth Device.
}
};
registerReceiver(discoveryResult,
new IntentFilter(BluetoothDevice.ACTION_FOUND));
if (!bluetooth.isDiscovering())
bluetooth.startDiscovery();The BluetoothDevice object returned through the discovery broadcast represents the remote Bluetooth Device discovered. In the following sections it will be used to create a connection, bond, and ultimately transfer data between the local Bluetooth Adapter and the remote Bluetooth Device.
The Bluetooth communications APIs are wrappers around RFCOMM, the Bluetooth radio frequency communications protocol. RFCOMM supports RS232 serial communication over the Logical Link Control and Adaptation Protocol (L2CAP) layer.
In practice, this alphabet soup provides a mechanism for opening communication sockets between two paired Bluetooth devices.
Note
Before your application can communicate between devices they must be paired (bonded). At the time of writing (Android API level 7) there is no way to manually initiate pairing between the local Bluetooth Adapter and a remote Bluetooth Device.
If two devices are to be paired the user will need to explicitly allow this, either through the Bluetooth Settings screen or when prompted by your application when you attempt to connect a Bluetooth Socket between two unpaired devices.
You can establish an RFCOMM communication channel for bidirectional communications using the following classes.
BluetoothServerSocketUsed to establish a listening socket for initiating a link between devices. To establish a handshake, one device acts as a server to listen for, and accept, incoming connection requests.BluetoothSocketUsed in creating a new client socket to connect to a listening Bluetooth Server Socket, and returned by the Server Socket once a connection is established. Once the connection is made, Bluetooth Sockets are used on both the server and client sides to transfer data streams.
When creating an application that uses Bluetooth as a peer-to-peer transport layer, you'll need to implement both a Bluetooth Server Socket to listen for connections and a Bluetooth Socket to initiate a new channel and handle communications.
Once connected, the Socket Server returns a Bluetooth Socket that's subsequently used by the server device to send and receive data. This server-side Bluetooth Socket is used in exactly the same way as the client socket. The designations of server and client are relevant only to how the connection is established. They don't affect how data flows once that connection is made.
A Bluetooth Server Socket is used to listen for incoming Bluetooth Socket connection requests from remote Bluetooth Devices. In order for two Bluetooth devices to be connected, one must act as a server (listening for and accepting incoming requests) and the other as a client (initiating the request to connect to the server).
Once the two are connected, the communications between the server and host device are handled through a Bluetooth Socket at both ends.
To listen for incoming connection requests call the listenUsingRfcommWithServiceRecord method on your Bluetooth Adapter, passing in both a string "name" to identify your server and a UUID (universally unique identifier). This will return a BluetoothServerSocket object. Note that the client Bluetooth Socket that connects to this listener will need to know the UUID in order to connect.
To start listening for connections call accept on this Server Socket, optionally passing in a timeout duration. The Server Socket will now block until a remote Bluetooth Socket client with a matching UUID attempts to connect. If a connection request is made from a remote device that is not yet paired with the local adapter, the user will be prompted to accept a pairing request before the accept call returns. This prompt is made via a notification, as shown in Figure 13-3.

If an incoming connection request is successful, accept will return a Bluetooth Socket connected to the client device. You can use this socket to transfer data, as shown later in this section.
Note
Note that accept is a blocking operation, so it's best practice to listen for incoming connection requests on a background thread rather than block the UI thread until a connection has been made.
It's also important to note that your Bluetooth Adapter must be discoverable for remote Bluetooth Devices to connect to it. Listing 13-8 shows some typical skeleton code that uses the ACTION_REQUEST_DISCOVERABLE broadcast to request that the device be made discoverable, before listening for incoming connection requests for the returned discoverability duration.
Example 13-8. Listening for Bluetooth Socket connection requests
startActivityForResult(new Intent(BluetoothAdapter.ACTION_REQUEST_DISCOVERABLE), DISCOVERY_REQUEST); @Override protected void onActivityResult(int requestCode, int resultCode, Intent data) { if (requestCode == DISCOVERY_REQUEST) { boolean isDiscoverable = resultCode > 0; int discoverableDuration = resultCode; if (isDiscoverable) { UUID uuid = UUID.fromString("a60f35f0-b93a-11de-8a39-08002009c666"); String name = "bluetoothserver";final BluetoothServerSocket btserver = bluetooth.listenUsingRfcommWithServiceRecord(name, uuid);Thread acceptThread = new Thread(new Runnable() { public void run() { try { // Block until client connection established.BluetoothSocket serverSocket = btserver.accept();// TODO Transfer data using the server socket } catch (IOException e) { Log.d("BLUETOOTH", e.getMessage()); } } }); acceptThread.start(); } } }
The BluetoothSocket class is used on the client device to initiate a communications channel from within your application to a listening Bluetooth Server Socket.
You create client-side Bluetooth Sockets by calling createRfcommSocketToServiceRecord on a BluetoothDevice object. That object represents the target remote server device. It should have a Bluetooth Server Socket listening for connection requests (as described in the previous section).
There are a number of ways to obtain a reference to a remote Bluetooth Device, and some important caveats regarding the devices with which you can create a communications link.
In order for a Bluetooth Socket to establish a connection to a remote Bluetooth Device, the following conditions must be true:
The remote device must be discoverable.
The remote device must accept connections using a Bluetooth Server Socket.
The local and remote devices must be paired (or bonded). If the devices are not paired, the user will be prompted to pair them when you initiate the connection request.
Each Bluetooth Device object represents a remote device. These objects are used to obtain remote device properties and to initiate Bluetooth Socket connections. There are several ways for you to obtain a BluetoothDevice object in code.
In each case you should check to ensure that the device you intend to connect to is discoverable, and (optionally) determine whether you are bonded to it. If you can't discover the remote device, you should prompt the user to enable discoverability on it.
You learned one technique for finding discoverable Bluetooth Devices earlier in this section using the startDiscovery method and monitoring ACTION_FOUND broadcasts. You learned that each received broadcast includes a BluetoothDevice.EXTRA_DEVICE extra that contains the discovered Bluetooth Device.
You can also use the getRemoteDevice method on your local Bluetooth Adapter, specifying the hardware address of the remote Bluetooth Device you want to connect to.
BluetoothDevice device = bluetooth.getRemoteDevice("01:23:77:35:2F:AA");To find the set of currently paired devices call getBondedDevices on the local Bluetooth Adapter. You can query the returned set to find out if a target Bluetooth Device is paired with the local adapter.
Set<BluetoothDevice> bondedDevices = bluetooth.getBondedDevices();
if (bondedDevices.contains(remoteDevice))
  // TODO Target device is bonded / paired with the local device.
Listing 13-9 shows a typical implementation pattern that checks a given Bluetooth Device for discoverability and pairing.
Example 13-9. Checking remote devices for discoverability and pairing
final BluetoothDevice device =
bluetooth.getRemoteDevice("01:23:77:35:2F:AA");
final Set<BluetoothDevice> bondedDevices = bluetooth.getBondedDevices();

BroadcastReceiver discoveryResult = new BroadcastReceiver() {
@Override
public void onReceive(Context context, Intent intent) {
  BluetoothDevice remoteDevice =
    intent.getParcelableExtra(BluetoothDevice.EXTRA_DEVICE);

    if ((remoteDevice.equals(device) &&
        (bondedDevices.contains(remoteDevice)) {
      // TODO Target device is paired and discoverable
    }
};
registerReceiver(discoveryResult,
                 new IntentFilter(BluetoothDevice.ACTION_FOUND));
if (!bluetooth.isDiscovering()) bluetooth.startDiscovery();
To initiate a communications channel to a remote device, create a Bluetooth Socket from the BluetoothDevice object that represents it.
To create a new connection call createRfcommSocketToServiceRecord on the Bluetooth Device to connect to, passing in the UUID of the Bluetooth Server Socket accepting requests.
If you attempt to connect to a Bluetooth Device that has not yet been paired (bonded) with the host device, you will be prompted to accept the pairing before the connect call completes, as shown in Figure 13-4.

The user must accept the pairing request on both the host and remote devices for the connection to be established.
The returned Bluetooth Socket can then be used to initiate the connection with a call to connect, as shown in Listing 13-10.
Note
Note that connect is a blocking operation, so it's best practice to initiate connection requests on a background thread rather than block the UI thread until a connection has been made.
Example 13-10. Connecting to a remote Bluetooth server
Try{
  BluetoothDevice device = bluetooth.getRemoteDevice("00:23:76:35:2F:AA");
  BluetoothSocket clientSocket =
    device.createRfcommSocketToServiceRecord(uuid);
  clientSocket.connect();
  // TODO Transfer data using the Bluetooth Socket
} catch (IOException e) {
  Log.d("BLUETOOTH", e.getMessage());
}Once a connection has been established, you will have a Bluetooth Socket on both the client and the server devices. From this point onward there is no significant distinction between them: you can send and receive data using the Bluetooth Socket on both devices.
Data transfer across Bluetooth Sockets is handled via standard Java InputStream and OutputStream objects, which you can obtain from a Bluetooth Socket using the appropriately named getInputStream and getOutputStream methods, respectively.
Listing 13-11 shows two simple skeleton methods, the first used to send a string to a remote device using an Output Stream, and the second to listen for incoming strings using an Input Stream. The same technique can be used to transfer any streamable data.
Example 13-11. Sending and receiving strings using Bluetooth Sockets
private void sendMessage(String message){
  OutputStream outStream;
  try {
    outStream = socket.getOutputStream();

    // Add a stop character.
    byte[] byteArray = (message + " ").getBytes();
    byteArray[byteArray.length − 1] = 0;

    outStream.write(byteArray);
  } catch (IOException e) { }
}

private String listenForMessage()
  String result = "";
  int bufferSize = 1024;
  byte[] buffer = new byte[bufferSize];

  try {
    InputStream instream = socket.getInputStream();
    int bytesRead = −1;

    while (true) {
      bytesRead = instream.read(buffer);
      if (bytesRead != −1) {
        while ((bytesRead == bufferSize) && (buffer[bufferSize-1] != 0)){
          message = message + new String(buffer, 0, bytesRead);
          bytesRead = instream.read(buffer);
        }
        message = message + new String(buffer, 0, bytesRead − 1);
           return result;
      }
    }
} catch (IOException e) {}
return result;
}The following example uses the Android Bluetooth APIs to construct a simple peer-to-peer messaging system that works between two paired Bluetooth devices.
Unfortunately the Android emulator can't currently be used to test Bluetooth functionality. In order to test this application you will need to have two physical devices.
Start by creating a new
BluetoothTextingproject featuring aBluetoothTextingActivity. Modify the manifest to includeBLUETOOTHandBLUETOOTH_ADMINpermissions.<?xml version="1.0" encoding="utf-8"?> <manifest xmlns:android="http://schemas.android.com/apk/res/android" package="com.paad.chapter13_bluetoothtexting" android:versionCode="1" android:versionName="1.0"> <application android:icon="@drawable/icon" android:label="@string/app_name"> <activity android:name=".BluetoothTexting" android:label="@string/app_name"> <intent-filter> <action android:name="android.intent.action.MAIN" /> <category android:name="android.intent.category.LAUNCHER" /> </intent-filter> </activity> </application> <uses-sdk android:minSdkVersion="5" /><uses-permission android:name="android.permission.BLUETOOTH"/> <uses-permission android:name="android.permission.BLUETOOTH_ADMIN"/></manifest>Modify the main.xml layout resource. It should contain a
ListViewthat will display the discovered Bluetooth devices above two buttons — one to start the Server Socket listener, and another to initiate a connection to a listening server.Also include Text View and Edit Text controls to use for reading and writing messages across the connection.
<?xml version="1.0" encoding="utf-8"?>
<RelativeLayout
  xmlns:android="http://schemas.android.com/apk/res/android"
  android:orientation="vertical"
  android:layout_width="fill_parent"
  android:layout_height="fill_parent">
<EditText
    android:id="@+id/text_message"
    android:layout_width="fill_parent"
    android:layout_height="wrap_content"
    android:layout_alignParentBottom="true"
    android:enabled="false"
  />
  <Button
    android:id="@+id/button_search"
    android:text="Search for listener"
    android:layout_width="fill_parent"
    android:layout_height="wrap_content"
    android:layout_above="@id/text_message"
  />
  <Button
    android:id="@+id/button_listen"
    android:text="Listen for connection"
    android:layout_width="fill_parent"
    android:layout_height="wrap_content"
    android:layout_above="@id/button_search"
  />
  <ListView
    android:id="@+id/list_discovered"
    android:layout_width="fill_parent"
    android:layout_height="fill_parent"
    android:layout_above="@id/button_listen"
    android:layout_alignParentTop="true"
  />
  <TextView
    android:id="@+id/text_messages"
    android:layout_width="fill_parent"
    android:layout_height="fill_parent"
    android:layout_above="@id/button_listen"
    android:layout_alignParentTop="true"
    android:visibility="gone"
  />
</RelativeLayout>
Override the
onCreatemethod of theBluetoothTextingActivity. Make calls to a collection of stub methods that will be used to access the Bluetooth device and wire up the UI controls.import java.io.IOException; import java.io.InputStream; import java.io.OutputStream; import java.util.ArrayList; import java.util.UUID; import android.app.Activity; import android.bluetooth.BluetoothAdapter; import android.bluetooth.BluetoothDevice; import android.bluetooth.BluetoothServerSocket; import android.bluetooth.BluetoothSocket; import android.content.BroadcastReceiver; import android.content.Context; import android.content.Intent; import android.content.IntentFilter;
import android.os.AsyncTask;
import android.os.Bundle;
import android.os.Handler;
import android.util.Log;
import android.view.KeyEvent;
import android.view.View;
import android.view.View.OnClickListener;
import android.view.View.OnKeyListener;
import android.widget.AdapterView;
import android.widget.ArrayAdapter;
import android.widget.Button;
import android.widget.EditText;
import android.widget.ListView;
import android.widget.TextView;
import android.widget.AdapterView.OnItemClickListener;

public class BluetoothTexting extends Activity {

  @Override
  public void onCreate(Bundle savedInstanceState) {
    super.onCreate(savedInstanceState);
    setContentView(R.layout.main);

    // Get the Bluetooth Adapter
    configureBluetooth();

    // Setup the ListView of discovered devices
    setupListView();

    // Setup search button
    setupSearchButton();

    // Setup listen button
    setupListenButton();
  }

  private void configureBluetooth() {}
  private void setupListenButton() {}
  private void setupListView() {}
  private void setupSearchButton() {}
}
Fill in the
configureBluetoothstub to get access to the local Bluetooth Adapter and store it in a field variable. Take this opportunity to create a field variable for a Bluetooth Socket. This will be used to store either the server or client communications socket once a channel has been established. You should also define a UUID to identify your application when connections are being established.private BluetoothAdapter bluetooth; private BluetoothSocket socket; private UUID uuid = UUID.fromString("a60f35f0-b93a-11de-8a39-08002009c666");private void configureBluetooth() {bluetooth = BluetoothAdapter.getDefaultAdapter();}Create a new
switchUImethod. It will be called once a connection is established to enable the Views used for reading and writing messages.private void switchUI() { final TextView messageText = (TextView)findViewById(R.id.text_messages); final EditText textEntry = (EditText)findViewById(R.id.text_message); messageText.setVisibility(View.VISIBLE); list.setVisibility(View.GONE); textEntry.setEnabled(true); }Create the server listener by filling in the
setupListenButtonstub. The Listen button should prompt the user to enable discovery. When the discovery window returns, open a Bluetooth Server Socket to listen for connection requests for the discovery duration. Once a connection has been made, make a call to theswitchUImethod you created in Step 5.private static int DISCOVERY_REQUEST = 1; private void setupListenButton() { Button listenButton = (Button)findViewById(R.id.button_listen); listenButton.setOnClickListener(new OnClickListener() { public void onClick(View view) { intent disc; disc = new Intent(BluetoothAdapter.ACTION_REQUEST_DISCOVERABLE); startActivityForResult(disc, DISCOVERY_REQUEST); } }); } @Override protected void onActivityResult(int requestCode, int resultCode, Intent data) { if (requestCode == DISCOVERY_REQUEST) { boolean isDiscoverable = resultCode > 0; if (isDiscoverable) { String name = "bluetoothserver"; try { final BluetoothServerSocket btserver = bluetooth.listenUsingRfcommWithServiceRecord(name, uuid); AsyncTask<Integer, Void, BluetoothSocket> acceptThread = new AsyncTask<Integer, Void, BluetoothSocket>() { @Override protected BluetoothSocket doInBackground(Integer... params) { try { socket = btserver.accept(params[0]*1000); return socket; } catch (IOException e) { Log.d("BLUETOOTH", e.getMessage()); }return null; } @Override protected void onPostExecute(BluetoothSocket result) { if (result != null) switchUI(); } }; acceptThread.execute(resultCode); } catch (IOException e) { Log.d("BLUETOOTH", e.getMessage()); } } } }Now create the client-side connection code. By performing discovery and displaying each of the possible devices, this code will provide a means for the client device to search for the listening server.
7.1 Start by creating a field variable to store an Array List of discovered Bluetooth Devices.
private ArrayList<BluetoothDevice> foundDevices;
7.2 Fill in the
setupListViewstub. Create a new Array Adapter that binds the List View to the found devices array.private ArrayAdapter<BluetoothDevice> aa; private ListView list; private void setupListView() { aa = new ArrayAdapter<BluetoothDevice>(this, android.R.layout.simple_list_item_1, foundDevices); list = (ListView)findViewById(R.id.list_discovered); list.setAdapter(aa); }7.3 Create a new Broadcast Receiver that listens for Bluetooth Device discovery broadcasts, adds each discovered device to the array of found devices created in Step 7-1, and notifies the Array Adapter created in Step 7-2.
BroadcastReceiver discoveryResult = new BroadcastReceiver() {
  @Override
  public void onReceive(Context context, Intent intent) {
    BluetoothDevice remoteDevice;
    remoteDevice = intent.getParcelableExtra(BluetoothDevice.EXTRA_DEVICE);
    if (bluetooth.getBondedDevices().contains(remoteDevice)) {
      foundDevices.add(remoteDevice);
      aa.notifyDataSetChanged();
    }
  }
};
7.4 Complete the
setupSearchButtonstub to register the Broadcast Receiver from the previous step and initiate a discovery session.private void setupSearchButton() { Button searchButton = (Button)findViewById(R.id.button_search); searchButton.setOnClickListener(new OnClickListener() { public void onClick(View view) {registerReceiver(discoveryResult, new IntentFilter(BluetoothDevice.ACTION_FOUND)); if (!bluetooth.isDiscovering()) { foundDevices.clear(); bluetooth.startDiscovery(); }} }); }
The final step to completing the connection-handling code is to extend the
setupListViewmethod from Step 7b. Extend this method to include anonItemClickListenerthat will attempt to asynchronously initiate a client-side connection with the selected remote Bluetooth Device. If it is successful, keep a reference to the socket it creates and make a call to theswitchUImethod created in Step 5.private void setupListView() { aa = new ArrayAdapter<BluetoothDevice>(this, android.R.layout.simple_list_item_1, foundDevices); list = (ListView)findViewById(R.id.list_discovered); list.setAdapter(aa); list.setOnItemClickListener(new OnItemClickListener() { public void onItemClick(AdapterView<?> arg0, View view, int index, long arg3) { AsyncTask<Integer, Void, Void> connectTask = new AsyncTask<Integer, Void, Void>() { @Override protected Void doInBackground(Integer... params) { try { BluetoothDevice device = foundDevices.get(params[0]); socket = device.createRfcommSocketToServiceRecord(uuid); socket.connect(); } catch (IOException e) { Log.d("BLUETOOTH_CLIENT", e.getMessage()); } return null; } @Override protected void onPostExecute(Void result) {switchViews(); } }; connectTask.execute(index); } }); }If you run the application on two devices, you can click the "Listen for connection" button on one device, and the "Search for listener" button on the other. The List View should then be populated with all the bonded devices within range, as shown in Figure 13-5.
If you select the other Android device running this application from that list, a connection will be established between the two devices. The following steps will use this communications channel to send simple text messages between the devices.
Start by extending the
switchUImethod. Add a new key listener to the text-entry Edit Text to listen for a D-pad click. When one is detected, read its contents and send them across the Bluetooth communications socket.private void switchUI() { final TextView messageText = (TextView)findViewById(R.id.text_messages); final EditText textEntry = (EditText)findViewById(R.id.text_message); messageText.setVisibility(View.VISIBLE); list.setVisibility(View.GONE); textEntry.setEnabled(true);textEntry.setOnKeyListener(new OnKeyListener() { public boolean onKey(View view, int keyCode, KeyEvent keyEvent) { if ((keyEvent.getAction() == KeyEvent.ACTION_DOWN) && (keyCode == KeyEvent.KEYCODE_DPAD_CENTER)) { sendMessage(socket, textEntry.getText().toString()); textEntry.setText(""); return true; } return false; } });}private void sendMessage(BluetoothSocket socket, String msg) {OutputStream outStream; try { outStream = socket.getOutputStream(); byte[] byteString = (msg + " ").getBytes(); stringAsBytes[byteString.length − 1] = 0; outStream.write(byteString); } catch (IOException e) { Log.d("BLUETOOTH_COMMS", e.getMessage()); } }In order to receive messages you will need to create an asynchronous listener that monitors the Bluetooth Socket for incoming messages.
11.1 Start by creating a new
MessagePosterclass that implements Runnable. It should accept two parameters, a Text View and a message string. The received message should be inserted into the Text View parameter. This class will be used to post incoming messages to the UI from a background thread.private class MessagePoster implements Runnable { private TextView textView; private String message; public MessagePoster(TextView textView, String message) { this.textView = textView; this.message = message; } public void run() { textView.setText(message); } }11.2 Now create a new
BluetoothSocketListenerthat implementsRunnable. It should take a Bluetooth Socket to listen to, a Text View to post incoming messages to, and a Handler to synchronize when posting updates.When a new message is received, use the
MessagePosterRunnable you created in the previous step to post the new message in the Text View.private class BluetoothSocketListener implements Runnable { private BluetoothSocket socket; private TextView textView; private Handler handler; public BluetoothSocketListener(BluetoothSocket socket, Handler handler, TextView textView) { this.socket = socket; this.textView = textView; this.handler = handler; }public void run() { int bufferSize = 1024; byte[] buffer = new byte[bufferSize]; try { InputStream instream = socket.getInputStream(); int bytesRead = −1; String message = ""; while (true) { message = ""; bytesRead = instream.read(buffer); if (bytesRead != −1) { while ((bytesRead==bufferSize)&&(buffer[bufferSize-1] != 0)) { message = message + new String(buffer, 0, bytesRead); bytesRead = instream.read(buffer); } message = message + new String(buffer, 0, bytesRead − 1); handler.post(new MessagePoster(textView, message)); socket.getInputStream(); } } } catch (IOException e) { Log.d("BLUETOOTH_COMMS", e.getMessage()); } } }11.3 Finally, make one more addition to the
swichUImethod, this time creating and starting the newBluetoothSocketListeneryou created in the previous step.private Handler handler = new Handler(); private void switchUI() { final TextView messageText = (TextView)findViewById(R.id.text_messages); final EditText textEntry = (EditText)findViewById(R.id.text_message); messageText.setVisibility(View.VISIBLE); list.setVisibility(View.GONE); textEntry.setEnabled(true); textEntry.setOnKeyListener(new OnKeyListener() { public boolean onKey(View view, int keyCode, KeyEvent keyEvent) { if ((keyEvent.getAction() == KeyEvent.ACTION_DOWN) && (keyCode == KeyEvent.KEYCODE_DPAD_CENTER)) { sendMessage(socket, textEntry.getText().toString()); textEntry.setText(""); return true; } return false; } });BluetoothSocketListener bsl = new BluetoothSocketListener(socket, handler, messageText); Thread messageListener = new Thread(bsr); messageListener.start();}

If you run the application now, you should be able to configure one device to listen for a connection, use a second device to connect to it — and then, once connected, send simple text messages between the devices.
Note that this example has been kept as simple as possible to highlight the Bluetooth functionality being described. A better implementation would move all the connection state and logic code into a Service, as well as unregistering Broadcast Receivers once discovery and pairing had been completed.
The incredible growth of Internet services and the ubiquity of mobile devices have made mobile Internet access an increasingly prevalent feature on mobile phones.
With the speed, reliability, and cost of Internet connectivity dependent on the network technology being used (Wi-Fi, GPRS, 3G), letting your applications know and manage these connections can help to ensure they run efficiently and responsively.
Android broadcasts Intents that describe changes in network connectivity and offers APIs that provide control over network settings and connections.
Just as importantly, users can specify their connectivity preferences — particularly in the case of allowing background data transfers.
Android networking is principally handled via the ConnectivityManager, a Service that lets you monitor the connectivity state, set your preferred network connection, and manage connectivity failover.
Later you'll learn how to use the WifiManager to monitor and control the device's Wi-Fi connectivity specifically. The Wi-Fi Manager lets you create new Wi-Fi configurations, monitor and modify the existing Wi-Fi network settings, manage the active connection, and perform access point scans.
The ConnectivityManager represents the Network Connectivity Service. It's used to monitor the state of network connections, configure failover settings, and control the network radios.
To access the Connectivity Manager, use getSystemService, passing in Context.CONNECTIVITY_SERVICE as the service name, as shown in Listing 13-12.
Example 13-12. Accessing the Connectivity Manager
String service =
Context.CONNECTIVITY_SERVICE;ConnectivityManager connectivity =
  (ConnectivityManager)getSystemService(service);
To use the Connectivity Manager, your application needs read and write network state access permissions. Add each to your manifest, as shown here:
<uses-permission android:name="android.permission.ACCESS_NETWORK_STATE"/>
<uses-permission android:name="android.permission.CHANGE_NETWORK_STATE"/>
One of the most important pieces of information available via the Connectivity Manager is the user's preference for background data transfers.
Users can elect to enable or disable background data transfers through the Settings
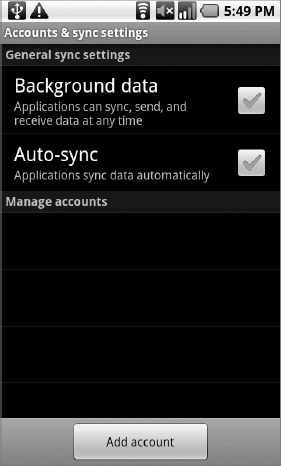
This value is enforced at the application level, meaning that you are responsible for reading the value and adhering to the user's preference for allowing background data transfers.
To obtain the background data setting, call the getBackgroundDataSetting method on the Connectivity Manager object:
boolean backgroundEnabled = connectivity.getBackgroundDataSetting();
If the background data setting is disabled, your application should transfer data only when it is active and in the foreground. By turning this value off, the user explicitly requests that your application not transfer data when it is not visible and in the foreground.
If your application requires background data transfer to function, it's best practice to notify users of this requirement and offer to take them to the settings page to alter their preference.
If the user does change the background data preference, the system will send a broadcast Intent with the ConnectivityManager.ACTION_BACKGROUND_DATA_SETTING_CHANGED action.
To monitor changes in the background data setting, create and register a new Broadcast Receiver that listens for this broadcast Intent, as shown in Listing 13-13.
Example 13-13. Accessing the Connectivity Manager
registerReceiver(
  new BroadcastReceiver() {
    @Override
    public void onReceive(Context context, Intent intent) {
      // Do something when the background data setting changes.
    },
  new IntentFilter(ConnectivityManager.ACTION_BACKGROUND_DATA_SETTING_CHANGED));
Note
While your applications are not forced to obey the user's preference for background data transfers, not doing so is likely to earn vocal criticism from users who installed your application and were rewarded with a significant mobile data bill.
The Connectivity Manager provides a high-level view of the available network connections. Using the getActiveNetworkInfo or getNetworkInfo methods, as shown in Listing 13-14, returns NetworkInfo objects that include details on the currently active network or on an inactive network of the type specified.
Use the returned NetworkInfo details to find the connection status, network type, and detailed state information of the returned network.
Example 13-14. Accessing network information
// Get the active network information.
NetworkInfo activeNetwork = connectivity.getActiveNetworkInfo();
int networkType = networkInfo.getType();
switch (networkType) {
  case (ConnectivityManager.TYPE_MOBILE) : break;
  case (ConnectivityManager.TYPE_WIFI) : break;
  default: break;
}

// Get the mobile network information.
int network = ConnectivityManager.TYPE_MOBILE;
NetworkInfo mobileNetwork = connectivity.getNetworkInfo(network);
NetworkInfo.State state = mobileNetwork.getState(); NetworkInfo.DetailedState detailedState = mobileNetwork.getDetailedState();
The Connectivity Manager can also be used to control network hardware and configure failover preferences.
Android will attempt to connect to the preferred network whenever an authorized application requests an Internet connection. You can find the current, and set the preferred, network using the getNetworkPreference and setNetworkPreference methods, respectively, as shown in the following code snippet:
int networkPreference = connectivity.getNetworkPreference();
connectivity.setNetworkPreference(NetworkPreference.PREFER_WIFI);
If the preferred connection is unavailable, or connectivity on this network is lost, Android will automatically attempt to connect to the secondary network.
You can control the availability of the network types using the setRadio method. This method lets you set the state of the radio associated with a particular network (Wi-Fi, mobile, etc.). For example, in the following code snippet the Wi-Fi radio is turned off and the mobile radio is turned on:
connectivity.setRadio(NetworkType.WIFI, false);
connectivity.setRadio(NetworkType.MOBILE, true);
One of the most useful functions of the Connectivity Manager is to notify applications of changes in network connectivity.
To monitor network connectivity create your own Broadcast Receiver implementation that listens for ConnectivityManager.CONNECTIVITY_ACTION broadcast Intents. Such Intents include several extras that provide additional details on the change to the connectivity state. You can access each extra using one of the static constants available from the ConnectivityManager class:
EXTRA_IS_FAILOVERA Boolean that returnstrueif the current connection is the result of a failover from a preferred network.EXTRA_NO_CONNECTIVITYA Boolean that returnstrueif the device is not connected to any network.EXTRA_REASONIf the associated broadcast represents a connection failure, this string value includes a description of why the connection attempt failed.EXTRA_NETWORK_INFOReturns aNetworkInfoobject containing more fine-grained details about the network associated with the current connectivity event.EXTRA_OTHER_NETWORK_INFOAfter a network disconnection this value will return aNetworkInfoobject populated with the details for the possible failover network connection.EXTRA_EXTRA_INFOContains additional network-specific extra connection details.
The WifiManager represents the Android Wi-Fi Connectivity Service. It can be used to configure Wi-Fi network connections, manage the current Wi-Fi connection, scan for access points, and monitor changes in Wi-Fi connectivity.
As with the Connectivity Manager, you access the Wi-Fi Manager using the getSystemService method, passing in the Context.WIFI_SERVICE constant, as shown in Listing 13-15.
Example 13-15. Accessing the Wi-Fi Manager
String service = Context.WIFI_SERVICE;
WifiManager wifi = (WifiManager)getSystemService(service);
To use the Wi-Fi Manager your application must have uses-permissions for accessing and changing the Wi-Fi state included in its manifest.
<uses-permission android:name="android.permission.ACCESS_WIFI_STATE"/>
<uses-permission android:name="android.permission.CHANGE_WIFI_STATE"/>
You can use the Wi-Fi Manager to enable or disable your Wi-Fi hardware using the setWifiEnabled method, or request the current Wi-Fi state using the getWifiState or isWifiEnabled methods, as shown in Listing 13-16.
Example 13-16. Monitoring and changing Wi-Fi state
if (!wifi.isWifiEnabled())
  if (wifi.getWifiState() != WifiManager.WIFI_STATE_ENABLING)
    wifi.setWifiEnabled(true);
The following sections begin with tracking the current Wi-Fi connection status and monitoring changes in signal strength. Later you'll also learn how to scan for and connect to specific access points.
These functions are likely to be sufficient for most application developers, but the WifiManager does also provide low-level access to the Wi-Fi network configurations. You have full control over each Wi-Fi configuration setting, which enables you to completely replace the native Wi-Fi management application if required. Later in this section you'll get a brief introduction to the APIs used to create, delete, and modify network configurations.
The Wi-Fi Manager broadcasts Intents whenever the connectivity status of the Wi-Fi network changes, using an action from one of the following constants defined in the WifiManager class:
WIFI_STATE_CHANGED_ACTIONIndicates that the Wi-Fi hardware status has changed, moving between enabling, enabled, disabling, disabled, and unknown. It includes two extra values keyed onEXTRA_WIFI_STATEandEXTRA_PREVIOUS_STATEthat provide the new and previous Wi-Fi states, respectively.SUPPLICANT_CONNECTION_CHANGE_ACTIONThis Intent is broadcast whenever the connection state with the active supplicant (access point) changes. It is fired when a new connection is established or an existing connection is lost, using theEXTRA_NEW_STATEBoolean extra, which returnstruein the former case.NETWORK_STATE_CHANGED_ACTIONFired whenever the Wi-Fi connectivity state changes. This Intent includes two extras — the firstEXTRA_NETWORK_INFOincludes aNetworkInfoobject that details the current network state, while the secondEXTRA_BSSIDincludes the BSSID of the access point you're connected to.RSSI_CHANGED_ACTIONYou can monitor the current signal strength of the connected Wi-Fi network by listening for theRSSI_CHANGED_ACTIONIntent. This Broadcast Intent includes an integer extra,EXTRA_NEW_RSSI, that holds the current signal strength. To use this signal strength you should use thecalculateSignalLevelstatic method on the Wi-Fi Manager to convert it to an integer value on a scale you specify.
Once an active network connection has been established, use the getConnectionInfo method on the Wi-Fi Manager to find information on the active connection's status. The returned WifiInfo object includes the SSID, BSSID, Mac address, and IP address of the current access point, as well as the current link speed and signal strength.
Listing 13-17 queries the active Wi-Fi connection.
Example 13-17. Querying the active network connection
WifiInfo info = wifi.getConnectionInfo();
if (info.getBSSID() != null) {
  int strength = WifiManager.calculateSignalLevel(info.getRssi(), 5);
  int speed = info.getLinkSpeed();
  String units = WifiInfo.LINK_SPEED_UNITS;
  String ssid = info.getSSID();

  String cSummary = String.format("Connected to %s at %s%s. Strength %s/5",
                                   ssid, speed, units, strength);
}You can also use the Wi-Fi Manager to conduct access point scans using the startScan method.
An Intent with the SCAN_RESULTS_AVAILABLE_ACTION action will be broadcast to asynchronously announce that the scan is complete and results are available.
Call getScanResults to get those results as a list of ScanResult objects.
Each Scan Result includes the details retrieved for each access point detected, including link speed, signal strength, SSID, and the authentication techniques supported.
Listing 13-18 shows how to initiate a scan for access points that displays a Toast indicating the total number of access points found and the name of the access point with the strongest signal.
Example 13-18. Querying the active network connection
// Register a broadcast receiver that listens for scan results.
registerReceiver(new BroadcastReceiver() {
  @Override
  public void onReceive(Context context, Intent intent) {
    List<ScanResult> results = wifi.getScanResults();
    ScanResult bestSignal = null;
    for (ScanResult result : results) {
      if (bestSignal == null ||
          WifiManager.compareSignalLevel(bestSignal.level,result.level)<0)
        bestSignal = result;
    }

    String toastText = String.format("%s networks found. %s is
                                     the strongest.",
                                     results.size(), bestSignal.SSID);

    Toast.makeText(getApplicationContext(), toastText, Toast.LENGTH_LONG);
  }
}, new IntentFilter(WifiManager.SCAN_RESULTS_AVAILABLE_ACTION));

// Initiate a scan.
wifi.startScan();You can use the Wi-Fi Manager to manage the configured network settings and control which networks to connect to. Once connected, you can interrogate the active network connection to get additional details of its configuration and settings.
Get a list of the current network configurations using getConfiguredNetworks. The list of WifiConfiguration objects returned includes the network ID, SSID, and other details for each configuration.
To use a particular network configuration, use the enableNetwork method, passing in the network ID to use and specifying true for the disableAllOthers parameter, as shown in Listing 13-19.
Example 13-19. Activating a network connection
// Get a list of available configurations
List<WifiConfiguration> configurations = wifi.getConfiguredNetworks();
// Get the network ID for the first one.
if (configurations.size() > 0) {
  int netID = configurations.get(0).networkId;
  // Enable that network.
  boolean disableAllOthers = true;
  wifi.enableNetwork(netID, disableAllOtherstrue);
}To connect to a Wi-Fi network you need to create and register a configuration. Normally, your users would do this using the native Wi-Fi configuration settings, but there's no reason you can't expose the same functionality within your own applications, or for that matter replace the native Wi-Fi configuration Activity entirely.
Network configurations are stored as WifiConfiguration objects. The following is a non-exhaustive list of some of the public fields available for each Wi-Fi configuration:
SSIDThe SSID for a particular networknetworkIdA unique identifier used to identify this network configuration on the current devicepriorityThe network configuration's priority to use when ordering the list of potential access points to connect tostatusThe current status of this network connection, which will be one of the following:WifiConfiguration.Status.ENABLED, WifiConfiguration.Status.DISABLED, orWifiConfiguration.Status.CURRENT
The configuration object also contains the supported authentication techniques, as well as the keys used previously to authenticate with this access point.
The addNetwork method lets you specify a new configuration to add to the current list; similarly, updateNetwork lets you update a network configuration by passing in a WifiConfiguration that's sparsely populated with a network ID and the values you want to change.
You can also use removeNetwork, passing in a network ID, to remove a configuration.
To persist any changes made to the network configurations, you must call saveConfiguration.
In this chapter you learned how to monitor and control some of the low-level communication hardware services available on Android devices.
The chapter included an introduction to Bluetooth management and communications mechanisms, a look at how to monitor and control Internet and network connectivity settings, and an introduction to the Wi-Fi manager — used to monitor and control the device's Wi-Fi connectivity and configurations.
In the next chapter you'll learn how to interact with the Sensor Manager to provide your applications access to the physical world. You will learn how to access the hardware sensors — particularly the compass and accelerometer — and how to monitor and interpret these sensors' values.