If you already have an AWS account, skip to the next section. Otherwise, you can follow these instructions to set up a new account and get the credentials you need to start building infrastructure with Puppet.
Follow these steps to create a new AWS account:
- Browse to the following URL:
- Click Sign In to the Console.
- Follow the instructions to create and verify your account.
To manage AWS resources using Puppet, we will create an additional AWS user account specifically for Puppet, using Amazon's Identiy and Access Management (IAM) framework. We'll see how to do this in the following sections.
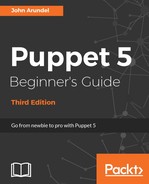
Before we create the user account for Puppet, we need to grant specific permissions for the things it needs to do, such as read and create EC2 instances. This involves creating an IAM policy, which is a set of named permissions you can associate with a user account.
IAM policies are expressed as a JSON-format document. There is a policy JSON file in the example repo, named /examples/iam_policy.json. Open this file and copy the contents, ready to paste into your web browser.
Follow these steps to create the policy and associate it with the Puppet user:
- In the AWS console, select Services | IAM.
- Select Policies.
- Click Create Policy.
- On the Create Policy screen, select Create Your Own Policy.
- Enter Policy Name (for example,
puppet). - In the Policy Document textbox, paste the text you copied from the
iam_policy.jsonfile. - Click Create Policy at the bottom to save this.
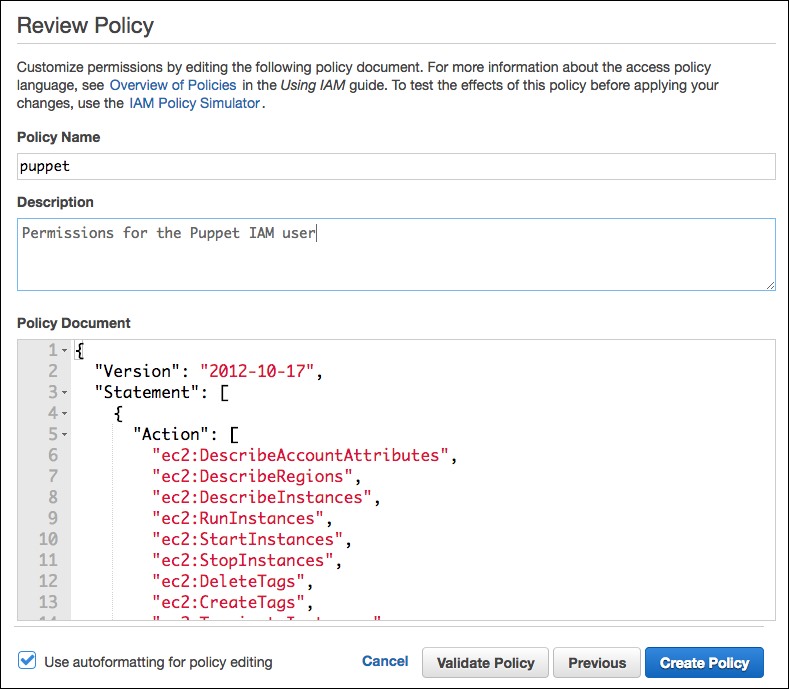
To create the Puppet IAM user and associate it with the policy, follow these steps:
- Sign in to the AWS console.
- Select Services | IAM | Users.
- Click Add user.
- Enter the username you want to use for this account (for example,
puppet). - In the Access type section, select Programmatic access.
- Click Next: Permissions.
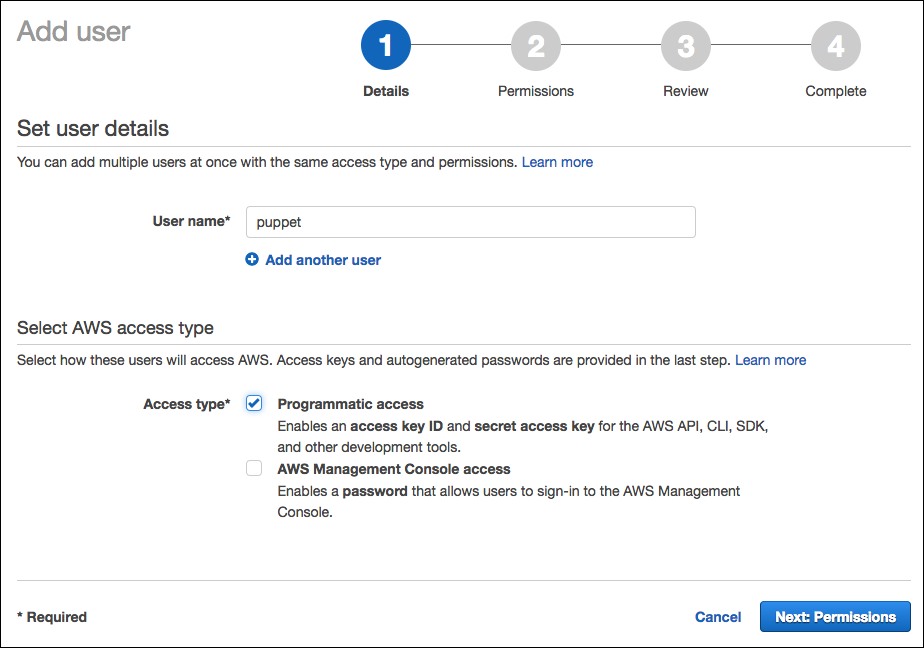
- Create Attach existing policies directly.
- Type
puppetin the Policy Type search box and press Enter.
- You should see the policy we created in the previous section, so check the box next to it and click Next: Review.
- Check that the settings are correct and click on Create user.
When you finish creating the IAM user and policy, you should see the Success screen, which lists your access credentials. Copy the access key ID and the secret access key (click Show to see the secret access key). You will need these credentials for the next steps (but keep them safe).
Follow these steps to configure your VM for access to AWS with your newly-generated credentials:
- On your Vagrant VM, run the following command to create the directory to hold your credentials file:
mkdir /home/ubuntu/.aws - Create a file named
/home/ubuntu/.aws/credentialswith the following contents (substitute your Access Key ID and Secret Access Key values from the AWS console screen):[default] aws_access_key_id = AKIAINSZUVFYMBFDJCEQ aws_secret_access_key = pghia0r5/GjU7WEQj2Hr7Yr+MFkf+mqQdsBk0BQr
Tip
Creating the file manually is fine for this example, but for production use, you should manage the credentials file with Puppet using encrypted Hiera data, as shown in the Managing secret data section in Chapter 6, Managing data with Hiera.