The Raspbian OS provides shells to be used to manage its system. Some shell commands are useful for optimizing your work. In this chapter, you learn how to work with Raspbian shells. You’ll see some examples to help you learn and understand the use of the shell.
The following is a list of topics covered in this chapter:
Understand Raspbian shells
Work with Raspbian shells
Manipulate files and directories
Work with redirection
Work with resource permissions
Manipulate processes
Work with media storage
2.1 Introducing Raspbian Shells
Raspbian is built from Debian OS. This means that you can operate Raspbian using the Debian/Ubuntu style. In this chapter, you learn about the Raspbian shells, which we usually call the command line.
You can access the Raspbian shell from desktop mode or via remote SSH. If you are working in desktop mode, you can access the Raspbian Terminal by clicking on the Terminal icon. You’ll then see the Terminal window, as shown in Figure 2-1.
Figure 2-1
Accessing the Raspbian Terminal from the desktop
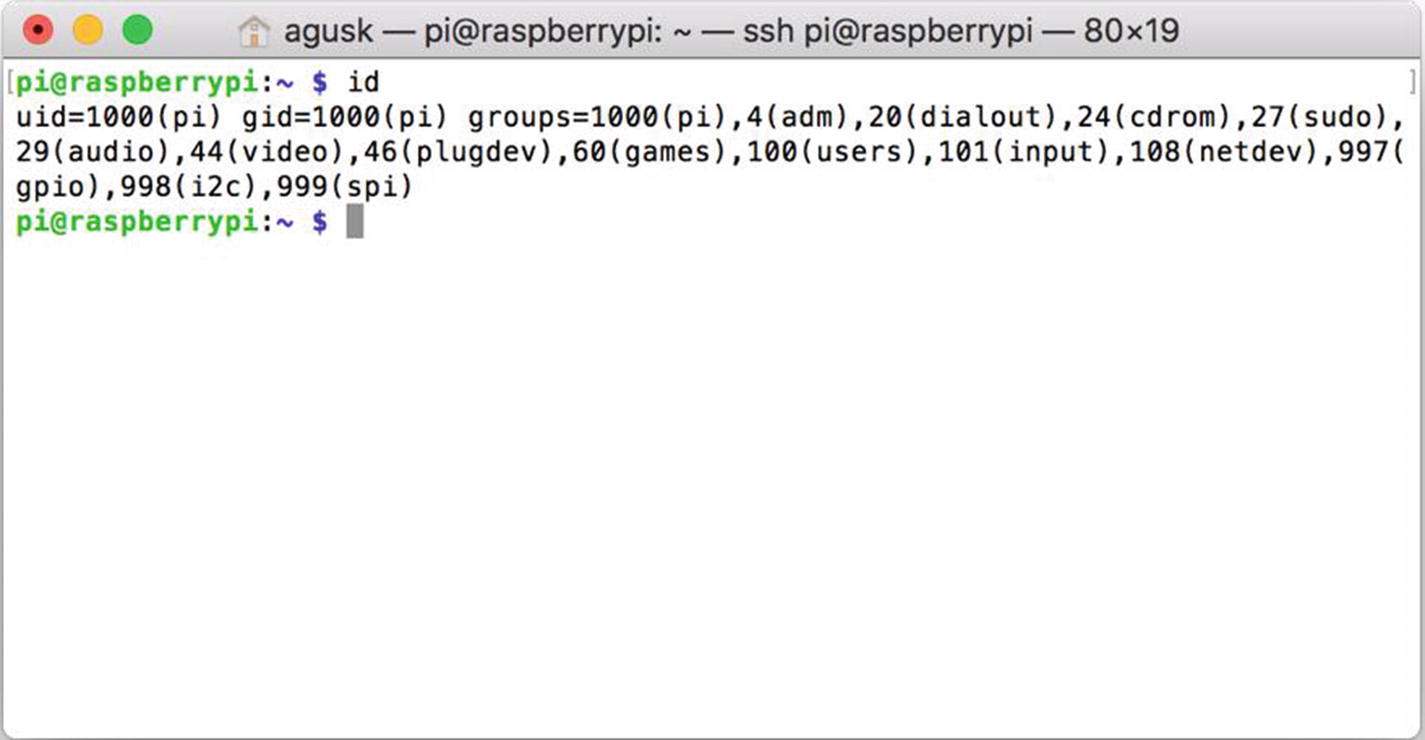
You also can access the Raspbian Terminal via SSH. For instance, the IP address of Raspbian is 192.168.1.21. You can access remote SSH with the pi account, as follows.
If this succeeds, you’ll see the Terminal, as shown in Figure 2-2.
Figure 2-2
Accessing the Raspbian Terminal using remote SSH
2.2 The Basic Raspbian Shell
In this section, we perform basic shell operations in Raspbian. These shell commands are general commands that you can use in your daily activities.
We explore some basic shells in the following sections.
2.2.1 Rebooting Raspbian OS
Sometimes you’ll want to refresh or reload libraries after you’ve installed or configured something. You’ll probably need to reboot your Raspbian. If you want to reboot your Raspberry Pi, use this command:
$ sudo shutdown -r now
You also can do it by using this command:
$ sudo reboot
2.2.2 Shutting Down
If you think you won’t be using the Raspberry Pi board again, you can turn it off. You should perform a shutdown before unplugging it from the power adapter.
Use this command to perform a shutdown and turn off your Raspberry Pi:
$ sudo shutdown -h now
Wait several minutes. After that, you can unplug the power cable from the Raspberry Pi board.
2.2.3 Configuring the Timezone
If you want to change the timezone in the Raspberry Pi, you can use the raspi-config tool. You can type this command on the Terminal.
$ sudo raspi-config
Then, you will get the dialog box shown in Figure 2-3.
Figure 2-3
Displaying the raspi-config form
You can select Localisation Options to configure the timezone. When you’re done, you should get the form shown in Figure 2-4.
Figure 2-4
Selecting the timezone
Then, you select your area to set the timezone. You can see the options in Figure 2-5.
Figure 2-5
Selecting the appropriate timezone area
When you’re done, your Raspberry Pi will set the timezone that you have selected.
2.2.4 Configuring the Keyboard
You can change the keyboard layout using raspi-config. You can follow the instructions from previous section to access the raspi-config tool. Select Change Keyboard Layout, which is also shown in Figure 2-4.
Raspbian will detect your keyboard layout automatically.
2.3 Manipulating Files and Directories
This chapter explains how to manipulate files and directories using the Raspberry Pi shell. We explore these topics in the next sections.
2.3.1 Getting the Current Working Directory
When you are working with the shell, you want to know what the current working directory is. You can use the pwd command to determine this.
$ pwd
Then you will obtain the following output.
$ pwd
/home/pi
2.3.2 Listing Files and Directories
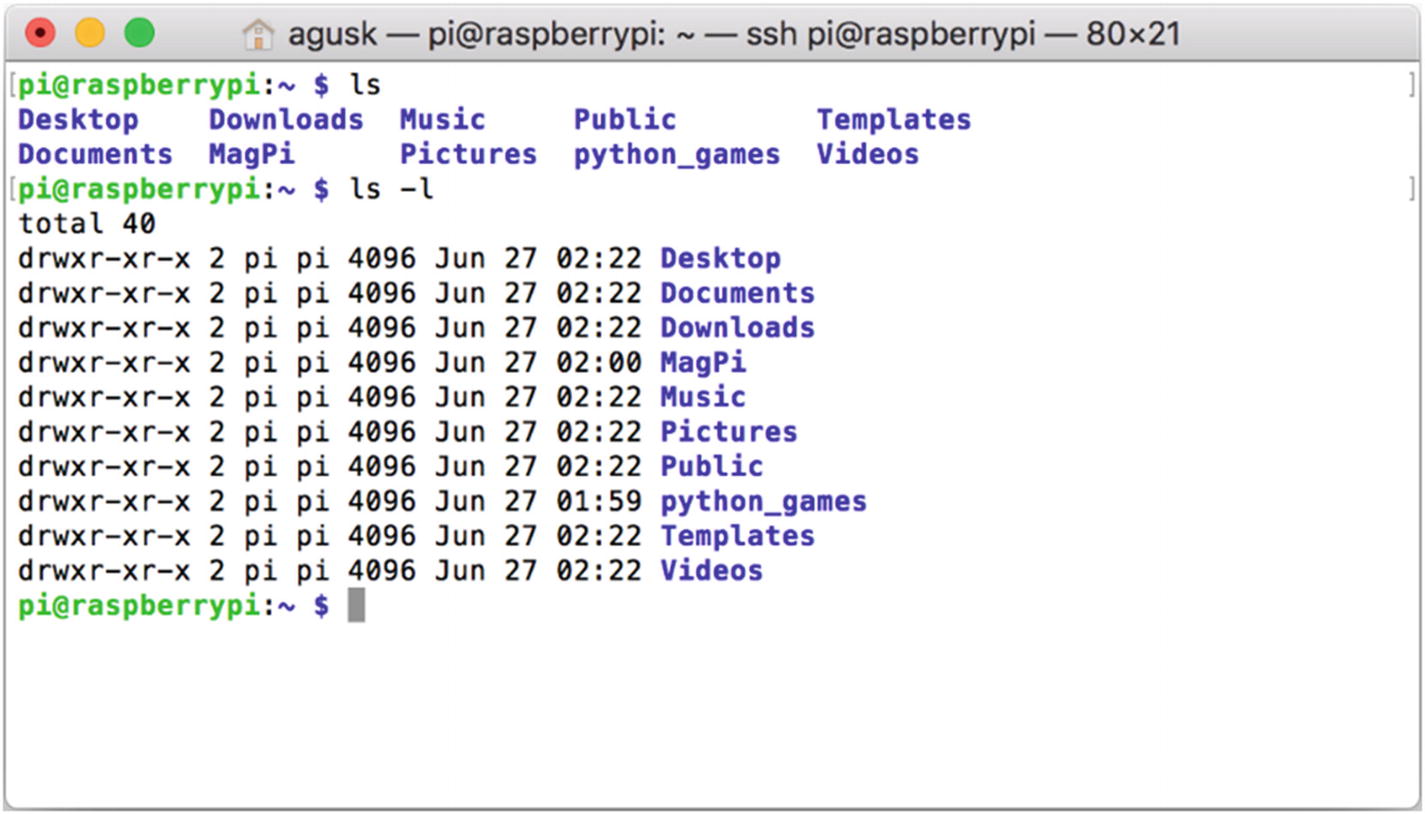
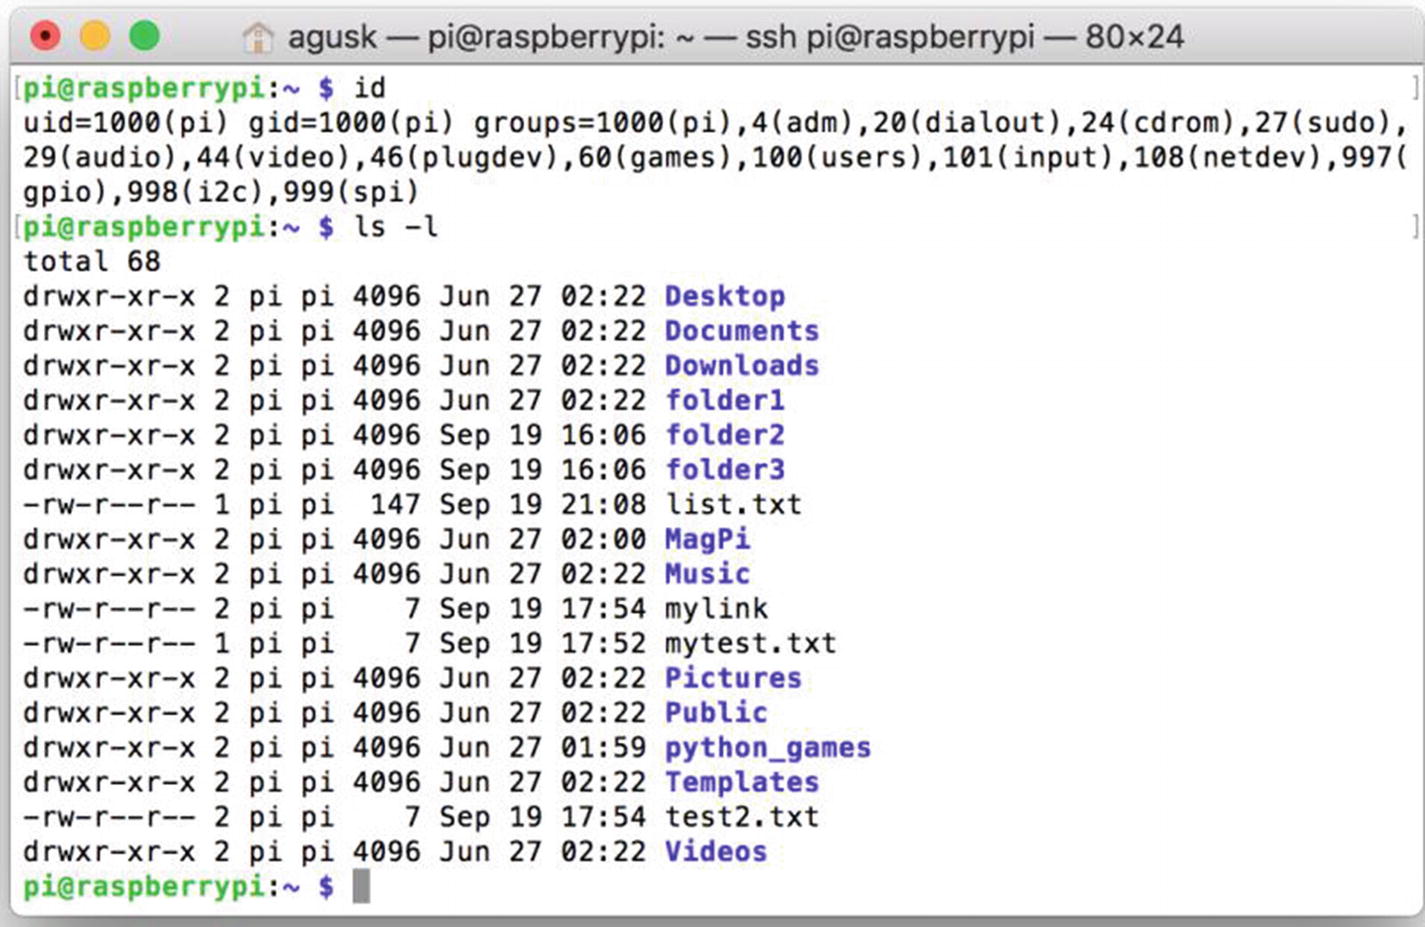
To list files and directories on the current directory, you can use the ls command.
Listing files and directories with the -l parameter
You can list the contents of a directory using ls as well. For instance, say you want to list the contents of the Documents directory. You would use this command:
$ ls Documents/
2.3.3 Understanding the ls Parameters
If you want to see the list of parameters used with the ls command, you can call ls with the --help parameter. You can type this command:
$ ls --help
Then you’ll see information about the parameter, as shown in Figure 2-8.
Figure 2-8
Displaying the parameters of the ls command
For example, you can use the parameter -l to list the format and -r to reverse the order of the files and directories.
Displaying a list of files and directories with the -l and -r parameters
2.3.4 Changing the Current Working Directory
If you want to change the current directory to another directory, you can use the cd command with a parameter that target the directory you want. For instance, say you want to change to the Documents folder. Then you can type this command.
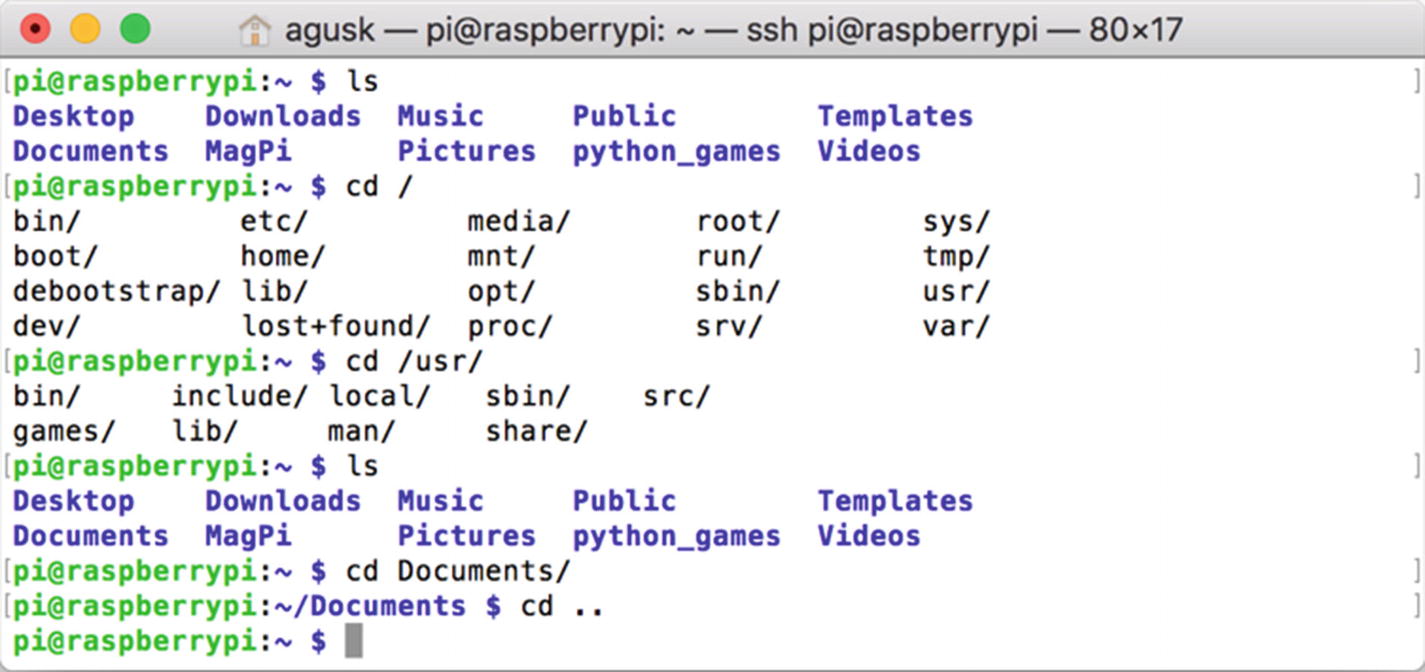
If you don’t have any idea as to which directory you want to navigate to, you can use the Tab key. For instance, say you want to see a list of directories on the root directory, /. Type this command:
$ cd /
After that, press the Tab key and then you can see the list of directories. You can see sample output in Figure 2-11.
Figure 2-11
Listing directories using the cd command
Now type this command.
$ cd /usr/
Press the Tab key again. You’ll see a list of directories under the /usr/ folder. Figure 2-12 shows this command output.
Figure 2-12
Listing directories with the cd command on a subfolder
Sometimes you’ll want to go back to the previous directory. You can do this using the cd command with the parameter .. (two dots). Type this command:
We can use the mkdir command to create a new directory. For instance, say you want to create a folder called myschool.
$ mkdir myschool
You can verify that it was created using the ls command. You can then see your newly created directory, as shown in Figure 2-14.
Figure 2-14
Creating a directory
You also can create multiple directories simultaneously. For instance, you can create these folders—folder1, folder2, and folder3—using the following command:
To remove a file or directory, you can use the rm command. You can check the rm parameters by typing this command.
$ rm --help
To delete a file, you specify the filename as the parameter. For instance, say you want to delete the test.txt file. You would type this command to do so.
$ rm test.txt
You can verify that it was deleted using the ls command. You can see the results in Figure 2-16.
Figure 2-16
Deleting a file
If you want to delete a directory, you can use the -rf parameter to force-delete all the content inside the directory.
$ rm -rf myschool
Then you can check it using the ls command, as shown in Figure 2-17.
Figure 2-17
Deleting files and directories with enforcement
2.3.7 Copying Files and Directories
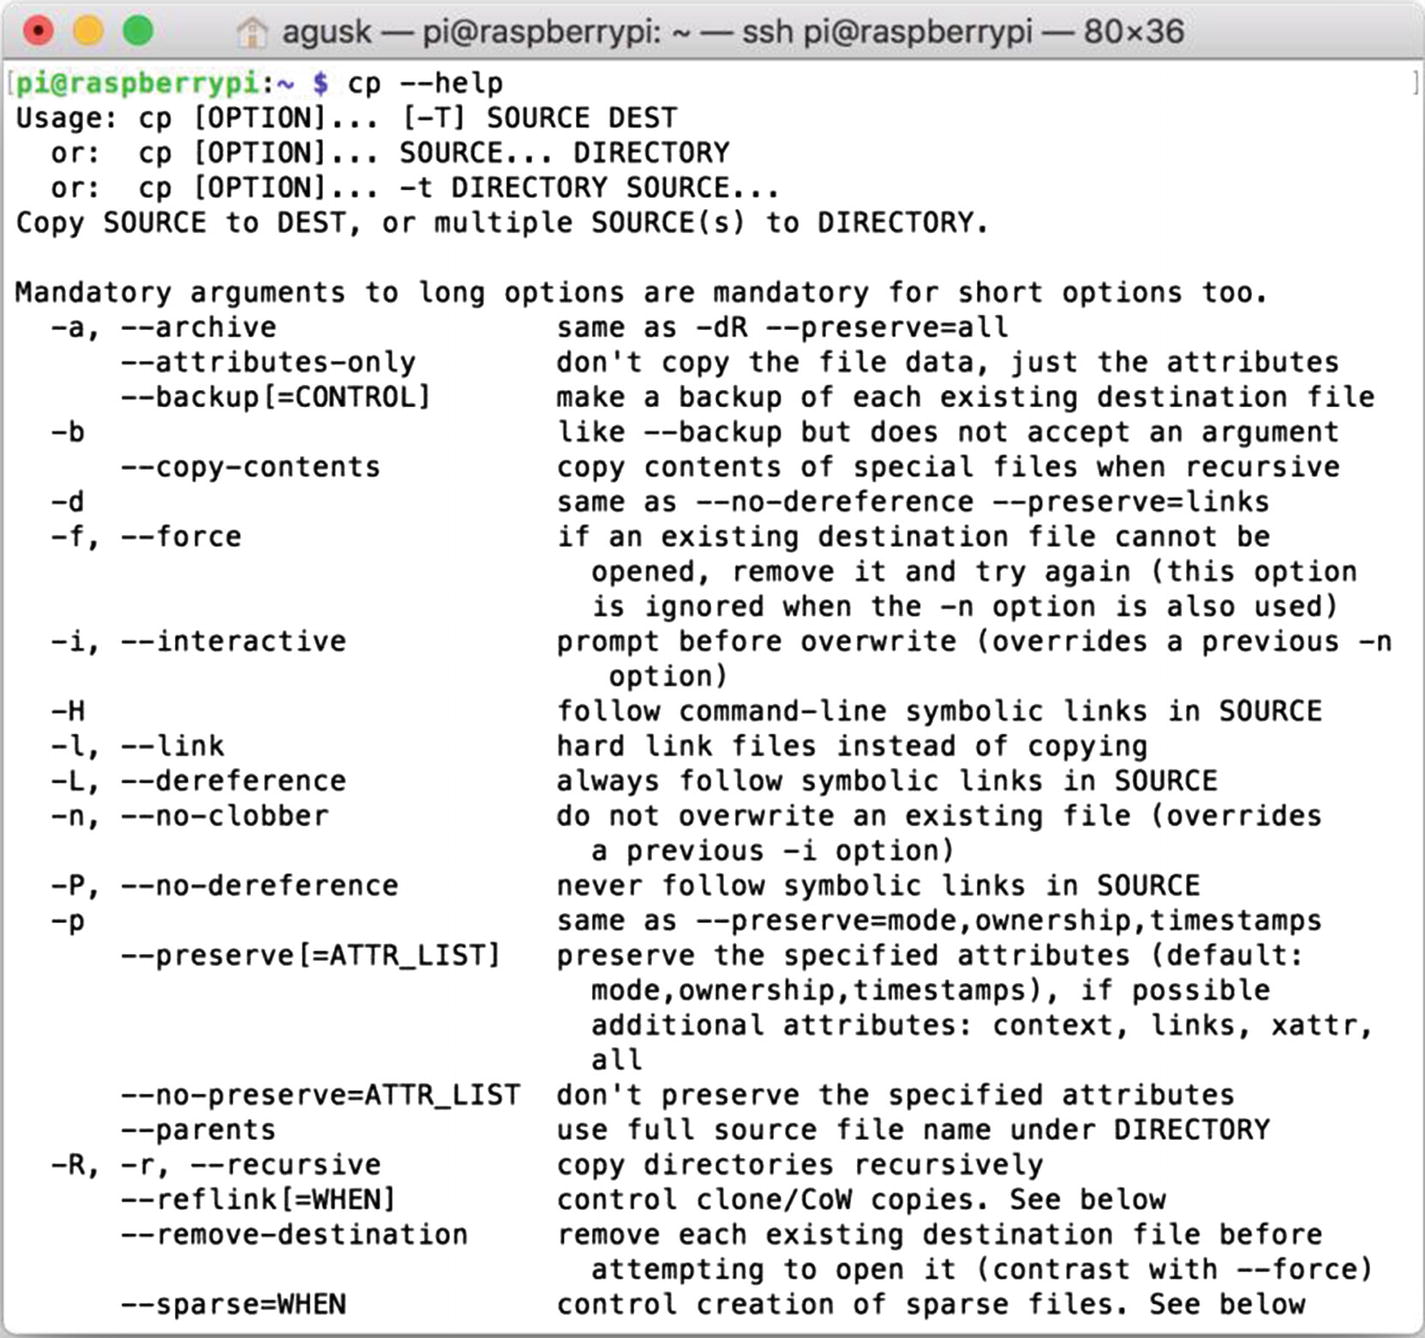
You can copy files and directories using the cp command. You can learn about the cp parameters by typing this command.
$ cp --help
Then you’ll obtain the output shown in Figure 2-18.
Figure 2-18
Displaying the cp parameters
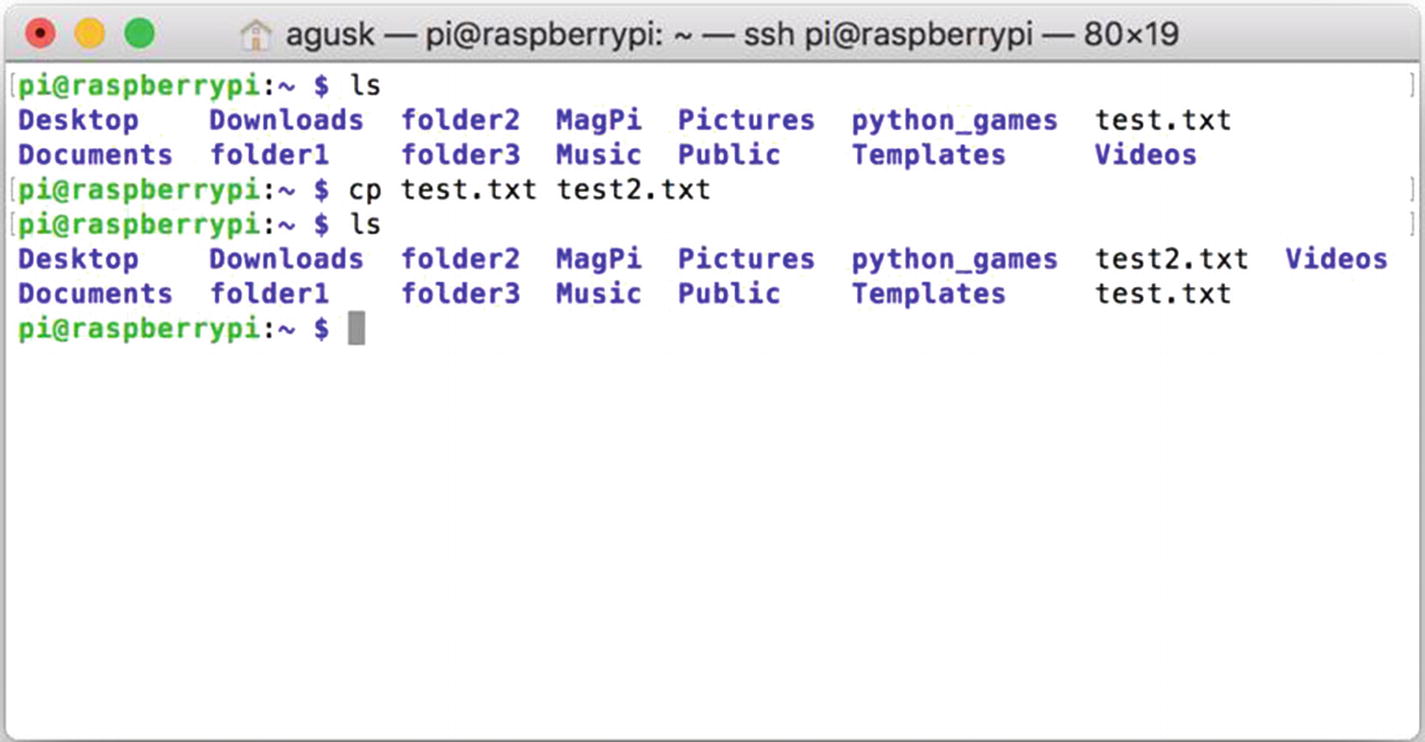
For demo purposes, say you want to copy the test.txt file to the current directory and name it a new name, called test2.txt. If a different text2.txt file exists in that directory, it will be overridden.
If you want a confirmation before copying files, use the -i parameter. If the text2.txt file does already exist, you will first be asked if you want to override this file.
You can also copy a file into a directory with the same filename. For instance, you can copy the test.txt file to the Documents directory.
$ cp test.txt Documents/
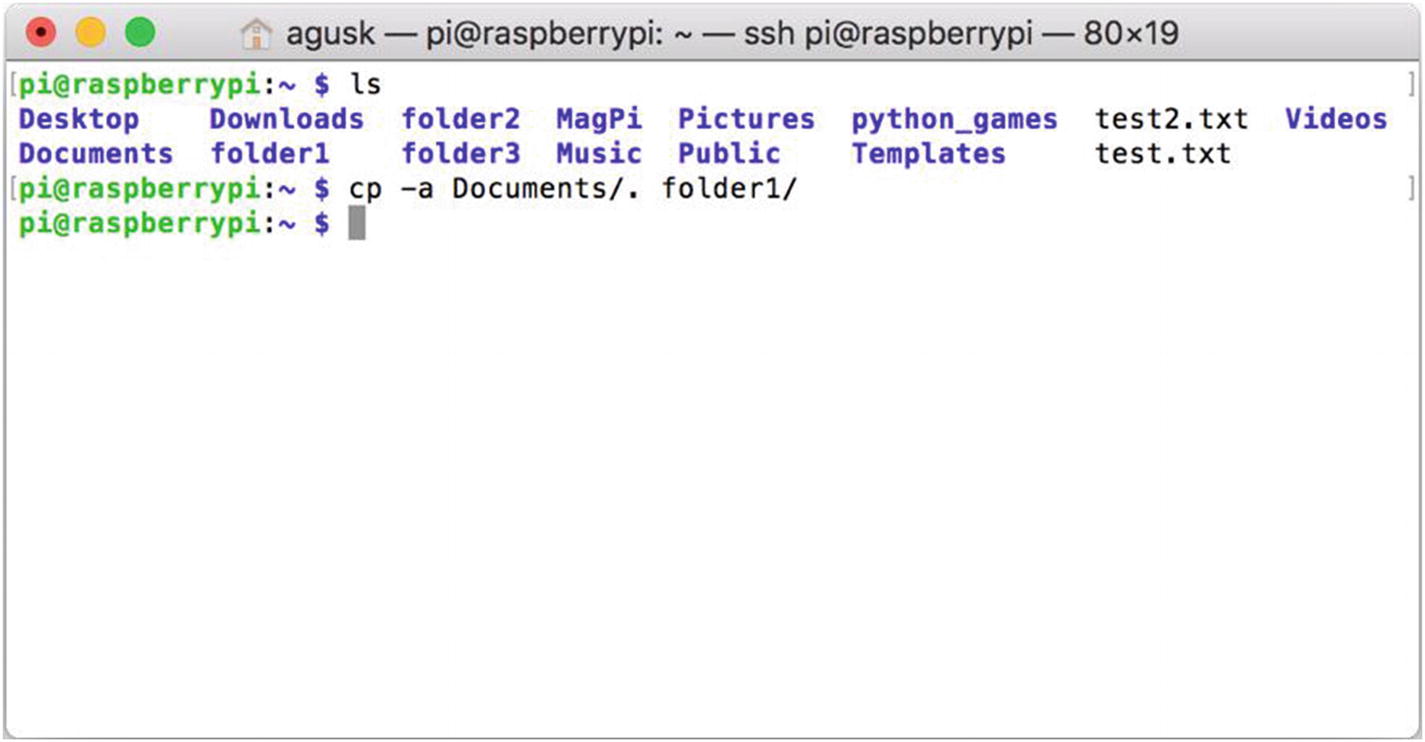
You also can copy all the files in a directory, including any subdirectories and hidden files/directories, into another directory. For instance, say you want to copy all the files in the Documents directory into the folder1 directory. You would type this command to do this:
Copying all files and directories into a targeted folder
2.3.8 Moving Files and Directories
We can move a file or directory to another folder using the mv command. You can also check parameters and usage of the mv command by typing this command.
$ mv --help
You should see a list of mv parameters. Let’s start to work with the mv command.
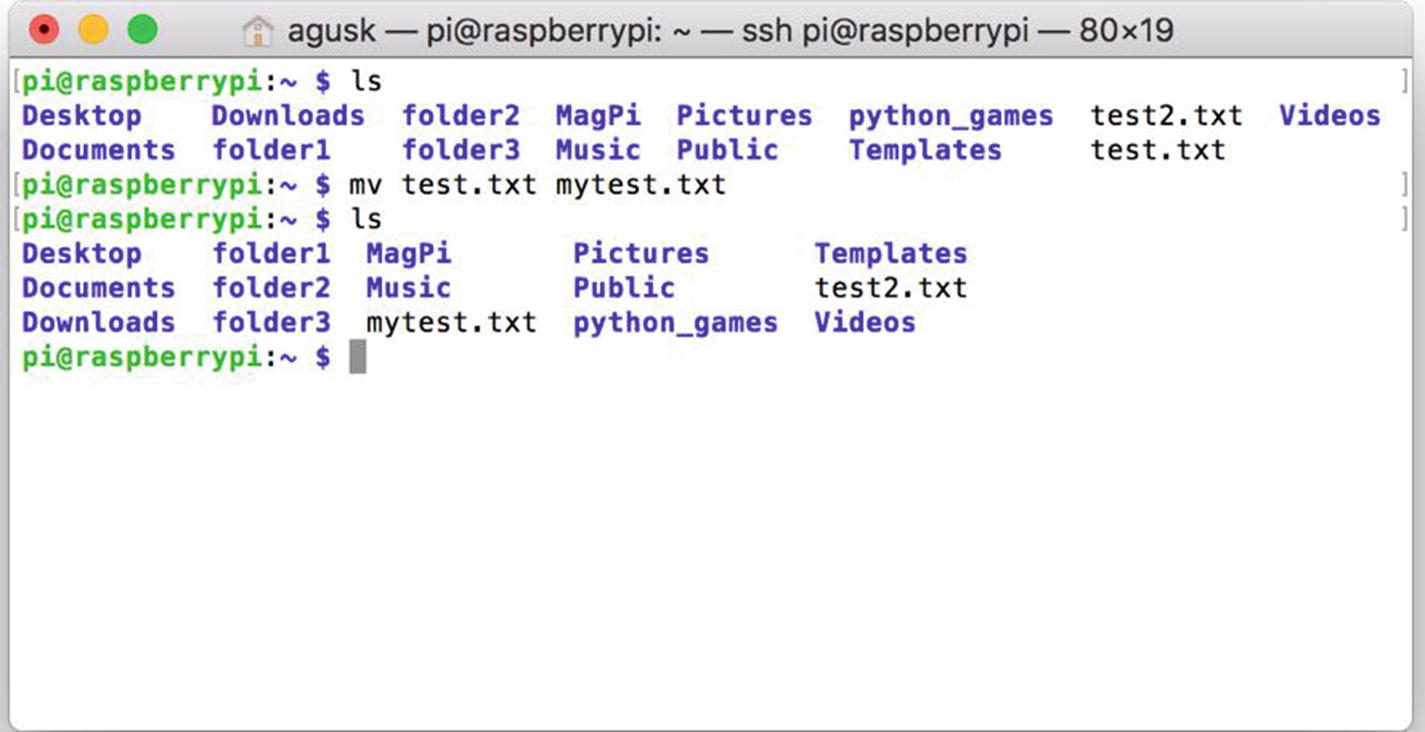
You can move a file with a new filename, but keep it in the current directory. It basically renaming the file. For instance, say you want to move the test.txt file into current directory with the name mytest.txt. You would use this command:
After executing this command, the test.txt file will be removed and a new file, mytest.txt, will be created. If the mytest file exists in the current directory, it will be overridden. You can request a confirmation before mv overrides the file by using the -i parameter.
$ mv -i test.txt mytest.txt
Now you also can move a file into another folder. For instance, you can move the mytest.txt file into the folder called Documents.
$ mv mytest.txt Documents/
You can move a folder to another folder, for instance, say you want to move the folder1 folder to folder2. Use this command:
$ mv folder1/ folder2/
2.3.9 Creating Symbolic Links
You can create a symbolic link using the ln command. You can see how to use this command and view its parameters by typing this command:
$ ln --help
You’ll then see all the ln parameters.
For example, say you want to create a symbolic link called mylink and refer to a file called test2.txt. Use this command sequence:
$ ln test2.txt mylink
You can see this command program, as shown in Figure 2-23.
Figure 2-23
Creating a symbolic link
If you open File Manager on the Raspbian desktop, you can see the link file, called mylink. Then open this file. You can see the text editor with the test2.txt file.
You also can create a symbolic link for a folder; for instance, you can create a symbolic link called myfolder to the folder folder2/.
$ ln -s folder2/ myfolder
2.4 Redirection
In this section, we are going to explore how to use redirection on the Raspberry Pi.
2.4.1 Standard Output
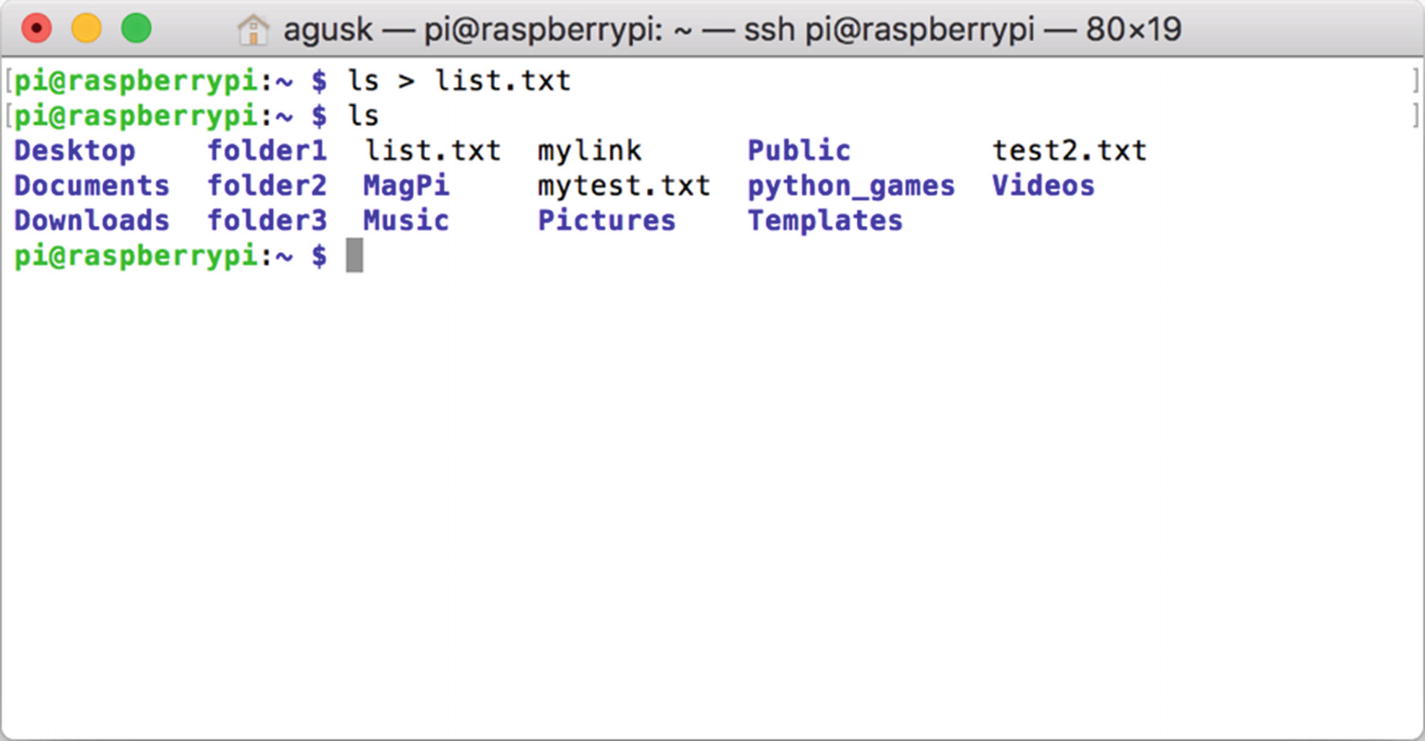
Most command-line programs that display their results do so by sending their results to standard output. By default, standard output directs its contents to the display. You can redirect standard output to a file using the > command. For instance, you can call the ls command and then save the result into a file.
$ ls > list.txt
You can see the list.txt file, which you can open using nano.
$ nano list.txt
A contents of the list.txt file can be seen in Figure 2-24.
Figure 2-24
Redirecting a file
The > command replaces the existing file. You can append the content using the >> command.
$ ls Documents/ >> list.txt
2.4.2 Standard Input
By default, standard input gets its contents from the keyboard, but like standard output, it can be redirected. To redirect the standard input to a file instead of to the keyboard, you use the < character. For instance, you can sort data in the list.txt file.
Let’s explore the drwxr-xr-x command in more detail. See Figure 2-29.
Figure 2-29
Permission information
The following is a list of file types:
d ----> directory
- -------> regular file
l ----> symbolic link
c ---> character special file
b ---> block special file
The following is a list of permission attributes:
r ---> read permission
w ---> write permission
x ---> execute permission
- ---> no permission
Now we go back to the permission drwxr-xr-x. You know that it’s a folder. The owner has read, write, and execute permissions. The group has read and execute permissions. The rest have read and execute permissions.
2.5.2 chmod
The chmod command is used to change permissions on a file or directory. We can use chmod with the octal representation or symbolic representation.
The octal representation for permissions is constructed as follows:
The first number is for the user
The second number is for the group
The third number is for all others
For instance, if you wanted to give read and write permissions (6) to the user and read permissions (4) to the group and others, you would use the following command:
$ chmod 644 filename
Note:
The 6 octal number converts to the binary number: 110. This means 110 is rw-
The 4 octal number converts to the binary number: 100. This means 100 is r--
As another example, say you want to give read and execute permissions (5) to the user, read permissions (4) to the group, and nothing (0) to the others. You would use the following command:
$ chmod 540 filename
Note:
The 5 octal number converts to the binary number: 111. This means 110 is rwx
The 4 octal number converts to the binary number: 100. This means 100 is r--
The 0 octal number converts to the binary number: 000. This means 000 is --- (no permissions)
The second way that you can change permissions is by applying the symbolic representation. Following is a list of the symbolic representations:
u is for user
g is for group
o is for others
For instance, you can add execute permissions (using the + symbol) to the user with this command.
$ chmod u+x filename
If you also can add multiple permissions for users and groups.
$ chmod u+r,g+x filename
To remove permissions, you use the - symbol. For instance, you can remove read and execute permissions from a file by using this command.
$ chmod u-rx filename
Use the -R option to change the permission recursively. Here is an example command.
$ chmod -R 755 my-directory/
2.5.3 chown
The chown command is used to change the user and/or group ownership of a given file. The following syntax is for chown.
$ chown owner-user file
$ chown owner-user:owner-group file
$ chown owner-user:owner-group directory
$ chown options owner-user:owner-group file
For instance, say you want to obtain permissions for the test.log file.
$ ls -l test.log
The following is the result.
$ -rw-r--r-- 1 pi pi 837 Feb 4 06:19 test.log
You can see the file owner is now pi.
Now you change ownership of the test.log file.
$ chown agusk test.log
Try to display the permissions again on the test.log file, use this command:
$ -rw-r--r-- 1 agusk pi 837 Feb 4 06:19 test.log
You also can change the ownership and group related to a file.
$ chown agusk:agusk test.log
You can see the permissions of the test.log file as follows.
$ -rw-r--r-- 1 agusk agusk 837 Feb 4 06:19 test.log
2.6 Manipulating Processes
In this section, we explore how to work with processes in Raspbian. To view processes, you can use the following commands:
ps
top
Each command will be explained in the following sections.
2.6.1 ps
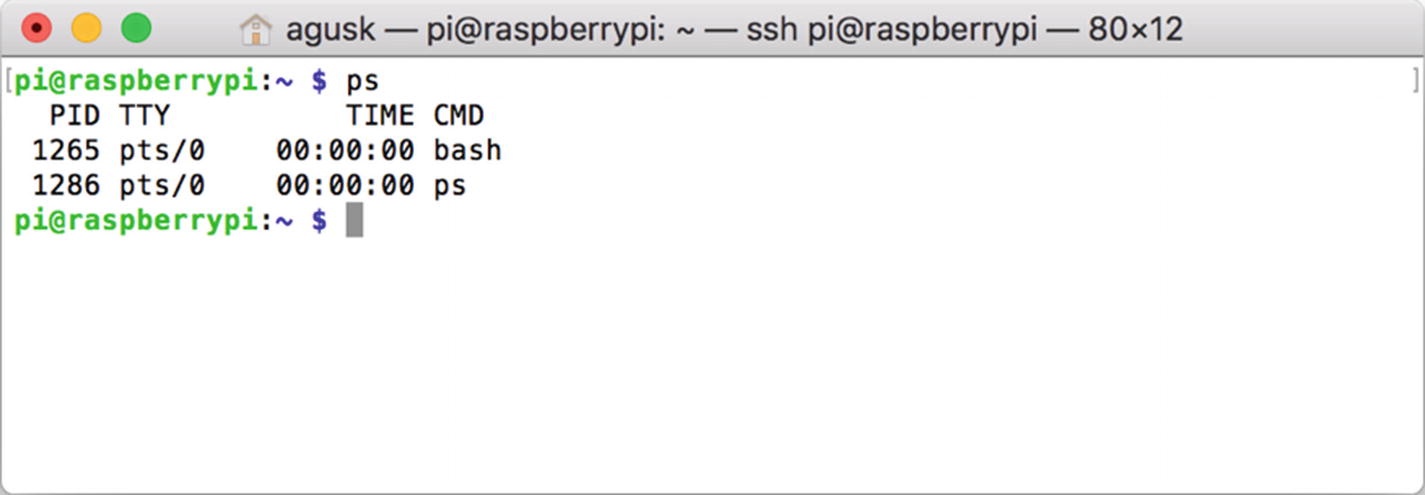
The ps command can be used to view the current processes, including their process identification numbers (PIDs). Simply type ps on the Terminal.
$ ps
You’ll see the current process, as shown in Figure 2-30.
Figure 2-30
A list of current processes in Raspbian
If you want to know details about the current process, you can pass the x parameter with the ps command.
Sometimes you’ll want to stop processes by killing them. To stop a process, you can use the kill command. You must know the process ID (PID), which you can determine via the ps command. For instance, say you want to stop a process with PID 2093. You would type the following command.
$ kill 2093
If you have a security problem, you can add the sudo command.
$ sudo kill 2093
To verify whether the process has stopped, you can use the ps command with the -ef parameter.
$ ps -ef
We can also stop all processes related to a particular name using the killall command. Here is the basic syntax:
$ killall [options] program_name
For instance, say you want to stop all processes related to Java. In that case, you would use this command:
$ killall java
2.6.4 Viewing Memory
We can view unused and used memory and swap space using the free command. Just type this command:
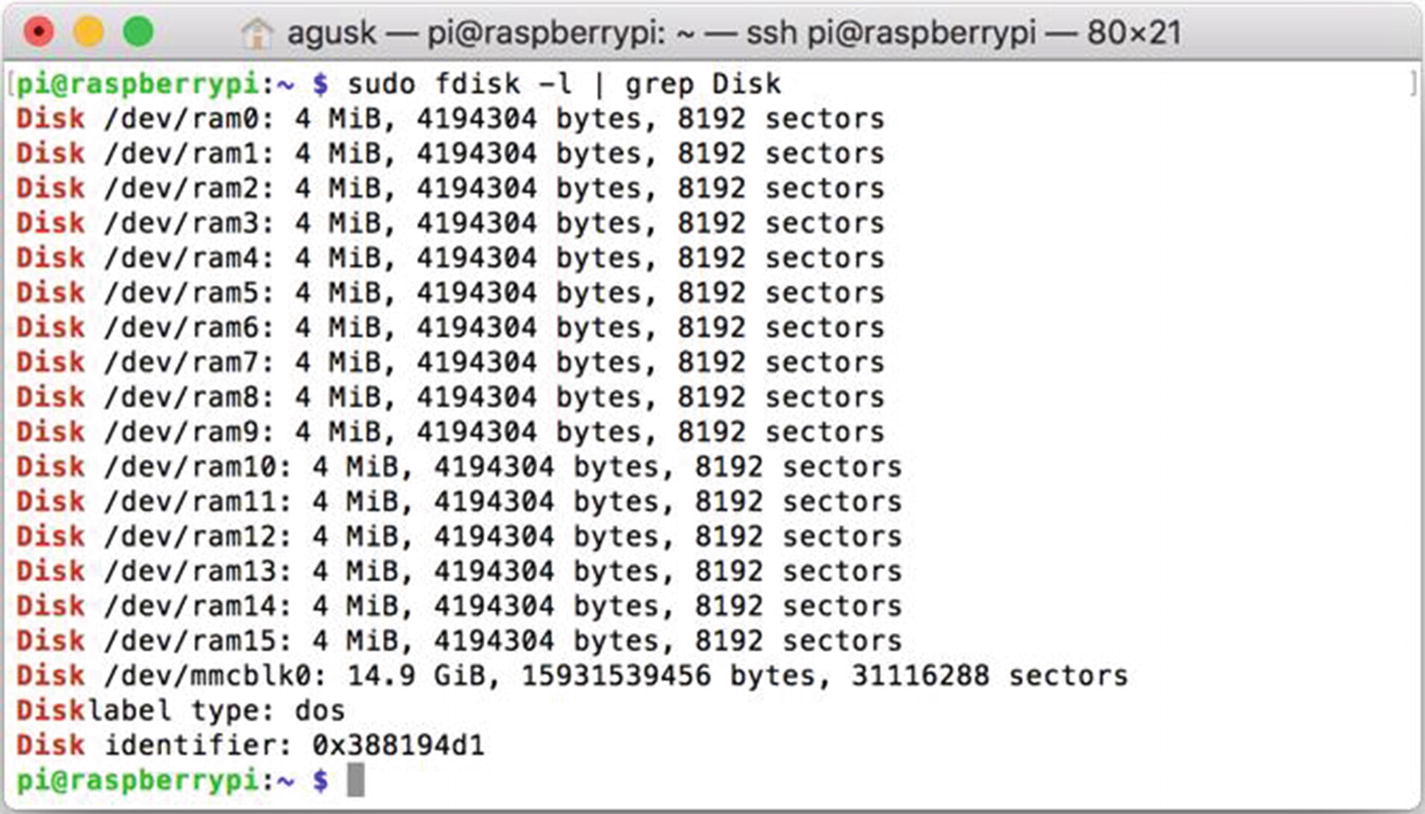
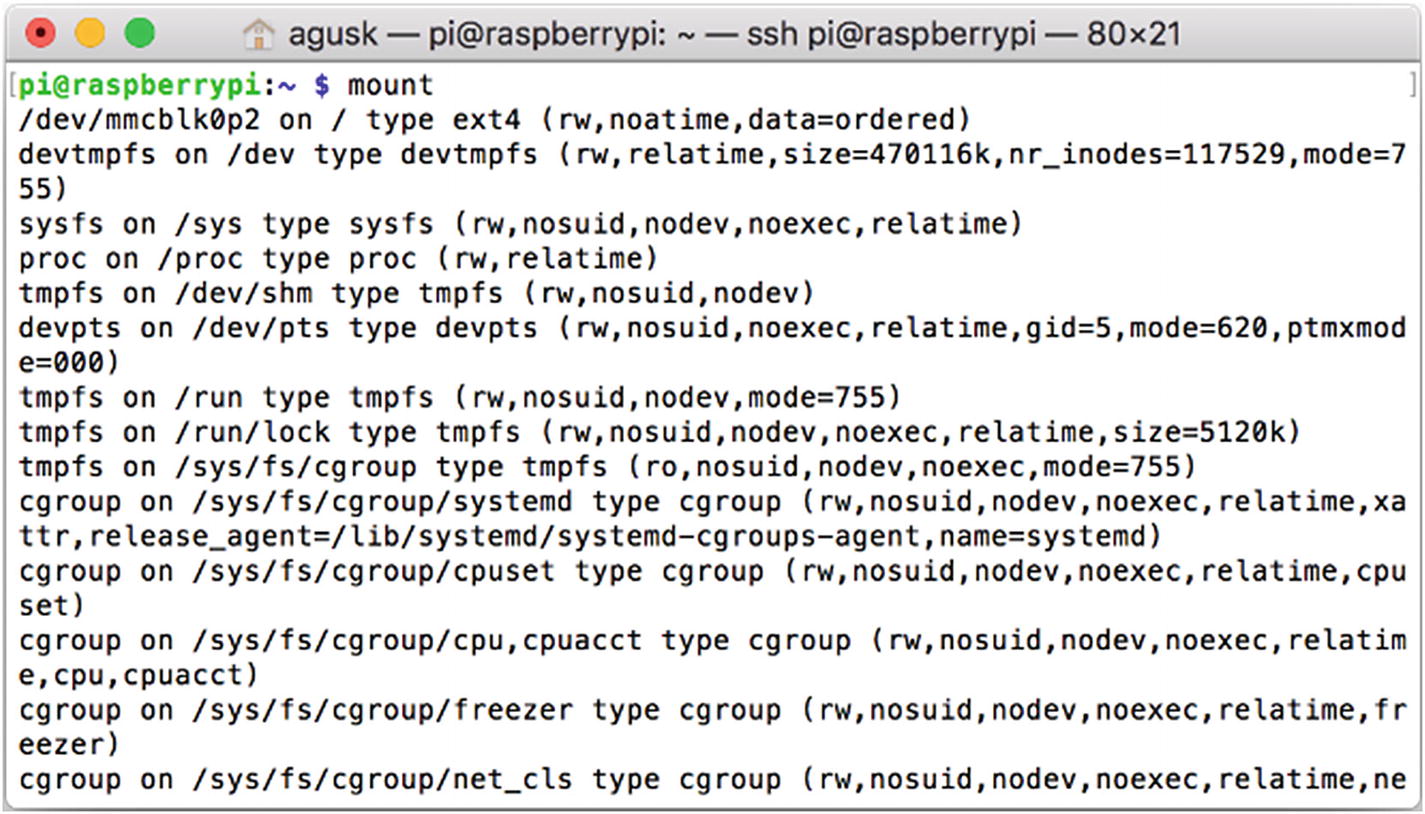
The mount command mounts a storage device or filesystem, making it accessible and attaching it to an existing directory structure. To view all mounted external devices, use the mount command.
Now how do you mount this device? First, you create a directory on /media/, for instance myfd. Type this command to do so:
$ sudo mkdir /media/myfd
Then you can mount your flashdisk using the following command:
$ sudo mount -o uid=pi,gid=pi /dev/sda1 /media/myfd
You may obtain the warning, "mount: warning: /media/myfd seems to be mounted read-only.". I used a flashdisk with the NTFS format. To solve this warning, install the ntfs-3g package.
$ sudo apt-get install ntfs-3g
If your flashdisk has the exfat format, you can install the following libraries.
$ sudo apt-get install exfat-fuse exfat-utils
Now try to mount the flashdisk using this command:
$ sudo mount -o uid=pi,gid=pi /dev/sda1 /media/myfd
You can see there is no warning. You can see my command output in Figure 2-41.
Figure 2-41
Mounting a flashdisk
You can then check the result by listing the contents of the flashdisk using the ls command.
The umount command “unmounts” a mounted filesystem. It tells the system to complete any pending read or write operations and then safely detaches the filesystem.
For instance, say you want to remove the flashdisk on /media/myfd. You type this command.
$ sudo umount /media/myfd
2.8 Summary
You learned how to work with the Raspbian shell, from basic uses, to using processes, working with storage, and manipulating permissions.
In the next chapter, we focus on the Raspbian program. You learn how to build programs using the Raspbian OS.