
4
Building and Configuring Pages
In the previous chapters, we have configured the base of our application, including the setup of the application, and shared UI components that will serve as the foundation of our UI.
In this chapter, we can proceed by creating our application pages. We will learn how routing in Next.js works and what rendering methods we can use to get the most out of Next.js. Then, we will learn about configuring per-page layouts, making our application look and feel like a single-page application.
In this chapter, we will cover the following topics:
- Next.js routing
- Next.js rendering strategies
- Next.js SEO
- Layouts
- Building the pages
By the end of this chapter, we will learn how to create pages in Next.js and get a better understanding of selecting different rendering strategies depending on the needs of the application.
Technical requirements
Before we get started, we need to set up the project. To be able to develop the project, you will need the following things installed on your computer:
- Node.js version 16 or above and npm version 8 or above.
There are multiple ways to install Node.js and npm. Here is a great article that goes into more detail:
https://www.nodejsdesignpatterns.com/blog/5-ways-to-install-node-js
- VSCode (optional) is currently the most popular editor/IDE for JavaScript/TypeScript, so we will be using it. It is open source, has great integration with TypeScript, and you can extend its features via extensions. It can be downloaded from https://code.visualstudio.com/.
The code files for this chapter can be found here: https://github.com/PacktPublishing/React-Application-Architecture-for-Production
The repository can be cloned locally with the following command:
git clone https://github.com/PacktPublishing/React-Application-Architecture-for-Production.git
Once the repository is cloned, we need to install the application’s dependencies:
npm install
We also need to provide the environment variables:
cp .env.example .env
Once the dependencies have been installed, we need to select the right stage of the code base that matches this chapter. We can do that by executing the following command:
npm run stage:switch
This command will prompt us with a list of stages for each chapter:
? What stage do you want to switch to? (Use arrow
 keys)
❯ chapter-02
  chapter-03
  chapter-03-start
  chapter-04
  chapter-04-start
  chapter-05
  chapter-05-start
(Move up and down to reveal more choices)
This is the fourth chapter, so you can select chapter-04-start if you want to follow along, or chapter-04 to see the final results of the chapter. Once the chapter has been selected, all files required to follow along with the chapter will appear.
To follow along with this chapter, you don’t need to make any changes to the code. You can use it as a reference to help get a better overview of the code base.
For more information about the setup details, check out the README.md file.
Next.js routing
Next.js has a filesystem-based router where every page file represents a page. The pages are special files that exist in the pages folder, and they have the following structure:
const Page = () => {
     return <div>Welcome to the page!</div>
}
export default Page;
As you can see, only exporting the page component as a default export is required; this is the minimum requirement for a page to be defined. We will see what else can be exported from a page in a few moments.
Since the routing is filesystem-based, routes are determined by how the page files are named. For example, the page pointing to the root route should be defined in the src/pages/index.tsx file. If we want the about page, we can define it in src/pages/about.tsx.
For any complex application with dynamic data, it is not enough to only create predefined pages. For example, let’s say we have a social network application where we can visit user profiles. The profiles should be loaded by the user’s ID. Since it would be too repetitive to create a page file for every user, we need to make the page dynamic as follows:
// pages/users/[userId].tsx
import { useRouter } from 'next/router';
const UserProfile = () => {
     const router = useRouter();
     const userId = router.query.userId;
     return <div>User: {userId}</div>;
}
export default UserProfile
To get the ID and load the data dynamically, we can define a generic user profile page in pages/users/[userId].tsx, where userId will be injected into the page dynamically. For example, going to /users/123 will show the user profile page and pass the value of 123 as userId via the query property of the router.
Next.js rendering strategies
Next.js supports four different rendering strategies:
- Client-side rendering: Where we can load the initial content on the server and then fetch additional data from the client.
- Server-side rendering: Where we can fetch the data on the server, inject it on the page, and return the page to the client with the provided data.
- Static site generation: Where static data is injected on the page and returned in the markup to the client.
- Incremental static regeneration: The middle ground between server-side rendering and static site generation. We can generate x number of pages statically, and then if a page that hasn’t been rendered and cached yet is requested, Next.js can render it on the server and cache it for future requests.
For our application, we will mainly focus on the first two methods, so let’s see how they work in the following examples.
Client-side rendering
Considering the user profile page example, we can perform client-side rendering by writing the pages as follows:
// pages/users/[userId].tsx
import { useRouter } from 'next/router';
import { useUser } from './api';
const UserProfile = () => {
     const router = useRouter();
     const userId = router.query.userId;
     const { user, isLoading } = useUser(userId);
     if(!user && isLoading) return <div>Loading...</div>;
     if(!user) return <div>User not found!</div>;
     return <div>User: {user.name}</div>;
}
As we can see, we are using userId to fetch the user data. In this example, we are doing this on the client side, which means that the server will initially render the following markup:
<div>Loading...</div>
Only after the data is fetched on the client will the user data be displayed:
<div>User: {user.name}</div>This is fine unless we care about SEO and the performance of the initial page load. Here we have to wait for the initial page to load and then for the user data to be fetched. This approach is perfectly valid for data that is not supposed to be public, such as admin dashboards.
However, for public pages, it is a good idea to enable the server to return the actual markup to the client to make it easier for search engines to crawl and index our pages. We can do that by server-side rendering the pages.
Server-side rendering
Let’s revisit the user profile page example, this time by rendering it on the server:
// pages/users/[userId].tsx
import { useRouter } from 'next/router';
import { getUser } from './api';
const UserProfile = ({ user }) => {
     const router = userRouter();
     const userId = router.query;
     const { user } = useUser(userId);
     if(!user) return <div>User not found!</div>;
     return <div>User: {user.name}</div>;
}
export const getServerSideProps = async ({ params }) => {
     const userId = params.userId;
     const user = await getUser(userId);
     return {
          props: {
               user
          }
     }
}
As we can see here, besides the page component, the page file exports the getServerSideProps function, which is executed on the server. Its return value can contain props, which is passed to the component’s props.
The server will render the following markup:
<div>User: {user.name}</div>The complete markup with the user data will be available on the initial render.
Let’s keep in mind that there is no perfect rendering strategy for all use cases; therefore, we must balance the pros and cons and choose which one to use based on our needs. The great thing with Next.js is that it allows us to use different rendering strategies per page so we can combine them to fit the application’s needs in the best way.
Next.js SEO
To improve the SEO of our pages, we should add some meta tags and the title of the page and inject them into the page. This can be done via the Head component provided by Next.js.
For the application, we want to have a dedicated component where we can add the title of the pages. Let’s open the src/components/seo/seo.tsx file and add the following:
import Head from 'next/head';
export type SeoProps = {
  title: string;
};
export const Seo = ({ title }: SeoProps) => {
  return (
    <Head>
      <title>{title}</title>
    </Head>
  );
};
The Head component will inject its content into the head of the page. For now, the title will suffice, but it can be extended to add different meta tags if needed.
Let’s add the Seo component to our landing page at src/pages/index.tsx.
First, let’s import the component:
import { Seo } from '@/components/seo';And then, we can add it at the top of the component:
const LandingPage = () => {
  return (
    <>
      <Seo title="Jobs App" />
      <Center>
      {/* rest of the component */}
      </Center>
    </>
  );
};
export default LandingPage
Layouts
When developing an application with multiple views or pages, we need to consider layout reusability.
Consider the following example:
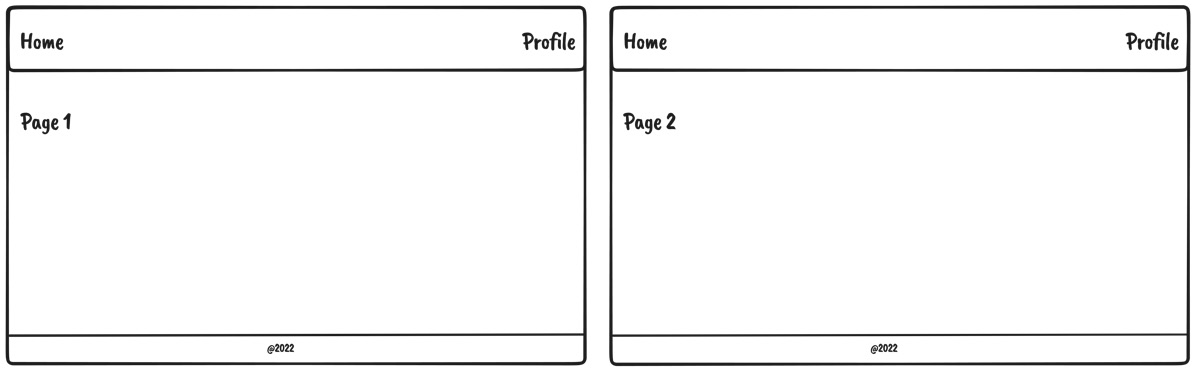
Figure 4.1 – Layouts example
We can see that the navbar and the footer are the same on both pages and the main content comes between, so it is a good idea to make it reusable.
There are two ways to add the layout component to pages:
- Wrap the returned JSX of every page with the layout component
- Attach the layout to the page component and use it to wrap the entire component
Wrapping JSX of every page with the layout component
Let’s say we have a layout component that can wrap the content of each page:
const Layout = ({ children }) => {
     return (
          <div>
               <Header />
               {children}
               <Footer />
          </div>
     )
}
We can add the Layout component to the page like this:
const Page1 = () => {
     const user = useUser();
     if (!user) {
          return (
               <Layout>
                    <div>Unauthenticated!</div>
               </Layout
          )
     }
     return (
          <Layout>
               <h1>Page 1</h1>
          </Layout
     )
}
This way of handling layouts in Next.js applications is OK for some simple cases. However, it comes with some drawbacks, as described in the following list:
- If the Layout component tracks some internal state, it will lose it when the page changes
- The page will lose its scroll position
- Anything we want to return before the final return, we also need to wrap with Layout
For our application, we will use a better way to handle per-page layouts by attaching them to the page component. Let’s see it in action in the following section.
Attaching the layout to the page component and using it to wrap the entire component
To make this work, we need to first update the src/pages/_app.tsx file:
import { NextPage } from 'next';
import type { AppProps } from 'next/app';
import { ReactElement, ReactNode } from 'react';
import { AppProvider } from '@/providers/app';
type NextPageWithLayout = NextPage & {
  getLayout?: (page: ReactElement) => ReactNode;
};
type AppPropsWithLayout = AppProps & {
  Component: NextPageWithLayout;
};
const App = ({
  Component,
  pageProps,
}: AppPropsWithLayout) => {
  const getLayout =
    Component.getLayout ?? ((page) => page);
  const pageContent = getLayout(
    <Component {...pageProps} />
  );
  return <AppProvider>{pageContent}</AppProvider>;
};
export default App;
The page component expects the getLayout static property to be attached, which will be used to wrap the entire component when it is rendered in _app.tsx. Thanks to the reconciliation in React, all of the layout component states will persist when navigating between pages with the same layout.
We already have the layout components built and will just add them to our pages.
Now that we have everything prepared, let’s build out our pages.
Building the pages
Now that we are acquainted with how Next.js pages work and have prepared the Seo component and the layout setup, let’s implement the pages for the application. We will be implementing the following pages:
- The public organization details page
- The public job details page
- The jobs page in the dashboard
- The job details page in the dashboard
- The create job page
- 404 page
The public organization details page
The public organization details page is the page where any user can see all details about a given organization and a list of its jobs. Since it is a public page, we want to render it on the server for better SEO.
To create the page, let’s create the src/pages/organizations/[organizationId]/index.tsx file, where organizationId refers to the dynamic ID of the organization, which will be used to retrieve the given organization.
Then, let’s import all dependencies:
import { Heading, Stack } from '@chakra-ui/react';
import {
  GetServerSidePropsContext,
  InferGetServerSidePropsType,
} from 'next';
import { ReactElement } from 'react';
import { NotFound } from '@/components/not-found';
import { Seo } from '@/components/seo';
import { JobsList, Job } from '@/features/jobs';
import { OrganizationInfo } from '@/features/
  organizations';
import { PublicLayout } from '@/layouts/public-layout';
import {
  getJobs,
  getOrganization,
} from '@/testing/test-data';
Now, let’s implement the page component:
type PublicOrganizationPageProps =
  InferGetServerSidePropsType<typeof getServerSideProps>;
const PublicOrganizationPage = ({
  organization,
  jobs,
}: PublicOrganizationPageProps) => {
  if (!organization) return <NotFound />;
  return (
    <>
      <Seo title={organization.name} />
      <Stack
        spacing="4"
        w="full"
        maxW="container.lg"
        mx="auto"
        mt="12"
        p="4"
      >
        <OrganizationInfo organization={organization} />
        <Heading size="md" my="6">
          Open Jobs
        </Heading>
        <JobsList
          jobs={jobs}
          organizationId={organization.id}
          type="public"
        />
      </Stack>
    </>
  );
};
The page component accepts organization and jobs as props. The props are passed to the page automatically by Next.js. What gets passed as props to a page component is determined by the return value of the getServerSideProps function, which is executed on the server and enables server-side rendering. We will see the implementation of it in a moment, but for now, let’s wire up the layout:
PublicOrganizationPage.getLayout = function getLayout(
  page: ReactElement
) {
  return <PublicLayout>{page}</PublicLayout>;
};
This is how we will use layouts for our pages based on the setup we just configured. The getLayout function will wrap the page component, and the layouts will be applied. We can also nest multiple layouts if required, so this approach is very flexible.
Now, let’s export our page, which must be exported as default:
export default PublicOrganizationPage;
And then, let’s implement the getServerSideProps function:
export const getServerSideProps = async ({
  params,
}: GetServerSidePropsContext) => {
  const organizationId = params?.organizationId as string;
  const [organization, jobs] = await Promise.all([
    getOrganization(organizationId).catch(() => null),
    getJobs(organizationId).catch(() => [] as Job[]),
  ]);
  return {
    props: {
      organization,
      jobs,
    },
  };
};
We are extracting the organization’s ID from params and using this to fetch the organization and its jobs, and then we return it as props, which will be passed to the page component. The getServerSideProps function must be exported as a named export.
One more thing to note is that currently, we are loading data using the utility functions that load our testing data since we don’t have our API ready. In the following chapters, we will see how to create an actual API integration, but for now, this will allow us to build most of the UI for our pages.
Let’s now open http://localhost:3000/organizations/amYXmIyT9mD9GyO6CCr:
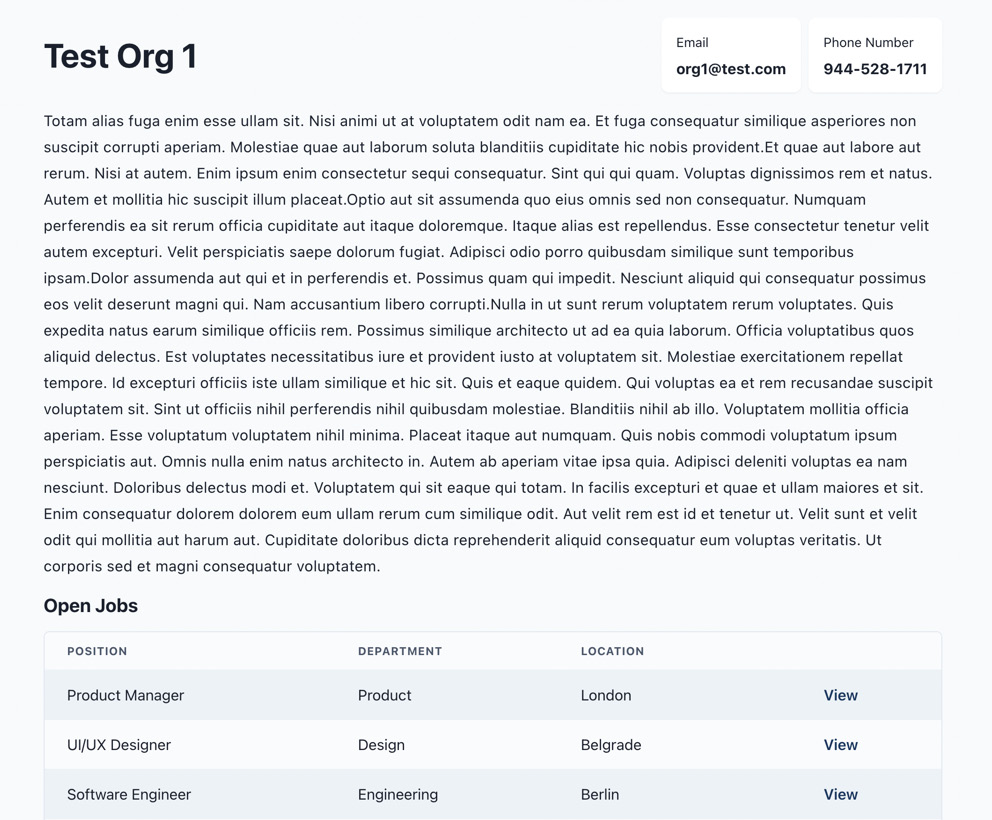
Figure 4.2 – The public organization details page
And there is our organization details page! Organizations can use this link to share info about their organizations and the list of their job postings.
The page is rendered on the server, meaning the page’s content will be immediately available to the user.
To verify that, disable JavaScript in your browser and refresh the page.
You will notice that there is no difference. All the content is available even if JavaScript is disabled because all the markup is generated on the server and returned to the client.
The public job details page
The public job details page is the page that shows all details about a given job and allows users to apply for it. It should also be available to all users, so we want to make it search-engine friendly. Therefore, we want to render its content on the server, just as we did with the organization page.
Let’s start by creating src/pages/organizations/[organizationId]/jobs/[jobId].tsx, where jobId refers to the ID of the job.
Then, let’s import all required dependencies:
import { Stack, Button } from '@chakra-ui/react';
import {
  GetServerSidePropsContext,
  InferGetServerSidePropsType,
} from 'next';
import { ReactElement } from 'react';
import { NotFound } from '@/components/not-found';
import { Seo } from '@/components/seo';
import { PublicJobInfo } from '@/features/jobs';
import { PublicLayout } from '@/layouts/public-layout';
import {
  getJob,
  getOrganization,
} from '@/testing/test-data';
Then, let’s define our job page component:
type PublicJobPageProps = InferGetServerSidePropsType<
  typeof getServerSideProps
>;
export const PublicJobPage = ({
  job,
  organization,
}: PublicJobPageProps) => {
  const isInvalid =
    !job ||
    !organization ||
    organization.id !== job.organizationId;
  if (isInvalid) {
    return <NotFound />;
  }
  return (
    <>
      <Seo title={`${job.position} | ${job.location}`} />
      <Stack w="full">
        <PublicJobInfo job={job} />
        <Button
          bg="primary"
          color="primaryAccent"
          _hover={{
            opacity: '0.9',
          }}
          as="a"
          href={`mailto:${organization?.email}?subject=
            Application for ${job.position} position`}
          target="_blank"
        >
          Apply
        </Button>
      </Stack>
    </>
  );
};
As we did with the organization page, we are loading the job and the organization via getServerSideProps and rendering the content on the server.
Next, we can attach the layout of the page and export it:
PublicJobPage.getLayout = function getLayout(
  page: ReactElement
) {
  return <PublicLayout>{page}</PublicLayout>;
};
export default PublicJobPage;
And finally, let’s create the getServerSideProps function and export it:
export const getServerSideProps = async ({
  params,
}: GetServerSidePropsContext) => {
  const organizationId = params?.organizationId as string;
  const jobId = params?.jobId as string;
  const [organization, job] = await Promise.all([
    getOrganization(organizationId).catch(() => null),
    getJob(jobId).catch(() => null),
  ]);
  return {
    props: {
      job,
      organization,
    },
  };
};
We are fetching the job and organization data, and we pass that as props to the page. The content is rendered on the server, so it will be available to the client immediately, just as it was on the organization details page.
To verify that everything works, let’s open http://localhost:3000/organizations/amYXmIyT9mD9GyO6CCr/jobs/2LJ_sgmy_880G9WivH5Hf:
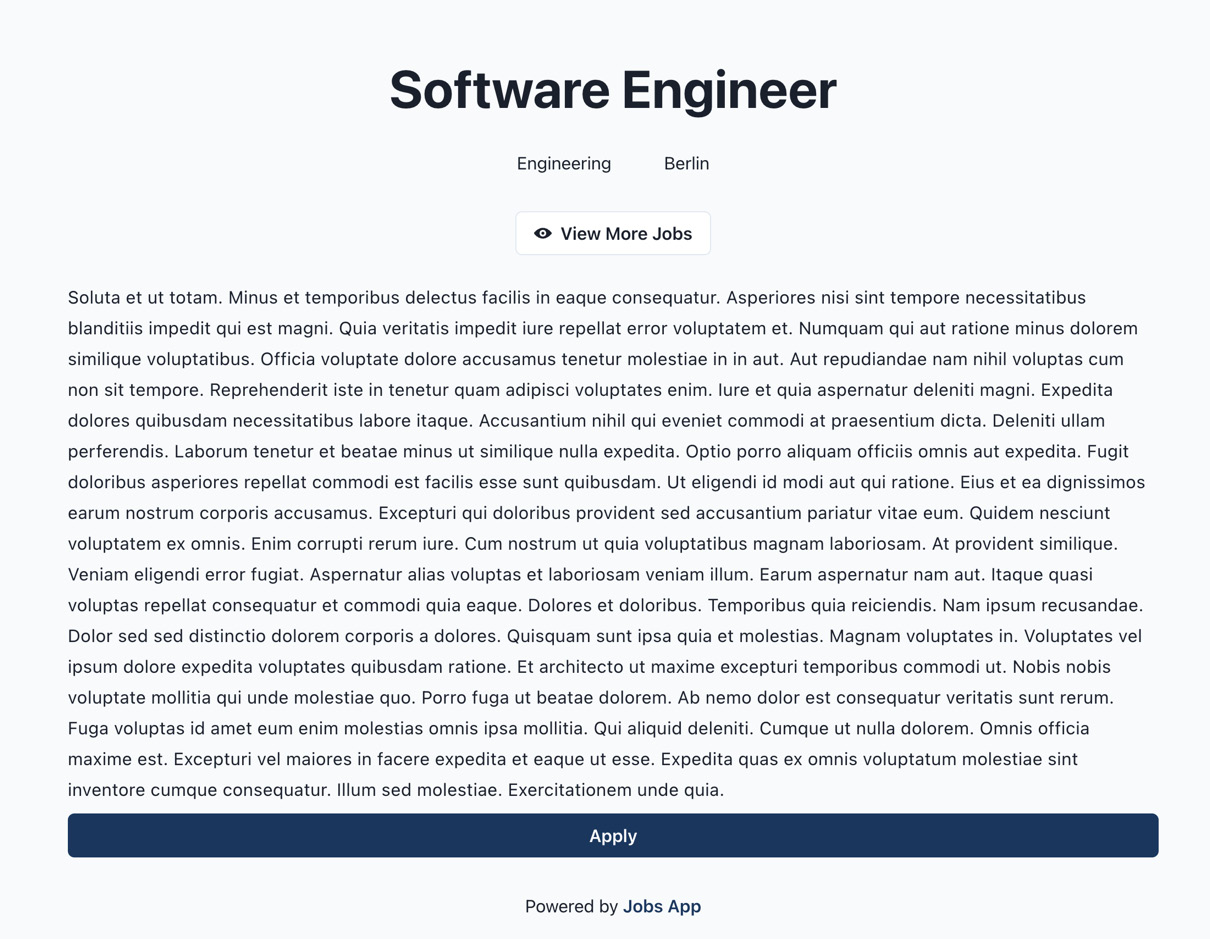
Figure 4.3 – The public job details page
It’s nice to have the content immediately available on the client, so why wouldn’t we render everything on the server?
Server-side rendering has a couple of drawbacks:
- More computing power for the server is required, which can affect server cost
- Long getServerSideProps execution time can block the entire application
That’s why we want to use it only where it makes sense, such as public pages that should be search-engine friendly, and where their content might change more frequently.
For the dashboard pages, we will render the initial loading state on the server and then load and render data on the client.
The jobs page in the dashboard
Let’s create the src/pages/dashboard/jobs/index.tsx file.
Then, we can import all required dependencies:
import { PlusSquareIcon } from '@chakra-ui/icons';
import { Heading, HStack } from '@chakra-ui/react';
import { ReactElement } from 'react';
import { Link } from '@/components/link';
import { Loading } from '@/components/loading';
import { Seo } from '@/components/seo';
import { JobsList } from '@/features/jobs';
import { DashboardLayout } from '@/layouts/dashboard-layout';
import { useJobs, useUser } from '@/testing/test-data';
Next, we can define and export the page component:
const DashboardJobsPage = () => {
  const user = useUser();
  const jobs = useJobs(user.data?.organizationId ?? '');
  if (jobs.isLoading) return <Loading />;
  if (!user.data) return null;
  return (
    <>
      <Seo title="Jobs" />
      <HStack
        mb="8"
        align="center"
        justify="space-between"
      >
        <Heading>Jobs</Heading>
        <Link
          icon={<PlusSquareIcon />}
          variant="solid"
          href="/dashboard/jobs/create"
        >
          Create Job
        </Link>
      </HStack>
      <JobsList
        jobs={jobs.data || []}
        isLoading={jobs.isLoading}
        organizationId={user.data.organizationId}
        type="dashboard"
      />
    </>
  );
};
DashboardJobsPage.getLayout = function getLayout(
  page: ReactElement
) {
  return <DashboardLayout>{page}</DashboardLayout>;
};
export default DashboardJobsPage;
Notice how all data fetching happens in the component because we are doing it on the client.
To verify that everything works as expected, let’s open http://localhost:3000/dashboard/jobs:
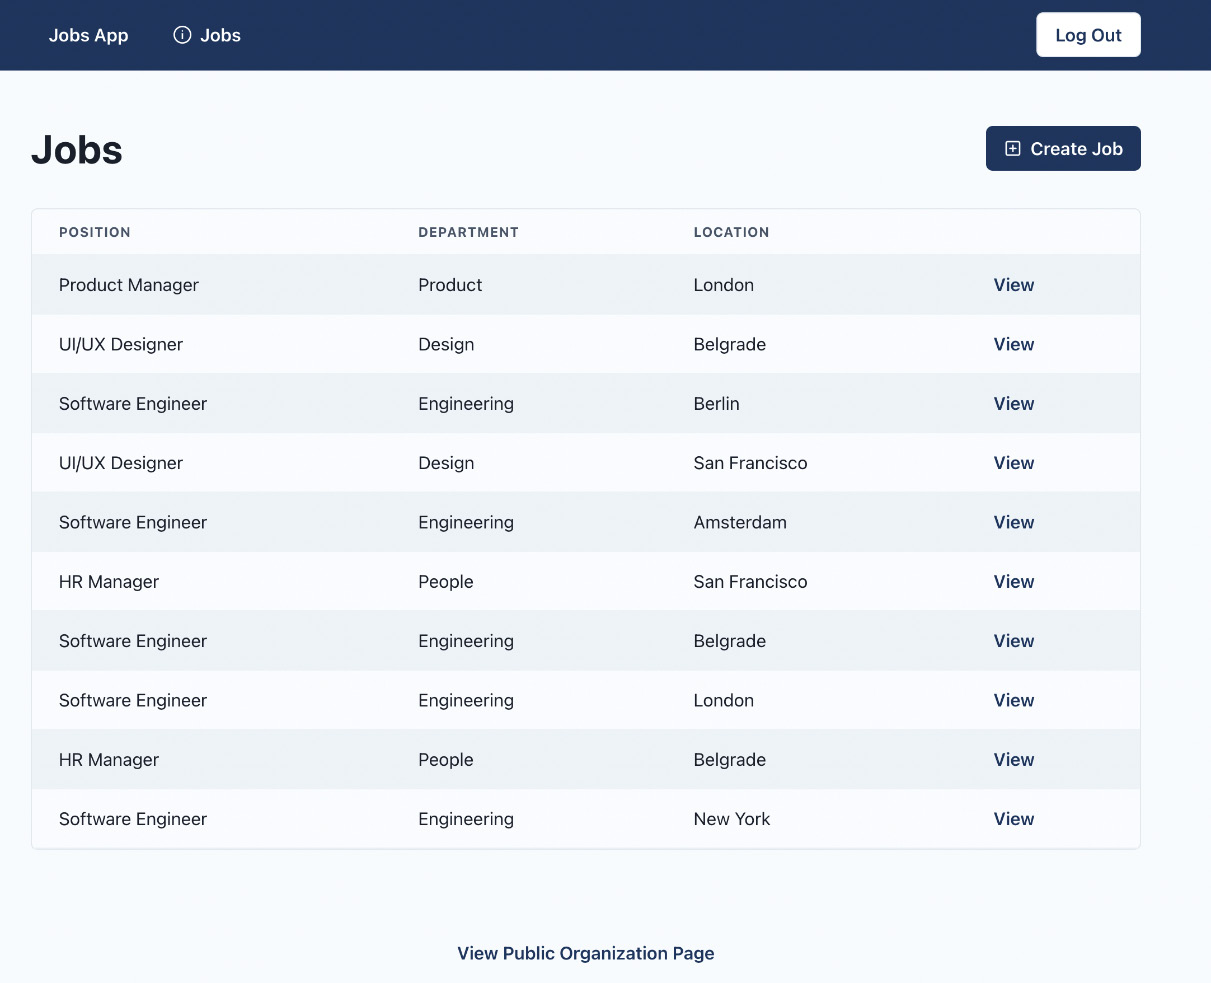
Figure 4.4 – The dashboard jobs page
And there it is! This page allows organization admins to have an overview of their organization’s jobs.
The job details page in the dashboard
The dashboard job details page will show all details about a given job in the dashboard.
To get started, let’s create src/pages/dashboard/jobs/[jobId].tsx, where jobId refers to the dynamic ID of the job.
Then we can import all dependencies:
import { useRouter } from 'next/router';
import { ReactElement } from 'react';
import { Loading } from '@/components/loading';
import { NotFound } from '@/components/not-found';
import { Seo } from '@/components/seo';
import { DashboardJobInfo } from '@/features/jobs';
import { DashboardLayout } from '@/layouts/
  dashboard-layout';
import { useJob } from '@/testing/test-data';
Then let’s define and export our page component:
const DashboardJobPage = () => {
  const router = useRouter();
  const jobId = router.query.jobId as string;
  const job = useJob(jobId);
  if (job.isLoading) {
    return <Loading />;
  }
  if (!job.data) {
    return <NotFound />;
  }
  return (
    <>
      <Seo
        title={`${job.data.position} | ${job.data.
          location}`}
      />
      <DashboardJobInfo job={job.data} />
    </>
  );
};
DashboardJobPage.getLayout = function getLayout(
  page: ReactElement
) {
  return <DashboardLayout>{page}</DashboardLayout>;
};
export default DashboardJobPage;
To verify that everything works as expected, let’s open http://localhost:3000/dashboard/jobs/wS6UeppUQoiXGTzAI6XrM:

Figure 4.5 – The dashboard job details page
And this is our dashboard job details page. We can see basic details about a given job here.
The create job page
The create job page is the page where we will render the form for creating jobs.
To get started, let’s create src/pages/dashboard/jobs/create.tsx.
Then, let’s import the required dependencies:
import { Heading } from '@chakra-ui/react';
import { useRouter } from 'next/router';
import { ReactElement } from 'react';
import { Seo } from '@/components/seo';
import { CreateJobForm } from '@/features/jobs';
import { DashboardLayout } from '@/layouts/
  dashboard-layout';
Then, we can create and export the page component:
const DashboardCreateJobPage = () => {
  const router = useRouter();
  const onSuccess = () => {
    router.push(`/dashboard/jobs`);
  };
  return (
    <>
      <Seo title="Create Job" />
      <Heading mb="8">Create Job</Heading>
      <CreateJobForm onSuccess={onSuccess} />
    </>
  );
};
DashboardCreateJobPage.getLayout = function getLayout(
  page: ReactElement
) {
  return <DashboardLayout>{page}</DashboardLayout>;
};
export default DashboardCreateJobPage;
To verify that everything works as expected, let’s open http://localhost:3000/dashboard/jobs/create:

Figure 4.6 – The dashboard create job page
And there it is! For this chapter, we have just created the pages and will handle the data submission in the upcoming chapters.
404 page
If you tried to visit a page before we implemented it, you might have noticed a blank page. To let users know when they visit a non-existent page, we should create a custom 404 page.
Let’s start by creating src/pages/404.tsx and add the following:
import { Center } from '@chakra-ui/react';
import { Link } from '@/components/link';
import { NotFound } from '@/components/not-found';
const NotFoundPage = () => {
  return (
    <>
      <NotFound />
      <Center>
        <Link href="/">Home</Link>
      </Center>
    </>
  );
};
export default NotFoundPage;
The 404.tsx file in the pages folder is a special page that will be displayed whenever a user visits an unknown page.
To verify that everything works as expected, let’s visit http://localhost:3000/non-existing-page:

Figure 4.7 – 404 page
And there it is! We have a nice interface to return to the application if we end up on a missing page.
Summary
In this chapter, our focus has been on building the pages of our application.
We started by looking at how routing works in Next.js. Then we covered the rendering strategies we will be using. After that, we built the SEO component, which injects content into the head of the page.
We then configured the layout system for our pages. At the end of the chapter, we built the pages for our application. To build the content for our pages, we used test data that was predefined. We used test data to render content on the pages, but we still need to make real API calls.
In the next chapter, we will learn how to mock the API endpoints, which we can use during development to make HTTP requests and fetch data as if we were consuming the real API.