
5
Mocking the API
In the previous chapter, we built the application pages that use test data. The UI of the pages is complete, but the pages are not functional yet. We are using the test data without making requests to the API.
In this chapter, we will learn what mocking is and why it is useful. We will learn how to mock the API endpoints with the msw library, a great tool that allows us to create mocked API endpoints that behave as real-world API endpoints.
We will also learn how to model the data of our application entities with the @mswjs/data library.
In this chapter, we will cover the following topics:
- Why is mocking useful?
- Introduction to MSW
- Configuring data models
- Configuring request handlers for API endpoints
By the end of this chapter, we will learn how to generate fully featured mocked APIs with data models set in place, which will make our code base less dependent on external APIs during development.
Technical requirements
Before we get started, we need to set up our project. To be able to develop our project, we will need the following things installed on our computer:
- Node.js version 16 or above and npm version 8 or above
There are multiple ways to install Node.js and npm. Here is a great article that goes into more detail: https://www.nodejsdesignpatterns.com/blog/5-ways-to-install-node-js.
- Visual Studio Code (VS Code) (optional) is currently the most popular editor/IDE for JavaScript/TypeScript, so we will be using it. It is open source, has great integration with TypeScript, and we can extend its features via extensions. It can be downloaded from here: https://code.visualstudio.com/.
The code files for this chapter can be found here: https://github.com/PacktPublishing/React-Application-Architecture-for-Production
The repository can be cloned locally with the following command:
git clone https://github.com/PacktPublishing/React-Application-Architecture-for-Production.git
Once the repository is cloned, we need to install the application’s dependencies:
npm install
We can provide the environment variables using the following command:
cp .env.example .env
Once the dependencies have been installed, we need to select the right stage of the code base that matches this chapter. We can do that by executing the following command:
npm run stage:switch
This command will prompt us with a list of stages for each chapter:
? What stage do you want to switch to? (Use arrow
 keys)
❯ chapter-02
  chapter-03
  chapter-03-start
  chapter-04
  chapter-04-start
  chapter-05
  chapter-05-start
(Move up and down to reveal more choices)
This is the fifth chapter, so we can select chapter-05-start if we want to follow along, or chapter-05 to see the final results of the chapter.
Once the chapter has been selected, all files required to follow along with the chapter will appear.
For more information about the setup details, check out the README.md file.
Why is mocking useful?
Mocking is the process of simulating parts of the system, meaning they are not production-ready but fake versions that are useful for development and testing.
You may ask yourself, Why do we want to bother with setting a mocked API? There are several benefits of having the API mocked:
- Independence of external services during development: A web application usually consists of many different parts such as the frontend, the backend, external third-party APIs, and so on. When developing our frontends, we want to be as autonomous as possible without getting blocked by some parts of the system that are not functional. If the API of our application is broken or unfinished, we should still be able to proceed with developing the frontend part of the application.
- Good for quick prototyping: Mocked endpoints allow us to prototype the application quicker since they don't require any additional setup such as the backend server, database, and so on. Very useful for building proofs of concept (POCs) and minimum viable product (MVP) applications.
- Offline development: Having mocked API endpoints allows us to develop our application without an internet connection.
- Testing: We do not want to hit our real services while testing our frontends. That’s where mocked APIs become useful. We can build and test the entire functionality as if we were building it against a real API and then switch to the real one when in production.
For testing our API endpoints, we will use the Mock Service Worker (MSW) library, a great tool that allows us to mock endpoints in a very elegant way.
Introduction to MSW
MSW is a tool that allows us to create mocked APIs. It works as a service worker that intercepts any API request that has its mocked version defined. We can inspect the requests and responses in the Network tab of our browser the same way as if we were calling the real API.
To get a high-level overview of how it works, let’s take a look at the diagram provided on their website:
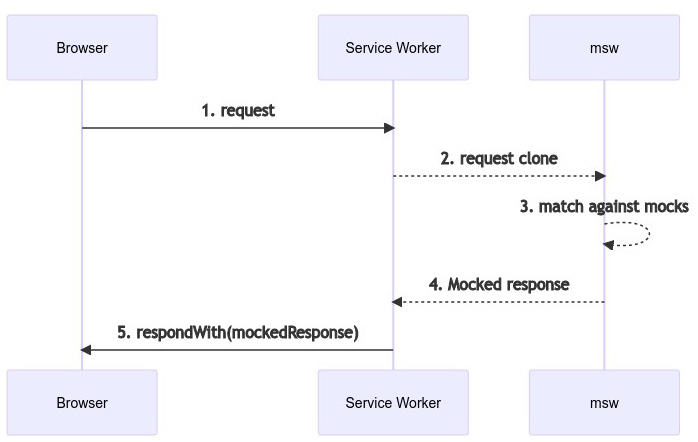
Figure 5.1 – MSW workflow diagram
One great thing about MSW is that our application will behave the same as if it were using a real API, and it’s pretty trivial to switch to using the real API by turning mocked endpoints off and not intercepting requests.
Another great thing is that since the interception happens at the network level, we will still be able to inspect our requests in the Network tab of the browser dev tools.
Configuration overview
We already have the MSW package installed as a dev dependency. The msw mocked API can be configured to work both in the browser and on the server.
Browser
The browser version of the mocked API can be used for running mocked endpoints during the development of the application.
Initialization
The first thing that needs to be done is to create a service worker. This can be done by executing the following command:
npx msw init public/ --save
The preceding command will create a service worker at public/mockServiceWorker.js, which will intercept our requests in the browser and modify the responses accordingly.
Configuring the worker for the browser
We can now configure our worker to use the endpoints we will define in a couple of moments. Let’s open the src/testing/mocks/browser.ts file and add the following:
import { setupWorker } from 'msw';
import { handlers } from './handlers';
export const worker = setupWorker(...handlers);
The preceding snippet will configure MSW to work with the provided handlers in the browser.
Server
The server version is used mostly during running automated tests since our test runner works in the Node environment instead of the browser. The server version is also useful for API calls executed on the server, which we will have for our application during server-side rendering.
Configuring MSW for the server
Let’s open the src/testing/mocks/server.ts file and add the following:
import { setupServer } from 'msw/node';
import { handlers } from './handlers';
export const server = setupServer(...handlers);
The preceding snippet will apply the handlers to the server version of our mocks.
Running MSW in the application
Now that we have configured MSW, we need to make it run in our application. To do that, let’s open the src/testing/mocks/initialize.ts file and modify the initializeMocks function to the following:
import { IS_SERVER } from '@/config/constants';
const initializeMocks = () => {
  if (IS_SERVER) {
    const { server } = require('./server');
    server.listen();
  } else {
    const { worker } = require('./browser');
    worker.start();
  }
};
initializeMocks();
The initializeMocks function is in charge of calling the proper MSW setup based on the environment it is being called in. If it is executed on the server, it will run the server version. Otherwise, it will start the browser version.
Now, we need to integrate our mocks.
Let’s create an src/lib/msw.tsx file and add the following:
import { MSWDevTools } from 'msw-devtools';
import { ReactNode } from 'react';
import { IS_DEVELOPMENT } from '@/config/constants';
import { db, handlers } from '@/testing/mocks';
export type MSWWrapperProps = {
  children: ReactNode;
};
require('@/testing/mocks/initialize');
export const MSWWrapper = ({
  children,
}: MSWWrapperProps) => {
  return (
    <>
      {IS_DEVELOPMENT && (
        <MSWDevTools db={db} handlers={handlers} />
      )}
      {children}
    </>
  );
};
Here we defined MSWWrapper, which is a component that will wrap our application and initialize MSW and the MSW dev tools into the wrapped application.
Now we can integrate it into our application by opening src/pages/_app.tsx.
We want to add new imports:
import dynamic from 'next/dynamic';
import { API_MOCKING } from '@/config/constants';
import { MSWWrapperProps } from '@/lib/msw';
Then, we want to load MSWWrapper dynamically:
const MSWWrapper = dynamic<MSWWrapperProps>(() =>
  import('@/lib/msw').then(({ MSWWrapper }) => MSWWrapper)
);
Finally, let’s modify the return statement of our App component as follows:
return (
    <AppProvider>
      {API_MOCKING ? (
        <MSWWrapper>{pageContent}</MSWWrapper>
      ) : (
        pageContent
      )}
    </AppProvider>
  );
As you can see, we will load the MSWWrapper component and wrap the content of the page only if the mocks are enabled. We are doing this to exclude MSW-related code for the production version of the application, which uses the real API and does not need the redundant MSW-related code.
To verify that MSW is running, let’s open the console. We should see something like this:
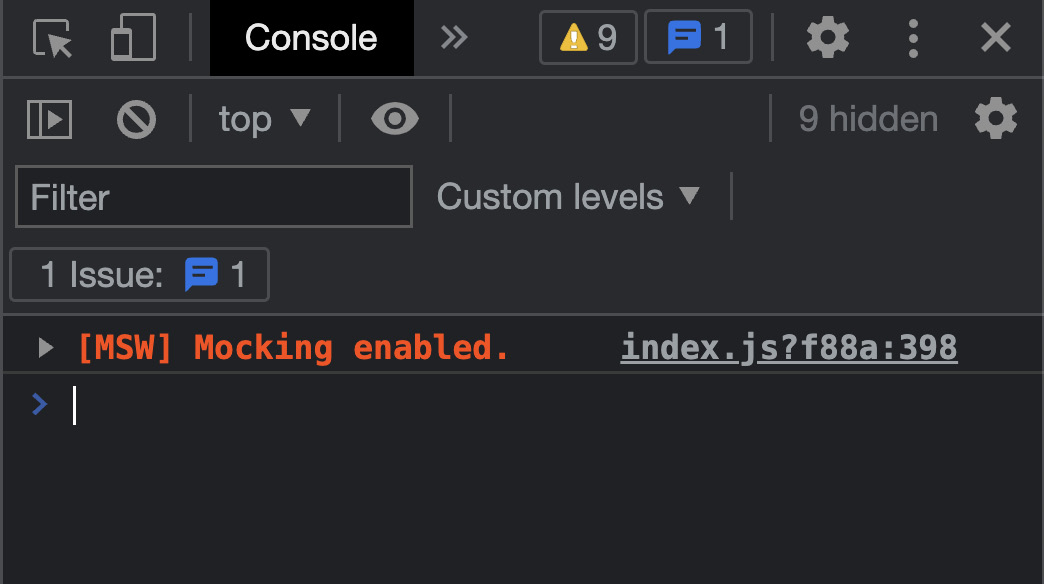
Figure 5.2 – MSW running in our application
Now that we have successfully installed and integrated MSW in our application, let’s implement our first mocked endpoint.
Writing our first handler
To define mocked endpoints, we need to create request handlers. Think of request handlers as functions that determine whether a request should be intercepted and modified by mocking their responses.
Let’s create our first handler in the src/testing/mocks/handlers/index.ts file by adding the following:
import { rest } from 'msw';
import { API_URL } from '@/config/constants';
export const handlers = [
  rest.get(`${API_URL}/healthcheck`, (req, res, ctx) => {
    return res(
      ctx.status(200),
      ctx.json({ healthy: true })
    );
  }),
];
We are using the rest helper provided by msw to define our rest endpoints. We are using the get method, which accepts the path, and a callback, which will modify the response.
The handler callback will return a response with a status code of 200 and the response data set as { healthy: true }.
To verify that our handler is working, let’s open the dev tools in the bottom-right corner and then select the health check endpoint:
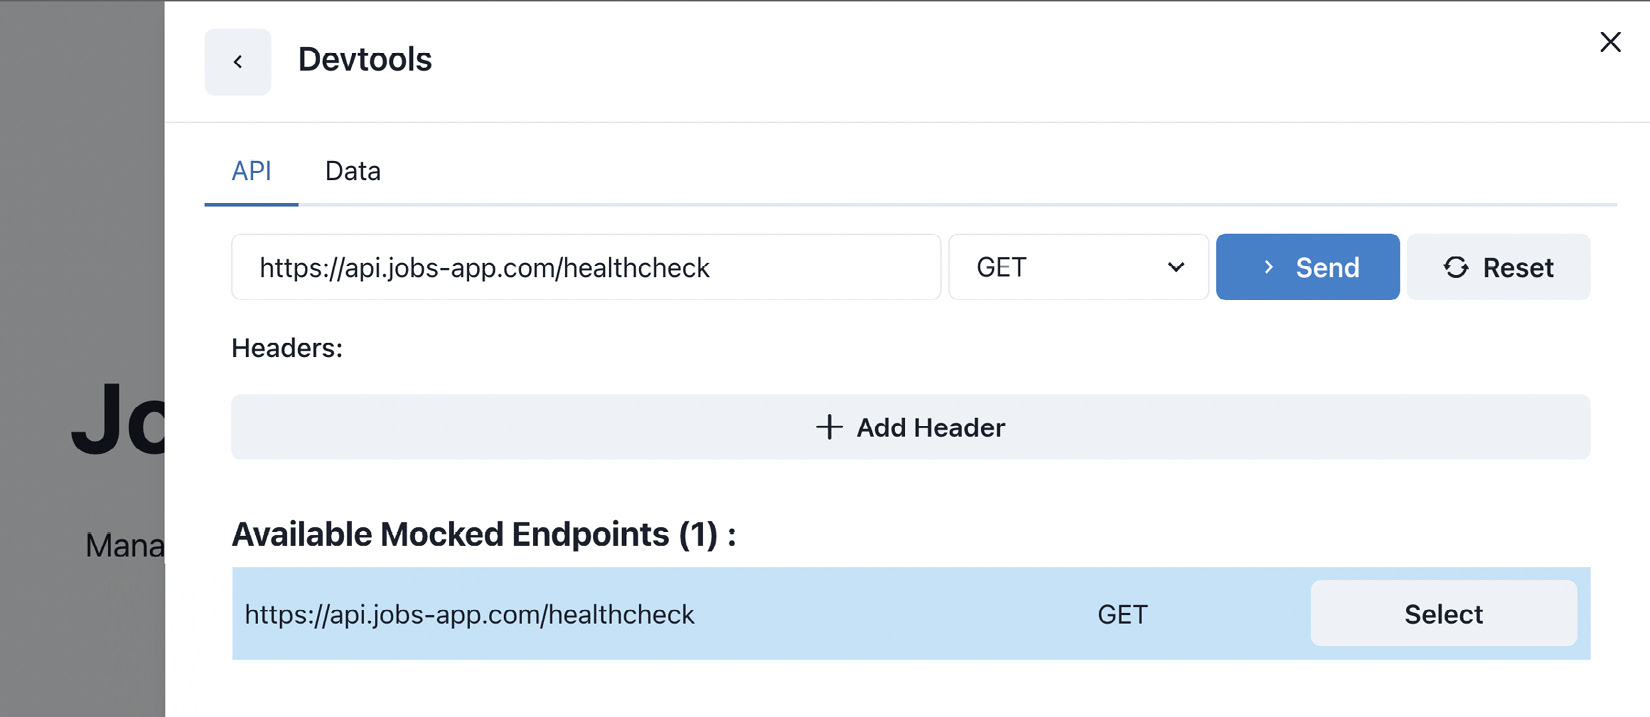
Figure 5.3 – Health check handler test selection
Sending the request should give us a response, as shown here:

Figure 5.4 – Health check handler test result
The Devtools widget is going to give us the ability to test our handlers without creating the UI in the application right away.
Now that we have MSW running properly in our application, it is time to create a data model for our application.
Configuring data models
For data modeling our application, we will be using the data library from MSW, which is very useful and simple to use to manipulate the data in a similar way an object-relational mapper (ORM) on the backend would.
To make our request handlers functional, we could just hardcode the responses, but where is the fun in that? With MSW and its data library, we can build a mocked backend that is fully functional with the business logic included should we decide to implement it.
To configure our data models, let’s open the src/testing/mocks/db.ts file and add the following:
import { factory, primaryKey } from '@mswjs/data';
import { uid } from '@/utils/uid';
const models = {
  user: {
    id: primaryKey(uid),
    createdAt: Date.now,
    email: String,
    password: String,
    organizationId: String,
  },
  organization: {
    id: primaryKey(uid),
    createdAt: Date.now,
    adminId: String,
    name: String,
    email: String,
    phone: String,
    info: String,
  },
  job: {
    id: primaryKey(uid),
    createdAt: Date.now,
    organizationId: String,
    position: String,
    info: String,
    location: String,
    department: String,
  },
};
export const db = factory(models);
We are importing the factory and primaryKey functions from the @mswjs/data package. The primaryKey function allows us to define primary keys in our mocked database, and the factory function creates an in-memory database that we can use for testing.
We can then access a bunch of different methods on each model that allow us to manipulate our data more easily, as follows:
db.job.findFirst
db.job.findMany
db.job.create
db.job.update
db.job.delete
It would also be great if we could pre-fill some data in the database so that we always had something to show in our application. To do that, we should seed the database.
Let’s open the src/testing/mocks/seed-db.ts file and add the following:
import { db } from './db';
import { testData } from '../test-data';
export const seedDb = () => {
  const userCount = db.user.count();
  if (userCount > 0) return;
  testData.users.forEach((user) => db.user.create(user));
  testData.organizations.forEach((organization) =>
    db.organization.create(organization)
  );
  testData.jobs.forEach((job) => db.job.create(job));
};
The seedDb function will populate the database with test data.
Let’s execute it after our mocked endpoints have been initialized. Open src/testing/mocks/initialize.ts and call the function, as follows:
import { IS_SERVER } from '@/config/constants';
import { seedDb } from './seed-db';
const initializeMocks = () => {
  if (IS_SERVER) {
    const { server } = require('./server');
    server.listen();
  } else {
    const { worker } = require('./browser');
    worker.start();
  }
  seedDb();
};
initializeMocks();
To inspect the data in our database, we can open the Data tab in Devtools:
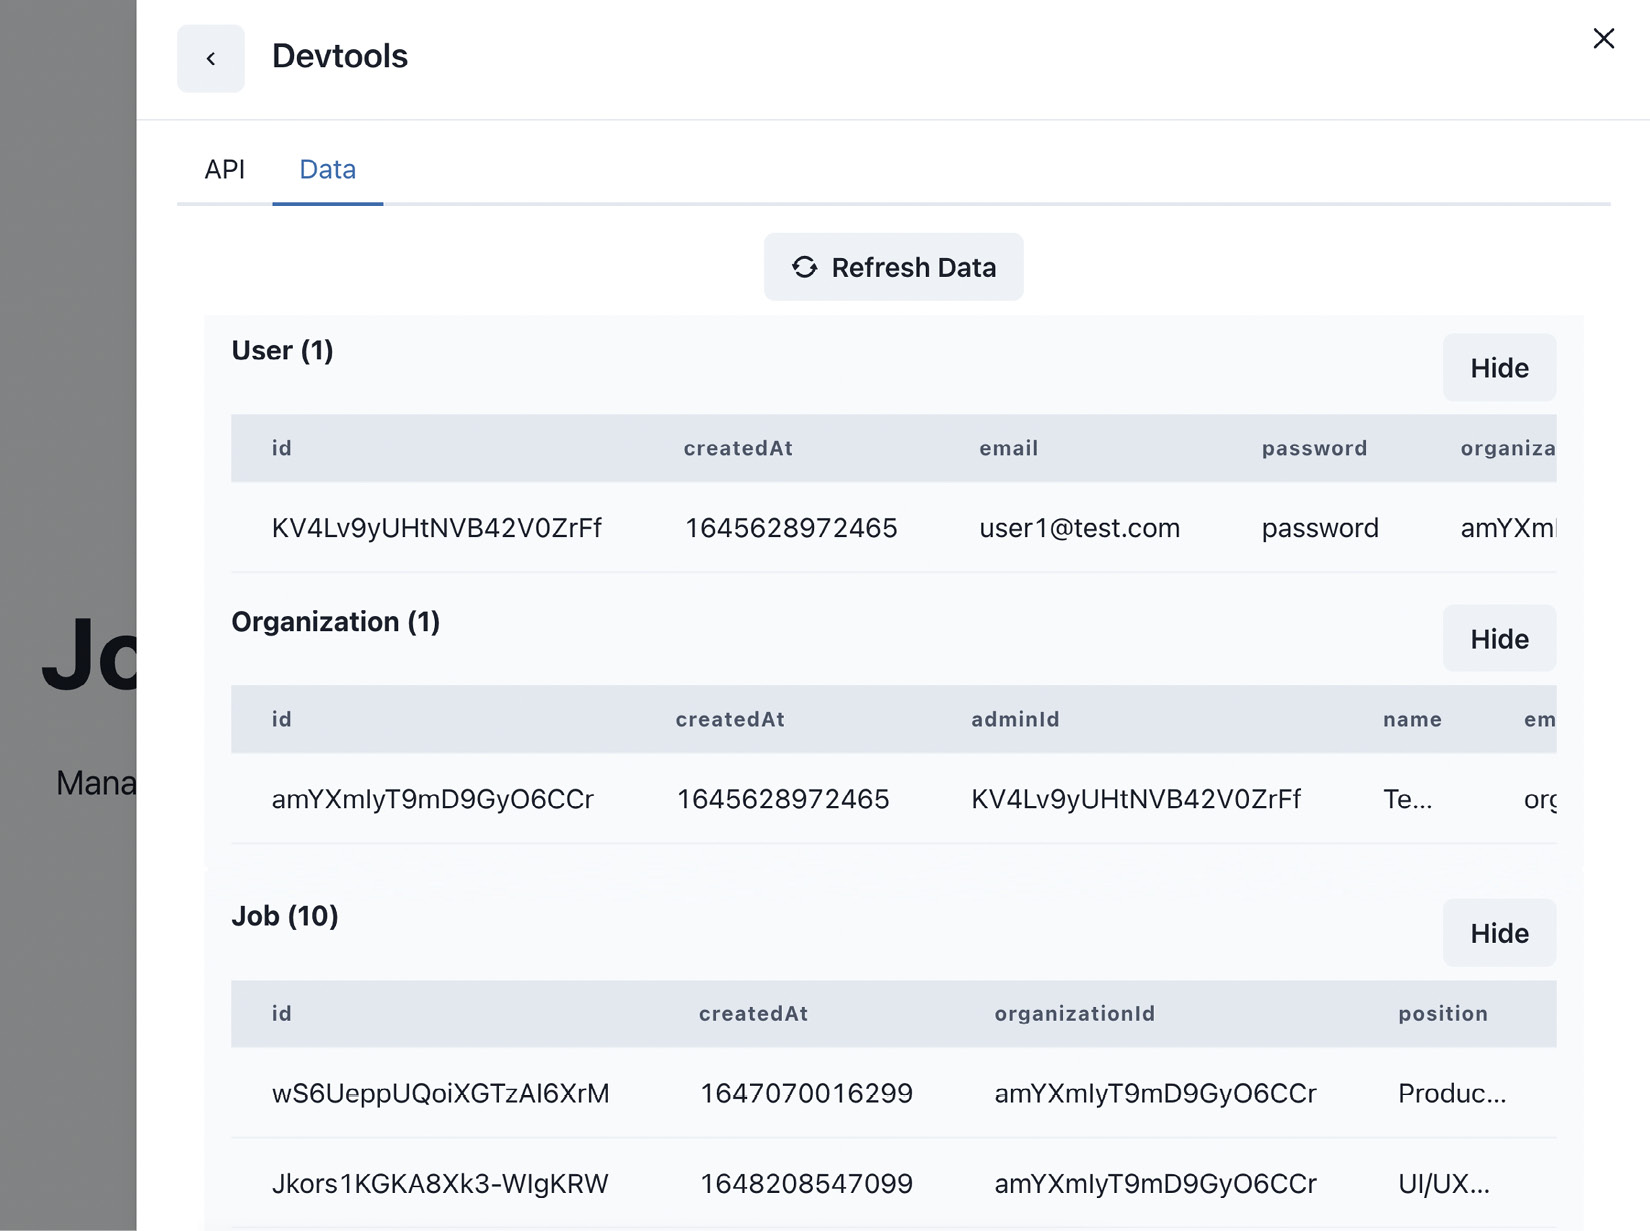
Figure 5.5 – Inspecting seeded data
Awesome! Now, we have our database pre-filled with some test data. We can now create request handlers, which will interact with the database and consume the data.
Configuring request handlers for API endpoints
In this section, we will define handlers for our application. As already mentioned, a handler in MSW is a function that, if defined, will intercept any matching requests, and instead of sending the requests to the network, it will modify them and return the mocked response.
API utils
Before getting started, let’s take a quick look at the src/testing/mocks/utils.ts file, which includes some utilities we will be using for handling the business logic of our API handlers:
- authenticate accepts user credentials, and if they are valid, it will return the user from the database together with the authentication token.
- getUser returns a test user object.
- requireAuth returns the current user if the token in the cookie is available. It can optionally throw an error if the token does not exist.
Before getting started, let’s include all handlers in the configuration. Open the src/testing/mocks/handlers/index.ts file and change it to the following:
import { rest } from 'msw';
import { API_URL } from '@/config/constants';
import { authHandlers } from './auth';
import { jobsHandlers } from './jobs';
import { organizationsHandlers } from './organizations';
export const handlers = [
  ...authHandlers,
  ...jobsHandlers,
  ...organizationsHandlers,
  rest.get(`${API_URL}/healthcheck`, (req, res, ctx) => {
    return res(
      ctx.status(200),
      ctx.json({ healthy: true })
    );
  }),
];
We are including all handlers we will define in each of the handlers’ files and make them available to MSW.
Now, we can start working on the request handlers for our application.
Auth handlers
For the auth feature, we will need the following endpoints:
- POST /auth/login
- POST /auth/logout
- GET /auth/me
The endpoints for auth will be defined in the src/test/mocks/handlers/auth.ts file.
Let’s start by importing the dependencies:
import { rest } from 'msw';
import { API_URL } from '@/config/constants';
import {
  authenticate,
  requireAuth,
  AUTH_COOKIE,
} from '../utils';
Then, let’s create a request handler for logging in:
const loginHandler = rest.post(
  `${API_URL}/auth/login`,
  async (req, res, ctx) => {
    const credentials = await req.json();
    const { user, jwt } = authenticate(credentials);
    return res(
      ctx.delay(300),
      ctx.cookie(AUTH_COOKIE, jwt, {
        path: '/',
        httpOnly: true,
      }),
      ctx.json({ user })
    );
  }
);
We are extracting the credentials and using them to get the user info and the token. Then, we attach the token to the cookie and return the user in the response with a 300 ms delay as the real API.
We are using the httpOnly cookie because it is safer since it is not accessible from the client.
Then, let’s create a logout handler:
const logoutHandler = rest.post(
  `${API_URL}/auth/logout`,
  async (req, res, ctx) => {
    return res(
      ctx.delay(300),
      ctx.cookie(AUTH_COOKIE, '', {
        path: '/',
        httpOnly: true,
      }),
      ctx.json({ success: true })
    );
  }
);
The handler will just empty the cookie and return the response. Any subsequent requests to protected handlers will throw an error.
Finally, we have an endpoint for fetching the currently authenticated user:
const meHandler = rest.get(
  `${API_URL}/auth/me`,
  async (req, res, ctx) => {
    const user = requireAuth({ req, shouldThrow: false });
    return res(ctx.delay(300), ctx.json(user));
  }
);
The endpoint will extract the user from the token and return it in the response. In the end, we should export the handlers in order for them to be consumed by MSW:
export const authHandlers = [
  loginHandler,
  logoutHandler,
  meHandler,
];
Jobs handlers
For the jobs feature, we will need the following endpoints:
- GET /jobs
- GET /jobs/:jobId
- POST /jobs
The endpoints for jobs will be defined in the src/test/mocks/handlers/jobs.ts file.
Let’s start by importing the dependencies:
import { rest } from 'msw';
import { API_URL } from '@/config/constants';
import { db } from '../db';
import { requireAuth } from '../utils';
Then, let’s implement a handler for fetching jobs:
const getJobsHandler = rest.get(
  `${API_URL}/jobs`,
  async (req, res, ctx) => {
    const organizationId = req.url.searchParams.get(
      'organizationId'
    ) as string;
    const jobs = db.job.findMany({
      where: {
        organizationId: {
          equals: organizationId,
        },
      },
    });
    return res(
      ctx.delay(300),
      ctx.status(200),
      ctx.json(jobs)
    );
  }
);
We are getting the organization ID from the search parameters and using that to get jobs for a given organization, which we return in the response.
Another endpoint we want to create is a job details endpoint. We can do that by creating the following handler:
const getJobHandler = rest.get(
  `${API_URL}/jobs/:jobId`,
  async (req, res, ctx) => {
    const jobId = req.params.jobId as string;
    const job = db.job.findFirst({
      where: {
        id: {
          equals: jobId,
        },
      },
    });
    if (!job) {
      return res(
        ctx.delay(300),
        ctx.status(404),
        ctx.json({ message: 'Not found!' })
      );
    }
    return res(
      ctx.delay(300),
      ctx.status(200),
      ctx.json(job)
    );
  }
);
We are getting the job ID from the URL parameters and using that to retrieve the given job from the database. If the job is not found, we return a 404 error. Otherwise, we return the job in the response.
Our application also needs an endpoint for creating jobs. We can create a handler for that, as follows:
const createJobHandler = rest.post(
  `${API_URL}/jobs`,
  async (req, res, ctx) => {
    const user = requireAuth({ req });
    const jobData = await req.json();
    const job = db.job.create({
      ...jobData,
      organizationId: user?.organizationId,
    });
    return res(
      ctx.delay(300),
      ctx.status(200),
      ctx.json(job)
    );
  }
);
We are first checking whether the user is authenticated since we don’t want to allow creation for unauthenticated users. Then, we get the job data from the request and use that to create a new job, which we then return in the response.
Finally, we want to export the handlers to make them available for MSW:
export const jobsHandlers = [
  getJobsHandler,
  getJobHandler,
  createJobHandler,
];
Organizations handlers
For the organizations feature, we will need the GET /organizations/:organizationId endpoint.
All handlers for this feature will be defined in the src/test/mocks/handlers/organizations.ts file.
Let’s start by importing all required dependencies:
import { rest } from 'msw';
import { API_URL } from '@/config/constants';
import { db } from '../db';
Then, we can implement the endpoint for getting organization details by adding the following:
const getOrganizationHandler = rest.get(
  `${API_URL}/organizations/:organizationId`,
  (req, res, ctx) => {
    const organizationId = req.params
      .organizationId as string;
    const organization = db.organization.findFirst({
      where: {
        id: {
          equals: organizationId,
        },
      },
    });
    if (!organization) {
      return res(
        ctx.status(404),
        ctx.json({ message: 'Not found!' })
      );
    }
    return res(
      ctx.delay(300),
      ctx.status(200),
      ctx.json(organization)
    );
  }
);
We are getting the organization ID from URL parameters and using that to retrieve the given organization. If it doesn’t exist in the database, the handler will return a 404 error; otherwise, it will return the found organization.
In the end, we must export the handler:
export const organizationsHandlers = [
  getOrganizationHandler,
];
To verify that we have all handlers defined, we can visit Devtools again:
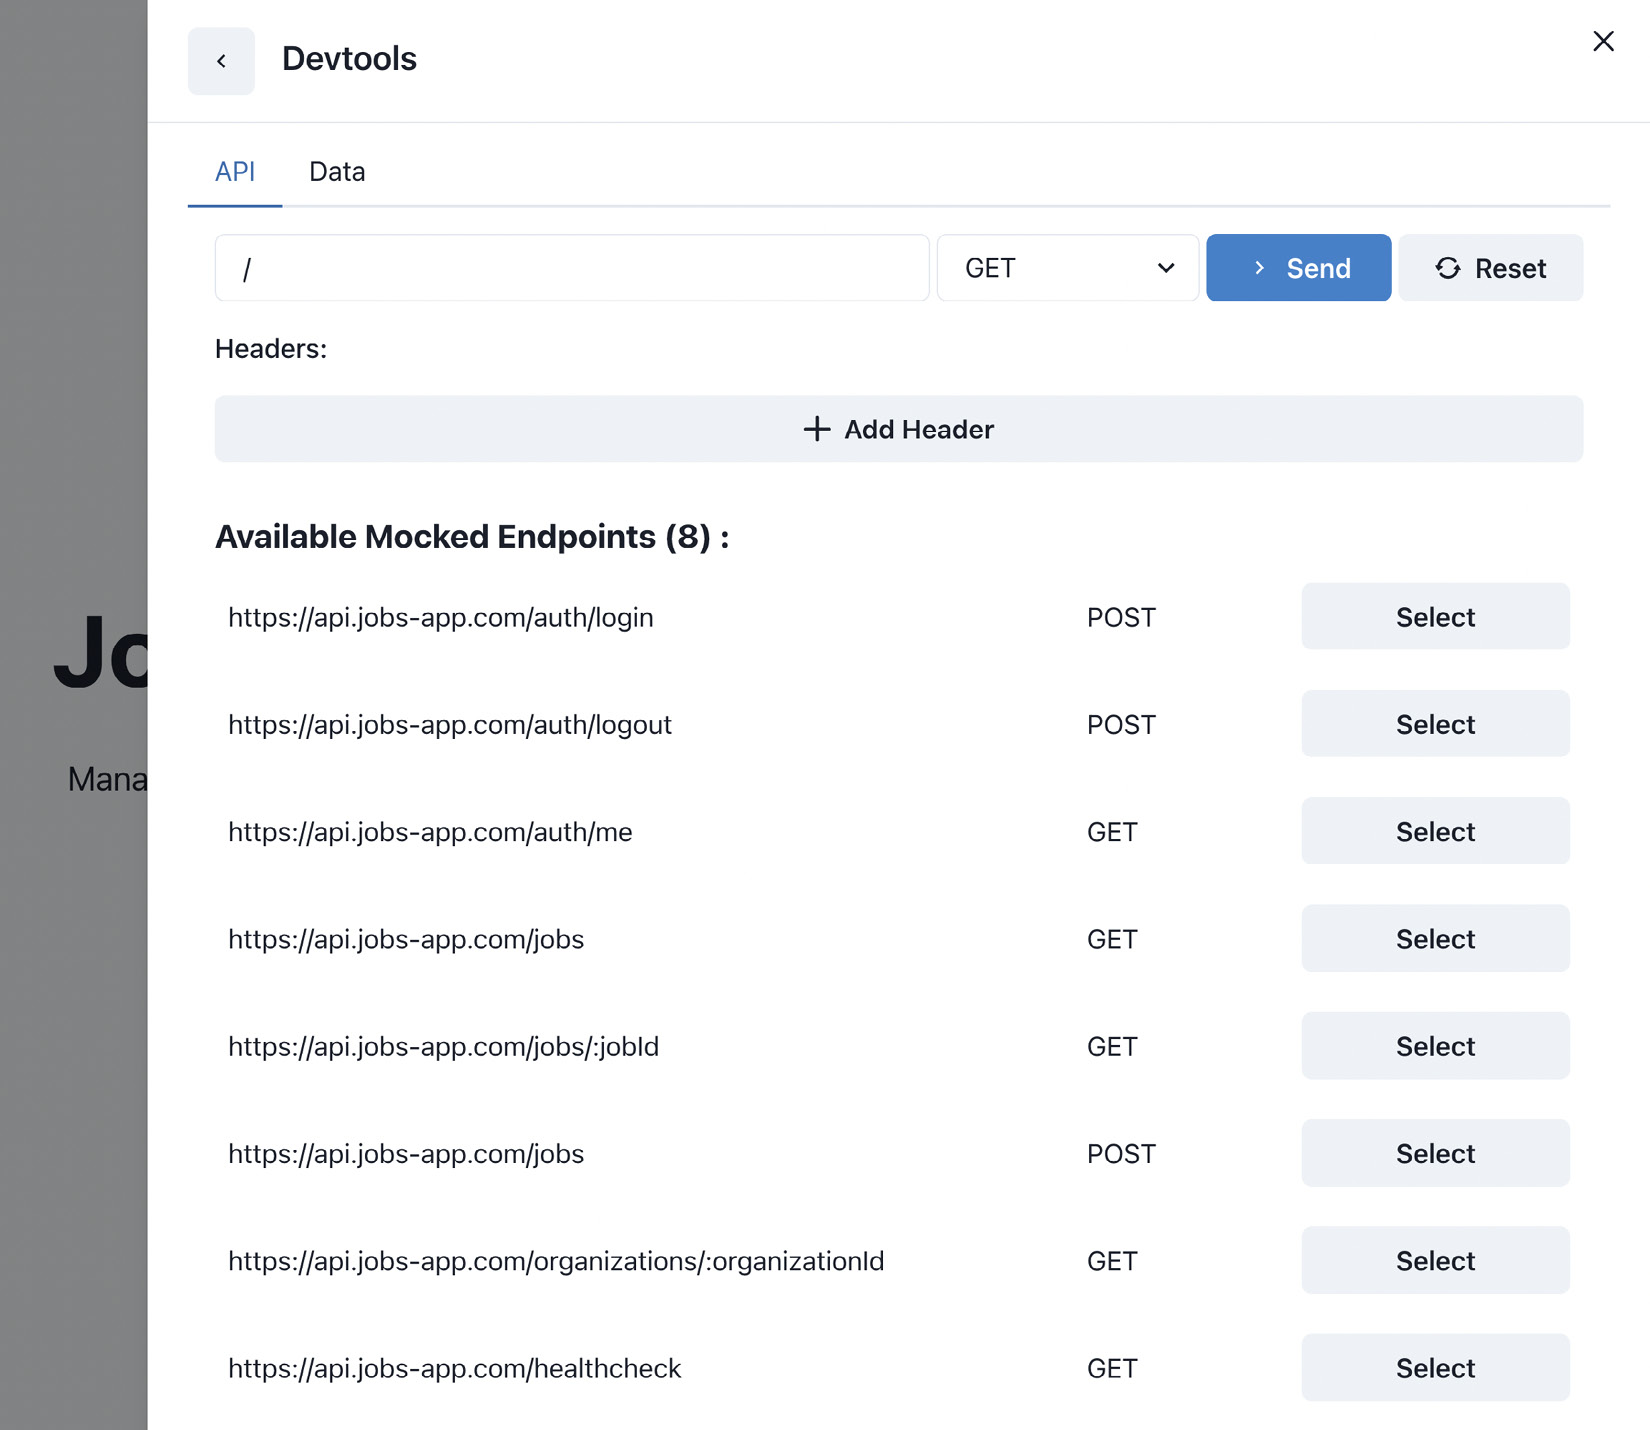
Figure 5.6 – Mocked endpoints
Great! Now, we have all the required handlers to make our application work as if it were consuming the real API. Play around with the handlers to make sure that everything works as expected. In the next chapter, we will integrate these endpoints into the application.
Summary
In this chapter, we learned about mocking the API. We introduced the MSW library, which is a great tool for mocking APIs in an elegant way. It can work both in the browser and on the server. It is super useful for prototyping and testing the application during development.
In the next chapter, we will integrate the API layer of the application, which will consume the endpoints we just created.